


Plant Profile & Key Characteristics
Overview: Poinsettia (Euphorbia pulcherrima) is an evergreen to semi-deciduous shrub or small tree 0.6-4 m (2-12 ft) tall, famous for the large coloured bracts that surround its tiny flowers. It is grown worldwide as an ornamental and as the classic seasonal potted plant.
Quick Specifications
| Specification | Attribute |
|---|---|
| Plant Type / Life Cycle | Perennial |
| Foliage Type | Evergreen to semi-deciduous |
| Mature Size | 0.6-4 m (2-12 ft) tall |
| Growth Rate | Slow to moderate |
| Toxicity | Mildly toxic – the irritant milky latex can cause skin or mild stomach upset; its danger is widely overstated but it is not for eating. |
| Hardiness | USDA zone 10 and warmer |
Growth Form & Structure
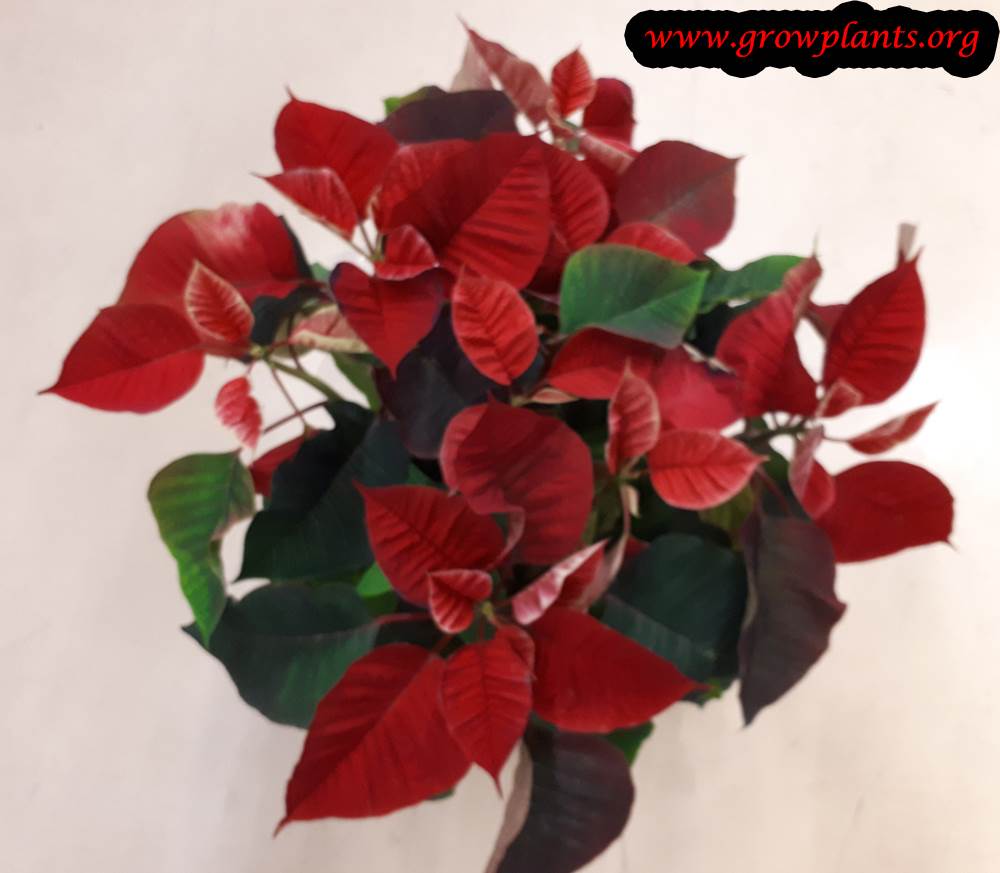
- Height & Spread: Outdoors it becomes a shrub of 0.6-4 m (2-12 ft); as a gift plant it is grown compact in pots and is one of the most popular seasonal houseplants.
- Growth Habit & Form: An open shrub to small tree; the show comes from large, leaf-like coloured bracts rather than the flowers themselves.
- Lifespan & Maturity: Slow to moderate growth; bracts colour up in the short days of autumn and winter.
Anatomy & Physical Features
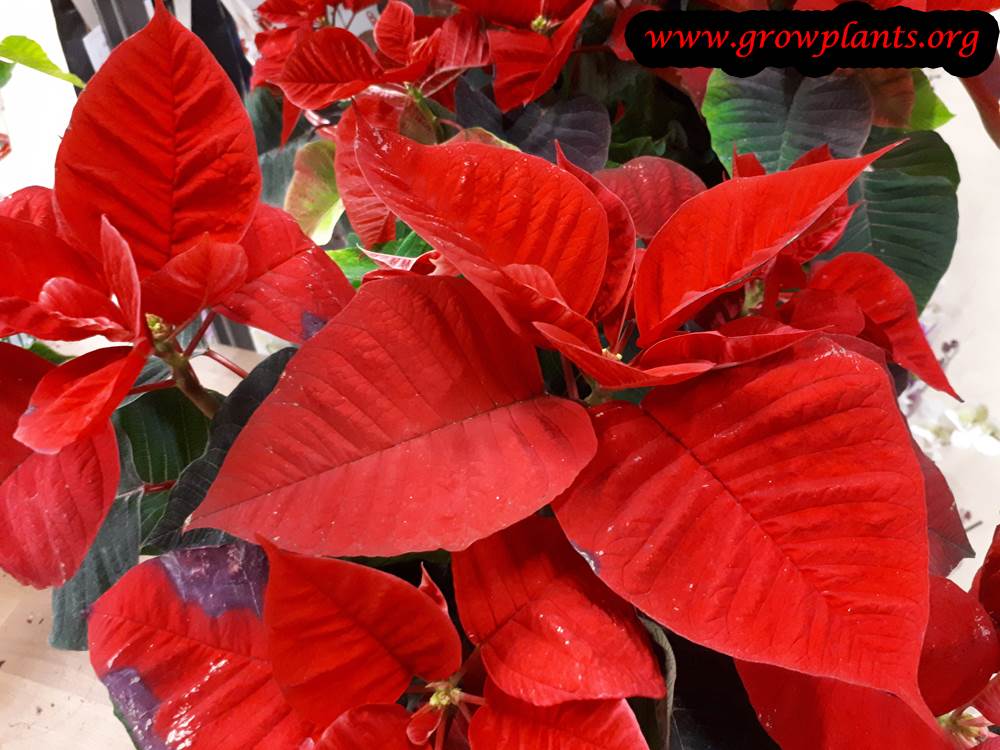
- Leaves & Foliage: Dark green, elliptic (often lobed) leaves.
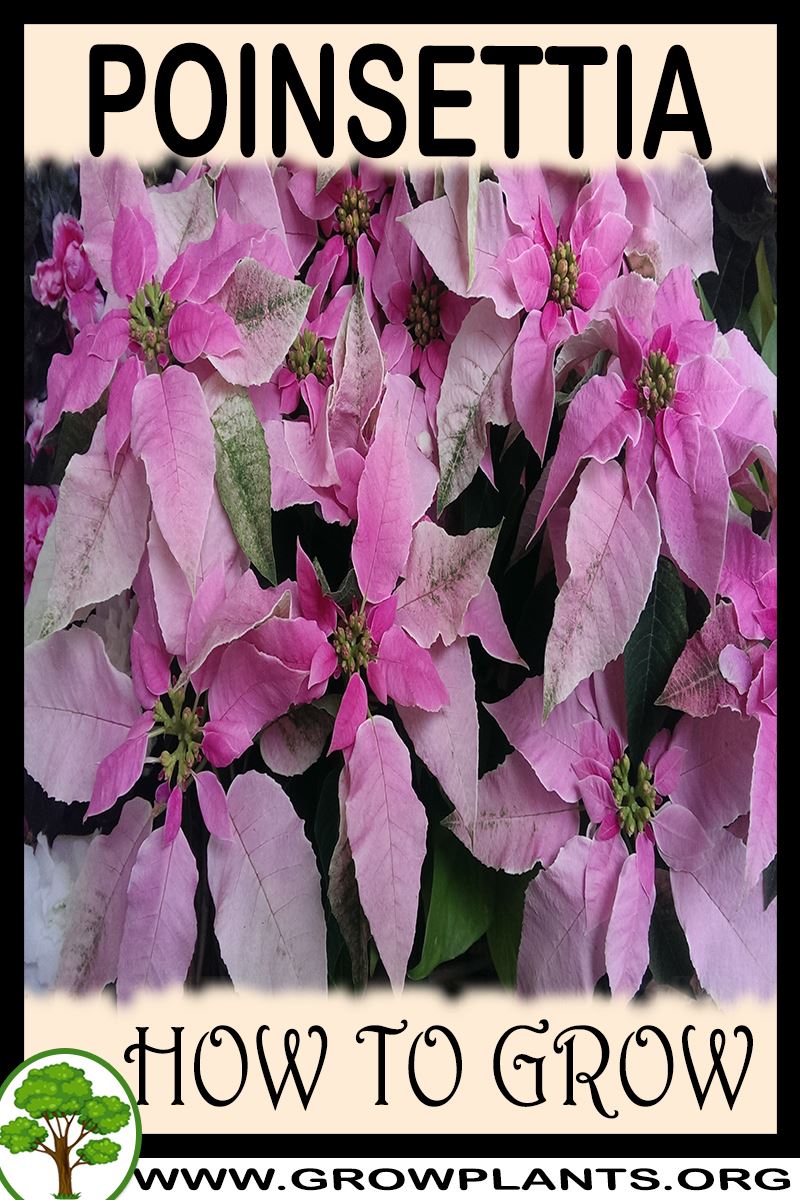
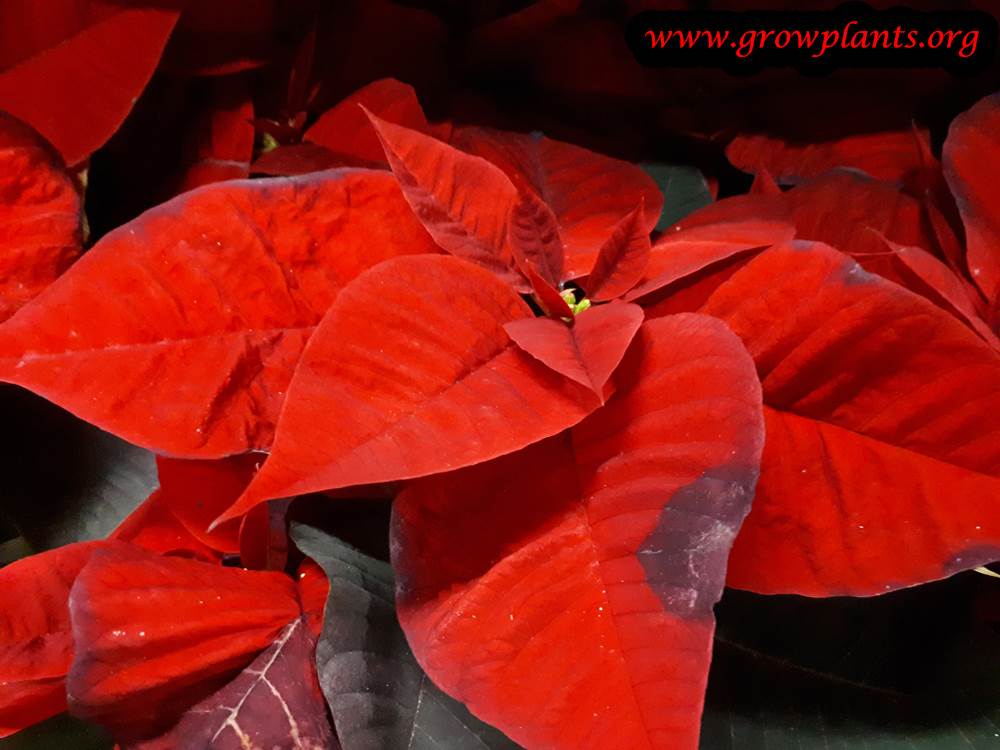
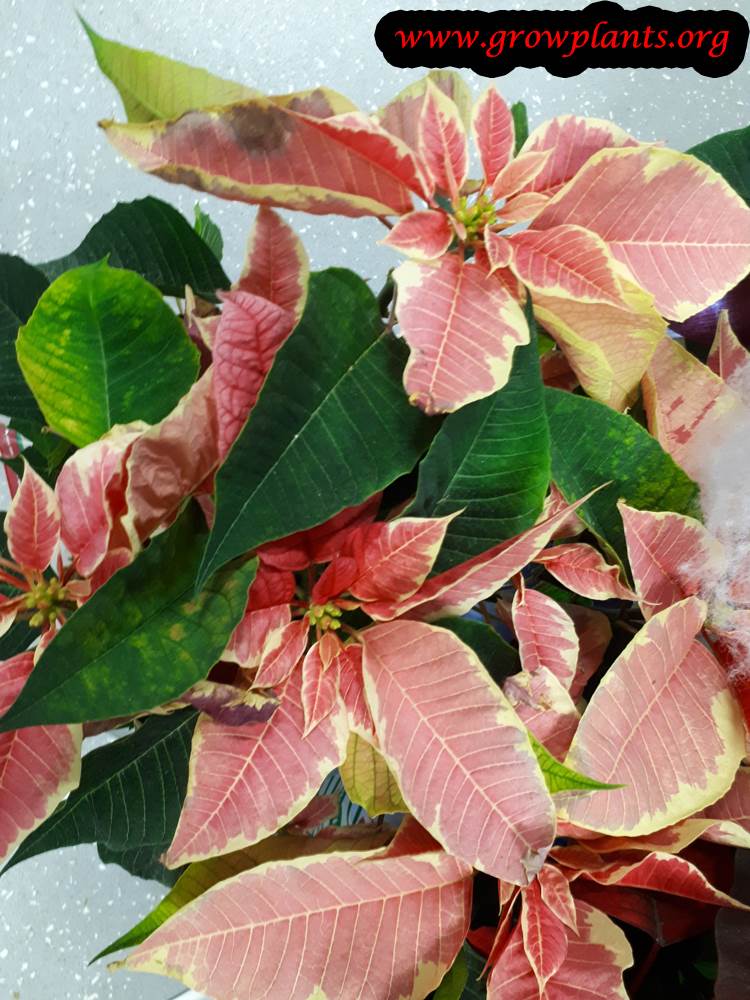
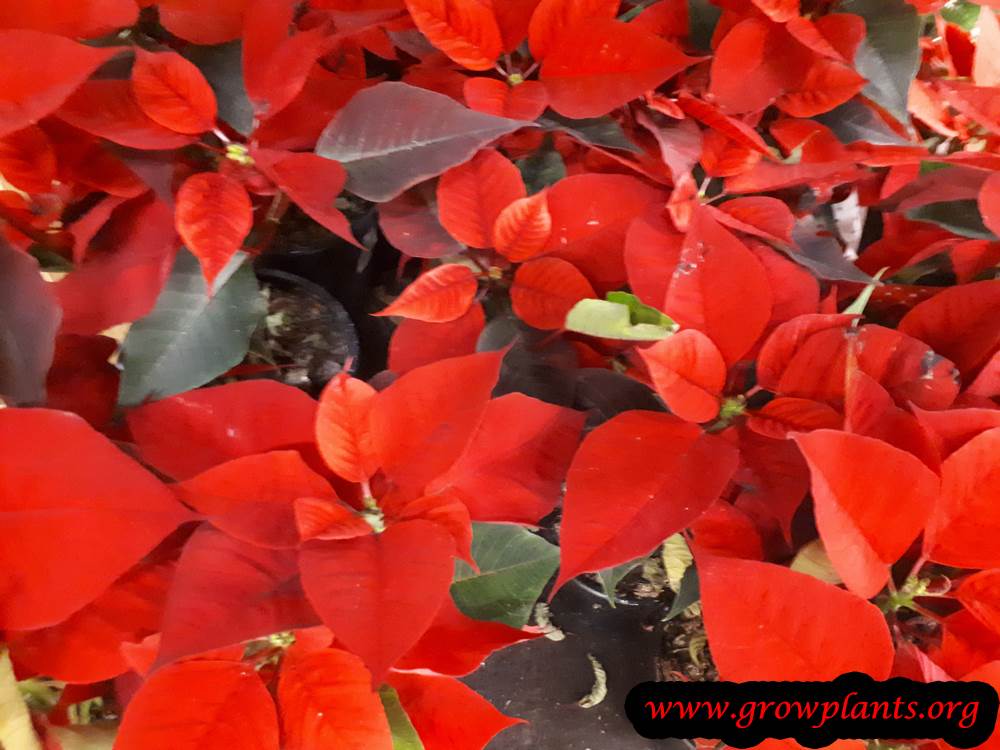
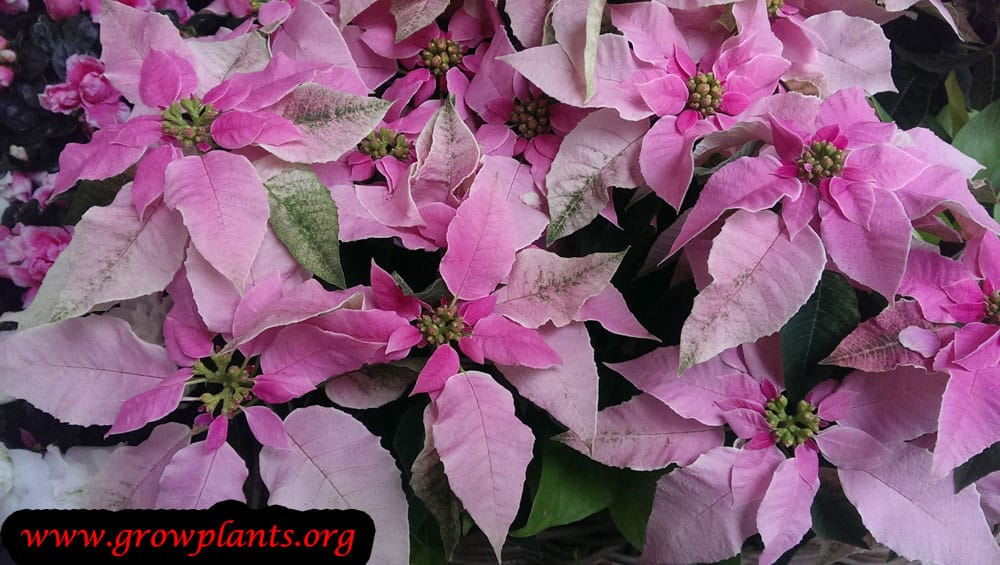
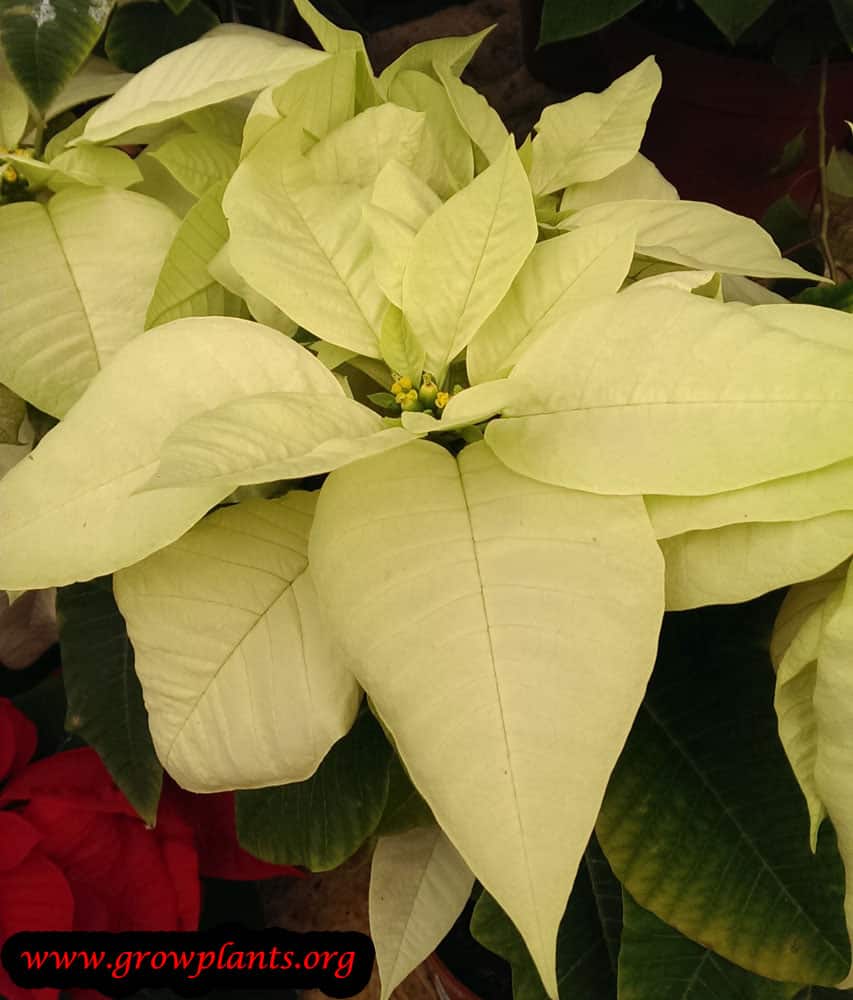
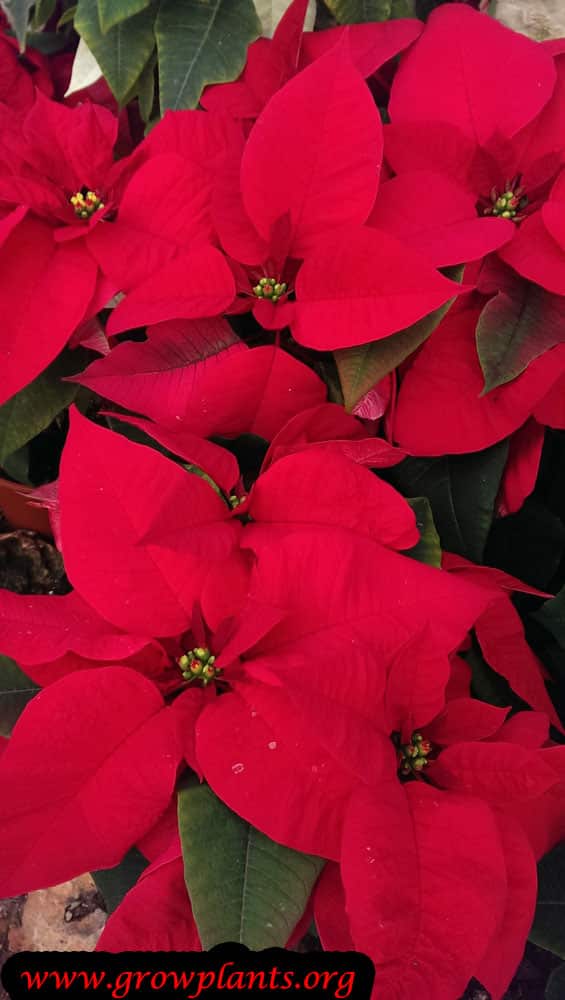
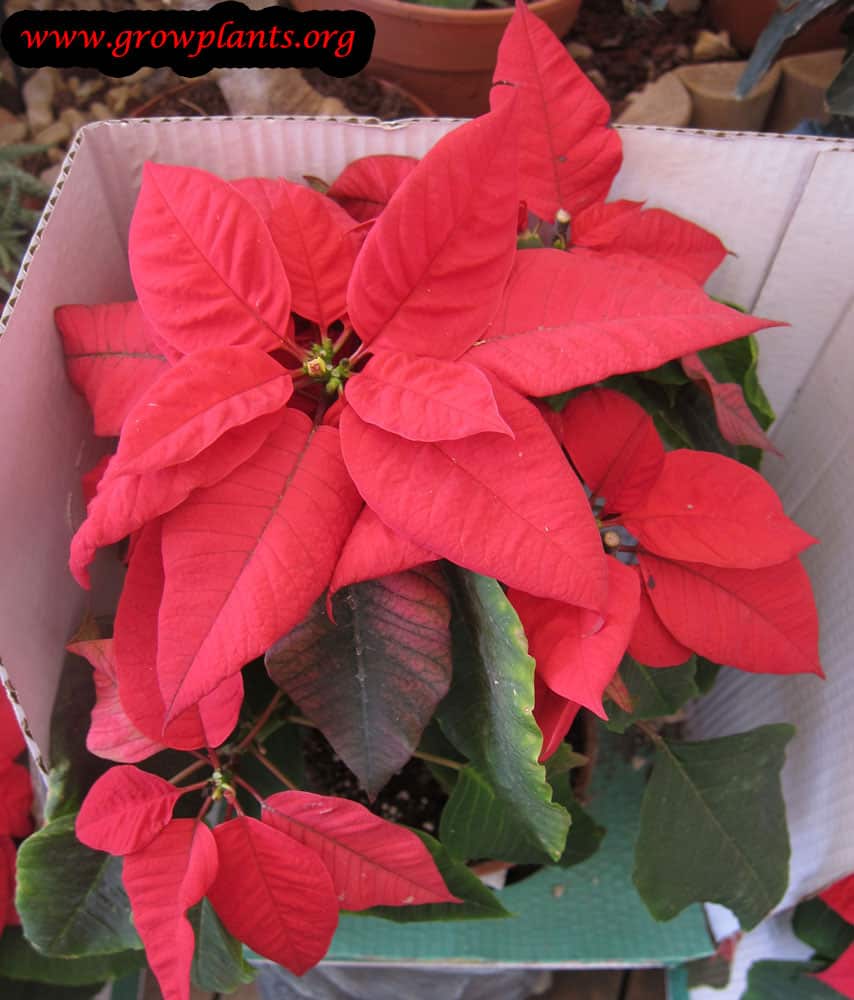
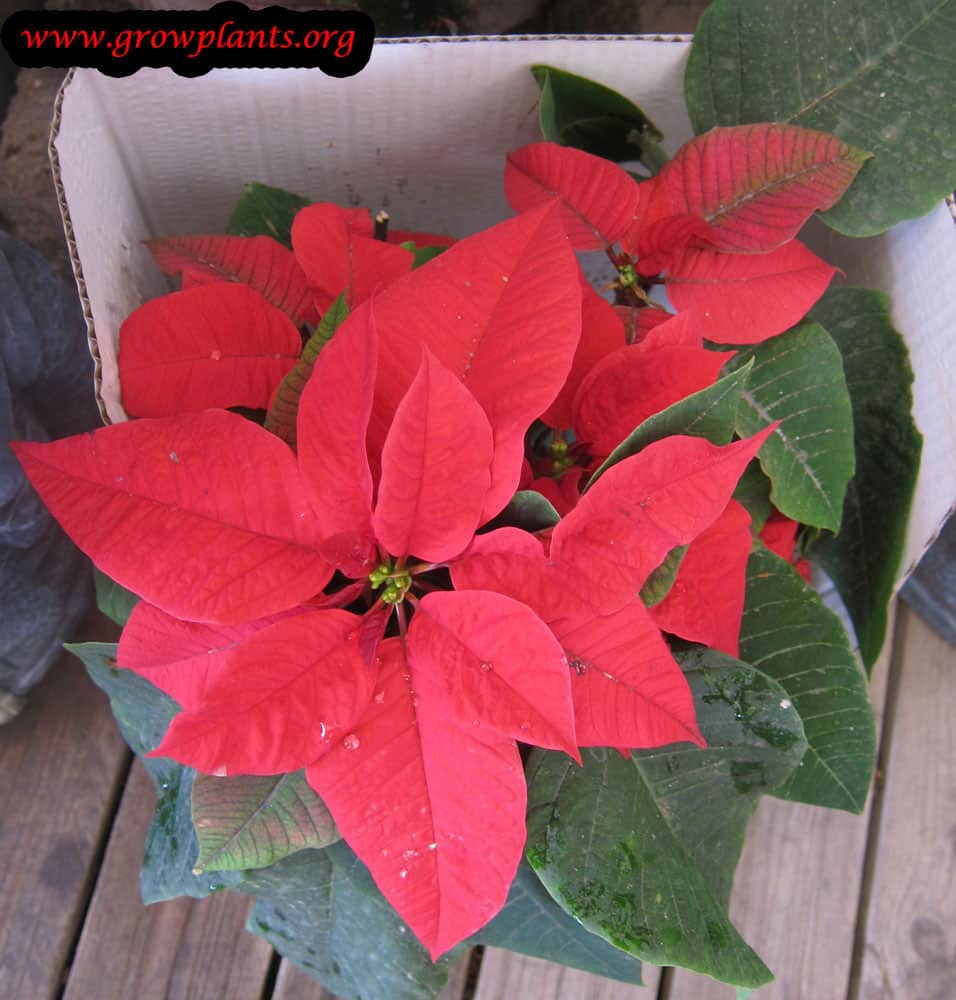
- Flower Characteristics: Tiny yellow true flowers (cyathia) in clusters, ringed by showy bracts in red, pink, yellow, orange, pale green or white, in autumn and winter.
Primary Uses & Landscape Value
- Functional & Ornamental Roles: Ornamental flowering shrub and, above all, the classic potted houseplant for winter colour.
Care Guide: Planting, Soil & Watering
Overview: Poinsettia (Euphorbia pulcherrima) is a drought-tolerant euphorbia succulent that grows best in partial to full shade and warm, frost-free (zone 10 and above) conditions. It needs sharply-drained, gritty soil and only light, occasional watering, as excess moisture at the roots quickly causes rot.
Quick Care Requirements
| Requirement | Ideal Condition |
|---|---|
| Planting Season | Year-round in frost-free conditions |
| Growth Rate | Slow to moderate |
| Soil Type | Sharp-draining, sandy or gritty cactus/succulent mix, low in organic matter |
| Water Need | Low to moderate – let the top of the soil dry before watering again |
Planting & Establishment
- Best Planting Season: In frost-free conditions it can be planted at any time of year; give new plantings warmth and shelter to establish.
- How to Plant:
- Hole Preparation: Wear gloves and take care with the milky sap, which is a skin and eye irritant common to all euphorbias. Dig a hole about twice the width of the root ball but no deeper, so the plant sits at the level it grew at, and loosen the sides so the roots spread easily.
- Soil Amendments: Blend plenty of coarse sand, grit, perlite or pumice into the backfill to guarantee fast drainage; only a little organic matter is needed.
- Planting Depth: Set the plant so the root collar sits right at soil level – never bury the stem, which invites rot in a succulent.
- Growth Speed & Expectations: Growth is slow to moderate – steady rather than rushed, picking up once the plant is well established.
Soil, Watering & Drainage Care
- Soil Mix & Drainage Needs: These succulents rot quickly in soggy soil, so drainage is everything. Use an open, gritty cactus mix (sand, perlite, lava grit or pumice); in a pot, add a coarse layer at the base and keep the drainage holes clear.
- Watering Schedule & Technique:
- Young / Newly Planted: Water lightly but regularly while the roots or cuttings establish, keeping the mix barely moist and never wet.
- Established: Once established, water deeply but infrequently, always letting the top of the soil dry out before watering again – overwatering is the quickest way to kill it.
- Seasonal Adjustments: Give a little more water during hot, active growth and cut back sharply in cool weather, keeping it nearly dry through a cold or dormant winter.
Climate, Light & Hardiness
Poinsettia (Euphorbia pulcherrima) is a subtropical, Mediterranean and tropical succulent shrub or small tree that prefers half to full shade rather than blazing direct sun, and it needs frost-free conditions to thrive outdoors (USDA zone 10+). Where winters bring frost it is best grown as an indoor houseplant.
Quick Climate Specifications
| Climate Zones | Subtropical, Mediterranean, Tropical |
|---|---|
| USDA Hardiness Zones | 10+ |
| Frost Tolerance | Very Low |
| Light Conditions | Half Shade / Full Shade |
Sunlight & Light Exposure
Optimal Light Setup
Half to full shade is preferred over intense direct sun, whether grown outdoors in its warm-climate range or as an indoor houseplant near a bright but not scorching window.
Shade & Heat Management
Its shade preference naturally helps it cope with hot subtropical and tropical summer sun; avoid exposed, all-day full-sun positions.
Best Exposure / Orientation
A lightly shaded outdoor spot within its hardy zones, or a bright but indirectly lit indoor window elsewhere.
Temperature Extremes & Hardiness
USDA Hardiness & Regional Limits
Hardy outdoors only in USDA zone 10 and warmer; the site notes it grows well indoors as a houseplant, which is how it is commonly kept through winter in colder climates.
Cold Damage & Winter Protection
The site's own care summary calls simply for frost-free conditions - keep it away from cold drafts, unheated porches, or any exposure to freezing temperatures.
Frost Sensitivity
Very frost-sensitive; even light frost is a risk to unprotected plants.
Extreme Heat Tolerance
Tolerates the warm summers typical of its subtropical and tropical range, provided it isn't also placed in harsh, unshaded direct sun.
Wind, Humidity & Microclimate
Humidity Preferences
Its subtropical and tropical origins suit it to moderate to higher humidity rather than very dry air.
Microclimate Recommendations
Outside zone 10+, the practical microclimate solution is indoor culture as a houseplant, sheltered from cold drafts and direct winter chill.
Growing in Pots, Balconies & Indoors
Poinsettia (Euphorbia pulcherrima) is the classic indoor pot plant, and the grower confirms it as a houseplant. Interestingly he does not recommend it for long-term planter or container growing outdoors – treat it as a seasonal indoor plant rather than a permanent patio subject.
Quick Details
- Container Size: A snug indoor pot, about 2-5 L, matched to the plant
- Indoor Suitability: A good houseplant – grown indoors for its coloured bracts
- Best Spot: Bright, indirect light indoors; the grower notes it tolerates part to full shade
- Soil & Drainage: Free-draining, peat- or coir-based potting mix
- Watering in Pots: Keep lightly, evenly moist; let the surface dry and never leave it standing in water
Indoors & On the Windowsill
- A true houseplant: The grower rates it as suitable indoors. Give it bright, indirect light and steady warmth away from cold draughts and heat sources for the longest-lasting colour.
- Light: It flowers well in modest light and the grower notes it accepts part to full shade indoors – unusual for a Euphorbia – but bright, indirect light keeps it strongest.
- Long-term containers: The grower does not recommend it for permanent planter or container culture, so enjoy it as a seasonal indoor pot plant rather than expecting years from one container.
- Safety: The milky sap is a mild irritant and can upset pets or children if chewed – keep it out of reach and avoid getting sap on skin or eyes.
On a Balcony or Patio
- Seasonal only: It can spend warm, frost-free spells outdoors in a sheltered, bright spot, but the grower does not rate it for long-term outdoor containers – and any chill or wind will quickly spoil it. Bring it back inside before temperatures drop.
Choosing the Pot, Soil & Long-Term Care
- Pot & drainage: A snug 2-5 L pot matched to the plant with strong drainage holes; skip a standing water saucer so the roots never sit wet. Terracotta breathes and dries fast, while glazed or plastic pots hold moisture longer.
- Potting mix: A free-draining, peat- or coir-based potting mix.
- Watering: Keep lightly and evenly moist while in leaf; let the surface dry between waterings and never leave the pot standing in water.
- Feeding: Potted plants exhaust their soil faster because nutrients leach out with every watering – feed lightly but regularly through the growing season.
- Repotting: Refresh the mix or pot up about every couple of years, teasing out and lightly trimming the roots of established plants.
Fertilizing & Feeding
Poinsettia is grown for its colorful bracts and needs steadier feeding than most Euphorbia relatives while it rebuilds foliage after its display fades. Balanced feeding with adequate nitrogen supports strong leaf and bract growth; feeding is best eased off as the bracts begin coloring rather than pushed through that stage.
Quick Fertilizing Specs
| Feeding Level | Moderate |
|---|---|
| Main Nutrient Priority | Balanced feeding with adequate nitrogen during vegetative regrowth; there is no need to switch to a high-phosphorus formula to encourage bract color |
| Best Feeding Period | Spring through summer while the plant is rebuilding foliage after its bracts fade |
| Soil pH | Prefers well-drained potting soil; tolerates a normal range of soil pH without special adjustment |
| Reduce/Stop Feeding | Ease off and stop feeding as the plant is brought into its short-day bract-coloring period and again once the display season ends and the plant rests |
| Organic Options | For garden or greenhouse plantings in frost-free climates, working compost into the bed provides gentle background nutrition alongside regular liquid feeding |
Feeding by Growth Stage
Spring and summer vegetative regrowth
Rebuild strong, leafy growth after the bracts fade, setting up a full plant for the next display period
| Nutrient direction | Balanced feeding with adequate nitrogen supports vigorous leafy regrowth; there is no benefit to a high-phosphorus formula, since balanced nutrition combined with adequate nitrogen is what drives strong bract development later |
|---|---|
| Timing | Spring through summer, once new growth resumes after the previous season’s bracts have faded and the plant has been cut back |
| Frequency | Regular light feedings through this period support steady leafy growth without letting the plant go hungry between applications |
| Fertilizer types | A balanced, complete liquid fertilizer suited to flowering houseplants or greenhouse crops, A balanced controlled-release fertilizer worked into the potting mix at repotting |
| Precautions | Wear gloves when handling or pruning the plant, since the sap is irritating to skin and eyes; avoid heavy nitrogen late in this period as day length shortens and the plant transitions toward bract coloring |
Bract coloring period
Support the plant through the color change of its bracts without pushing soft new growth that can reduce color quality
| Nutrient direction | Light, balanced feeding is enough during this stage; the emphasis shifts from building new growth to supporting the plant through its natural color change |
|---|---|
| Timing | In autumn and winter as shortening days trigger the bracts to begin changing color |
| Frequency | Feeding is scaled back through this period; light, infrequent feeding is usually enough while the plant focuses on coloring rather than new growth |
| Fertilizer types | An occasional light application of a balanced liquid feed, reduced from the more regular spring and summer schedule |
| Precautions | Do not increase feeding to try to intensify bract color, since color change is driven by day length and temperature rather than fertilizer; keep the plant away from artificial light at night during this period, which can disrupt coloring |
Post-display rest
Let the plant rest after its bract display fades, before cutting back and restarting the growth cycle
| Nutrient direction | None – withhold fertilizer during this rest period |
|---|---|
| Timing | After the bract display has faded and before the plant is cut back to begin a new growth cycle |
| Frequency | No feeding at this stage |
| Fertilizer types | No feeding at this stage; reduce watering slightly and hold off feeding until new growth resumes after cutting back |
| Precautions | Do not fertilize a resting plant that has just finished its display, since feeding now offers no benefit until the plant is cut back and begins active regrowth |
Nutrient Deficiency Signs & Corrections
Lower leaves look pale or yellowish and overall growth is weaker than expected during the active regrowth period
| Possible causes | Nitrogen deficiency from infrequent feeding during the main vegetative growth period, Root stress from overwatering or a slow-draining potting mix limiting nutrient uptake, A pot-bound plant that has outgrown its container, Insufficient light, which limits growth independent of feeding |
|---|---|
| Appears first on | Lower and older leaves first, spreading upward if uncorrected |
| What to check | Recent feeding history and whether the plant has missed regular applications, Soil moisture and how well the pot drains, How root-bound the plant has become since its last repotting, Light exposure through the growing period |
| Possible correction | Resume regular balanced feeding during active growth if the plant has been underfed; if drainage or root-binding are the cause, address those directly since feeding alone will not fix them |
Younger leaves yellow between the veins while the veins stay green
| Possible causes | Iron deficiency associated with high potting mix pH or waterlogged, poorly aerated soil that limits iron uptake, Overwatering causing root stress that reduces nutrient uptake broadly, Cool growing temperatures temporarily slowing nutrient uptake |
|---|---|
| Appears first on | Newest leaves |
| What to check | Potting mix pH and drainage, Whether the yellowing is limited to new growth, which points toward iron, Recent watering frequency and growing temperature |
| Possible correction | Correct drainage and watering first; if chlorosis persists in an otherwise healthy, well-fed plant, a chelated iron product applied per its label can help |
Older, lower leaves develop yellowing between the veins along with marginal browning and eventually drop, while newer growth still looks healthy
| Possible causes | Magnesium deficiency, a well-documented issue in poinsettia when older leaves are not adequately supplied relative to vigorous new growth, Natural lower-leaf shedding as the plant redirects resources to new growth and, later, bract development, Root stress from overwatering or salt buildup in the potting mix |
|---|---|
| Appears first on | Older, lower leaves |
| What to check | Whether yellowing follows a lower-leaf, interveinal-then-marginal pattern typical of magnesium deficiency, Feeding history and whether only nitrogen-heavy products have been used, Watering consistency and any visible salt buildup on the soil surface |
| Possible correction | If the pattern matches magnesium deficiency, switching to a complete fertilizer that includes magnesium, or an occasional supplemental application per its label, typically resolves it; rule out overwatering and salt buildup first since both produce similar lower-leaf decline |
Pruning, Training & Seasonal Maintenance
Poinsettia is a semi-woody subshrub that tolerates moderate to fairly hard pruning and responds by branching freely. The two goals are: (1) build a full, multi-branched shape early in the growing season through repeated pinching, and (2) rejuvenate the plant with a hard cutback once the bract display fades. Because poinsettia is a short-day (photoperiodic) plant, the single most important pruning rule is timing – pinching must stop well before the plant needs uninterrupted long nights to trigger bract coloring, or the display will be delayed, sparse, or lost. All parts exude a milky latex sap that can irritate skin and eyes, so cuts should be made carefully.
Quick Pruning & Maintenance Specs
| Pruning Tolerance | Moderate–High (responds well to pinching and cutback) |
| Primary Pruning Window | Late winter–spring, immediately after the bracts fade (hard cutback) |
| Secondary Maintenance Window | Spring–summer pinching to build branch structure |
| Typical Frequency | Pinch every 3–4 weeks through the growing season; one hard cutback per year |
| Main Objective | Compact, well-branched habit and reliable bract re-flowering |
| Young Plant Priority | Repeated pinching to establish multiple branches |
| Mature Plant Priority | Annual post-bloom rejuvenation cutback |
| Best Tool Type | Precision snips (pinching) / bypass secateurs (cutback) |
| Avoid Heavy Pruning During | From roughly 10 weeks before the desired bloom date through the end of the bract display |
Pruning by Plant Age & Size
Newly Established
Let a young plant settle in for a few weeks before the first pinch; remove only damaged or weak growth in the meantime.
Young / Formative
Pinch (remove the growing tip just above a leaf) once a stem has 4–6 leaves, then repeat on each resulting shoot every few weeks through spring and early summer. This is not a central-leader or vase system – the goal is simply a multi-stemmed, evenly branched mound.
Mature / Established
After the annual bract display finishes, cut the whole plant back hard to a low framework to prevent legginess and reset it for the next cycle.
Seasonal Pruning Schedule
Post-Flowering
Objective: rejuvenate. Remove: cut all stems back to about 10–15cm (4–6in), leaving a few nodes on each. Do not remove: nothing needs preserving at this stage. Expected response: vigorous new shoots within a few weeks in warm, frost-free conditions. Flowering impact: none – well before the next bract cycle begins.
Summer Canopy Management
Objective: build branch count. Remove: growing tips of each new shoot (pinch) every 3–4 weeks. Do not remove: any growth after the cutoff below. Expected response: each pinch roughly doubles the branch count. Flowering impact: pinching must stop by roughly 10 weeks before the desired bloom date (commonly mid-August in the Northern Hemisphere) – later pinching removes the shoot tips that would otherwise become bracts.
Ongoing Sanitary
Snap or snip off any yellowed, damaged, or overly leggy shoots at any time; this does not affect the bract cycle.
Flowering & Fruiting Wood
The true flowers are small and yellow; the showy part is the surrounding bracts, which color up only after several weeks of uninterrupted long nights (short days) in autumn. Bracts form at the tips of whatever shoots exist when photoperiod induction begins, so every pinch made after the cutoff date directly removes potential bract growth. Once bracts are coloring, do not prune – wait until the display fades.
Special Growth to Remove
Remove weak, thin, or crossing shoots that don’t contribute to an even shape; remove any stem showing basal blackening/rot promptly, as poinsettia can be prone to stem rot in cool or overly wet conditions.
Container & Small-Space Pruning
Most poinsettias are grown and finished in pots. Keep the framework low (10–15cm after cutback) and continue pinching through summer to match the smaller root volume – an unpinched potted plant becomes top-heavy and sparse. Water a little less frequently right after a hard cutback, since the reduced leaf area uses less water.
Tools
Precision snips for pinching soft new growth; bypass secateurs for the annual hard cutback into semi-woody stems.
Tool Hygiene & Disease Risk
Routine hygiene (clean, sharp tools) is sufficient – poinsettia has no major tool-transmitted disease of note in home settings. The bigger concern is the milky latex sap: it is a skin and eye irritant, so wear gloves, avoid touching your face while cutting, and wipe the blade clean after use so sap doesn’t gum it up.
Cut Placement & Technique
Pinch or cut just above a leaf node/bud facing the direction you want the new shoot to grow, keeping the resulting branch pointing outward rather than into the plant’s center.
Heavy Pruning & Rejuvenation
Poinsettia tolerates an annual hard cutback well. Cut all stems to 10–15cm right after the bracts fade; expect the plant to look bare for a few weeks before vigorous regrowth begins, given warm (frost-free) conditions and bright light.
Post-Pruning Care
After a hard cutback, keep the plant warm and bright, water moderately (reduced foliage needs less water until regrowth appears), and watch the cut stem bases for rot. Don’t fertilize heavily immediately after cutback – wait until new growth is established.
Common Pruning Mistakes
Pinching or shaping too late in the season, which removes the shoots that would have become bracts; skipping the annual cutback and letting the plant get tall, bare-based, and sparse; handling the latex sap without gloves; placing a plant you’re trying to rebloom near night-time light, which interrupts the dark period needed for bract coloring.
When NOT to Prune
Do not pinch or cut back after the photoperiod-induction cutoff (roughly 10 weeks before the desired bloom date) or at any point while bracts are actively coloring or on display – wait until after the display fades.
Recommended Tools (by task)
- Young plant, soft-tip pinching (spring–summer): precision_snips – clean small cuts on soft green growth without crushing the stem.
- Mature plant, annual hard cutback (semi-woody stems): bypass_secateurs – needed for the thicker base stems at rejuvenation time.
- Any cutting stage: blade_disinfectant – wipes the irritant latex sap off the blade between cuts.
Pruning Troubleshooting
| Problem | Possible Cause | What to Check | Corrective Action |
| Bracts fail to color or are sparse | Pinching continued past the photoperiod cutoff, or night-time light exposure | Date of last pinch; any lamps/streetlight reaching the plant at night | Stop pinching by the recommended cutoff next season; give 12–14 hours of full darkness nightly during induction |
| Leggy, sparse plant | Too few pinches, or no annual cutback | Number of branch tips; framework height after last season | Resume regular pinching in the growing season; cut back hard after the next bract display |
| Stem base blackening/rot after cutback | Overwatering a bare, leafless framework in cool conditions | Soil moisture and temperature around the cut stems | Reduce watering until regrowth appears; keep warm and bright |
Propagation Guide
Poinsettia is propagated almost exclusively from stem cuttings in both home and commercial settings, since named bract colors do not come reliably from seed and must be kept vegetatively; seed is used mainly for breeding new types rather than for reproducing a chosen color. Difficulty is easy to moderate, since success mostly depends on providing enough warmth and humidity while roots form.
Quick Propagation Specs
| Best Propagation Method | Stem (tip) cuttings |
| Alternative Methods | Seed (breeding/species use only) |
| Propagation Difficulty | Easy to Moderate |
| Seed True-to-Type | No – hybrid/named-color offspring vary |
| Vegetative True-to-Type | Yes |
| Best Propagation Season | Warm, frost-free period |
| Cutting Rooting Time | Commonly a few weeks under warm, humid conditions |
Growing from Seed
Seed is rarely used for garden or houseplant poinsettias, because the bract colors recorded for this plant (red, pink, yellow, orange, light green, white) are cultivar-specific and are not reproduced reliably from seed; seed propagation is mainly a breeding tool rather than a way to reproduce a chosen color.
Stem Cuttings
Cutting Type
Tip (softwood) cuttings with a few leaves and nodes.
Best Timing
During a warm, frost-free period, consistent with this plant needing frost-free conditions generally.
Cutting Preparation
Like other Euphorbias, cut ends exude milky latex sap; briefly dipping the cut end in warm water, or straight into rooting hormone, is a commonly used way to slow the sap flow before inserting the cutting.
Rooting Setup
Warm substrate with high humidity (for example under mist or a covered/enclosed setup) improves rooting success.
Rooting Hormone
Beneficial and commonly used in commercial propagation to improve rooting uniformity, though not strictly required for a home cutting to root.
Rooting Time
Typically a few weeks under warm, humid conditions.
Bloom & Flower Guide
Quick Details
- Bloom Season: Autumn and winter
- Flower Appearance: Small yellow true flowers (cyathia) at the shoot tips, surrounded by large showy bracts in red, pink, yellow, orange, pale green, or white
- Edibility: Not edible – the milky sap can irritate skin and eyes; grown purely as an ornamental
Detailed Blooming Overview
The poinsettia”s celebrated winter display is not really a flower show at all: the tiny true flowers are the yellow cyathia bunched at the centre, while the colour that makes the plant so popular comes from large modified leaves (bracts) that turn red, pink, cream and other shades as the nights lengthen through autumn and winter.
Flower Characteristics
- Small yellow true flowers (cyathia) clustered at the shoot tips.
- Surrounded by large, showy bracts.
- Bracts in red, pink, yellow, orange, pale green, or white.
Bloom Care & Thinning
- Colouring up: To colour for the season, the plant needs long, uninterrupted nights (about 14 hours of darkness) for several weeks in autumn.
- Handling: Wear gloves when pruning, as the sap is an irritant.
- Position: Bright, indirect light once the bracts have coloured.
Pests, Diseases & Troubleshooting
Overview: The Poinsettia (Euphorbia pulcherrima) is, like most of the genus Euphorbia, far more often lost to cultural mistakes than to pests. Grown soft and fast under glass, it is a magnet for whitefly and is also hit by root/stem rots, scab and Botrytis, plus cold-induced leaf and bract drop. The winning approach is prevention: clean stock, steady warmth, careful watering and early, gentle intervention.
Quick Troubleshooting Overview
| Issue / Pest | Main Symptom | Primary Solution |
|---|---|---|
| Overwatering / root & stem rot | Soft, blackening, collapsing base or stems; foul smell | Dry out; cut back to firm tissue; improve drainage |
| Whitefly | Tiny white flies rising in clouds; sticky honeydew & sooty mould | Yellow sticky traps; insecticidal soap/neem; parasitoids under glass |
| Mealybugs | White cottony fluff in crevices, spines and at soil line | Spot-treat with alcohol; neem/insecticidal soap; check roots |
| Spider mites | Fine stippling, dull skin, webbing in dry heat | Raise humidity/airflow; horticultural oil or miticide |
| Scale | Brown/tan bumps on stems that don’t rub off; sticky honeydew | Scrape off; horticultural oil; systemic if heavy |
| Scab / Pythium | Raised stem lesions; damping-off & wilt of soft stems | Clean stock, dry surface, fungicide drench |
| Cold / leaf & bract drop | Sudden yellowing and shedding after a chill or draught | Keep warm (above ~15°C); avoid cold draughts |
| Latex burns (handling) | Skin/eye irritation from cut sap | Wear gloves & eye protection; wash off promptly |
Common Pests & Management
- Whitefly (Trialeurodes vaporariorum & Bemisia tabaci):
- Symptoms: Tiny white moth-like flies that erupt in a cloud when the plant is disturbed; scale-like nymphs on leaf undersides, with honeydew and sooty mould. This is the signature and most damaging pest of soft-stemmed, leafy euphorbias grown warm.
- Prevention & Control: Hang yellow sticky traps to monitor and thin adults, keep plants uncrowded, and spray insecticidal soap or neem to leaf undersides, repeating on a tight cycle to break the life-stages. Under glass, the parasitoid Encarsia formosa gives excellent control.
- Mealybugs, incl. root mealybug (Pseudococcus & Rhizoecus spp.):
- Symptoms: Soft white, cottony tufts tucked into ribs, spine cushions, branch junctions and the growing point; sticky honeydew and sooty mould follow. Root mealybugs hide below soil as a white, mealy crust on roots and inside the rootball, causing unexplained stalling and slow decline — always suspect them when a euphorbia sulks with no pest visible above ground.
- Prevention & Control: Inspect crevices and roots at every repot; isolate new plants. Dab colonies with a cotton bud dipped in isopropyl alcohol, then follow with neem or insecticidal soap, repeating every 7–10 days. For root mealybug, bare-root, wash the roots, drench with a soil-applied systemic and repot into fresh gritty mix in a clean pot.
- Spider mites (Tetranychus urticae):
- Symptoms: Fine pale stippling and a dull, bronzed skin, worst in hot dry air; in bad cases fine webbing over the growing tips. On green-stemmed cactiform species the damage shows as permanent russet scarring.
- Prevention & Control: Raise humidity and airflow and avoid heat-stress. Rinse the plant, then apply horticultural oil or a labelled miticide, repeating to catch newly hatched mites; rotate actives to avoid resistance. Predatory mites work well in enclosed spaces.
- Scale insects (soft & armoured — Coccus, Diaspis spp.):
- Symptoms: Fixed brown, tan or grey bumps along stems and in rib grooves that do not rub off like dirt; soft scales weep honeydew and blacken the plant with sooty mould. Cactiform stems can carry heavy colonies hidden along the ridges.
- Prevention & Control: Scrape or wipe off with an alcohol-dampened cloth, then coat with horticultural oil to smother crawlers, repeating over several weeks. A soil-applied systemic helps with stubborn armoured scale on woody stems.
- Aphids (Aphis & Macrosiphum spp.):
- Symptoms: Soft green, black or yellow insects clustered on tender new shoots, leaves and flower heads; distorted growth, sticky honeydew and sooty mould. Colonies build fast in mild, sheltered conditions.
- Prevention & Control: Dislodge with a firm jet of water, encourage ladybirds and lacewings, and spray insecticidal soap or neem to the undersides of the growth if numbers climb. Avoid heavy nitrogen feeding, which fuels soft, aphid-prone growth.
- Fungus gnats (Bradysia spp.):
- Symptoms: Small dark flies running over the soil surface; their larvae feed on roots and organic matter in constantly damp mix, weakening seedlings and rot-prone succulents. Their presence is itself a warning that the mix is too wet.
- Prevention & Control: Let the surface dry between waterings, top-dress with grit or sand, and use yellow sticky traps. A Bacillus thuringiensis var. israelensis (Bti) drench or beneficial nematodes clears the larvae.
Diseases & Fungal Issues
- Root, basal & stem rot (Pythium, Phytophthora, Fusarium, Rhizoctonia):
- Symptoms: The number-one killer of this plant. Soft, water-soaked, blackening tissue at the base or along a stem, often with a foul smell; the rot travels upward or downward and can collapse the whole plant within days. Usually starts from cold, wet, airless soil or a wound.
- Treatment & Management: Prevent it — a gritty, sharply draining mix, a pot with drainage, warmth and restrained watering. At the first soft patch, cut back to clean firm tissue with a sterile blade, dust the wound, let it callus, and re-root the healthy top if the base is lost. Drench survivors sparingly; a biofungicide (Bacillus/Trichoderma) helps protect fresh roots.
- Poinsettia scab (Sphaceloma poinsettiae):
- Symptoms: Raised, corky, tan-to-grey spots with dark margins on stems and leaves; badly affected shoots can gallop upward in a spurt of distorted growth. Spread by splashing water in warm, humid houses.
- Treatment & Management: Start with clean, scab-free stock, keep foliage dry, and remove and destroy infected shoots. Protective fungicide is used on valuable crops where the disease is established.
- Grey mould (Botrytis cinerea):
- Symptoms: Fuzzy grey-brown mould on dying leaves, cyathia/bracts and soft growth in cool, damp, crowded conditions; tissue browns and rots where the mould takes hold.
- Treatment & Management: Remove spent flowers and dead tissue promptly, cut watering and humidity, and increase ventilation. Fungicide is rarely needed once the environment is dried out and opened up.
- Powdery mildew (Oidium / Podosphaera spp.):
- Symptoms: A white powdery bloom on leaves and soft stems, with yellowing and distortion beneath, in humid but still air with big day/night swings.
- Treatment & Management: Open up airflow and space plants, avoid shade and overhead water, and spray sulfur, potassium bicarbonate or a biofungicide at the first sign (avoid sulfur in high heat, which can scorch the plant).
- Fungal stem & leaf spot (Cercospora, Alternaria spp.):
- Symptoms: Sunken tan, brown or black spots and blotches on stems or leaves, sometimes with concentric rings or a yellow halo; favoured by overhead water sitting on the plant and by poor airflow.
- Treatment & Management: Improve ventilation, keep water off the stems, and remove affected parts with a sterile blade. A copper fungicide checks spread in persistent cases; avoid misting.
Growing Difficulties & Abiotic Problems
- Overwatering (root & stem rot — the killer):
- Cause & Symptoms: Soggy, airless soil starves and drowns the roots; the base yellows, softens and blackens, and the plant collapses. This, not any pest, is what kills most of these euphorbias.
- Correction Strategy: Use a gritty, mineral-rich free-draining mix and a pot with a drainage hole, water only when the mix has dried, and cut watering right back in cool or dim conditions.
- Cold shock & leaf / bract drop:
- Cause & Symptoms: A chill, a cold draught, a dry rootball or a sudden move causes rapid yellowing and shedding of leaves and bracts — the classic reason a poinsettia collapses soon after coming home.
- Correction Strategy: Keep it warm (above ~15°C) and evenly moist but never wet, out of hot and cold draughts, in bright light. Sleeve it for the cold journey home.
- Edema (oedema):
- Cause & Symptoms: Corky bumps or blisters on stems/leaves when roots take up water faster than the plant transpires it, in cool humid spells with wet soil.
- Correction Strategy: Water less during dull, humid weather, improve airflow and warmth, and avoid watering late in the day.
- Nutrient / salt issues:
- Cause & Symptoms: Overfeeding or hard water builds salts that scorch root tips and brown leaf/stem margins; starvation shows as overall paling.
- Correction Strategy: Feed lightly in growth only, flush the pot occasionally with clean water, and use rainwater where the supply is hard.
- Caustic milky latex (handling hazard):
- Cause & Symptoms: Every part of the plant bleeds a white latex when cut, snapped or bruised. On skin it causes burning, redness and blistering; splashed in the eye it can cause intense pain, inflammation and, in severe cases, temporary or lasting vision damage. It is also toxic if ingested by people or pets.
- Correction Strategy: Always wear nitrile gloves and eye protection when pruning, repotting or taking cuttings; keep the plant away from the face and never rub your eyes while handling it. Seal cut cuttings by rinsing or blotting the latex, work out of reach of children and animals, and wash skin and tools immediately with soap and water. If latex contacts the eye, flush with water and seek medical advice.
What Helps — Products & Tools
For this plant keep to gentle, targeted tools: yellow sticky traps and insecticidal soap or neem oil for whitefly and aphids, horticultural oil for scale and mites, a copper or biofungicide for scab and leaf spot, and a Bacillus/Trichoderma biofungicide drench plus a fast-draining mix to head off rot. Isopropyl alcohol on a cotton bud knocks out mealybugs.
Frequently Asked Questions
How do you care for a poinsettia?
Poinsettia is a drought-tolerant succulent shrub that grows best in partial to full shade and warm, frost-free conditions (USDA zone 10 and above). Plant it in sharply-drained, gritty soil and water it only lightly and occasionally – once established, water deeply but infrequently, always letting the top of the soil dry out before watering again, since overwatering is the quickest way to kill it.
Is poinsettia poisonous to pets or people?
Poinsettia is only mildly toxic – the irritant milky latex can cause skin or mild stomach upset, and its danger is widely overstated, but it is not for eating. The sap can upset pets or children if chewed, so keep the plant out of reach and avoid getting sap on skin or eyes.
Is poinsettia a tree or a shrub?
Poinsettia is naturally an evergreen to semi-deciduous shrub or small tree, 0.6-4 m (2-12 ft) tall – an open shrub to small tree, with its real show coming from the large, leaf-like coloured bracts rather than the flowers themselves.
Can you grow poinsettia from seed?
Poinsettia is propagated almost exclusively from stem cuttings, not seed, since named bract colors do not come reliably from seed and must be kept vegetatively – seed is used mainly for breeding new types rather than for reproducing a chosen color. Seed is rarely used for garden or houseplant poinsettias, because the recorded bract colors are cultivar-specific and are not reproduced reliably from seed.
What do poinsettia flowers look like?
The poinsettia’s famous winter display isn’t really a flower show – the tiny true flowers are the yellow cyathia bunched at the centre, while the colour comes from large modified leaves (bracts) that turn red, pink, cream and other shades as the nights lengthen through autumn and winter. Bracts can be red, pink, yellow, orange, pale green, or white.