Plant Profile & Key Characteristics
Overview: Brassavola nodosa is a perennial evergreen epiphytic orchid, about 30-60 cm, grown as a fragrant ornamental houseplant in mediterranean and subtropical climates or under glass. Its night-scented white to greenish flowers attract pollinators.
Quick Specifications
| Specification | Attribute |
|---|---|
| Plant Type / Life Cycle | Perennial (epiphytic orchid) |
| Foliage Type | Evergreen |
| Mature Size | 30-60 cm (12-24 in) |
| Growth Rate | Slow |
| Root System | Epiphytic – thick aerial roots rather than a soil root system |
| Toxicity | Non-toxic (orchids are generally regarded as non-toxic) |
| Hardiness | USDA zones 11-12 |
Growth Form & Structure
- Height & Spread: 30-60 cm (12-24 in); grown in a snug, well-drained pot of bark or cork, or mounted.
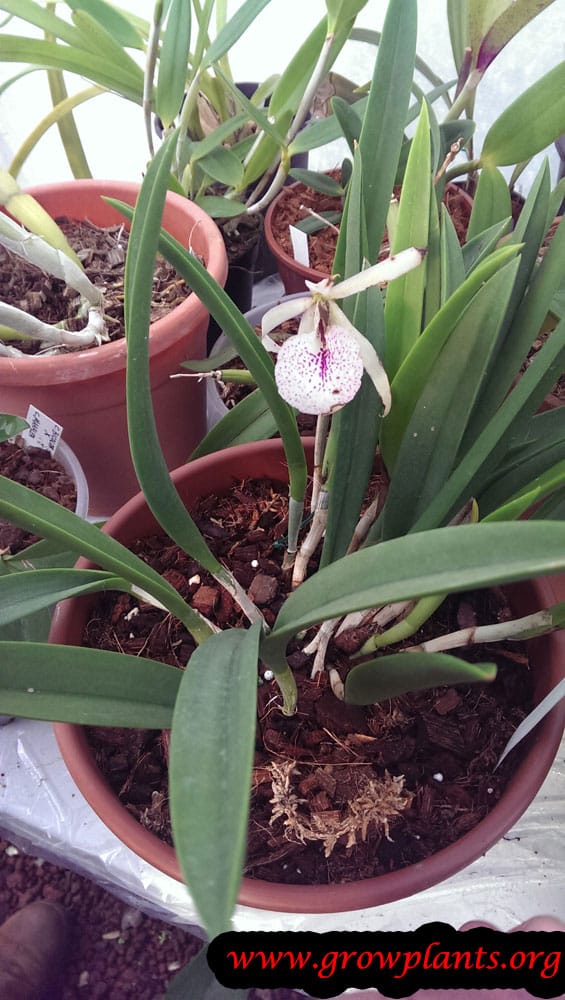
- Growth Habit & Form: Epiphytic, sympodial orchid with slender, fleshy, near-cylindrical leaves; roots need air and good drainage.
- Lifespan & Maturity: Long-lived, slow-growing orchid; repot and divide roughly once a year as new roots grow.
Anatomy & Physical Features
- Leaves & Foliage: Green, elliptic, fleshy (terete) leaves.
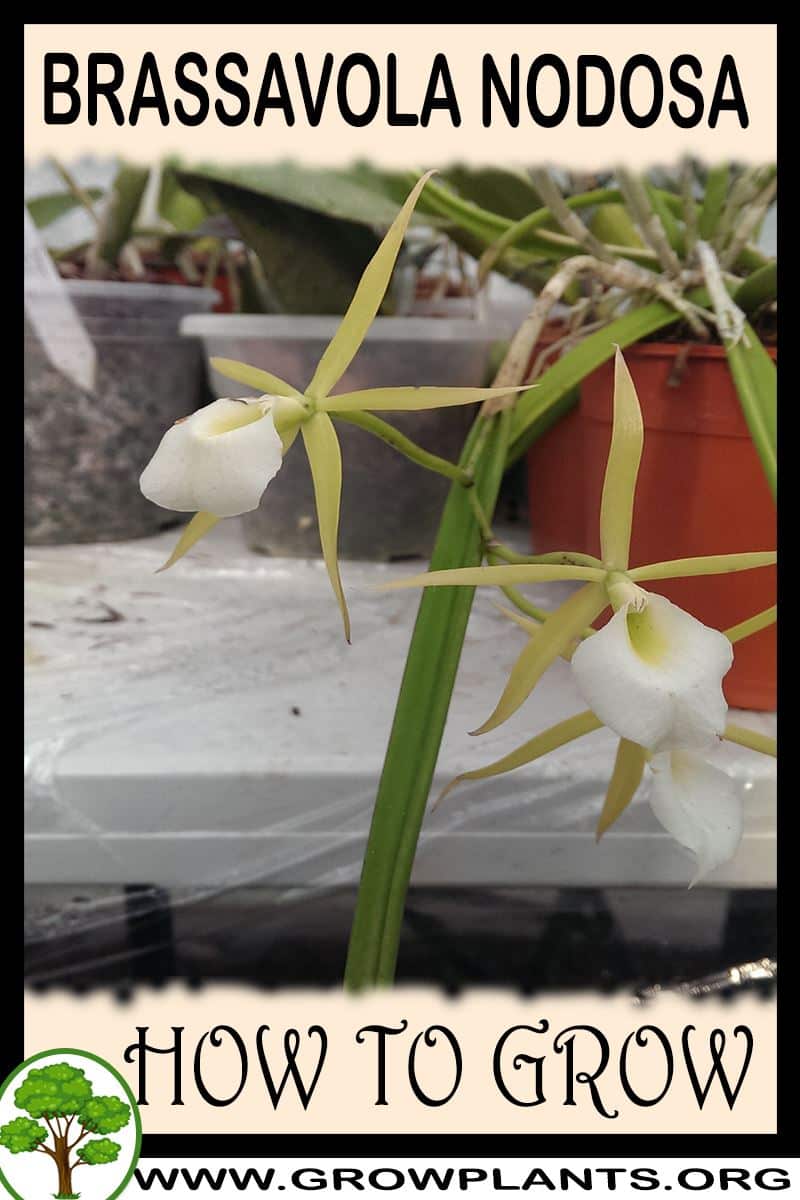
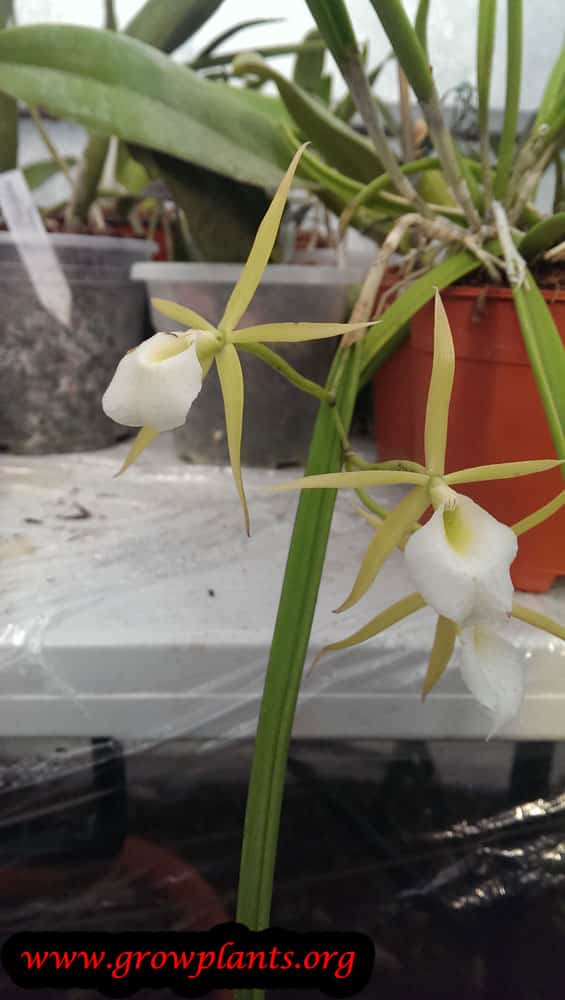
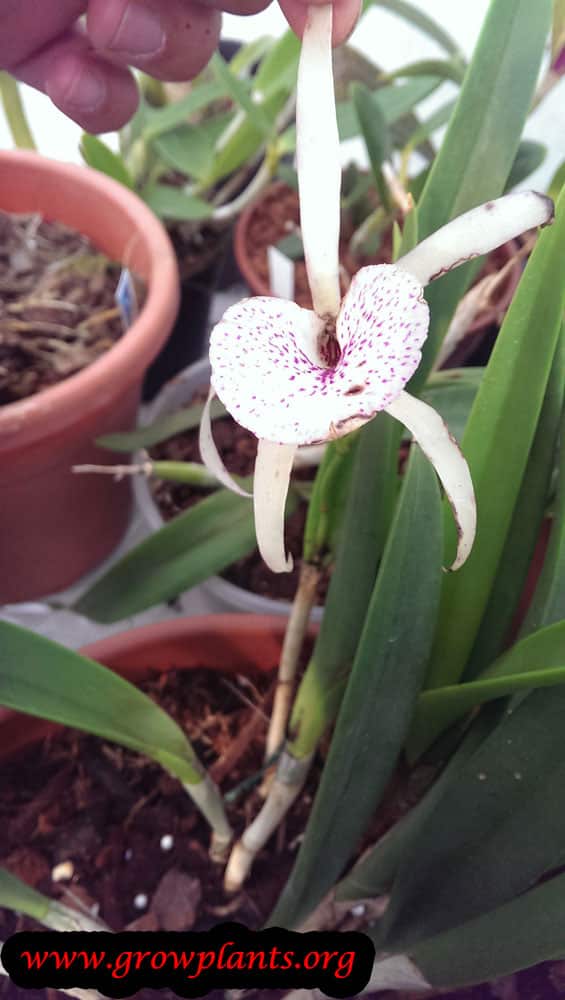
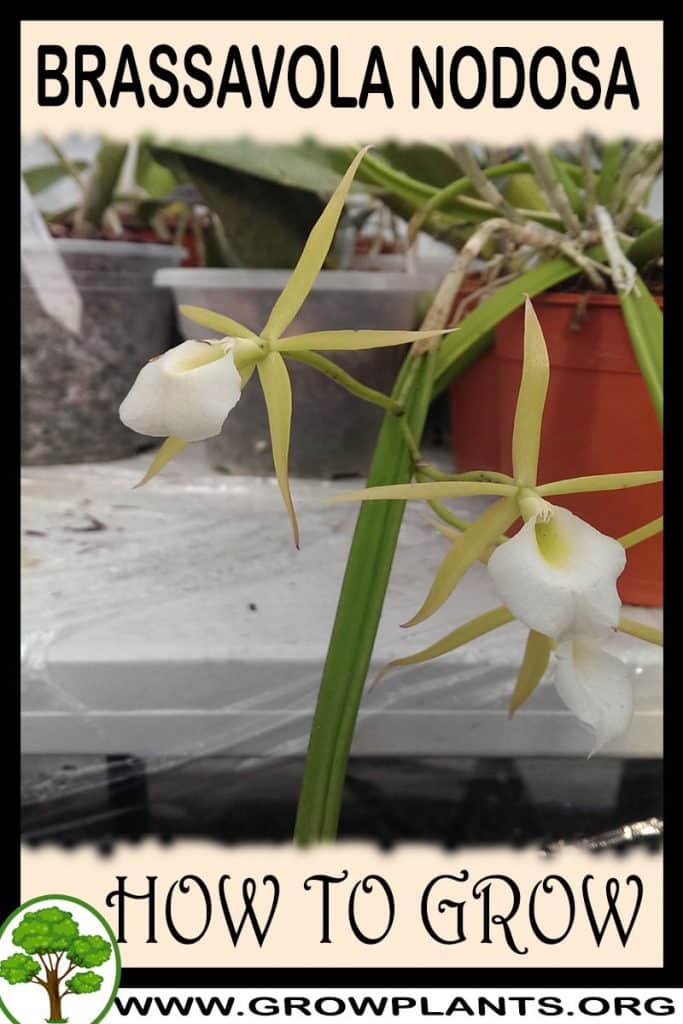
- Flower Characteristics: Fragrant trumpet-form flowers with five narrow petals, in white, green or cream (occasionally purple-marked), sometimes striped or spotted (summary only – see the Bloom guide).
Primary Uses & Landscape Value
- Functional & Ornamental Roles: Ornamental fragrant orchid grown as a houseplant, in a greenhouse or mounted; attracts pollinators.
Care Guide: Planting, Soil & Watering
Overview: Brassavola nodosa (lady of the night orchid) is an epiphytic orchid that grows on bark and branches rather than in soil, thriving in bright, filtered light, warmth and high humidity. It prefers warm days (about 18-32 C) and cooler nights (about 10-16 C). It needs an open, fast-draining bark or cork medium in a snug pot, with clean, room-temperature water and a slight dry-down between waterings.
Quick Care Requirements
| Requirement | Ideal Condition |
|---|---|
| Planting Season | Year-round (repot after flowering) |
| Growth Rate | Slow |
| Soil Type | Epiphytic – open bark or cork-chip mix, not soil |
| Water Need | Moderate – moist but freely draining, with high humidity |
Planting & Establishment
- Best Planting Season: Brassavola nodosa (lady of the night orchid) can be potted or divided at almost any time, but disturb it only when repotting, ideally after flowering.
- How to Plant:
- Hole Preparation: Choose a transparent pot just large enough for the roots – too big a pot stays wet and rots them.
- Soil Amendments: Use fresh orchid bark, cork or bark chips, adding pieces of Styrofoam for extra air, and refresh the medium before it breaks down into acidic compost.
- Planting Depth: Settle the plant so the base of the shoots sits at the surface and the roots are held in the bark; trim any dead roots when repotting.
- Growth Speed & Expectations: Slow-growing; repot roughly once a year as the roots and plant outgrow their pot.
Soil, Watering & Drainage Care
- Soil Mix & Drainage Needs: An open, airy bark or cork mix in a snug transparent pot gives the free drainage and root aeration these orchids demand; keep humidity high.
- Watering Schedule & Technique:
- Young / Newly Planted: After potting, water with clean, room-temperature or rain water, keeping the medium lightly moist as new roots establish.
- Established: Water when the bark approaches dryness, then water thoroughly with clean water; never leave it sodden.
- Seasonal Adjustments: More frequently during warm, active growth and less in cooler months.
Climate, Light & Hardiness
Brassavola nodosa is a warmth-loving epiphyte suited to Mediterranean, subtropical, and greenhouse conditions, tolerating a wide day-to-night temperature swing. It wants half-shade with strong overall light and has essentially no frost tolerance, so it is only reliable outdoors in warm, frost-free climates.
Quick Climate Specifications
| Factor | Detail |
|---|---|
| Climate Zones | Mediterranean, subtropical, or greenhouse/houseplant conditions |
| USDA Hardiness Zones | 11–12 |
| Optimal Temp Range | Approximately 18–32°C (65–85°F) by day, 10–16°C (50–60°F) at night; can tolerate somewhat higher daytime heat |
| Frost Tolerance | None |
| Light Conditions | Half shade with strong overall light |
| Wind Tolerance | Low |
Sunlight & Light Exposure
Optimal Light Setup
Bright, filtered light or half-shade with strong ambient brightness suits this orchid best – enough light for good flowering without harsh, scorching midday sun.
Shade & Heat Management
Light shading during the hottest part of the day helps prevent leaf stress, though the plant otherwise tolerates a fairly wide temperature range comfortably.
Best Exposure/Orientation
An east-facing window, a bright greenhouse bench, or a lightly shaded outdoor spot in warm climates all work well; avoid deep, dense shade, which reduces flowering.
Temperature Extremes & Hardiness
USDA Hardiness & Regional Limits
Site data places it in hardiness zone 11–12, so it needs a warm, essentially frost-free climate to survive outdoors year-round; elsewhere it is best grown as a houseplant or in a greenhouse.
Cold Damage & Winter Protection
No specific cold-damage threshold is given, but as a warm-climate epiphyte it should be protected whenever night temperatures drop much below its preferred 10–16°C (50–60°F) range, and moved indoors or under cover ahead of any frost risk.
Frost Sensitivity
Frost sensitive with no established survival minimum in the source data; treat frost exposure as damaging to fatal.
Extreme Heat Tolerance
Good; the plant is noted to tolerate daytime temperatures higher than 32°C (85°F) without difficulty, provided humidity and airflow remain adequate.
Wind, Humidity & Microclimate
Humidity Preferences
High humidity is preferred, supporting strong root and flower development.
Dry-Air Tolerance
Moderate at best; prolonged dry air, especially indoors, should be offset with misting or a humidity tray.
Wind Tolerance
Low to moderate; the open, well-drained pot this orchid needs benefits from gentle airflow but not strong, drying wind.
Rainfall & Seasonal Moisture
Adapted to humid conditions with regular moisture rather than a long dry season; container-grown plants dry out faster than those with more root buffer, so consistency matters more than any single watering event.
Microclimate Recommendations
A warm, humid, bright spot with some midday shading and good air movement – a covered patio, bright greenhouse, or sheltered balcony – suits it well in climates cooler or drier than its native subtropical range.
Growing in Pots, Balconies & Indoors
Brassavola nodosa (lady of the night) (Brassavola nodosa) is a compact orchid (about 30-60 cm) and a genuine houseplant – the grower confirms it grows well indoors, and orchids are almost always grown in a pot rather than open ground. Give it bright, indirect light near a window and it makes a rewarding, long-flowering indoor plant. It also takes brighter light than most orchids, so it can enjoy a sunnier window or a lightly shaded spot outdoors in summer.
Quick Details
- Container Size: A pot only about 20-40% larger than the root ball – orchids like to be snug
- Indoor Suitability: Yes – a true houseplant in bright, indirect light
- Best Spot: Bright light – it takes stronger light than most orchids, including some direct sun
- Soil & Drainage: Never ordinary potting soil – use a coarse, open orchid medium (bark or cork chips) with lots of drainage holes
- Watering in Pots: Water moderately – water when the medium is nearly dry, then let it drain; let excess drain away and never leave the pot standing in water
Indoors & On the Windowsill
- A true houseplant: The grower confirms it thrives indoors – keep it near a bright window but out of harsh, direct midday sun.
- Windowsill growing: An east or shaded-south window is ideal; a clear pot lets you watch the roots and see when to water.
- Overwintering: As a tropical plant it is happiest indoors year round in cool climates – keep it warm, bright and away from cold draughts and frost.
On a Balcony or Patio
- Summering outdoors: It can spend warm spells on a shaded, sheltered balcony or patio in bright but indirect light – protect it from direct sun, drying wind and any chill. Pots and open orchid media dry quickly, so check moisture often.
Choosing the Pot, Soil & Long-Term Care
- Pot & drainage: A snug pot with many holes; a transparent pot is useful for watching the roots. Never let it sit in standing water – the fastest route to rot.
- Medium: A coarse, free-draining orchid mix of bark or cork chips (some more terrestrial types appreciate a little added coir or humus), not garden soil.
- Feeding & water quality: Feed with a dilute orchid fertiliser a few times a year; where possible use rain or distilled water, which orchids prefer.
- Repotting: Refresh the medium about every two years – bark breaks down and loses structure over time – and pot on when roots fill the container.
Fertilizing & Feeding
A light feeder typical of epiphytic orchids: this warmth- and sun-loving, fragrant species is best served by frequent, dilute balanced feeding during active growth rather than infrequent heavy applications.
Quick Fertilizing Specs
| Feeding Level | Light feeder |
|---|---|
| Main Nutrient Priority | A dilute, balanced complete orchid fertilizer rather than a high-phosphorus bloom formula |
| Best Feeding Period | While new growth is developing, with a flowering peak in autumn and winter |
| Micronutrients | A complete orchid fertilizer generally covers routine needs; correct only a diagnosed deficiency |
| Reduce/Stop Feeding | Feeding is withheld while the plant rests between growth flushes |
Feeding by Growth Stage
New growth and root development
Support fresh fleshy stems, leaves, and roots as a new growth develops in the brighter light this species prefers over most other orchids.
| Nutrient direction | A dilute, nitrogen-leaning balanced fertilizer supports the flush of new growth and roots without pushing soft tissue that scorches easily in strong light. |
|---|---|
| Timing | As soon as new growth is visible at the base of the plant. |
| Frequency | Regular light feedings through the active growing period suit this species better than infrequent heavy ones. |
| Fertilizer types | A balanced, complete orchid fertilizer diluted well below label strength for regular container feeding, An occasional plain-water flush through the bark mix to prevent salt buildup |
| Routine trace nutrients | iron, manganese |
| Precautions | Flush the bark mix with plain water periodically to prevent salt buildup, which shows up faster under this species’ brighter light and warmer growing conditions. |
Flower development and night fragrance
Support the trumpet-shaped, night-fragrant flowers this species is prized for, which peak in autumn and winter but can appear across much of the year.
| Nutrient direction | Keep to a balanced fertilizer with adequate potassium rather than a high-phosphorus ‘bloom booster’ – consistent bright light, not extra phosphorus, is what drives this species’ heavy flowering. |
|---|---|
| Timing | As flowers develop and while they remain open, with a heavier flush typically in autumn and winter. |
| Frequency | Continue the same light, regular feeding used during growth; there is no need to increase strength for bloom. |
| Fertilizer types | A balanced, complete orchid fertilizer at the same dilute strength used during active growth |
| Routine trace nutrients | iron, manganese |
| Precautions | Avoid switching to a high-phosphorus ‘bloom booster’ product; it does not improve flowering and can unbalance feeding. |
Rest between growth cycles
Let the most recent growth mature and the plant pause before the next new growth begins.
| Nutrient direction | None – withhold fertilizer while the plant sits between active growth flushes. |
|---|---|
| Timing | After a growth has matured and before the next new growth is visible. |
| Frequency | No feeding during this rest period. |
| Fertilizer types | No feeding at this stage; plain water only if the bark mix has dried, until new growth resumes. |
| Precautions | Resume feeding once new leaf or root growth is visible at the base of the plant. |
Nutrient Deficiency Signs & Corrections
New growth emerges pale yellow-green and undersized, and new growth is slow to develop.
| Possible causes | insufficient nitrogen during the active growth flush, fertilizer diluted too far or applied too infrequently, roots reduced by an old, broken-down bark medium |
|---|---|
| Appears first on | newest growth |
| What to check | feeding routine and dilution during active growth, condition and age of the bark or cork mix, root health at repotting |
| Possible correction | Resume regular light feeding with a balanced fertilizer during active growth and repot into fresh bark if the mix has broken down. |
Older growth shows yellowing between the veins while the veins themselves stay green, starting near the base.
| Possible causes | magnesium depleted from the bark mix over time, fertilizer salt buildup interfering with nutrient uptake, more likely under this species’ brighter light and warmer conditions, an old, compacted medium restricting root function |
|---|---|
| Appears first on | older growth |
| What to check | age and condition of the potting mix, fertilizer and flushing routine, overall root health |
| Possible correction | Flush the mix with plain water to clear built-up salts, consider a fertilizer that includes magnesium, and repot into fresh bark if needed. |
New growth shows yellowing between the veins while the veins themselves remain green.
| Possible causes | irrigation water with a high mineral content limiting iron availability, a mix that has broken down and become compacted, strong light and warm conditions increasing overall nutrient demand faster than uptake keeps pace |
|---|---|
| Appears first on | youngest growth |
| What to check | mineral content of the water used for irrigation, condition and age of the potting mix, root health |
| Possible correction | Switch to lower-mineral water where practical, improve drainage, and apply a chelated iron product per its label if the deficiency persists. |
Pruning, Training & Seasonal Maintenance
Brassavola nodosa is a sympodial, Cattleya-alliance epiphyte — new growths with slender, fleshy, terete leaves and a small basal pseudobulb are produced in succession along a creeping rhizome, and each mature growth flowers once from its own single inflorescence. Unlike a monopodial orchid, a spent bloom on this plant will not reflower from the same stem; next season’s flowers come from the next new growth. Pruning tolerance is low: routine care removes old yellowed leaves and cuts the spent flower stem back once the fragrant night-time flowers have fully finished, but there is no framework to shape or size-control.
Quick Pruning & Maintenance Specs
| Pruning Tolerance | Low – sanitary grooming and post-bloom spike removal only |
| Primary Pruning Window | After bloom, once flowers on the current spike have fully finished |
| Secondary Maintenance Window | Ongoing – old yellow leaf removal, root grooming at repotting |
| Typical Frequency | Per bloom cycle (flowers year-round with an autumn/winter peak), plus as-needed grooming |
| Main Objective | Remove the spent flower stem and old leaves; protect the current season’s new growth |
| Mature Plant Priority | Let each new growth mature fully before its inflorescence is cut back |
| Best Tool Type | Small precision snips, disinfected |
| Avoid Heavy Pruning During | While a new growth or root flush is actively expanding |
Pruning by Plant Age & Size
Newly Established
On a recent division, remove only dead or rotten tissue and let the plant put energy into new roots and growths rather than encouraging bloom.
Young / Formative
No structural training — this is a clumping rhizomatous epiphyte, not a plant that is staked into a shape. Simply allow successive growths to fill the mount or pot.
Mature / Established
Once a mature clump is flowering regularly, priorities shift to post-bloom cleanup (cut the spent stem, remove old yellowed leaves) and, at repotting, dividing the clump only when it has produced enough new growths to split without weakening either half.
Seasonal Pruning Schedule
| Post-Flowering | Objective: tidy the finished inflorescence. Remove: the flower stem, cut back once all flowers on it have died (own notes: about 2 cm past where the bloom dies). Do not remove: the leaf or growth that bore it — it keeps contributing reserves. Expected response: none from this cut; the next flower will come from the next new growth, not this stem. Flowering impact: none, since this species does not rebloom on a spent spike. |
| Ongoing Sanitary | Objective: keep the clump clean between bloom cycles. Remove: fully yellowed, dying leaves. Do not remove: green leaves, even on older growths, since they still feed the plant. |
Structural Pruning & Training
No branch selection applies. The relevant structural task is managing successive growths along the rhizome: let a clump build to several strong growths before dividing at repotting, keeping at least a few growths per division so neither half is left too weak to flower well.
Special Growth to Remove
Old yellow leaves removed at the base once fully spent; the spent flower stem cut back after bloom; fully dead, hollow back-growths can be removed, but leafless older growths that are still firm should be left, since they continue to store reserves for the clump.
Container & Small-Space Pruning
Grown mounted or in a snug, well-drained pot (its own notes recommend not oversizing the pot, and using a styrofoam layer for root aeration in bark or cork-based mix). At repotting, cut only dead roots — own notes specify trimming dead root tissue when changing pots — and leave firm roots intact.
Tools
Precision snips for leaf and spike removal; a disinfected blade for root trimming at repotting. Nothing heavier is needed on growths this slender.
Tool Hygiene & Disease Risk
High-risk, as with all orchids — disinfect blades between plants and between cuts to avoid spreading mechanically transmitted viruses such as Cymbidium mosaic virus.
Cut Placement & Technique
Cut the spent flower stem cleanly a short distance past the point where the last flower died, rather than flush against the leaf, to avoid nicking live tissue. Remove old leaves close to the growth without tearing.
Heavy Pruning & Rejuvenation
Not tolerated in the shrub sense — there is no hard cut-back that improves this plant. A weak clump is best addressed by correcting light, watering and repotting frequency, not by pruning.
Post-Pruning Care
No fertilizer push after a routine post-bloom trim. Keep watering and humidity steady; after root trimming at repotting, let cuts dry briefly before rewetting the medium.
Common Pruning Mistakes
Cutting a spent flower stem flush into the leaf or growth instead of leaving a short stub; removing green leaves from older growths, losing stored reserves; dividing the clump too small, leaving too few growths per division to flower well; and skipping tool disinfection between orchids.
When NOT to Prune
Avoid cutting while the current inflorescence is still flowering — the display can last extended periods, especially with its strong night fragrance. Avoid repotting or root work while a new growth or root flush is actively pushing.
Recommended Tools (by task)
- precision_snips – cutting spent flower stems and trimming old leaves.
- blade_disinfectant – between plants and cuts, given orchid virus transmission risk.
Propagation Guide
Brassavola nodosa is most reliably propagated by dividing its pseudobulb clusters, since seed germination is genuinely difficult outside a sterile flask and offers no real advantage for a home grower. Division is a moderate task best timed to the plant’s own repotting cycle, while seed remains a specialist, lab-based method.
Quick Propagation Specs
| Best Propagation Method | Division of pseudobulb clusters |
| Alternative Methods | Backbulb propagation; asymbiotic (flask) seed culture – specialist/lab only |
| Propagation Difficulty | Moderate (division); Specialist (seed) |
| Seed True-to-Type | Usually true-to-type (species), though division guarantees an identical clone |
| Vegetative True-to-Type | Yes |
| Best Propagation Season | Spring, as new growth begins, often alongside repotting |
Division, Offsets, Pups & Suckers
Divide clumps so each section keeps at least 3 pseudobulbs with healthy growing points and roots attached; the site notes this plant’s roots only push out new growth about once a year, so division is best combined with the routine repot rather than done on a whim. Older, leafless back pseudobulbs (backbulbs) can also be potted separately – they are slower to sprout but can start a new plant. Pot divisions in a chunky, free-draining mix such as bark or cork chip, in a pot sized to just fit the roots rather than an oversized one, and keep them lightly moist with clean, room-temperature water while new roots form.
Bloom & Flower Guide
Quick Details
- Bloom Season: Possible year-round, heaviest in autumn and winter
- Flower Appearance: Five narrow petals with a broad, trumpet-shaped white lip; white, green or cream, occasionally touched with purple, night-fragrant
- Edibility: Ornamental — grown for its flowers, not eaten (orchid foliage and flowers are generally non-toxic)
Detailed Blooming Overview
Brassavola nodosa is affectionately known as the Lady of the Night for the powerful scent it releases after dark to draw its moth pollinators. The grower describes five narrow petals and a trumpet-shaped lip in the middle, in white, green or cream and rarely marked with purple. The flowers appear over much of the year, with the main flush in autumn and winter, and the evening perfume is one of the plant’s great pleasures.
Flower Characteristics
- Five narrow petals surrounding a broad, trumpet-shaped white lip (grower’s description).
- Colours are white, green and cream, occasionally with a little purple.
- Flowers are strongly fragrant at night, the better to attract their moth pollinators.
Bloom Care & Thinning
- Triggering bloom: Bright light — more than most orchids will take — is the key to free flowering on this tough species.
- After flowering: Remove spent flowers; the plant blooms readily from its slender, pencil-like growths.
- Enjoying the scent: Keep a flowering plant where its evening fragrance can be appreciated.
Bloom Health & Protection
- Botrytis petal blight can spot open flowers with small brown or translucent marks in cool, damp, still air — better ventilation and keeping water off the blooms is the first line of defence, with a fungicide only if it spreads.
- Aphids, scale and mealybugs are drawn to soft buds and flower spikes — wiping them off or treating with neem oil or insecticidal soap keeps the flowers clean.
- Bud blast (buds yellowing and dropping before they open) is usually a stress response to sudden changes in temperature, light or humidity, or to dry air — steady conditions while the plant is in spike prevent it.
Pests, Diseases & Troubleshooting
Overview: Brassavola nodosa is an epiphytic orchid, and its pest and disease profile is the classic orchid one: sap-sucking scale, mealybug, spider mites and thrips, plus snails and slugs that chew roots and new growth. Its most dangerous diseases are the fast bacterial and fungal rots (black rot, bacterial brown/soft rot) that spread in warm, wet, stagnant conditions, along with incurable orchid viruses. Almost everything is prevented by clean tools, good air movement, careful watering into a free-draining medium, and never letting water sit in the crown. Brassavola nodosa (‘Lady of the Night’) is an unusually tough, forgiving orchid that tolerates bright light and some neglect, so it is less pest-prone than most – but the same scale, mite and rot risks apply if it is kept wet and stagnant.
Quick Troubleshooting Overview
| Issue / Pest | Main Symptom | Primary Solution |
|---|---|---|
| Scale insects | Brown/white bumps on leaves, pseudobulbs and sheaths; sticky | Wipe/alcohol; horticultural oil |
| Mealybugs | White cottony tufts in sheaths and leaf axils | Alcohol swab; insecticidal soap / oil |
| Spider mites | Fine silvery stippling and webbing on leaf undersides | Raise humidity, wipe leaves; miticidal oil |
| Thrips | Silvery flecking, distorted buds, spoiled flowers | Sticky traps; spinosad; remove buds |
| Snails & slugs | Chewed roots, new growth and flower spikes; slime | Bait, barriers, night hand-picking |
| Black rot / soft rot | Fast-spreading black or watery mushy lesions | Cut out to clean tissue; improve airflow; reduce wetness |
Common Pests & Management
- Scale insects (Diaspididae / Coccidae (e.g. Boisduval scale)):
- Symptoms: Brown, tan or white immobile bumps and, with Boisduval scale, cottony patches on the leaves, pseudobulbs and inside old leaf sheaths; feeding causes yellow flecking, pitting and gradual decline, plus honeydew and sooty mould from soft scales. Hidden populations under sheaths make it persistent.
- Prevention & Control: Isolate the plant and strip away old dry sheaths and bracts where scale hides. Wipe or dab crawlers and adults with an alcohol-moistened swab, and spray horticultural oil or insecticidal soap over all surfaces, repeating every 1–2 weeks to catch successive crawlers. Sterilise tools between plants.
- Mealybugs (Pseudococcus / Planococcus spp.):
- Symptoms: White cottony, waxy tufts tucked into leaf axils, flower sheaths, new growth and even among the roots, with honeydew, sooty mould and weakened, distorted growth.
- Prevention & Control: Dab colonies with an alcohol swab and remove hiding places such as old sheaths; check the roots and repot into fresh medium if infested. Spray insecticidal soap or horticultural oil thoroughly and repeat until clear, keeping the plant isolated.
- Spider mites (Tetranychus / Brevipalpus spp.):
- Symptoms: Fine silvery or pale stippling and a dull, pitted look on the leaf undersides, sometimes with delicate webbing, in warm, dry, low-humidity air; false spider mites cause sunken pitting without obvious webbing.
- Prevention & Control: Raise humidity and improve air movement, and wipe or rinse the leaf undersides regularly to remove mites and dust. Encourage predatory mites. Treat outbreaks with a miticidal horticultural oil or insecticidal soap, covering the undersides and repeating.
- Thrips (Frankliniella / Thrips spp.):
- Symptoms: Tiny slender insects that rasp leaves, buds and flowers, causing silvery flecking and streaking, deformed buds, and browning, spotted, short-lived blooms; they also spread orchid viruses.
- Prevention & Control: Monitor with blue or yellow sticky traps and remove infested buds and spent flowers. For outbreaks use spinosad or insecticidal soap in the evening, repeating to break the cycle; keep new purchases isolated, as thrips arrive on incoming plants.
- Snails and slugs (Gastropoda):
- Symptoms: Chewed root tips, new growth, buds and flower spikes with tell-tale slime trails; small bush snails hide in the pot and medium and feed at night, damaging the sensitive roots.
- Prevention & Control: Hand-pick at night, set beer or bait traps, and use copper barriers around benches. Drench or repot to flush out pot-dwelling snails, and use iron-phosphate pellets where needed. Keep benches and pots clean and free of debris.
Diseases & Fungal Issues
- Black rot (Phytophthora / Pythium spp.):
- Symptoms: Fast-spreading black or purplish-brown watery, mushy lesions on leaves, new growth and pseudobulbs, often starting at the base or in the crown after water sits there; it can kill a plant rapidly in warm, wet, stagnant conditions.
- Treatment & Management: Act fast: cut well back into clean, firm green tissue with a sterile blade, dust the cuts with cinnamon or a fungicide, and move the plant to bright, airy, drier conditions. Water early in the day, never into the crown, and improve air movement. A copper or phosphonate fungicide protects valued plants; discard plants that are too far gone.
- Bacterial brown / soft rot (Acidovorax / Erwinia (Pectobacterium) spp.):
- Symptoms: Soft, water-soaked, sunken spots that turn brown or blackish and enlarge rapidly, sometimes with a foul smell and oozing, especially in warm, humid, wet conditions and after crown wetting.
- Treatment & Management: Cut out infected tissue back to healthy green with a sterile tool and keep the plant dry, cool and airy while it heals; treat cuts with cinnamon or copper. Reduce humidity around the plant, water in the morning only, and avoid overhead splashing that spreads bacteria plant-to-plant.
- Fungal leaf spot & anthracnose (Cercospora / Colletotrichum / Guignardia):
- Symptoms: Small yellow, brown or black spots and blotches, sometimes in rings or with concentric zoning, mainly on older leaves in humid, poorly ventilated conditions; anthracnose causes sunken dark leaf-tip and blotch lesions.
- Treatment & Management: Remove and destroy spotted leaves, improve air circulation and light, and keep foliage dry, especially overnight. A copper-based fungicide checks persistent spotting, but ventilation and dry leaves are the primary control.
- Orchid viruses (Cymbidium mosaic & Odontoglossum ringspot virus):
- Symptoms: Irregular mosaic mottling, colour-break streaking, chlorotic or necrotic rings, streaks and flecks on leaves, and distorted, streaky flowers; growth is weakened but the plant does not usually die outright. Viruses are incurable and spread by sap.
- Treatment & Management: There is no cure – isolate and ideally destroy confirmed virus-positive plants to protect the collection. Prevent spread by sterilising cutting tools between every plant (flame or fresh blades), controlling sap-feeding thrips, aphids and scale, and buying clean stock; virus test valuable plants if unsure.
Growing Difficulties & Abiotic Problems
- Root rot from overwatering / stale medium:
- Cause & Symptoms: Overwatering, a broken-down soggy medium, or pots that never dry cause the fleshy roots to blacken, rot and die, so the plant dehydrates and shrivels even though it is ‘wet’ – the commonest orchid killer.
- Correction Strategy: Grow in an open, free-draining orchid medium (bark, or mounted for these epiphytes), let the roots approach dryness between waterings, and repot into fresh medium every year or two. Ensure pots drain freely and never leave the plant standing in water.
- Sunburn & leaf scorch:
- Cause & Symptoms: Bleached, then brown or black dry patches on leaves exposed to too much direct sun or a sudden increase in light, worst when leaves are wet or airflow is poor.
- Correction Strategy: Provide bright but filtered/diffused light appropriate to the plant, and increase light gradually. Improve air movement to cool the leaves, and shade during the most intense midday sun. Damaged tissue will not recover but should stop spreading.
- Bud blast & poor flowering:
- Cause & Symptoms: Buds yellowing and dropping before opening, or failure to flower, caused by sudden changes in temperature, light or watering, low humidity, or drought/overwatering stress.
- Correction Strategy: Keep conditions stable through spike and bud development, maintain adequate humidity and steady watering, and give the correct light and the day–night temperature difference the plant needs to initiate and hold blooms.
- Salt & fertiliser burn:
- Cause & Symptoms: Blackened, dead root tips and brown leaf-tip burn from accumulated fertiliser salts, over-strong feeding, or hard water in the medium.
- Correction Strategy: Feed ‘weakly, weekly’ with a dilute balanced orchid fertiliser, flush the medium periodically with plain water to leach salts, and use rain or low-mineral water where possible. Repot if the medium is heavily salt-encrusted or degraded.
What Helps – Products & Tools
The orchid toolkit is isopropyl alcohol swabs, insecticidal soap and horticultural / neem oil for scale, mealybug and mites, spinosad plus blue/yellow sticky traps for thrips, and iron-phosphate pellets or copper barriers for snails and slugs. For the dangerous rots keep ground cinnamon or a copper/phosphonate fungicide and a sterile blade to cut out infection, and always sterilise tools between plants to stop virus spread. Fresh free-draining medium and good airflow are the best insurance. Spray oils in the evening to protect pollinators.