

Plant Profile & Key Characteristics
Overview: A compact, evergreen epiphytic orchid reaching about 20-60 cm (12-24 in), grown as an ornamental flowering pot plant or houseplant.
Quick Specifications
| Specification | Attribute |
|---|---|
| Plant Type / Life Cycle | Perennial (epiphytic orchid) |
| Foliage Type | Evergreen |
| Mature Size | 20-60 cm tall (12-24 in) |
| Growth Rate | Slow to Moderate |
| Root System | Epiphytic aerial roots |
| Toxicity | Non-toxic |
| Hardiness | USDA zones 11-12 (or indoors) |
Growth Form & Structure
- Height & Spread: 20-60 cm (12-24 in), grown in a well-drained, snug transparent pot rather than in open ground.
- Growth Habit & Form: Clumping epiphytic orchid that builds up from fleshy pseudobulbs.
- Lifespan & Maturity: Long-lived perennial; blooms can appear through much of the year in good conditions.
Anatomy & Physical Features
- Leaves & Foliage: Green, linear leaves that are fleshy at the base, forming pseudobulbs.
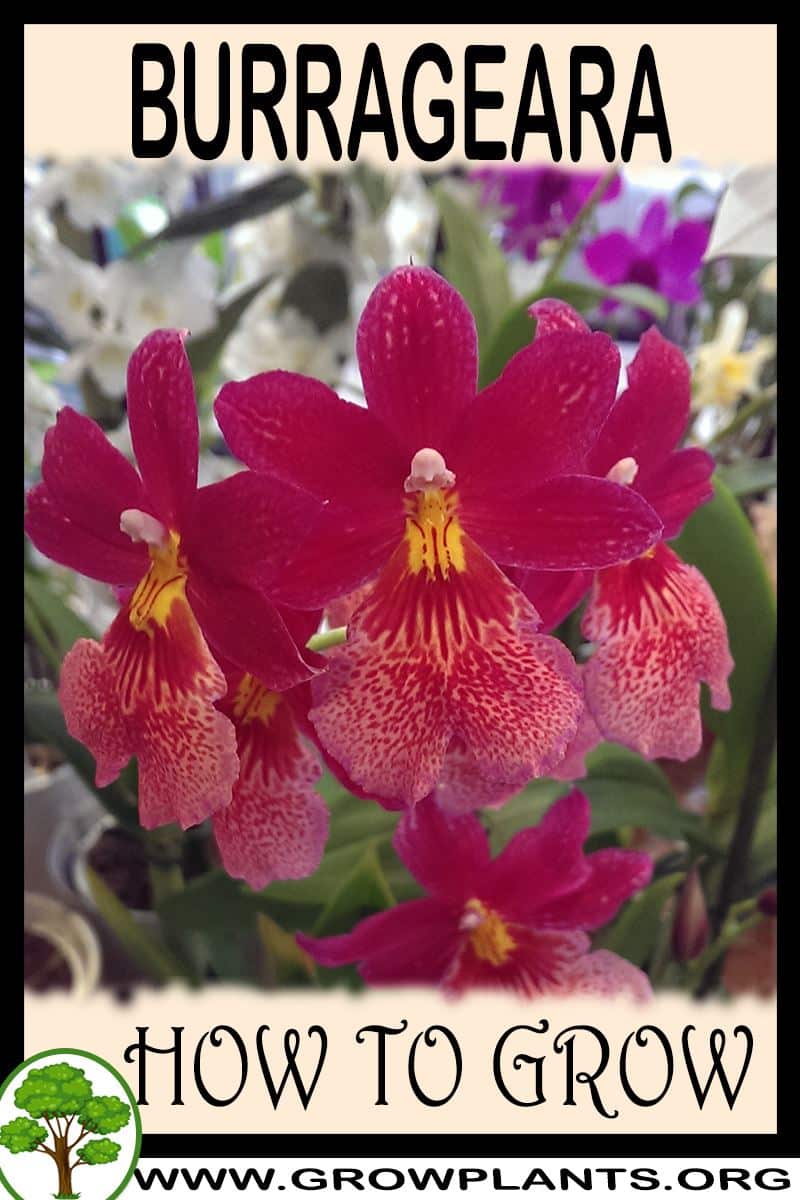
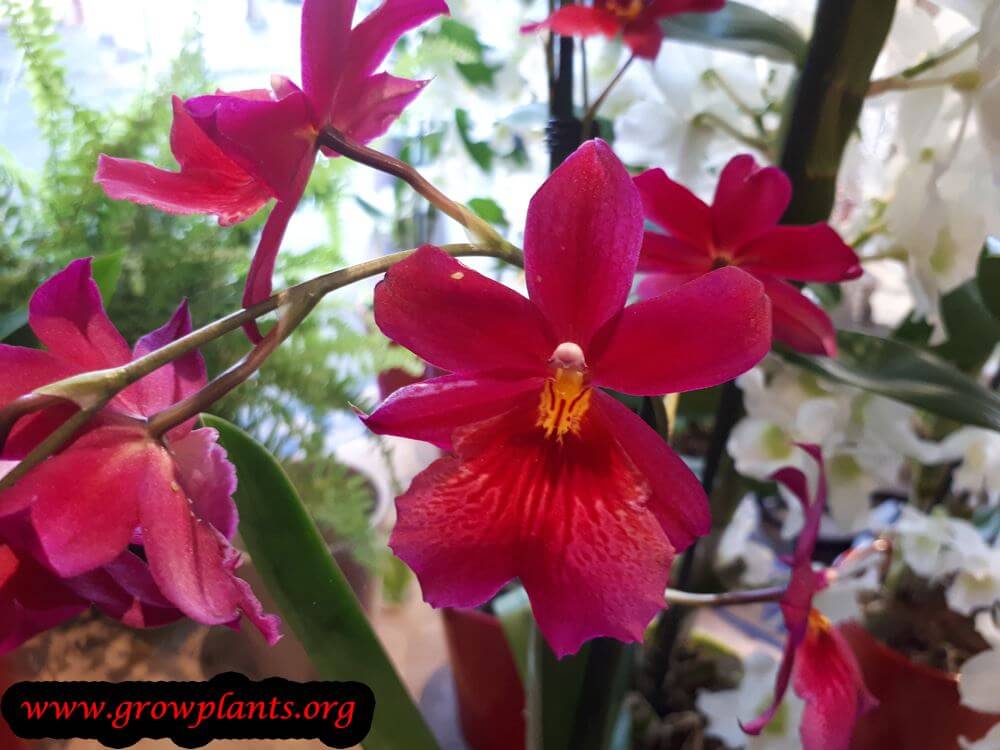
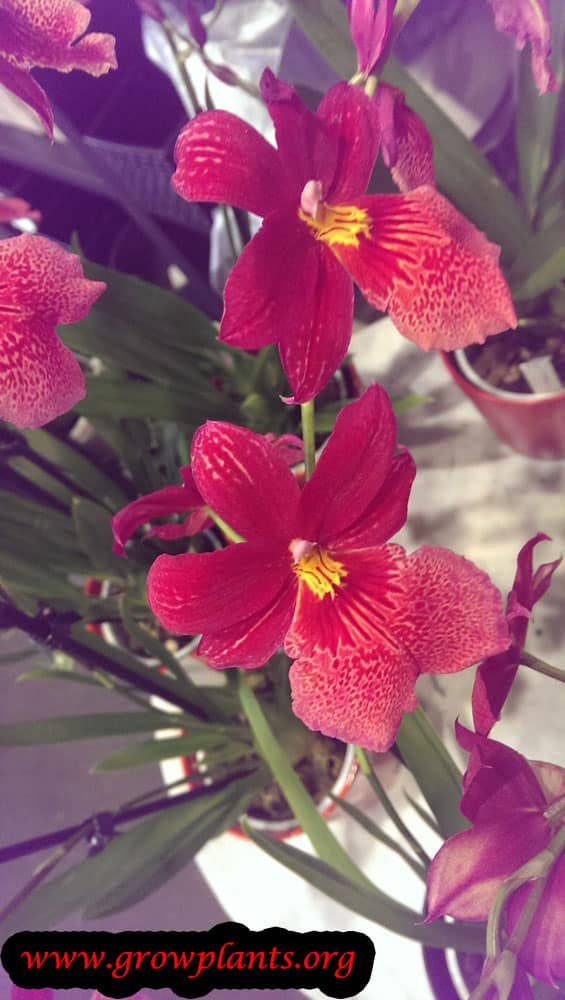
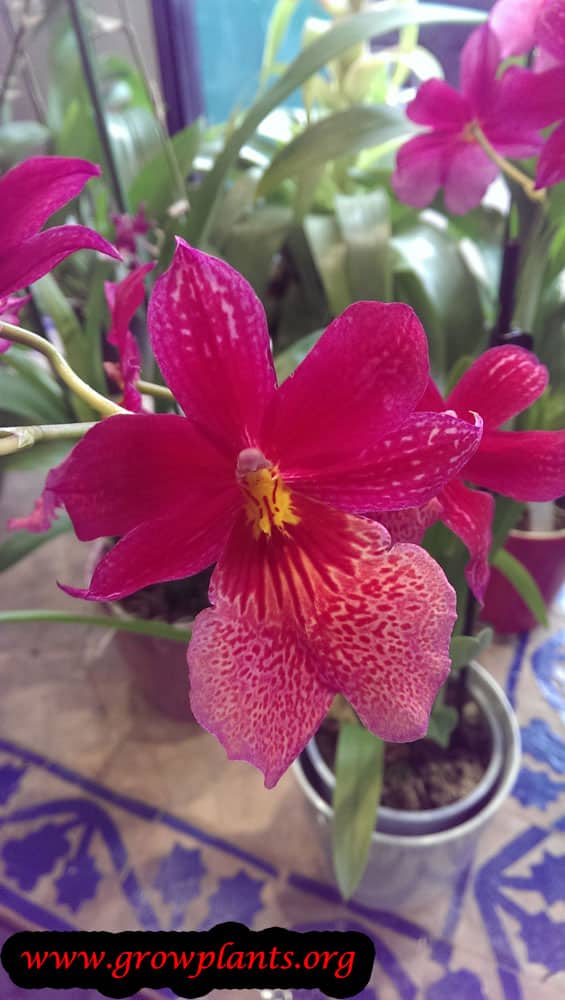
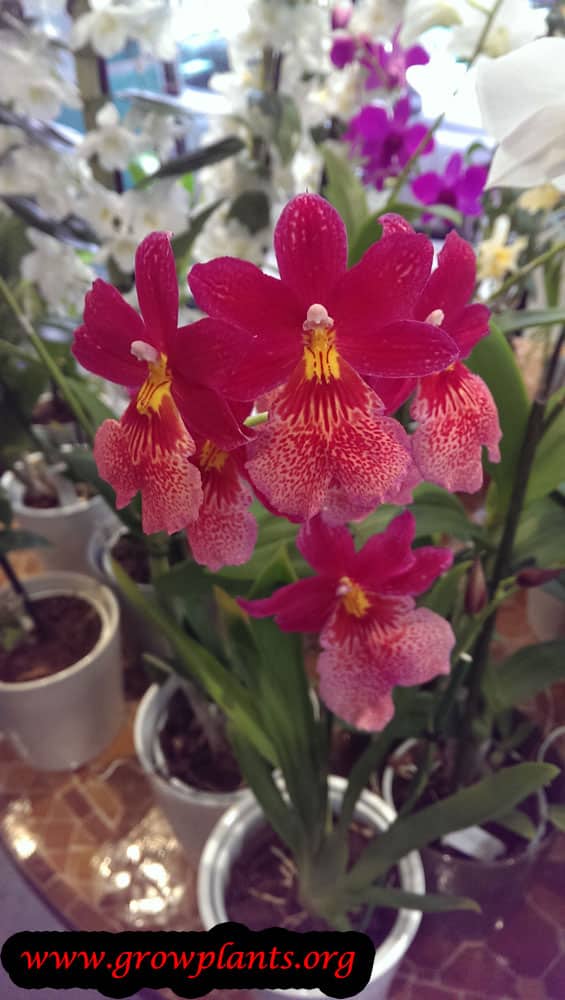
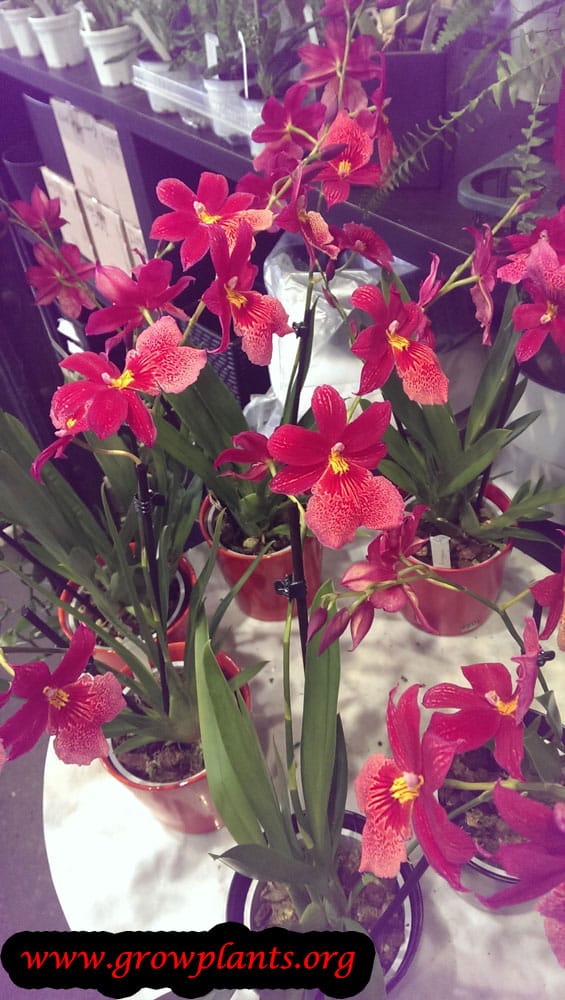
- Flower Characteristics: Showy, often multicoloured flowers (red, pink, purple, magenta) frequently patterned with stripes, dots or spots.
Primary Uses & Landscape Value
- Functional & Ornamental Roles: Ornamental flowering pot plant and houseplant grown for its colourful, long-lasting blooms.
Care Guide: Planting, Soil & Watering
Overview: An epiphytic orchid for warm, humid, brightly-shaded conditions indoors or under glass (hardiness zone 11-12), happiest at 13-19C nights and 22-26C days. Rather than soil it wants an open, fast-draining bark medium kept lightly moist with clean, room-temperature water.
Quick Care Requirements
| Requirement | Ideal Condition |
|---|---|
| Planting Season | Spring to autumn (indoors year-round) |
| Growth Rate | Slow to Moderate |
| Soil Type | Open orchid medium – bark or cork, not garden soil |
| Water Need | Moderate – evenly moist, never waterlogged |
Planting & Establishment
- Best Planting Season: Pot or repot from spring to autumn while in active growth; indoors it can be handled year-round.
- How to Plant:
- Hole Preparation: Use a transparent pot only slightly larger than the roots – not oversized; when repotting, trim away dead or rotten roots first.
- Soil Amendments: Pot into bark, bark chips or cork; adding a little Styrofoam improves air to the roots. Refresh the medium before it breaks down into acidic compost.
- Planting Depth: Seat the plant so the base sits at the top of the medium, with roots spread among the bark rather than buried.
- Growth Speed & Expectations: Slow to moderate; steady warmth, humidity and feeding bring on new growth and flowering.
Soil, Watering & Drainage Care
- Soil Mix & Drainage Needs: A coarse, airy bark or cork medium in a pot with free drainage is essential – the roots must breathe and never sit wet. Maintain humidity above 70%.
- Watering Schedule & Technique:
- Young / Newly Planted: After potting, water with clean rainwater at room temperature to settle the medium and keep it lightly moist.
- Established: Water so the bark stays evenly moist but drains freely; always use clean or rain water, never letting the roots stand in water.
- Seasonal Adjustments: Water a little less in cool, low-light periods and keep humidity high year-round.
Climate, Light & Hardiness
Burrageara is an intermediate-temperature epiphytic hybrid suited to subtropical climates or growing as a houseplant, needing very high humidity and bright shade rather than direct sun. It has essentially no frost tolerance, so outdoor culture is limited to warm, frost-free climates.
Quick Climate Specifications
| Factor | Detail |
|---|---|
| Climate Zones | Subtropical; also grown as a houseplant |
| USDA Hardiness Zones | 11–12 |
| Optimal Temp Range | Approximately 22–26°C (71–80°F) by day, 13–19°C (50–66°F) at night |
| Frost Tolerance | None |
| Light Conditions | Full shade with light |
| Wind Tolerance | Low |
Sunlight & Light Exposure
Optimal Light Setup
Bright, filtered shade suits this hybrid best; it does not want direct sun.
Shade & Heat Management
Consistent shade combined with the day-to-night temperature drop it prefers helps prevent heat stress; well-drained soil and good airflow support healthy roots.
Best Exposure/Orientation
A bright but shaded position, whether indoors or on a covered patio, suits it well.
Temperature Extremes & Hardiness
USDA Hardiness & Regional Limits
Site data places this hybrid in hardiness zone 11–12, so a warm, essentially frost-free climate is needed for outdoor growth year-round; elsewhere it is best grown as a houseplant or in a greenhouse.
Cold Damage & Winter Protection
No specific cold-damage threshold is given, but night temperatures dropping much below the preferred 13–19°C (50–66°F) range call for protection, and the plant should be moved under cover before any frost risk.
Frost Sensitivity
Frost sensitive with no established survival minimum in the source data; treat frost exposure as damaging to fatal.
Extreme Heat Tolerance
Moderate; daytime temperatures above roughly 26°C (80°F) should be paired with strong humidity and shade to avoid stress.
Wind, Humidity & Microclimate
Humidity Preferences
Very high humidity is important, with the site recommending more than 70%.
Dry-Air Tolerance
Low; dry air, especially indoors, should be offset with misting or a humidity tray.
Wind Tolerance
Low to moderate; the open, well-drained pot this orchid needs benefits from gentle airflow but not strong or drying wind.
Rainfall & Seasonal Moisture
Prefers consistently humid, moist conditions rather than a pronounced dry season, with the site recommending well-drained but consistently moist soil.
Microclimate Recommendations
A warm, very humid, shaded spot that cools noticeably at night – a greenhouse, humid indoor room, or covered patio – supports healthy growth and flowering.
Growing in Pots, Balconies & Indoors
Burrageara is a compact epiphytic orchid and a good houseplant – the grower confirms it grows well indoors and in pots. It likes bright shade with plenty of light rather than harsh direct sun, so a bright window suits it, and it does well in a container in dappled shade outdoors in warm weather.
Quick Details
- Container Size: 20-60 cm (12-24 in)
- Indoor Suitability: A good houseplant in bright, indirect light
- Best Spot: Bright shade with lots of light – no scorching direct sun
- Soil & Drainage: Open orchid bark mix (never ordinary soil); must drain freely A orchid potting mix and bark blend gives that open, free-draining structure without sourcing bark and mix separately.
- Watering in Pots: Average water – water then let the mix dry before watering again
Indoors & On the Windowsill
- A real houseplant: Burrageara grows happily indoors in bright, indirect light – it prefers bright shade to strong direct sun, which makes it easy to place near many windows.
- Windowsill growing: An east or lightly-shaded window is ideal; its compact size suits a sill or shelf. A clear pot lets you watch the roots and moisture.
- Overwintering: Not frost-hardy – keep it indoors over winter in cold climates; it lives indoors happily all year.
On a Balcony or Patio
- Light & shelter: Outdoors give it bright dappled shade, out of direct midday sun. Open bark and reflected heat from walls dry pots fast, so check moisture often and shelter from wind.
- Bring it in: Return it indoors before cold nights – it is a tender, tropical orchid.
Choosing the Pot, Soil & Long-Term Care
- Pot & drainage: Use a pot with plenty of holes (a slotted orchid pot is ideal); a clear plastic pot lets you watch the roots and moisture. Never leave it standing in a saucer of water – stagnant wet at the base rots the roots.
- Potting mix: Not ordinary potting soil – grow in an open, fast-draining orchid medium of bark chips or coconut husk; a few pieces of cork or charcoal add extra air around the roots.
- Feeding: Bark mixes hold few nutrients and pots leach fast, so feed with a dilute orchid fertiliser through the growing season.
- Repotting: Bark breaks down over about two years – refresh the medium and pot up then, or sooner once the roots fill the container. See how to repot orchids for the step-by-step process.
Fertilizing & Feeding
A moderate feeder among orchids: this vigorous intermediate hybrid grows fastest in high humidity and an evenly moist, well-drained mix, and its own care notes call for regular fertilizing – weak and steady suits it better than occasional strong feeding.
Quick Fertilizing Specs
| Feeding Level | Moderate feeder for an orchid |
|---|---|
| Main Nutrient Priority | A weak, balanced fertilizer applied regularly, which this humidity-loving hybrid takes up steadily during active growth |
| Best Feeding Period | Through the warm growing months whenever new growth or root tips are visible |
| Organic Options | A diluted organic liquid feed made for container or epiphytic plants |
| Micronutrients | Usually supplied by a complete, weak fertilizer formulated for orchids or container plants |
| Soil pH | Grown in a well-drained bark-based mix; refresh the medium before it breaks down and turns acidic |
| Reduce/Stop Feeding | Ease off feeding during the cooler, less humid part of the year when growth slows |
Feeding by Growth Stage
Active growth
Support new leaf, pseudobulb, and root growth on this humidity-loving intermediate hybrid.
| Nutrient direction | A weak, balanced fertilizer suited to epiphytic, bark-grown plants, applied regularly. |
|---|---|
| Timing | Through the warm growing months whenever new growth is visible. |
| Frequency | Regular light feeding suits this hybrid’s steady growth in consistently high humidity. |
| Fertilizer types | A weak, balanced fertilizer diluted for container-grown orchids, A fertilizer suited to bark or bark-chip mixes |
| Routine trace nutrients | iron, manganese |
| Precautions | Keep fertilizer weak and avoid feeding right after repotting until the plant has settled into fresh medium. |
Flowering
Support this hybrid’s multi-colored, patterned flowers, which can appear across most of the year but mainly from spring to autumn.
| Nutrient direction | Continue the same weak, balanced fertilizer through flowering; avoid switching to a high-phosphorus bloom product. |
|---|---|
| Timing | Mostly spring through autumn, whenever a new flower spike is developing. |
| Frequency | Maintain the same light, regular feeding through the bloom period. |
| Fertilizer types | The same weak, balanced fertilizer used during active growth, Avoid high-phosphorus bloom-booster products |
| Routine trace nutrients | iron, manganese |
| Precautions | Do not increase fertilizer strength to try to prolong flowering – steady balanced feeding supports better blooms than extra-strength fertilizer. |
Cool-season slowdown
Let growth ease through the coolest, least humid part of the year, outside this hybrid’s mostly spring-to-autumn bloom window.
| Nutrient direction | None – withhold fertilizer while growth has slowed. |
|---|---|
| Timing | The coolest months, when growth and flowering are least active. |
| Frequency | No feeding at this stage. |
| Fertilizer types | No feeding at this stage; feeding begins again as active growth picks up. |
| Precautions | Do not fertilize while growth is slow; keep humidity up and avoid letting the medium dry out completely. |
Nutrient Deficiency Signs & Corrections
Older leaves fade toward pale yellow-green and new pseudobulbs come in smaller than expected.
| Possible causes | long stretches without feeding during active growth, low light limiting overall growth and nutrient demand, root loss from medium breakdown limiting uptake |
|---|---|
| Appears first on | older leaves and the size of new pseudobulbs |
| What to check | feeding history and consistency, root condition, medium age |
| Possible correction | Resume steady, weak, balanced feeding through the growing season. |
Leaf tips and margins show yellowing or scorch-like browning, and flowering is sparser than expected.
| Possible causes | a feeding program low in potassium relative to nitrogen over time, salt buildup in the medium interfering with nutrient balance, root damage limiting overall nutrient uptake |
|---|---|
| Appears first on | older leaf margins and tips |
| What to check | fertilizer balance and feeding history, signs of salt buildup on the medium surface, root condition |
| Possible correction | Switch to a balanced fertilizer that supplies adequate potassium and flush the medium periodically to prevent salt buildup. |
New leaves emerge pale yellow while the veins stay noticeably greener than the surrounding tissue.
| Possible causes | a medium that has broken down and turned acidic, pushing the root zone outside the range this hybrid prefers, waterlogged or poorly aerated medium limiting root function, an extended period without micronutrient feeding |
|---|---|
| Appears first on | newest leaves |
| What to check | medium age and condition, water quality, recent feeding history |
| Possible correction | Refresh the growing medium first, then apply a chelated iron product per its label if chlorosis persists. |
Pruning, Training & Seasonal Maintenance
Burrageara is an intergeneric oncidium-alliance orchid grown for its long, branching sprays of patterned red, pink, purple and magenta flowers, and it tolerates very little in the way of true pruning. There is no framework or canopy to shape – maintenance is limited to removing spent flower spikes, fading leaves and dead roots as they occur. Because bloom season runs almost all year (mostly spring to autumn), this grooming is triggered by the plant’s own cycle rather than a single calendar window, and it has no effect on the following year’s flower production since each new spike comes from the plant’s newest growth, not the one just removed.
Quick Pruning & Maintenance Specs
| Pruning Tolerance | Low – grooming only, no structural cuts |
| Primary Pruning Window | As each flower spike fades – can occur nearly any time of year |
| Secondary Maintenance Window | At repotting, when old roots and medium are renewed |
| Typical Frequency | Ongoing light grooming rather than a seasonal event |
| Main Objective | Remove spent spikes, yellowing leaves and rotten roots; keep the root zone healthy |
| Young Plant Priority | None – let a new division establish roots and its first mature pseudobulb undisturbed |
| Mature Plant Priority | Timely spike removal after bloom and periodic clump division |
| Best Tool Type | Fine precision snips or scissors, sterilized |
| Avoid Heavy Pruning During | Active spiking/budding, and for a week or two after repotting while roots recover |
Pruning by Plant Age & Size
Newly Established
A fresh division or young plant should not be pruned beyond removing any tissue that is already dead; let it build root mass and mature its first pseudobulb before any grooming begins.
Young / Formative
No structural training applies – sympodial orchids like this are not staked or shaped. The only priority is letting each new pseudobulb finish maturing, since it is that newest growth, not older ones, that will produce the next flower spike.
Mature / Established
Established clumps need spent-spike removal after each bloom cycle, ongoing removal of yellowed leaves, and division every couple of years (growth is medium to slow) once the clump crowds its pot.
Ongoing Sanitary Maintenance
Because bloom timing is not confined to one season, sanitary grooming – old yellow leaves, faded spikes, and rotten roots found at repotting – is done whenever it is needed rather than on a fixed schedule; none of it removes future flowering tissue since new spikes always come from the current season’s newest pseudobulb.
Special Growth to Remove
- Spent flower spikes: once a spike is fully faded, cut it back to about 2 cm above a node; cutting while any part is still green risks losing a spike that could still produce a lower flowering branch
- Old yellow leaves: remove as they decline – they no longer contribute to the plant
- Rotten or dead roots: trim at repotting time; healthy roots should be left intact
- Backbulbs: older leafless pseudobulbs will not rebloom but still store reserves – leave them attached while green and only remove once fully shriveled or brown
Container & Small-Space Pruning
Burrageara is always grown in a pot or mount, never in open ground, so root and medium management substitutes for canopy pruning. Keep it in a pot sized to the current root mass rather than oversized, use an open bark/cork-chip mix, and add a layer such as styrofoam to keep air at the roots. Repot and trim dead roots only when the medium breaks down or the clump has outgrown its container.
Tools
- Precision snips or fine scissors – the only cut size this orchid ever needs, for spikes, leaves and roots
- Blade disinfectant – orchid viruses spread readily on cutting tools
Tool Hygiene & Disease Risk
Increased risk: orchids as a group are prone to virus transmission (e.g. Cymbidium mosaic and Odontoglossum ringspot viruses) carried on unclean blades between plants. Disinfect the blade between plants, not just wipe it, before any spike, leaf or root cut.
Cut Placement & Technique
Cut spent spikes cleanly just above a node with a sterile blade; when trimming roots at repotting, cut back to firm white tissue at the base without tearing the rhizome; never cut into a still-green pseudobulb.
Heavy Pruning & Rejuvenation
Not applicable in the hard-pruning sense – there is no foliage mass or framework to cut back. The equivalent renewal action is dividing an overcrowded clump at repotting rather than cutting back existing growth.
Post-Pruning Care
After spike removal, resume normal watering and humidity; after root trimming at repotting, hold back on heavy watering for a few days so cut ends can callus, since fresh cuts are vulnerable to rot in the plant’s required high humidity.
Common Pruning Mistakes
- Cutting a flower spike while it is still green and could branch again
- Cutting into a live, green pseudobulb
- Removing backbulbs before they have shriveled, discarding stored reserves
- Repotting into an oversized pot after root trimming, inviting rot
When NOT to Prune
Do not cut a spike while it is still budding or flowering, and avoid root work immediately after a bloom cycle when the plant’s reserves are already drawn down; keep any root disturbance to the post-bloom/repotting window.
Recommended Tools (by task)
- precision_snips – every cut this orchid needs (spent spikes, old leaves, root trimming) is a fine, sterile snip, never a heavy cut
- blade_disinfectant – required between plants and sessions given orchids’ susceptibility to blade-borne virus
Propagation Guide
Burrageara is an intergeneric epiphytic orchid hybrid, so the most reliable way to increase it is by dividing the pseudobulb clump at repotting rather than raising it from seed. Because seedlings from a hybrid cross like this vary, seed will not reproduce the exact flower color and shape — vegetative division is used whenever a specific clone needs to be preserved; overall difficulty is moderate by division and specialist by seed.
Quick Propagation Specs
| Best Propagation Method | Division of the pseudobulb clump (with backbulbs) |
| Alternative Methods | Backbulb propagation; professional meristem (tissue-culture) division to increase a specific clone |
| Propagation Difficulty | Moderate (division) – Specialist (seed/flask) |
| Seed True-to-Type | Hybrid offspring vary |
| Vegetative True-to-Type | Yes |
| Best Propagation Season | Spring to autumn, ideally at repotting as new growth begins |
Growing from Seed
Seed is genetically variable from this hybrid cross and, as with virtually all orchids, will not germinate in open soil — it requires sterile in-vitro (flask) sowing under laboratory conditions and is not practical for home growers. It is used commercially mainly to raise new hybrid seedlings rather than to reproduce an existing named plant true.
Division, Offsets, Pups & Suckers
- Divide at repotting, which the plant needs periodically since it dislikes being left in an oversized pot.
- Each division should keep at least 3–4 connected pseudobulbs, including one or more with an active growth point (“eye”), and healthy roots attached.
- Trim away any dead or rotten roots at the same time, letting cut surfaces dry briefly before potting into fresh bark/cork-based orchid mix.
- Older leafless backbulbs can be potted separately in humid, shaded conditions to encourage them to break dormancy and produce a new growth.
- Pot divisions in a well-fitted container, not oversized, and keep humidity above 70% while new roots establish.
Bloom & Flower Guide
Quick Details
- Bloom Season: Possible year-round, mainly spring to autumn
- Flower Appearance: Flat, star-shaped flowers with five ovate, often pointed petals and a broad triangular, rounded or heart-shaped lip; red, pink, purple or magenta, usually patterned
- Edibility: Ornamental — grown for its flowers, not eaten (orchid foliage and flowers are generally non-toxic)
Detailed Blooming Overview
Burrageara is a complex intergeneric hybrid in the Oncidium alliance, famous through cultivars such as “Nelly Isler” for glowing red and pink flowers, often with a light scent. The grower describes five ovate petals, often pointed at the top, around a broad lip that may be triangular, rounded or heart-shaped, mostly multicoloured with stripes, dots, spots or blotches. Flowering is possible for much of the year, with the main show from spring to autumn on arching spikes.
Flower Characteristics
- Five ovate, often pointed petals with a broad triangular, rounded or heart-shaped lip (grower’s description).
- Colours are red, pink, purple and magenta, mostly multicoloured with stripes, dots, spots or blotches.
- The flat, star-shaped flowers are carried on arching spikes and are often lightly fragrant.
Bloom Care & Thinning
- Triggering bloom: Bright but filtered light with cool, steady conditions and a night temperature drop suits flowering best.
- After flowering: Cut the spent spike to the base and let the pseudobulbs plump up for the next round.
- While in spike: Keep humidity up and do not let the roots dry out fully, which can check the buds.
Bloom Health & Protection
- Botrytis petal blight can spot open flowers with small brown or translucent marks in cool, damp, still air — better ventilation and keeping water off the blooms is the first line of defence, with a fungicide only if it spreads.
- Aphids, scale and mealybugs are drawn to soft buds and flower spikes — wiping them off or treating with neem oil or insecticidal soap keeps the flowers clean.
- Bud blast (buds yellowing and dropping before they open) is usually a stress response to sudden changes in temperature, light or humidity, or to dry air — steady conditions while the plant is in spike prevent it.
Pests, Diseases & Troubleshooting
Overview: Burrageara is an intergeneric Oncidium-alliance orchid hybrid (bred from Cochlioda, Miltonia, Odontoglossum and Oncidium parents), so it takes the standard epiphytic-orchid pest and disease profile: sap-sucking insects on leaves and pseudobulbs, and rots or spots that follow from stagnant, overwet conditions. Good airflow, careful watering and scrupulous hygiene prevent almost all of its problems.
Quick Troubleshooting Overview
| Issue / Pest | Main Symptom | Primary Solution |
|---|---|---|
| Scale & mealybugs | Bumps or white tufts on leaves, bulbs and sheaths | Alcohol swab, horticultural oil, isolate |
| Spider mites | Silvery stippling and webbing on leaf undersides | Raise humidity, wipe leaves, miticidal oil |
| Thrips | Silvery streaks and deformed flowers/buds | Sticky traps, insecticidal soap |
| Black rot | Soft blackening spreading through leaves/bulbs | Cut out, cinnamon/copper, dry out, airflow |
| Bacterial brown spot | Sunken watery blister spreading fast | Excise, keep foliage dry, reduce humidity |
| Root rot | Mushy brown roots, limp pleated leaves | Fresh open mix, water less, repot |
Common Pests & Management
- Scale insects (Boisduval scale, Diaspis boisduvalii and soft scale):
- Symptoms: Small brown, tan or white limpet-like bumps and cottony masses on leaves, pseudobulbs and under the papery bulb sheaths, with yellowing and honeydew.
- Prevention & Control: Peel off old sheaths where scale hide, scrub bumps off with a soft toothbrush, and dab with rubbing alcohol. Spray horticultural oil, repeating at 1–2 week intervals, and isolate infested plants.
- Mealybugs (Pseudococcus spp.):
- Symptoms: White cottony tufts in leaf axils, on roots and beneath sheaths, with sticky honeydew and sooty mould.
- Prevention & Control: Swab with alcohol, wash off, and treat with insecticidal soap or oil; check the root zone at repotting and quarantine new orchids.
- Spider mites (Tetranychus spp.):
- Symptoms: Fine silvery or pale stippling and a thin, papery, dull look to leaves, with faint webbing on undersides – worst in warm, dry air.
- Prevention & Control: Raise humidity and wipe both leaf surfaces regularly. Use insecticidal soap or a light horticultural oil, covering undersides, and repeat to break the cycle.
- Thrips (Thrips / Frankliniella spp.):
- Symptoms: Silvery streaking and speckling on leaves, deformed buds and flowers with brown streaks, and premature bud drop.
- Prevention & Control: Use blue or yellow sticky traps to monitor, remove affected flowers, and treat with insecticidal soap or spinosad; thrips also spread orchid viruses, so control them promptly.
- Aphids (Aphis / Myzus spp.):
- Symptoms: Green, black or brown clusters on flower spikes and buds, causing distortion, honeydew and, importantly, virus spread.
- Prevention & Control: Rinse off, wipe spikes, and use insecticidal soap; keep new buds clean, as aphids readily transmit orchid viruses.
- Fungus gnats & snails/slugs:
- Symptoms: Fungus-gnat larvae feed on roots in soggy media (tiny black flies around the pot); snails and slugs chew roots, new growths and flower spikes at night.
- Prevention & Control: Let the mix dry between waterings and use sticky traps for gnats; hand-pick molluscs after dark and bait with iron phosphate around the bench.
Diseases & Fungal Issues
- Black rot (Phytophthora / Pythium spp.):
- Symptoms: Soft, watery black or purplish lesions that spread rapidly through leaves, new growths and pseudobulbs, killing tissue as they go.
- Treatment & Management: Act fast: cut well back into clean green tissue with a sterile blade, dust the cut with cinnamon or copper, and stop overhead watering. Improve airflow, dry the plant out, and drench with a phosphonate or copper fungicide.
- Bacterial brown/soft spot (Acidovorax / Erwinia):
- Symptoms: Water-soaked blisters that turn brown to black, often with a yellow halo, spreading quickly and sometimes oozing in humid, still air.
- Treatment & Management: Excise the lesion plus a margin of healthy tissue with a sterile tool, keep foliage dry, and increase ventilation. Reduce humidity and apply copper; discard severely affected plants to protect the collection.
- Botrytis petal blight (Botrytis cinerea):
- Symptoms: Small brown or pinkish spots peppering the flowers, spoiling blooms in cool, damp, still conditions.
- Treatment & Management: Remove spotted flowers, improve air movement, and lower humidity around blooms; avoid wetting flowers when watering.
- Fungal leaf spots & orchid viruses:
- Symptoms: Fungal spots appear as brown or black round lesions; viruses (ORSV, CymMV) cause colour-break, mottling, ringspots or streaking that never washes off.
- Treatment & Management: Remove spotted leaves and improve airflow for fungal spots. There is no cure for virus – sterilise cutting tools between plants, control sap-sucking vectors, and isolate or discard confirmed virus-positive orchids.
Growing Difficulties & Abiotic Problems
- Root rot from overwatering / stale mix:
- Cause & Symptoms: Mushy brown roots, limp and pleated (accordion-folded) leaves, and a plant that wobbles in its pot – usually from a broken-down, soggy medium.
- Correction Strategy: Repot into fresh, open bark or mix, water only as the medium approaches dry, and ensure the pot drains freely; trim dead roots at repotting.
- Underwatering & low humidity:
- Cause & Symptoms: Pleated, accordion-like new leaves, shrivelled pseudobulbs and dry, wiry roots.
- Correction Strategy: Water more consistently, increase humidity with trays or grouping, and keep roots plump but not waterlogged.
- Sunburn / light stress:
- Cause & Symptoms: Bleached white or black scorched patches on leaves in too-strong light, or dark, floppy, non-flowering leaves in too little.
- Correction Strategy: Give bright but filtered light; a healthy leaf is mid-green. Increase light gradually to encourage flowering while avoiding burn.
- Salt & fertiliser burn:
- Cause & Symptoms: Blackened root tips and brown leaf tips from accumulated fertiliser salts.
- Correction Strategy: Feed weakly but regularly, flush the mix with plain water periodically, and use low-salt or rainwater where possible.
What Helps – Products & Tools
The orchid-grower’s kit covers this plant: rubbing alcohol and horticultural oil for scale and mealybugs, insecticidal soap or spinosad for thrips and aphids, sticky traps and iron-phosphate bait for gnats and snails, cinnamon or copper fungicide plus a sterile blade for black rot and bacterial spot, and a fresh, open bark mix with careful watering to prevent the root rots that cause most orchid losses.