Plant Profile & Key Characteristics
Overview: Compact terrestrial jewel orchid growing 20-40 cm, a perennial evergreen prized for its velvety, colourfully veined foliage rather than its bloom. Popular as a warm, shade-loving houseplant.
Quick Specifications
| Specification | Attribute |
|---|---|
| Plant Type / Life Cycle | Perennial (terrestrial orchid) |
| Foliage Type | Evergreen |
| Mature Size | 20-40 cm (8-16 in) |
| Growth Rate | Slow |
| Root System | Creeping rhizome with fleshy roots (terrestrial orchid) |
| Hardiness | USDA zone 13+ (frost-tender; grown indoors) |
Growth Form & Structure
- Height & Spread: 20-40 cm, low and spreading; well suited to pots and terrariums.
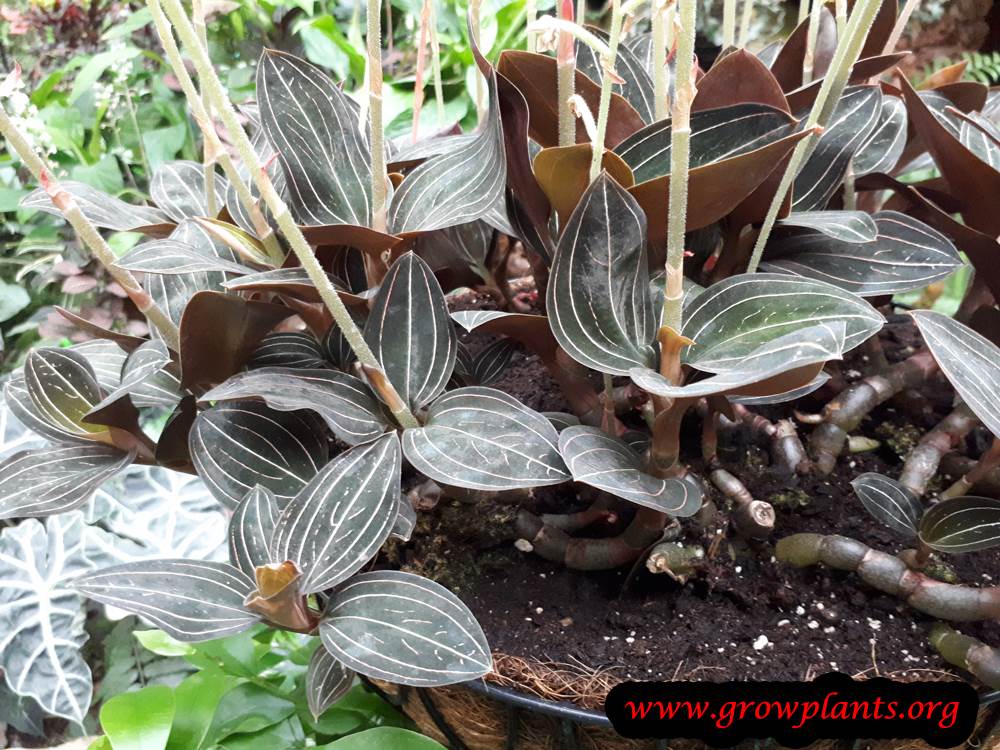
- Growth Habit & Form: Low, creeping herbaceous orchid forming clumps from a fleshy rhizome.
- Lifespan & Maturity: Long-lived, slow-growing perennial.
Anatomy & Physical Features
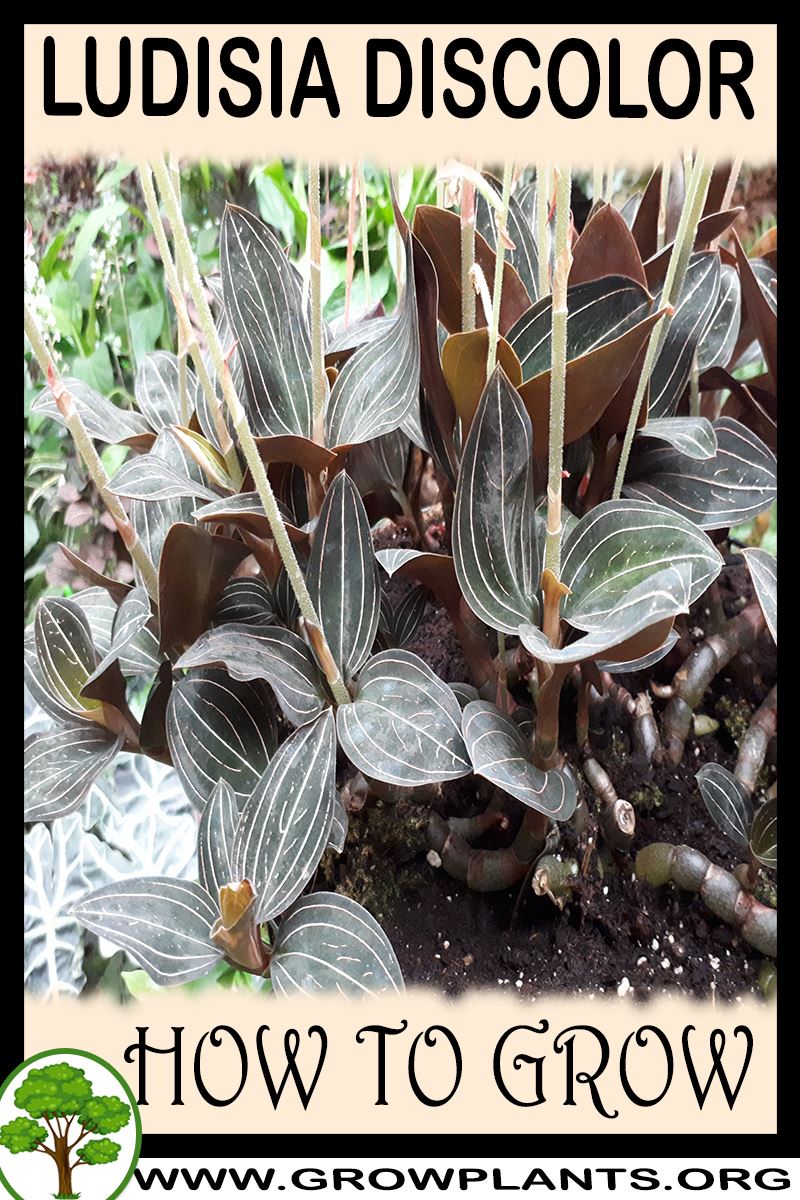
- Leaves & Foliage: Oval, velvety leaves in green to purple, black or red, usually with red, white or green veining and often a red underside.
- Flower Characteristics: Small white and yellow flowers carried on an upright spike.
Primary Uses & Landscape Value
- Functional & Ornamental Roles: Grown as a foliage houseplant, terrarium and shade plant.
Care Guide: Planting, Soil & Watering
Overview: The jewel orchid is a slow-growing terrestrial orchid usually grown indoors in full shade, high humidity (70%+), and warmth. It is prized for its foliage and needs a loose, humus-rich mix kept evenly moist but never soggy.
Quick Care Requirements
| Requirement | Ideal Condition |
|---|---|
| Planting Season | Year-round, grown indoors in stable warm conditions |
| Growth Rate | Slow |
| Soil Type | Loose, airy, humus-rich orchid mix |
| Water Need | Moderate to high — keep the soil consistently moist, but never waterlogged |
Planting & Establishment
- Best Planting Season: Can be potted at any time of year, since it is grown indoors under stable warm, humid, shaded conditions.
- How to Plant:
- Hole Preparation: Use a pot only slightly larger than the root system, with good drainage holes.
- Soil Amendments: Pot in a loose, humus-rich blend of fine bark, sphagnum, and perlite rather than dense garden soil.
- Planting Depth: Set the creeping rhizome at the surface with the roots just covered; do not bury the fleshy stems.
- Growth Speed & Expectations: Expect slow, steady growth as the creeping stems gradually lengthen.
Soil, Watering & Drainage Care
- Soil Mix & Drainage Needs: Pot in a loose, airy, humus-rich mix — such as fine bark, sphagnum, and perlite — that holds light moisture while draining freely, so the fleshy creeping stems never sit in water.
- Watering Schedule & Technique:
- Young / Newly Planted: Keep the potting mix evenly moist after potting and provide high humidity and warmth while new roots establish.
- Established: Water regularly so the mix stays lightly moist but never soggy, and maintain humidity around 70% with warm temperatures.
- Seasonal Adjustments: Water a little less in cool, low-light periods, always letting excess drain freely to protect the fleshy stems and roots.
Climate, Light & Hardiness
Ludisia discolor is a terrestrial jewel orchid grown for its foliage, native to tropical climates and almost always grown as a houseplant elsewhere; it needs warm, humid, shaded conditions year-round and has essentially no frost tolerance. Deep shade with only filtered light suits it best, unlike most sun-loving orchids.
Quick Climate Specifications
| Climate Zones | Tropical, or as a houseplant in any climate |
| USDA Hardiness Zones | 13+ (per site data) - effectively a houseplant/indoor subject outside true tropical climates |
| Cold Damage Begins | Chilling and cold drafts cause leaf damage well above freezing; keep consistently warm |
| Frost Tolerance | None |
| Light Conditions | Full Shade |
Sunlight & Light Exposure
Optimal Light Setup
Grows best in shade or bright indirect/filtered light rather than direct sun - treat it more like a shade foliage plant than a typical light-hungry orchid.
Shade & Heat Management
Protect from direct sun, which scorches the velvety leaves; a spot away from bright windows is ideal.
Temperature Extremes & Hardiness
USDA Hardiness & Regional Limits
The site data places it at zone 13+, essentially frost-free tropical climates; outside of that it is grown strictly as an indoor houseplant.
Cold Damage & Winter Protection
Keep away from cold windows, drafts, and air conditioning; sustained cool temperatures slow growth and can cause leaf drop.
Frost Sensitivity
Has no frost tolerance and should never be exposed to freezing or near-freezing conditions.
Extreme Heat Tolerance
Tolerates warm tropical heat well provided humidity and moisture stay high; it is cold, not heat, that limits this plant.
Wind, Humidity & Microclimate
Humidity Preferences
Needs high humidity, ideally 70% or more, reflecting its tropical forest-floor origin.
Dry-Air Tolerance
Poor - dry indoor air (especially from heating or air conditioning) causes crisping leaf edges; a pebble tray or humidifier helps indoors.
Microclimate Recommendations
A warm, shaded, humid microclimate such as a terrarium, bathroom, or enclosed plant case suits it better than an open, dry room.
Growing in Pots, Balconies & Indoors
Ludisia discolor, the jewel orchid, is an excellent houseplant – the grower confirms it grows well indoors and in containers. Grown for its dark, velvety, red-veined foliage rather than sun-loving flowers, it thrives in low light, making it one of the easier orchids for a shady room.
Quick Details
- Container Size: A shallow, wide pot of about 1-3 L (0.2-0.8 gal); it likes to spread sideways more than down
- Indoor Suitability: A very good low-light houseplant – ideal away from direct sun
- Best Spot: Full shade to low, indirect light; keep out of direct sun, which scorches the leaves
- Soil & Drainage: A loose, airy terrestrial-orchid mix that holds moisture without staying soggy
- Watering in Pots: Keep evenly moist (it likes an average-to-generous amount) but never waterlogged
Indoors & On the Windowsill
- A true houseplant: The grower confirms it as an indoor plant, and it is happiest there – low, indirect light, steady warmth and humidity bring out the best foliage.
- Care indoors: A north-facing sill or a spot back from a bright window is perfect; raise humidity with a pebble tray and keep it away from cold draughts.
- Windowsill note: Because it wants shade, not sun, it suits rooms and sills that are too dim for most flowering plants.
On a Balcony or Patio
- Shade & shelter: Outdoors it needs a fully shaded, sheltered, frost-free spot; direct sun and cold both damage it, so most growers keep it as an indoor pot.
Choosing the Pot, Soil & Long-Term Care
- Pot & drainage: A shallow 1-3 L pot with good drainage suits its creeping habit. Use strong drainage holes and skip a standing water saucer, which invites root rot; terracotta breathes and dries fast, while glazed or plastic pots hold moisture longer.
- Potting mix: A loose, airy mix – fine bark, coir and perlite (or leaf mould) – so roots get moisture and air.
- Feeding: Feed sparingly with a dilute balanced or orchid feed through the growing season.
- Repotting: Refresh the mix and pot on every couple of years; it is easy to divide the creeping stems at the same time.
Fertilizing & Feeding
A very light feeder: this terrestrial orchid is grown mainly for its richly colored foliage and is easily burned by excess fertilizer, so dilute balanced feeding only during active growth, held off after repotting and when growth slows.
Quick Fertilizing Specs
| Feeding Level | Light feeder |
|---|---|
| Main Nutrient Priority | Balanced feeding kept dilute for a salt-sensitive terrestrial orchid |
| Best Feeding Period | During active growth in warm, humid conditions |
| Organic Options | An occasional, well-diluted organic liquid feed |
| Reduce/Stop Feeding | Hold off feeding after repotting and when growth slows in cooler, dimmer conditions |
| Micronutrients | A complete, dilute houseplant fertilizer supplies iron and manganese for foliage color |
| Soil pH | Slightly acidic, humus-rich growing mix |
Feeding by Growth Stage
Settling in after potting or repotting
Let fresh roots settle into new mix before adding any fertilizer.
| Nutrient direction | None – the fresh potting mix already supplies enough nutrients. |
|---|---|
| Timing | Right after potting or repotting, while roots re-establish. |
| Frequency | No feeding at this stage. |
| Fertilizer types | No feeding at this stage; do not fertilize until new growth appears after repotting. |
| Precautions | Do not fertilize a freshly repotted jewel orchid; wait for clear new growth first. |
Active growth
Support healthy, richly colored foliage and steady growth.
| Nutrient direction | A balanced, well-diluted complete fertilizer leaning to nitrogen for foliage. |
|---|---|
| Timing | During warm, humid periods of active growth. |
| Frequency | Light, dilute feeding while actively growing. |
| Fertilizer types | A balanced complete houseplant fertilizer kept well diluted, An occasional dilute liquid feed during active growth |
| Routine trace nutrients | iron, manganese |
| Precautions | Keep fertilizer well diluted; this orchid’s fine roots are easily burned by excess salts. |
Low-light or cool-season slowdown
Let the plant idle through low light or cooler conditions without forcing growth.
| Nutrient direction | None – withhold fertilizer while growth is not active. |
|---|---|
| Timing | During cooler, lower-light periods when growth clearly slows. |
| Frequency | No feeding at this stage. |
| Fertilizer types | No feeding at this stage; do not fertilize until active growth resumes. |
| Precautions | Do not fertilize now; feeding a plant that is not actively growing risks salt buildup around sensitive roots. |
Nutrient Deficiency Signs & Corrections
Older leaves lose their rich color and fade toward pale green.
| Possible causes | low available nitrogen from infrequent feeding, leaching from frequent watering in a humid setup, an overly inert or nutrient-poor growing mix |
|---|---|
| Appears first on | older, lower leaves |
| What to check | recent feeding history, growing mix composition, watering frequency |
| Possible correction | Resume light, dilute balanced feeding during active growth. |
New leaves show fine interveinal yellowing while veins stay green.
| Possible causes | low manganese availability in the growing mix, overly wet, poorly aerated growing medium, high mix pH locking up manganese |
|---|---|
| Appears first on | new, young leaves |
| What to check | growing mix moisture and drainage, mix pH if known, whether new growth is affected first |
| Possible correction | Improve drainage and aeration and apply a labeled manganese product only if a deficiency is confirmed. |
Leaf tips and edges brown or blacken despite consistent watering.
| Possible causes | fertilizer salt buildup from feeding at too strong a concentration, infrequent flushing of the growing mix, excessive or too-frequent feeding for a salt-sensitive orchid |
|---|---|
| Appears first on | leaf tips and margins |
| What to check | fertilizer strength and frequency used, last time the mix was flushed with plain water, overall root health |
| Possible correction | Cut back feeding strength, flush the mix with plain water, then resume only light, dilute feeding. |
Pruning, Training & Seasonal Maintenance
Ludisia discolor is a terrestrial, rhizomatous orchid grown almost entirely for its patterned foliage, and it is one of the few orchids that takes routine trimming well – unlike epiphytic orchids, its creeping stems can be pinched and cut back to build a fuller pot. Pruning tolerance is moderate: light shaping can be done through the year, but the main scheduled cut is removing the flower spike once its autumn–winter bloom has finished, since flowering here does not depend on any persistent woody structure.
Quick Pruning & Maintenance Specs
| Pruning Tolerance | Moderate – tolerates pinching and cutting back creeping stems, but is not a heavily woody plant |
| Primary Pruning Window | After flowering (autumn–winter into early spring) – remove the spent bloom spike |
| Secondary Maintenance Window | Any time in active growth – pinch tips and remove dead leaves as needed |
| Typical Frequency | Informal, ongoing; one clear post-bloom cut per flowering cycle |
| Main Objective | Full, many-stemmed, low-trailing habit and healthy foliage colour |
| Young Plant Priority | Pinch trailing stem tips early to encourage branching from a young start |
| Mature Plant Priority | Cut back leggy, bare stem sections to a node and use the cuttings to refill the pot |
| Best Tool Type | Precision snips (soft, fleshy stems) |
Pruning by Plant Age & Size
Newly Established
A newly potted division or rooted cutting needs only damaged-leaf removal while it settles in – avoid cutting a stressed, freshly potted plant.
Young / Formative
Pinch out the growing tip of young trailing stems once they have a few nodes, which pushes branching from lower nodes instead of one long single runner – this is the main way a full, bushy pot is built.
Mature / Established
Once mature, cut back any stem that has gone bare and leggy at the base to a healthy node, and use the removed sections as cuttings to fill in gaps – a common way to keep an older jewel orchid pot dense rather than sparse and trailing.
Seasonal Pruning Schedule
Post-Flowering: once the autumn–winter flower spike has finished, cut it off at its base. This tidies the plant and redirects energy back into the foliage; it has no effect on next season’s flowering since new spikes form on new growth.
Ongoing Sanitary: remove yellowed, damaged or rotting leaves as soon as they appear, year-round, given how readily soft tissue can decline in the high humidity this plant needs.
Structural Pruning & Training
There is no branch framework to build – training is purely a matter of pinching creeping stem tips for density and cutting back bare, leggy sections to force fresh basal growth.
Special Growth to Remove
The spent flower spike (cut at its base once bloom is over), yellowed or damaged leaves, and any bare, leggy stem sections – the last of these are worth keeping as propagation cuttings rather than simply discarding.
Container & Small-Space Pruning
Ludisia is grown in pots or terrariums by nature, so this is effectively its only growing method: keep it compact by pinching regularly, and refresh a leggy pot by taking cuttings from the oldest stems and replanting them densely rather than trying to prune the original clump back hard in place.
Tools
Precision snips only – the stems and leaves are soft and fleshy, and nothing heavier is ever needed.
Tool Hygiene & Disease Risk
Increased. The high humidity (70%+) this plant is grown in that makes it thrive also makes cut wounds slower to dry and more prone to rot, so use a clean blade and avoid cutting into wet, saturated foliage where possible.
Cut Placement & Technique
Pinch or cut just above a leaf node on the creeping stem, since new growth breaks from that point. Cut the spent flower spike right down at its base rather than partway up the stalk.
Heavy Pruning & Rejuvenation
Tolerated well: an old, leggy, bare-stemmed clump can be cut back hard, and the healthy tip cuttings replanted into the same pot to rebuild a dense specimen – the standard way to renovate an overgrown plant rather than trying to force the original stems to rebranch in place.
Post-Pruning Care
Keep warmth and humidity up after cutting – this plant does not tolerate a cool, dry recovery period well – and watch cut ends for rot rather than assuming they will callus over as a woodier plant would.
Common Pruning Mistakes
- Letting stems run long and bare without pinching, which produces a sparse, trailing plant instead of a full mound.
- Cutting in cool or low-humidity conditions, where wounds are slow to heal and prone to rot.
- Leaving the spent flower spike in place indefinitely instead of cutting it back once bloom is over.
When NOT to Prune
Avoid cutting right after repotting or while the plant is still settling in, and avoid cutting into an actively developing flower spike before it has bloomed.
Recommended Tools (by task)
- precision_snips – pinching stem tips, removing the spent flower spike, and taking stem cuttings for propagation.
Propagation Guide
Jewel orchid is most easily and reliably increased from stem (node) cuttings taken from its creeping stems, which root readily within a few weeks – far faster and simpler than seed, which (as with virtually all orchids) needs sterile, specialist conditions and is impractical for home growers. Overall difficulty is easy by cuttings or clump division.
Quick Propagation Specs
| Best Propagation Method | Stem (node) cuttings |
| Alternative Methods | Clump/stem division |
| Propagation Difficulty | Easy (cuttings/division); Specialist (seed – needs sterile flask culture) |
| Vegetative True-to-Type | Yes |
| Best Propagation Season | Warm active-growth months (spring/summer) |
| Cutting Rooting Time | Typically a few weeks under warm, humid conditions |
As with orchids generally, seed lacks the stored food reserves to germinate on its own and needs a symbiotic fungus or sterile in-vitro flask culture – not a practical home method, so it is omitted from the sections below.
Stem Cuttings
Cutting Type
Nodal sections cut from healthy trailing stems, each with at least one node and leaf.
Best Timing
During active growth in the warmer months.
Cutting Preparation
Cut stem sections a few nodes long; remove the lower leaf if that node will be buried or in contact with the rooting medium.
Rooting Setup
Lay or partially bury the nodal sections in moist, well-aerated media such as damp sphagnum moss or a fine orchid/houseplant mix, kept humid; cuttings will also root in water.
Rooting Hormone
Not necessary – Ludisia roots readily without it.
Rooting Time
Typically a few weeks under warm, humid conditions.
Division, Offsets, Pups & Suckers
Established clumps consist of multiple rooted stems and can be separated at repotting time. Take divisions that already have their own roots and a few healthy leaves; sections without established roots are better treated as cuttings rather than divisions.
Bloom & Flower Guide
Quick Details
- Bloom Season: Autumn into winter
- Flower Appearance: Small white-and-yellow flowers on an upright spike; each has a shell-like upper petal, two wing-like side petals and a tail-like lower lip
- Edibility: Ornamental – grown mainly for its velvety, patterned foliage
Detailed Blooming Overview
The jewel orchid is prized for its dark, red-veined leaves, but in the cooler months it rewards you with an elegant upright spike of small white flowers touched with yellow. Each little bloom has an almost bird-like shape, with a shell above, wings to the sides and a tail below.
Flower Characteristics
- White flowers marked with yellow, borne along an upright spike.
- Distinctly shaped – shell-like top petal, wing-like laterals, tail-like lip.
Bloom Care & Thinning
- Managing the bloom: Enjoy the winter spike, then cut it off once finished and give a light feed to help the plant rebuild.
Pests, Diseases & Troubleshooting
Overview: The jewel orchid is grown for its velvety, veined foliage and, being a soft terrestrial orchid, is most vulnerable to sap-sucking insects that disfigure leaves and to rots caused by water sitting on the crown. Keep it in a humid, airy, shaded spot and water carefully – most trouble here is cultural, not pest-driven.
Quick Troubleshooting Overview
| Issue / Pest | Main Symptom | Primary Solution |
|---|---|---|
| Mealybugs | White cottony tufts in leaf axils; sticky honeydew | Dab with alcohol; wipe leaves; systemic only if heavy |
| Scale | Brown bumps on stems/leaf undersides | Scrape off; horticultural oil |
| Spider mites | Fine stippling, dulling in dry air | Raise humidity; rinse foliage; oil |
| Soft / crown rot | Mushy, blackened stems or crown | Cut out; dry off; improve airflow; avoid water in crown |
| Slugs & snails | Ragged holes in tender leaves | Handpick at night; barriers; iron-phosphate bait |
Common Pests & Management
- Mealybugs (Pseudococcus / Planococcus spp.):
- Symptoms: White, cottony, waxy clusters hide in leaf axils and along the fleshy stems, sucking sap and coating the plant in sticky honeydew that turns to sooty mould; growth becomes stunted and leaves yellow.
- Prevention & Control: Wipe or dab colonies with a cotton bud dipped in dilute isopropyl alcohol, sponge the leaves clean, and isolate new plants. For persistent infestations use insecticidal soap or a light horticultural oil, treating repeatedly to catch hatchlings.
- Scale insects (Coccus / Diaspididae spp.):
- Symptoms: Small brown, tan or waxy bumps fixed to stems and leaf undersides; they suck sap, cause yellow spotting and honeydew, and are easily mistaken for part of the plant.
- Prevention & Control: Scrape off by hand or with a soft brush, then treat with horticultural oil to smother juveniles. Keep the plant healthy and inspect regularly, as scale spreads slowly and is easiest to beat early.
- Spider mites (Tetranychus urticae):
- Symptoms: Fine pale stippling, a dull bronzed look and faint webbing on the undersides of leaves in warm, dry indoor air; the prized leaf sheen is quickly lost.
- Prevention & Control: Raise humidity, rinse the foliage, and keep the plant out of hot dry drafts; conserve any predatory mites. Insecticidal soap or horticultural oil clears heavier infestations.
- Aphids (on flower spikes) (Myzus / Aphis spp.):
- Symptoms: Clusters of soft green insects on emerging flower stalks and new leaves, causing distortion and honeydew.
- Prevention & Control: Rinse off with tepid water or wipe away; insecticidal soap for larger colonies. Because blooms are delicate, treat gently and cover the growing tip only if needed.
- Slugs & snails (Gastropoda):
- Symptoms: Ragged holes and slime trails on the soft, ground-hugging leaves, worst in humid, sheltered conditions.
- Prevention & Control: Handpick after dark, keep the surface litter clean, use copper tape or grit barriers around pots, and scatter iron-phosphate bait sparingly if needed.
Diseases & Fungal Issues
- Bacterial / crown & soft rot (Erwinia / Pectobacterium):
- Symptoms: Water-soaked, mushy, foul-smelling patches that spread fast through the fleshy crown and stems, collapsing the plant – usually where water lodges in the crown or air is stagnant.
- Treatment & Management: Cut well back into clean, firm tissue with a sterile blade, dust cuts with cinnamon or a copper product, keep water off the crown, and increase airflow. Badly affected plants are best restarted from a healthy cutting.
- Botrytis / grey mould (Botrytis cinerea):
- Symptoms: Fuzzy grey mould and brown spotting on flowers and soft leaves in cool, damp, still air.
- Treatment & Management: Remove faded blooms and affected tissue promptly, lower humidity around the plant and improve ventilation; a mild fungicide only if it persists.
- Leaf-spot fungi (Cercospora / Phyllosticta):
- Symptoms: Brown or black spots with yellow halos on leaves, sometimes merging in wet conditions.
- Treatment & Management: Remove spotted leaves, avoid wetting the foliage, improve airflow, and use a copper fungicide only for stubborn spread.
Growing Difficulties & Abiotic Problems
- Crown/root rot from overwatering:
- Cause & Symptoms: Yellowing, softening and collapse when the fleshy roots and crown stay saturated in a dense, airless mix.
- Correction Strategy: Grow in a chunky, free-draining terrestrial-orchid or aroid mix, water when the surface just dries, and never leave the pot standing in water.
- Leaf scorch & bleaching:
- Cause & Symptoms: Pale, crisped or reddened leaves and lost velvet sheen from direct sun; the jewel orchid is a shade-loving forest-floor plant.
- Correction Strategy: Move to bright, indirect light or dappled shade; an east-facing position or a sheer curtain is ideal.
- Low humidity & tip browning:
- Cause & Symptoms: Brown leaf tips and margins, slowed growth and mite susceptibility in dry indoor air.
- Correction Strategy: Group with other plants, use a humidity tray or room humidifier, and avoid heating/AC drafts. Rainwater or filtered water prevents tip burn from salts.
What Helps – Products & Tools
Keep a bottle of isopropyl alcohol and cotton buds for spot-treating mealybugs and scale, insecticidal soap or horticultural oil for wider sap-feeder outbreaks, and cinnamon or a copper product to seal cuts against rot. Iron-phosphate slug bait and steady humidity round out the toolkit.