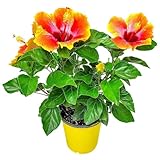


Plant Profile & Key Characteristics
Overview: Hibiscus clayi (Kauai rosemallow) is an evergreen shrub or small tree, grown as an ornamental for its red or pink flowers, that can be kept at 0.5-2 m as a shrub or grown to 2-8 m as a tree. It is a rare Hawaiian endemic suited to tropical and subtropical zones 10a+.
Quick Specifications
| Specification | Attribute |
|---|---|
| Plant Type / Life Cycle | Perennial (shrub or tree) |
| Foliage Type | Evergreen |
| Mature Size | 0.5-2 m as a shrub; 2-8 m as a tree |
| Growth Rate | Fast |
| Toxicity | Non-toxic – leaves are edible |
| Hardiness | USDA zone 10a+ |
Growth Form & Structure
- Height and Spread: Kept at 0.5-2 m as a shrub or grown to 2-8 m as a tree; grows in containers of about 10-20 L (2-4 gallons) when trained as a shrub (a larger 50 L / 10 gallon container is needed for tree form).
- Growth Habit and Form: Can be shaped as a bushy shrub or a single-trunk small tree.
- Lifespan and Maturity: Fast-growing perennial; benefits from early training to shrub or tree form.
Anatomy & Physical Features
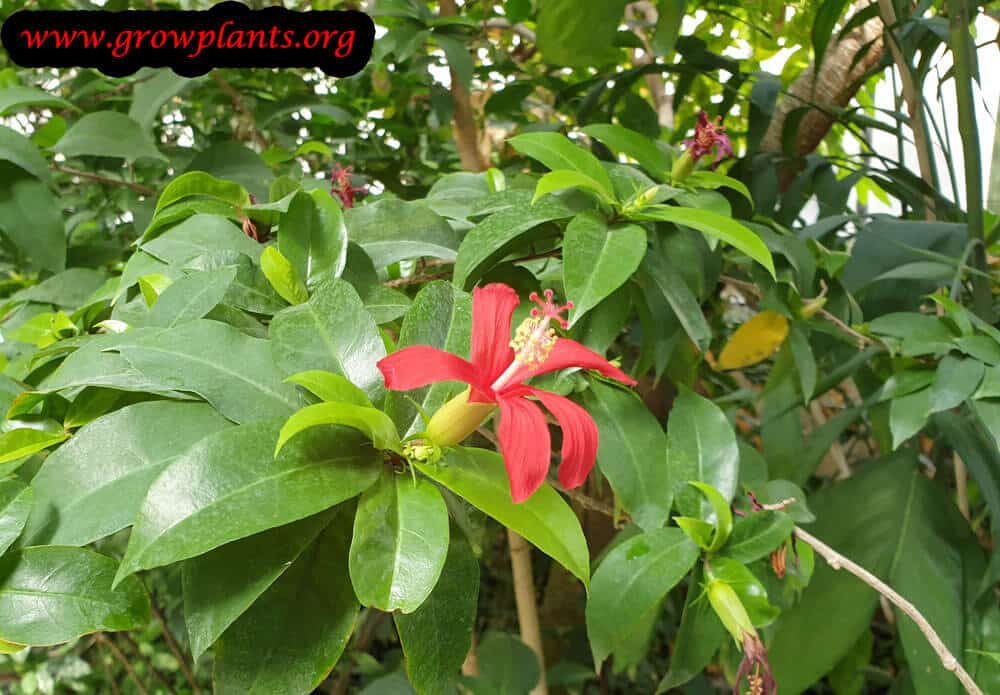
- Leaves and Foliage: Edible green leaves, oval with a serrated margin.
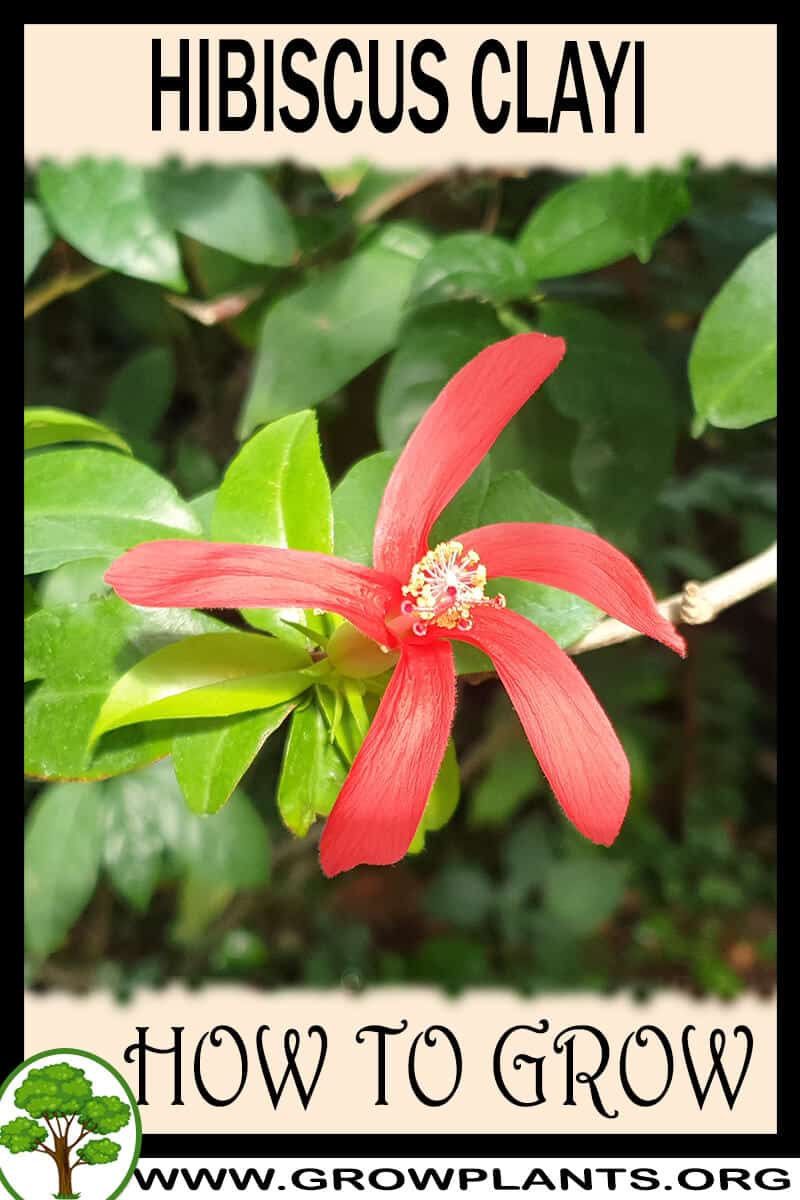
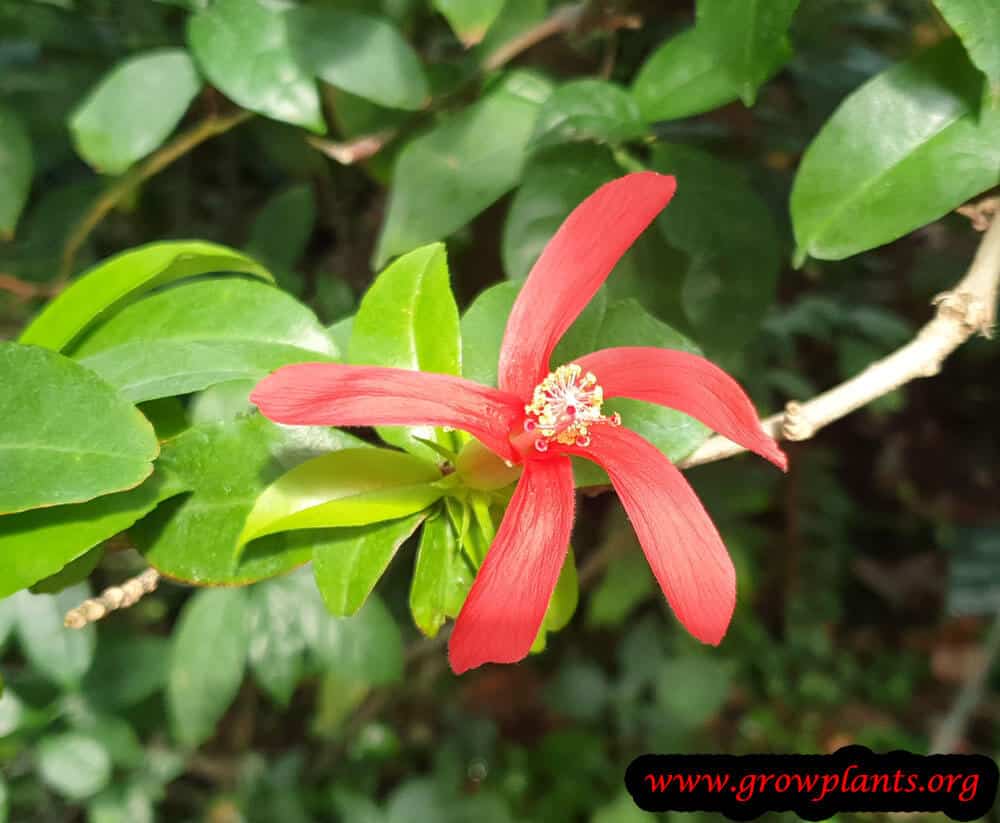
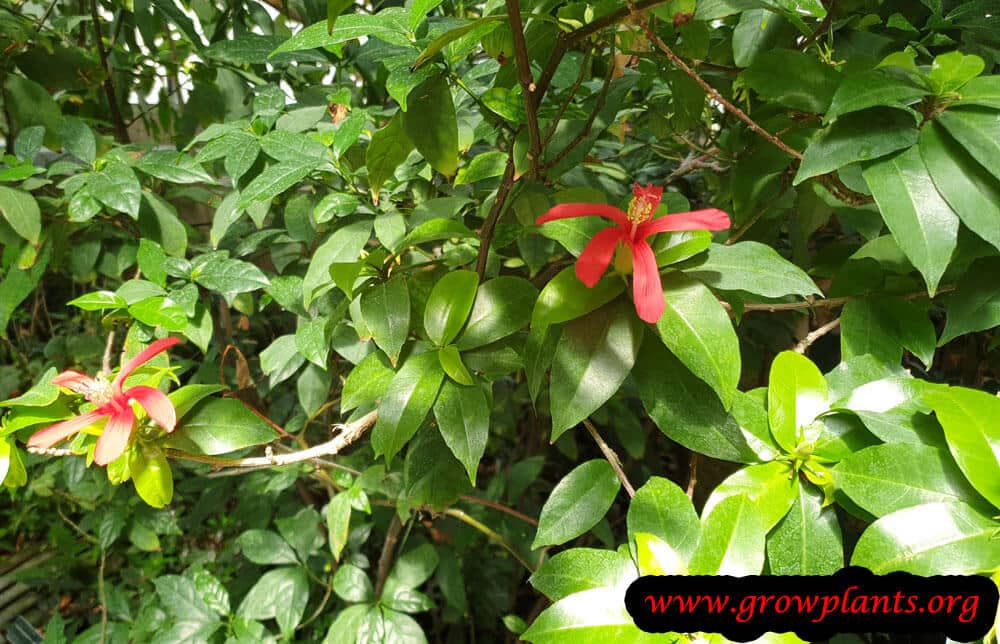
- Flower Characteristics: Five-petalled flowers in red or pink (full detail in the Bloom accordion).
Primary Uses & Landscape Value
- Functional and Ornamental Roles: Ornamental flowering shrub or small tree; conservation interest as an endangered Hawaiian native.
Care Guide: Planting, Soil & Watering
Overview: Kauai rosemallow (Hibiscus clayi) is a fast-growing frost-tender shrub or small tree for full sun, growing in rich soil with organic matter, mulch and steady moisture.
Quick Care Requirements
| Requirement | Ideal Condition |
|---|---|
| Planting Season | Spring; year-round in frost-free zones |
| Growth Rate | Fast |
| Soil Type | Rich, moisture-retentive soil with organic matter and mulch |
| Water Need | Moderate – keep evenly moist |
Planting & Establishment
- Best Planting Season: Plant in spring in zone 10a, spring to summer in 10b, spring to autumn in zone 11, and year-round in zone 12+.
- How to Plant:
- Hole Preparation: Dig the hole about 50% wider than the root ball so roots can spread into loosened soil.
- Soil Amendments: Work plenty of organic matter into the backfill (compost, well-rotted leaves and humus), then mulch the surface to hold moisture; hold back on fertiliser until the plant has established.
- Planting Depth: Set the plant so the top of the root ball sits level with the surrounding soil, firm it in gently and stake if unstable, without burying the stem.
- Growth Speed & Expectations: Fast-growing – quickly makes a full shrub or small tree in warm conditions.
Soil, Watering & Drainage Care
- Soil Mix & Drainage Needs: Rich soil that holds moisture yet drains freely, mulched to stay moist; in pots use a light, free-draining mix, keep it as a shrub in smaller containers, and avoid standing water.
- Watering Schedule & Technique:
- Young / Newly Planted: Water twice on planting day, then daily for the first two weeks, giving extra water until new growth appears.
- Established: Water regularly to keep the soil evenly moist, letting the top dry slightly between waterings.
- Seasonal Adjustments: More water in hot, dry weather; ease off through cooler months.
Climate, Light & Hardiness
Hibiscus clayi thrives in warm, frost-free tropical, subtropical, and mild Mediterranean climates, and needs full sun for the best flowering. It is a genuinely tender hibiscus with limited cold hardiness – reliably hardy outdoors only in USDA zone 10b and above, and survivable in zone 10a solely with dedicated overwinter care.
Quick Climate Specifications
| Climate Zones | Tropical, subtropical, mild Mediterranean |
|---|---|
| USDA Hardiness Zones | 10b+ (10a possible with overwinter protection) |
| Light Conditions | Full sun (half shade tolerated, but flowering is reduced) |
| Frost Tolerance | Very low |
Sunlight & Light Exposure
Optimal Light Setup
Full sun gives the strongest growth and the most flowers; a half-shade position is tolerated but noticeably reduces bloom.
Direct Sun Requirement
Needs several hours of direct sun daily to flower well – this is a sun-loving shrub, not a shade plant.
Best Exposure / Orientation
A south- or west-facing spot with unobstructed light is ideal in most climates; in exceptionally hot, arid microclimates a little afternoon relief can help protect flower and leaf quality.
Temperature Extremes & Hardiness
USDA Hardiness & Regional Limits
Reliable, unprotected outdoor culture is limited to zone 10b and warmer. In zone 10a it can be grown outdoors with the right overwinter care (a warm microclimate and protection on cold nights), but colder zones require container culture with winter shelter.
Cold Damage & Winter Protection
Cold tolerance is limited and, as with many hibiscus, can vary somewhat with plant age, exposure duration, and microclimate – younger plants are generally more vulnerable than established specimens. Overwinter protection (wind shelter, mulch, moving containers under cover) is important at the cooler edge of its range.
Frost Sensitivity
High – frost and freezing temperatures are likely to damage or kill foliage and stems.
Extreme Heat Tolerance
Good in genuinely tropical and subtropical heat, especially with the average, regular moisture and mulching it prefers.
Wind, Humidity & Microclimate
Humidity Preferences
Native to humid Hawaiian conditions and appreciates moderate to high humidity along with consistently moist, mulched soil.
Microclimate Recommendations
At the cooler margin of its range (zone 10a), a warm, sheltered microclimate – against a sun-facing wall or under high canopy cover – measurably improves winter survival.
Growing in Pots, Balconies & Indoors
Hibiscus clayi is a sun-loving flowering shrub or small tree (0.5-2 m as a shrub, taller as a tree). The grower says it is not a true houseplant, but it grows well in a container if you keep it pruned as a shrub – and it needs full sun to flower, so indoors it only really works at a very bright, sunny window or in a sunroom.
Grown as a potted shrub it is an excellent patio, balcony or conservatory plant that can be moved under cover for winter in cold climates.
Quick Details
- Container Size: 10-20 L (2-4 gal), grown as a shrub; a full-size tree would need 50 L (10 gal) or more.
- Indoor Suitability: Not a deep-indoor houseplant; needs a very sunny window or sunroom to flower.
- Best Spot: Full sun – a sunny patio, balcony or bright glasshouse; part shade means fewer flowers.
- Soil & Drainage: Potting soil, or peat and perlite / other light mix; free-draining.
- Watering in Pots: Water regularly, but never leave water standing in the saucer for days.
Indoors & On the Windowsill
- Not a deep-indoor plant: The grower says it is not a houseplant. Indoors it needs the brightest, sunniest window or a sunroom, or it will grow leggy and shy of flowering.
- Overwintering: In cold climates keep it potted so you can move it into a bright, frost-free room or glasshouse for winter, then back out in the warm season.
On a Balcony or Patio
- Light & warmth: Give it the hottest, sunniest spot; walls and paving that reflect heat suit it well, but pots then dry fast, so check moisture daily in summer. A drip irrigation kit with a timer can take over that watering check automatically.
- Wind: On an exposed balcony, shelter it and keep it pruned compact so it does not rock in the pot.
Choosing the Pot, Soil & Long-Term Care
- Pot & drainage: Grow it as a shrub in a 10-20 L pot with strong drainage holes; a tree form needs far more (about 50 L). Give it strong drainage holes and skip a standing-water saucer to avoid root rot; terracotta breathes and dries faster, while glazed or plastic pots hold moisture longer.
- Potting mix: Potting soil, or a mix of peat and perlite / other light medium, enriched with humus and organic matter; mulch to hold moisture.
- Feeding: Potted plants use up their food faster because nutrients wash out with every watering, so feed lightly but more regularly than plants growing in open ground.
- Repotting: Each time you move up a pot, replace some of the old soil with fresh; once at final size, refresh part of the soil and trim some roots every few years – you can lift it slightly from the side without fully removing it.
Grower’s Container Tip
- Grow it as a shrub: Start in a pot about 50% bigger than the rootball and pot up gradually. Keep it trained as a shrub rather than a tree – a tree form is too big for a 20 L pot – and be careful never to let water sit in the saucer for too many days.
Fertilizing & Feeding
A moderate feeder once established: nitrogen-forward feeding as new growth begins shifts to steady balanced feeding through the long bloom season, then eases off as growth slows in cooler weather.
Quick Fertilizing Specs
| Feeding Level | Moderate feeder once established |
|---|---|
| Main Nutrient Priority | Balanced feeding with adequate nitrogen for foliage and repeat flowering |
| Best Feeding Period | Warm-season active growth through the long bloom period |
| Organic Options | Compost, humus, and organic matter worked into the root zone |
| Reduce/Stop Feeding | Ease off as growth slows in cooler weather or during overwintering care |
| Micronutrients | Usually supplied by a complete fertilizer; correct only a diagnosed deficiency |
| Soil pH | Tolerates a range of soil pH; performs best in rich, well-drained soil |
Feeding by Growth Stage
Establishment after planting
Let the root system settle into rich, moisture-retentive soil before it is asked to support new top growth.
| Nutrient direction | None – rely on organic matter and mulch while roots establish, not fertilizer. |
|---|---|
| Timing | The first weeks after planting, before clear new growth appears. |
| Frequency | No feeding at this stage; watering and mulch matter far more than fertilizer now. |
| Fertilizer types | No feeding at this stage; organic matter and mulch support the roots instead. |
| Precautions | Do not fertilize a freshly planted hibiscus; wait for clear signs of active new growth first. |
Spring flush of new growth
Fuel the flush of new stems and foliage as the plant resumes active growth.
| Nutrient direction | A balanced, nitrogen-forward complete fertilizer supports the new flush of stems and leaves. |
|---|---|
| Timing | As new growth resumes in spring or at the start of the warm season. |
| Frequency | A light feeding as new growth begins, building toward the coming bloom season. |
| Fertilizer types | A balanced, nitrogen-forward complete fertilizer, Compost or organic matter worked into the root zone |
| Routine trace nutrients | iron, manganese |
| Precautions | Avoid heavy doses on young flushes; over-rich feeding produces soft, pest-prone growth. |
Extended bloom period
Sustain the long flowering display without pushing excess soft growth.
| Nutrient direction | A balanced fertilizer with steady nitrogen keeps flowering going through the warm season. |
|---|---|
| Timing | Through the spring-to-autumn bloom season, or continuously in the warmest, frost-free climates. |
| Frequency | Continue light, regular feeding through the active flowering months. |
| Fertilizer types | A balanced complete fertilizer, Compost or humus as a top-dressing |
| Routine trace nutrients | iron, manganese |
| Precautions | Keep feeding moderate; excess late-season nitrogen can leave growth too tender heading into cooler weather. |
Cool-season rest or overwintering
Let the plant coast through cooler weather or overwintering care without pushing tender new growth.
| Nutrient direction | None – growth is slow or paused, so supplemental feeding is not needed. |
|---|---|
| Timing | During cool weather or the overwintering period at the cooler edge of its hardiness range. |
| Frequency | No feeding during this rest period; resume only once active growth clearly returns. |
| Fertilizer types | No feeding at this stage; withhold fertilizer until active growth resumes. |
| Precautions | Withhold fertilizer now; feeding a plant that isn’t actively growing risks salt buildup and cold-tender new shoots. |
Nutrient Deficiency Signs & Corrections
New leaves turn yellow between the veins while the veins themselves stay green.
| Possible causes | high soil pH limiting iron availability, poor drainage or waterlogged roots, low soil iron |
|---|---|
| Appears first on | newest growth at branch tips |
| What to check | soil pH and drainage, recent watering pattern, whether yellowing is interveinal or uniform |
| Possible correction | Where soil is markedly alkaline, work toward a more moderate pH and apply a chelated iron product per its label. |
Older, lower leaves fade to pale green or yellow and overall growth and flowering slow.
| Possible causes | low available soil nitrogen, nitrogen leaching from heavy watering or rain, thin, low-organic-matter soil |
|---|---|
| Appears first on | older, lower leaves |
| What to check | recent feeding history, soil organic matter, overall vigor and leaf color |
| Possible correction | Apply a balanced, nitrogen-forward fertilizer and build soil organic matter. |
Flower buds form but drop before opening, or open flowers are undersized.
| Possible causes | boron deficiency affecting bud development, inconsistent watering or heat stress, insect feeding on developing buds |
|---|---|
| Appears first on | developing flower buds |
| What to check | watering consistency and recent heat stress, buds for insect damage, overall feeding history |
| Possible correction | Stabilize watering, check for pests, and apply a chelated micronutrient product per its label only if a boron deficiency is confirmed. |
Pruning, Training & Seasonal Maintenance
Kauai Rosemallow is a fast-growing evergreen that can be kept as a 0.5–2m shrub or trained up into a small tree to around 2–8m, and it tolerates moderate-to-high pruning well given its vigorous growth rate. Because propagation cuttings are specifically taken from stems that are not going to bloom, flowering clearly happens on soft, actively growing current-season shoots rather than older wood, so the recommended autumn/winter pruning window removes old wood and shapes the plant just before the next growth flush – the very flush that will carry the next flowering display – rather than cutting off developing buds. In truly tropical conditions this species can bloom year-round, so where there is no clear seasonal lull, pruning should be done more conservatively and opportunistically rather than on a hard autumn/winter cutoff.
Quick Pruning & Maintenance Specs
| Pruning Tolerance | Moderate to High – fast-growing and recovers vigorously from cuts |
| Primary Pruning Window | Autumn / Winter (in climates with a seasonal bloom lull), just before the next growth flush |
| Secondary Maintenance Window | Ongoing light deadheading and dead-material removal, especially where bloom is year-round |
| Typical Frequency | Annual structural pruning, plus ongoing light clean-up |
| Main Objective | Control size/form and renew flowering wood by removing weak, non-blooming growth |
| Young Plant Priority | Choose and establish a shrub or small-tree training form |
| Mature Plant Priority | Renew weak/non-blooming interior wood; control size and spread |
| Best Tool Type | Bypass secateurs for most cuts; loppers or a pole pruner for framework wood on larger specimens |
| Avoid Heavy Pruning During | Active bloom flush and bud development, and during active aphid/mealybug/mite outbreaks |
Pruning by Plant Age & Size
Newly Established
Remove only damaged growth and let the young plant establish before any structural cuts.
Young / Formative
Decide early whether to grow it as an open, multi-stemmed shrub or limb it up into a single- or few-trunk small tree by selecting a leader and removing lower competing shoots – the plant’s fast growth makes either training path achievable within a couple of seasons, but the choice should be made early rather than left to sort itself out.
Mature / Established
Each cycle, remove weak, spindly, non-blooming interior branches and dead material, and control overall size and spread, which the fast growth rate makes necessary more often than for a slow-growing shrub.
Seasonal Pruning Schedule
| Stage | Autumn / Winter (post-bloom, pre-growth-flush) |
| Objective | Structural shaping and renewal of non-blooming wood ahead of the next flush |
| Remove | Weak or spindly interior branches that are not flowering, dead material, and growth crowding the chosen shrub/tree form |
| Do Not Remove | In truly tropical, year-round-blooming conditions, do not apply a hard blanket cutback on a fixed date – some growth may still be carrying late blooms |
| Expected Response | A fresh flush of vigorous new growth that carries the next flowering display |
| Flowering / Fruiting Impact | Minimal in the recommended window, since flowers form on the resulting new growth rather than on the wood being removed |
Flowering & Fruiting Wood
Flowers form on current-season, soft actively-growing shoots – propagation cuttings are specifically taken from stems not headed for bloom, confirming that flowering tissue is the new growth rather than older wood. Autumn/winter structural pruning removes old, spent wood and stimulates the fresh growth that carries the coming flush, but hard pruning right before or during active bud development removes flowers directly and should be avoided.
Structural Pruning & Training
Select and maintain the chosen shrub or small-tree branch structure, remove crossing or rubbing growth, and thin canopy density where it has become congested – better airflow through the canopy also helps limit the aphid, mealybug and mite pressure this species is prone to on dense new growth. Control height and spread actively given the fast growth rate, particularly for container specimens with limited root volume.
Special Growth to Remove
- Weak, spindly interior branches that are not flowering
- Dead flowers and leaves
- If a specimen was propagated by grafting onto rootstock (not stated for this particular plant but common in named hibiscus cultivars), watch for and remove any rootstock suckers below the graft union
Container & Small-Space Pruning
In a container, the plant must be kept pruned to a shrub form rather than allowed to reach tree size, since even a large 50L (10-gallon) pot only accommodates the shrub habit. Pair top pruning with periodic root work: every few years, switch part of the soil and trim some roots at the same time as pruning the top growth, rather than pruning the canopy alone.
Tools
Bypass secateurs for the bulk of routine shaping and deadwood cuts; loppers for thicker framework wood, especially when renewing an overgrown shrub or building a tree-form trunk; a pole pruner for upper-canopy work on specimens trained as a small tree up to around 8m.
Tool Hygiene & Disease Risk
Increased – this species is prone to aphids, mealybugs and mites, which can be spread on tools when cutting through infested soft growth, so wipe blades between plants (or between heavily infested and clean growth on the same plant) rather than relying on routine cleaning alone.
Cut Placement & Technique
Use thinning cuts for interior branches to preserve an open form; heading cuts are tolerated for shaping since the plant regrows vigorously. Cut to an outward-facing bud or node, and on tree-form trunks or larger limbs, cut outside the branch collar to avoid tearing the relatively soft, fast-grown wood.
Heavy Pruning & Rejuvenation
Tolerated well given the fast growth rate – a leggy or overgrown shrub can be cut back hard in late winter to renew it, with vigorous regrowth expected and a temporary reduction in bloom for that flush, recovering by the next cycle. On a tree-form specimen, stage a larger reduction over two seasons rather than removing the whole canopy at once, to avoid shock and sunburn on previously shaded bark.
Post-Pruning Care
Watch newly exposed bark for sunburn after opening a dense canopy in this full-sun-preferring species, keep watering consistent especially after hard cuts, and monitor the resulting tender regrowth closely for aphids, mealybugs and mites. Avoid feeding immediately after a hard prune, since the cut has already forced a strong regrowth response.
Common Pruning Mistakes
- Shearing into a formal hedge shape and losing the plant’s natural flowering habit
- Pruning during active bloom or bud development, directly removing flowers
- Not choosing a shrub-vs-tree training form early, leading to a floppy, poorly structured plant
- Pruning through pest-infested growth with the same tool used elsewhere on the plant
When NOT to Prune
Avoid major pruning right before or during an active bloom flush, skip pruning through visibly pest-infested growth until it is treated, and in truly tropical, year-round-blooming conditions avoid a blanket seasonal hard prune, favoring conservative, opportunistic cuts instead.
Recommended Tools (by task)
- Young & mature, routine shaping and deadwood (bypass_secateurs): covers most stem-sized cuts on both shrub- and tree-form specimens.
- Mature, framework renewal or tree-trunk building (loppers): thicker basal and framework wood exceeds what secateurs can cleanly cut.
- Tree-form specimens up to ~8m, upper canopy (pole_pruner): warranted specifically because this species is trained as a small tree, putting some growth out of reach of hand tools.
Pruning Troubleshooting
| Problem | Possible Cause | What to Check | Corrective Action |
| Reduced flowering after pruning | Pruning done during active bud development or bloom | Timing of the last prune relative to the bloom flush | Shift structural pruning to the autumn/winter window (or prune more conservatively in year-round-bloom climates) |
| Weak, floppy, leggy growth | No training form was chosen while the plant was young and fast-growing | Whether a clear shrub or tree structure was ever established | Select and reinforce a training form now with structural cuts; stake if needed while it fills in |
| Pest flush (aphids/mealybugs/mites) after pruning | Soft, tender regrowth following a hard cut | New growth tips and leaf undersides | Monitor and treat promptly; avoid stacking repeated hard prunings in quick succession |
Propagation Guide
Hibiscus clayi is most reliably propagated from stem cuttings, which is also the preferred method because it reproduces the exact flower color and mature plant size of the parent; growing from seed is not difficult either, but seedlings can vary somewhat from the parent plant. Propagation is generally easy for a home grower with basic warmth and humidity.
Quick Propagation Specs
| Best Propagation Method | Stem cuttings |
| Alternative Methods | Seed |
| Propagation Difficulty | Easy |
| Seed True-to-Type | Variable (flower color and plant size can differ from the parent) |
| Vegetative True-to-Type | Yes |
| Best Propagation Season | Early spring, before the plant resumes growth after dormancy |
| Cutting Rooting Time | A few weeks |
| Germination Temperature | Generally warm conditions, roughly 21–27°C (70–80°F) |
Growing from Seed
Dormancy & Pre-Sowing Treatment
Hibiscus seed often has a hard seed coat; a light scarification (nicking the coat) or a warm-water soak before sowing can improve and speed germination.
Sowing Depth & Orientation
Sow seed shallowly, just covering it with soil or mix.
Germination Conditions
Warm temperatures and consistently moist, well-drained mix.
Stem Cuttings
Cutting Type
Semi-hardwood stem cuttings taken from stems that are not going to bloom.
Best Timing
Early spring, before the plant starts to grow again after dormancy, or when temperatures are 15–26°C (59–79°F).
Rooting Setup
Moist, peat-based soil with high humidity; a greenhouse or a small plastic box with air holes is highly recommended.
Rooting Hormone
Beneficial for reliable rooting.
Rooting Time
A few weeks.
Bloom & Flower Guide
Quick Details
- Bloom Season: Spring through autumn (year-round in the tropics)
- Flower Appearance: Funnel-shaped red or pink flowers with five petals and a central staminal column
- Edibility: Ornamental – grown for its flowers
Detailed Blooming Overview
Clay’s hibiscus (Hibiscus clayi), a Hawaiian native, is grown for its bold red-to-pink flowers. Each bloom has the classic hibiscus shape – five spreading petals around a prominent central column of fused stamens. Individual flowers typically last about a day, but a healthy shrub keeps opening fresh ones through a long season.
Flower Characteristics
- Funnel-shaped flowers with five petals, in red or pink.
- A prominent central staminal column, typical of hibiscus.
Bloom Care & Thinning
- Encouraging more flowers: Blooms form on new growth, so light pruning keeps fresh flowering wood coming.
- During bloom: Steady moisture and feeding help prevent bud drop and keep the flowers coming.
Bloom Health & Protection
- Aphids and thrips on buds: These gather on soft buds and can distort or drop the flowers; a neem-oil or insecticidal-soap spray usually keeps them in check.
- Bud drop: Often a stress response to sudden dryness or big swings in conditions – steady watering and feeding is the main help.
Fruit & Uses
Site information notes the leaves of Hibiscus clayi as edible, in line with the wider Hibiscus genus, where young leaves of several species are used as a cooked leaf vegetable. Hibiscus clayi is a rare, endangered Hawaiian endemic grown almost exclusively as an ornamental for its red or pink flowers, so any leaf use should be treated as a minor, unconfirmed possibility rather than an established food crop.
Quick Edible Specs
| Edible Parts | Leaves (as reported for this species) |
| Main Use(s) | Occasional cooked leaf-green use, by analogy with other edible-leaf Hibiscus species |
| Eaten Raw or Cooked | Cooked preferred; not established as a raw salad green |
| Preparation Required | Cook (boil or steam) before eating |
| Harvest Season | Young leaves during active growth, spring through autumn |
| Storage | Use fresh; not suited to storage |
| Safety/Toxicity Caveat | No specific toxicity documented, but this is a rare, endangered species – do not harvest from wild or limited garden specimens, and treat any leaf use as unconfirmed |
Leaves & Greens
The green, oval, serrated-margin leaves are the only part noted as edible. As with related Hibiscus species, they would be used as a cooked leafy green rather than raw, but no specific preparation method or culinary tradition is documented for this particular species – treat this as a minor, secondary use of a plant that is grown and valued primarily for its flowers.
Preparation, Uses & Safety
Because Hibiscus clayi is a critically endangered Hawaiian native grown mainly for conservation and ornamental value, harvesting its leaves for food is not recommended in practice, and no reliable species-specific safety or preparation data exists. If leaves are ever used, cooking rather than eating them raw is the cautious approach, following the pattern of better-documented edible-leaf Hibiscus species. This is not a plant to source edible material from casually.
Pests, Diseases & Troubleshooting
Overview: Hibiscus clayi is a tender, warmth-loving tropical hibiscus grown for its large showy blooms. Across the genus, hibiscus are magnets for sap-sucking insects — aphids, whitefly, mealybugs (including the serious pink hibiscus mealybug), spider mites and thrips — and they suffer bud drop, leaf spot and root rot when stressed. Manage them with vigilant scouting, strong plant health, and organic controls first (water jets, soaps, oils, beneficials), keeping stronger products for outbreaks.
Quick Troubleshooting Overview
| Issue / Pest | Main Symptom | Primary Solution |
|---|---|---|
| Aphids | Colonies on buds & shoot tips; honeydew, sooty mould | Hose off; insecticidal soap; beneficials |
| Whitefly | Clouds of tiny white flies under leaves; sticky honeydew | Yellow sticky traps; oil/soap; Encarsia |
| Mealybugs | White cottony masses; distorted growth | Alcohol/oil; control ants; ladybird predators |
| Hibiscus gall midge | Yellow buds drop before opening (maggots inside) | Pick & destroy dropped/yellow buds |
| Spider mites | Stippling, bronzing and webbing in heat | Hose; raise humidity; horticultural oil |
| Root rot / bud drop | Wilting in wet soil; buds yellow and drop | Improve drainage; reduce stress; steady watering |
Common Pests & Management
- Aphids (Aphis gossypii and others):
- Symptoms: Dense colonies of soft green, yellow or black aphids on shoot tips, buds and leaf undersides, coating growth in honeydew and sooty mould and distorting new leaves and flowers.
- Prevention & Control: Blast off with water, encourage ladybirds, lacewings and hoverflies, and use insecticidal soap or neem oil in the evening. Control ants, which farm and protect aphids.
- Whitefly (Bemisia tabaci / giant whitefly Aleurodicus dugesii):
- Symptoms: Clouds of tiny white moth-like flies rising when the plant is disturbed, with sticky honeydew and sooty mould on leaves; a chronic hibiscus pest under warm conditions.
- Prevention & Control: Hang yellow sticky traps, spray horticultural oil or insecticidal soap to the leaf undersides, and introduce the parasitic wasp Encarsia formosa under glass; keep plants unstressed.
- Mealybugs, incl. pink hibiscus mealybug (Maconellicoccus hirsutus):
- Symptoms: White cottony masses on shoot tips, buds and leaf axils; the pink hibiscus mealybug injects a toxic saliva that causes severely bunched, distorted “bonsai-like” growth and is a serious quarantine pest.
- Prevention & Control: Dab colonies with alcohol, wash off, use horticultural oil, and control tending ants. For pink hibiscus mealybug, biological control (the ladybird Cryptolaemus and parasitoid wasps) is the mainstay; report suspected outbreaks in regulated areas.
- Hibiscus gall midge (Contarinia maculipennis):
- Symptoms: Flower buds turn yellow and drop before opening; splitting a fallen bud reveals tiny white or yellow maggots inside. A common cause of frustrating bud drop on tropical hibiscus.
- Prevention & Control: Collect and destroy all yellowing and dropped buds to break the cycle (do not leave them on the ground), cultivate the soil surface beneath the plant, and time any treatment to the bud stage.
- Spider mites (Tetranychus urticae):
- Symptoms: Fine pale stippling, bronzing and fine webbing on leaf undersides, worst in hot, dry, dusty conditions; leaves yellow and drop.
- Prevention & Control: Raise humidity and hose down foliage, introduce predatory mites, and apply horticultural oil or insecticidal soap; avoid drought stress.
- Thrips (Frankliniella spp.):
- Symptoms: Silvery flecking on leaves and, importantly, streaked, distorted flowers and buds that may drop before opening.
- Prevention & Control: Use blue sticky traps, remove weeds and spent blooms, and apply insecticidal soap or spinosad; encourage predatory mites.
Diseases & Fungal Issues
- Leaf spot & bacterial leaf spot (Cercospora, Pseudomonas spp.):
- Symptoms: Brown, tan or angular water-soaked spots on leaves, sometimes with yellow haloes, leading to yellowing and leaf drop in warm, wet weather.
- Treatment & Management: Remove affected leaves, improve airflow, avoid overhead watering, and use a copper fungicide for persistent bacterial or fungal spotting.
- Root & collar rot (Phytophthora / Pythium):
- Symptoms: Wilting despite moist soil, yellowing lower leaves, and dark, decayed roots and stem base in wet, poorly drained ground.
- Treatment & Management: Improve drainage, avoid overwatering, plant at the correct depth, and remove badly rotted plants; prevention through good drainage is far more effective than cure.
- Botrytis / grey mould (Botrytis cinerea):
- Symptoms: Fuzzy grey mould on flowers and soft growth in cool, damp, crowded conditions.
- Treatment & Management: Remove spent blooms and dead tissue, improve airflow, and avoid wetting the flowers.
Growing Difficulties & Abiotic Problems
- Bud drop:
- Cause & Symptoms: Flower buds yellow and drop before opening due to stress — sudden temperature swings, dryness, overwatering, low light or a check to growth (as well as gall midge or thrips). Correction Strategy: Keep watering, light and temperature steady, avoid moving plants in bud, and rule out midge/thrips.
- Chlorosis (iron / manganese deficiency):
- Cause & Symptoms: Yellowing leaves with green veins, common on hibiscus in alkaline or waterlogged soil where iron uptake is blocked. Correction Strategy: Improve drainage, acidify slightly, and apply chelated iron/manganese; feed with a balanced fertiliser.
- Overwatering & poor drainage:
- Cause & Symptoms: Yellow leaves, wilting and root rot from soggy soil. Correction Strategy: Let the top of the soil dry between waterings and ensure containers drain freely.
- Cold sensitivity:
- Cause & Symptoms: Leaf yellowing, drop and dieback below about 10–12°C, as tropical hibiscus are frost-tender. Correction Strategy: Protect from cold, bring indoors or under cover in cool climates, and avoid cold draughts.
What Helps — Products & Tools
For hibiscus keep insecticidal soap and neem/horticultural oil for aphids, whitefly, mealybugs and mites; yellow sticky traps for whitefly; spinosad for thrips; copper fungicide for leaf spot; and chelated iron for chlorosis. Beneficials — ladybirds, lacewings, Encarsia and predatory mites — do much of the work if you avoid harsh sprays. Steady watering and good drainage prevent most of the abiotic troubles.