

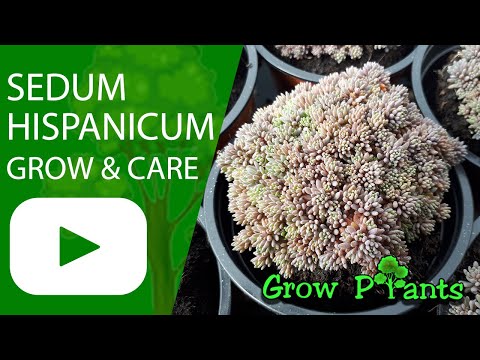

Plant Profile & Key Characteristics
Overview: Sedum clavatum (Sedum clavatum) is a low, evergreen, drought-tolerant succulent groundcover, 5-15 cm (2-6 in) tall, grown for its fleshy foliage and star-like flower clusters. This slow-growing perennial is used mainly as ornamental groundcover in rock gardens, containers and green roofs (hardiness zone 9-11 (12a with care)).
Quick Specifications
| Specification | Attribute |
|---|---|
| Plant Type / Life Cycle | Perennial (evergreen succulent, groundcover) |
| Foliage Type | Evergreen (fleshy, succulent) |
| Mature Size | 5-15 cm (2-6 in), spreading |
| Growth Rate | Slow |
| Root System | Shallow, fibrous |
| Toxicity | Toxic to cats |
| Hardiness | USDA zone 9-11 (12a with care) |
Growth Form & Structure
- Height & Spread: Reaches 5-15 cm (2-6 in); a low, drought-tolerant groundcover that also does well in shallow, wide containers and can be grown indoors as a houseplant.
- Growth Habit & Form: Low, spreading, mat-forming succulent with trailing or creeping stems that root as they spread, forming a dense groundcover.
Anatomy & Physical Features
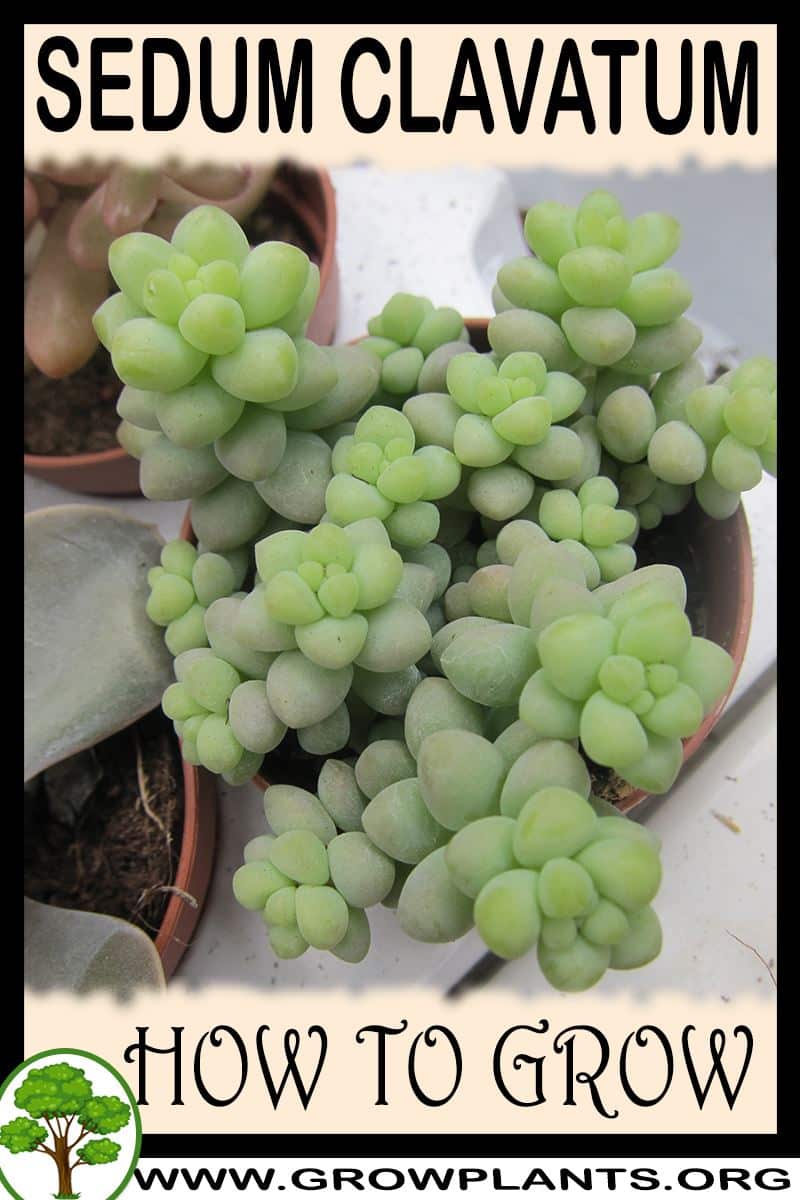
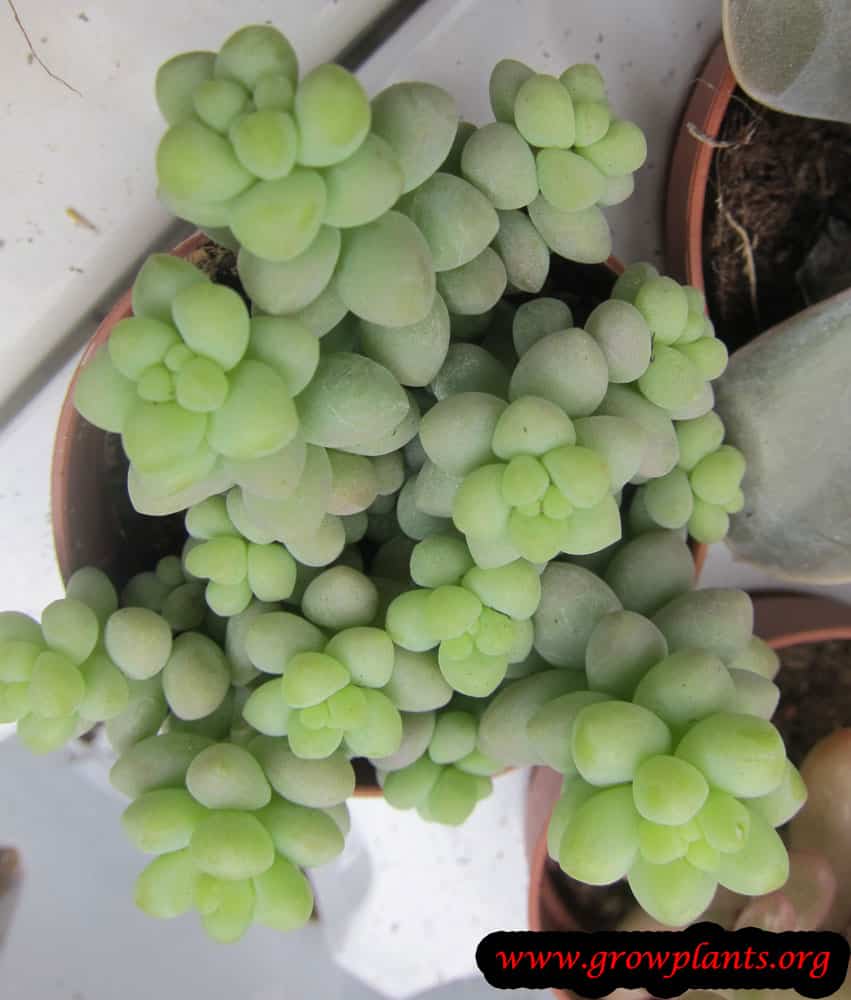
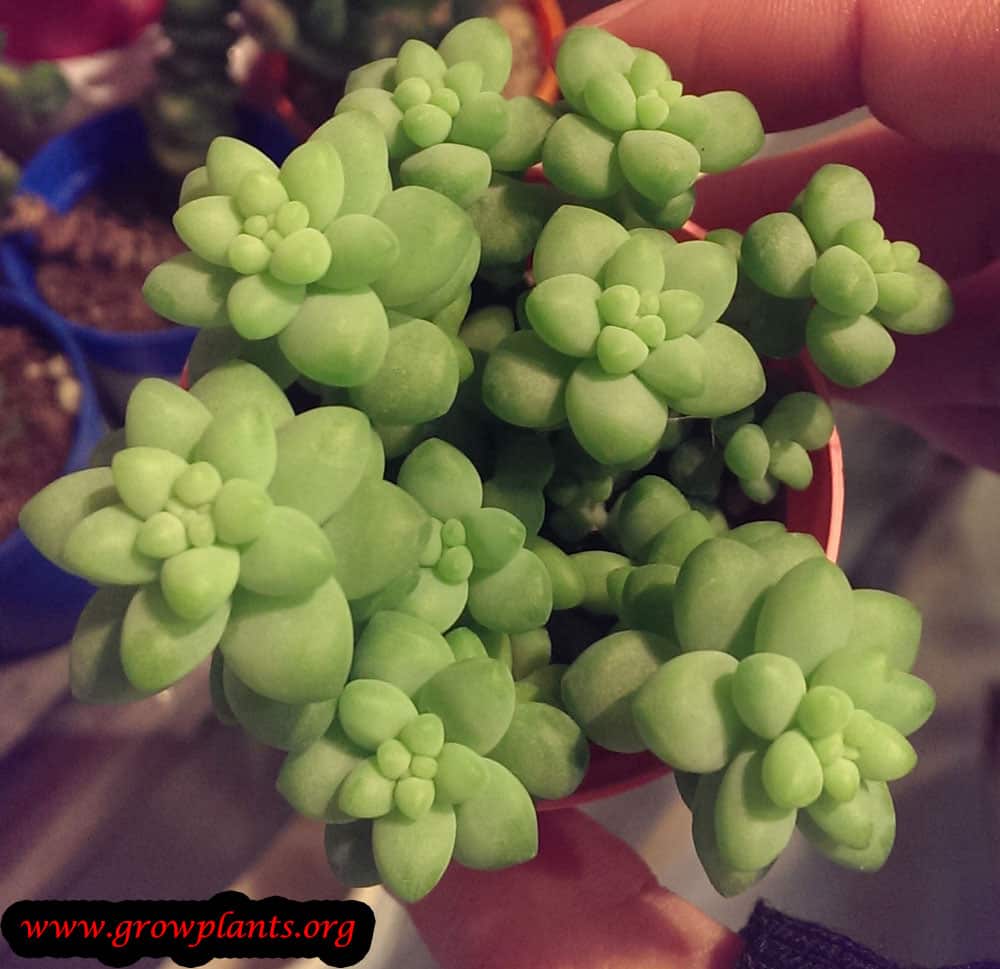
- Leaves & Foliage: Plump, blue-green fleshy oval leaves clustered in tight rosettes.
- Flower Characteristics: White, crown-shaped flowers in clusters at the branch tips.
Primary Uses & Landscape Value
- Functional & Ornamental Roles: Ornamental groundcover, rock-garden, green-roof and container plant, houseplant and dish-garden succulent.
Care Guide: Planting, Soil & Watering
Overview: Sedum clavatum is a hardy, drought-tolerant succulent that thrives in bright light and gritty, sharply draining soil. It stores water in its fleshy leaves, so it needs only occasional watering and quickly rots in heavy, wet ground.
Quick Care Requirements
| Requirement | Ideal Condition |
|---|---|
| Planting Season | Spring in zone 9; spring to summer in zone 10a; spring to autumn zone 10b-11; year-round in zone 12a+ |
| Growth Rate | Slow |
| Soil Type | Light, sandy, well-draining soil — a cactus/succulent mix or soil opened up with grit |
| Water Need | Low — let the soil dry out completely between waterings |
Planting & Establishment
- Best Planting Season: Set out plants in the warmth of spring so the roots settle before winter; in the mildest zones the window stretches further (spring in zone 9; spring to summer in zone 10a; spring to autumn zone 10b-11; year-round in zone 12a+). In cold-winter areas grow it in containers that can be moved under cover.
- How to Plant:
- Hole Preparation: Dig a shallow hole just wide and deep enough for the small root ball — these succulents are shallow-rooted and resent sitting in a deep, water-holding pocket.
- Soil Amendments: Mix coarse sand, grit or perlite into the bed to sharpen drainage; aim for a lean, airy soil rather than a rich, moisture-retentive one.
- Planting Depth: Set the crown level with the soil surface so the fleshy stems and leaves rest on top — never bury them, which invites rot.
- Growth Speed & Expectations: Expect slow growth; as a spreading groundcover it knits together steadily into a low mat rather than shooting upward.
Soil, Watering & Drainage Care
- Soil Mix & Drainage Needs: Give it a light, well-aerated mix; in pots use a shallow, wide container of free-draining cactus/succulent soil with ample drainage holes. Waterlogged soil is the single biggest threat, quickly rotting the roots and stems.
- Watering Schedule & Technique:
- Young / Newly Planted: Water lightly after planting and then only once the soil has dried, just enough to help new roots settle — overwatering now is the main cause of failure.
- Established: Water deeply but infrequently, always letting the soil dry out completely first; established plants shrug off real drought.
- Seasonal Adjustments: Cut watering back sharply in winter while the plant rests, and water a little more often only during prolonged summer heat.
Note: Space plants roughly 20-30cm (8-12in) apart.
Climate, Light & Hardiness
Sedum clavatum is a trailing succulent suited to temperate, Mediterranean, desert, and subtropical climates, and it also adapts well to life as a houseplant. It grows in anything from full sun to full shade, but it is frost-tender and best treated as an outdoor perennial only where winters stay mild.
Quick Climate Specifications
| Climate Zones | Temperate, Mediterranean, Desert, Subtropical |
| USDA Hardiness Zones | 9–11 reliably, 12a possible with the right care |
| Optimal Temp Range | Approximately 15–27°C (59–80°F) |
| Cold Damage Begins | Foliage can be marked as temperatures approach freezing (around 0°C / 32°F) |
| Approx. Survival Minimum | In zone-9 areas, established plants may briefly tolerate a light frost, but a hard freeze is likely to cause real damage |
| Frost Tolerance | Low |
| Light Conditions | Full Sun / Half Shade / Full Shade |
Sunlight & Light Exposure
Optimal Light Setup
Full sun to half shade produces the best compact form and blue-green leaf color; it also tolerates full shade, which makes it workable indoors.
Direct Sun Requirement
Direct sun is beneficial but not mandatory - its broad light tolerance suits both sunny outdoor beds and bright indoor rooms.
Shade & Heat Management
Its shade tolerance gives flexibility in hot-summer climates; no extra heat management is generally needed.
Best Exposure/Orientation
A sunny to lightly shaded outdoor spot, or a bright windowsill when grown as a houseplant.
Temperature Extremes & Hardiness
USDA Hardiness & Regional Limits
The site places it in hardiness zone 9–11, extending to 12a with extra care; north of that range it is best grown in containers or indoors.
Cold Damage & Winter Protection
Keep it frost-free where possible; younger, less-established plants are more vulnerable to cold than mature clumps. Indoors, avoid cold windowsills and winter drafts.
Frost Sensitivity
Low frost tolerance - frost damages the fleshy foliage and should be avoided.
Extreme Heat Tolerance
Good - it is a drought-tolerant succulent that copes well with warm-climate summer heat.
Wind, Humidity & Microclimate
Humidity Preferences
Prefers drier air; it does not need, and can struggle in, constantly humid conditions.
Dry-Air Tolerance
High - well suited to arid and semi-arid climates and to typical indoor room humidity.
Wind Tolerance
Moderate; its low, trailing habit copes reasonably well in open, breezy sites.
Rainfall & Seasonal Moisture
Best suited to climates with a dry period; the well-drained, sandy soil the site recommends matters most in wetter climates, where it prevents rot.
Microclimate Recommendations
A sunny, sharply drained outdoor bed suits it in mild climates; elsewhere, container culture lets it be moved to shelter for winter.
Growing in Pots, Balconies & Indoors
Sedum clavatum is a compact succulent that makes an easy, good-looking houseplant or patio-pot plant. It stays small, stores its own water and asks mainly for light and sharp drainage. Indoors it needs your brightest window – in a room’s weaker light it stretches and softens.
Quick Details
- Container Size: From about 5-8 L (bigger is fine); a wide, shallow pot roughly 10-15 cm deep and 70-150% wider than the root ball
- Indoor Suitability: A good little houseplant in a bright spot
- Best Spot: Bright light to full sun
- Soil & Drainage: Free-draining cactus/gritty mix – drainage is everything
- Watering in Pots: Water only when the mix has dried out; pots must never stay soggy
Indoors & On the Windowsill
- As a houseplant: Yes – it grows happily indoors given enough light. A ready-made cactus and succulent soil mix provides that structure without mixing it yourself. Stand it at your brightest window (south or west facing) so growth stays tight and well coloured rather than pale and drawn.
- Windowsill growing: Its compact size suits a sunny sill; turn the pot now and then for even growth, and water only when the mix is dry.
- Overwintering: In cold climates a pot lets you bring it indoors to a bright, cool, frost-free spot over winter.
On a Balcony or Patio
- Light, heat & wind: Give it the brightest spot you have; walls and railings throw back a lot of heat and pots dry fast, so check the mix often in warm weather. Move tender succulents under cover before frost.
- Practicalities: Raise the pot on feet so water drains away freely and does not pool on the balcony floor.
Choosing the Pot, Soil & Long-Term Care
- Pot & drainage: Use a pot with strong drainage holes and skip a standing saucer of water – wet feet are the fastest way to rot a succulent. Terracotta breathes and dries quickly, which suits it well; glazed or plastic holds moisture longer, so water more sparingly.
- Potting mix: A free-draining cactus/succulent mix, or a standard mix opened up with plenty of perlite, pumice or coarse sand; a layer of gravel, lava rock or pebbles in the base helps water clear.
- Feeding: Potted plants use up their soil, so feed lightly once or twice through the growing season with a dilute cactus or balanced feed – far less than a leafy houseplant needs.
- Refreshing the mix: After a couple of years the mix stops draining freely – tip the plant out, trim any tired roots and repot into fresh gritty mix.
Grower’s Container Tip
- Wide, shallow and root-pruned: Choose a container about 70-150% wider than the root ball but only 10-15 cm deep – wide and shallow beats deep. To keep the plant compact, lift it every so often and trim the roots so fresh ones regrow. Drainage matters most: use cactus mix or sandy soil with gravel, lava rock or pebbles, and renew the mix once it stops draining after a few years.
Growing this plant in a greenhouse
A greenhouse can give sedum clavatum frost protection, cold protection, humidity control and extra warmth.
Greenhouse at a glance
| Greenhouse suitability | Good - clearly useful |
|---|---|
| Main benefits | frost protection, cold protection, humidity control, extra warmth |
| Outdoor protection advisable below | about 2°C |
| Maintain greenhouse minimum | around 2°C for active growth |
| Suitable types | unheated greenhouse, polycarbonate greenhouse |
| Heating | Heating is optional - useful mainly for winter growing in cold areas. |
Related greenhouse guides
- Greenhouses: How to Choose the Right Greenhouse
- Polycarbonate Greenhouses: What to Look for Before Buying
- Greenhouse Climate Control: Temperature, Ventilation and Humidity
Fertilizing & Feeding
A light feeder: this trailing, blue-green rosette succulent stays compact and well-colored on lean soil and an occasional light feeding, with none needed once growth slows.
Quick Fertilizing Specs
| Feeding Level | Light feeder |
|---|---|
| Main Nutrient Priority | A dilute, low-nitrogen feed applied sparingly, to keep rosettes tight and blue-green leaf color true |
| Best Feeding Period | During the warm active growing season |
| Organic Options | A little compost worked into a light, sandy, well-ventilated soil |
| Reduce/Stop Feeding | Ease off as growth slows going into cooler weather |
| Micronutrients | Usually met by a complete fertilizer; correct only a diagnosed issue |
| Soil pH | Tolerates a wide range in a light, sandy, well-drained soil |
Feeding by Growth Stage
Warm-season growth for a trailing rosette succulent
Support tight rosette form and blue-green leaf color while the plant spreads or trails during active growth.
| Nutrient direction | A weak, diluted low-nitrogen feed, applied only occasionally, keeps rosettes compact rather than stretched and leggy. |
|---|---|
| Timing | During the warm growing season, avoiding the coldest months. |
| Frequency | Light, infrequent feeding is enough; this slow-growing, trailing succulent does not need regular fertilizing. |
| Fertilizer types | A dilute, low-nitrogen liquid fertilizer, used sparingly, A little compost worked into a light, sandy, well-drained soil |
| Precautions | Feed sparingly; too much nitrogen stretches the rosettes and dulls the blue-green color, and overfeeding in damp soil raises the risk of rot. |
Cooler-season rest
Let this slow-growing succulent rest through the cooler part of the year without pushing tender new growth.
| Nutrient direction | None – withhold fertilizer while growth is slow or stopped. |
|---|---|
| Timing | During the cooler part of the year, when growth naturally slows. |
| Frequency | No feeding at this stage; resume only once active growth returns. |
| Fertilizer types | No feeding at this stage; do not fertilize until active growth resumes. |
| Precautions | Withhold fertilizer now; feeding a resting plant wastes nutrients and adds unnecessary stress heading into cooler weather. |
Nutrient Deficiency Signs & Corrections
Leaf color looks pale or washed out and growth, already slow for this succulent, becomes even slower over a full season.
| Possible causes | low available nitrogen in lean, well-drained soil that has gone unfed for a long time, nutrients leaching through fast-draining, sandy or gritty soil, general root stress from poor drainage or a waterlogged spot |
|---|---|
| Appears first on | older, lower leaves |
| What to check | how long since any feeding or soil amendment, drainage and soil texture around the root zone, overall plant vigor and leaf color |
| Possible correction | Apply a dilute, balanced or low-nitrogen fertilizer during the next active growing period and consider a light organic matter amendment. |
Leaf tips or margins brown and look scorched, especially on a container-grown plant.
| Possible causes | fertilizer salt buildup in a container with limited soil volume, feeding too often or too concentrated for this light-feeding succulent, poor drainage concentrating salts near the roots |
|---|---|
| Appears first on | leaf tips and margins |
| What to check | recent feeding frequency and strength, container or soil drainage and any visible salt crust on the surface, whether the plant is in-ground or containerized |
| Possible correction | Ease off feeding, water thoroughly to move accumulated salts through the drainage, then resume lighter feeding. |
New leaves emerge yellow with the veins staying green, while older leaves keep a normal color.
| Possible causes | iron unavailability in alkaline, compacted, or waterlogged soil, poorly aerated soil restricting root uptake, overwatering or planting too deep, limiting root function |
|---|---|
| Appears first on | newest leaves first |
| What to check | soil drainage and whether water pools around the base, planting depth relative to the root ball, recent watering pattern |
| Possible correction | Improve drainage and aeration first; correct with a chelated iron product per its label only if the pattern persists once drainage is fixed. |
Pruning, Training & Seasonal Maintenance
Sedum clavatum forms low, slow-spreading clumps of chubby blue-green paddle-leaved rosettes only 5–15cm tall, so it tolerates very little pruning and needs none for shape — cuts here are grooming, not structural control. The plant’s own care notes flag winter as the better pruning window (growth is slower and wounds are less likely to sit in humid, active-growth conditions), though light grooming of spent blooms or damaged leaves is fine any time of year. Pruning has no effect on flowering size or vigor; it is purely cosmetic upkeep.
Quick Pruning & Maintenance Specs
| Pruning Tolerance | Low |
| Primary Pruning Window | Winter |
| Secondary Maintenance Window | Any time, for spent blooms or damaged leaves |
| Typical Frequency | One grooming pass a year, plus occasional spot-checks |
| Main Objective | Tidy appearance; remove spent bloom stems and shriveled lower leaves |
| Young Plant Priority | Leave undisturbed while the rosette establishes |
| Mature Plant Priority | Remove old bloom stalks and dried lower leaves; renew a leggy or bare clump by rooting fresh cuttings rather than hard-pruning it |
| Best Tool Type | Small precision snips |
| Avoid Heavy Pruning During | Active summer heat/drought stress; immediately after transplanting |
Pruning by Plant Age & Size
Newly Established
No pruning. Remove only visibly damaged or crushed leaves from transplant handling; let the rosette root in undisturbed.
Young / Formative
No structural training — the plant naturally forms a clumping mat. An occasional pinch of a stretched stem tip encourages a fuller, denser rosette rather than one long reaching stem.
Mature / Established
Annual tidy of spent flower stalks and shriveled lower leaves. Because growth is slow and the clump stays small, the practical way to renew an old, bare, or leggy patch is to root fresh stem or leaf cuttings and let them replace it, not to cut back the existing growth hard.
Structural Pruning & Training
Not really applicable at this scale; the only relevant control is an occasional pinch of an over-extended stem to keep the rosette cluster compact rather than sprawling.
Special Growth to Remove
- Spent flower stems, once the white crown-shaped blooms fade — cut at the base of the stalk.
- Shriveled, dried lower leaves that naturally senesce as the stem lengthens — remove for appearance and airflow; leave firm, healthy leaves attached.
Container & Small-Space Pruning
This species is grown almost exclusively in pots or rock gardens. Top growth still needs only light grooming; the plant’s own container guidance points to root trimming at repotting time as the actual tool for controlling overall size, not top pruning.
Tools
Precision snips only — every cut here is on a thin flower stalk or a fleshy leaf base; nothing on this plant calls for loppers or a saw.
Tool Hygiene & Disease Risk
Routine. The main pest pressure is slugs and snails, not transmissible pathogens, so clean, sharp blades that avoid crushing the fleshy tissue are enough.
Cut Placement & Technique
Cut at the base of the leaf or stem being removed, not through the middle of a leaf — the plant’s own propagation notes describe cutting at the leaf base for the cleanest heal, and a mid-leaf cut on this fleshy tissue heals poorly and invites rot. The same clean base-cuts double as ready propagation material.
Heavy Pruning & Rejuvenation
Not tolerated and not needed — this is a small, slow-growing mat-former. A bare or leggy clump is better replaced with freshly rooted cuttings than cut back hard.
Post-Pruning Care
Let any cut surface air-dry and callus for a day or two before it contacts damp soil, as the plant’s own propagation guidance describes, to prevent rot; hold off watering immediately after a grooming cut.
Common Pruning Mistakes
- Cutting through the middle of a leaf instead of at its base.
- Watering heavily right after a cut, before it has calloused.
- Trying to rejuvenate an old, bare clump with hard pruning instead of propagating fresh rosettes from cuttings.
When Not to Prune
Avoid pruning during active summer heat or drought stress, and right after transplanting — let the plant settle in first.
Recommended Tools (by task)
| Task | Tool Category | Why |
| Removing spent bloom stalks or shriveled leaves on any age plant | precision_snips | All cuts are on thin flower stems or fleshy leaf bases — a small, sharp blade gives a clean cut without crushing the tissue |
Propagation Guide
Sedum clavatum is propagated most practically from healthy vegetative cuttings. Stem cuttings are reliable; leaf cuttings may also be used where intact leaves can be removed without damage. Let cuttings dry in a shaded spot for a few days before planting. This species can also be propagated by layering – bending a stem down and covering the contacted section with soil.
Quick Propagation Specs
| Preferred Method | Stem cuttings; leaf cuttings where healthy leaves detach cleanly |
| Seed | Possible, but slower than vegetative propagation |
Stem Cuttings
Take a healthy stem section with viable nodes, allow the cut surface to dry briefly if needed, and place it in a clean, very well-drained succulent medium.
Leaf Cuttings
Use leaf cuttings only when a healthy intact leaf can be removed cleanly and the plant is suitable for this method. Let damaged tissue dry briefly before placing it on or into a well-drained medium.
Aftercare
Keep the medium only lightly moist and avoid prolonged wet conditions while roots and new growth form.
Note: Seeds typically germinate in 2-4 weeks and need light to sprout, so do not bury them.
Bloom & Flower Guide
Quick Details
- Bloom Season: Spring
- Flower Appearance: Small, white, star-shaped flowers in clusters at the ends of the stems
- Edibility: Ornamental – grown for its blue-green foliage and flowers, not eaten
Detailed Blooming Overview
Sedum clavatum is prized for its chubby, blue-green rosettes, and in spring a mature, well-lit plant tops its stems with small white flowers. Each is a neat little star, and together they form loose clusters that draw bees and hoverflies for their nectar.
Flower Characteristics
- Small, white, star-shaped flowers
- Held in loose clusters at the tips of the stems
- Nectar-rich and attractive to bees and hoverflies
Bloom Care & Thinning
- Encouraging bloom: Bright light and a cool, dry winter rest encourage flowering; too little light usually means few blooms.
- Aftercare: Trim the spent flower stems once they fade to keep the rosettes tidy.
- Pollination: Insect-pollinated – mainly bees and hoverflies.
Pests, Diseases & Troubleshooting
Overview: Sedum clavatum forms tidy blue-green rosettes with a soft powdery bloom, a tender Mexican species prized for its neat symmetry. Like all stonecrops, Sedum clavatum is far more often harmed by cultivation mistakes-above all overwatering-than by any pest. The insects it does attract (mealybugs and aphids under cover, the occasional slug) are few and easily managed by hand or with gentle organic sprays. Grow it hard in sharply drained gritty soil with strong light, water only when the soil is dry, and most problems never begin.
Quick Troubleshooting Overview
| Issue / Pest | Main Symptom | Primary Solution |
|---|---|---|
| Mealybugs | White cottony tufts tucked into leaf axils and rosette centres, sticky honeydew and sooty mould | Dab with alcohol, rinse, then insecticidal soap or neem |
| Aphids | Clusters of soft green/black insects on new growth and flower stems, distortion and sticky sap | Blast with water, insecticidal soap, encourage ladybirds |
| Root & stem rot | Blackened, mushy, translucent stems that collapse at the base | Withhold water, improve drainage, cut back to firm tissue and re-root |
| Etiolation | Stems stretch pale and floppy with wide gaps between leaves | Move to much brighter light; behead and re-root compact tips |
| Sunburn / scorch | Bleached white or brown scabby patches after a sudden move into full sun | Acclimatise gradually; shade during the fiercest midday sun |
Common Pests & Management
- Mealybugs (Planococcus citri / Pseudococcus spp.):
- Symptoms: Slow-moving, soft insects coated in white waxy fluff, hiding deep in leaf axils, rosette centres and among trailing stems. They excrete sticky honeydew that turns black with sooty mould; heavy infestations stunt and yellow the plant. Do not mistake the cottony masses for the natural waxy bloom on the leaves.
- Prevention & Control: Inspect new plants before introducing them and isolate any that are infested. Touch each colony with a cotton bud dipped in isopropyl alcohol, then rinse. For wider outbreaks spray insecticidal soap or neem oil, wetting the hidden crevices, and repeat weekly until clear. A bad potted infestation is best cured by unpotting, washing the roots (root mealybugs hide there too) and repotting into fresh gritty mix.
- Aphids (Aphis sedi and other Aphis spp.):
- Symptoms: Dense clusters of soft green, grey or black insects on tender new shoots and especially on the flower stalks, causing curling and sticky honeydew. Aphis sedi is the stonecrop specialist and swarms flowering heads.
- Prevention & Control: Knock them off with a firm jet of water, repeated every few days. Encourage ladybirds, lacewings and hoverflies, which clear light infestations on their own. If they persist, an insecticidal soap or a light neem spray in the cool of evening works well; avoid spraying open flowers to protect pollinators.
- Scale insects (Coccus / Saissetia spp.):
- Symptoms: Small, immobile brown or tan bumps stuck along stems and leaf undersides, often overlooked until honeydew and sooty mould appear and growth weakens.
- Prevention & Control: Scrape off light infestations with a fingernail or an alcohol-dipped bud. Smother the rest with horticultural oil or neem, coating the stems thoroughly, and repeat to catch newly hatched crawlers.
- Two-spotted spider mite (Tetranychus urticae):
- Symptoms: A problem of hot, dry, still indoor air: fine pale stippling on the leaves, a dulled bronzed look and, when severe, gossamer webbing spun over the growing tips.
- Prevention & Control: Raise humidity and airflow. Rinse the plant, then spray insecticidal soap or neem to the leaf undersides, repeating every 5–7 days to break the fast breeding cycle. Predatory mites give good control in a greenhouse.
Diseases & Fungal Issues
- Crown, stem & root rot (Pythium, Phytophthora, Fusarium, Rhizoctonia):
- Symptoms: By far the commonest killer of stonecrops. Stems and the base of the plant turn black, soft, translucent and foul-smelling, then collapse; roots are brown and mushy. It follows soggy soil, buried crowns or cold wet conditions.
- Treatment & Management: Prevention is everything-use a fast-draining gritty mix, pots with drainage holes, and water only when dry, never letting the plant sit wet. If rot appears, cut cleanly back into firm green tissue, let the cutting callus, and re-root it; discard badly rotted plants and the contaminated soil.
- Botrytis / grey mould (Botrytis cinerea):
- Symptoms: Fuzzy grey-brown mould on leaves, stems and faded flowers in cool, damp, crowded conditions; affected tissue rots and drops.
- Treatment & Management: Improve air movement, avoid overhead watering, and remove dead leaves and spent flower heads promptly. Thin congested growth; a copper or biological fungicide helps only if the underlying damp is corrected.
- Powdery mildew (Erysiphe/Golovinomyces spp.):
- Symptoms: A less frequent, white powdery film on leaves and stems in warm, humid, still air, sometimes distorting new growth.
- Treatment & Management: Increase spacing and airflow, remove affected parts, and treat if needed with a potassium-bicarbonate or sulphur spray.
Growing Difficulties & Abiotic Problems
- Overwatering & waterlogging:
- Cause & Symptoms: The single most common problem-leaves and stems turn yellow, translucent, soft and mushy, and the plant rots from the base. Caused by too-frequent watering, water-retentive soil or pots without drainage.
- Correction Strategy: Let the soil dry fully between waterings, switch to a gritty free-draining mix, and always use a pot that drains. When in doubt, water less-a stonecrop recovers from drought far more readily than from rot.
- Etiolation (stretching for light):
- Cause & Symptoms: In too little light the stems elongate, grow pale, and the leaves space out and point down, losing the tight compact form and any bright colour.
- Correction Strategy: Move to the brightest position available or add a grow light. Stretched growth will not re-compact, so behead the plant and re-root the tidy tips for a fresh, dense start.
- Loss of the powdery bloom (farina):
- Cause & Symptoms: The chalky protective wax on the leaves rubs off permanently at a touch, leaving shiny fingermarks and reducing the plant’s sun protection.
- Correction Strategy: Handle the rosettes by the stem, not the leaves, and avoid overhead watering that washes the bloom away; new leaves will emerge fully coated.
- Cold & frost damage:
- Cause & Symptoms: This is a tender stonecrop; frost turns the leaves glassy, then brown and mushy, and hard freezes kill it outright.
- Correction Strategy: Grow it in a container that can be moved under cover before frost, keep it dry and cool but frost-free over winter, and give it bright light indoors.
What Helps – Products & Tools
For this stonecrop keep the toolkit simple and gentle: isopropyl alcohol on a cotton bud for spot-treating mealybugs, insecticidal soap and neem oil for aphids, scale and mites, and-outdoors-iron-phosphate slug pellets, copper barrier tape or sharp grit against slugs and snails. Beneficial nematodes deal with vine weevil grubs in pots, sulphur or potassium-bicarbonate spray checks rust and mildew, and a bag of horticultural grit or pumice is the best long-term insurance against the rot that causes most losses.