
Plant Profile & Key Characteristics
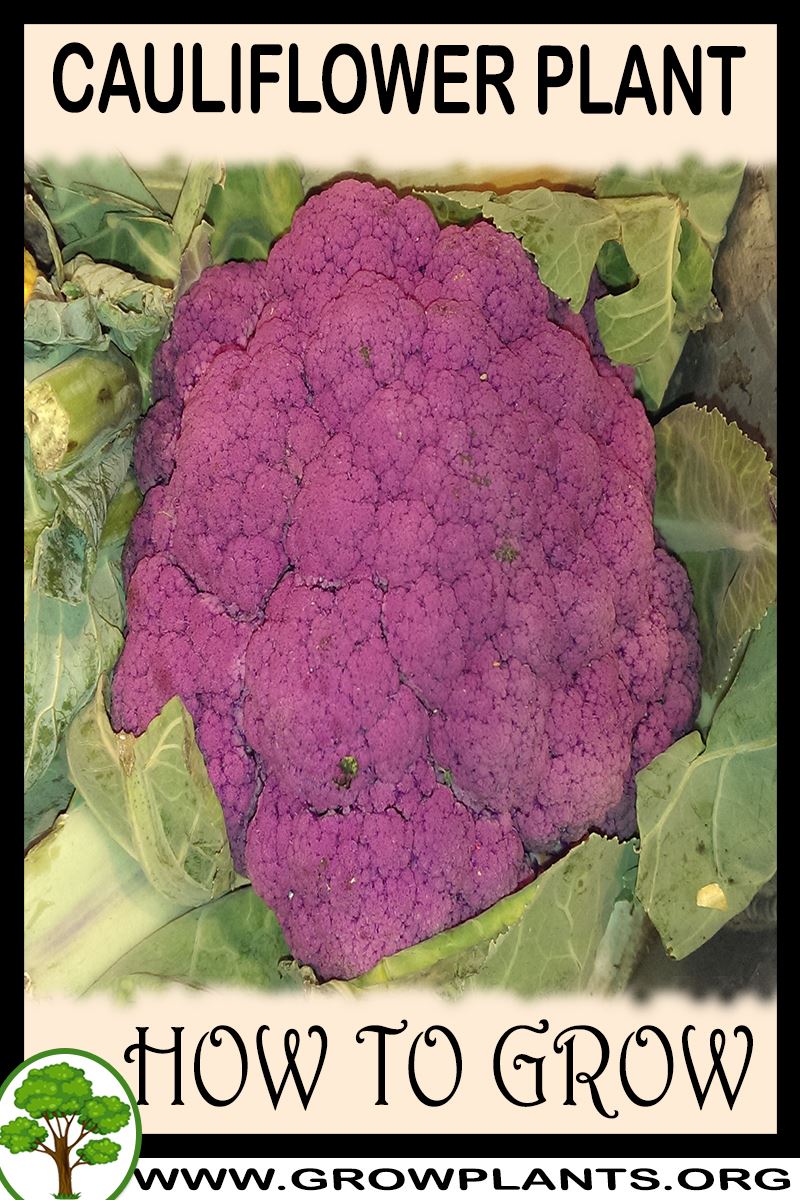
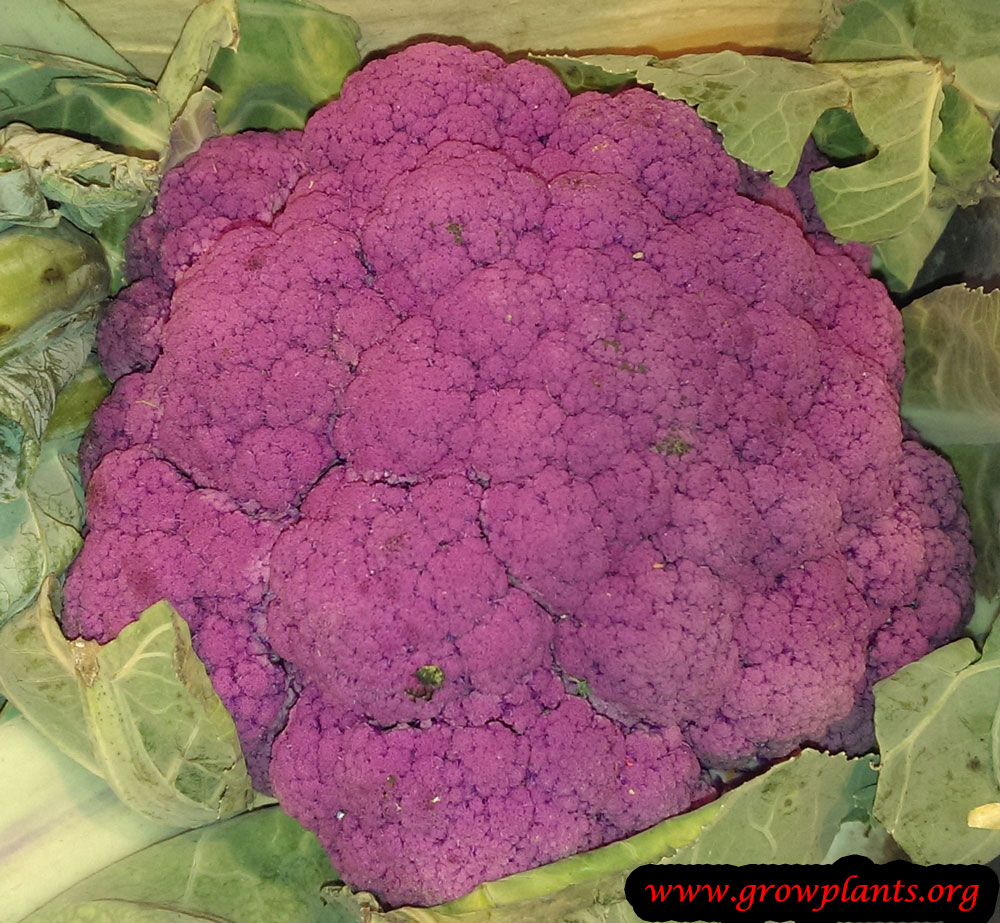
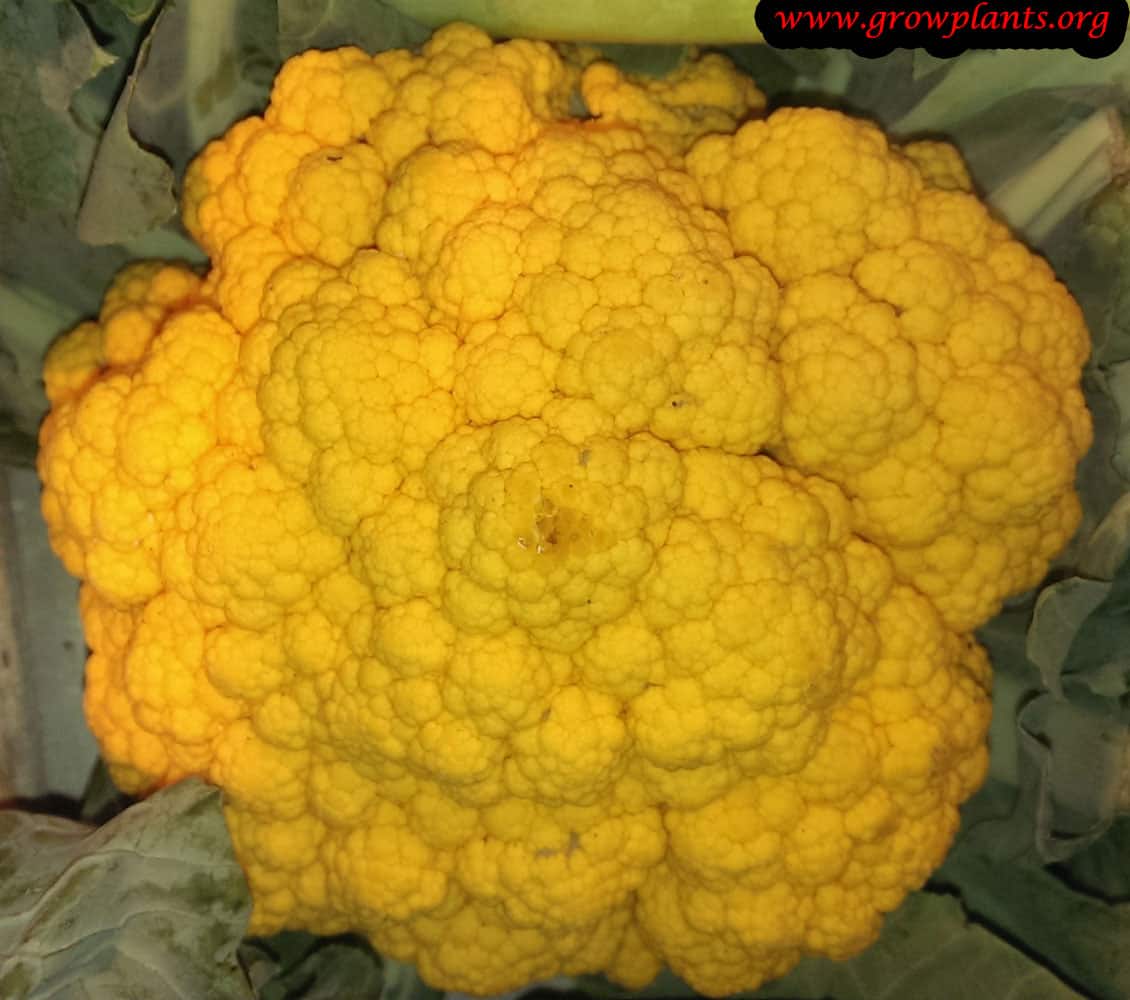
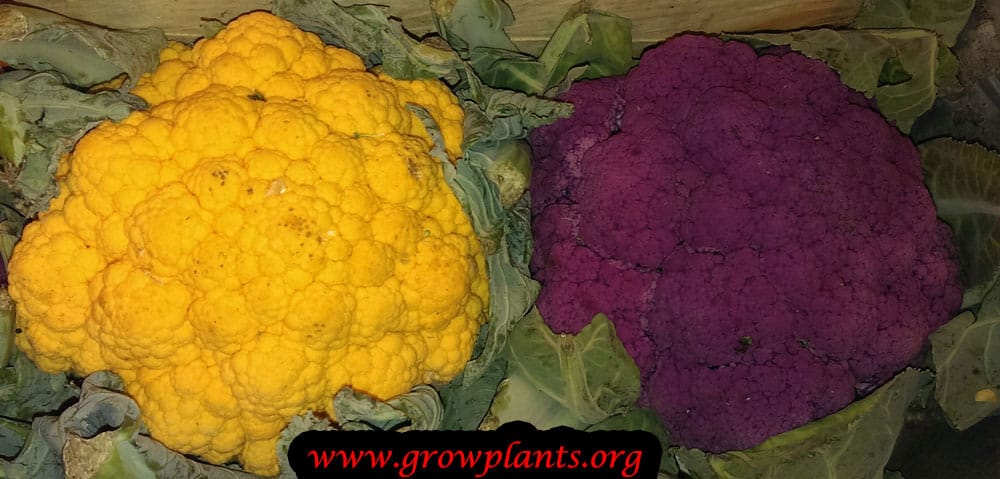
Overview: Cauliflower (Brassica oleracea) is a fast-growing, cool-season annual (sometimes biennial) vegetable about 20-60 cm tall, grown for its dense edible head. The head can be white, yellow, orange or purple, and the leaves are also edible.
Quick Specifications
| Specification | Attribute |
|---|---|
| Plant Type / Life Cycle | Annual (sometimes biennial) |
| Mature Size | 20-60 cm tall (8-24 in) |
| Growth Rate | Fast |
| Root System | Shallow taproot with fibrous laterals |
| Toxicity | Non-toxic / edible (culinary vegetable) |
| Hardiness | USDA zones 2-10a (spring planting); 10a-11 (autumn planting) |
Growth Form & Structure
- Height & Spread: 20-60 cm (8-24 in); grows well in containers as well as the open ground.
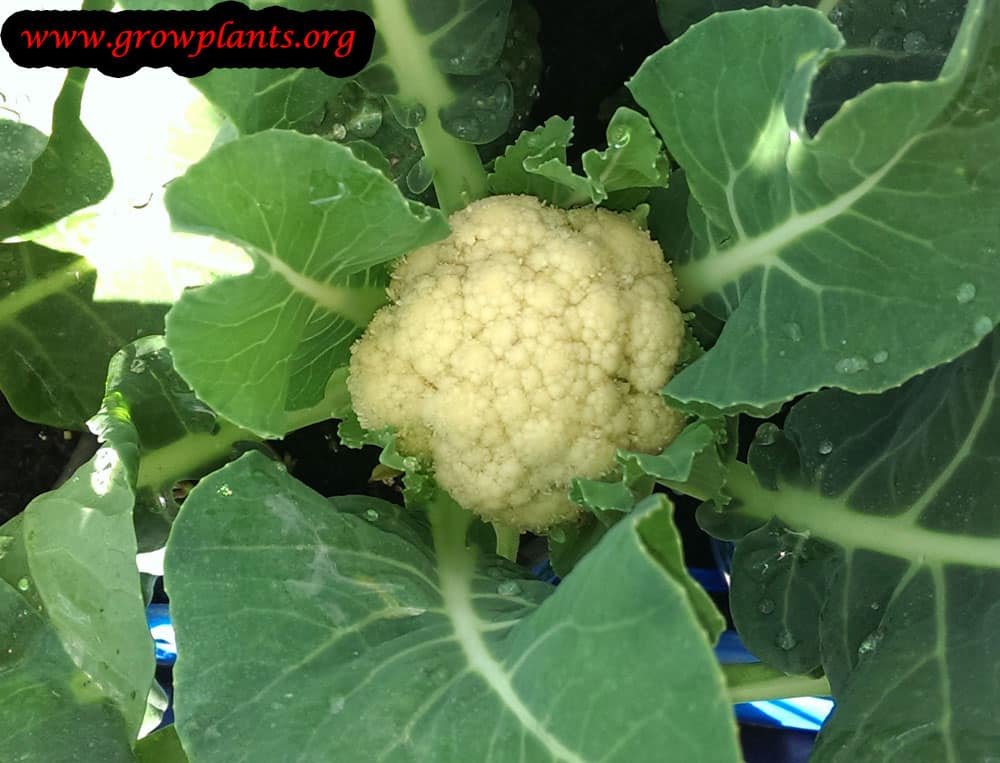
- Growth Habit & Form: Upright vegetable with a central stem enclosing a dense head (curd) surrounded by leaves.
- Lifespan & Maturity: Fast to reach harvest; the head is cut in the cool season before it loosens and flowers.
Anatomy & Physical Features
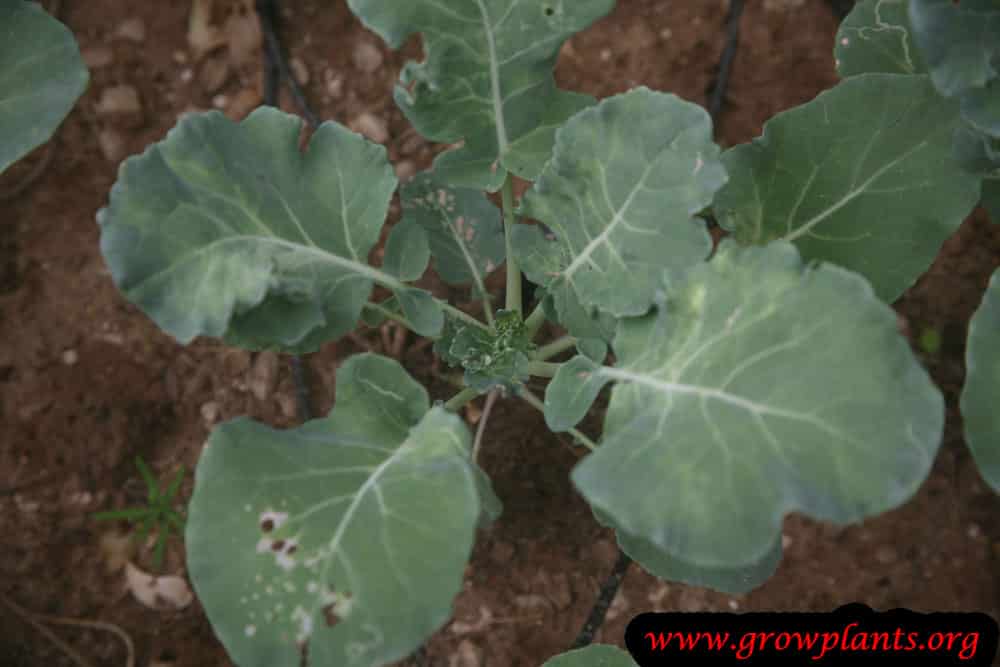
- Leaves & Foliage: Green, oval to shapeless edible leaves (about 10-30 cm).
- Flower Characteristics: Small yellow flowers on the inflorescence; the dense immature head (white, yellow, orange or purple) is the edible part (summary only – see the Bloom guide).
Primary Uses & Landscape Value
- Edible Uses: Head eaten cooked, raw or in salads; leaves also cooked, in casseroles, stir-fries and salads.
- Functional & Ornamental Roles: Grown primarily as a vegetable crop.
Care Guide: Planting, Soil & Watering
Overview: Cauliflower is a fast-growing, cool-season crop that curds up best in mild, cool conditions and full sun to light shade. It wants rich, fertile soil kept evenly moist – steady growth is the key to a firm, well-formed head.
Quick Care Requirements
| Requirement | Ideal Condition |
|---|---|
| Planting Season | Cool season – autumn in frost-free areas, spring in temperate climates |
| Growth Rate | Fast |
| Soil Type | Rich, fertile soil |
| Soil pH | Neutral, around 6.0-7.0 |
| Water Need | Moderate – keep the soil evenly moist |
Planting & Establishment
- Best Planting Season: Plant in the cool parts of the year – autumn in frost-free areas and spring in temperate climates – so the curd forms in cool weather.
- How to Plant:
- Hole Preparation: For transplants, dig a hole a little larger than the rootball into loosened, fertile ground, giving each plant room to form its head.
- Soil Amendments: Dig in plenty of compost and a balanced feed before planting – these are hungry, fast crops.
- Planting Depth: Set seedlings slightly deep, up to the first set of leaves, to anchor them firmly.
- Growth Speed & Expectations: Fast, reaching 20-60 cm and forming a single central head (curd).
Soil, Watering & Drainage Care
- Soil Mix & Drainage Needs: Rich, fertile, moisture-retentive but well-drained soil is ideal; in containers use a rich potting mix and keep it evenly moist.
- Watering Schedule & Technique:
- Young / Newly Planted: Water regularly to keep seedlings growing steadily – any check can spoil the curd.
- Established: Water deeply and consistently; cauliflower resents any interruption to steady, even moisture.
- Seasonal Adjustments: More in warm, dry weather and less in cool, wet spells, but never let it dry out.
Climate, Light & Hardiness
Cauliflower is a cool-season heading brassica for mediterranean, subtropical and temperate gardens in full sun to partial shade. It is the fussiest of the group about temperature: its curd is damaged by both hard frost and heat, so it needs a steady cool spell to head well.
Quick Climate Specifications
| Climate Zones | Mediterranean, subtropical and temperate |
| USDA Hardiness Zones | USDA 2–10a (spring planting); 10a–11 (autumn planting) |
| Optimal Temp Range | approximately 15–20 °C (59–68 °F) |
| Cold Damage Begins | curd from roughly −2 to −3 °C (28 to 27 °F) |
| Approx. Survival Minimum | hardened plants briefly to about −4 to −5 °C (25 to 23 °F) |
| Frost Tolerance | Low to Moderate |
| Light Conditions | Full Sun / Half Shade |
| Wind Tolerance | Moderate |
Sunlight & Light Exposure
Optimal Light Setup
Full sun grows strong plants and dense curds; several hours of direct light are ideal, with partial shade tolerated where summers are warm.
Direct Sun Requirement
Give it a good half-day or more of direct sun for firm, full curds, but note the curd itself is often shaded by tying leaves over it to keep white types blanched and protected.
Shade & Heat Management
Heat causes loose, ricey or discoloured curds and premature bolting, so light afternoon shade in warm regions and cool-season timing are important; the curd is also protected from sun scorch by folding leaves over it.
Best Exposure & Orientation
An open sunny aspect suits cool climates; in warm regions an east-facing bed with afternoon shade helps the curd form cleanly.
Temperature Extremes & Hardiness
USDA Hardiness & Regional Limits
The site records a broad seasonal cultivation range of about USDA 2–10a for spring plantings, extending to 10a–11 for autumn plantings. This describes where cauliflower can be grown as a cool-season crop rather than a winter-persistent perennial: in cold-winter zones it is planted for the frost-free part of the year (spring, or late summer for an autumn crop), while in mild and frost-free zones it is grown right through the cool season, planted in autumn for an autumn-to-winter harvest. Cold limits outdoor cultivation at one end and summer heat at the other, so matching the crop to a cool spell matters more than any single winter-hardiness figure.
Cold Damage & Winter Protection
Cauliflower is only half-hardy and its curd is the weak point: exposed curd can be discoloured or damaged by frost from around −2 to −3 °C (28 to 27 °F), while leafy plants take a little more; hardened plants briefly survive near −4 to −5 °C (25 to 23 °F). Curd damage also shows as browning after even light freezes. Cold tolerance varies by cultivar, age, hardening, and duration.
Frost Sensitivity
Frost tolerance is low to moderate: leafy growth takes light frost, but the developing curd is readily spoiled by frost, which is why the wrapping leaves are folded over it in cold spells.
Extreme Heat Tolerance
Heat is equally limiting - warm weather causes loose, ricey curds, off-colour and bolting - so cauliflower demands a steady cool period and is grown in cool spring or, where winters are mild, autumn to winter.
Wind, Humidity & Microclimate
Wind Tolerance
At 20–60 cm (8–24 in) it is moderately wind-tolerant; strong wind can whip the large leaves and expose the curd, so a little shelter helps in exposed gardens.
Rainfall & Seasonal Moisture
Adapted to a cool, moist season, cauliflower needs an uninterrupted cool spell to curd well; hot dry checks in growth cause buttoning and poor heads. This is a climate note, not an irrigation schedule.
Microclimate Recommendations
A cool, even, sheltered microclimate is essential - steady cool temperatures with light afternoon shade in warm regions give the best chance of clean, firm curds.
Growing in Pots, Balconies & Indoors
Cauliflower can be grown in a large pot on a sunny balcony or patio, though it needs rich, steadily moist conditions to form a good head. It is not a houseplant.
Quick Details
- Container Size: Large – about 15-25 L (4-6 gal), one plant per pot
- Indoor Suitability: Not a houseplant – needs full sun and open air, and steady moisture
- Best Spot: Full sun to light shade
- Soil & Drainage: Rich, moisture-retentive but free-draining mix
- Watering in Pots: Keep steadily moist – brassicas are thirsty and pots dry fast; do not let them dry out
Indoors & On the Windowsill
- Not a houseplant: The grower marks it ‘no’ – it needs full sun and open air to form good heads, and indoors it grows leggy and will not head up.
- Grow it outside: A bright, sunny sill can raise young seedlings, but move them to a big, sunny outdoor pot to crop.
On a Balcony or Patio
- Light & wind: Give them full sun and cool, fresh air; tall types catch the wind and rock, so stake them and use a large, heavy pot. Pots dry fast in sun and wind, so water often.
- Practicalities: A balcony makes it easy to net plants against cabbage caterpillars and pigeons; large tubs are heavy when wet and drain freely, so protect the floor from runoff.
Choosing the Pot, Soil & Long-Term Care
- Pot & drainage: A 15-25 L pot with strong drainage holes; skip a standing-water saucer to avoid root rot, but keep the mix consistently moist. A large, heavy tub also stays put under tall, top-heavy plants.
- Potting mix: A rich, moisture-retentive but free-draining mix – a quality potting mix with plenty of added organic matter such as compost or well-rotted manure.
- Feeding: Brassicas are hungry plants and pots leach quickly – feed regularly through the season with a balanced or nitrogen-rich liquid feed to keep leaves growing strongly.
- Longevity: Most are grown for a single crop – refresh the mix and replant for the next sowing; if you hold a plant longer, pot it on so the hungry, thirsty roots have room.
Growing this plant in a greenhouse
A greenhouse can give cauliflower plant frost protection, cold protection, a longer growing season and winter growing.
Greenhouse at a glance
| Greenhouse suitability | Good - clearly useful |
|---|---|
| Main benefits | frost protection, cold protection, a longer growing season, winter growing |
| Season extension | can grow through winter |
| Outdoor protection advisable below | about -3°C |
| Suitable types | unheated greenhouse, polycarbonate greenhouse |
| Heating | No added heat is normally needed. |
Related greenhouse guides
- Greenhouses: How to Choose the Right Greenhouse
- Polycarbonate Greenhouses: What to Look for Before Buying
- Greenhouse Propagation Equipment
Fertilizing & Feeding
A hungry cool-season crop: feed nitrogen-forward to build a strong leafy frame, then shift to balanced feeding with potassium as heads and buds form.
Quick Fertilizing Specs
| Feeding Level | Hungry cool-season feeder |
|---|---|
| Main Nutrient Priority | Nitrogen early, then balanced feeding with potassium as heads form |
| Best Feeding Period | Through leafy growth and head development in the cool season |
| Organic Options | Compost or aged manure worked into rich soil |
| Micronutrients | Boron matters for head and stem quality – correct only if a soil test shows a shortfall |
| Soil pH | Slightly acidic to near neutral |
| Reduce/Stop Feeding | Ease feeding once heads are maturing |
Feeding by Growth Stage
Establishment after transplanting
Help transplants settle in and build roots for a strong, hungry crop
| Nutrient direction | A balanced complete feed worked into rich soil as growth begins |
|---|---|
| Timing | At transplanting and as new growth starts in the cool season |
| Frequency | A light feeding as plants settle in |
| Fertilizer types | Balanced complete garden fertilizer, Compost or aged manure worked into rich soil |
| Precautions | Go easy on tender new roots and keep the soil evenly moist |
Building the leafy frame
Grow a large, healthy leaf frame to power head and bud formation
| Nutrient direction | Lean nitrogen-forward to build vigorous leafy growth |
|---|---|
| Timing | Through active leafy growth before heads or buds form |
| Frequency | Several light feedings across the growing season |
| Fertilizer types | Nitrogen-forward complete fertilizer, Compost or aged manure as an organic option |
| Precautions | Keep feeding steady; this is a hungry crop, but overly soft growth invites cabbage-family pests |
Head and bud formation
Support firm, well-formed heads, curds, or buds
| Nutrient direction | Shift to balanced feeding with good potassium as heads and buds form |
|---|---|
| Timing | As flower buds, heads, or curds begin to develop |
| Frequency | Light, regular feedings through head development |
| Fertilizer types | Balanced complete fertilizer with adequate potassium, Compost top-dressing |
| Precautions | Keep soil evenly moist during head formation; uneven moisture and boron shortfalls cause hollow stems and browning |
Nutrient Deficiency Signs & Corrections
Overall pale, light-green to yellow foliage with slow, stunted growth
| Possible causes | Low available nitrogen in the soil, Cold or waterlogged soil limiting root uptake, Nitrogen leached away after heavy rain or over-watering |
|---|---|
| Appears first on | Older, lower leaves |
| What to check | Soil fertility and recent feeding history, Drainage and how wet the root zone stays, Whether heavy rain may have leached nutrients |
| Possible correction | Side-dress with a nitrogen-forward complete fertilizer and make sure the soil drains well so roots can take it up. |
Yellowing between the veins while the veins stay green (interveinal chlorosis)
| Possible causes | Low available magnesium, High potassium in the soil competing with magnesium uptake, Acidic, leached soil short on magnesium |
|---|---|
| Appears first on | Older, lower leaves |
| What to check | Soil pH, Recent heavy potassium feeding, Leaching history of the bed |
| Possible correction | Correct soil pH if needed and apply a magnesium source per its label. |
Hollow or browning stems and heads, distorted growing points, and poor head or bud quality
| Possible causes | Low available boron, High soil pH reducing boron availability, Dry soil limiting boron movement to the roots |
|---|---|
| Appears first on | Growing points, heads, and curds |
| What to check | Soil pH, Even soil moisture during head formation, A soil test for boron before adding any |
| Possible correction | Keep soil evenly moist and correct pH; apply a boron product only if a soil test confirms a shortfall, because boron has a narrow safety margin. |
Pruning, Training & Seasonal Maintenance
Cauliflower plant forms a single terminal curd and, unlike broccoli, does not reliably produce useful side shoots, so it is essentially a one-cut crop — the ‘pruning’ that matters is harvesting the whole head at the right moment and managing the wrapper leaves around it. The classic technique is blanching: on white types the large outer leaves are bent or tied over the curd to shade it, keeping it white and tender. There is no structural or renewal pruning; you protect the developing curd and remove only damaged leaves until harvest.
Quick Pruning & Maintenance Specs
| Pruning Tolerance | Low — one harvest cut; protect the curd |
| Primary Pruning Window | At harvest, when the curd is full but still tight |
| Secondary Maintenance Window | During heading — wrapper-leaf management |
| Typical Frequency | Essentially a single cut |
| Main Objective | A firm, well-coloured curd cut at peak |
| Young Plant Priority | Grow on without stress; remove only damaged leaves |
| Mature Plant Priority | Blanch (tie leaves over curd); harvest before it loosens |
| Best Tool Type | A clean sharp knife |
| Avoid Heavy Pruning During | Heading — never strip the wrapper leaves |
Pruning by Plant Age & Size
Newly Established
Remove only dead or infected leaves. Any check to a young plant (cold, drought, nutrient shortage) can cause premature ‘buttoning’, so the aim is steady, unstressed growth rather than cutting.
Young / Formative
No training. Keep the full canopy of leaves — they build the plant that will feed the single curd.
Mature / Established
As the curd develops, keep the wrapper leaves around it. On white cauliflower, bend or loosely tie the large outer leaves over the curd to blanch it. Harvest the whole head with a collar of leaves while the curd is firm and the segments are still tight, before it ‘rices’ and separates.
Seasonal Pruning Schedule
Curd Protection & Harvest
Objective — a tight, well-coloured head. Remove — nothing from the curd until harvest; then cut the whole head. Do NOT remove — the wrapper leaves that shade and protect the curd. Flowering impact — the curd is an immature flower head, so harvest before it loosens and starts to bloom.
Ongoing Sanitary
Take out dead and infected lower leaves and remove Pieris / Spodoptera caterpillars, slugs and aphids that hide in the head.
Special Growth to Remove
Only damaged or diseased leaves are removed before harvest; the whole curd is then cut as the crop. Do NOT strip healthy wrapper leaves — they protect the curd. No suckers or runners occur.
Container & Small-Space Pruning
In containers the priority is avoiding stress that causes buttoning — steady water and feeding matter more than any cutting. Keep all healthy leaves and blanch the curd once it starts to form.
Tools
A single clean, sharp knife does everything — cutting the head through the stem below the curd with a few wrapper leaves attached. No selective pruning tools are needed.
Tool Hygiene & Disease Risk
Increased risk — the cut stem is an open wound and brassicas carry black rot and soft rots. Use a clean, sharp knife and disinfect it if you have cut diseased material or are moving between plants during disease.
Cut Placement & Technique
Cut straight through the main stem below the curd, leaving a collar of wrapper leaves to protect the head in storage. There is no bud-direction or thinning technique here — it is one clean harvest cut.
Heavy Pruning & Rejuvenation
Not applicable — once the single curd is cut the plant’s job is done; there is no rejuvenation and the plant is removed and resown.
Post-Pruning Care
After harvest simply clear the spent plant. There is no regrowth to feed, so no post-cut feeding is needed; compost healthy debris and remove any diseased material from the bed.
Common Pruning Mistakes
- Stripping the wrapper leaves and exposing the curd to sun (yellowing/browning).
- Harvesting late, so the curd ‘rices’ and separates into flower buds.
- Letting young plants be stressed, causing premature buttoning.
When NOT to Prune
Never remove leaves during heading — the plant needs its full canopy and the curd needs its wrappers — and avoid disturbing a heat-stressed plant, which is already at risk of a loose, ricey curd.
Recommended Tools (by task)
- precision_snips — removing the occasional damaged or diseased leaf before harvest.
- soft_ties_stakes — soft ties to fold the outer leaves over the curd for blanching.
- blade_disinfectant — cleaning the knife between plants when brassica disease is present.
Pruning Troubleshooting
| Problem | Possible Cause | What to Check | Corrective Action |
| Curd loosens / ‘rices’ into buds | Harvested too late or grown in heat | Curd tightness as it matures; temperature | Cut while segments are still tight; grow in the cool season |
| Small premature head (buttoning) | Young plant stressed or checked | History of cold, drought or nutrient shortage | Prevent by steady, unstressed growth; a buttoned plant rarely recovers |
| Curd yellow or discoloured | Sun reached the curd (not blanched) | Whether wrapper leaves cover the curd | Bend or tie outer leaves over the curd early in heading |
Propagation Guide
Cauliflower is grown only from seed, and because most varieties are F1 hybrids you should sow fresh seed rather than saving your own. The seed germinates quickly, but seedlings resent any check, which can trigger premature “buttoning”, so raise them in modules and transplant with minimal root disturbance.
Quick Propagation Specs
| Best Propagation Method | Seed |
| Alternative Methods | Transplanting module-raised seedlings |
| Propagation Difficulty | Moderate (sensitive to transplant and temperature stress) |
| Seed True-to-Type | Hybrid offspring vary – most are F1 |
| Best Propagation Season | Sow autumn in frost-free areas, spring in temperate climates |
| Seed Germination Time | 5–10 days |
| Germination Temperature | 15–25°C (59–77°F) |
| Seed Sowing Depth | About 1.5 cm (0.6 in) |
Growing from Seed
Seed Handling & Viability
The seed is small and black; store it in a dry, dark place.
Sowing Season
Sow in autumn in frost-free areas and in spring in temperate climates, keeping plants growing steadily through cool weather.
Sowing Depth & Spacing
Sow about 1.5 cm deep; space or thin seedlings to roughly 10–20 cm.
Germination Conditions & Time
Keep the soil moist and airy; germination takes about 5–10 days.
Seedling Care
Raise in modules to avoid root disturbance, keep evenly moist and cool, and transplant without letting the young plants check, which helps prevent premature buttoning.
Bloom & Edible Flower Guide
Quick Details
- Bloom Season: Spring to summer (the head forms first; if left, it opens into yellow flowers)
- Time to First Bloom: In its first season – the curd is harvested before flowering
- Flower Appearance: Small yellow, four-petalled flowers on the inflorescence (once the head bolts)
- Edibility: The edible head (curd) is the immature inflorescence – white, yellow, orange or purple – and the later flowers are edible too
Detailed Blooming Overview
Cauliflower (Brassica oleracea) is grown for its “curd” – a dense, pre-flower head. It is harvested before it “rices” and bolts into loose yellow flowers; heat or stress pushes it to flower early.
Flower Characteristics
- Small yellow, four-petalled flowers on a branched inflorescence once the curd bolts.
- The curd itself (white, yellow, orange or purple) is the prized edible stage.
Bloom Care & Thinning
- Managing the bloom: Harvest while the curd is tight; heat, stress or short watering can trigger premature flowering, so keep it cool and evenly watered. Blanch white types by tying the leaves over the curd.
- Pollination: If left to flower, bees are the main pollinators.
Bloom Health & Protection
- Cabbage aphids shelter in the curd, and cabbage-white caterpillars chew it. What helps: a strong water spray or insecticidal soap for aphids, and hand-picking or a Bt-based product for caterpillars.
Fruit & Uses
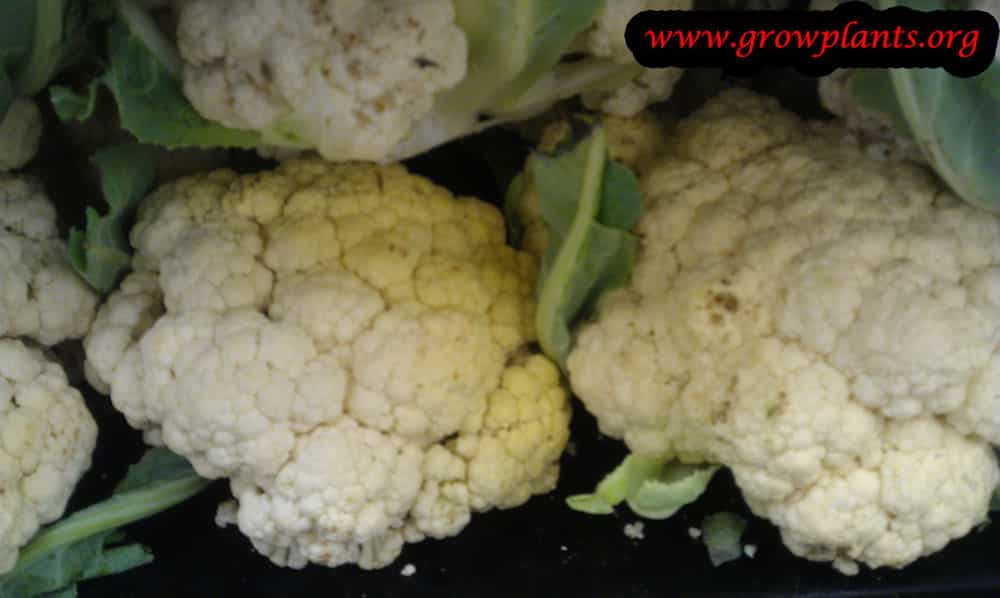
Cauliflower is grown for its edible head (the curd) — a dense mass of immature flower buds, coloured white, yellow, orange or purple — and its green leaves are edible too. The head is eaten cooked or raw, the leaves cooked.
Quick Edible Specs
| Edible Parts | Flower-bud head (curd) and leaves |
|---|---|
| Main Use(s) | Culinary – head cooked or raw, leaves cooked |
| Eaten Raw or Cooked | Head both; leaves usually cooked (young leaves raw) |
| Preparation Required | Cut the head while firm and compact, before it opens; wash well |
| Harvest Season | Cold areas spring–summer; frost-free areas autumn–winter |
| Time to First Harvest | Fast-growing; harvest the head while still tight |
| Storage | Best used fresh; refrigerate short-term |
| Safety/Toxicity Caveat | A commonly eaten vegetable; no special toxicity |
Flowers & Flower Buds
The head (curd) is the main crop — white, yellow, orange or purple depending on variety. Cut it while it is firm and the buds are still tightly packed and closed; harvesting at the right time, before it loosens and runs to flower, is the key skill.
Leaves & Greens
The green leaves (about 10–30 cm) are edible — young leaves for salad, mature leaves for cooking. It is best not to strip the leaves before the head has been cut, as they protect and feed the developing curd.
Preparation, Uses & Safety
The head is steamed, boiled, roasted, riced or eaten raw; the leaves are used in casseroles, stir-fries and cooked dishes. No special detoxification is needed.
Pests, Diseases & Troubleshooting
Overview: As a cultivated Brassica oleracea, this crop faces the classic and heavy brassica pest and disease pressure: cabbage-white and diamondback-moth caterpillars, cabbage aphids, flea beetles, cabbage root fly and cabbage whitefly among the pests, and clubroot, downy mildew, black rot and Alternaria among the diseases. Management is built on rotation, netting and healthy soil, with sprays kept to a minimum. Cauliflower is the most demanding brassica for even, unchecked growth and clean curds – protect the developing head from caterpillars and aphids with netting and blanch it to keep it white and unblemished.
Quick Troubleshooting Overview
| Issue / Pest | Main Symptom | Primary Solution |
|---|---|---|
| Cabbage caterpillars | Ragged holes, chewed leaves/heads, green droppings | Net crop; hand-pick; Bt (Bacillus thuringiensis) |
| Cabbage aphid | Grey-white mealy colonies on undersides and hearts; distortion | Blast off; insecticidal soap; encourage predators |
| Flea beetles | Tiny shot-holes peppering leaves, worst on seedlings | Fleece/row cover; keep moist; deter with mulch |
| Cabbage root fly | Wilting, stunted plants; maggots eating the roots | Brassica collars on stems; netting; rotation |
| Clubroot | Wilting; swollen, distorted, galled roots | Lime to raise pH, improve drainage, long rotation; resistant varieties |
| Downy mildew / black rot | Yellow blotches; or V-shaped yellow leaf-edge lesions | Airflow, clean seed, rotation; copper if needed |
Common Pests & Management
- Cabbage white & cabbage moth caterpillars (Pieris rapae / Pieris brassicae / Mamestra brassicae):
- Symptoms: Green or velvety caterpillars (the yellow-and-black large-white gregarious ones are especially destructive) chewing ragged holes in leaves and boring into hearts and curds, leaving masses of green-black droppings. Cabbage-moth caterpillars tunnel into the centre and foul it.
- Prevention & Control: Net the crop with fine insect mesh from planting to exclude the egg-laying butterflies and moths – the single most effective step. Squash yellow egg clusters and hand-pick caterpillars, and encourage parasitic wasps and birds. Spray Bacillus thuringiensis (Bt kurstaki) in the evening onto the foliage for heavy infestations; it targets caterpillars only.
- Diamondback moth caterpillars (Plutella xylostella):
- Symptoms: Small, pale-green, wriggly caterpillars that make ‘windowpane’ patches and small holes on leaf undersides and can heavily damage hearts and heads; they breed fast and have developed resistance to many insecticides.
- Prevention & Control: Exclude with fine netting and practise rotation and good hygiene. Encourage the many natural enemies by avoiding broad-spectrum sprays. Bt or spinosad control them when netting is impractical, but rotate active ingredients to avoid resistance and time sprays to young larvae.
- Cabbage aphid & peach-potato aphid (Brevicoryne brassicae / Myzus persicae):
- Symptoms: Dense grey-white, mealy, waxy aphid colonies packed on leaf undersides, in the hearts and on flower shoots, causing curling, stunting, honeydew and sooty mould; they also transmit viruses. Colonies hide deep in the heart where sprays miss.
- Prevention & Control: Inspect undersides and hearts regularly and blast off early colonies with water. Encourage ladybirds, hoverflies, lacewings and parasitic wasps, and remove and destroy old brassica stumps where the aphid overwinters. Treat persistent infestations with insecticidal soap or neem, aiming well into the undersides and hearts.
- Flea beetles (Phyllotreta spp.):
- Symptoms: Tiny black or bronze beetles that jump when disturbed and pepper the leaves – especially of seedlings – with countless small round ‘shot-holes’; heavy attack checks or kills young plants in warm, dry spells.
- Prevention & Control: Protect seedlings and young plants with fleece or fine mesh, keep them well watered and growing fast (stress worsens damage), and raise transplants to a robust size before setting out. Yellow sticky traps and a diatomaceous-earth dusting help; established plants outgrow light damage.
- Cabbage root fly (Delia radicum):
- Symptoms: Sudden wilting, blue-tinged foliage and stunting of young plants, whose roots are eaten by white maggots that tunnel the root system; plants may keel over and pull up easily. Worst on spring and autumn transplants.
- Prevention & Control: Fit brassica collars (discs of card, felt or matting) snugly around each stem at soil level to stop the fly laying at the base, and/or grow under insect mesh. Rotate brassicas and firm plants in well. There is no easy rescue once maggots are present, so prevention is essential.
- Cabbage whitefly (Aleyrodes proletella):
- Symptoms: Small white flies that rise in clouds from leaf undersides when plants are disturbed, leaving honeydew and black sooty mould on lower leaves; more of a cosmetic nuisance on leafy brassicas than a yield-killer, but persistent, especially on overwintering kale.
- Prevention & Control: Remove and compost heavily fouled old lower leaves, clear away finished brassica plants that harbour them, and encourage natural enemies. Hose off or spray insecticidal soap or horticultural oil onto the undersides for bad infestations; whitefly are hard to eradicate, so focus on keeping numbers tolerable.
Diseases & Fungal Issues
- Clubroot (Plasmodiophora brassicae):
- Symptoms: Stunted, wilting plants that flag in warm weather and recover overnight; pulling them reveals grossly swollen, distorted, club-like galled roots. A soil-borne organism that persists for many years (up to ~20) and thrives in acidic, wet soil – the most serious and long-lasting brassica disease.
- Treatment & Management: There is no cure, so prevent it: never introduce it on soil, boots or bought-in plants; practise long rotations away from all brassicas; raise soil pH by liming towards neutral-to-alkaline; and sharply improve drainage. Grow clubroot-resistant varieties where available, raise sturdy transplants in clean module compost, and remove and destroy (do not compost) affected roots.
- Downy mildew (Hyaloperonospora parasitica):
- Symptoms: Pale yellow, angular blotches bounded by veins on the upper leaf surface, with a fluffy off-white to grey mould beneath in cool, wet, humid conditions; badly affected seedlings and leaves yellow and die. Common on young plants and dense foliage.
- Treatment & Management: Sow thinly and space plants for airflow, avoid overhead watering late in the day, and remove infected lower leaves. Practise rotation and clear crop debris. Copper-based fungicide protects a valuable crop in a wet spell, but ventilation and dry foliage are the main defence.
- Black rot (Xanthomonas campestris pv. campestris):
- Symptoms: Characteristic V-shaped yellow lesions spreading inwards from the leaf margins, with the veins inside the V turning black; leaves yellow, wither and drop, and the vascular system blackens, sometimes rotting whole heads. A seed-borne and splash-spread bacterial disease favoured by warm, wet weather.
- Treatment & Management: Start with clean, certified or hot-water-treated seed, since it is largely seed-borne. Rotate away from brassicas, avoid working among wet plants, control splashing and cruciferous weeds, and remove and destroy infected plants and debris. There is no effective chemical cure once plants are infected, so prevention and sanitation are everything.
- Alternaria leaf spot (Alternaria brassicae / A. brassicicola):
- Symptoms: Dark brown to black spots with concentric ‘target-board’ rings and often a yellow halo on leaves and heads, enlarging in warm, wet weather and disfiguring or rotting curds and florets; also seed-borne.
- Treatment & Management: Use clean seed, rotate, space for airflow and avoid prolonged leaf wetness; remove and destroy affected debris. A copper or protectant fungicide helps protect heads in a wet season, but cultural measures and clean seed are the foundation.
- White blister / white rust (Albugo candida):
- Symptoms: Raised, shiny white blister-like pustules on leaf undersides (and sometimes distorted, swollen growth) that burst to release white spores, mainly in cool, moist conditions.
- Treatment & Management: Improve airflow and drainage, avoid overhead watering, rotate and remove infected leaves and debris. Resistant varieties and, if needed, a protectant fungicide manage persistent problems; it is usually more disfiguring than devastating.
Growing Difficulties & Abiotic Problems
- Browning curds, buttoning, ricey/loose curds & whiptail:
- Cause & Symptoms: Cauliflower is the fussiest of the group: brown or pink discolouration of the curd comes from boron deficiency (and sun exposure); ‘buttoning’ (tiny heads) and ‘ricey’, loose or fuzzy curds follow heat, cold checks, stress or over-maturity; and ‘whiptail’ (thin, strap-like distorted leaves) signals molybdenum deficiency, common in acidic soil.
- Correction Strategy: Grow in rich, firm, evenly moist soil without any growth check, keeping temperatures moderate. Ensure adequate boron and molybdenum (correct acidic soil with lime for molybdenum uptake), blanch white varieties by folding leaves over the developing curd to prevent yellowing and browning, and harvest promptly while curds are tight.
- Nutrient deficiencies (nitrogen, magnesium):
- Cause & Symptoms: Overall pale, yellowing older leaves and weak growth signal nitrogen shortage in these hungry crops, while interveinal yellowing of older leaves indicates magnesium deficiency, common on light or acidic soils.
- Correction Strategy: Grow in rich, firm, well-limed soil with plenty of organic matter and feed with a balanced nitrogen-rich fertiliser during leafy growth; correct magnesium shortage with Epsom-salt (magnesium sulfate) as a foliar feed and address soil pH.
- Bolting & heat/water stress:
- Cause & Symptoms: Premature bolting (running to flower), loose or open heads, and poor curd/head formation follow heat, drought, cold checks to young plants, or irregular watering – brassicas dislike stress and fluctuation.
- Correction Strategy: Grow in the cooler parts of the season, keep soil evenly moist with mulch and regular deep watering, avoid transplanting stress and root-binding, and choose varieties suited to the season. Steady, unchecked growth gives the best heads and leaves.
- Root rot & waterlogging:
- Cause & Symptoms: Yellowing, wilting and rotting roots in heavy, waterlogged soil (which also strongly favours clubroot); plants sit and sulk in cold, wet ground.
- Correction Strategy: Improve drainage, work in organic matter, and grow on ridges or raised beds in heavy soil; avoid overwatering. Firm planting plus good drainage keeps roots healthy.
What Helps – Products & Tools
The brassica toolkit is fine insect netting / fleece and brassica stem collars as the first line against caterpillars, flea beetles, whitefly and root fly, backed by Bt (Bacillus thuringiensis) or spinosad for caterpillars and insecticidal soap / neem oil for aphids and whitefly. Garden lime (to raise pH against clubroot), clean/hot-water-treated seed, rotation and resistant varieties handle the diseases, with a copper fungicide in reserve for downy mildew, black rot and Alternaria in wet weather. Spray any oils in the evening to protect pollinators.