Plant Profile & Key Characteristics
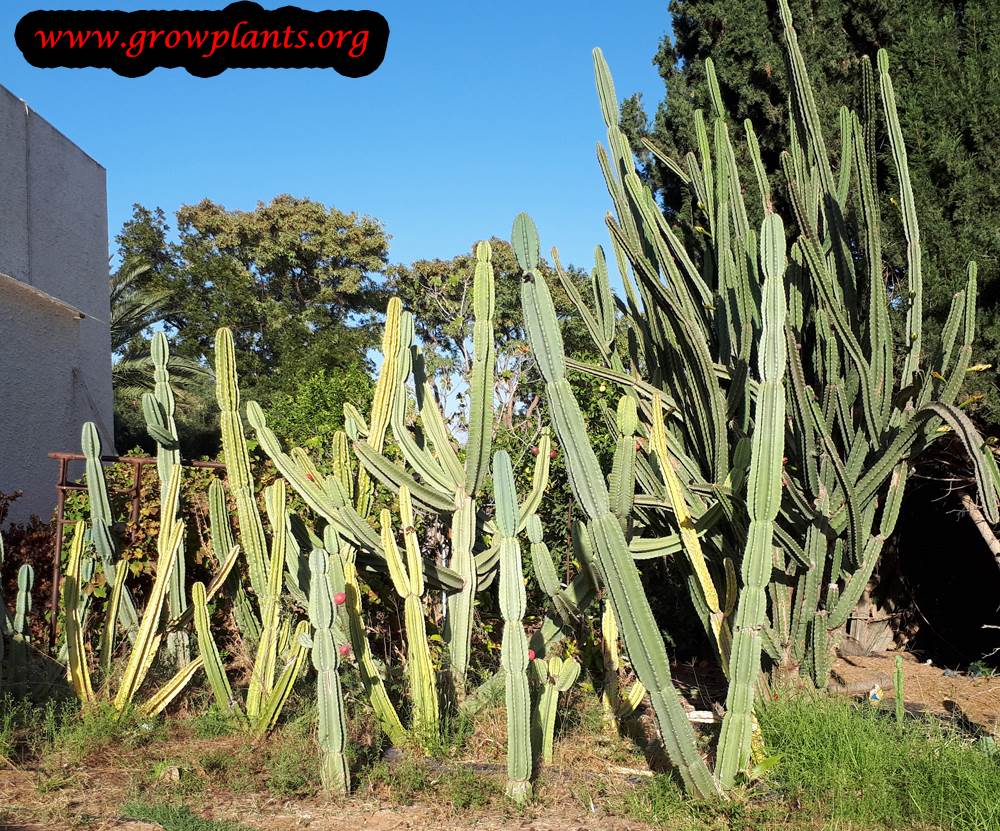
Overview: A tall columnar cactus reaching 3-10 m (10-30 ft), grown as an architectural ornamental and for its edible apple-like fruit. It is a slow-growing perennial for desert, Mediterranean and subtropical gardens.
Quick Specifications
| Specification | Attribute |
|---|---|
| Plant Type / Life Cycle | Perennial (columnar cactus) |
| Mature Size | 3-10 m (10-30 ft) tall |
| Growth Rate | Slow |
| Root System | Shallow, spreading (typical of columnar cacti) |
| Toxicity | Non-toxic; fruit and seeds edible |
| Hardiness | USDA zone 9-12 |
Growth Form & Structure
- Height & Spread: 3-10 m (10-30 ft) tall; can be container-grown, staying smaller in a pot.
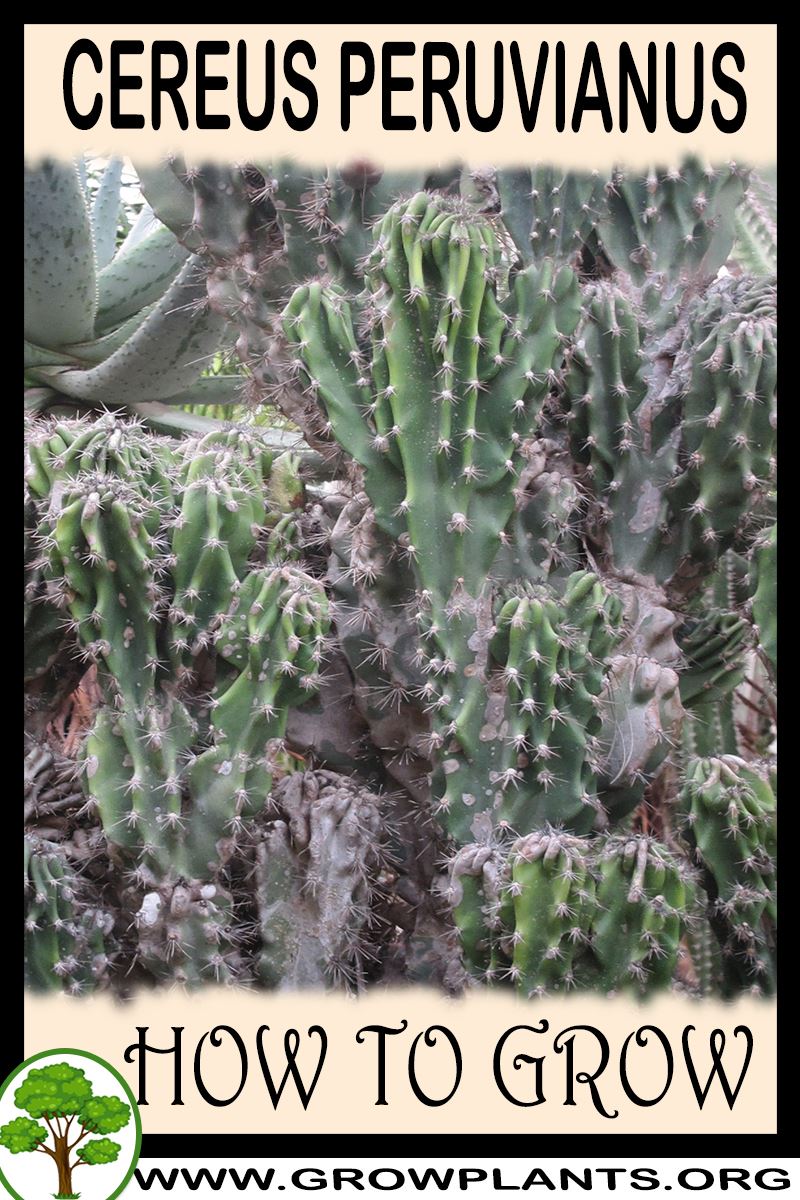
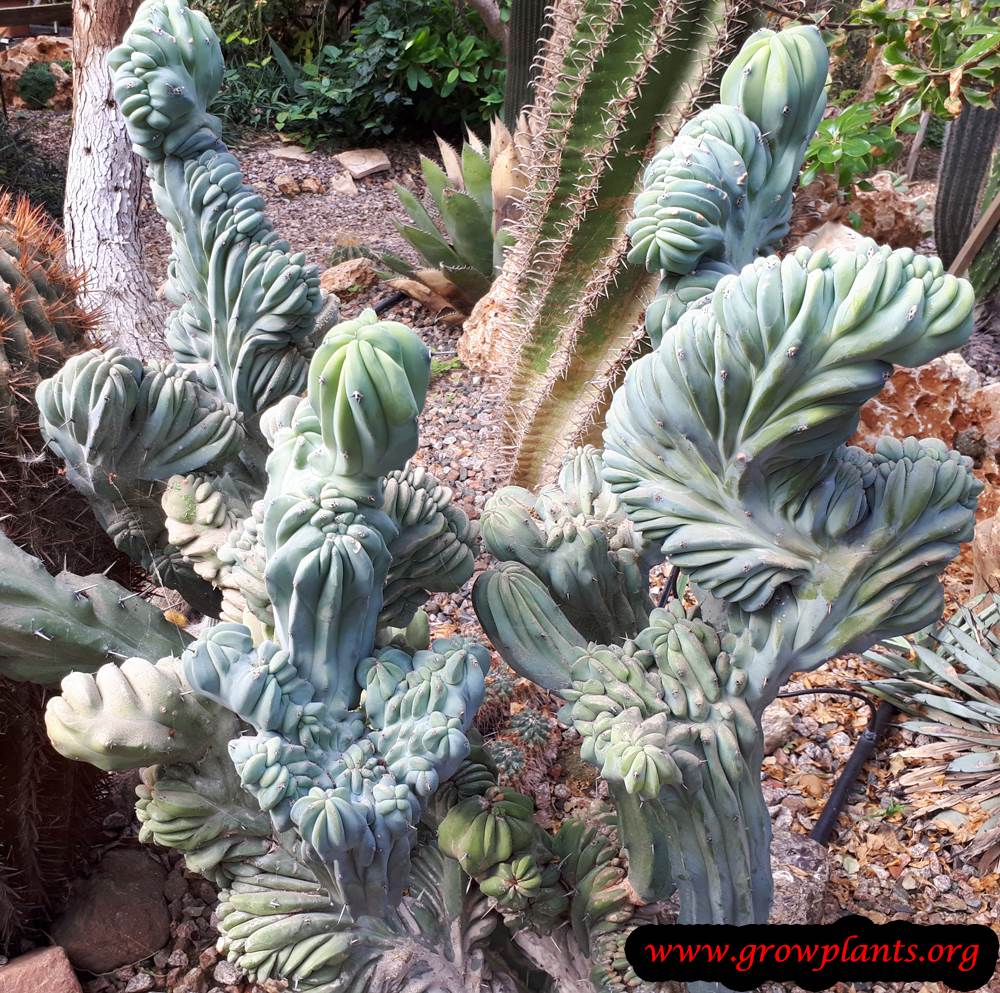
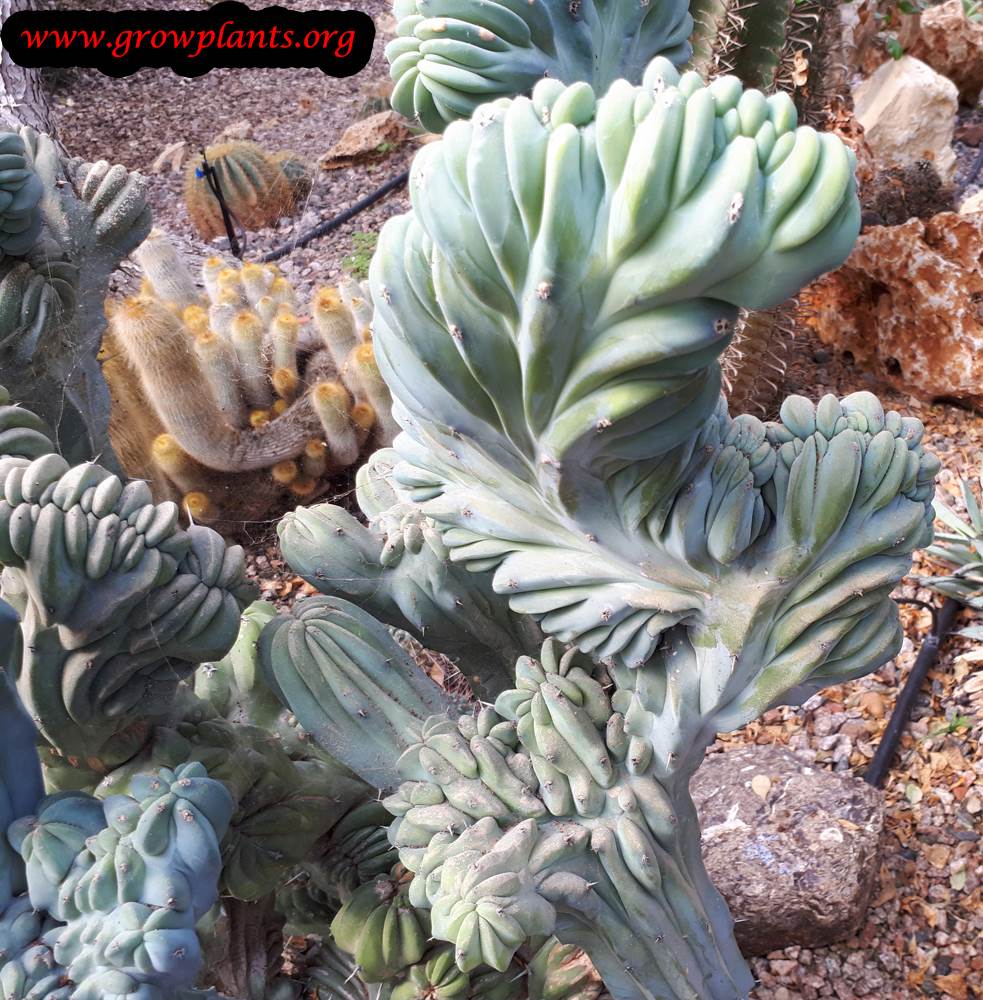
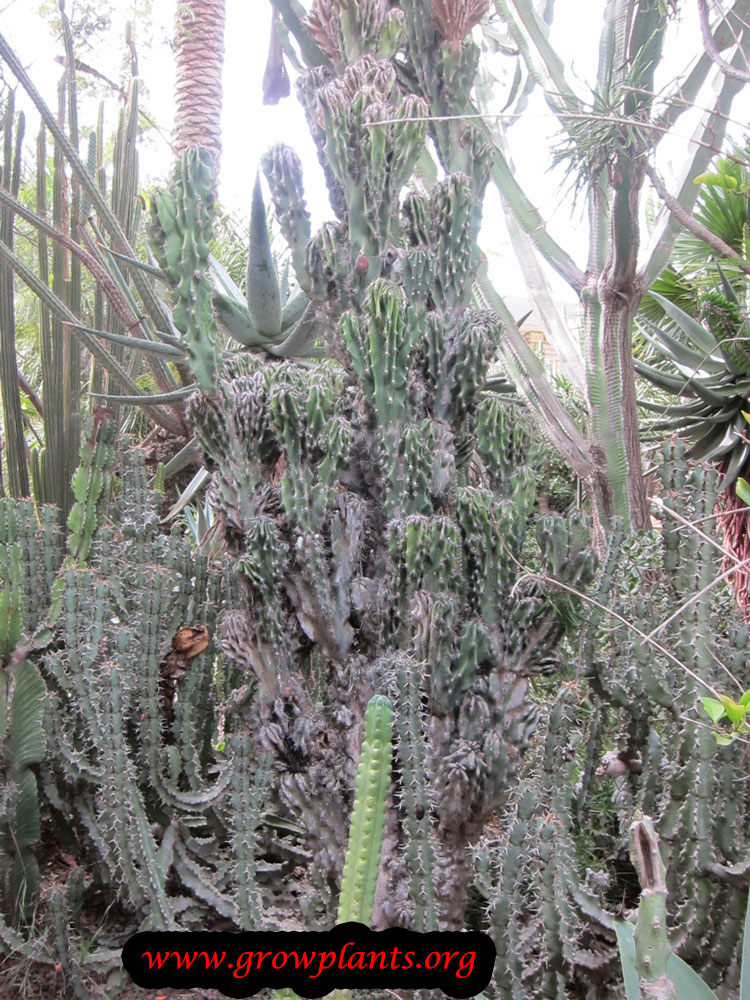
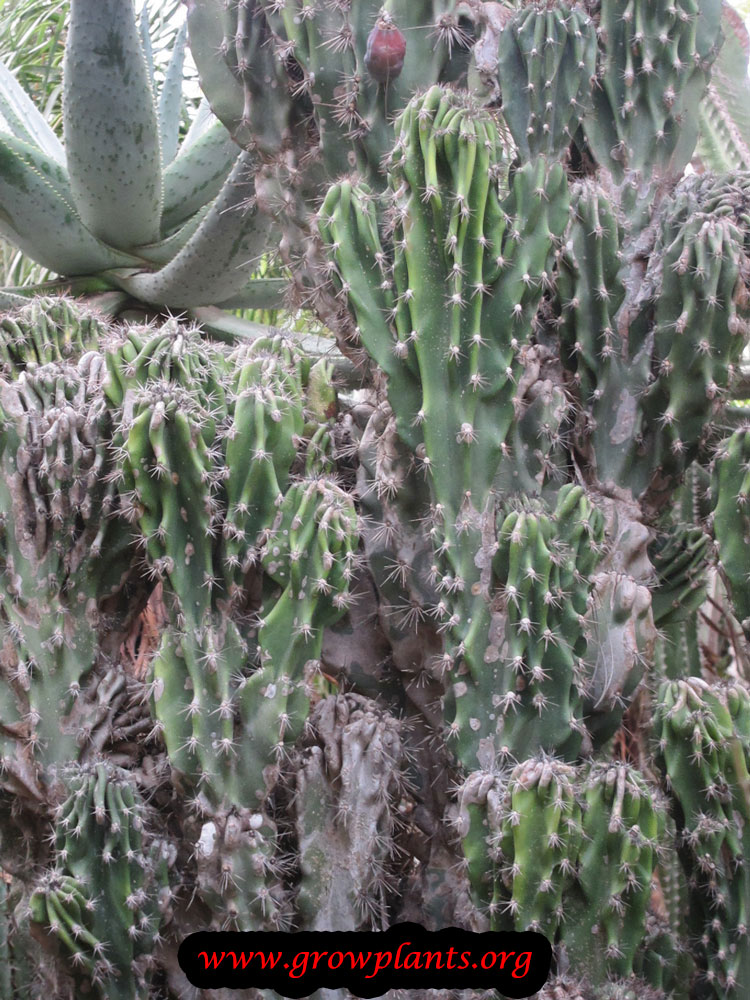
- Growth Habit & Form: Erect, tree-like columnar cactus with ribbed, branching green stems.
- Lifespan & Maturity: Slow-growing, long-lived perennial; bears fruit in about 2-5 years.
Anatomy & Physical Features
- Trunk & Bark: Ribbed, spiny columnar green stems.
- Flower Characteristics: Large white flowers (over 10 cm) with pink-tinged edges, opening at night (full detail in the Bloom section).
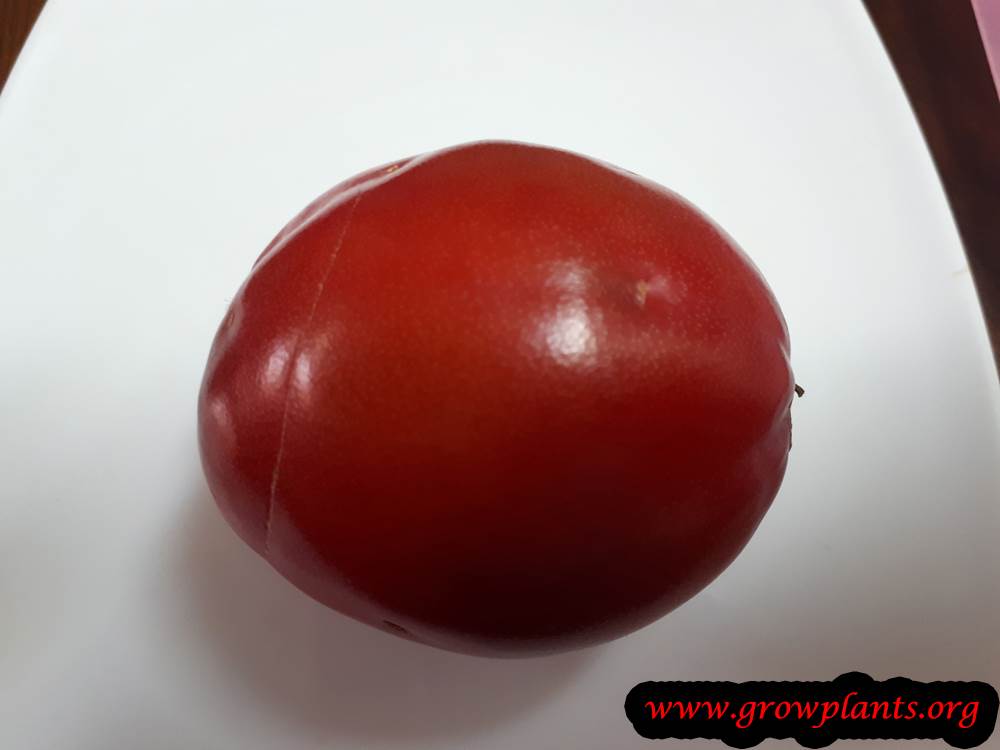
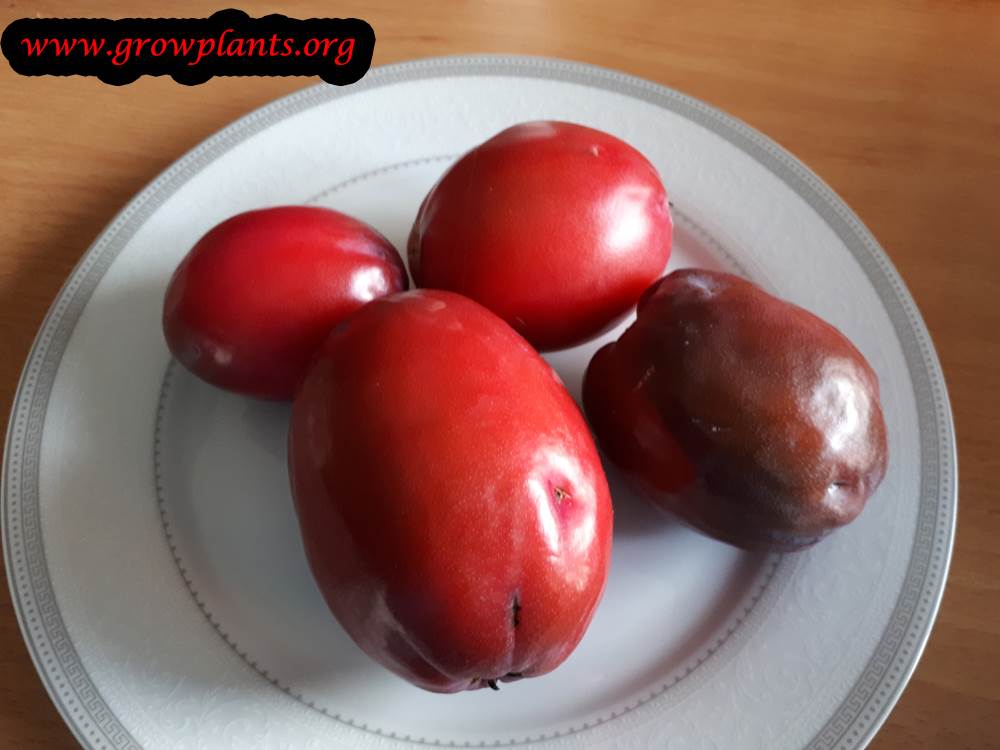
- Fruit Profile: Rounded fruit with red to orange skin and white to purple edible flesh and seeds (full detail in the Fruit section).
Primary Uses & Landscape Value
- Edible Uses: Fruit eaten raw, juiced, or made into jams.
- Functional & Ornamental Roles: Bold architectural ornamental and drought-tolerant xeriscape plant.
Care Guide: Planting, Soil & Watering
Overview: This columnar desert cactus thrives in full sun and heat in dry, subtropical or Mediterranean gardens. It needs a sharply-draining, mostly dry soil and only a small amount of water.
Quick Care Requirements
| Requirement | Ideal Condition |
|---|---|
| Planting Season | Through the warm season, from spring to autumn |
| Growth Rate | Slow |
| Soil Type | Sharply-draining, gritty, sandy cactus mix kept on the dry side |
| Water Need | Low – water sparingly and let the soil dry out fully between waterings |
Planting & Establishment
- Best Planting Season: Through the warm season, from spring to autumn.
- How to Plant:
- Hole Preparation: Plant into a shallow hole in fast-draining, gritty ground, handling the spined stems with folded cardboard or thick gloves.
- Soil Amendments: Blend coarse sand, grit or pumice through the native soil so water drains away fast and never lingers around the base.
- Planting Depth: Set the stem at the depth it grew before, keeping the base slightly proud of the soil to guard against crown rot.
- Growth Speed & Expectations: A slow grower that becomes a tall columnar cactus of 3-10 m over time.
Soil, Watering & Drainage Care
- Soil Mix & Drainage Needs: Use a sharply-draining cactus or succulent mix – native soil cut heavily with coarse sand, grit or pumice. Excess moisture is the main killer, so ensure water runs straight through; in pots use a gritty mix with generous drainage holes.
- Watering Schedule & Technique:
- Young / Newly Planted: Water lightly to settle the roots after planting, then only once the soil has dried out, giving just enough to moisten without keeping the base wet.
- Established: Water deeply but infrequently, letting the soil dry almost completely between waterings; once established the plant is markedly drought tolerant.
- Seasonal Adjustments: Give a little extra during prolonged heat, and withhold water over the cool, dormant months to prevent rot.
Climate, Light & Hardiness
Cereus peruvianus is a columnar cactus for desert, Mediterranean, and subtropical climates, needing full sun and excellent heat and drought tolerance. It is moderately cold-hardy for a cactus, reliable from USDA zone 9 through 12.
Quick Climate Specifications
| Climate Zones | Desert, mediterranean, subtropical |
|---|---|
| USDA Hardiness Zones | 9–12 |
| Light Conditions | Full sun |
| Frost Tolerance | Low to moderate |
Sunlight & Light Exposure
Direct Sun Requirement
Needs full sun for healthy, compact growth; insufficient light causes weak, stretched stems.
Temperature Extremes & Hardiness
USDA Hardiness & Regional Limits
Hardy from zone 9 through 12; tolerates brief light frost once mature, but prolonged freezing is likely to damage or kill stem tissue, so it is best suited to essentially frost-free to mild-frost climates.
Extreme Heat Tolerance
Excellent heat tolerance, well suited to desert summer conditions.
Wind, Humidity & Microclimate
Dry-Air Tolerance
As a desert cactus, it tolerates dry air and low humidity very well; it is not suited to consistently humid, wet climates.
Growing in Pots, Balconies & Indoors
Cereus peruvianus is a fast, columnar cactus that the grower confirms grows well in containers. He does not class it as a houseplant, but young plants are among the easiest indoor cacti on a bright, sunny windowsill; just know it eventually reaches 3-10 m, so a pot keeps it manageable for years while young and it will outgrow the sill in the long run.
Quick Details
- Container Size: A stable, fairly deep pot; pot up gradually as the column grows – a heavy base stops tall plants toppling
- Indoor Suitability: Not a low-light houseplant, but excellent on a bright, sunny windowsill while young; eventually too large indoors
- Best Spot: Full sun – the brightest position available
- Soil & Drainage: Very free-draining cactus/gritty mix; drainage holes essential
- Watering in Pots: Sparingly – water then let the mix dry completely; keep nearly dry in the cool season
Indoors & On the Windowsill
- On a sunny windowsill: Though marked ‘no’ as a houseplant, young Cereus is a classic, forgiving indoor cactus on the sunniest sill; in weak light it grows thin and pale.
- Long-term size: It is naturally a tall column, so accept it will eventually be too big for indoors – enjoy it as a windowsill plant while young and move it to a large patio pot later.
- Handle with care: The spines are sharp – site it away from walkways and small children.
On a Balcony or Patio
- Light & heat: A hot, sunny balcony or patio is ideal; it loves reflected wall heat. Water very sparingly – it stores its own moisture.
- Weight & stability: As it gains height it becomes top-heavy – use a heavy, wide-based pot and shelter from strong wind.
Choosing the Pot, Soil & Long-Term Care
- Pot & drainage: A deep, stable pot with strong drainage holes. Use a pot with strong drainage holes and skip a standing water saucer – constantly wet feet are the quickest route to root rot. Terracotta breathes and dries quickly (good for plants that dislike wet feet); glazed or plastic pots hold moisture longer.
- Potting mix: A gritty, very free-draining cactus mix – sand or grit with a little organic matter.
- Feeding & repotting: Feed sparingly, only in the growing season; pot up every couple of years while young, handling the spiny column with thick gloves or a folded strap.
Fertilizing & Feeding
As a large, slow-growing columnar cactus, Cereus peruvianus needs very little fertilizer: light, low-nitrogen feeding during its active warm-season growth supports steady growth and fruiting, while it should be left completely unfed during its cool dormant rest.
Quick Fertilizing Specs
| Feeding Level | Light feeder |
|---|---|
| Main Nutrient Priority | A low-nitrogen fertilizer formulated for cacti and succulents, used sparingly |
| Best Feeding Period | During the warm active growing season |
| Organic Options | A well-drained, mineral cactus mix rather than rich organic matter |
| Reduce/Stop Feeding | Feeding stops completely during the cooler dormant period |
| Micronutrients | Rarely an issue given this slow, light-feeding growth habit |
| Soil pH | Prefers dry, very well-drained soil |
Feeding by Growth Stage
Warm-season active growth
Support slow, steady stem growth and fruiting during the plant’s warm active season.
| Nutrient direction | A light, low-nitrogen feeding supports steady growth without pushing soft, overly fast tissue that is prone to damage. |
|---|---|
| Timing | During the warm part of the year while the plant is actively growing. |
| Frequency | Feed sparingly; this slow-growing cactus rarely needs more than an occasional light feeding. |
| Fertilizer types | A low-nitrogen fertilizer formulated for cacti and succulents, diluted well, A mineral, well-drained cactus mix as the primary growing medium |
| Precautions | Avoid rich or frequent feeding, which can cause soft, weak growth prone to rot and disfiguring corky scarring. |
Cool-season dormancy
Let the plant rest fully during its cooler dormant period without pushing new growth.
| Nutrient direction | None – withhold fertilizer completely during the dormant period. |
|---|---|
| Timing | During the cooler part of the year when growth naturally stops. |
| Frequency | No feeding is needed while the plant is dormant. |
| Fertilizer types | No feeding at this stage; a dormant cactus should not be fertilized. |
| Precautions | Do not fertilize a dormant cactus; feeding during dormancy can cause salt buildup and root stress without any growth benefit. |
Nutrient Deficiency Signs & Corrections
New growth looks pale and unusually slow even during the warm active season.
| Possible causes | very low available soil nitrogen over an extended period, an old, depleted cactus mix that has not been refreshed, minimal feeding history typical of this light-feeding species |
|---|---|
| Appears first on | newest stem growth |
| What to check | age of the growing mix, feeding history, growth compared to a typical warm season |
| Possible correction | Apply a diluted, low-nitrogen cactus fertilizer during the active growing season. |
New growth appears pale yellow rather than the plant’s normal green.
| Possible causes | high soil or mix pH limiting iron availability, waterlogged or poorly drained mix restricting root uptake, an alkaline water source used for irrigation |
|---|---|
| Appears first on | newest growth |
| What to check | mix and water pH if testable, drainage of the growing mix, irrigation water source |
| Possible correction | Improve drainage, consider a less alkaline water source, and apply a chelated iron product per its label if the pattern continues. |
Corky, brown scarring develops on the stem surface.
| Possible causes | fertilizer salt buildup from feeding more often or heavily than this light feeder needs, mineral buildup from hard irrigation water, a growing mix that no longer drains freely |
|---|---|
| Appears first on | the stem surface, often on newer growth |
| What to check | recent fertilizer amounts and frequency, irrigation water quality, drainage of the growing mix |
| Possible correction | Ease off feeding, flush the mix thoroughly with water, and resume only light, infrequent feeding. |
Pruning, Training & Seasonal Maintenance
Cereus peruvianus is a large, slow-growing, branching columnar cactus (reaching 3–10 m) grown both ornamentally and for its edible fruit. Unlike most cacti, its branching habit means occasional structural pruning is genuinely useful, not just tolerated: the objective is to prevent branches from crowding into each other to the point that fruit becomes hard to reach, and to remove any branch that has stopped producing new growth. Pruning tolerance is otherwise low – cuts are slow to heal on succulent tissue and carry a real rot risk, so intervention should stay infrequent and deliberate. The safest window is autumn, once the growing season’s new growth has hardened off, and pruning does not affect flowering timing (flowers form on mature stem tissue) but removing a branch does remove its future flowering/fruiting sites.
Quick Pruning & Maintenance Specs
| Pruning Tolerance | Low (infrequent, deliberate cuts only – succulent tissue is slow to heal) |
| Primary Pruning Window | Autumn, after the season’s growth has hardened |
| Secondary Maintenance Window | None routine – inspect after fruit harvest for congested branches |
| Typical Frequency | Occasional – only when branches stagnate or crowd each other |
| Main Objective | Maintain access to fruit and remove non-productive branches, not shape control |
| Young Plant Priority | Leave unpruned – let the main columns establish |
| Mature Plant Priority | Remove congested/non-growing branches for fruit access and airflow |
| Best Tool Type | Pruning saw or loppers depending on branch thickness; pole pruner for upper growth on tall specimens |
| Avoid Heavy Pruning During | Active spring/summer growth flush and flowering period |
Pruning by Plant Age & Size
Newly Established
No pruning – remove only clearly dead or damaged tissue from planting/transport.
Young / Formative
No structural training system applies (no leader/vase framework); the plant’s natural branching pattern is left to develop untouched while it builds size, since this species can take 2–5 years to first bear fruit.
Mature / Established
Once the plant is fruiting and branching, selectively remove branches that have stopped producing new growth or that have grown into neighbouring branches badly enough to block fruit access.
Seasonal Pruning Schedule
Ongoing Sanitary
Objective: remove damaged or rotting tissue promptly. Remove: any soft, discoloured, or rotting branch section, cut well back into firm healthy tissue. Do not remove: firm, actively growing branch tips. Expected response: the wound calluses over; no regrowth is forced.
Post-Harvest Structural Check
Objective: keep fruit accessible and the crown open. Remove: branches that have stopped elongating, or that cross so tightly into another branch that fruit cannot be reached. Do not remove: branches that are still actively producing new growth, even if crowded, since these are next season’s fruiting wood. Fruiting impact: removing a branch removes its future flowering areoles, so cuts should be limited to genuinely non-productive or inaccessible growth.
Flowering & Fruiting Wood
Flowers and the fruit that follows form directly from areoles on mature, established stem tissue (not on new season’s tips only) – pollination is nocturnal, by bees at dusk and night-flying moths. Because flowering sites persist on the stem surface over multiple years, removing a whole branch permanently removes that branch’s future flowering capacity; there is no “renewal” wood the way there is on a shrub. This is why cuts are limited to branches that are genuinely stagnant or blocking harvest access, rather than routine thinning.
Structural Pruning & Training
The main structural concern is branches growing into one another as the plant matures – thin only the branches causing genuine crowding or blocking fruit access; height and spread are otherwise left to the plant’s natural, slow growth habit rather than being controlled.
Special Growth to Remove
- Rootstock suckers/growth below the graft union – relevant only on grafted specimens (grafting is used commercially on this species to bring forward fruiting); remove growth arising below the graft line so it doesn’t compete with the fruiting scion.
Container & Small-Space Pruning
Container specimens stay more compact by nature of restricted rooting; height control by heading cuts is not advisable since it removes fruiting tissue permanently – better to select the location/pot size to accommodate its eventual size than to prune for compactness.
Tools
- Pruning saw – for thick, woody-ribbed branch removal at the base.
- Loppers – for medium branches too thick for hand snips but smaller than saw-cuts.
- Pole pruner – for reaching upper branches on specimens approaching the species’ full 3–10 m height.
Tool Hygiene & Disease Risk
Increased risk – cut succulent tissue is prone to rot entering through the wound, especially in humid conditions; disinfect blades between plants and avoid pruning during or right before wet weather so cuts can dry and callus properly.
Cut Placement & Technique
Make branch-removal cuts cleanly at the branch base into firm tissue; avoid leaving a stub, which is more prone to rot than a clean flush cut on this genus (unlike woody trees, there is no branch collar to cut outside of).
Heavy Pruning & Rejuvenation
Not tolerated – this species does not respond well to hard rejuvenation cuts; heavy removal of branches sacrifices years of fruiting wood and slow growth (2–5 years to first fruit) that cannot be quickly regrown. Limit intervention to the minimum necessary.
Post-Pruning Care
Keep cut wounds dry – withhold water immediately around large cuts to let them callus, and watch for soft or discoloured tissue spreading from the cut, which signals rot needing further removal back into clean tissue.
Common Pruning Mistakes
- Removing branches that are still actively growing/fruiting just for shape, sacrificing future fruit for no functional gain.
- Leaving stubs instead of clean base cuts, inviting rot.
- Pruning during or right before wet weather, increasing infection risk in the fresh wound.
When NOT to Prune
Avoid pruning during the active growth flush or while in flower, and avoid it in humid/wet weather when cut tissue is more likely to rot before it can callus.
Recommended Tools (by task)
- Removing a congested or stagnant branch (mature plant): pruning_saw – branch bases are thick and woody-ribbed, too large for hand tools.
- Medium branch removal: loppers – for branches too thick for snips but manageable without a saw.
- Upper-branch access on tall specimens: pole_pruner – this species can reach 3–10 m, putting upper growth out of reach.
- Between cuts / between plants: blade_disinfectant – succulent tissue wounds are prone to rot entering through the cut.
Pruning Troubleshooting
| Problem | Possible Cause | What to Check | Corrective Action |
| Soft, discoloured tissue spreading from a recent cut | Rot entering the wound, often from pruning in humid/wet conditions | Inspect the cut edge and surrounding tissue for softening or discolouration | Cut back into firm, healthy tissue well beyond the affected area; disinfect the blade before and after |
| Reduced fruit set after removing branches | Flowering areoles were removed along with the pruned branch | Confirm how much mature branch tissue (the actual flowering surface) was removed | Limit future cuts to genuinely stagnant/inaccessible branches, not general thinning |
| Branches growing into each other, fruit hard to reach | Natural dense branching habit left unmanaged for several seasons | Identify which branches are crossing tightly enough to block access | Remove only the minimum branches needed to restore access, cut cleanly at the base |
Propagation Guide
The most practical way to propagate Cereus peruvianus is from stem cuttings, since sections of the columnar stem root readily and, being clonal, this also brings plants into flower and fruit sooner than starting from seed. Seed is easy to grow but produces variable offspring, since different cultivars are best cross-pollinated together for good fruit set, so cuttings are preferred when a particular form is wanted. Difficulty is easy by cuttings, though patience is needed while the cut end calluses before rooting.
Quick Propagation Specs
| Best Propagation Method | Stem Cuttings (Segments) |
| Alternative Methods | Seed |
| Propagation Difficulty | Easy |
| Seed True-to-Type | Variable (plants are cross-pollinated between cultivars) |
| Vegetative True-to-Type | Yes |
| Best Propagation Season | Spring to autumn (active growing season) |
| Cutting Rooting Time | Several weeks to a couple of months, depending on warmth |
Growing from Seed
Site data does not give exact depth, temperature, or germination-timing figures for this cactus; the notes below reflect general, cautious cactus-propagation practice rather than site-specific data.
Seed Handling & Viability
Cactus seed generally stores reasonably well in a cool, dry, dark place once cleaned of fruit pulp.
Sowing Season
Sow during the warm months, spring through summer.
Sowing Depth & Orientation
Cactus seed is typically surface-sown or barely covered, pressed onto a gritty, well-draining mix.
Germination Conditions
Warm temperatures and high humidity until germination (often kept covered), then gradually reduced humidity afterward.
Seedling Care
Bright light with protection from harsh direct sun while young, and sparing water to avoid rot.
Stem Cuttings
Cutting Type
A stem segment – a whole branch, or a length cut from one – rather than a small tip cutting.
Best Timing
During the warm growing season (spring to summer) when the plant is actively growing.
Cutting Preparation
Cut cleanly with a sharp, clean blade and let the cut surface dry and callus for one to two weeks (longer for thick cuts) before planting, to reduce the risk of rot.
Rooting Setup
Plant the callused end in a very well-draining, gritty cactus mix; water sparingly at first, increasing once roots are established.
Rooting Hormone
Not necessary for this easy-rooting cactus, though it can be used to speed rooting along.
Rooting Time
Roots are typically established within several weeks to a couple of months.
Grafting & Budding
Why Grafting Is Used
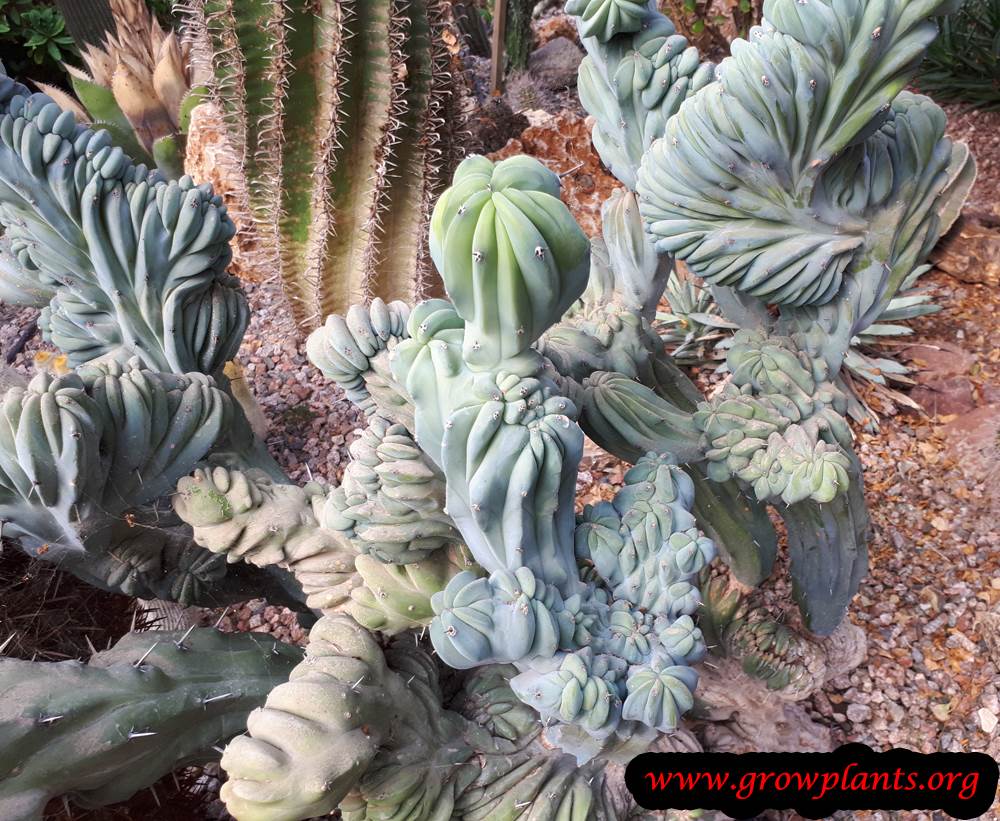
Not usually needed for the straight species, but occasionally used with crested, variegated, or chlorophyll-deficient cactus forms, since a graft can bring a plant into active growth faster than growing it on its own roots.
Rootstock
Because of its vigorous, fast, columnar growth, Cereus peruvianus is itself a popular rootstock choice for grafting slower-growing or unstable cacti in cultivation, more often serving as the rootstock than as the scion.
Bloom & Flower Guide
Quick Details
- Bloom Season: Spring to summer
- Time to First Bloom: Only on mature plants, which are usually several years old
- Flower Appearance: Very large, funnel-shaped white flowers flushed pink at the edges, 10 cm or more across, opening in the evening
- Edibility: Grown as an ornamental (and later for its fruit, covered separately) – the short-lived night flowers are not eaten
Detailed Blooming Overview
This tall columnar cactus rewards patience with spectacular blooms once it matures. In spring and summer the big, funnel-shaped white flowers open late in the day and last only a single night. Bees work them in the last light before sunset, and night-flying moths take over after dark – a neat two-shift pollination that makes the most of a flower that will be gone by morning.
Flower Characteristics
- Large, funnel-shaped flowers, white with pink-tinged edges, 10 cm or more across.
- Open in the evening and last a single night.
- Borne along the ribs of mature stems.
Bloom Care & Thinning
- Managing the bloom: Give it plenty of sun, warmth and age – flowering comes only once the plant is well established, and needs no thinning.
- Pollination: By bees in the last light before sunset, and by moths after dark.
Fruit & Uses
Cereus peruvianus (Peruvian apple cactus) produces a genuinely edible fruit, eaten fresh together with its small seeds, and also used for juice and jam. Fruit and seeds are eaten raw, with no special processing required.
Quick Edible Specs
| Edible Parts | Fruit, seeds |
| Main Use(s) | Culinary – eaten fresh, juice, jams |
| Eaten Raw or Cooked | Raw (fresh eating); cooked when made into jam |
| Preparation Required | None for fresh eating; cook down for jam |
| Harvest Season | Summer, autumn |
| Time to First Harvest | Several years after planting (see Propagation for the typical bearing age) |
| Storage | Not noted as a storage fruit on this page – best used fresh or processed into juice/jam |
| Safety/Toxicity Caveat | None noted beyond normal cactus spine handling care when picking |
Fruit
The fruit’s outer peel can be red, pink, purple, or orange, with white, yellow, orange, or purple flesh inside; the small seeds throughout the flesh are eaten along with it, similar to other Cereus/dragon-fruit-type cacti. Fruit is picked once fully coloured, in summer through autumn, and is eaten fresh out of hand, juiced, or cooked down into jam. Because the plant is a spiny cactus, handle the stems carefully when reaching in to pick fruit.
Preparation, Uses & Safety
No special preparation is needed for fresh eating beyond cutting the fruit open; making juice or jam is a simple cooking step. The main hazard around this crop is the plant’s spines rather than the fruit itself, so take care when harvesting.
Pests, Diseases & Troubleshooting
Overview: This large columnar cactus is tough and long-lived, and by far its greatest enemy is overwatering, which triggers soft and bacterial rot; the insect pests are the usual succulent sap-suckers. Keep it lean, bright and sharply drained and it needs little else.
Quick Troubleshooting Overview
| Issue / Pest | Main Symptom | Primary Solution |
|---|---|---|
| Overwatering / soft rot | Mushy, blackening, collapsing stem | Cut out rot; dry out; sharp drainage |
| Mealybugs | White cottony tufts in ribs/areoles | Alcohol swab; oil/soap |
| Root mealybugs | Poor growth; white powder on roots | Bare-root, wash, repot |
| Scale | Fixed brown/grey bumps on stems | Scrape; horticultural oil |
| Spider mites | Rusty stippling near growing tip | Rinse; raise humidity; oil |
| Fungal spots | Corky or black spots on ribs | Improve airflow; avoid wetting |
Common Pests & Management
- Mealybugs (Pseudococcus / Planococcus spp.):
- Symptoms: White cottony tufts in growth tips, leaf joints and along stems; sticky honeydew and sooty mould follow. On succulents/cacti check the root zone too, where root mealybugs coat roots in white powder.
- Prevention & Control: Wipe or dab colonies with a cotton swab dipped in dilute alcohol; rinse plants and encourage predators (ladybirds, lacewings). For root mealybug, bare-root, wash the roots and repot in fresh mix. Follow up with horticultural oil or insecticidal soap.
- Root mealybugs (Rhizoecus spp.):
- Symptoms: Stalled growth and a plant that fails to thrive; tip it out and the roots and inner pot wall are dusted with white waxy powder and insects.
- Prevention & Control: Bare-root the plant, wash the roots clean, discard old soil and repot into fresh gritty mix in a clean pot. A soil drench of horticultural oil or a systemic can follow; quarantine new cacti to prevent spread.
- Scale insects (Coccidae / Diaspididae):
- Symptoms: Immobile brown, tan or white bumps on stems and leaf undersides; sticky honeydew and blackish sooty mould on soft scale. Growth slows and leaves yellow.
- Prevention & Control: Scrape off light infestations by hand and prune heavily-encrusted stems. Smother the rest with horticultural or neem oil, covering undersides; repeat to catch mobile crawlers. Conserve parasitic wasps and ladybirds.
- Spider mites (Tetranychus urticae):
- Symptoms: Fine pale stippling on leaves, a dull bronzed look, and fine webbing on undersides in hot, dry conditions. Leaves dry and drop as numbers build.
- Prevention & Control: Raise humidity and hose down foliage to break the cycle; mites thrive on dry, dusty plants. Release predatory mites where practical, and treat with insecticidal soap or horticultural oil, coating leaf undersides over repeat applications.
Diseases & Fungal Issues
- Soft rot / bacterial & fungal rot (Erwinia / Fusarium / Phytophthora spp.):
- Symptoms: Water-soaked mushy patches that turn brown-black and collapse, often starting at the base or a wound and spreading fast; foul smell with bacterial rot. Nearly always follows overwatering, cold-wet soil or an infected wound.
- Treatment & Management: Catch it early: cut out all soft tissue back to firm green flesh with a sterile blade, dust the wound and let it callus dry, and withhold water. Prevention is everything – gritty free-draining mix, careful watering, warmth and avoiding wounds.
- Fungal leaf/stem spot (Fungal (various)):
- Symptoms: Corky, sunken or black spots on the ribs, usually where moisture lingers or after cold damage.
- Treatment & Management: Improve airflow, keep the body dry when watering, and cut away badly affected tissue. Cosmetic scarring is permanent but harmless; systemic spread is the real concern to prevent.
Growing Difficulties & Abiotic Problems
- Overwatering (the number-one killer):
- Cause & Symptoms: Soft, discoloured, collapsing stems and root loss from soil kept too wet, especially in cool or low-light conditions.
- Correction Strategy: Water only when the mix is fully dry, use a gritty cactus medium and a pot with drainage, and cut watering right back in winter and cool weather.
- Etiolation & sunburn:
- Cause & Symptoms: Pale, thin, stretched new growth in low light; or bleached, scorched patches when moved abruptly into fierce sun.
- Correction Strategy: Give bright light for sturdy growth but acclimatise gradually to direct sun to avoid scorch.
- Corky scarring & edema:
- Cause & Symptoms: Rusty or corky patches and, in overwatered plants, blister-like edema on the skin.
- Correction Strategy: Accept old cosmetic scarring; prevent new edema by steadier, leaner watering and good light.
What Helps – Products & Tools
The main ‘tools’ here are a gritty cactus mix, a sharp sterile knife for rot surgery, and restraint with the watering can. For pests use isopropyl alcohol on a swab, insecticidal soap and horticultural/neem oil; sulfur can dust cut surfaces to discourage fungal entry.