


Plant Profile & Key Characteristics
An upright tender subshrub reaching about 1-2 m (3-6 ft), grown as a warm-season annual in cold climates and as an evergreen perennial where frost-free. It is cultivated for its small, very hot fruits (30,000-50,000 Scoville) used in sauces and spices.
Quick Specifications
| Specification | Attribute |
|---|---|
| Plant Type / Life Cycle | Perennial (often grown as an annual) |
| Foliage Type | Evergreen (frost-tender) |
| Mature Size | 1-2 m tall (3-6 ft / 40-80 in) |
| Growth Rate | Fast to moderate |
| Toxicity | Fruit edible but very pungent (30,000-50,000 SHU) |
| Hardiness | USDA zone 10b+ as perennial, 2+ as annual |
Growth Form & Structure
- Height & Spread: 1-2 m (3-6 ft) in the ground; kept smaller in a 10-30 L (2-6 gal) container
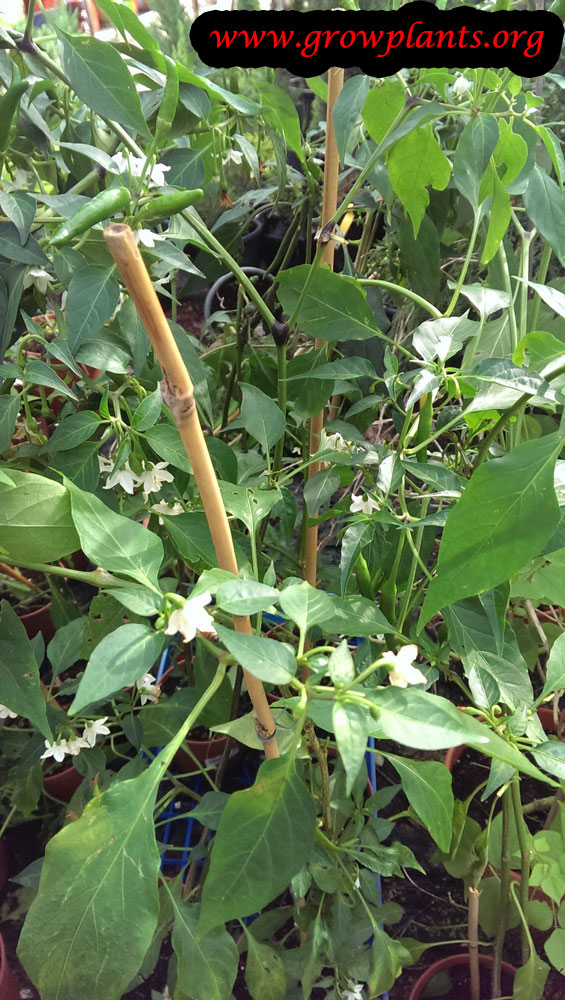
- Growth Habit & Form: Erect, well-branched subshrub; stems may need support when fruiting
- Lifespan & Maturity: Bears fruit about 60-90 days from transplanting; a short-lived perennial in mild climates
Anatomy & Physical Features
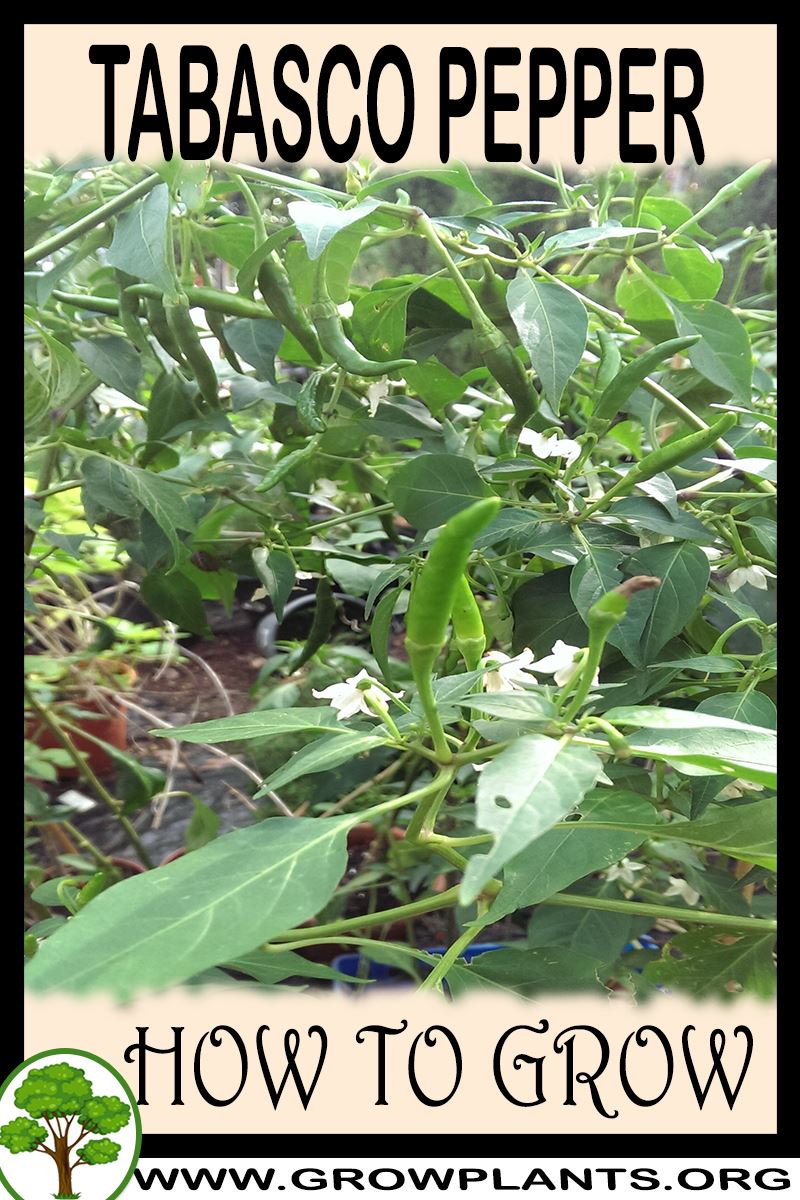
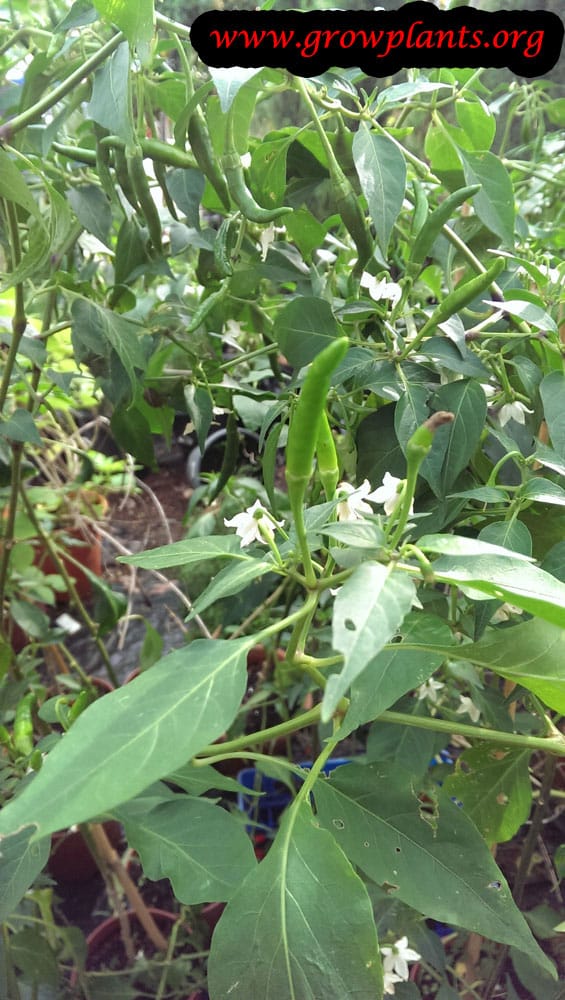
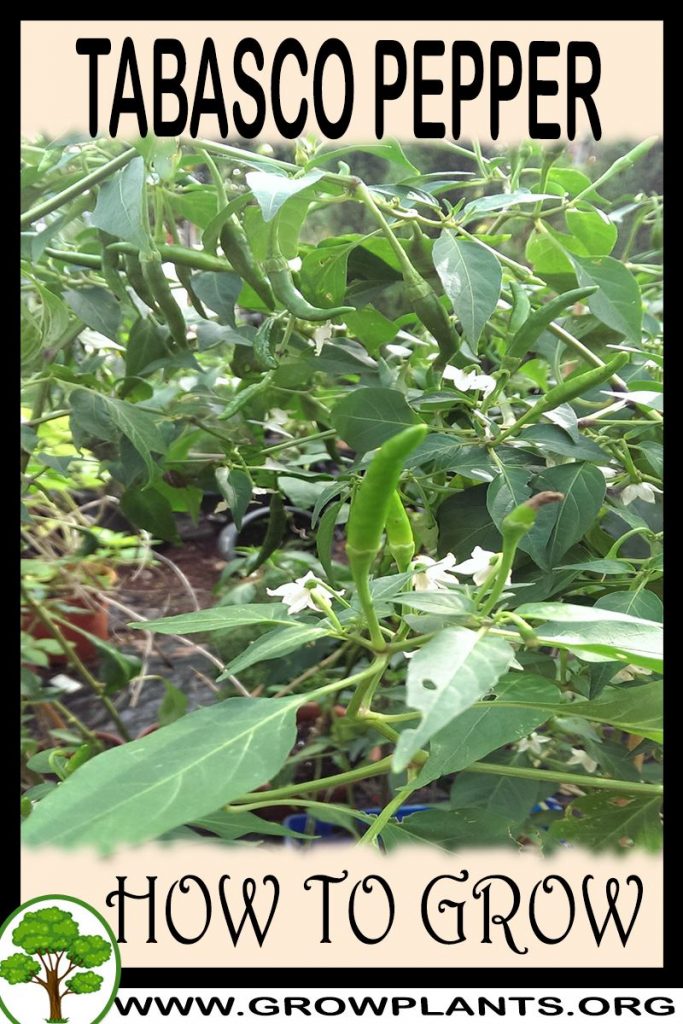
- Leaves & Foliage: Green, oval to elliptic leaves
- Flower Characteristics: Small white, cream or purple 6-petalled flowers in clusters of 2-3; bee-pollinated
- Fruit Profile: Small, mostly erect pods ripening red, yellow, green or orange; intensely hot
Primary Uses & Landscape Value
- Edible Uses: Hot sauces (notably Tabasco), spices, pickles and cooking
- Functional & Ornamental Roles: Vegetable and container crop; also grown ornamentally for its colourful fruit
Care Guide: Planting, Soil & Watering
Overview: A warm-loving, fast-growing pepper best in full sun, rich fertile soil and steady moisture. It likes warmth and even watering, dislikes waterlogged ground, and is frost-sensitive.
Quick Care Requirements
| Requirement | Ideal Condition |
|---|---|
| Planting Season | In spring after the last frost in cooler zones; spring–summer in zone 10b–11a; spring–autumn in 11b; year-round in zone 12+ |
| Growth Rate | Fast to moderate |
| Soil Type | Rich, fertile and well-draining |
| Soil pH | Slightly acidic to neutral (about 6.0–6.8) |
| Water Need | Moderate to high – keep evenly moist but never waterlogged |
Planting & Establishment
- Best Planting Season: Warm-season crop – plant out only after all danger of frost has passed and the soil has warmed; in frost-free zones plant across the warm season or year-round. Stake or trellis taller plants at planting time.
- How to Plant:
- Hole Preparation: Dig a hole 50–100% wider than the root ball to give the roots loose, easy soil.
- Soil Amendments: Mix compost, humus and dead leaves into the backfill for fertility and moisture.
- Planting Depth: Set the plant a little deeper than it sat in the pot (peppers can root along a buried stem), then firm gently.
- Growth Speed & Expectations: Fast to moderate in warm weather; if growth stalls, add fertiliser and organic matter to push it along.
Soil, Watering & Drainage Care
- Soil Mix & Drainage Needs: Fertile, well-aerated, free-draining soil; in containers use a 10–30 L pot with good drainage holes and mulch to hold moisture.
- Watering Schedule & Technique:
- Young / Newly Planted: Water twice on planting day, then daily for the first two weeks while the plant settles in.
- Established: Water regularly and deeply to keep the soil evenly moist; mulch in summer to steady moisture.
- Seasonal Adjustments: More in heat, wind and full fruiting; less in cool weather and over winter.
Climate, Light & Hardiness
Tabasco pepper is a warm-season, full-sun hot pepper that thrives through a long, warm season in tropical, subtropical, Mediterranean, temperate and desert climates. It is frost-sensitive - perennial only in essentially frost-free areas (roughly USDA zone 10b and warmer) and grown as a summer annual from zone 2 upward wherever winters freeze.
Quick Climate Specifications
| Climate Zones | Tropical, subtropical, Mediterranean, temperate and desert (warm-season growing) |
|---|---|
| USDA Hardiness Zones | Perennial in zone 10b+; grown as an annual from zone 2 upward |
| Optimal Temp Range | About 21–26 °C (70–79 °F); broadly tolerable roughly 10–32 °C (50–90 °F) |
| Cold Damage Begins | Growth slows and chilling stress appears below about 10–12 °C (50–54 °F) |
| Approx. Survival Minimum | Near 0 °C (32 °F); frost is generally fatal to unprotected plants |
| Frost Tolerance | None (frost-sensitive) |
| Light Conditions | Full sun; part shade tolerated only when carried on as a perennial, with lower yield |
| Wind Tolerance | Low–Moderate (a tall, fruit-laden plant benefits from support) |
Sunlight & Light Exposure
Optimal Light Setup
Full sun gives the most growth and the heaviest set of its small upright pods; in very warm climates near-full sun is ideal. Part shade is tolerated only when carried on as a perennial, with reduced fruiting.
Direct Sun Requirement
A full-sun crop - open, unshaded exposure drives flowering and ripening of the pods.
Shade & Heat Management
Under intense desert sun leaves and fruit can scorch, so easing midday exposure with light shade cloth protects the crop through peak heat.
Best Exposure / Orientation
A warm, sheltered, sun-facing position gathers heat and helps the plant flower and ripen its fruit, while airflow limits foliar disease. As a taller plant (to roughly 1–2 m / 3–6 ft) it appreciates shelter from strong wind.
Temperature Extremes & Hardiness
USDA Hardiness & Regional Limits
The site data lists Tabasco pepper as perennial in zone 10b and warmer and grown as an annual from zone 2 upward. Hardiness reflects winter cold survival, not heat preference - in colder zones it is grown as a warm-season annual, or a plant is overwintered indoors and set out after the last frost.
Cold Damage & Winter Protection
Growth slows below roughly 10–12 °C (50–54 °F), and even in zone 10b an overwintering plant often suffers or dies from winter cold. Protect from cold snaps, or carry a plant over by cuttings or indoors.
Frost Sensitivity
The site data flags this pepper as frost-sensitive: light frost damages foliage and frost near 0 °C (32 °F) is generally fatal to unprotected plants. Transplant only after the last expected frost.
Extreme Heat Tolerance
Heat-loving but not heat-proof: foliage and fruit can burn above about 44 °C (111 °F) in full sun, and very high temperatures with strong sun cause sunscald and can trigger blossom drop. Heat and cold performance vary by cultivar, plant age, exposure duration and conditions.
Frost-Free Growing Season
As a frost-tender crop, Tabasco needs a long, frost-free warm season - it is often slower to ripen than large sweet types - so in short-season areas start seed indoors in late winter (about 21–26 °C / 70–79 °F) and set out only after the last frost.
Wind, Humidity & Microclimate
Humidity Preferences
Germinating seed and seedlings prefer warm, humid conditions; established plants accept a fairly wide range, with moderate humidity and good airflow ideal.
Dry-Air Tolerance
Established plants tolerate dry air reasonably well when soil moisture is kept up, though hot, dry winds during flowering can cause blossom drop.
Wind Tolerance
Its taller, brittle, fruit-laden stems break in strong wind, so a sheltered spot and support help - especially in containers, whose root zones heat, cool and dry out faster and are more wind-exposed.
Rainfall & Seasonal Moisture
Suits a warm season with dry-to-moderate conditions; prolonged wet, humid weather favours fungal problems, so a drier, warm ripening period benefits fruit quality.
Microclimate Recommendations
A sunny wall, raised bed or reflected heat extends the season in cooler areas, while light shade and airflow ease extreme-heat, desert-type sites.
Growing in Pots, Balconies & Indoors
Tabasco peppers are first-rate container and balcony plants rather than true houseplants – indoors the light is simply too weak to set fruit unless it is a very sunny sill. Hot peppers like this generally stay compact and fruit over a long season, which makes them well suited to a hydroponic Dutch bucket or tower system. In a good-sized, free-draining pot they crop well on a warm, sunny patio or balcony, and because they are naturally tender perennials a potted plant is easy to move under cover and overwinter for a second season. Mature size in the ground is about 1-2 m (3-6 ft), but a container keeps them compact.
Quick Details
- Container Size: 10-30 L (2-6 gal), depending on whether you grow it as an annual or a perennial
- Indoor Suitability: Not a deep-room houseplant; kept small it can fruit on a bright, sunny windowsill
- Best Spot: Full sun – a warm, south-facing balcony or patio is ideal (in fierce desert sun give a little afternoon shade so fruit and leaves don’t scorch)
- Soil & Drainage: Well-aerated, organic-rich mix (potting mix, or peat/coir with perlite or vermiculite); must drain freely
- Watering in Pots: Keep evenly moist – pots dry fast, so mulch the surface; never leave it waterlogged
Indoors & On the Windowsill
- Houseplant limits: Not a true houseplant – deep in a room the light is too weak to flower and fruit.
- Windowsill growing: Keep the plant small and stand it on the edge of a bright, sunny window; grown this way the plant and its fruit get enough direct sun. Guard against cold drafts, and don’t let it get too cold in winter.
- Overwintering: In cold climates lift the pot indoors to a bright, cool, frost-free spot to carry the plant over as a perennial – it will crop earlier the following season.
- Safety: The ripe fruit is edible, but keep hot-pepper plants out of reach of children and pets on a windowsill – capsaicin in the fruit and sap stings eyes and skin, and the leaves are not for eating.
On a Balcony or Patio
- Light & wind: Give it the sunniest corner you have. Walls and paving reflect heat and dry pots quickly, so check moisture daily in summer and mulch the surface; shelter a tall, laden plant from wind and stake it if needed. A drip irrigation kit with a timer can take over that watering check automatically.
- Practicalities: A filled 10-30 L pot is heavy – set it in its final position first, and make sure drainage runoff won’t stain the balcony floor.
Choosing the Pot, Soil & Long-Term Care
- Pot & drainage: A 10-30 L pot with plenty of drainage holes so water runs straight through. Skip a standing-water saucer, which keeps the roots wet and invites rot. Terracotta breathes and dries faster; glazed or plastic pots hold moisture longer.
- Potting mix: Well-aerated and organic-rich – a quality potting mix, or peat/coir with perlite or vermiculite for drainage.
- Feeding: Potted plants need feeding more often than those in the ground, since frequent watering leaches nutrients away – feed through the growing season with a balanced, organic-rich fertilizer.
- Repotting: Every couple of years refresh the mix and pot on a size; for perennials, lightly prune the root ball and top growth at the same time to keep them vigorous.
Grower’s Container Tip
- Gradual fill: Start the pot with only about 10% of its soil; as the roots fill that soil, keep topping up until the container is full – this builds a stronger, deeper root system.
Growing this plant in a greenhouse
A greenhouse can give tabasco pepper plant frost protection, cold protection, a longer growing season and controlled production. Under warm enough conditions it can keep growing well beyond the normal outdoor season and potentially be maintained year-round - though continuous cropping is not guaranteed and depends on temperature and light.
Greenhouse at a glance
| Greenhouse suitability | Excellent - a major practical advantage |
|---|---|
| Main benefits | frost protection, cold protection, a longer growing season, controlled production |
| Season extension | potentially year-round |
| Outdoor protection advisable below | about 12°C |
| Maintain greenhouse minimum | around 12°C for active growth |
| Suitable types | heated greenhouse, polycarbonate greenhouse, lean-to |
| Heating | Heating is recommended in cold climates for continuous growth. |
Related greenhouse guides
- Greenhouses: How to Choose the Right Greenhouse
- Best Greenhouse Heaters
- Greenhouse Climate Control: Temperature, Ventilation and Humidity
- Best Lean-To Greenhouses
Fertilizing & Feeding
A moderate feeder: start light at transplanting, lean to nitrogen while building leafy growth, then shift to a balanced, potassium-inclusive feed once flowering and fruiting begin, with even watering throughout. A fertilizer formulated for tomatoes and vegetables supports that feeding pattern through harvest.
Quick Fertilizing Specs
| Feeding Level | Moderate feeder |
|---|---|
| Main Nutrient Priority | Nitrogen while building the plant, then balanced feeding with adequate potassium at fruiting |
| Best Feeding Period | Through the warm active growing and fruiting season |
| Organic Options | Compost, aged manure, and humus worked into the bed |
| Reduce/Stop Feeding | Ease back on nitrogen as flowering begins; feeding tapers as the plant finishes for the season |
| Micronutrients | Usually supplied by a complete fertilizer and organic matter; correct only diagnosed problems |
| Soil pH | Slightly acidic to near neutral |
Feeding by Growth Stage
Establishment after transplanting
Help young transplants settle in and build roots before heavy growth begins.
| Nutrient direction | A balanced complete fertilizer plus plenty of organic matter worked into the planting area to get roots established. |
|---|---|
| Timing | At transplanting and through the first weeks in the ground or container. |
| Frequency | A light feeding at planting, supported by organic matter in the soil. |
| Fertilizer types | A balanced complete fertilizer, Compost, humus, and organic matter worked into the bed |
| Precautions | Keep early feeding light; too much nitrogen now pushes soft growth at the expense of roots. |
Leafy vegetative growth
Build a strong, well-branched frame of stems and leaves before flowering.
| Nutrient direction | Lean toward nitrogen to drive vigorous stems and foliage while the plant is still building its frame. |
|---|---|
| Timing | Through the active growing weeks before flowers set. |
| Frequency | Regular light feedings while the plant is putting on leafy growth. |
| Fertilizer types | A nitrogen-forward complete fertilizer, Compost or aged manure as a top-dressing |
| Precautions | Support and mulch the plant as it grows, and ease back on nitrogen as flowering approaches so bloom is not delayed. |
Flowering and fruiting
Support steady flower set and fruit development through the harvest period.
| Nutrient direction | Shift to a balanced feed with good potassium to support fruit set and filling, easing back on high nitrogen. |
|---|---|
| Timing | From first flowering through the fruiting and harvest period. |
| Frequency | Steady light feedings that continue while fruit is setting and maturing. |
| Fertilizer types | A balanced complete fertilizer with adequate potassium, A potassium-inclusive fruiting-vegetable fertilizer |
| Precautions | Keep watering even during fruiting; erratic moisture plus salt buildup encourages blossom-end rot and cracking. |
Nutrient Deficiency Signs & Corrections
Older, lower leaves fade to pale green or uniform yellow and overall growth slows.
| Possible causes | low available soil nitrogen, nitrogen leaching from heavy watering or rain, thin, low-organic-matter soil |
|---|---|
| Appears first on | older, lower leaves |
| What to check | recent feeding history, soil organic matter, watering and drainage |
| Possible correction | Apply a nitrogen-containing complete fertilizer and build soil organic matter, then water evenly. |
A sunken, dark, leathery rot develops at the blossom end of developing fruit.
| Possible causes | locally low calcium reaching the developing fruit, irregular or inconsistent watering, root stress or salt buildup limiting calcium uptake |
|---|---|
| Appears first on | the blossom (bottom) end of young fruit |
| What to check | watering consistency and mulch, soil moisture swings, soil calcium and salt status |
| Possible correction | Steady the moisture supply with even watering and mulch, correct pH and calcium availability, and avoid over-applying nitrogen. |
Interveinal yellowing on older leaves while the veins themselves stay green.
| Possible causes | low soil magnesium, high potassium feeding competing with magnesium uptake, leaching in light, sandy soils |
|---|---|
| Appears first on | older, lower leaves |
| What to check | soil magnesium status, how potassium-heavy recent feeding has been, soil texture and leaching |
| Possible correction | Apply a labeled magnesium source such as Epsom salt or a dolomitic amendment and rebalance feeding. |
Pruning, Training & Seasonal Maintenance
Peppers (Capsicum frutescens) are frost-tender subshrubs—woody at the base, soft at the tips—grown as annuals in cold climates but true short-lived perennials where frost is absent. This one is an erect, well-branched tabasco carrying small pods that point upward in clusters, with a hot fruit (Scoville rating of about 30,000–50,000). Peppers need little cutting overall: the useful interventions are shaping a young plant, keeping the base clean and open, and—where the plant is carried over—a hard cutback before overwintering. Fruit forms continuously on new growth, so timing pruning is about vigour and light, not about protecting next year’s flower buds.
Quick Pruning & Maintenance Specs
| Pruning Tolerance | Low–Moderate (naturally tidy; little cutting needed) |
| Primary Pruning Window | End of season, before overwintering – hard cutback to the main Y-frame |
| Secondary Maintenance Window | In-season sanitary and light shaping |
| Typical Frequency | Occasional light passes in season; one hard cut before overwintering |
| Main Objective | Bushy sturdy frame, open lit base, healthy carry-over |
| Young Plant Priority | Little needed – naturally branches well |
| Mature Plant Priority | Clean below the first fork, expose fruit to light, remove dead/diseased wood |
| Best Tool Type | Precision snips (soft tips); bypass secateurs for the semi-woody base |
| Avoid Heavy Pruning During | Active flowering/fruit set, heat spikes, and before frost while outdoors |
Pruning by Plant Age & Size
Newly Established
After transplanting, remove only damaged leaves. Peppers resent root disturbance and a check to growth, so do not shape a plant that is still settling. If the base later rots at soil line—common on older plants—you can lay the stem down and mound soil over the healthy part to force new roots rather than cutting the top away.
Young / Formative
This species branches densely and tidily on its own, so topping is rarely needed. If a seedling runs up leggy, a single early tip pinch encourages branching; otherwise leave it—the small upright pods are carried on the natural twiggy structure. Peppers form a naturally dichotomous (Y-branching) structure—every growing point splits in two—so no leader system is imposed; you are only deciding whether to encourage more branches and how clean to keep the trunk below the first fork.
Mature / Established
Keep the base clean by removing shoots and leaves below the first fork for airflow, take out any dead or aphid-infested lower branches, and thin lightly only if inner fruit is heavily shaded. Heavy-fruited types still need a stake or cage so branches do not bend to the soil.
Seasonal Pruning Schedule
Early Season / Establishment
Objective: build a sturdy branched frame. Remove: nothing structural until established; optional early tip pinch and crown-bud removal as above. Keep: all healthy foliage. Response: bushier growth, stronger later set.
Summer Canopy & Base Management
Objective: light to inner fruit and airflow at the base. Remove: shoots and leaves below the first fork, any aphid-infested shaded lower growth, dead wood. Do NOT remove: healthy outer canopy—peppers and their exposed fruit sunscald badly if you open them up in strong heat. Response: cleaner base, better-lit fruit. Fruiting impact: minimal if light; over-thinning bares fruit to scald.
End of Season / Pre-Overwinter
Objective: prepare the plant to be carried through winter indoors or under cover. Remove: most foliage and cut the branches back hard to the main Y-framework (a few short stubs above each fork); strip remaining leaves to reduce pests moving inside. Response: the plant goes semi-dormant, then reshoots from the retained frame in spring and fruits far earlier than a fresh seedling. Fruiting impact: sacrifices late fruit for a big head start next year.
Ongoing Sanitary
Objective: limit aphids, mites, mildew and mosaic virus. Remove: dead, mildewed or virus-mottled leaves and any rotting fruit as they appear, working with dry foliage and clean hands.
Flowering & Fruiting Wood
Peppers flower and fruit on current-season new growth, producing a flower at each new Y-fork continuously through the season—never on spurs or on specific one-year-old wood. Because of this, ordinary pruning does not remove “next year’s flowers” the way it can on woody fruit trees: whatever framework you keep will simply grow new flowering shoots. Crown-flower removal matters little on this freely branching type, which sets many small pods regardless. A hard overwintering cutback removes the current fruiting wood but not the plant’s ability to refruit, since next season’s crop comes from entirely new growth off the retained frame.
Structural Pruning & Training
Little structural pruning is needed—the Y-branching habit self-builds a balanced bush. Remove crossing, rubbing or inward branches only where they crowd the centre, and cage or stake heavy-fruited plants so branches stay off the soil. Thinning the canopy helps only when interior fruit is deeply shaded; otherwise it invites sunscald.
Special Growth to Remove
Remove the shoots and leaves that sprout on the main stem below the first fork to keep the base open and dry—these low, shaded shoots are where aphids congregate. Take off dead, yellowing or infested lower leaves and any rotting fruit. Peppers are grown on their own roots (not grafted in the home garden), so there are no rootstock suckers; and unlike tomatoes there is no need to strip every axillary shoot—the upper side-shoots are the fruiting branches and should be kept.
Container & Small-Space Pruning
In a 10–30 litre (2–6 gallon) pot, an early tip pinch to force a compact bushy plant is more useful than in the ground, and keeping the base clean matters more in the still air of a patio. Keep the plant to a size the root ball can support. Containers make overwintering easy: after the season cut the plant hard back to its frame, root-prune and refresh part of the soil, and bring it into a bright frost-free spot to reshoot in spring. Do not feed heavily right after a hard cutback—let new growth call for it.
Tools
Soft growing tips and the crown flower: pinch by hand or use precision snips. The semi-woody main stem and branch bases (notably at the hard overwintering cutback): bypass secateurs. There is no call for loppers, a saw or a pole pruner on a plant this size, and never hedge shears—pepper cuts are selective and shearing would destroy the branch structure.
Tool Hygiene & Disease Risk
Classification: High-risk. Peppers host mechanically transmitted tobamoviruses (Pepper mild mottle virus, Tobacco/Tomato mosaic) that pass plant to plant on hands and blades with no insect vector. Wash hands and wipe or dip snips and secateurs (dilute bleach or 70% alcohol) between plants, and especially before and after any plant showing leaf mottling or distortion. Bin infected prunings rather than composting near the crop. This reflects the genuine disease profile of Capsicum, not a blanket rule.
Cut Placement & Technique
Pinch soft tips and the crown bud with finger and thumb. On firmer wood cut cleanly just above a node or fork, angled so water sheds, leaving no long stub to die back. At the overwintering cutback, cut a short way above each main fork so dormant buds remain to reshoot. Work with dry foliage and clean tools so soft-stem wounds seal before disease enters.
Heavy Pruning & Rejuvenation
Peppers tolerate a hard cutback to the main Y-framework—this is exactly the overwintering technique. Cut most of the top away leaving the fork structure and a few short stubs; the plant reshoots from those buds in spring. This costs the late crop but, for a slow long-season type, delivers a much earlier and larger harvest next year.
Post-Pruning Care
After opening the base or thinning, the main risk is sunscald on newly exposed fruit and stems—shade cloth helps in fierce heat. Keep soil evenly moist (not wet) and hold off on nitrogen: after a hard overwintering cutback the plant should be kept cool, on the dry side and lightly lit until new shoots appear, then eased back into feeding as growth resumes.
Common Pruning Mistakes
- Stripping all side-shoots like a tomato—on peppers the upper forks are the fruiting branches and must be kept.
- Over-thinning the canopy in heat and exposing fruit and stems to sunscald.
- Shearing the plant with hedge shears instead of making selective cuts at the forks.
- Pruning or handling plants with mottled leaves without cleaning tools, spreading mosaic virus.
- Topping a naturally dense, tidy plant that never needed it and losing early set.
When NOT to Prune
Avoid pruning right after transplanting (peppers sulk after a check), during active flowering and fruit set (you drop developing pods), in heat spikes (fresh cuts and bared fruit scald), and—while the plant is still outdoors—in the weeks before first frost, since pruning pushes tender regrowth that frost will kill. Time the hard cutback to coincide with moving the plant under cover, not before a cold night outside.
Recommended Tools (by task)
- precision_snips — pinch/cut soft tips, the crown bud and thin lower leaves cleanly without crushing the stem.
- bypass_secateurs — the semi-woody main stem and the hard overwintering cutback to the Y-frame.
- blade_disinfectant — wipe/dip between plants to block mechanical spread of pepper mosaic viruses.
Pruning Troubleshooting
| Problem | Possible Cause | What to Check | Corrective Action |
| Tall leggy plant, few branches | Never tip-pinched; low light | Branching at the growing tips, light levels | Pinch the tip early to force forking; move to full sun |
| Sunscald on fruit (pale sunken patches) | Canopy over-thinned in heat | How much shading foliage remains | Stop thinning; let canopy regrow; use shade cloth in peak heat |
| Aphids and mould at the base | Congested, shaded lower shoots kept on | Growth below the first fork | Clean the stem below the fork; improve airflow; treat pests |
| Overwintered plant slow to reshoot | Kept too cold, wet or dark after cutback | Temperature, moisture, light after the hard cut | Move to bright frost-free warmth, keep just moist, resume light feeding as buds break |
Propagation Guide
Tabasco (Capsicum frutescens) is easiest from seed, the most practical method; cuttings and layering keep an individual plant true and let it be overwintered.
Seed is easy and the usual practical start, but because peppers are pollinated by insects a plant grown near other peppers or cultivars can throw variable seedlings; stem cuttings (rooted in water or moist soil) reproduce a chosen plant exactly and let a favourite be overwintered indoors. Propagation itself is easy.
Quick Propagation Specs
| Best Propagation Method | Seed (easy, practical) |
| Alternative Methods | Stem cuttings; simple layering; overwintering rooted stock |
| Propagation Difficulty | Easy |
| Seed True-to-Type | Tabasco is a stable open-pollinated variety and comes fairly true if isolated; seed from plants near other peppers can vary |
| Vegetative True-to-Type | Yes – cuttings and layers keep the parent’s fruit type |
| Best Propagation Season | Sow late winter to early spring indoors; take cuttings in the warm season |
| Seed Germination Time | Roughly 5–20 days, sometimes longer |
| Cutting Rooting Time | About 2–3 weeks, sometimes less |
| Germination Temperature | Best 21–26°C (70–79°F); workable roughly 10–32°C (50–90°F) |
| Seed Sowing Depth | 5–10 mm (about 0.25–0.5 in) |
| Final Field Spacing | 20×40 cm (8×16 in), varies by cultivar |
Growing from Seed
Seed Handling & Viability
Scoop seed from fully ripe fruit, wash off the pulp and dry it. Only fully matured seed is reliably viable, so check that the seed is ripe before storing. Keep it dark, cool and dry; for storage beyond a year the refrigerator is best. The small upright fruits carry the seed; harvest fully ripe fruit for the most viable seed.
Sowing Season
Start indoors at the end of winter and set out in early spring where grown as an annual; in frost-free zones (about 10b–11a and warmer) sowing can be done in spring or, with enough warmth, through much of the year.
Sowing Depth & Seedling Spacing
Sow 5–10 mm (0.25–0.5 in) deep in trays or cells. Space seed about 2–3 cm apart, better 4–5 cm, and prick out into individual pots once seedlings have about five true leaves.
Germination Conditions
Germination wants steady warmth and evenly moist (not wet) soil in a bright, humid spot; raise watering if temperatures are high.
Germination Time
Roughly 5–20 days, sometimes longer, so germination can be staggered rather than even.
Seedling Care
Keep seedlings above 10°C (50°F) in good light with moderate, steady moisture. The young sprouts are very attractive to insects and need protection early on; transplant after about five leaves.
Stem Cuttings
Cutting Type & Timing
Use healthy stem sections – including the shoots removed when pruning. Cuttings root best in the warm season; in mild areas spring or autumn suit them, but they can be taken almost any time given warmth and humidity.
Rooting Setup & Hormone
Root the cutting either in a glass of water (change the water every few days) or inserted into moist soil, ideally a peat-based mix. Rooting hormone is optional and can speed things but is not required.
Rooting Time
Roots usually form in about 2–3 weeks, sometimes sooner. An easy trick is to sow indoors over winter, feed with nitrogen to push leafy growth, then take several cuttings from that one seedling – giving several plants from a single seed and letting frost-tender plants be carried through winter as rooted stock.
Air & Ground Layering
A low branch can be bent down, pegged and covered with soil; it roots where buried and is then severed from the parent – a simple, high-success way to clone a plant without detaching a cutting first.
Bloom & Flower Guide
Quick Details
- Bloom Season: Year-round in tropical and subtropical climates; spring to summer in temperate climates
- Time to First Bloom: Roughly 45-70 days after planting out
- Flower Appearance: Small white, cream or purple flowers with about six petals, in clusters of 2-3
- Edibility: Ornamental only – the flower is not eaten, and the leaves and unripe fruit are toxic
Detailed Blooming Overview
Tabasco is a productive, upright pepper that flowers abundantly, often holding many small blooms and green-to-red fruit at once. In warm climates it carries flowers nearly all year; in temperate gardens it blooms strongly through spring and summer. The small flowers, held erect on this species, are the making of the fiery little peppers.
Flower Characteristics
- Small flowers in white to cream or purple, with roughly six petals.
- Carried in small clusters of two or three, often standing upright on this species.
- Star-shaped with a central cone of stamens.
Bloom Care & Thinning
- Thinning the bloom: On young plants still building their frame, removing the first flowers encourages sturdier growth before a heavy fruit set.
- Pollination: Largely self-fertile; bees and other pollinators plus a gentle shake improve fruit set.
- Encouraging steady bloom: Even warmth, consistent moisture and light feeding keep flowers coming; extreme heat can cause blossom drop.
Bloom Health & Protection
- Aphids and thrips collect on buds and flowers; an insecticidal soap or neem oil helps.
- Gray mold (Botrytis) can rot blooms in cool, damp air; airflow and a suitable fungicide help if it appears.
Fruit & Uses
The Tabasco pepper is grown for its small, hot edible fruits, which are used fresh, dried, ground and made into sauces and pickles. The fruit is the only part used and, being pungent, is normally used in small amounts as a seasoning rather than eaten on its own.
Quick Edible Specs
| Edible Parts | Fruit (pod) |
|---|---|
| Main Use(s) | Culinary – hot sauces, cooking, pickling, spreads, spices and herbs; some traditional medicinal use |
| Eaten Raw or Cooked | Both, but used sparingly because of the heat |
| Preparation Required | Handle with care; deseed to reduce heat if wished |
| Harvest Season | Year-round in sub/tropical climates; spring–summer in temperate climates |
| Time to First Harvest | Within the first growing season (see growing notes for bearing age) |
| Storage | Fresh for short-term use; dried, ground, made into sauce or pickled for long-term storage |
| Safety/Toxicity Caveat | A hot pepper — roughly 30,000–50,000 Scoville heat units — whose capsaicin can burn skin, eyes and mouth; wear gloves and use in moderation |
Fruit
Fruit colour can be red, yellow, green or orange and comes in a variety of shapes; the peppers are hot, rated at about 30,000–50,000 on the Scoville scale. Fruit is usually picked when fully coloured (commonly red) for full flavour and heat, though it can also be used green. Pick when firm and of typical cultivar size.
Harvesting
Cut fruit with a short stub of stem rather than pulling. In warm climates fruit can be picked over much of the year; in temperate climates the harvest is mainly spring to summer. Frequent picking encourages further bearing.
Preparation, Uses & Safety
Tabasco-type peppers are used to make hot sauces, in cooking, pickling and spreads, and dried and ground as a spice; the seeds and inner ribs carry most of the heat and can be removed to soften it. Because capsaicin is a strong irritant, wear gloves when handling and keep hands away from the eyes. Some pepper parts are traditionally used medicinally, but no health claims are made here.
Pests, Diseases & Troubleshooting
Overview: Tabasco-type hot peppers (Capsicum frutescens) face the same insect and disease pressures as other peppers — aphids, thrips (and TSWV), whiteflies, weevil, mites, plus bacterial leaf spot, Phytophthora and anthracnose. Their small, upright fruit are somewhat less prone to blossom-end rot than large bells, but even watering, airflow and sanitation remain the core of management.
Quick Troubleshooting Overview
| Issue / Pest | Main Symptom | Primary Solution |
|---|---|---|
| Aphids / whitefly / thrips | Curled tips, sticky honeydew, silvery stippling; virus spread | Water spray, beneficials, insecticidal soap or neem; sticky traps |
| Pepper weevil | Bud and fruit drop, misshapen pods with internal damage | Remove fallen buds/fruit, sanitation, pheromone traps |
| Spider mites | Stippling, bronzing and webbing in hot dry spells | Raise humidity, hose foliage, horticultural oil |
| Bacterial leaf spot / anthracnose | Spots on leaves, scabby or sunken fruit lesions in wet weather | Resistant seed, no overhead water, copper sprays |
| Phytophthora blight | Wilt, stem-base and root rot, fruit rot in wet soil | Raised beds, drainage, rotation, remove sick plants |
| Blossom-end rot | Sunken black patch at fruit tip | Even deep watering, mulch, correct calcium/pH |
Common Pests & Management
- Aphids (Myzus persicae / Aphis gossypii):
- Symptoms: Small green, yellow or black soft-bodied insects clustered on growing tips and leaf undersides; curled, distorted new growth, sticky honeydew and sooty mold. The most important concern is their role as vectors of mosaic and other viruses.
- Prevention & Control: Blast colonies off with a firm water spray; encourage ladybirds, lacewings and parasitic wasps; use reflective mulch to deter landing; remove badly infested tips. If needed, treat with insecticidal soap or neem oil, spraying leaf undersides thoroughly.
- Western flower thrips (Frankliniella occidentalis):
- Symptoms: Slender, fast-moving insects; silvery stippling and speckling on leaves, deformed new growth and scarred fruit. Critically, thrips transmit Tomato spotted wilt virus (TSWV), so even low numbers matter.
- Prevention & Control: Use blue sticky traps to monitor; keep the area weed-free (weeds harbour thrips and TSWV); introduce predatory mites (Amblyseius) and minute pirate bugs. Treat hotspots with spinosad or insecticidal soap, rotating modes of action.
- Whiteflies (Bemisia tabaci / Trialeurodes vaporariorum):
- Symptoms: Tiny white moth-like insects that fly up in clouds when foliage is disturbed; yellowing, honeydew and sooty mold. They also vector viruses and weaken plants under protection.
- Prevention & Control: Hang yellow sticky traps; release Encarsia parasitic wasps in greenhouses; remove heavily infested lower leaves. Apply insecticidal soap or horticultural oil to leaf undersides, repeating to catch newly hatched nymphs.
- Pepper weevil (Anthonomus eugenii):
- Symptoms: Small dark snout beetle; adults feed on buds and foliage while larvae develop inside buds and young fruit, causing bud and fruit drop and misshapen, discolored pods with internal frass.
- Prevention & Control: Remove and destroy all fallen buds and fruit promptly to break the life cycle; monitor with pheromone/yellow traps; keep nightshade weeds down. In hot climates where it is established, targeted insecticides may be needed, but sanitation is the backbone of control.
- Two-spotted spider mite (Tetranychus urticae):
- Symptoms: Fine pale stippling, bronzing and faint webbing on leaf undersides in hot, dry, dusty conditions; leaves dull, then dry and drop.
- Prevention & Control: Raise humidity and hose down foliage; avoid dusty, drought-stressed plants; introduce predatory mites (Phytoseiulus). Treat with horticultural oil or insecticidal soap, targeting undersides and repeating every 5-7 days.
- Tomato/tobacco hornworm (Manduca quinquemaculata / Manduca sexta):
- Symptoms: Large green caterpillars with a tail horn that strip foliage rapidly and gouge fruit, leaving dark droppings; damage often appears overnight.
- Prevention & Control: Hand-pick at dawn or dusk (a UV torch makes them glow); encourage parasitic braconid wasps (leave caterpillars carrying white cocoons). For heavy pressure, use a Bacillus thuringiensis (Bt) spray while larvae are small.
Diseases & Fungal Issues
- Bacterial leaf spot (Xanthomonas euvesicatoria):
- Symptoms: Small water-soaked spots that turn brown with yellow halos on leaves, and raised scabby lesions on fruit; leaves yellow and drop, worst in warm, wet, splashy conditions.
- Treatment & Management: Use certified disease-free seed and resistant varieties; avoid overhead watering and handling plants when wet; rotate away from peppers/tomatoes for 2-3 seasons; remove infected debris. Copper-based sprays give suppression, not a cure.
- Phytophthora blight (Phytophthora capsici):
- Symptoms: Sudden wilting and plant collapse, dark lesions at the stem base and crown, root rot, and firm brown rot on fruit; devastating in waterlogged soil.
- Treatment & Management: Plant on raised, well-drained beds; never let water pool around stems; avoid overwatering and improve drainage; rotate crops and remove infected plants entirely. Resistant rootstocks/varieties and phosphonate or mefenoxam products help where the disease is established.
- Anthracnose (Colletotrichum spp.):
- Symptoms: Sunken, circular, water-soaked lesions on ripening fruit with concentric rings of pink-to-black spore masses; mostly a problem in warm, humid, rainy weather.
- Treatment & Management: Use clean seed and resistant lines; mulch to reduce soil splash; harvest ripe fruit promptly and remove infected pods; improve airflow. Preventive copper or approved fungicides help during prolonged wet spells.
- Tomato spotted wilt virus (TSWV):
- Symptoms: Bronzing, ring spots and necrotic streaks on leaves and stems, stunted growth, and mottled, deformed fruit with concentric ring patterns; spread by thrips, not by contact alone.
- Treatment & Management: There is no cure: rogue out infected plants immediately. Control thrips rigorously, manage weeds that host the virus, and choose TSWV-resistant varieties where available.
- Powdery mildew (Leveillula taurica):
- Symptoms: Patchy white powdery growth, often first on leaf undersides, with yellow blotches on the upper surface and leaf drop; unusual in that it can infect from within the leaf.
- Treatment & Management: Space plants for airflow and avoid heavy nitrogen; remove affected leaves. Sulfur, potassium bicarbonate or horticultural oil sprays check its spread; apply sulfur only in mild temperatures to avoid burn.
Growing Difficulties & Abiotic Problems
- Blossom-end rot:
- Cause & Symptoms: A sunken, leathery brown-black patch at the blossom (bottom) end of the fruit, caused by calcium not reaching the fruit tip — usually from uneven watering, drought stress or excess nitrogen rather than a true soil calcium shortage.
- Correction Strategy: Water deeply and evenly and mulch to buffer soil moisture; avoid letting plants dry out and rewet; do not over-fertilize with high-nitrogen feeds. Correct soil pH so calcium is available; the first affected fruit can be removed to redirect energy.
- Sunscald:
- Cause & Symptoms: Pale, papery, blistered patches on fruit shoulders exposed to intense sun, which later collapse or rot; worst on plants that have lost canopy to pests, disease or heavy pruning.
- Correction Strategy: Maintain healthy leaf cover to shade fruit; avoid over-pruning; use light shade cloth during extreme heat waves. Keep plants vigorous so foliage protects developing pods.
- Blossom drop:
- Cause & Symptoms: Flowers dry and fall without setting fruit, typically when day temperatures exceed roughly 32°C or nights stay very warm, or under drought, low humidity or excess nitrogen.
- Correction Strategy: Provide afternoon shade and consistent moisture during heat; avoid heavy nitrogen feeding while flowering; be patient — set usually resumes as temperatures moderate.
- Leaf curl and edema:
- Cause & Symptoms: Upward or downward leaf curling from heat, wind or watering swings; and corky blisters on undersides (edema) when roots take up water faster than leaves release it in cool, humid, wet conditions.
- Correction Strategy: Even watering, good drainage and shelter from drying wind reduce curl; improve airflow and avoid overwatering in cool, humid spells to prevent edema.
What Helps — Products & Tools
For this crop, keep a core kit of insecticidal soap and neem or horticultural oil (for aphids, mites, whitefly and thrips), spinosad or Bt (for thrips and hornworms), plus yellow and blue sticky traps for monitoring. On the disease side, copper fungicide addresses bacterial leaf spot and anthracnose, sulfur or potassium bicarbonate handles powdery mildew, and phosphonate products support against Phytophthora. Reflective mulch and even, deep watering prevent both virus spread and blossom-end rot.