

Plant Profile & Key Characteristics
Overview: Canyon sage, a compact evergreen shrub 0.5-1 m (20-40 in) tall, grown as an ornamental for its purple, white-lipped flowers. It is a moderate-growing, pollinator-friendly perennial, often grown as an annual in cold climates.
Quick Specifications
| Specification | Attribute |
|---|---|
| Plant Type / Life Cycle | Evergreen perennial shrub (grown as an annual where cold) |
| Foliage Type | Evergreen in frost-free climates |
| Mature Size | 0.5-1 m (20-40 in) tall |
| Growth Rate | Moderate |
| Hardiness | USDA zone 8-11 as a perennial; 5-8 as an annual |
Growth Form & Structure
- Height & Spread: A compact shrub 0.5-1 m (20-40 in) tall in the ground; also grown in a 10-20 L (2.6-5.2 gal) container with free-draining soil.
- Growth Habit & Form: Bushy, twiggy, well-branched shrub; vigorous and can be invasive, kept neat by pruning.
- Lifespan & Maturity: A perennial that reaches size quickly and flowers over a long season.
Anatomy & Physical Features
- Leaves & Foliage: Small, ovate, hairy green leaves.
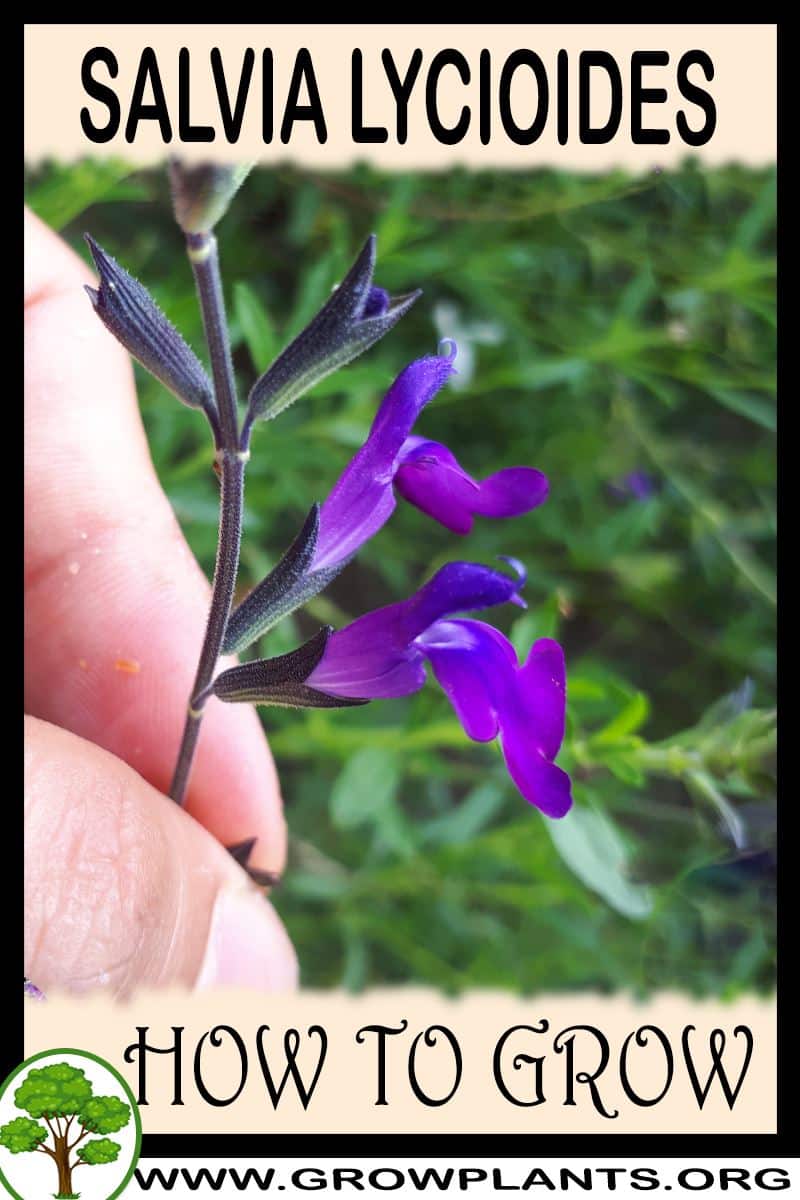
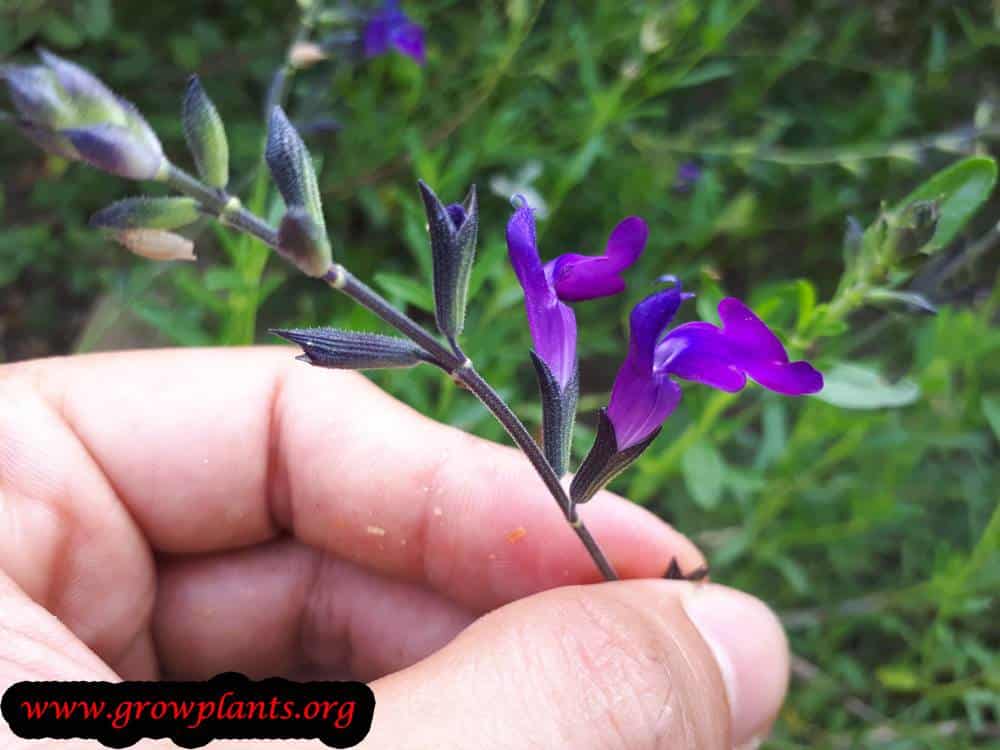
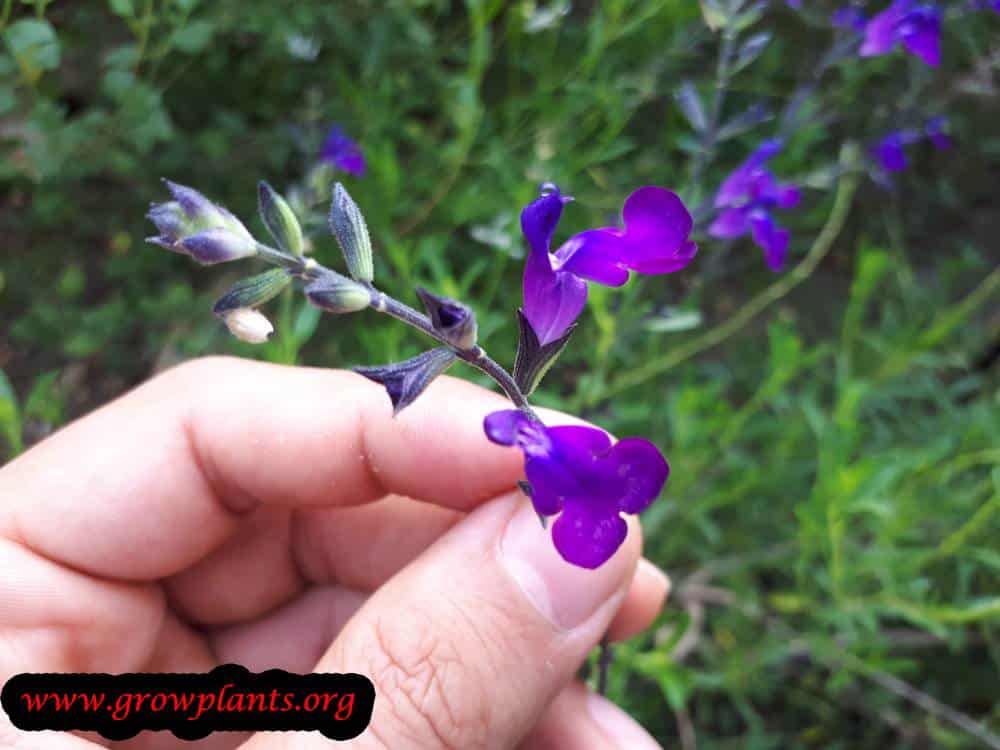
- Flower Characteristics: Purple flowers with a white lower lip (“apron”), attractive to pollinators.
Primary Uses & Landscape Value
- Functional & Ornamental Roles: A compact, long-flowering ornamental for borders, dry gardens, pollinator plantings and containers.
Care Guide: Planting, Soil & Watering
Overview: Canyon sage (Salvia lycioides) is a compact shrubby sage for full sun to light shade in light, well-draining soil. It is drought-tolerant once established, so sharp drainage is the key requirement.
Quick Care Requirements
| Requirement | Ideal Condition |
|---|---|
| Planting Season | Spring (as an annual, zones 5-9); spring to summer (9); spring or autumn (10b); year-round (11) |
| Growth Rate | Moderate |
| Soil Type | Light, well-draining soil |
| Water Need | Low to moderate — drought-tolerant once established; let the top few cm dry out between waterings |
Planting & Establishment
- Best Planting Season: Plant in spring as an annual in zones 5-9, spring to summer in zone 9, spring or autumn in zone 10b, and year-round in zone 11.
- How to Plant:
- Hole Preparation: Dig a planting hole roughly twice as wide as the root ball but no deeper, so the roots can spread into loosened soil.
- Soil Amendments: Work in a little compost to improve structure, and add grit or coarse sand to sharpen drainage on heavier soils — these sages dislike rich, soggy ground.
- Planting Depth: Set the plant at the same depth it grew in its pot, with the root collar level with the surface — never bury the stem, which invites rot.
- Growth Speed & Expectations: Expect a moderate, steady pace of growth, reaching a good size over a season or two.
Soil, Watering & Drainage Care
- Soil Mix & Drainage Needs: Provide light, aerated, sharply drained soil; in containers use a free-draining potting mix with added perlite or vermiculite rather than heavy garden soil, and make sure excess water escapes freely, since waterlogged roots quickly rot.
- Watering Schedule & Technique:
- Young / Newly Planted: Water regularly right after planting to settle the roots, keeping the soil lightly moist while the plant establishes.
- Established: Once established it is drought-tolerant — water deeply but infrequently, letting the top few centimetres dry out before watering again.
- Seasonal Adjustments: Increase watering during prolonged heat and cut right back over the cool, wet season, since soggy soil is the main cause of rot.
Climate, Light & Hardiness
Salvia lycioides (canyon sage) is a drought-tolerant subshrub suited to subtropical, Mediterranean, and temperate climates. It is reliably perennial in zone 8–11 and is grown as an annual in colder zone 5–8 climates, needing full sun to half shade.
Quick Climate Specifications
| Climate Zones | Subtropics, mediterranean, temperate |
|---|---|
| USDA Hardiness Zones | 8–11 as a perennial; grown as an annual in zone 5–8 |
| Light Conditions | Full sun to half shade |
| Frost Tolerance | Low to moderate within its perennial range |
Sunlight & Light Exposure
Optimal Light Setup
Full sun gives the strongest, most floriferous growth; half shade is tolerated.
Extreme Heat Tolerance
Well suited to hot, dry summers typical of Mediterranean and subtropical climates once established.
Temperature Extremes & Hardiness
USDA Hardiness & Regional Limits
Reliably perennial from zone 8 to 11; in zone 5–8 it is more commonly grown as an annual since a typical winter there is likely to kill it.
Cold Damage & Winter Protection
A mulch over the base for winter, as the source data recommends, can help protect the crown at the colder edge of its perennial range.
Frost Sensitivity
Frost can damage or kill top growth; well-drained soil is important since cold combined with wet soil is more likely to be fatal than cold alone.
Wind, Humidity & Microclimate
Dry-Air Tolerance
Well suited to the drier air of Mediterranean and subtropical climates.
Growing in Pots, Balconies & Indoors
Salvia lycioides (canyon sage) is a sun-loving shrubby sage, first-rate in a patio or balcony pot but not a houseplant – it wants full sun and airy outdoor conditions. The grower gives a clear container recipe: a modest 10-20 L (2.6-5.2 gal) pot with sharp drainage.
Quick Details
- Container Size: 10-20 L (2.6-5.2 gal) – the grower’s recommendation
- Indoor Suitability: Not a houseplant – a full-sun Mediterranean-type sage
- Best Spot: Full sun to half shade
- Soil & Drainage: Well-drained, well-ventilated mix; water must run out freely
- Watering in Pots: Small to average – let it dry between waterings
Indoors & On the Windowsill
- Houseplant limits: Not a houseplant – it needs full sun and moving air to grow well and flower; indoors it grows soft, leggy and shy to bloom.
- Overwintering: It is only half-hardy, so in cold-winter areas move the pot into a bright, frost-free, airy spot (cool porch or unheated greenhouse) over winter and return it to the sun once frosts pass.
On a Balcony or Patio
- Light & air: Give it the sunniest, most open spot; it thrives in the bright, breezy conditions of a balcony and enjoys reflected heat from walls. Pots dry fast in sun, so check moisture in warm spells.
- Practicalities: A filled pot is heavy once watered – check the balcony can take the load, and stand it where drainage runoff will not be a nuisance.
Choosing the Pot, Soil & Long-Term Care
- Pot & drainage: The grower’s guide: a 10-20 L (2.6-5.2 gal) pot, well ventilated with enough holes for good drainage so water runs straight out – he advises against a saucer under the pot. strong drainage holes and never leave it standing in a saucer of water, or the roots rot. Terracotta breathes and dries faster; glazed or plastic holds moisture longer.
- Potting mix: Potting mix or peat soil with perlite or vermiculite and add rich soil with organic matter, as the grower advises.
- Soil renewal: Every few years change the soil – all of it, or just the outer soil around the roots, as the grower suggests.
- Feeding: Potted plants use up their feed quickly as nutrients leach away with each watering, so feed more often than plants in open ground through the growing season.
Fertilizing & Feeding
This desert-canyon-adapted sage is used to lean soil and flowers best on light feeding, whether grown in the ground or in a container, where nutrient needs are slightly steadier because pots leach nutrients faster than garden soil.
Quick Fertilizing Specs
| Feeding Level | Light – a lean-soil desert sage, in ground or in containers. |
|---|---|
| Main Nutrient Priority | A light balanced fertilizer with restrained nitrogen; container plants need a touch more consistency than garden plants. |
| Best Feeding Period | Spring as growth resumes, with only light feeding needed through the long bloom season. |
| Soil pH | Tolerates a wide range; not a demanding factor for this species. |
| Reduce/Stop Feeding | Stop feeding well before winter, including container plants, so growth can harden off before cold weather. |
Feeding by Growth Stage
Establishment After Planting or Potting
Help a newly planted or newly potted Canyon sage establish roots, whether in garden soil or a container.
| Nutrient direction | A light, balanced fertilizer with restrained nitrogen – this desert-canyon-adapted sage is accustomed to lean soil and does not want rich feeding. |
|---|---|
| Timing | In spring, as new growth begins or shortly after planting. |
| Frequency | A light feeding as growth resumes is usually enough to start the season; container-grown plants may need slightly more regular light feeding since nutrients leach from pots faster than from garden soil. |
| Fertilizer types | Light balanced fertilizer for flowering perennials, Well-draining potting mix amended with a slow-release feed for container plants |
| Precautions | Whether in the ground or a container, keep nitrogen light – heavy feeding pushes soft growth and reduces flowering on this lean-soil-adapted species. |
Extended Bloom Season
Support the plant’s spring-through-autumn bloom season.
| Nutrient direction | Continue with light, balanced feeding; a high-phosphorus ‘bloom’ product offers no real advantage. |
|---|---|
| Timing | Through the extended spring-to-autumn bloom period. |
| Frequency | Established garden plants rarely need feeding through bloom; container plants benefit from an occasional light feeding since their root zone is more limited. |
| Fertilizer types | Light balanced fertilizer, applied sparingly for in-ground plants, Diluted liquid feed at a light rate for container plants |
| Precautions | In containers, flush the potting mix with plain water occasionally to prevent fertilizer salts from building up around the roots. |
Dormancy / Winter Protection
Let the plant enter dormancy or protective winter care without pushing tender growth before cold weather.
| Nutrient direction | None – withhold fertilizer as the plant heads into dormancy or protective winter care. |
|---|---|
| Timing | Autumn through winter. |
| Frequency | No feeding during this period. |
| Fertilizer types | No feeding at this stage – allow the plant to rest through autumn and winter without supplemental nutrition. |
| Precautions | Do not fertilize in autumn or winter, including container plants; resume light feeding only once new growth resumes in spring. |
Nutrient Deficiency Signs & Corrections
Leggy, floppy stems with lush leaves but noticeably fewer flowers than expected, especially in container-grown plants.
| Possible causes | Over-fertilizing, especially frequent feeding of a potted plant, Insufficient light causing stretching independent of nutrition, Pot-bound roots reducing overall vigor and bloom |
|---|---|
| Appears first on | New stem growth |
| What to check | Recent fertilizer frequency, especially for container plants, Light exposure, Root crowding inside the pot |
| Possible correction | Reduce feeding frequency, especially for potted plants, confirm adequate direct sun, and repot into fresh, well-draining mix if roots are crowded. |
Yellowing between the veins of new leaves while the veins stay green.
| Possible causes | High soil or potting-mix pH limiting iron availability, Poor drainage or waterlogged roots, Root stress from a recent transplant or repotting |
|---|---|
| Appears first on | Newest leaves |
| What to check | Soil or potting mix pH and drainage, Recent lime application or alkaline irrigation water, Root health |
| Possible correction | Improve drainage and pH first, then apply a chelated iron product per its label if the pattern persists. |
Crusty white deposits on the soil surface or pot rim, with leaf tip or margin burn.
| Possible causes | Fertilizer salt buildup from regular feeding without flushing, Naturally salty or hard irrigation water, Poor drainage trapping salts in the root zone |
|---|---|
| Appears first on | Leaf tips and margins, and the visible soil or pot surface |
| What to check | Any visible salt crust on the soil or pot, The irrigation water source and hardness, Drainage and how often the pot has been flushed with plain water |
| Possible correction | Flush the potting mix thoroughly with plain water to leach out accumulated salts, improve drainage, and reduce fertilizer frequency going forward. |
Pruning, Training & Seasonal Maintenance
Salvia lycioides (Canyon sage) is a small, woody-based subshrub native to arid canyon and scrub habitat, and it is best pruned with a light hand. Unlike border-style salvias that are trimmed into a tidy rounded form, Canyon sage is usually grown in naturalistic or xeriscape plantings where a looser, more open habit is actually the desired look, so infrequent, minimal shaping suits it better than regular shearing. It tolerates pruning through most of the growing season, but where it sits at the cold edge of its perennial range (zone 8), winter dieback of stem tips is common, so the main cleanup cut is best done in spring once new growth confirms which wood survived.
Quick Pruning & Maintenance Specs
| Pruning Tolerance | Moderate |
| Primary Pruning Window | Spring, once new basal growth appears and winter dieback is visible |
| Secondary Maintenance Window | Light, occasional shaping/deadheading through spring–autumn |
| Typical Frequency | Infrequent – light spring cleanup plus occasional touch-ups, not regular shearing |
| Main Objective | Remove winter-killed tips; keep a loose, naturalistic form rather than a formal shape |
| Young Plant Priority | Light pinching only, to encourage some early branching without over-shaping |
| Mature Plant Priority | Spring dieback removal; occasional light renewal if growth becomes sparse or woody |
| Best Tool Type | Bypass secateurs for slender, semi-woody stems |
| Avoid Heavy Pruning During | Autumn/winter (removes potentially still-living wood before winter damage is visible) and peak summer drought stress |
Pruning by Plant Age & Size
Newly Established
Pinch lightly to encourage a few branching points; avoid heavy shaping while the plant is still rooting into its (typically lean, well-drained) site.
Young / Formative
No formal training system – a light touch of pinching is enough; over-shaping runs against the naturalistic habit this species is usually grown for.
Mature / Established
In spring, cut back stems that show no new growth to just above live wood; beyond that, prune only occasionally to control size or remove an errant stem, keeping the open, informal habit intact.
Seasonal Pruning Schedule
Pre-Growth / Early-Spring
Objective: remove winter dieback and tidy the plant before the main growth flush. Remove: stem tips or sections that failed to leaf out. Do not remove: live wood that is simply slow to show growth – wait until new leaves clarify what survived. Expected response: fresh growth from below the cut. Flowering impact: positive, since flowers form on the new growth that follows.
Ongoing Sanitary
Objective: light, occasional tidying. Remove: spent flower stems and the rare overly long shoot. Do not remove: significant portions of the plant – keep cuts minimal to preserve the loose native form. Expected response: minor, doesn’t materially change bloom.
Structural Pruning & Training
Little formal structure is imposed; the main structural task is simply preventing the base from becoming bare or overly woody over several years, addressed with an occasional light renewal cut rather than annual hard shaping.
Special Growth to Remove
Winter-killed stem tips (removed once spring growth shows the live/dead boundary); spent flower stems, tidied occasionally rather than after every bloom flush.
Container & Small-Space Pruning
In a container, a somewhat more regular light trim helps keep proportions in check, but avoid over-shaping into a tight ball – this species still reads best with some natural looseness even in a pot.
Tools
Bypass secateurs are sufficient for the slender, semi-woody stems this small subshrub produces; no heavier tools are needed.
Tool Hygiene & Disease Risk
Routine – clean, sharp tools are enough. Facts note aphids and spider mites as pest risks, neither of which is meaningfully spread by pruning tools.
Cut Placement & Technique
Cut winter-damaged stems back to the first point of visible live growth (green tissue) rather than to a fixed height; cut spent flower stems back to a leaf node.
Heavy Pruning & Rejuvenation
Tolerated only moderately – occasional renewal of a sparse or overly woody plant is reasonable, but this species is not suited to the kind of hard annual cutback used on more vigorous border salvias; keep rejuvenation infrequent and light.
Post-Pruning Care
Water lightly after spring cleanup if the season has been dry, matching this species’ naturally low water needs; avoid extra feeding, since it is adapted to lean soils.
Common Pruning Mistakes
Shearing it into a tight, formal shape, which works against its naturalistic habit and can reduce flowering; cutting back hard in autumn before winter damage is even visible, removing wood that may have survived fine; treating it like the more vigorous, harder-pruned garden salvias.
When NOT to Prune
Avoid cutting back in autumn/early winter before dieback is visible; avoid pruning during peak summer drought stress, when this dry-adapted species is best left undisturbed.
Recommended Tools (by task)
- Any age – spring dieback removal and light shaping, slender stems: bypass_secateurs – clean, precise cuts suited to this small subshrub’s light pruning needs.
Propagation Guide
As with closely related Salvia species, the most practical way to keep a particular color or form true is by stem cuttings, which can be rooted either in water or in a peat-based mix with rooting hormone; growing from seed is also an option and is not required, though as with many Salvia, named selections are best kept true by cuttings. Overall this is an easy plant to propagate by cuttings, with seed also generally straightforward though less precisely documented for this species.
Quick Propagation Specs
| Best Propagation Method | Stem cuttings |
| Alternative Methods | Seed; simple/ground layering |
| Propagation Difficulty | Easy |
| Seed True-to-Type | Usually true-to-type for the species (cultivar-dependent for named selections) |
| Vegetative True-to-Type | Yes |
| Best Propagation Season | Cuttings/layering: best in warm spring or in autumn, rooted in half shade in hardiness zone 10b-11 |
| Cutting Rooting Time | Typically a few weeks under warm, humid conditions |
| Seed Sowing Depth | Shallow, just covering the small seed |
Growing from Seed
Sowing Depth & Orientation
Sow shallowly, just covering the small seed, as is typical for other shrubby Salvia species.
Germination Conditions
Warm, sunny conditions with consistently moist soil typically suit this genus best.
Germination Time
Not documented in detail for this species; expect roughly a few weeks under favorable warm conditions, as is typical for shrubby sages.
Seedling Care
Keep evenly moist in a sunny position while seedlings establish.
Stem Cuttings
Cutting Type
Stem/tip cuttings.
Best Timing
Warm spring or in autumn; in hardiness zone 10b-11, root cuttings in half shade.
Cutting Preparation
Take a stem section with a few nodes and remove the lower leaves before rooting.
Rooting Setup
Cuttings can be rooted either in water, changing the water every few days, or in soil, ideally a peat-based mix, keeping humidity high around the cutting either way.
Rooting Hormone
Beneficial when rooting in soil — a root-growth hormone is recommended to improve results.
Rooting Time
Typically a few weeks under warm, humid conditions.
Air & Ground Layering
A low, flexible stem can also be propagated by simple layering — bend a branch down and cover a section of it with soil while still attached to the parent plant, then sever and grow it on once rooted.
Bloom & Flower Guide
Quick Details
- Bloom Season: Spring, summer and autumn
- Time to First Bloom: In its first season – young plants flower quickly once established
- Flower Appearance: Two-lipped (labiate) flowers in deep purple-blue, each with a paler “apron” lower lip
- Edibility: Grown as an ornamental; the flowers are not a documented edible, so best enjoyed for their colour and nectar
Detailed Blooming Overview
Canyon sage flowers over a long stretch from spring through autumn. The small, two-lipped blooms – the grower describes each as a little dancer’s body wearing a dress – are a rich purple-blue set off by a white lower lip. Like its Salvia cousins, it is nectar-rich and draws bees and hummingbirds while it flowers.
Flower Characteristics
- Labiate (two-lipped) flowers with an upright upper lip and a flared lower one.
- Deep purple to blue with a contrasting white “apron.”
- Fragrant foliage and nectar-rich flowers that attract pollinators.
Bloom Care & Thinning
- Managing the bloom: A light trim after each flush keeps the plant neat and prompts more flowers.
- Pollination & wildlife: Leave the flowers to feed bees and hummingbirds through the warm months.
Pests, Diseases & Troubleshooting
Overview: Canyon sage is a small, drought-adapted desert shrub salvia that is very trouble-free; aphids and spider mites in hot, dry conditions are the main pests, and overwatering causing root rot is the chief danger.
Quick Troubleshooting Overview
| Issue / Pest | Main Symptom | Primary Solution |
|---|---|---|
| Aphids | Sticky, curling new shoots with clustered insects | Water jet, then insecticidal soap or neem |
| Spider mites | Fine stippling and webbing in hot, dry spells | Raise humidity; horticultural oil / soap |
| Whiteflies | White flies rising in clouds; honeydew | Sticky traps; insecticidal soap on undersides |
| Powdery mildew | White powdery coating on leaves | Improve airflow; sulphur or bicarbonate spray |
| Root / crown rot | Wilting and collapse in wet soil | Sharp drainage; avoid overwatering |
Common Pests & Management
- Aphids (Aphis / Myzus spp.):
- Symptoms: Clusters of small green, black or grey soft-bodied insects on tender new shoots, flower stalks and leaf undersides; sticky honeydew, sooty mould and distorted, curling young growth, often with ants in attendance.
- Prevention & Control: Blast colonies off with a firm jet of water in the morning; encourage ladybirds, lacewings and hoverflies by leaving some flowers; pinch out badly infested tips. If needed, treat with insecticidal soap or a light horticultural/neem oil, coating leaf undersides and repeating weekly.
- Two-spotted spider mites (Tetranychus urticae):
- Symptoms: Fine pale stippling or bronzing on the leaves, later a dusty look and delicate webbing on the undersides; leaves dry and drop. Flares up in hot, dry, dusty or indoor conditions.
- Prevention & Control: Raise humidity and hose the foliage down (mites hate moisture); remove heavily webbed leaves; avoid drought stress. Treat with horticultural oil or insecticidal soap, thoroughly wetting leaf undersides, and repeat every 5–7 days for several rounds.
- Whiteflies (Trialeurodes vaporariorum):
- Symptoms: Tiny white moth-like insects that fly up in clouds when the plant is disturbed, with scale-like nymphs and honeydew on the leaf undersides, leading to yellowing, weak growth and sooty mould. Worst on soft-leaved and greenhouse-grown salvias.
- Prevention & Control: Hang yellow sticky traps to monitor and reduce adults; spray leaf undersides with insecticidal soap or neem oil every 5–7 days to break the life cycle; improve airflow and avoid excess nitrogen. Encarsia parasitic wasps help under cover.
- Mealybugs (Pseudococcus / Planococcus spp.):
- Symptoms: White cottony tufts tucked into leaf axils, stem joints and around the base; sticky honeydew and sooty mould, with stunted, off-colour growth. Common on tender salvias overwintered indoors.
- Prevention & Control: Dab colonies with a cotton bud dipped in surgical spirit; isolate affected plants; wash off with insecticidal soap. Repeat neem or soap sprays every 7–10 days, and inspect new plants before bringing them in.
- Spittlebugs (froghoppers) (Philaenus spumarius):
- Symptoms: Frothy white ‘cuckoo spit’ on stems and leaf joints in late spring, sheltering a soft green nymph; slight distortion but usually little real harm.
- Prevention & Control: Largely cosmetic – wash the froth off with a jet of water; no spraying is normally needed. Because this insect can carry Xylella in affected regions, keep plants vigorous and buy from clean stock.
- Slugs & snails (Gastropoda):
- Symptoms: Ragged holes chewed in young leaves and soft new shoots, especially in spring and after rain, with slime trails on soil and foliage; most damaging to seedlings and fresh basal growth.
- Prevention & Control: Clear hiding places near the crown; hand-pick after dark; protect young plants with copper rings, grit or wool pellets; use iron-phosphate slug pellets sparingly where pressure is high.
Diseases & Fungal Issues
- Powdery mildew (Golovinomyces / Erysiphe spp.):
- Symptoms: White powdery patches on upper leaf surfaces and stems, spreading to coat the foliage; leaves may yellow, curl and drop. Worst in crowded plantings with poor airflow, humid nights and dry days.
- Treatment & Management: Space and prune for good air movement; avoid overhead watering late in the day; remove and bin affected leaves. Treat with a potassium-bicarbonate, sulphur or biofungicide spray, and choose mildew-tolerant varieties where it recurs.
- Grey mould / Botrytis (Botrytis cinerea):
- Symptoms: Fuzzy grey-brown mould on faded flowers, soft stems and crowded leaves, rotting and collapsing them; common in cool, damp, still conditions and on winter-protected plants.
- Treatment & Management: Remove spent flowers and dead material promptly; increase ventilation and reduce leaf wetness; avoid overcrowding. A biofungicide or, if severe, a labelled fungicide can help – but sanitation and airflow are the real fix.
- Root & crown rot (Rhizoctonia / Pythium / Phytophthora spp.):
- Symptoms: Wilting despite moist soil, blackened crown, mushy roots and sudden collapse – most often on Mediterranean sages sitting in wet, heavy ground over winter. This, not insects, is the biggest killer of shrubby salvias.
- Treatment & Management: Prevention is everything: plant in free-draining, gritty soil, avoid overwatering, and never let the crown sit wet. Improve drainage or grow in raised beds/pots. Remove and destroy collapsed plants; there is no reliable cure once rot is advanced.
- Leaf spot (Cercospora / Septoria spp.):
- Symptoms: Brown or purple-ringed spots that enlarge and merge on lower, older leaves in wet spells; heavy spotting yellows the leaves and causes drop.
- Treatment & Management: Remove and bin affected leaves; water at the base, not over the foliage; thin crowded growth for airflow. A copper-based fungicide can slow persistent outbreaks, but cultural control is usually enough.
Growing Difficulties & Abiotic Problems
- Wet feet & winter root rot:
- Cause & Symptoms: Salvias – especially shrubby Mediterranean and Mexican types – hate cold, soggy soil. Waterlogging in winter suffocates and rots the roots, causing yellowing, collapse and death often blamed on cold when drainage is the real culprit.
- Correction Strategy: Plant high in sharply drained, gritty soil; add horticultural grit to heavy ground or use raised beds and pots. Water sparingly once established, and cut back watering going into the cool season.
- Frost & cold damage:
- Cause & Symptoms: Tender salvias are cut down or killed by hard frost; foliage blackens and stems die back.
- Correction Strategy: Mulch the crown, grow in a sheltered spot, or overwinter frost-tender types under cover or as cuttings. Leave old top-growth on until the worst cold passes, then cut back as new shoots appear.
- Legginess & poor flowering:
- Cause & Symptoms: Too little light, sparse pruning or over-feeding with nitrogen makes plants sprawl with weak stems and few flowers.
- Correction Strategy: Give full sun; pinch young plants and cut back after each flush to keep them bushy; feed lightly. Many salvias flower far better when not over-pampered.
- Sunburn & heat/wind scorch:
- Cause & Symptoms: Bleached, brown-edged or crisped leaves where plants moved suddenly into fierce sun, hot drying wind or reflected heat without hardening off.
- Correction Strategy: Harden plants off gradually, keep them adequately (not excessively) watered in heat, and mulch the root zone; light afternoon shade helps in the hottest sites.
What Helps – Products & Tools
For the few pests salvias get, reach first for insecticidal soap, a light horticultural or neem oil, and yellow/blue sticky traps; a jet of water clears aphids and mites. For disease, airflow and good drainage do most of the work, backed by a potassium-bicarbonate or sulphur spray for powdery mildew and a copper fungicide for leaf spot or downy mildew. Always follow the label, and spray oils in the cool of the evening to protect the bees that love salvia flowers.