



Plant Profile & Key Characteristics
Overview: Tradescantia hirta is a fast-growing, 30-80 cm (12-31 in) herbaceous perennial in the spiderwort genus (Tradescantia), grown mainly as an ornamental foliage and flowering plant. It is evergreen in frost-free climates and is usually treated as an annual where winters are cold.
Quick Specifications
| Specification | Attribute |
|---|---|
| Plant Type / Life Cycle | Perennial (grown as an annual in cold climates) |
| Foliage Type | Evergreen (dies back where frost occurs) |
| Mature Size | 30-80 cm (12-31 in) high, spreading wider |
| Growth Rate | Moderate to fast |
| Root System | Fibrous and shallow |
| Toxicity | Mildly toxic – the sap can irritate skin and is an irritant to cats and dogs |
| Hardiness | USDA zone 9b+ as a perennial |
Growth Form & Structure
- Height & Spread: In the ground it reaches 30-80 cm (12-31 in) high and forms a spreading clump. In a container it stays more compact; start in a 5-10 litre pot at least twice the width of the root ball and pot on as the roots fill it.
- Growth Habit & Form: Mounding, clump-forming herbaceous perennial with arching, slightly fleshy stems and grassy, lance-shaped leaves.
- Lifespan & Maturity: A short-lived but easily renewed perennial that reaches full size within a single growing season and is quickly propagated from stem cuttings.
Anatomy & Physical Features
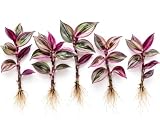
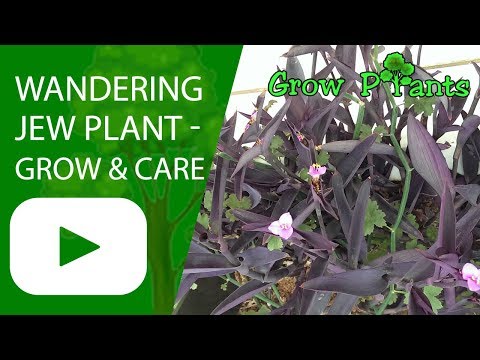
- Leaves & Foliage: Leaves are green with purple top, leaves hairy, linear-shaped with pointed top. The foliage is slightly fleshy and, in the variegated cultivars, brightly patterned.
- Flower Characteristics: Small three-petalled flowers in purple, each bloom lasting only a single day but produced in succession over the season.
Primary Uses & Landscape Value
- Functional & Ornamental Roles: Ornamental clump for borders, cottage-garden and native plantings, edging and containers, and also grown as a houseplant. Spreads readily and is listed as invasive in the source, so give it room or keep it contained.
Care Guide: Planting, Soil & Watering
Overview: This spiderwort is an easy, vigorous perennial that does best in rich, evenly moist yet free-draining soil with room to spread. It enjoys steady moisture and some humidity but is forgiving once established, tolerating short dry spells and light drought.
Quick Care Requirements
| Requirement | Ideal Condition |
|---|---|
| Planting Season | Spring after the last frost in cold climates; through to year-round in frost-free zones |
| Growth Rate | Moderate to Fast |
| Soil Type | Light, rich, well-draining soil high in organic matter |
| Water Need | Low to Moderate – prefers evenly moist soil but tolerates short dry spells; let the top few cm dry between waterings |
Planting & Establishment
- Best Planting Season: Timing depends on your climate: Spring as an annual or in zone 9, spring to summer in zone 10a, spring to autumn 10b-11a, year-round in zone 11b+. In frost-prone areas, plant in spring once the danger of frost has passed, or simply grow it as an annual.
- How to Plant:
- Hole Preparation: Dig a hole about twice the width of the root ball and no deeper, loosening the surrounding soil so the shallow roots spread out easily.
- Soil Amendments: Work in compost, humus or well-rotted organic matter to enrich the bed, and keep the mix light and free-draining – add perlite or grit to heavy ground.
- Planting Depth: Set the plant with its crown at soil level and keep the fleshy stems from being buried, which can invite rot.
- Growth Speed & Expectations: Growth is moderate to fast, and plants spread readily by trailing, self-rooting stems – give them space to crawl and expect quick, dense groundcover in good conditions.
Soil, Watering & Drainage Care
- Soil Mix & Drainage Needs: It wants soil that holds moisture yet drains freely. In containers use a peat- or potting-mix base blended with perlite plus humus and organic matter, and always plant in pots with drainage holes so the roots never sit in water and rot.
- Watering Schedule & Technique:
- Young / Newly Planted: Water regularly and mulch around young plants to hold moisture while the roots establish, keeping the soil consistently moist but never waterlogged.
- Established: Once settled, water moderately and deeply, letting the top few centimetres dry before watering again – established plants shrug off short dry spells.
- Seasonal Adjustments: Water more during summer heat and less in winter, keeping the soil only barely moist for plants overwintered in cold climates.
Climate, Light & Hardiness
Tradescantia hirta grows as a true perennial in warm climates from about USDA zone 9b up (zone 9a with attentive overwinter care), and is grown as an annual in much colder zones down to about zone 3. It tolerates full sun through full shade but needs plenty of light to bloom.
Quick Climate Specifications
| Climate Zones | Mediterranean, Desert, Subtropics, Temperate, Tropics |
|---|---|
| USDA Hardiness Zones | 9b+ as a perennial (zone 9a with the right overwinter care); grown as an annual from zone 3 upward |
| Optimal Temp Range | Typically 18–29°C (64–84°F) during active growth |
| Cold Damage Begins | Foliage is damaged by frost; growth halts as temperatures approach 0°C (32°F) |
| Approx. Survival Minimum | The rootstock may persist through winter with care down to about USDA zone 9a, corresponding to lows of roughly −6 to −9°C (15–20°F), though top growth dies back with frost |
| Frost Tolerance | Low |
| Light Conditions | Full Sun / Half Shade / Full Shade |
| Wind Tolerance | Low–Moderate |
| Salt / Coastal Tolerance | Low |
Sunlight & Light Exposure
Optimal Light Setup
Adapts to full sun through full shade, but flowering depends on abundant indirect light.
Direct Sun Requirement
Its own sowing guidance calls for a sunny location, and direct sun does help boost flowering, though it is not strictly required.
Shade & Heat Management
In hot desert or subtropical sun, part shade helps prevent leaf scorch on the hairy, purple-tinged foliage.
Best Exposure / Orientation
A bright, sunny to lightly filtered spot with good drainage suits it best.
Temperature Extremes & Hardiness
USDA Hardiness & Regional Limits
Reliably perennial from about zone 9b upward (zone 9a with care). Outside this range it is grown as an annual, typically from about zone 3.
Cold Damage & Winter Protection
At the cold edge of its perennial range, mulching the crown for winter improves the odds of the rootstock surviving.
Frost Sensitivity
Top growth is frost-tender and dies back quickly with freezing temperatures.
Extreme Heat Tolerance
Tolerates hot summers well, including desert and subtropical heat, provided some shade or moisture is available.
Wind, Humidity & Microclimate
Humidity Preferences
Prefers moist, humid, rich-soil conditions; less vigorous in prolonged dry air without extra moisture.
Wind Tolerance
Its crawling habit tolerates moderate wind, though strong wind can dry the shallow-rooted growth.
Rainfall & Seasonal Moisture
Performs best with fairly consistent moisture while tolerating some drought once established.
Microclimate Recommendations
Give it room to spread, as it grows vigorously and can become weedy in favorable warm, humid conditions.
Growing in Pots, Balconies & Indoors
Spiderworts like Tradescantia hirta are among the easiest and most rewarding container plants – fast, forgiving trailing or clumping growers that settle happily into pots on a windowsill, balcony or patio, reaching about 30-80 cm (12-28 in) tall. The grower confirms they grow well indoors as houseplants; a mature plant with room to grow will even flower. The main limit indoors is light: ordinary room lighting is too weak, so give it plenty of bright, indirect daylight (a little direct sun is welcome) — or, where natural light is limited, a grow light can help.
Quick Details
- Container Size: Start at 5-10 L (2.6-5.2 gal), at least twice the size of the root ball – it grows fast and fills a pot quickly.
- Indoor Suitability: A genuine, easy houseplant in bright indirect light; it only blooms once mature.
- Best Spot: Bright, indirect light with a little sun (full sun to part shade outdoors).
- Soil & Drainage: Airy potting mix or peat with perlite, enriched with humus and organic matter; must drain freely.
- Watering in Pots: Keep lightly moist (a mulch helps); let the base briefly hold water then dry out over a few days – drought-tolerant and unhappy in constant wet.
- Mature Size: About 30-80 cm (12-28 in) tall.
Indoors & On the Windowsill
- A real houseplant: Yes – spiderwort is one of the classic beginner houseplants. Give it a spot with good light (even a little sun is fine); ordinary artificial room light alone is not enough, but bright indirect daylight does the job.
- Flowering indoors: It needs to mature and have room to grow before it blooms, so give it space, light and time.
- Windowsill growing: The trailing stems look great cascading from a bright sill or shelf, and the plant stays happy in a fairly small pot.
- Overwintering: It is tender – in cold-winter climates bring it indoors before frost and keep it as a houseplant through winter; cuttings root very easily if you want a backup.
- Keep out of reach: Spiderwort sap can irritate skin and is mildly toxic to pets and people if chewed – site it away from curious cats, dogs and small children, and never treat it as edible.
On a Balcony or Patio
- Light & wind: Give it a bright spot with some sun. On hot, exposed balconies, walls and railings throw back heat and pots dry fast – check moisture often and offer a little shade in the fiercest afternoon sun.
- Practicalities: It is light and easy to move or bring in for winter; make sure water drains freely and does not pool under the pot.
Choosing the Pot, Soil & Long-Term Care
- Pot & drainage: A 5-10 L pot with strong drainage holes; skip a permanently full saucer to avoid root rot. Terracotta breathes and dries faster (well suited to this drought-tolerant plant), while glazed or plastic holds moisture longer.
- Potting mix: Airy potting mix or peat/coir with perlite, plus humus and organic matter; a layer of chopped mulch on top keeps the surface from drying too fast.
- Feeding: Potted plants need feeding more often than in the ground, since nutrients leach out with watering – a light balanced feed through the growing season is plenty.
- Repotting & potting up: It grows fast, so when the roots fill the pot either move up a size or prune the roots and top growth and replant; refresh the mix every couple of years.
Grower’s Container Tip
- Fill-and-dry watering: The grower lets the base of the pot fill with water and then dry out once every few days, keeping a chopped-mulch layer on top – a simple rhythm that keeps spiderwort evenly moist without leaving it waterlogged.
- Give it headroom: Because it grows so quickly, he starts it in a pot at least 200% larger than the root ball so it has room to spread.
Growing this plant in a greenhouse
A greenhouse can give tradescantia hirta frost protection and cold protection.
Greenhouse at a glance
| Greenhouse suitability | Conditional - depends on your climate |
|---|---|
| Main benefits | frost protection, cold protection |
| Season extension | earlier spring & later autumn |
| Outdoor protection advisable below | about 0°C |
| Suitable types | unheated greenhouse, polycarbonate greenhouse |
| Heating | Heating is optional - useful mainly for winter growing in cold areas. |
Related greenhouse guides
- Greenhouses: How to Choose the Right Greenhouse
- Polycarbonate Greenhouses: What to Look for Before Buying
Fertilizing & Feeding
Grown for both its purple flowers and the purple tinting on its new leaf tops, this spiderwort does well on moderate feeding through spring growth and bloom; very rich feeding can favor lush green growth over that purple foliage tint.
Quick Fertilizing Specs
| Feeding Level | Moderate feeder – steady feeding through spring and bloom supports a full display. |
|---|---|
| Main Nutrient Priority | Balanced nutrition with adequate nitrogen; avoid overly rich feeding, which can dilute the purple tint on new foliage. |
| Best Feeding Period | Spring through the bloom season, while the plant is actively producing new growth and flowers. |
| Organic Options | Compost or well-rotted organic matter worked into the bed, or a diluted balanced liquid feed for container-grown plants. |
| Reduce/Stop Feeding | Taper off once bloom finishes and growth slows toward the rest period. |
Feeding by Growth Stage
Spring Growth Flush
Build a full clump of foliage, including the purple-tinted new leaf tops, ahead of the purple flowering display.
| Nutrient direction | A balanced feed with adequate nitrogen supports strong new growth as the plant resumes active growth for the season. |
|---|---|
| Timing | Spring, as new growth resumes after the cooler months. |
| Frequency | Light-to-moderate feeding as growth resumes supports a fuller plant heading into bloom. |
| Fertilizer types | A balanced general-purpose garden fertilizer, or a diluted liquid feed for container-grown plants. |
| Precautions | Very heavy nitrogen feeding can push lush, plain-green growth at some expense to the purple tint on new leaf tops – keep feeding moderate rather than rich. |
Spring–Summer Bloom Period
Support the plant’s purple flowering display through the bloom season.
| Nutrient direction | Continued balanced feeding, without switching to a specialty bloom-booster product, keeps both foliage color and flowering healthy. |
|---|---|
| Timing | Through the spring-to-summer bloom season. |
| Frequency | Moderate feeding through bloom keeps the display going without overfeeding. |
| Fertilizer types | A balanced general-purpose garden or flowering-perennial fertilizer. |
| Precautions | Skip high-phosphorus bloom-booster products – balanced nutrition, not extra phosphorus, is what drives good flowering. |
Post-Bloom Rest
Let the plant wind down after flowering without pushing fresh, tender growth into the season’s decline.
| Nutrient direction | None – withhold fertilizer at this stage. |
|---|---|
| Timing | Once flowering has finished and growth slows for the season. |
| Frequency | No feeding at this stage. |
| Fertilizer types | No feeding at this stage – the plant is winding down for the season and does not need additional nutrients. |
| Precautions | Do not fertilize after bloom finishes; resume feeding only with the next season’s new growth. |
Nutrient Deficiency Signs & Corrections
Foliage looks pale and thin, the purple leaf-top tint is faint, and flowering is noticeably reduced.
| Possible causes | Poor or depleted soil with little natural fertility, A feeding routine skipped for one or more seasons, Heavy competition from nearby plant roots for available nutrients |
|---|---|
| Appears first on | Older leaves and the overall size and number of new stems. |
| What to check | Soil fertility and organic matter content, Whether nearby plants are outcompeting it for nutrients, Bloom quantity compared with a typical season |
| Possible correction | Work compost or a balanced fertilizer into the soil as new growth begins in spring. |
Leaf edges show a dry, scorched-looking brown margin and flower stems seem weak.
| Possible causes | Potassium leaching from light, sandy, or heavily irrigated soil, An unbalanced feeding history that has emphasized nitrogen alone, General soil nutrient depletion in an unamended bed |
|---|---|
| Appears first on | Margins of older leaves first. |
| What to check | Soil type and how freely it drains or is watered, Whether only nitrogen-heavy fertilizers have been used in the past, Stem strength and flower stem sturdiness |
| Possible correction | Switch to a balanced fertilizer rather than a nitrogen-only product, and amend sandy soil with organic matter. |
New leaves emerge yellow between green veins, distinct from the plant’s normal purple leaf-top tint.
| Possible causes | High soil pH limiting iron availability, Compacted or waterlogged soil restricting root function, Root disturbance from recent transplanting or dividing |
|---|---|
| Appears first on | Newest leaves and shoot tips. |
| What to check | Whether the pale areas follow leaf veins rather than the plant’s normal purple tinting, Soil pH if new growth is consistently yellow, Drainage and compaction around the root zone |
| Possible correction | Address soil pH and drainage first; a chelated iron product applied per its label can help persistent cases. |
Pruning, Training & Seasonal Maintenance
Tradescantia hirta is an upright, clump-forming herbaceous perennial reaching 30–80cm, with soft hairy stems and purple-tinged leaf tips – there is no woody structure, so pruning is entirely about managing current-season growth rather than building a framework. Its size range overlaps the larger spiderworts in this batch, so by mid-summer clumps can lengthen and begin to sprawl; a post-bloom cutback is the main useful intervention, tidying spent flower stems and reliably producing denser, more compact regrowth. Because flowers form on new growth from the crown rather than on old wood, cutting the clump back after flowering does not cost next year’s bloom.
Quick Pruning & Maintenance Specs
| Pruning Tolerance | Moderate (soft stems regrow readily from the crown) |
| Primary Pruning Window | After the main bloom flush, spring into summer |
| Secondary Maintenance Window | Early spring, to clear any winter damage in cooler parts of its range |
| Typical Frequency | 1 cutback per season plus ongoing deadheading |
| Main Objective | Remove spent bloom stems, curb sprawl, encourage repeat flowering |
| Young Plant Priority | Minimal – let the clump establish |
| Mature Plant Priority | Post-bloom renewal cutback |
| Best Tool Type | Precision snips or bypass secateurs (soft, hairy stems) |
| Avoid Heavy Pruning During | Peak heat/drought stress and shortly before a cold snap in marginal zone 9a sites |
Pruning by Plant Age & Size
Newly Established
Leave a young clump largely uncut in its first season beyond removing damaged growth, to let it build its root system.
Young / Formative
No structural training applies; light pinching can encourage a fuller, less leggy clump before the first bloom flush.
Mature / Established
Established clumps are cut back after flowering, particularly once stems near the upper end of this species’ 30–80cm range have begun to arch and open up the clump.
Seasonal Pruning Schedule
| Stage | Objective | Remove | Do Not Remove | Expected Response / Flowering Impact |
| Early Spring (pre-growth) | Clear winter dieback | Collapsed or frost-blackened stems | Green basal growth | Clears space for new shoots; no bloom impact |
| Post-Flowering | Renew the clump, curb sprawl | Spent flower stems; cut the clump back by roughly a third to a half | Do not remove more than half the foliage in hot weather | Encourages compact regrowth and often a lighter repeat bloom |
| Ongoing Sanitary | General tidiness | Individual spent flower stems, dead leaves | Healthy foliage | Keeps the clump presentable without a full regrowth cycle |
Structural Pruning & Training
No branch framework exists. The relevant structural task is renewal – cutting the clump back after flowering keeps it self-supporting rather than sprawling, especially where individual clumps reach the taller end of this species’ size range.
Special Growth to Remove
- Spent flower stems once the day-long blooms finish.
- Dead or yellowing basal leaves, watching for excess moisture retention at the hairy crown in humid conditions.
Container & Small-Space Pruning
In containers, cut the clump back after flowering to keep it in scale with the pot, since this species can reach the taller end of its size range and outgrow a small container’s proportions. Trim roots and top growth together at repotting if rootbound.
Tools
Precision snips for spot deadheading; bypass secateurs for the bulk post-bloom cutback of a mature clump. No saw, loppers or hedge shears are needed for this non-woody plant.
Tool Hygiene & Disease Risk
Routine hygiene (clean, sharp blades) is sufficient; no documented transmissible disease risk specific to this species requires disinfecting between cuts.
Cut Placement & Technique
Cut spent flower stems just above a leaf node or at the base near the crown; for the seasonal renewal cut, shear the clump to a uniform height.
Heavy Pruning & Rejuvenation
Tolerates a moderate-to-hard cutback well after flowering; reducing the clump by a third to a half renews it, with a short gap in bloom followed by fresh, denser foliage and often a second flush.
Post-Pruning Care
Water after a cutback made in warm weather; avoid fertilizing purely to force regrowth, since this species already grows at a fast to medium rate on its own.
Common Pruning Mistakes
- Leaving the clump uncut through summer, resulting in a sprawling mass at the taller end of this species’ size range.
- Cutting back too early, before the first bloom flush has finished.
- Cutting back hard just before a cold snap in marginal zone 9a sites, exposing tender new growth to frost.
When NOT to Prune
Avoid hard cutback during active flowering, during peak heat/drought stress, and shortly before an expected frost at the cooler edge of its hardiness range.
Recommended Tools (by task)
- precision_snips – for deadheading spent blooms on lightly maintained clumps.
- bypass_secateurs – for the main post-bloom renewal cutback of a mature, larger clump.
Propagation Guide
Spiderwort (Tradescantia hirta) can be started from seed with a fairly standard 2–8 week germination window, or – more quickly and reliably – from stem cuttings, which root readily in soil or water through spring and early summer; seed is usually true-to-type for this straight species, but cuttings are still the faster route, especially where the plant is grown as an annual. Propagation overall is easy.
Quick Propagation Specs
| Best Propagation Method | Stem cuttings |
| Alternative Methods | Seed; simple (ground) layering; clump division |
| Propagation Difficulty | Easy |
| Seed True-to-Type | Usually true-to-type |
| Vegetative True-to-Type | Yes |
| Best Propagation Season | Spring to early summer (cuttings); spring to summer (seed sowing) |
| Seed Germination Time | 2–8 weeks |
| Cutting Rooting Time | Often shows roots within a couple of weeks under warm, humid conditions |
| Germination Temperature | About 18–24°C (65–75°F) |
| Seed Sowing Depth | 0.5–1cm (0.25–0.5in) |
Growing from Seed
Seed Handling & Viability
Store saved seed in a dry, dark place, ideally refrigerated, until sowing time.
Sowing Season
Spring to summer.
Sowing Depth & Orientation
Sow at 0.5–1cm (0.25–0.5in) deep in light, well-drained soil, in a sunny spot. Where sowing multiple seeds or a nursery row, space at roughly 20 x 30cm (8 x 12in).
Germination Conditions
Keep the soil moist with light humidity around the seed bed.
Germination Time
2–8 weeks.
Seedling Care
Water at an average, consistent rate – keep the soil moist without overwatering, and never let it dry out completely. Once up, grow seedlings on in full sun with regular watering, keeping the soil moist.
Stem Cuttings
Cutting Type
Softwood stem cuttings carrying at least three leaves.
Best Timing
Spring to early summer; also the recommended route when the plant is grown as a cold-climate annual, for a faster start than seed.
Cutting Preparation
Cut a stem section with a minimum of three leaves attached.
Rooting Setup
Two options work: insert the cutting into moist soil and keep humidity high, or stand it in water – changing the water every few days – until small roots form, then either pot it into soil or leave it longer in water with a dilute fertilizer added.
Rooting Hormone
Not necessary – cuttings root without special treatment, though a hormone dip is optional if faster rooting is wanted.
Rooting Time
Not stated precisely by the site; water cuttings typically show visible roots within a couple of weeks under warm, bright conditions.
Air & Ground Layering
The site’s own propagation guidance describes bending a stem over and covering it with soil while still attached to the parent plant – effectively simple (ground) layering. Pin or weigh the buried section down, keep it moist, and once roots have formed at the buried node, sever it from the parent and transplant.
Division, Offsets, Pups & Suckers
Not covered in the site’s own propagation notes, but as a clump-forming spiderwort this species can generally also be divided in spring: lift an established clump, separate it into rooted sections, and replant promptly, keeping divisions shaded and moist until they resume growth.
Bloom & Flower Guide
Quick Details
- Bloom Season: Spring / Summer
- Time to First Bloom: Fast-growing – it usually flowers in its first or second season
- Flower Appearance: Small three-petalled flowers in a neat triangular form, coloured purple
- Edibility: Grown as an ornamental and not eaten – as with other spiderworts the sap can be a mild skin irritant for some people
Detailed Blooming Overview
Tradescantia hirta – Tradescantia hirta – is a spiderwort grown mainly for its foliage, but it flowers freely in spring and summer. Each bloom is a small three-petalled triangle in purple. A hallmark of spiderworts is that every individual flower lasts only a single day, usually opening in the morning and closing by the heat of the afternoon, while the plant keeps opening a steady succession of fresh blooms over many weeks.
Flower Characteristics
- Three triangular petals forming a small, tidy triangular flower.
- Colour: purple.
- Each flower is short-lived (about a day), with new buds opening in succession.
- The open, pollen-rich flowers draw bees and other pollinators.
Bloom Care & Thinning
- Prolonging the show: Because each flower lasts only a day, deadheading is not essential, but shearing back leggy or tired stems after the first flush encourages fresh growth and a new wave of flowers.
- Light: The most generous flowering comes in bright light – morning sun with some afternoon shade suits it well.
- Pollination: Bees visit the open, pollen-rich flowers readily.
Bloom Health & Protection
- Aphids: Soft new flower stems and buds can attract aphids; a firm jet of water, insecticidal soap or neem oil keeps them down.
Fruit & Uses
This spiderwort is grown ornamentally, but its young leaves, stems and purple flowers follow the same wild-edible pattern documented for the genus: raw or lightly cooked leaves/stems as a mucilaginous green, and fresh flowers as a garnish. It is an occasional foraged edible, not a cultivated vegetable.
Quick Edible Specs
| Edible Parts | Young leaves & stems; flowers |
|---|---|
| Main Use(s) | Culinary – wild salad green/potherb; flowers as garnish |
| Eaten Raw or Cooked | Both |
| Preparation Required | None for flowers; rinse leaves/stems, cook briefly if preferred |
| Harvest Season | Leaves best young in spring; flowers through the spring–summer bloom period |
| Time to First Harvest | Not a cultivated crop – harvest sparingly once the plant is established and growing actively |
| Storage | Use fresh the same day; does not store |
| Safety/Toxicity Caveat | Foraged, not a food crop – sap may irritate skin or mouth in sensitive people; try a small amount first |
Leaves & Greens
Leaves are green with a purple-tinged tip, hairy and linear with a pointed top; pick them young for the mildest, least fibrous texture. Raw they are mucilaginous and grassy-tasting with a slightly fuzzy mouthfeel from the hairs, which a brief saute or steaming removes.
Flowers & Flower Buds
The purple, triangular three-petalled flowers open for a single day and are picked fresh as they open, used raw as a mildly sweet garnish; gather only as much as will be used right away.
Harvesting
Pick leaves and tender stems lightly through the spring–summer growing season, leaving enough foliage for the plant to keep growing, and collect flowers fresh each morning during bloom.
Preparation, Uses & Safety
Rinse leaves, stems and flowers before eating; use raw in salads or wilt briefly, where the texture becomes mildly mucilaginous like a light okra. As with related spiderworts, the sap can occasionally irritate skin or the mouth in sensitive individuals, so sample a small amount first and limit skin contact when gathering larger quantities. This is a foraged use only, not a studied or commercially grown food crop.
Pests, Diseases & Troubleshooting
Tender trailing spiderworts such as this one are among the most resilient of houseplants and warm-climate ground covers, but their soft, fleshy, fast-growing stems attract sap-sucking insects and rot readily in soggy soil. The overwhelming majority of problems are cultural and preventable: bright indirect light, free-draining mix that is allowed to dry slightly between waterings, good airflow, and prompt removal of tired growth keep a plant nearly trouble-free. Reach for organic and physical controls first and treat sprays as a last resort.
Quick Troubleshooting Overview
| Issue / Pest | Main Symptom | Primary Solution |
|---|---|---|
| Mealybugs | White cottony fluff in leaf joints and stem tips | Dab with alcohol, then spray neem or insecticidal soap |
| Spider mites | Fine pale stippling and cobwebbing, dry indoor air | Raise humidity, rinse foliage, apply horticultural oil |
| Aphids | Clusters on soft new tips; sticky honeydew | Blast off with water; insecticidal soap if persistent |
| Root & stem rot | Blackened, mushy, collapsing stems; sour smell | Cut back watering, improve drainage, re-root healthy tips |
| Leggy, fading growth | Sparse stems, washed-out or reverted variegation | Move to brighter indirect light and pinch tips |
| Brown crispy leaf tips | Dry, scorched leaf edges and tips | Raise humidity, water evenly, flush salts from the soil |
Common Pests & Management
- Mealybugs (Pseudococcus longispinus, Planococcus citri):
- Symptoms: Small, soft, white cottony-waxy insects tucked into leaf axils, stem joints and the undersides of leaves, often the single most common pest of spiderworts. They exude honeydew that turns leaves sticky and sooty; heavy colonies stunt and yellow the plant. Do not mistake the white fluff for a fungal mould.
- Prevention & Control: Inspect new plants and isolate them, and wipe leaves regularly. Touch each clump with a cotton bud dipped in rubbing alcohol to kill on contact, then spray thoroughly with neem oil or insecticidal soap, repeating weekly to catch hatchlings. The mealybug destroyer beetle (Cryptolaemus) is an excellent biological control in greenhouses.
- Spider Mites (Tetranychus urticae):
- Symptoms: Tiny sap-suckers that thrive in warm, dry indoor air. Look for fine pale or bronze stippling on the upper leaf surface and delicate webbing across leaf undersides and stem tips; badly infested plants dry out and drop leaves. A sharp tap over white paper dislodges the moving specks.
- Prevention & Control: Raise humidity and avoid hot, stagnant air, and shower the foliage periodically to knock mites off. For active infestations spray horticultural oil or insecticidal soap on the leaf undersides, repeating every few days; predatory mites (Phytoseiulus persimilis) give clean control indoors.
- Aphids (Aphis and Myzus persicae):
- Symptoms: Soft green, black or pink insects clustered on the tender growing tips and flower stalks. They distort new growth and coat it in sticky honeydew that blackens with sooty mould and attracts ants.
- Prevention & Control: Dislodge them with a firm jet of water and pinch out the worst tips. Encourage ladybirds and lacewings outdoors; for stubborn colonies use insecticidal soap or neem, spraying in the cool of the evening to protect pollinators.
- Scale Insects (Coccus hesperidum, soft brown scale):
- Symptoms: Flat to domed brown or tan bumps clamped along stems and leaf veins that do not brush off. They feed on sap, weaken the plant and, like mealybugs, produce honeydew and sooty mould.
- Prevention & Control: Scrape off light infestations by hand or with an alcohol-dipped swab. Smother the rest with horticultural oil, ensuring the spray reaches under the scale covers, and repeat to catch the mobile crawler stage.
- Fungus Gnats (Bradysia spp.):
- Symptoms: Small dark flies drifting up from the potting mix, a sign of soil kept too wet. The larvae live in the top layer of moist mix and can nibble tender roots and rooting cuttings, weakening young plants.
- Prevention & Control: The cure is to let the surface of the mix dry between waterings, which breaks their cycle. Set yellow sticky traps to catch the adults and drench with Bacillus thuringiensis israelensis (mosquito bits) or top-dress with a layer of grit to stop egg-laying.
- Slugs & Snails (Deroceras and others):
- Symptoms: Irregular holes chewed in the tender foliage of plants grown outdoors or in damp, shaded ground-cover plantings, with tell-tale silvery slime trails on leaves and soil.
- Prevention & Control: Water in the morning so foliage is dry by nightfall, clear leaf litter and hiding places, and set out beer traps or copper barriers. Iron-phosphate pellets are a pet-safer bait if pressure is heavy.
Diseases & Fungal Issues
Spiderworts are strongly disease-resistant, and nearly every problem below traces back to excess moisture or crowded, stagnant conditions.
- Root & Stem Rot (Pythium, Rhizoctonia, Fusarium):
- Symptoms: The commonest killer of this genus. Stems turn soft, black and translucent at the base and collapse, roots are brown and mushy, and the whole plant wilts despite wet soil. Triggered by overwatering and poor drainage.
- Treatment & Management: There is no cure for badly rotted tissue, so act early: cut away all healthy tips, let the cut ends callus, and re-root them in fresh, free-draining mix, discarding the rotten base. Prevent by using an open mix, letting the surface dry between waterings and never leaving pots standing in water.
- Gray Mould (Botrytis cinerea):
- Symptoms: A fuzzy grey-brown mould on decaying leaves, dead stem stubs and spent flowers in cool, humid, crowded conditions, spreading into healthy tissue from the debris.
- Treatment & Management: Improve airflow, thin congested growth and promptly remove dead and dying material and fallen litter. Avoid overhead watering late in the day; a copper-based fungicide helps only under persistent damp pressure.
- Fungal Leaf Spot (Cercospora, Colletotrichum):
- Symptoms: Occasional brown to tan spots, sometimes with a yellow halo, on older or splashed leaves in wet, humid weather. Largely cosmetic and rarely serious on a vigorous plant.
- Treatment & Management: Pick off spotted leaves, water at the base to keep foliage dry, and space plants for airflow. A copper fungicide is only warranted if spotting becomes widespread.
Growing Difficulties & Abiotic Problems
- Overwatering & Soggy Soil:
- Cause & Symptoms: The number-one abiotic problem. Constantly wet, airless soil suffocates roots and invites rot, showing as yellowing, mushy stem bases and sudden collapse even as the plant is watered more.
- Correction Strategy: Use a light, free-draining mix, water only when the top of the soil feels dry, and ensure pots drain freely. When in doubt, err on the dry side; spiderworts recover far better from drought than from wet feet.
- Leggy Growth & Fading Variegation:
- Cause & Symptoms: In too little light stems stretch and go bare at the base, leaf colour washes out, and variegated cultivars lose their pattern or revert to plain green.
- Correction Strategy: Move to bright, indirect light (variegated types need the most), pinch the tips regularly to force bushy growth, and cut back leggy stems and re-root the cuttings to renew the plant. Snip out any all-green reverting shoots.
- Brown, Crispy Leaf Tips & Edges:
- Cause & Symptoms: Dry air, erratic watering, or a build-up of fertiliser salts and fluoride scorch the delicate leaf margins and tips brown and papery.
- Correction Strategy: Keep watering even, raise humidity for indoor plants, feed at half strength, and flush the pot thoroughly with plain water every so often to leach out accumulated salts.
- Leaf Scorch & Sunburn:
- Cause & Symptoms: The soft, often variegated foliage of tender spiderworts bleaches and develops dry, faded or scorched patches in harsh, direct midday sun.
- Correction Strategy: Give bright but filtered light or morning sun only, and acclimatise plants gradually when moving them into brighter conditions. Deeply coloured types (like purple heart) take more sun than white-variegated ones.
- Sap Irritation (handling note):
- Cause & Symptoms: The clear sap of many spiderworts can cause redness or itchy contact dermatitis on sensitive skin, and it may irritate the mouth and skin of curious pets.
- Correction Strategy: Wear gloves when pinching, cutting back or propagating, wash hands afterwards, and site plants out of reach of pets that like to chew foliage.
What Helps – Products & Tools
For this genus a small, organic-leaning kit covers almost everything: neem oil and insecticidal soap for mealybugs, aphids, mites and scale; horticultural oil to smother scale and mites; rubbing alcohol and cotton buds for spot-treating mealybugs; yellow sticky traps plus Bt israelensis (mosquito bits) for fungus gnats; iron-phosphate slug bait or beer traps for slugs; and, only if fungal spotting or mould persists, a copper fungicide. Above all, a free-draining potting mix and a moisture meter prevent the root rot that causes most losses. Apply oils and soaps in the cool of the evening to protect bees.