Plant Profile & Key Characteristics
Overview: A hardy herbaceous Allium grown for its edible parts, reaching 10–50 cm (4–20 in) of leaf above clustered bulbs. This culinary perennial (its bulb is biennial) is usually cultivated as an annual or biennial for the kitchen.
Quick Specifications
| Specification | Attribute |
|---|---|
| Plant Type / Life Cycle | Herbaceous perennial (usually grown as an annual/biennial) |
| Mature Size | Bulb 1–10 cm (0.3–4 in); leaves 10–50 cm (4–20 in) |
| Growth Rate | Moderate |
| Root System | Bulbous — fibrous roots from a bulb. |
| Toxicity | Edible for people; toxic to dogs, cats and livestock (onion/garlic toxicity from organosulfur compounds). |
| Hardiness | USDA zones 3–10 |
Growth Form & Structure
- Height & Spread: About Bulb 1–10 cm (0.3–4 in); leaves 10–50 cm (4–20 in) in the ground; grows well in pots, troughs and window boxes.
- Growth Habit & Form: Clump-forming bulbous herb with upright leaves rising from the base.
- Lifespan & Maturity: Perennial from its bulbs; usually harvested within its first season or two of growth.
Anatomy & Physical Features
- Leaves & Foliage: Narrow, hollow, tubular green leaves in a radial fan; bulbs form in clusters linked at the base.
- Flower Characteristics: Small white flowers in a rounded umbel on a hollow stalk; edible. (see the Bloom guide for detail).
Primary Uses & Landscape Value
- Edible Uses: Clustered mild, sweet bulbs are the main crop for cooking; young hollow leaves can be used like green onions.
- Functional & Ornamental Roles: Gourmet culinary bulb crop for the vegetable garden and containers.
Care Guide: Planting, Soil & Watering
Overview: Shallot is a hardy, sun-loving allium that grows best in loose, fertile, well-drained soil enriched with organic matter and nitrogen, and kept free of stones. It needs steady, even moisture in an open bed so the roots and bulbs can develop.
Quick Care Requirements
| Requirement | Ideal Condition |
|---|---|
| Planting Season | In spring, summer or autumn depending on the cultivar |
| Growth Rate | Moderate |
| Soil Type | Loose, rich, well-drained soil, free of rocks, with added nitrogen |
| Soil pH | Neutral, about 6.0–7.0 |
| Water Need | Moderate — keep the soil evenly moist but never waterlogged |
Planting & Establishment
- Best Planting Season: Plant in spring, summer or autumn depending on the cultivar; alliums do best sown or set when temperatures suit the chosen cultivar.
- How to Plant:
- Hole Preparation: Work the bed to a loose, rock-free tilth so bulbs and roots can develop without obstruction.
- Soil Amendments: Enrich the bed with compost and a source of nitrogen before planting for strong growth.
- Planting Depth: Set bulbs, cloves or sets with the pointed tip up and about 2–3 cm of soil over them (roughly their own height), leaving the neck near the surface — do not bury them deeply; sow seed more shallowly.
- Growth Speed & Expectations: Expect moderate growth in good conditions.
Soil, Watering & Drainage Care
- Soil Mix & Drainage Needs: Alliums need a light, rich, free-draining bed kept clear of stones so bulbs can swell; in containers use a fertile potting mix with good drainage. Waterlogged soil causes bulb and root rot.
- Watering Schedule & Technique:
- Young / Newly Planted: Keep the soil consistently moist while seedlings, bulbs or cloves establish and root.
- Established: Water regularly and evenly through the growing season, avoiding both drought stress and waterlogging.
- Seasonal Adjustments: As bulbs mature and the tops begin to bend over, ease off watering to let them firm up; water more in warm, dry spells and less in cool, wet weather.
Climate, Light & Hardiness
Shallots grow across Mediterranean, desert, subtropical, and temperate climates and need full sun to half shade for good bulb development. Like other alliums, the biennial bulb is grown on an annual harvest cycle, but the plant itself is cold-hardy through most of its zone 3–10 range.
Quick Climate Specifications
| Climate Zones | Mediterranean, desert, subtropical, temperate |
|---|---|
| USDA Hardiness Zones | 3–10 |
| Light Conditions | Full sun to half shade |
Sunlight & Light Exposure
Optimal Light Setup
Full sun produces the best bulb clusters; half shade is tolerated.
Temperature Extremes & Hardiness
USDA Hardiness & Regional Limits
Hardy from zone 3 through 10; planting timing shifts with cultivar and climate, from spring/summer planting in cooler zones to autumn planting where winters stay mild.
Growing in Pots, Balconies & Indoors
Shallots are a full-sun bulb crop, not a houseplant – the clustered bulbs need strong outdoor sun, so grow them in a wide container on a sunny balcony or patio. Their green tops, though, can be snipped from a pot on a bright sill.
Quick Details
- Container Size: A pot or planter with free drainage (the grower confirms container growing but gives no set size); for bulbs, use a wider pot so the cluster has room
- Indoor Suitability: Not a houseplant for bulbs; strong outdoor sun is needed to form good bulbs
- Best Spot: Full sun to half shade
- Soil & Drainage: Loose, free-draining, organic-rich mix
- Watering in Pots: Average, even moisture; let the pot drain freely.
Indoors & On the Windowsill
- Houseplant limits: The grower lists them as not an indoor plant.
- Windowsill option: For green tops, grow shallots in a pot on a bright sunny sill and cut the leaves, but full bulbs need outdoor sun.
- Safety: Onions, garlic and their relatives are toxic to cats and dogs – keep pots out of pets’ reach if you grow them indoors, and never let pets nibble the leaves.
On a Balcony or Patio
- Light and shelter: A sunny balcony or patio suits it well; containers dry quickly, so check moisture often in warm weather.
- Practicalities: Mind the weight of a watered planter and manage drainage runoff with a tray or pot feet.
Choosing the Pot, Soil & Long-Term Care
- Pot and drainage: Choose a pot with strong drainage holes; if you stand it on a saucer, empty the saucer promptly so the roots never sit in water. Terracotta breathes and dries faster, while glazed or plastic pots hold moisture longer.
- Potting mix: Use a well-aerated, organic-rich mix – a good potting soil, or peat/coir blended with perlite or vermiculite for drainage and air.
- Watering: Water regularly to keep the mix evenly moist – pots dry out far faster than open ground, so check often in heat – but never leave it standing wet.
- Feeding: Potted plants run through their soil faster because nutrients leach out with every watering, so feed a little more often than you would in open ground.
Fertilizing & Feeding
Shallots are moderate feeders: nitrogen supports the leafy growth that drives the bulb dividing into a full cluster, then feeding shifts to potassium and tapers off as the cluster finishes sizing.
Quick Fertilizing Specs
| Main Nutrient Priority | Nitrogen while the cluster is dividing and leafing out, shifting to potassium as bulbs size |
|---|---|
| Best Feeding Period | The leafy growth phase while the cluster is dividing |
| Soil pH | Prefers soil on the neutral side |
| Reduce/Stop Feeding | Taper as the cluster sizes up and stop once tops begin yellowing and falling over |
| Organic Options | Aged compost or well-rotted manure worked into the bed at planting and as a side-dress during leaf growth |
Feeding by Growth Stage
Establishment After Planting
Support root development and early shoot growth as bulbs establish and begin dividing
| Nutrient direction | Balanced feeding to support root establishment |
|---|---|
| Timing | At planting through early shoot emergence |
| Frequency | A light initial feeding at planting, then minimal feeding until growth is underway |
| Fertilizer types | A balanced, complete fertilizer or finished compost worked into the bed |
| Precautions | Keep the rich, well-drained, rock-free soil shallots prefer; avoid fertilizer touching planted bulbs directly |
Leaf Growth and Cluster Division
Build leaf growth that supports the bulb dividing into a full cluster
| Nutrient direction | Nitrogen-forward feeding to support vigorous leaf growth |
|---|---|
| Timing | Through the main leafy growth phase, as the original bulb divides into a cluster |
| Frequency | Several light feedings spaced through this active growth window |
| Fertilizer types | A nitrogen-forward complete fertilizer, or nitrogen-rich compost or aged manure |
| Routine trace nutrients | iron, manganese |
| Precautions | Pair nitrogen feeding with consistent moisture through this dividing, leafy phase |
Bulb Cluster Sizing
Shift energy from leaves into sizing the full cluster of bulbs
| Nutrient direction | Shift toward a potassium-emphasis feed and taper nitrogen as the cluster sizes up |
|---|---|
| Timing | Once the cluster of bulbs begins sizing up |
| Frequency | Feeding tapers off through this stage |
| Fertilizer types | A potassium-emphasis or low-nitrogen complete fertilizer |
| Routine trace nutrients | iron, manganese |
| Precautions | Continued heavy nitrogen here favors leaves over bulb sizing and can reduce storage quality |
Bulb Maturation and Curing Prep
Let the cluster finish sizing and its wrapper skins set without pushing new growth
| Nutrient direction | None – withhold fertilizer as the tops begin to yellow and fall over |
|---|---|
| Timing | As tops begin yellowing and falling over ahead of harvest |
| Frequency | No feeding at this stage |
| Fertilizer types | No feeding at this stage; let the cluster finish naturally ahead of harvest and curing |
| Precautions | Do not fertilize once tops start to yellow; fresh growth at this point compromises storage quality |
Nutrient Deficiency Signs & Corrections
Leaves are pale green and the cluster’s leafy growth is slow to fill in
| Possible causes | Insufficient nitrogen availability, Soil fertility depleted from a previous crop, Waterlogged or compacted soil limiting root uptake |
|---|---|
| Appears first on | Older, lower leaves first |
| What to check | Soil fertility and recent feeding history, Soil drainage and compaction |
| Possible correction | Apply a nitrogen-forward feed and confirm the bed drains well |
New leaves emerge pale yellow while the veins stay greener
| Possible causes | High soil pH limiting iron availability, Waterlogged, poorly drained soil, Root stress from compacted or rocky soil |
|---|---|
| Appears first on | New, inner leaves |
| What to check | Soil pH and drainage |
| Possible correction | Correct pH toward neutral and improve drainage; apply a chelated iron product per its label if chlorosis persists |
Leaf tips and margins scorch or brown while the cluster is sizing
| Possible causes | Insufficient potassium during cluster sizing, Drought stress or inconsistent watering, Salt buildup from over-fertilizing |
|---|---|
| Appears first on | Leaf tips and margins, older leaves first |
| What to check | Watering consistency, Recent feeding balance, Salt buildup in the soil |
| Possible correction | Shift to a potassium-emphasis feed and keep watering consistent through bulking |
Pruning, Training & Seasonal Maintenance
Shallot has no woody structure, and its cluster of small bulbs is what matters, not any framework of stems – so "pruning" is limited to removing a flower stalk if the plant bolts and to routine leaf harvest. The cluster itself separates into individual bulbs naturally at harvest; it is never divided by cutting while growing. As with bulb onion, the goal is to keep leaf area intact for as long as possible so each bulb in the cluster keeps sizing, and to cut out any flowering stem promptly so it doesn’t draw energy away from bulb development.
Quick Pruning & Maintenance Specs
| Pruning Tolerance | Minimal – functional trims only |
| Primary Pruning Window | As needed, all season – remove a flower stalk as soon as it appears |
| Typical Frequency | Occasional |
| Main Objective | Protect bulb-cluster development; allow ongoing leaf harvest |
| Young Plant Priority | None – leave all leaves so the developing cluster can size up |
| Mature Plant Priority | Remove any flowering stalk promptly unless saving seed |
| Best Tool Type | Precision snips or clean fingers |
| Avoid Heavy Pruning During | Active bulb-cluster bulking |
Pruning by Plant Age & Size
Newly Established
No pruning; the young clump needs its full leaf canopy to grow the bulb cluster.
Young / Formative
No structural training – just monitor as the cluster of bulbs develops underground.
Mature / Established
Cut out any flowering stalk at the base as soon as it’s noticed unless seed is wanted. Harvest outer leaves as needed without disturbing the developing bulbs.
Special Growth to Remove
- Flower stalk (scape): remove at the base promptly – bolting diverts energy from the bulb cluster.
- Dying outer leaves: normal near maturity and fine to trim; don’t remove green leaves early.
Container & Small-Space Pruning
Shallot grows well in containers; give enough depth and spacing for the whole cluster to expand, and avoid cutting leaves back hard while bulbs are sizing.
Tools
Precision snips (or hand-pinching) for a flower stalk or leaf harvest – nothing larger is needed.
Tool Hygiene & Disease Risk
Routine – keep tools clean and sharp. Onion fly and thrips are the main pest pressures; they aren’t spread by pruning, but avoid moving between rotten bulbs and healthy ones with the same tool.
Cut Placement & Technique
Cut a flower stalk close to its point of origin; take outer leaves individually at the base, leaving the centre of each plant intact.
Heavy Pruning & Rejuvenation
Not applicable – shallot has no woody framework to rejuvenate. Removing a large share of leaves at once only sets back the bulb cluster’s growth.
Post-Pruning Care
No special aftercare beyond normal, even watering.
Common Pruning Mistakes
- Stripping several leaves at once and reducing the size of the whole bulb cluster.
- Leaving a bolted flower stalk too long before removing it.
- Trying to separate the bulb cluster by cutting while it’s still growing, instead of at harvest.
When NOT to Prune
Avoid heavy leaf removal during the mid-season bulking period, and right after transplanting while the clump is still establishing.
Recommended Tools (by task)
- precision_snips – the only tool needed, for cutting a flower scape or a leaf at its base; shallot tissue is soft and needs only a clean, light cut.
Propagation Guide
Shallots are traditionally grown by planting and dividing bulbs rather than by seed, since each planted bulb naturally multiplies into a cluster of new bulbs and reliably reproduces the cultivar’s mild, sweet-spicy flavor. Seed propagation is possible, as this site notes, but is far less common in practice; difficulty is Easy either way.
Quick Propagation Specs
| Best Propagation Method | Bulb Division |
| Alternative Methods | Seed (less common) |
| Propagation Difficulty | Easy |
| Seed True-to-Type | Usually true-to-type for isolated open-pollinated seed; an uncommon route for this crop |
| Vegetative True-to-Type | Yes |
| Best Propagation Season | Spring or summer, or autumn depending on cultivar; bulb planting can be done all year |
Rhizomes, Tubers, Bulbs & Corms
Bulb Division
Plant a fully grown bulb using care similar to an established plant, with a bit of extra water while it re-establishes; once the bulb is mature, it typically begins forming new roots at the start of the growing season. This bulb-based propagation can be carried out at any time of year. Because shallots naturally multiply into a cluster of several bulbs around the original, that cluster can be lifted once mature and divided into individual bulbs, each replanted to grow into its own clump.
Bloom & Edible Flower Guide
Quick Details
- Bloom Season: Summer
- Time to First Bloom: Biennial – it flowers in its second year, or earlier if cold-shocked (bolting)
- Flower Appearance: A rounded umbel of small white flowers on a tall hollow stem
- Edibility: Edible – the flowers have a mild oniony flavor and make an attractive garnish
Detailed Blooming Overview
Shallots are grown for their clustered bulbs, and like onions they flower when the crop is finishing or after a cold spell. A hollow stem rises and opens into a globe of small white flowers. Because flowering draws energy away from the bulbs, the stalks are usually removed for the best harvest – though the blossoms themselves are edible and loved by bees.
Flower Characteristics
- Small white flowers gathered into a round umbel.
- Held on a tall, hollow flower stem.
- Nectar-rich and attractive to bees.
Bloom Care & Thinning
- Managing the bloom: Remove the flower stem as it appears unless you want seed – flowering reduces bulb size.
- Pollination: By bees.
- In the kitchen: Pull the umbel into florets to scatter over dishes for a mild onion flavor.
Fruit & Uses
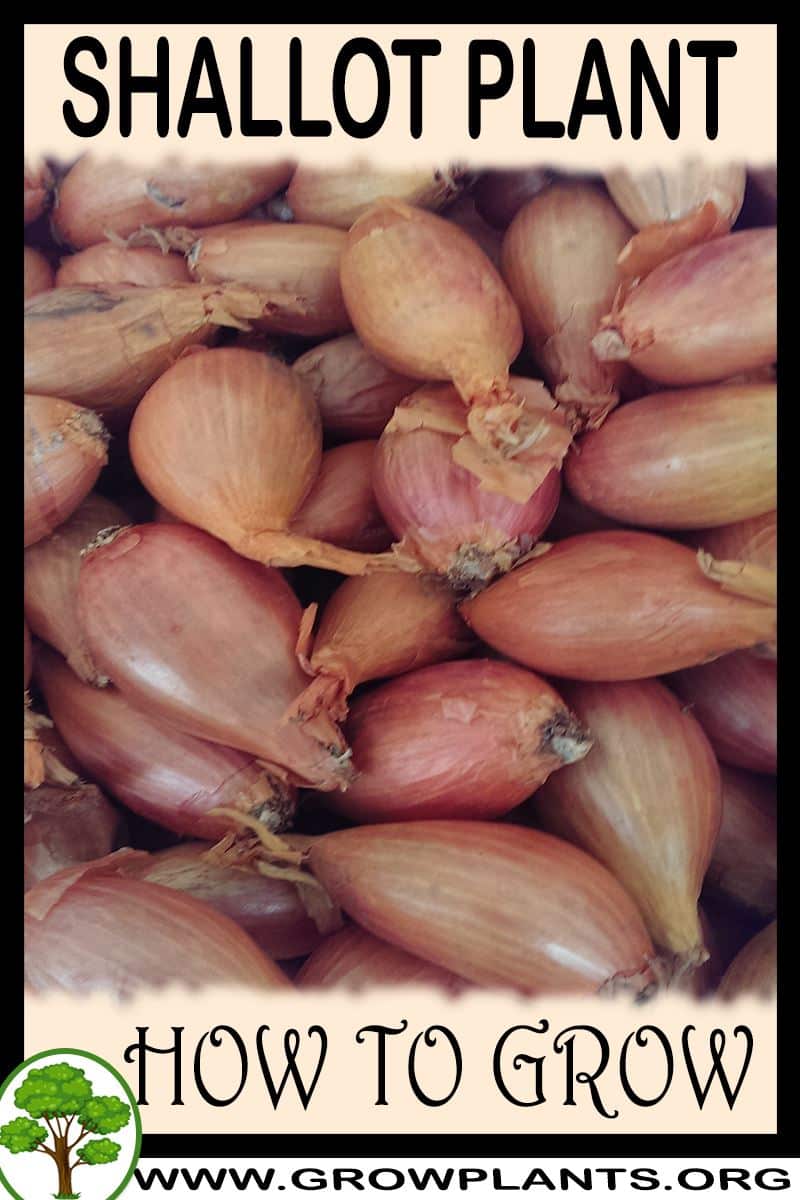
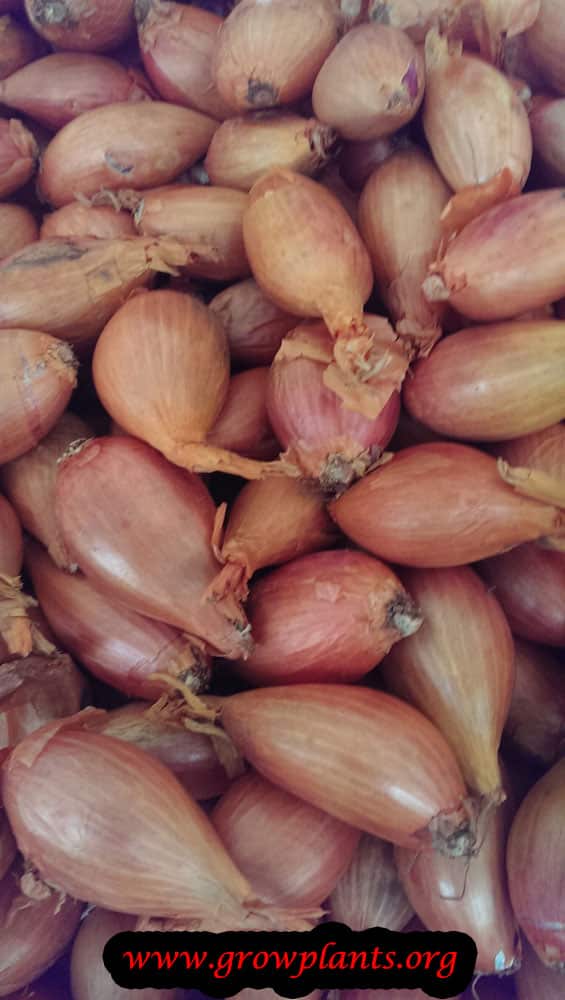
Shallot is grown for its purple, round-to-oval bulb — noted for a spicier flavor than sweet onion — along with its edible narrow green leaves, both used raw or cooked as an allium seasoning.
Quick Edible Specs
| Edible Parts | Bulb, Leaves |
|---|---|
| Main Use(s) | Culinary (raw, cooked, spice, salad, herbs) |
| Eaten Raw or Cooked | Both |
| Preparation Required | Peel outer skin (bulb); None (leaves) |
| Harvest Season | Bulb: Summer/Autumn · Leaves: All year |
| Time to First Harvest | Single bulb harvest per growing cycle (see Propagation) |
| Storage | Cured bulbs store well in a cool, dry, well-ventilated spot; leaves are best used fresh |
| Safety/Toxicity Caveat | Like other Allium plants, shallot is toxic to dogs and cats and should be kept away from pets |
Leaves & Greens
The narrow, hollow leaves grow in linked radial groups. They can be picked separately or together with the bulb, and are eaten raw, cooked, or used as a spice/herb.
Bulbs, Corms & Rhizomes
The bulb forms from layers in a round-to-oval shape with purple skin, and is noted for a spicier flavor than milder onion types. It is pulled in summer or autumn, peeled, and eaten raw or cooked as a seasoning or salad ingredient.
Harvesting
Leaves can be picked year-round; bulbs are lifted once in summer or autumn as the tops die back, then cured for storage.
Preparation, Uses & Safety
Peel the papery skin before use. The spicier flavor compared with sweet onion makes shallot popular raw in dressings and salads as well as cooked. As with other Allium plants, keep shallot away from dogs and cats.
Pests, Diseases & Troubleshooting
Overview: Shallot (Allium cepa var. aggregatum) is most at risk from sap-rasping onion thrips and soil-borne maggots and nematodes above ground, and from a battery of storage and basal rots below. Its shallow roots and waxy leaves mean even watering, long crop rotation, clean planting stock and careful curing matter more than any spray. Manage culturally first and store only sound, well-cured bulbs.
Quick Troubleshooting Overview
| Issue / Pest | Main Symptom | Primary Solution |
|---|---|---|
| Onion thrips | Silver streaks/stippling on leaves | Even watering; soap/spinosad in evening; beneficials |
| Onion fly / maggot | Wilting seedlings; maggots in bulb base | Rotate; insect mesh; remove culls; nematodes |
| Leaf/stem miners & moths | Windowpane mines & tunnels in leaves/shank | Mesh barrier; destroy mined leaves; Bt/spinosad |
| Downy mildew | Grey-violet fuzz; yellow collapsing leaves | Airflow; no evening overhead water; copper |
| Basal / white rot | Rotten basal plate; white mould, black sclerotia | Clean stock; long rotation; destroy infected plants |
| Neck / soft rot (store) | Soft slimy neck; bulb collapses in store | Cure & dry well; store cool, dry, ventilated |
Common Pests & Management
- Onion Thrips (Thrips tabaci):
- Symptoms: Tiny (1 mm) slender straw-yellow insects hiding in the leaf axils and inner leaf bases; feeding rasps the surface leaving silvery-white streaks, blotches and a general silvering that later browns. Worst in hot, dry weather; heavy populations distort growth and cut bulb size. Look-alikes: nutrient streaking (uniform) versus thrips (stippled with black frass specks).
- Prevention & Control: Encourage natural enemies (predatory mites, minute pirate bugs, lacewings); avoid drought stress with even irrigation and mulch, since stressed plants attract thrips. Use reflective/silver mulch and blue sticky traps for monitoring. Rotate away from other alliums. If needed, spray insecticidal soap, spinosad or horticultural oil into the leaf bases in the evening, repeating at 5–7 day intervals; rotate modes of action as thrips resist products quickly.
- Onion Fly / Onion Maggot (Delia antiqua):
- Symptoms: Small white legless maggots tunnel into the base of the bulb and stem; young plants wilt, yellow and collapse, older bulbs rot and are riddled with tunnels that invite secondary soft rot. Adults are grey, house-fly-like. Damage often appears in patches, worst in cool moist springs.
- Prevention & Control: Rotate crops and avoid planting into ground that grew alliums the previous year; remove and destroy culls and thinnings (their smell attracts egg-laying females). Firm the soil around transplants and cover beds with insect mesh/floating row cover at emergence to exclude the fly. Avoid heavy fresh manure. Beneficial nematodes (Steinernema) drenched into the soil help against larvae.
- Allium Leafminer (Phytomyza gymnostoma):
- Symptoms: Adults make neat rows of white feeding punctures down the leaf; larvae mine toward the base and pupate as brown seed-like puparia in the stem and bulb, opening the door to bacterial and fungal rot. Two generations, in spring and autumn.
- Prevention & Control: Exclude adults with insect netting during the spring and autumn flight periods; destroy infested debris and rotate. Delay or time plantings to miss peak flights. Spinosad or a suitable systemic can be used where pressure is high, applied at first sign of the punch-row feeding scars.
- Stem & Bulb Nematode (Ditylenchus dipsaci):
- Symptoms: ‘Onion bloat’ – swollen, distorted, spongy soft bulbs and twisted, bloated leaves; seedlings stunted and killed. Persists many years in soil and is carried in seed, cloves and sets.
- Prevention & Control: Use certified nematode-free seed and planting stock; practise long (3–4 year+) rotations away from alliums, beans and other hosts. Remove and destroy infested plants; control host weeds. Hot-water treatment of garlic seed cloves before planting reduces infestation.
- Bulb Mites (Rhizoglyphus spp.):
- Symptoms: Slow, stunted, patchy growth; roots and basal plate chewed by tiny pearly-white bulbous mites that swarm on damaged and rotting tissue, especially in wet, high-organic soils. They spread rot pathogens and attack stored bulbs.
- Prevention & Control: Plant only clean, undamaged sets/cloves; avoid burying fresh undecomposed organic matter. Rotate, cure and store bulbs cool and dry. Hot-water or fungicide seed treatment of cloves reduces carry-over; discard soft, mite-infested stock.
Diseases & Fungal Issues
- Downy Mildew (Peronospora destructor):
- Symptoms: Pale green to yellow oval patches on leaves and stalks, soon covered by a fuzzy grey-violet mould in humid mornings; leaves collapse and die back from the tip, bulbs mature small and soft. Favoured by cool, wet, humid weather.
- Treatment & Management: Space and orient rows for airflow and morning drying; avoid overhead evening irrigation; rotate 3+ years and destroy volunteers and culls. Use resistant varieties where available. Preventive copper or an approved downy-mildew fungicide at the first cool damp spell, on a protectant schedule.
- Fusarium Basal Rot (Fusarium oxysporum f.sp. cepae):
- Symptoms: Yellowing and dieback of leaves; the basal plate rots brown and the roots die, so the bulb pulls free easily and decays from the bottom, often continuing in storage. Favoured by warm soils.
- Treatment & Management: Plant clean stock in well-drained soil; avoid basal-plate and root injury and control root maggots/nematodes that create entry wounds. Rotate away from alliums; use tolerant varieties; cure and store bulbs dry and cool.
- Botrytis Neck Rot (Botrytis allii / aclada):
- Symptoms: A storage disease: the neck softens and becomes water-soaked and sunken, then a grey fuzzy mould and hard black sclerotia develop as the bulb rots from the top down, often weeks after harvest.
- Treatment & Management: Avoid excess late nitrogen; stop irrigation as tops fall and cure/dry bulbs thoroughly with good airflow before storage. Store cool, dry and well-ventilated. Handle gently to avoid bruising; discard thick-necked and damaged bulbs. Field fungicide programmes protect the crop before harvest.
- White Rot (Sclerotium cepivorum):
- Symptoms: Yellowing, wilting and dieback; a fluffy white mould with tiny black poppy-seed-sized sclerotia rots the base of the bulb and roots. Devastating and persistent – sclerotia survive 15–20+ years in soil, so a field once infested stays infested.
- Treatment & Management: Prevention is everything: never move soil, tools or bulbs from infested ground; plant only clean stock; practise very long rotations. Remove and destroy infected plants with surrounding soil before sclerotia form. Garlic and onion are highly susceptible; there is no reliable cure once established, so containment and sanitation are key.
- Purple Blotch (Alternaria porri):
- Symptoms: Small water-soaked spots that enlarge into zonate, purplish-brown lesions with yellow halos on leaves and seed stalks; lesions girdle and collapse the leaf, and can infect bulbs at the neck in storage. Worst in warm, humid weather with dew.
- Treatment & Management: Rotate, space for airflow, avoid prolonged leaf wetness and remove debris. Use tolerant varieties. Protectant fungicides (chlorothalonil, mancozeb or copper) on a schedule during warm humid spells; add a spreader-sticker as waxy allium leaves shed spray.
- Pink Root (Setophoma (Phoma) terrestris):
- Symptoms: Roots turn pink then red and wither, so plants are stunted and bulbs undersized; worst on stressed plants in warm soils and continuous onion ground.
- Treatment & Management: Long rotations and resistant varieties are the main tools; relieve stress with good fertility, drainage and even watering. Solarisation and clean stock reduce inoculum in bad fields.
- Bacterial Soft Rot (Pectobacterium / Burkholderia spp.):
- Symptoms: One or more inner scales turn soft, water-soaked and slimy with a foul smell while the outside may look sound; the bulb collapses in the field or store, usually entering through the neck or through insect and sun-scald wounds.
- Treatment & Management: Avoid bruising and sunscald; cure and dry bulbs well and store cool, dry and ventilated. Do not harvest or handle wet; control neck-rot and maggot wounds that let bacteria in. Discard any soft, weeping bulbs promptly.
Growing Difficulties & Abiotic Problems
- Premature Bolting (Flowering):
- Cause & Symptoms: A tough flower stalk shoots up before the bulb sizes, hollowing the neck and stopping bulb growth; triggered by a cold spell after growth starts, oversized transplants/sets, or wide temperature swings.
- Correction Strategy: Use correctly sized sets (about 1–2 cm), the right variety for your daylength/season, and avoid very early exposure to cold. Snap off bolters early and use those bulbs first – they will not store.
- Thick Necks (Bull-necking):
- Cause & Symptoms: Fat, soft, sappy necks that never mature or ‘fall over’; bulbs stay small and store poorly. Caused by excess nitrogen, especially late in the season, and too-deep planting.
- Correction Strategy: Front-load nitrogen early and taper off as bulbing begins; stop feeding and watering as tops start to fall; plant at correct depth. Cure thick-necked bulbs first for immediate use, not storage.
- Bulb Splitting & Doubling:
- Cause & Symptoms: A single bulb divides into two or more joined bulbs or fused twins; caused by irregular watering (drought then heavy water), over-rich soil, or transplant/sizing stress.
- Correction Strategy: Water evenly and consistently, avoid drought-then-flood cycles, use moderate balanced fertility, and plant properly spaced, correctly sized stock.
- Poor Bulbing (Daylength Mismatch):
- Cause & Symptoms: Plants grow lush tops but never form a proper bulb, or bulb far too early and small; caused by growing a long-day variety in the south or a short-day variety in the north, or planting at the wrong time.
- Correction Strategy: Choose the correct daylength type for your latitude (short-day, intermediate or long-day) and plant on time so leaves build up before the bulbing trigger; feed and water for strong early leaf growth.
- Bulb Sunscald & Greening:
- Cause & Symptoms: Exposed shoulders of maturing/curing bulbs bleach, blister or green (chlorophyll); scalded tissue then rots. From bulbs sitting fully exposed in intense sun, especially during curing.
- Correction Strategy: Cure in a shaded, airy, dry place rather than in full sun; keep developing bulbs lightly covered with soil/mulch. Handle gently and remove scalded bulbs from the store.
- Leaf Tip Burn & Yellowing:
- Cause & Symptoms: Leaf tips brown and die back, older leaves yellow; from drought stress, salinity, or nitrogen/potassium shortage on the shallow allium root system.
- Correction Strategy: Water evenly, mulch to buffer moisture, and feed with a balanced fertiliser matched to a shallow-rooted crop; leach salts in over-fertilised beds and correct deficiencies.
What Helps – Products & Tools
For allium pests, reach first for insecticidal soap, horticultural/neem oil and spinosad (thrips, leek moth, leafminer), insect mesh/floating row cover as a physical barrier, blue sticky traps for thrips monitoring, reflective mulch, and beneficial nematodes for soil maggots and larvae. For disease, use protectant copper or an approved downy-mildew/purple-blotch/rust fungicide, garden sulfur for rust, a spreader-sticker so spray clings to waxy leaves, and above all clean seed/sets plus long rotations. Cure and store bulbs cool, dry and ventilated to beat neck rot and soft rot.