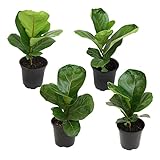


Plant Profile & Key Characteristics
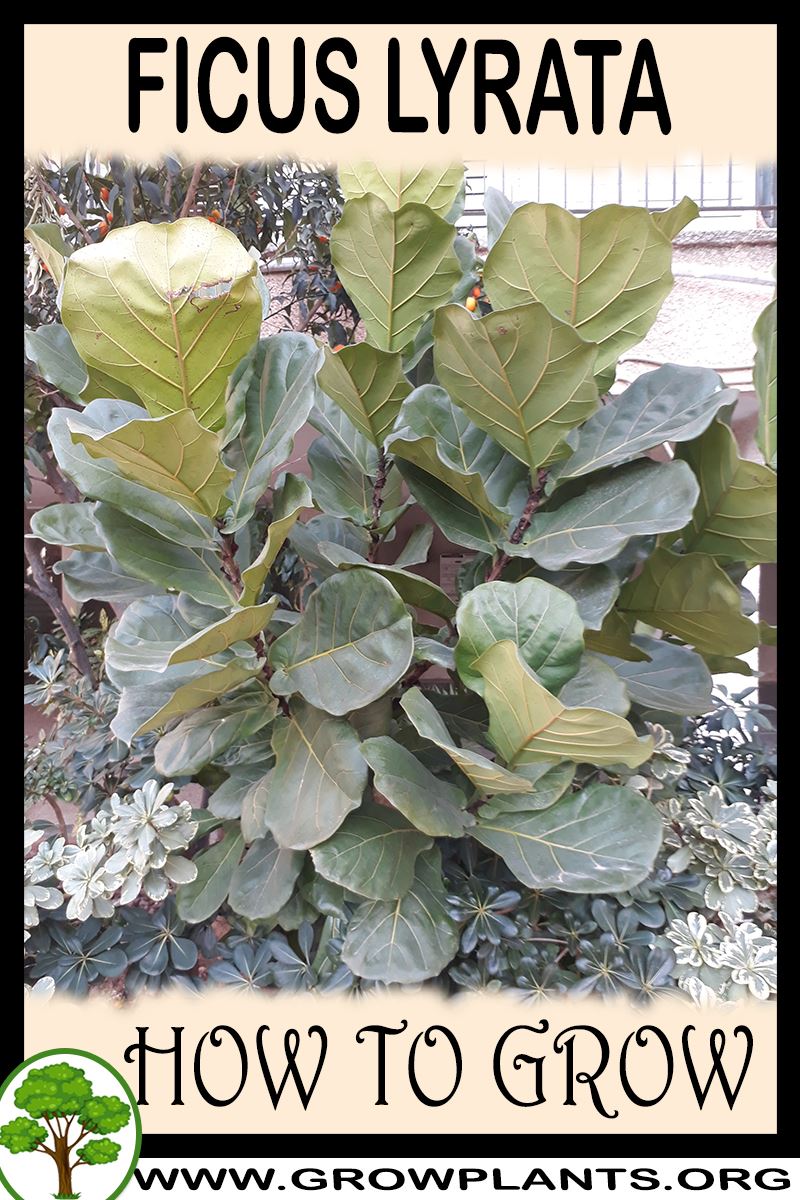
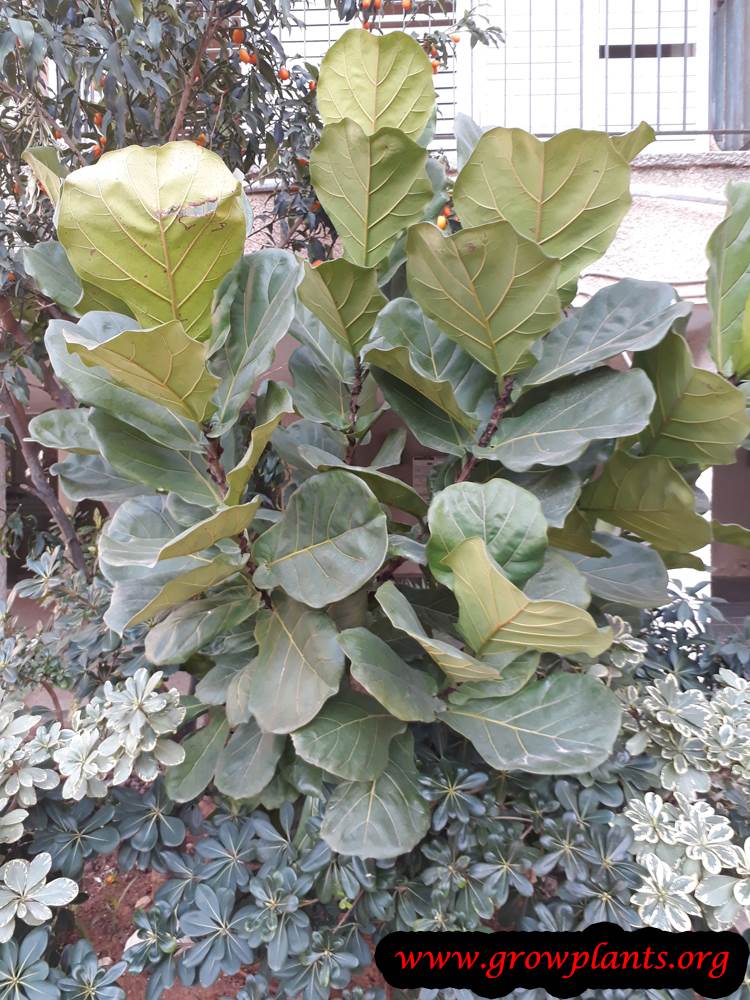
Overview: The fiddle-leaf fig, an evergreen tree to 10-15 m (33-49 ft) in the wild but hugely popular as an ornamental houseplant, with large violin-shaped glossy leaves. Fast-to-moderate growing and drought tolerant; its figs are not edible.
Quick Specifications
| Specification | Attribute |
|---|---|
| Plant Type / Life Cycle | Perennial (tree; starts as an epiphyte) |
| Foliage Type | Evergreen |
| Mature Size | 10-15 m tall (33-49 ft); kept far smaller indoors |
| Growth Rate | Moderate to Fast |
| Root System | Vigorous and spreading outdoors; begins life as an epiphyte |
| Toxicity | Milky sap is a skin and eye irritant and toxic if ingested; fruit not edible |
| Hardiness | USDA zones 10+ (zone 9b with winter protection) |
Growth Form & Structure
- Height & Spread: 10-15 m (33-49 ft) outdoors, but usually grown as an indoor tree, container specimen or bonsai.
- Growth Habit & Form: Upright tree with a bold, sculptural crown; can start life as an epiphyte.
- Lifespan & Maturity: Long-lived; grown for its foliage rather than fruit.
Anatomy & Physical Features
- Trunk & Bark: Upright woody trunk that exudes milky, irritant sap when cut.
- Leaves & Foliage: Very large, glossy, violin- or lyre-shaped green leaves with wavy margins; some forms edged yellow or white.
- Flower Characteristics: Inconspicuous green, fig-like flower structures (full detail in the Bloom guide).
- Fruit Profile: Small, round-to-teardrop green figs – not edible.
Primary Uses & Landscape Value
- Functional & Ornamental Roles: Grown as an ornamental foliage plant, indoor houseplant, shade tree and bonsai; drought tolerant.
Care Guide: Planting, Soil & Watering
Overview: Ficus lyrata (fiddle-leaf fig) is an evergreen fig for tropical, Mediterranean and subtropical climates (hardiness zone 10+, or 9b with winter care) and a favourite indoor tree. It grows in rich, well-draining soil kept lightly moist and mulched, tolerates sun to full shade, and is drought tolerant but sensitive to soggy roots.
Quick Care Requirements
| Requirement | Ideal Condition |
|---|---|
| Planting Season | Warm season, varying by zone (see below) |
| Growth Rate | Moderate to Fast |
| Soil Type | Rich, well-draining, mulched |
| Water Need | Moderate – adaptable, but never waterlogged |
Planting & Establishment
- Best Planting Season: Plant in the warm season: spring in zone 9b, spring to summer in zone 10a, spring to autumn in zone 10b, and year-round in zone 11.
- How to Plant:
- Hole Preparation: Dig a hole noticeably wider and deeper than the root ball – roughly 70-100% larger – then backfill so the roots sit on firm, amended ground at root-ball depth.
- Soil Amendments: Mix plenty of organic matter, humus and dried leaves into the backfill to feed the young tree and improve the soil; top with mulch to hold moisture.
- Planting Depth: Set the tree so the root collar sits at soil level, loosen the outer roots of the root ball slightly, and firm the soil gently – not so hard that it compacts, not so loose that the tree wobbles.
- Growth Speed & Expectations: A moderate-to-fast grower that becomes a tree of 10-15 m outdoors, but is usually kept as a compact indoor specimen or bonsai through pruning.
Soil, Watering & Drainage Care
- Soil Mix & Drainage Needs: Grow in rich, well-draining soil kept lightly moist and mulched; in containers use a potting or peat mix with perlite and organic matter, a pot about 50% larger than the root ball, and plenty of drainage holes so water never sits at the roots and rots them.
- Watering Schedule & Technique:
- Young / Newly Planted: For the first two weeks after planting, water every day, preferably in the morning, so the root ball never dries out while it establishes.
- Established: Once established, water moderately and deeply, letting the top few centimetres dry before watering again; it tolerates modest-to-generous watering but is prone to root problems if kept wet.
- Seasonal Adjustments: Increase watering in hot weather – above about 30 C (86 F) young trees need noticeably more – and ease off in the cool season when growth slows.
Climate, Light & Hardiness
Fiddle-leaf fig is a tropical-to-subtropical tree that is also one of the most popular indoor foliage plants worldwide, tolerating average room temperatures well but disliking cold draughts and chills. Outdoors it needs a nearly frost-free climate; indoors it wants bright, indirect light with some direct sun tolerated once acclimated.
Quick Climate Specifications
| Climate Zones | Tropical, Mediterranean, Subtropical |
|---|---|
| USDA Hardiness Zones | 10 and above outdoors; zone 9b possible with winter protection |
| Frost Tolerance | Very Low |
| Light Conditions | Full Sun to Full Shade (indoors: bright indirect light) |
Sunlight & Light Exposure
Optimal Light Setup
Outdoors it accepts full sun through fairly deep shade; indoors, bright, filtered light near an unobstructed window gives the best growth, with some direct morning sun tolerated once acclimated.
Shade & Heat Management
Indoor plants moved outdoors for summer should be acclimated gradually to avoid leaf scorch from sudden direct sun exposure.
Temperature Extremes & Hardiness
USDA Hardiness & Regional Limits
Reliably grown outdoors only in USDA zone 10 and warmer; with a sheltered site and winter protection it can be grown outdoors in zone 9b, but young or exposed plants are at real risk of cold damage there.
Cold Damage & Winter Protection
Indoors, keep it away from cold windows and draughts in winter; sustained temperatures well below typical room temperature can cause leaf drop.
Frost Sensitivity
Frost-sensitive; even light freezes can damage or kill unprotected plants.
Wind, Humidity & Microclimate
Humidity Preferences
Appreciates the higher humidity of its native tropical range; indoor air that is very dry, especially with winter heating, can stress the plant and increase leaf-edge browning.
Growing in Pots, Balconies & Indoors
The fiddle-leaf fig (Ficus lyrata) is one of the most popular indoor trees, and the grower confirms it grows both as a houseplant and in containers. In the wild it reaches 10-15 m, so in a pot it must be kept small – the grower grows it as a restricted, dwarf or bonsai-style specimen with a controlled root ball. Its milky sap is an irritant, so keep it away from children and pets.
Quick Details
- Container Size: Minimum 25-50 L (5-10 gal) and bigger is better; the pot should be about 50% larger than the root ball, stepping up gradually rather than starting huge
- Indoor Suitability: A genuine, popular houseplant – grown indoors as an upright foliage tree
- Best Spot: Bright light; it tolerates full sun through to shade but grows best in bright indirect light indoors
- Soil & Drainage: Potting mix or peat/coir with perlite and organic matter, in a pot with plenty of drainage holes
- Watering in Pots: Water regularly but never overwater; if the pot has a tray, do not let water sit in it more than a day – standing water rots the roots and ruins the soil
Indoors & On the Windowsill
- As a houseplant: The grower confirms indoor growing. Give it a bright spot with steady warmth, turn it occasionally for even growth, and keep it out of cold draughts.
- Size control: Because it is naturally a large tree, keep it dwarfed by restricting the roots to a controlled pot and pruning to shape.
- Safety: The white sap irritates skin and is toxic to pets if chewed – site it out of reach and wash hands after pruning.
On a Balcony or Patio
- Warm-season use: It can stand outdoors in bright, sheltered warmth once nights are mild, but it is frost-tender and must come back indoors before any cold.
- Light & wind: Acclimatise it gradually to brighter light to avoid leaf scorch, and shelter the big leaves from wind; pots dry fast against warm walls.
Choosing the Pot, Soil & Long-Term Care
- Pot & drainage: Plenty of drainage holes; never leave water standing in the tray beyond a day. Step the pot up gradually – do not plant a small tree straight into a large container, which sours the soil.
- Potting mix: Potting mix or peat/coir opened up with perlite and organic matter.
- Feeding: Fertilise at least once a year, and add humus a few times – twice is better; potted trees exhaust their soil.
- Repotting: Every few years, when moving up to a bigger pot, you need not replace all the soil – swap part of it (from the sides and top) and trim some of the root ball.
Grower’s Container Tip
- Keep it dwarfed with gradual root control: Grow it as a dwarf or bonsai by limiting the roots – each new pot only about 50% bigger than the root ball, worked up in stages to the final size. Bigger is better once established, but starting a small tree in a big pot risks the soil’s health. At repotting, swap only part of the soil and cut back some of the root ball.
Fertilizing & Feeding
A light to moderate feeder as a houseplant: young plants building size respond to a nitrogen-forward feed, while mature specimens kept at a controlled size need only modest, balanced feeding through the active growing season.
Quick Fertilizing Specs
| Feeding Level | Light to moderate feeder |
|---|---|
| young_feeding | A nitrogen-forward complete fertilizer to support size and canopy development while young |
| mature_feeding | A balanced complete fertilizer at modest strength once the plant is at its desired size |
| Main Nutrient Priority | Nitrogen-forward while young, shifting to balanced feeding for an established, size-controlled plant |
| Best Feeding Period | During active growth in the warmer, brighter months |
| Organic Options | Humus, compost, or other organic matter worked into the soil surface and mulch |
| Micronutrients | Usually supplied by a complete houseplant fertilizer with iron and manganese; correct specific issues only when diagnosed |
| Soil pH | Prefers well-drained soil; tolerates a range but avoid strongly alkaline potting mixes, which favor iron chlorosis |
| Reduce/Stop Feeding | Pause feeding right after repotting and again when light drops and growth slows for the season |
Feeding by Growth Stage
Establishment after planting or repotting
Let roots recover and settle into fresh soil before asking the plant to take up extra fertilizer.
| Nutrient direction | None – hold off on fertilizer while the root system recovers from planting or repotting. |
|---|---|
| Timing | Immediately after planting or repotting, for the first stretch of new growth. |
| Frequency | No feeding at this stage. |
| Fertilizer types | No feeding at this stage – fresh potting mix and mulch supply what the plant needs to start |
| Precautions | Do not fertilize freshly disturbed roots; wait for clear signs of new growth before resuming feeding. |
Active growing season
Support steady canopy and leaf development, with extra nitrogen for younger plants still building size.
| Nutrient direction | A nitrogen-forward complete fertilizer while the plant is young and building size, shifting toward a balanced feed once it reaches its desired size, with a complete houseplant product supplying routine iron and manganese. |
|---|---|
| Timing | Through the warm, bright active growing season. |
| Frequency | Light, steady feeding through the growing season, easing off as growth naturally slows. |
| Fertilizer types | A complete houseplant fertilizer, nitrogen-forward for young plants and balanced for mature ones, Humus or organic matter worked into the soil surface |
| Routine trace nutrients | iron, manganese |
| Precautions | Keep feeding light for container and bonsai specimens where root growth is intentionally restricted; over-fertilizing pushes growth the container cannot support well. |
Low-light seasonal slowdown
Match feeding to the plant’s naturally reduced growth when light and warmth drop indoors.
| Nutrient direction | None – withhold fertilizer while growth is slow under reduced indoor light. |
|---|---|
| Timing | During the darker, cooler part of the year when new growth largely stops. |
| Frequency | No feeding at this stage. |
| Fertilizer types | No feeding at this stage – resume only once active new growth returns |
| Precautions | Do not fertilize a plant that has stopped producing new growth; unused fertilizer salts can build up in the soil and stress the roots. |
Nutrient Deficiency Signs & Corrections
New leaves emerge pale yellow between dark green veins while older leaves stay green.
| Possible causes | high soil pH or an overly alkaline potting mix tying up iron, waterlogged or poorly drained soil, cold or overly wet root conditions limiting uptake |
|---|---|
| Appears first on | the newest leaves |
| What to check | potting mix pH, drainage and recent watering habits, root health if the plant can be unpotted |
| Possible correction | Improve drainage, avoid overly alkaline potting mix, and apply a chelated iron product per its label if chlorosis persists. |
Overall pale green to yellowish leaves, smaller new leaves, and slow growth.
| Possible causes | low soil nitrogen, infrequent feeding relative to the plant’s growth rate, leaching from frequent watering in a container |
|---|---|
| Appears first on | older leaves first, then the whole plant |
| What to check | overall leaf color and new leaf size, recent feeding history, watering and drainage habits |
| Possible correction | Resume or increase a nitrogen-forward complete fertilizer during the active growing season. |
Interveinal yellowing appears on newer leaves, often with a fine mottled or speckled pattern.
| Possible causes | low soil or potting mix manganese, high soil pH limiting availability, overly wet, poorly aerated potting mix |
|---|---|
| Appears first on | newer leaves |
| What to check | potting mix pH, drainage and aeration, recent fertilizer history |
| Possible correction | Improve drainage and apply a chelated manganese product per its label if the pattern persists. |
Interveinal yellowing appears on older, lower leaves while the veins themselves stay green.
| Possible causes | low soil magnesium, leaching from frequent container watering, high potassium feeding competing with magnesium uptake |
|---|---|
| Appears first on | older, lower leaves |
| What to check | soil or potting mix magnesium status, watering and leaching frequency, recent feeding balance |
| Possible correction | Apply a labeled magnesium source such as Epsom salt and rebalance overall feeding. |
Pruning, Training & Seasonal Maintenance
Ficus lyrata tolerates moderate pruning well and is usually cut for one of two reasons: to keep a container/houseplant specimen compact and well-shaped, or to thin and size-control a much larger landscape or bonsai tree. Winter is the safest general window, though light shaping can be done nearly year-round in warm climates – the source guidance specifically favours pruning after the (inedible, ornamentally insignificant) fruit has formed, since cutting mid-flush interrupts the plant’s energy allocation less. Because it pushes strong new growth readily, pruning has a large effect on ultimate size and branching density but little effect on any ornamental flower or fruit display.
Quick Pruning & Maintenance Specs
| Pruning Tolerance | Moderate to High – recovers vigorously from cuts |
| Primary Pruning Window | Winter |
| Secondary Maintenance Window | Possible year-round in warm climates; best after fruit set |
| Typical Frequency | About once a year for structural/size pruning |
| Main Objective | Size control and removal of weak branches (indoors: keep the tree small and shapely) |
| Young Plant Priority | Establish a single strong leader or chosen branch structure; remove only weak/crossing growth |
| Mature Plant Priority | Restrain size, remove weak wood, maintain an open, well-lit canopy |
| Best Tool Type | Precision snips for young stems, bypass secateurs/loppers for older wood, a pruning saw only for a large landscape specimen |
| Avoid Heavy Pruning During | Peak summer heat and immediately after repotting or transplanting |
Pruning by Plant Age & Size
Newly Established
Minimal pruning – remove only damaged or dead growth while the root system settles in; hold off on structural cuts in the first season.
Young / Formative
As a houseplant: pinch or head the leading stem once it reaches the desired height to force branching and a fuller, multi-stemmed form; as a landscape or bonsai tree: select and retain one central leader (or a deliberate multi-trunk bonsai structure) and remove competing weak shoots early.
Mature / Established
Focus on keeping the tree small and manageable – the source guidance is explicit that Ficus lyrata should be kept restrained rather than left to reach its full 10–15m landscape size, particularly indoors or in a container; remove weak, thin or overcrowded branches to maintain an open canopy.
Seasonal Pruning Schedule
Winter (main structural window): objective – control size and remove weak wood while growth is slowest; remove damaged, crossing or spindly branches; do not remove large amounts of healthy canopy in one session on an indoor specimen with limited light recovery. Expected response is a flush of new growth once active growing resumes; since flowers/fruit are ornamentally insignificant, timing has no crop impact.
Ongoing Sanitary (light, warm-climate/indoor): objective – tidy shape and remove any damaged leaves or weak shoots as they appear; safe in most seasons except peak summer heat.
Structural Pruning & Training
- Branch/shoot selection – keep the strongest, best-placed shoots and remove weak or thin competitors, as the source guidance directs
- Crossing/rubbing/inward growth – remove to keep the canopy open
- Height & spread control – the primary reason to prune this species at all, especially indoors or in bonsai culture
- Canopy density – light thinning improves light penetration to inner leaves and reduces lower leaf drop
Container & Small-Space Pruning
Most Ficus lyrata grown by home gardeners are containerised, where the size logic is inverted from the landscape tree: aggressively restrain height and canopy spread through regular heading/pinching, and pair canopy pruning with the periodic root pruning described for repotting (cutting part of the root ball every few years) – canopy and root system should be kept in balance so the container plant doesn’t outgrow its pot or become top-heavy.
Tools
- Precision snips for pinching tips and thin young growth
- Bypass secateurs for finger-thick stems
- Loppers for thicker branches on a larger specimen
- Pruning saw only if renovating a mature landscape tree’s structural limbs
Tool Hygiene & Disease Risk
Routine – clean, sharp tools between plants is sufficient; the species’ documented issues (gall, scale, mealybug, thrips, whitefly, spider mite) are pest problems rather than tool-transmissible pathogens, so there is no need for disinfection between every cut.
Cut Placement & Technique
Use a heading cut just above a leaf node to force branching on young stems, and thinning cuts back to the branch collar for larger limbs to avoid stub die-back. Ficus lyrata exudes an irritant, sticky latex sap when cut – wear gloves and avoid skin/eye contact, and expect some sap flow to stop naturally after a few minutes.
Heavy Pruning & Rejuvenation
Tolerates a hard cutback well when the plant has become leggy or oversized, especially indoors where a leaning, top-heavy specimen benefits from being cut back to a lower framework; expect a strong flush of new growth, though recovery is best spread across more than one season for a large, mature tree rather than removed all at once.
Post-Pruning Care
After a hard cutback, keep watering steady but avoid overwatering while leaf area (and therefore water use) is reduced; a newly opened canopy on an outdoor specimen can expose previously shaded bark to sunscald, so shade a heavily thinned trunk temporarily in hot climates. Do not fertilize immediately after a hard prune – the plant is already primed to push vigorous regrowth.
Common Pruning Mistakes
- Letting an indoor specimen grow unchecked until it is leggy and top-heavy instead of pruning annually to keep it small, as recommended
- Cutting without gloves and being caught off guard by the irritant latex sap
- Removing too much canopy at once from a low-light indoor plant, which recovers far more slowly than an outdoor tree
When NOT to Prune
Avoid major pruning right after transplanting or repotting, during peak summer heat, or immediately after a stressful move (new location, temperature swing) – let the plant stabilise first.
Pruning Troubleshooting
| Problem | Possible Cause | What to Check | Corrective Action |
| Leggy, sparse growth | Insufficient light and no pinching/heading of the leader | Light levels and last pruning date | Move to brighter light and pinch/head the leading stem to force branching |
| Heavy leaf drop after pruning | Too much canopy removed at once, or stress from a location change | Percentage of canopy removed, recent watering/light changes | Reduce watering slightly, keep conditions stable, and prune more conservatively next time |
| Weak, thin regrowth | Low light or lack of feeding during the active growing season | Light exposure and fertilizing schedule (about 4x/year) | Increase light and resume the normal feeding schedule once new growth is established |
Recommended Tools (by task)
- Precision snips – for pinching tips and shaping a young or container specimen.
- Bypass secateurs – for finger-thick stems on an established houseplant or young tree.
- Loppers – for thicker branches when restraining a larger specimen’s size.
- Pruning saw – only for structural limb removal on a mature landscape-grown tree.
Propagation Guide
Ficus lyrata, commonly called fiddle-leaf fig, is propagated vegetatively by stem cuttings or air layering. Both methods produce plants genetically identical to the parent plant.
Quick Propagation Specs
| Best Propagation Methods | Stem cuttings and air layering |
| Propagation Difficulty | Moderate |
| Best Season | Warm active-growth period |
| Seed | Not a normal home or nursery propagation method |
| Vegetative True-to-Type | Yes |
Stem Cuttings
Take a healthy stem cutting that includes at least one node. Remove lower leaves while retaining healthy foliage near the top, and insert the stem into a moist, well-aerated rooting medium.
Rooting Conditions
Keep the cutting warm with bright indirect light and stable humidity. The growing medium should remain lightly moist but never waterlogged. A brown, fully-grown woody branch also works well for cuttings; a rooting hormone suited to woody material can help, along with a closed box or greenhouse with ventilation and light misting.
Air Layering
Air layering is especially useful when producing a larger new plant from an established specimen. A section of stem is encouraged to form roots while it is still attached to the parent plant, then separated after a healthy root system has developed.
After Rooting
Once a cutting or air layer has developed a strong root system, move it into a well-drained potting mix and gradually acclimate it to normal growing conditions.
Note: Germination is slow and unreliable, commonly taking anywhere from 2 weeks to 3 months, with a high proportion of seeds failing to sprout at all. If attempting seed, soak for 24 hours in warm water first, keep at around 24-29C (75-85F) with high humidity (a covered tray or regular misting helps). Genuine seed is also hard to come by – most “fiddle-leaf fig seeds” sold online are reported to be mislabeled or fake.
Bloom & Flower Guide
Quick Details
- Bloom Season: Spring to summer, and only rarely in cultivation
- Time to First Bloom: Seldom flowers as a potted or indoor plant
- Flower Appearance: Tiny flowers hidden inside a small green fig – no visible petals
- Edibility: Not edible – the fig-like fruits are not eaten
Detailed Blooming Overview
Like all figs, the fiddle-leaf fig keeps its flowers out of sight: the tiny true flowers line the inside of a hollow green structure (the syconium) that looks like a small fruit. In the wild these are pollinated by specialised fig wasps, so plants grown as houseplants or in pots outside their native range rarely flower and almost never set fruit.
Flower Characteristics
- Minute flowers enclosed within a green, round to drop-shaped fig – there are no showy petals.
- What looks like a fruit is really the flowering structure itself.
Bloom Care & Thinning
- Encouraging bloom: There is little to do – indoor and potted plants are grown for foliage and seldom bloom.
- Handling note: The milky sap is a mild skin irritant, so wear gloves if pruning.
Pests, Diseases & Troubleshooting
Overview: Ornamental figs are woody tropical foliage plants whose troubles are dominated by sap-sucking insects on soft indoor growth (scale, mealybug, spider mite, thrips) and by environmental stress that triggers the fig’s notorious leaf drop and brown-spotting. Management is overwhelmingly cultural: stable warmth, bright indirect light, steady moisture without waterlogging, good airflow, and regular leaf inspection catch problems before they spread.
Quick Troubleshooting Overview
| Issue / Pest | Main Symptom | Primary Solution |
|---|---|---|
| Scale insects | Sticky honeydew, black sooty mould, brown bumps on stems/leaf backs | Wipe off, horticultural oil, isolate plant |
| Mealybugs | White cottony fluff in leaf axils and undersides | Alcohol swab, insecticidal soap/oil, repeat |
| Spider mites | Fine pale stippling, dull leaves, webbing in dry air | Raise humidity, rinse foliage, miticidal oil |
| Thrips | Silvery scarring, curled or galled new leaves | Sticky traps, prune galled tips, spinosad/oil |
| Leaf drop | Sudden shedding after a move, draft or watering change | Stabilise light, warmth and watering; be patient |
| Brown leaf spots | Dark blotches with yellow halos or dry brown edges | Diagnose water/root vs. infection; adjust watering |
Common Pests & Management
- Soft/brown scale (Coccus hesperidum, Saissetia coffeae):
- Symptoms: Flat to domed brown or greenish limpet-like bumps along stems, petioles and leaf undersides; they exude sticky honeydew that turns leaves shiny then black with sooty mould, and heavy infestations sap vigour and yellow the foliage.
- Prevention & Control: Wipe off with a damp cloth or a cotton bud dipped in dilute alcohol, prune badly encrusted stems, and isolate the plant. Follow with horticultural or neem oil to smother crawlers, repeating every couple of weeks; wash off honeydew and sooty mould so the leaves can breathe.
- Mealybugs (Planococcus citri):
- Symptoms: White cottony tufts tucked into leaf axils, new growth and along veins on leaf undersides, with honeydew and sooty mould as for scale; growth becomes stunted and puckered.
- Prevention & Control: Dab colonies with an alcohol-moistened cotton bud, then treat with insecticidal soap or neem/horticultural oil, hitting the hidden crevices. Check the root zone at repotting for root mealybug and quarantine new plants for a few weeks.
- Two-spotted spider mite (Tetranychus urticae):
- Symptoms: Fine pale stippling and a dull, faded, sometimes bronzed cast to the leaves, with delicate webbing under leaves and around growing tips; worst on plants kept hot, dry and airless.
- Prevention & Control: Raise humidity and improve airflow, rinse the foliage (including undersides) periodically, and treat persistent infestations with insecticidal soap or a light miticidal/horticultural oil. Predatory mites work well in conservatories.
- Thrips (Gynaikothrips ficorum, Frankliniella spp.):
- Symptoms: Silvery or bronzed scarring and tiny black frass specks on leaves; the fig-specific Cuban laurel thrips roll and pucker new leaves into galled pockets where they breed.
- Prevention & Control: Prune out and destroy rolled or galled tips, use blue sticky traps to monitor, and treat with spinosad or neem/horticultural oil, repeating to catch successive generations. Keep new growth clean and inspect fresh flushes.
- Whitefly (Trialeurodes vaporariorum):
- Symptoms: Tiny white moth-like insects that flutter up when the plant is disturbed, with honeydew and sooty mould; more common under glass and in warm interiors.
- Prevention & Control: Hang yellow sticky traps, rinse or vacuum adults, and treat undersides with insecticidal soap or horticultural oil on a regular cycle until numbers collapse.
Diseases & Fungal Issues
- Bacterial and fungal leaf spot (Xanthomonas campestris pv. fici, Cercospora / Colletotrichum spp.):
- Symptoms: Water-soaked or angular dark spots, sometimes with yellow halos, that enlarge and merge; fungal anthracnose produces tan sunken lesions, often starting at leaf edges or tips.
- Treatment & Management: Remove and bin affected leaves, avoid wetting the foliage, and improve airflow and spacing. Sterilise pruning tools. A copper-based fungicide/bactericide helps check spread on valued specimens, but correcting the wet, stagnant conditions that favour it matters more.
- Root and stem rot (Phytophthora / Pythium spp.):
- Symptoms: Wilting despite moist soil, yellowing lower leaves, soft blackened stem bases and dark mushy roots; the plant declines steadily and may collapse.
- Treatment & Management: Prevention is the cure: use a free-draining mix, a pot with drainage, and let the top of the soil dry between waterings. If caught early, repot into fresh mix, cut away rotten roots, and water sparingly until recovery; discard hopelessly rotted plants and their soil.
- Botrytis (grey mould) (Botrytis cinerea):
- Symptoms: Fuzzy grey-brown mould on damaged or shaded leaves and cuttings in cool, damp, still air.
- Treatment & Management: Remove affected tissue, improve ventilation and lower humidity around the plant, and avoid overhead wetting. Rarely needs chemical control indoors if airflow is corrected.
Growing Difficulties & Abiotic Problems
- Leaf drop (environmental shock):
- Cause & Symptoms: Figs shed leaves in response to sudden change – being moved, cold drafts, heating vents, low light, or a swing between over- and under-watering; fiddle-leaf figs are especially touchy and drop or brown-spot leaves at the slightest change in light, drafts or watering.
- Correction Strategy: Choose a stable, bright spot away from drafts and vents and leave the plant there; keep watering even. Expect some drop after any move and allow weeks for it to settle rather than reacting with more water or fertiliser.
- Brown spots and leaf-edge browning:
- Cause & Symptoms: Dark interior spots often signal overwatering/root rot or bacterial spot, while crispy brown edges and tips usually mean underwatering, low humidity, salt build-up or scorch – diagnosis depends on where the browning sits.
- Correction Strategy: Check soil moisture and roots first; correct watering to a steady cycle, flush salts occasionally, and raise humidity. Move away from hot dry drafts and harsh midday sun through glass.
- Leaf scorch / sunburn:
- Cause & Symptoms: Abrupt exposure to strong direct sun (or a grow light too close) bleaches and browns leaf surfaces, especially after life in lower light.
- Correction Strategy: Acclimatise gradually to brighter light and provide bright but filtered exposure; move back from intense direct sun through glass.
- Chlorosis (yellowing):
- Cause & Symptoms: Uniform paling or interveinal yellowing points to nutrient shortage (nitrogen, magnesium or iron) or waterlogged roots that cannot feed.
- Correction Strategy: Feed with a balanced foliage-plant fertiliser in the growing season, correct any waterlogging, and use an iron/magnesium supplement if interveinal yellowing persists on new leaves.
- Sap irritation (handling):
- Cause & Symptoms: Cut or broken stems ooze a milky latex that can irritate skin and eyes and stain surfaces.
- Correction Strategy: Wear gloves when pruning, keep the sap off skin and pets, and wipe tools and surfaces afterwards.
What Helps – Products & Tools
Care is mostly cultural – stable light and warmth, steady watering, humidity, airflow and leaf-wiping. For insects, reach for insecticidal soap, neem or light horticultural oil (scale, mealybug, mites, whitefly), spinosad for thrips, and yellow/blue sticky traps for monitoring. For leaf-spot diseases a copper fungicide helps, while root rot is handled by repotting into free-draining mix rather than any spray.