


Plant Profile & Key Characteristics
Overview: An evergreen, clump-forming foliage plant reaching about 30-60 cm. Grown as an ornamental for its striking patterned leaves and for air-purifying, indoors as a houseplant or in warm-climate shade.
Quick Specifications
| Specification | Attribute |
|---|---|
| Plant Type / Life Cycle | Perennial (rhizomatous foliage plant) |
| Foliage Type | Evergreen |
| Mature Size | 30-60 cm tall (12-24 in) |
| Growth Rate | Slow to Moderate |
| Root System | Rhizomatous, clump-forming |
| Toxicity | Non-toxic (pet-safe) |
| Hardiness | USDA zone 11+ (or indoors) |
Growth Form & Structure
- Height & Spread: 30-60 cm (12-24 in), grown in the ground in warm shade or, more commonly, in pots and indoors.
- Growth Habit & Form: Clumping foliage plant that spreads slowly from rhizomes.
- Lifespan & Maturity: Long-lived perennial grown chiefly for its foliage; leaves fold upward at night in the prayer-plant manner.
Anatomy & Physical Features
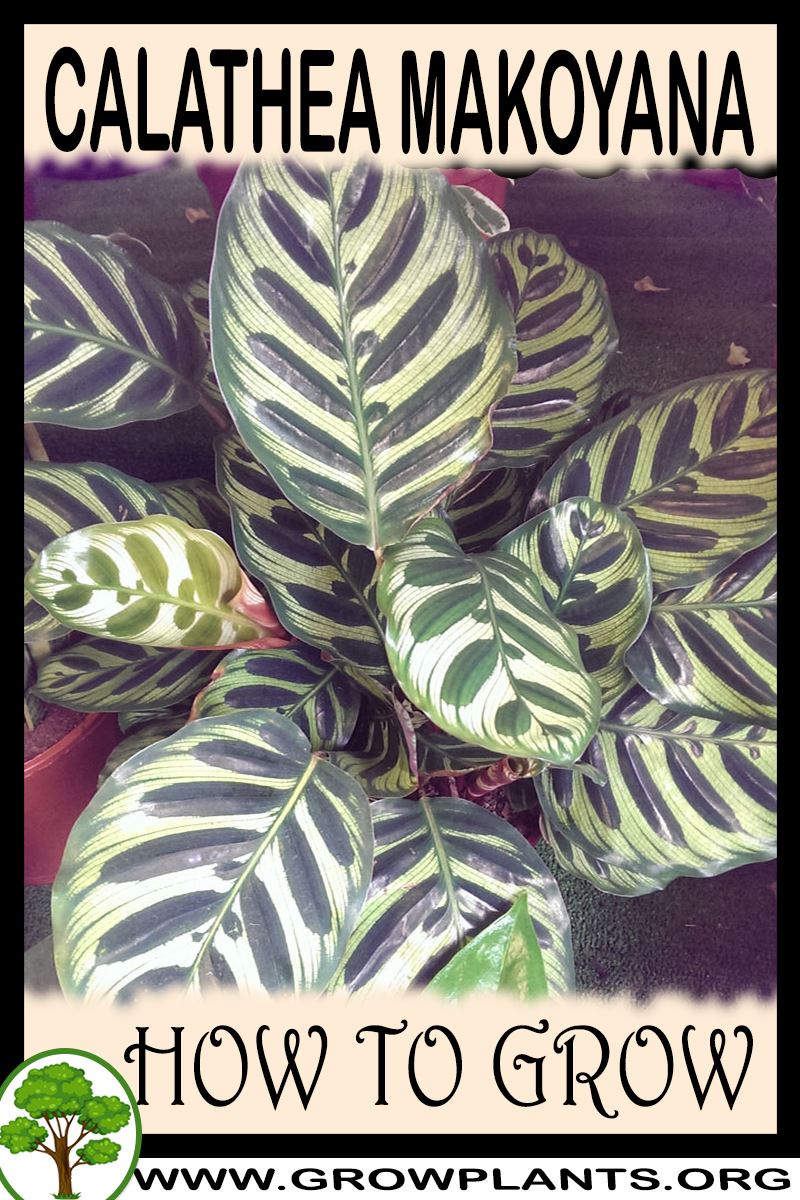
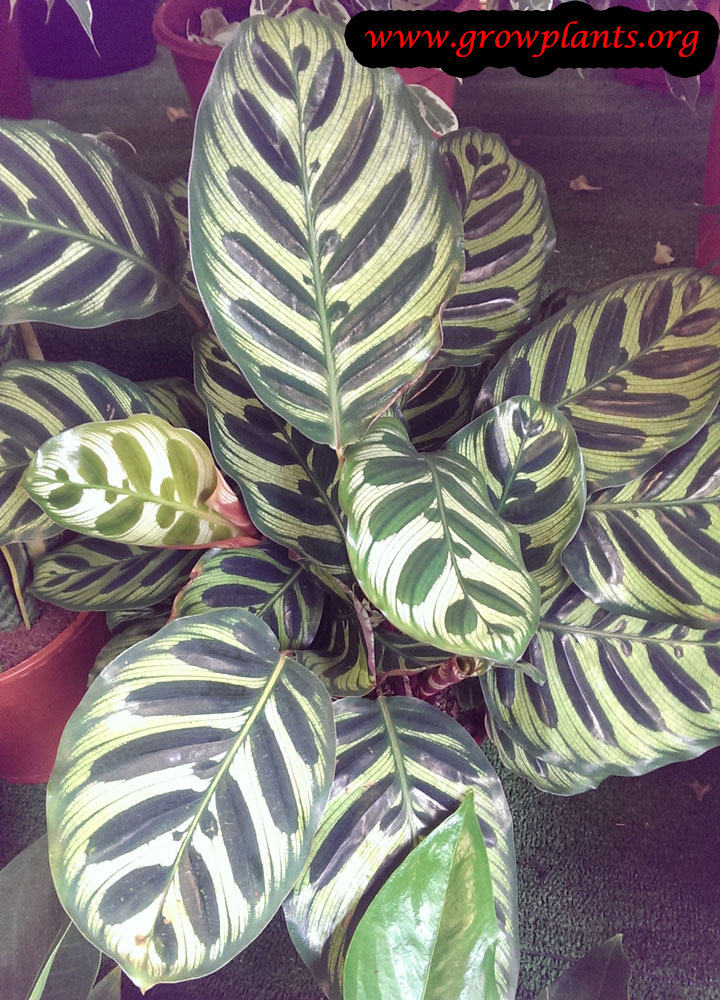
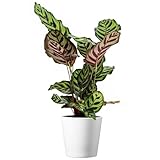
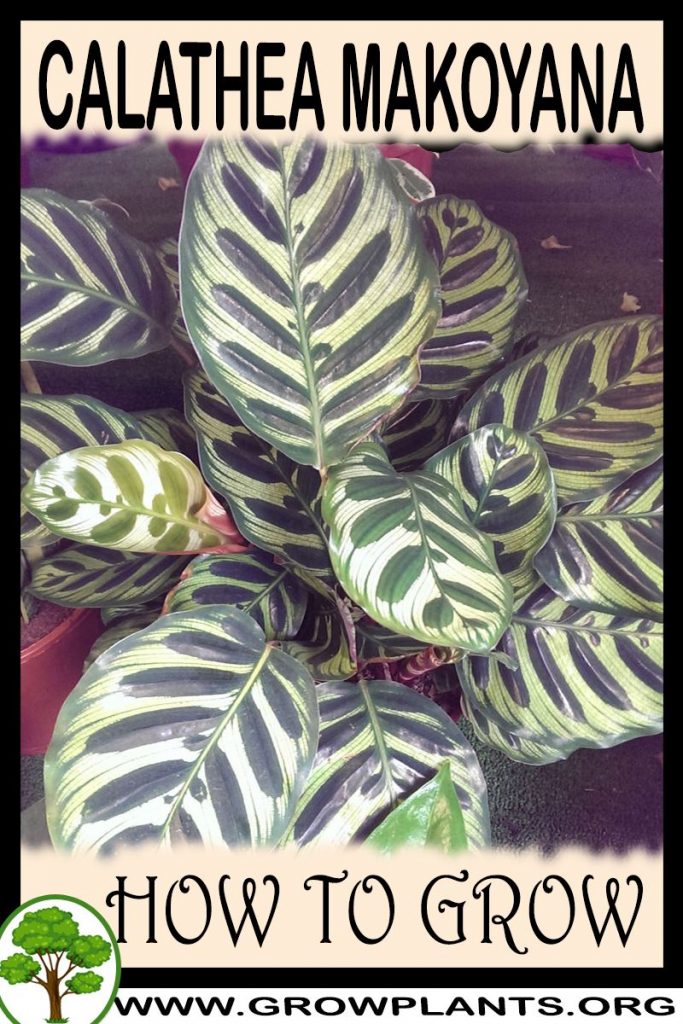
- Leaves & Foliage: Rounded-elliptic leaves patterned green with dark-green brush-mark markings in a peacock-feather effect, purple to red beneath.
- Flower Characteristics: Small white beehive-like flowers; minor ornamentally.
Primary Uses & Landscape Value
- Functional & Ornamental Roles: Ornamental foliage houseplant for shaded spots, and grown to help purify indoor air.
Care Guide: Planting, Soil & Watering
Overview: These tropical foliage plants thrive in warm, humid, shaded spots (ideally 18-25C) and resent hard water, so rainwater or filtered water is best. Give them a rich, organic, consistently moist but free-draining mix that never dries out completely or turns waterlogged.
Quick Care Requirements
| Requirement | Ideal Condition |
|---|---|
| Planting Season | Year-round under cover; spring to early summer if borderline |
| Growth Rate | Slow to Moderate |
| Soil Type | Rich, organic, moisture-retentive yet free-draining |
| Water Need | Moderate to High – keep evenly moist, never soggy or bone dry |
Planting & Establishment
- Best Planting Season: Grown under cover or indoors they can be planted at any time of year; in borderline conditions (around zone 11a) plant in spring to early summer so they establish through the warm season.
- How to Plant:
- Hole Preparation: Pot into a container about 30-50% larger than the root ball (roughly 10-15 L / 2.6-4 gallons for a mature clump) – an oversized pot holds too much wet soil around the roots.
- Soil Amendments: Work compost or other organic matter through the mix and add perlite for aeration; a surface mulch keeps the root zone evenly moist.
- Planting Depth: Set the crown level with the surface of the mix – keep the base of the stems at soil level rather than buried.
- Growth Speed & Expectations: Expect slow to moderate growth; steady warmth, humidity and feeding three to four times a year keep fresh leaves unfurling.
Soil, Watering & Drainage Care
- Soil Mix & Drainage Needs: Use a rich yet free-draining medium – potting mix or peat blended with perlite for aeration and plenty of compost or other organic matter, with mulch over the surface to hold moisture. In pots, let any water that collects in the saucer drain away and the base dry out the same day; standing water rots the roots.
- Watering Schedule & Technique:
- Young / Newly Planted: Water a newly potted or divided plant thoroughly, then keep the mix evenly moist while roots take hold; warmth and high humidity speed establishment.
- Established: Keep the soil consistently moist but never soggy – don’t let it dry out and don’t leave it sitting in water. Use rainwater or filtered water, as this genus is sensitive to hard, chlorinated or fluoridated water.
- Seasonal Adjustments: Ease back in the cooler months when growth slows, and water a little more often during warm, bright spells; raise humidity whenever indoor air turns dry.
Climate, Light & Hardiness
Calathea makoyana is a tropical foliage perennial grown outdoors only in frost-free tropics and as a houseplant everywhere else, wanting warm, stable temperatures of about 18–25 °C, deep shade or bright indirect light, and consistently high humidity. It is cold- and frost-intolerant and never takes direct sun.
Quick Climate Specifications
| Climate Zones | Tropical (grown as a houseplant in cooler climates) |
|---|---|
| USDA Hardiness Zones | 11b+ (11a+ with attentive care) (site data) |
| Optimal Temp Range | 18–25 °C (64–77 °F) (site data) |
| Cold Damage Begins | Growth suffers below about 15 °C (59 °F) |
| Approx. Survival Minimum | Briefly tolerates about 10 °C (50 °F) per site data; no frost tolerance |
| Frost Tolerance | None |
| Light Conditions | Full shade to bright indirect light - no direct sun |
| Wind Tolerance | Low (avoid drafts and heater/AC airflow) |
Sunlight & Light Exposure
Optimal Light Setup
Bright indirect light, or full to dappled shade. Indoors, place it at an east- or north-facing window, or set back from a brighter window so no direct sun reaches the leaves.
Shade & Heat Management
Direct sun scorches and fades the patterned foliage; deep shade is well tolerated. Keep it off hot window glass, which can burn leaves even when the room feels comfortable.
Best Exposure / Orientation
Indoors, an east- or north-facing aspect is ideal; outdoors in the tropics, grow it under canopy shade.
Temperature Extremes & Hardiness
USDA Hardiness & Regional Limits
Suited to zone 11b+ outdoors - frost-free tropics only - and grown as a houseplant in every cooler zone. Cold winters make year-round outdoor culture impossible below its limit, which is why it is treated as an indoor plant across most of the world.
Cold Damage & Winter Protection
Keep it above about 15 °C (59 °F) for good growth; below roughly 10 °C (50 °F) chilling injury sets in. In winter keep it away from cold window glass and drafts. It has no frost tolerance whatsoever.
Frost Sensitivity
None - any frost kills it.
Extreme Heat Tolerance
It enjoys warmth, but temperatures above the optimal combined with dry air cause the leaves to curl and crisp at the edges; humidity must rise with the temperature.
Wind, Humidity & Microclimate
Humidity Preferences
High humidity is essential - this is a rainforest-understorey plant, and its leaves crisp and brown in dry air.
Dry-Air Tolerance
Low. The site data specifically warns that dry air from heating and cooling machines damages it.
Wind Tolerance
Low - avoid drafts and the direct airflow of air conditioners, heaters and vents.
Rainfall & Seasonal Moisture
Adapted to warm, humid, evenly moist tropical conditions with soft rainwater and no marked dry season.
Microclimate Recommendations
Give it a warm, humid, draft-free, shaded spot - group plants together or stand the pot on a humidity tray, and keep it well away from radiators and air-conditioning outlets.
Growing in Pots, Balconies & Indoors
Calathea makoyana is a classic tropical houseplant, and the grower confirms it grows well indoors. Prized for its patterned foliage, it thrives in the low, filtered light of a room and dislikes direct sun – one of the best choices for a shadier indoor spot – and it is pet-friendly, too.
Quick Details
- Container Size: Pot around 10-15 L (2.6-4 gal); start in a pot only 30-50% larger than the plant (grower’s guidance)
- Indoor Suitability: Grows well indoors – a genuine houseplant that likes warmth, humidity and steady moisture
- Best Spot: Bright, indirect light or light shade; keep it out of direct sun and away from heating and cooling drafts
- Soil & Drainage: Peat- or coir-based potting mix with perlite, enriched with humus and organic matter
- Watering in Pots: Keep the soil consistently moist and humid – do not let it dry out, and do not let it sit in standing water
Indoors & On the Windowsill
- A true houseplant: The grower confirms Calathea makoyana grows well indoors. Give it warmth, bright indirect light and humidity.
- Care indoors: Keep it away from the dry air of heaters and air-conditioners, keep the soil moist and the air humid, and feed it at least once a year (grower’s guidance).
- Humidity: Grouping plants, a pebble tray or occasional misting helps hold the humidity it loves; brown leaf edges usually mean the air is too dry.
On a Balcony or Patio
- Shade and shelter: Outdoors it wants warm shade – never direct sun, which scorches the leaves. A sheltered, shaded balcony in warm weather suits it.
- Warmth matters: It is tropical and not frost-hardy, so bring it back indoors before nights turn cold; wind and dry air on a balcony can crisp the foliage.
Choosing the Pot, Soil & Long-Term Care
- Pot & drainage: A pot with strong drainage holes and no standing saucer – the grower lets the base of the pot take up water but makes sure it drains away the same day, so roots never stay waterlogged.
- Potting mix: Potting mix or peat with perlite, blended with humus and organic matter, and topped with chopped mulch to hold moisture (grower’s mix).
- Feeding: Feed at least once a year, and more often through the growing season, as pot nutrients leach with watering.
- Repotting: Terracotta breathes and dries faster while plastic holds the moisture Calathea prefers; move to fresh soil every few years (see the grower’s tip below).
Grower’s Container Tip
- Right-sized pot: Start in a container only 30-50% larger than the plant (about 10-15 L / 2.6-4 gal) – an over-large pot holds too much wet soil.
- Winter root refresh: Every few years, ideally in winter, wash the old soil from the roots, trim the roots, prune the plant, and replant in fresh mix.
- Moisture routine: Top with chopped mulch and let the base of the pot take up water, but make sure it dries out the same day so the roots never sit wet.
Growing this plant in a greenhouse
A greenhouse can give calathea makoyana frost protection, cold protection, humidity control and extra warmth. In the right climate it may also be kept growing through winter, depending on how much warmth and light are provided.
Greenhouse at a glance
| Greenhouse suitability | Good - clearly useful |
|---|---|
| Main benefits | frost protection, cold protection, humidity control, extra warmth |
| Season extension | earlier spring & later autumn |
| Outdoor protection advisable below | about 15°C |
| Maintain greenhouse minimum | around 15°C for active growth |
| Suitable types | heated greenhouse, polycarbonate greenhouse |
| Heating | Heating is recommended in cold climates for continuous growth. |
Related greenhouse guides
- Greenhouses: How to Choose the Right Greenhouse
- Best Greenhouse Heaters
- Greenhouse Climate Control: Temperature, Ventilation and Humidity
- Polycarbonate Greenhouses: What to Look for Before Buying
Fertilizing & Feeding
Calathea is a light feeder grown for its patterned foliage; it responds to gentle, dilute nutrition during active growth and is sensitive to salt and hard-water buildup.
Quick Fertilizing Specs
| Feeding Level | Light – a modest feeder grown for foliage |
|---|---|
| Main Nutrient Priority | Balanced nutrition with modest nitrogen to keep foliage lush and well-coloured |
| Best Feeding Period | During active growth in the warmer, brighter part of the year |
| Organic Options | Worm castings or a diluted organic liquid feed; enrich the mix with compost or hummus |
| Soil pH | Prefers a slightly acidic mix |
| Reduce/Stop Feeding | Ease off in low light and hold after repotting until settled |
| Micronutrients | Iron or manganese only if new leaves pale between the veins |
Feeding by Growth Stage
Settling in after potting or repotting
Let fresh roots settle into new mix before any feeding begins.
| Nutrient direction | None – withhold fertilizer while roots re-establish. |
|---|---|
| Timing | For the first weeks after potting or repotting into fresh mix. |
| Frequency | No feeding at this stage. |
| Fertilizer types | No feeding at this stage; fresh potting mix already supplies nutrients. |
| Precautions | Do not fertilize newly potted plants; wait until active growth resumes. |
Active growth
Support healthy new leaves with strong colour and patterning during active growth.
| Nutrient direction | Balanced nutrition with modest nitrogen; keep feeds gentle and dilute. |
|---|---|
| Timing | Through the warmer, brighter part of the year when new leaves appear. |
| Frequency | Light, dilute feedings spread across the active growing season. |
| Fertilizer types | A balanced complete houseplant fertilizer, well diluted, A gentle organic liquid feed |
| Routine trace nutrients | iron, manganese |
| Precautions | Sensitive to salts – use rainwater or filtered water and feed sparingly to avoid leaf-tip burn. |
Low-light winter slowdown
Match feeding to slower growth in the low light of the cooler season.
| Nutrient direction | None – withhold fertilizer while growth slows in low light. |
|---|---|
| Timing | During the darker, cooler part of the year. |
| Frequency | No feeding at this stage. |
| Fertilizer types | No feeding at this stage; resume when growth picks up. |
| Precautions | Do not fertilize during the low-light rest; unused salts can build up and scorch leaves. |
Flushing salt buildup
Clear accumulated salts from the potting mix to protect sensitive roots and leaf tips.
| Nutrient direction | None – this is a leaching step, not a feeding. |
|---|---|
| Timing | Whenever leaf tips brown or a white salt crust appears on the mix or pot. |
| Frequency | No feeding at this stage. |
| Fertilizer types | No feeding at this stage; flush the mix thoroughly with low-salt water instead. |
| Precautions | Do not fertilize while flushing; leach with rainwater or distilled water to remove salts. |
Nutrient Deficiency Signs & Corrections
Leaf tips and edges turn brown and crispy.
| Possible causes | Salt buildup from hard water or excess fertilizer, Low humidity and dry air, Inconsistent watering or root stress |
|---|---|
| Appears first on | Leaf tips and margins |
| What to check | Water quality and any white salt crust on the mix, Fertilizer history and humidity |
| Possible correction | Flush the mix with rainwater or distilled water to leach salts, raise humidity, and feed more sparingly. |
New leaves pale or yellow between the green veins.
| Possible causes | Iron or manganese shortage, often from a mix that is too alkaline, Cold, waterlogged roots limiting uptake, Overwatering damaging fine roots |
|---|---|
| Appears first on | Youngest leaves |
| What to check | Mix pH and drainage, Watering routine and root health |
| Possible correction | Correct mix pH and watering; if needed apply a chelated iron or manganese product per its label. |
Overall pale, yellowing older leaves and weak growth.
| Possible causes | Nitrogen shortage after long spells without feeding, Too little light, Overwatering or soggy mix suffocating roots |
|---|---|
| Appears first on | Older leaves |
| What to check | Feeding history and light levels, Whether the mix stays soggy |
| Possible correction | Improve light and drainage; during active growth give light, dilute balanced feeding. |
Pruning, Training & Seasonal Maintenance
Calathea makoyana (Peacock plant) is a tender tropical foliage plant grown almost entirely for its leaves — translucent, feather-patterned leaves, green above with dark tracery and purple-red beneath — and it is not pruned in any structural sense. There is no woody framework, no seasonal cutting cycle and no fruiting logic; the only routine task is removing dead, faded or badly damaged leaves at the base and dividing a congested clump when you repot. It grows from a clumping rhizome to about 30–60 cm and, hardy only to zone 11, is kept indoors in most climates in warm, humid, shaded conditions.
Quick Pruning & Maintenance Specs
| Pruning Tolerance | Low — leaf grooming only; the growing crown must not be cut into |
| Primary Pruning Window | Any time — remove leaves as they age or become damaged |
| Secondary Maintenance Window | Warm growing season — divide the clump when repotting |
| Typical Frequency | As needed; division only every few years at repotting |
| Main Objective | Remove spent leaves and keep the foliage clean and healthy |
| Young Plant Priority | None — let it acclimatise to humidity and settle |
| Mature Plant Priority | Remove old outer leaves; divide a crowded clump at repot |
| Best Tool Type | Sterile precision snips |
| Avoid Heavy Pruning During | Winter / low light, and never cut back into the healthy crown |
Pruning by Plant Age & Size
Newly Established
Do not prune. A newly potted or recently moved Calathea needs to acclimatise to its humidity and light; touch it only to remove a leaf lost to transplant shock.
Young / Formative
No training applies — the plant is a clumping rosette of leaf-topped petioles, not a branching stem. Pinching, staking and leader work are all irrelevant; it simply adds leaves from the centre.
Mature / Established
Groom the oldest outer leaves as they yellow, and when the clump fills its pot, divide it at repotting rather than cutting it back. Division into rooted crowns is the only way to reduce size and multiply the plant.
Seasonal Pruning Schedule
Ongoing Sanitary (All Year)
Objective: keep foliage clean. Remove: dead, yellowing or heavily marked leaves at the petiole base as they occur. Do NOT remove: healthy leaves or the central growing points. Response: the plant continues pushing new leaves from the crown.
Warm Season (Growth)
Objective: refresh and multiply. Do: carry out any division and repotting while the plant is in active warm-season growth so it recovers quickly. Avoid: disturbing or dividing in winter, when low light and cool temperatures slow recovery.
Structural Pruning & Training
None applies. There are no branches to select, no crossing wood and no canopy to thin. If a clump grows too large or too dense, the answer is division at repotting — separating rooted crowns — not cutting the plant back.
Special Growth to Remove
- Dead and faded leaves: cut the whole petiole at soil level rather than snipping the blade.
- Brown, crispy leaf tips or edges: trim following the leaf’s natural outline — but treat this as a symptom, since it is caused by hard water or dry air, not by needing a prune.
- Spent flower stalks: the small white inflorescence is insignificant on a foliage plant; remove the stalk once it fades to return energy to the leaves.
Container & Small-Space Pruning
As an indoor plant, the container is its world. Grooming stays the same, and the key periodic job is division and soil renewal at repotting: every few years in the warm season, ease apart the clump, refresh the sterile, moisture-holding potting mix, and pot each division only slightly larger than its roots. Do not over-pot — a swamp of cold, wet soil around a small clump invites rot.
Tools
Only one tool is needed: clean, sharp precision snips for soft leaves and petioles. Secateurs, loppers, saws and hedge shears have no place on a soft-tissue houseplant.
Tool Hygiene & Disease Risk
Routine, rising to Increased if leaf spot is present. Calathea’s soft foliage can develop fungal or bacterial leaf-spotting; if you are cutting away spotted leaves, wipe the blade before moving to a healthy plant so you do not carry the pathogen across. For ordinary grooming of clean foliage, a clean sharp snip is sufficient.
Cut Placement & Technique
- Remove a spent leaf by cutting its petiole right down at the soil line — a bare stalk left standing looks worse and can rot.
- For brown tips, cut just inside the damage, mirroring the leaf’s natural shape.
- Never cut into or across the central crown — that is where all new leaves originate.
Heavy Pruning & Rejuvenation
Calathea does not tolerate hard cutting-back. It has no dormant buds along a stem to reshoot from — cut into the crown and you kill that section outright. A tired, congested or leggy plant is rejuvenated by division and fresh soil, never by shearing it down.
Post-Pruning Care
After grooming or division, keep the plant warm, humid and out of direct sun; water with rain or filtered water (it is sensitive to hard water) to keep the soil evenly moist but never waterlogged. No feeding is required simply for grooming; resume normal feeding once new growth appears after a division.
Common Pruning Mistakes
- Cutting healthy leaves to ‘shape’ the plant — it will not bush out from cuts like a hedge.
- Trimming brown tips again and again without fixing the cause: hard water, dry air or under-watering.
- Cutting into the crown expecting fuller regrowth — it only kills growing points.
- Dividing in winter’s low light instead of in warm active growth.
When NOT to Prune
- Not on a stressed plant — removing many leaves at once from one already struggling with light or humidity sets it back further.
- Not in winter or low light for any division or major grooming.
- Never a hard cut-back into the healthy crown.
Recommended Tools (by task)
- precision_snips — sterile snips for removing soft leaves and petioles at the base and tidying brown tips.
- blade_disinfectant — to wipe the blade between plants when cutting away leaf-spot-affected foliage.
Propagation Guide
The peacock plant (Calathea makoyana) is increased by separating the daughter plants (division) that form around the base — the site’s own preferred and easier route — and, less commonly, from seed. Division is of moderate difficulty because the roots must be freed carefully; seed is the slower, fiddlier option and does not reproduce the leaf markings reliably.
Quick Propagation Specs
| Best Propagation Method | Division – separating daughter plants |
| Alternative Methods | Seed |
| Propagation Difficulty | Moderate |
| Seed True-to-Type | No – daughter plants are easier to start and more reliable |
| Vegetative True-to-Type | Yes |
| Best Propagation Season | Warm season, spring to autumn; indoors it can be done year-round |
| Seed Germination Time | About 4–8 weeks |
| Germination Temperature | Around 25°C (77°F) by day, about 22°C (68°F) at night |
| Seed Sowing Depth | Barely covered, about 2 mm |
Division, Offsets, Pups & Suckers
The most reliable method is to separate the daughter plants that arise around the base. Keep as much of the root system as possible: dig around the plant and uncover the roots — blowing the soil away with an air blower, or washing it off with a gentle stream of water, exposes them with least damage. Once the roots are revealed, detach a daughter plant from the mother only after it has enough of its own roots to live independently; then lift it and pot it up. Simply pulling a division straight out of the soil is possible but gives poorer results. Grow the new plant on warm and in high humidity, for example in a closed, humid box, until it is established.
Growing from Seed
Seed Handling & Viability
Store seed in a dry, dark place until sowing.
Sowing Season
Sow in spring, summer or autumn (in the warm season).
Sowing Depth & Orientation
Cover the seed only lightly, about 2 mm.
Germination Conditions
Use a sterile peat-based mix kept moist and in high humidity — standing the pot in a plastic bag or clear box holds the moisture. Keep it warm at around 25°C (77°F), a little cooler at about 22°C (68°F) at night; this day-to-night temperature difference, together with high humidity, favours germination.
Germination Time
Seedlings usually appear in about 4–8 weeks.
Seedling Care
Keep the seedlings in a closed, humid enclosure with even moisture and warmth around 25°C (77°F). Prick them out into separate pots, or space them about 2×3 cm (roughly 1×1 inch) apart, to grow on.
Bloom & Flower Guide
Quick Details
- Bloom Season: Can appear through much of the year in warm, humid conditions
- Flower Appearance: Small white flowers in a cone-like head (inflorescence), the overlapping bracts recalling a beehive with petals fused at the base
- Edibility: Ornamental – grown for its foliage; the flowers are not eaten (the plant is non-toxic and pet-safe)
Detailed Blooming Overview
The peacock plant earns its name from finely patterned leaves – dark brushstroke markings over green, with purple-red undersides. Flowering is secondary: given warmth and humidity it can produce a short, cone-like head of small white flowers through much of the year, though indoor plants often stay in leaf only.
Flower Characteristics
- Small white flowers.
- Held in a beehive-like cone (inflorescence), the petals merging at the base.
Bloom Care & Thinning
- To encourage bloom: Warmth, high humidity and bright indirect light give the best chance of flowering.
- After flowering: Trim spent flower stems at the base; the patterned foliage is the main attraction.
Pests, Diseases & Troubleshooting
Overview: Calatheas (now largely reclassified as Goeppertia) are humidity-loving foliage plants whose thin, showy leaves are magnets for spider mites in dry indoor air and are extremely sensitive to water quality and low humidity. Most ‘problems’ are actually cultural – crispy edges and browning from dry air, salts or fluoride – with sap-suckers and root rot the main biological threats.
Quick Troubleshooting Overview
| Issue / Pest | Main Symptom | Primary Solution |
|---|---|---|
| Spider mites | Fine stippling, webbing, dull bronzed leaves | Raise humidity, wipe/hose, oil/soap |
| Mealybugs | White cottony tufts in axils and undersides | Alcohol swab, soap/oil |
| Thrips | Silvery streaks and speckling, deformed leaves | Sticky traps, insecticidal soap/spinosad |
| Aphids & scale | Sticky honeydew, bumps or clusters | Wipe, soap/oil |
| Root rot | Yellowing, mushy stems, wilting in wet mix | Ease watering, drain well, repot |
| Leaf-edge browning | Crispy brown margins and tips | Humidity, filtered water, even moisture |
Common Pests & Management
- Spider mites (Tetranychus urticae):
- Symptoms: The number-one Calathea pest: fine pale stippling, a dull, dusty, bronzed look, and delicate webbing on leaf undersides and between the leaf and stem – thriving in the warm, dry air of heated rooms.
- Prevention & Control: Raise humidity (the single best defence), wipe or shower both leaf surfaces regularly, and isolate affected plants. Treat with insecticidal soap or a light horticultural/neem oil on undersides, repeating every 5–7 days until clear.
- Mealybugs (Pseudococcus / Planococcus spp.):
- Symptoms: White cottony tufts tucked into leaf axils, along veins on the undersides, and around the roots, with sticky honeydew and stalled growth.
- Prevention & Control: Dab colonies with a cotton bud dipped in rubbing alcohol, wash the foliage, and treat with insecticidal soap or oil; check the roots at repotting and quarantine new plants.
- Thrips (Frankliniella / Thrips spp.):
- Symptoms: Silvery streaking and fine speckling on leaves, deformed or scarred new growth, and dark frass specks; thrips can also spread viruses.
- Prevention & Control: Monitor with blue or yellow sticky traps, remove badly affected leaves, and treat with insecticidal soap or spinosad, repeating to catch successive generations.
- Aphids & scale (occasional):
- Symptoms: Aphids cluster on new growth with honeydew; scale appear as small brown limpet-like bumps on undersides and stems, also with honeydew and sooty mould.
- Prevention & Control: Wipe off, rinse, and treat with insecticidal soap or horticultural oil; scrape or dab scale with alcohol and repeat oil sprays to catch crawlers.
- Fungus gnats (Bradysia spp.):
- Symptoms: Small black flies around the pot; their larvae feed on roots and organic matter in constantly wet potting mix, weakening young plants.
- Prevention & Control: Let the top of the mix dry between waterings, use yellow sticky traps, and drench with Bti (Bacillus thuringiensis subsp. israelensis) if larvae persist; avoid keeping the mix waterlogged.
Diseases & Fungal Issues
- Root & stem rot (Pythium / Rhizoctonia / Fusarium):
- Symptoms: Yellowing lower leaves, soft mushy stem bases, wilting despite wet soil, and dark, decaying roots – from overwatering, a soggy heavy mix, or cold-wet conditions.
- Treatment & Management: Water only when the top of the mix is approaching dry, use a light, free-draining but moisture-retentive mix, and ensure the pot drains freely. Remove rotted roots, cut back to healthy tissue, and repot into fresh mix; keep warm.
- Fungal & bacterial leaf spot (Helminthosporium/Drechslera, Pseudomonas):
- Symptoms: Brown or tan spots, sometimes water-soaked with yellow halos (bacterial) or ringed (fungal), spreading in warm, humid, wet-foliage conditions.
- Treatment & Management: Keep water off the leaves, improve airflow, and remove affected leaves. Avoid overhead misting late in the day; copper sprays help persistent cases, and bacterial spot especially demands dry foliage.
- Cucumber mosaic virus (occasional):
- Symptoms: Mosaic mottling, ring patterns and leaf distortion that do not wash off, spread by aphids.
- Treatment & Management: There is no cure – remove and destroy affected plants, control aphid vectors, and propagate only from clean stock.
Growing Difficulties & Abiotic Problems
- Leaf-edge & tip browning (dry air, salts, fluoride):
- Cause & Symptoms: Crispy brown margins and tips – the classic Calathea complaint – from low humidity, fertiliser-salt build-up, or fluoridated/chlorinated/hard tap water, to which the genus is unusually sensitive.
- Correction Strategy: Keep humidity high (50–60%+), water with rain, distilled or filtered water, feed weakly and flush the mix periodically, and keep moisture even; avoid letting the plant dry out or sit soggy.
- Low-humidity / underwatering stress:
- Cause & Symptoms: Curling, rolling leaves that fail to open flat, faded colour, and general sulking in dry air.
- Correction Strategy: Group plants, use a humidity tray or humidifier, keep out of heating and draughts, and water consistently so the mix stays lightly moist.
- Light stress – scorch or fading:
- Cause & Symptoms: Bleached, scorched patches and washed-out markings in direct sun; leggy, dull, poorly-patterned growth in deep shade.
- Correction Strategy: Give bright, indirect light; the vivid patterning is best in good filtered light but burns in direct sun. Turn plants for even growth.
- Cold damage:
- Cause & Symptoms: Yellowing, limp or blackened leaves and stalled growth below about 15°C.
- Correction Strategy: Keep warm (ideally 18–24°C), away from cold windows and draughts; these are tropical plants intolerant of chills.
What Helps – Products & Tools
For Calatheas the key ‘tools’ are a humidifier or humidity tray and filtered/rain water to prevent the edge-browning that plagues them, plus insecticidal soap and horticultural/neem oil for spider mites, mealybugs, scale and aphids, blue/yellow sticky traps and Bti for thrips and fungus gnats, and a light, free-draining mix with careful watering to avoid root rot. Copper fungicide covers leaf spots if they appear.