
Plant Profile & Key Characteristics
Also known as: Chrysanthemum grandiflora, Chrysanthemum flower, Mums flowers, Chrysanths, Chrysanthemum × morifolium
Overview: A herbaceous plant usually 20-50 cm (8-20 in) tall (occasionally to 1.5 m / 60 in), grown as an ornamental and cut flower for its large, many-coloured blooms. It may be perennial or annual in temperate, Mediterranean and subtropical gardens.
Quick Specifications
| Specification | Attribute |
|---|---|
| Plant Type / Life Cycle | Perennial or annual (evergreen or deciduous) |
| Mature Size | 20-50 cm (8-20 in) tall, up to 1.5 m (60 in) |
| Growth Rate | Fast to moderate |
| Toxicity | Toxic to pets (contains pyrethrins) |
| Hardiness | USDA zone 5-10 (annual in zones 2-5 and 11) |
Growth Form & Structure
- Height & Spread: Mostly 20-50 cm (8-20 in), occasionally to 1.5 m (60 in); grows well in containers and as a houseplant with plenty of light.
- Growth Habit & Form: Bushy, mounding herbaceous plant with showy flowerheads.
- Lifespan & Maturity: Fast-to-moderate; flowers the same season.
Anatomy & Physical Features
- Leaves & Foliage: Green, deeply lobed leaves.
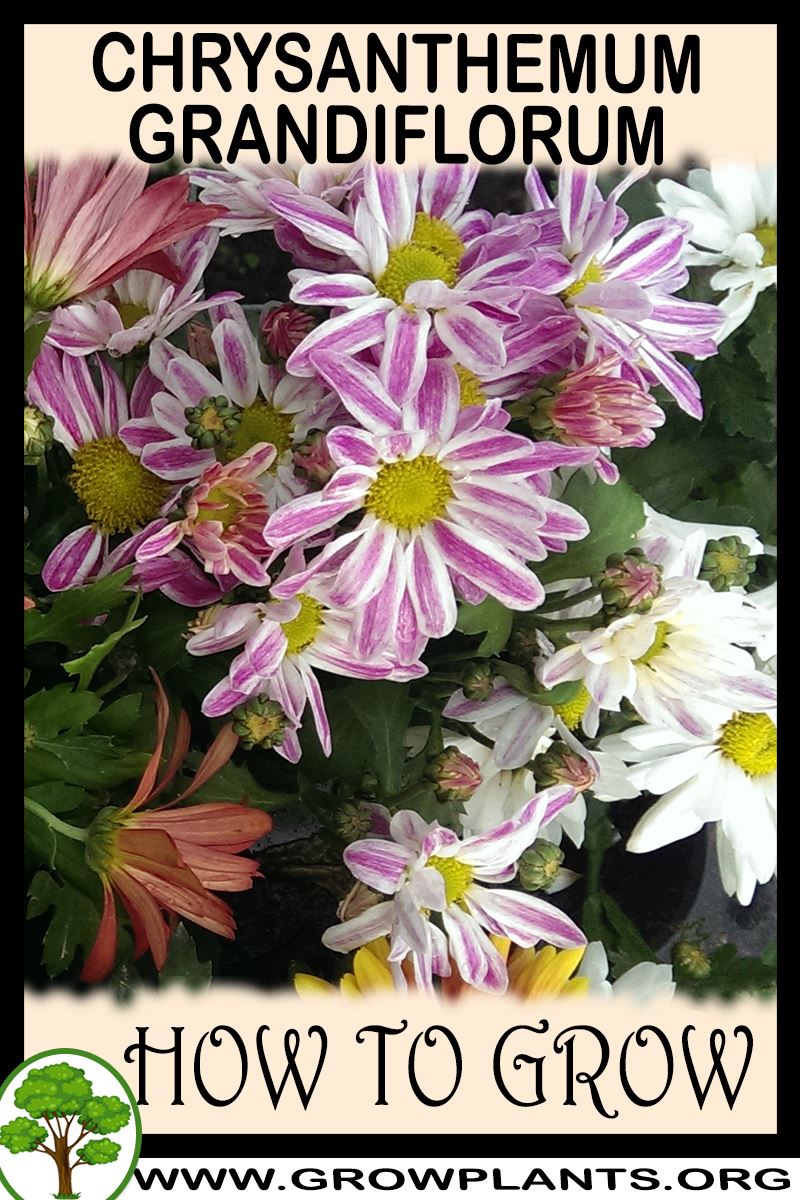
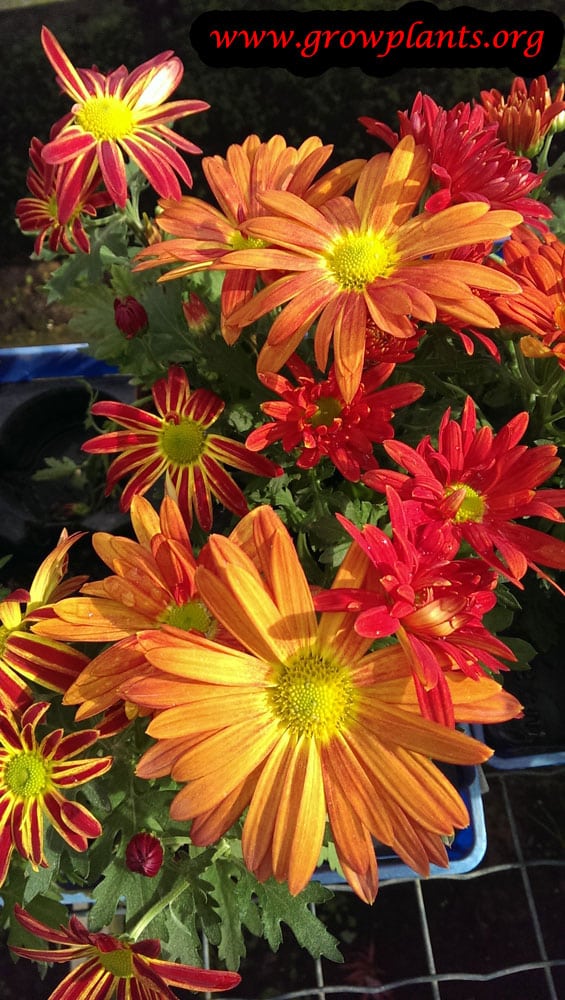
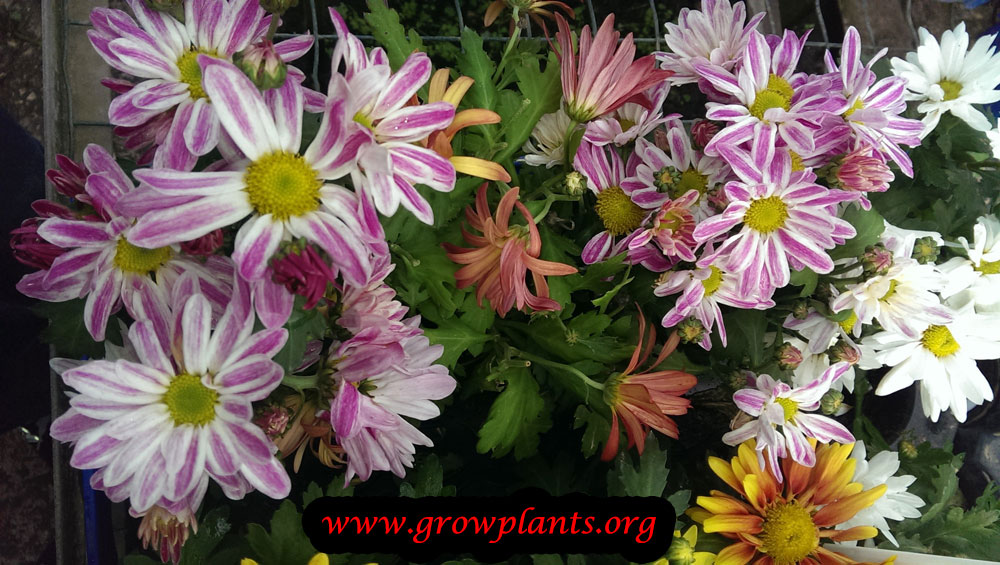
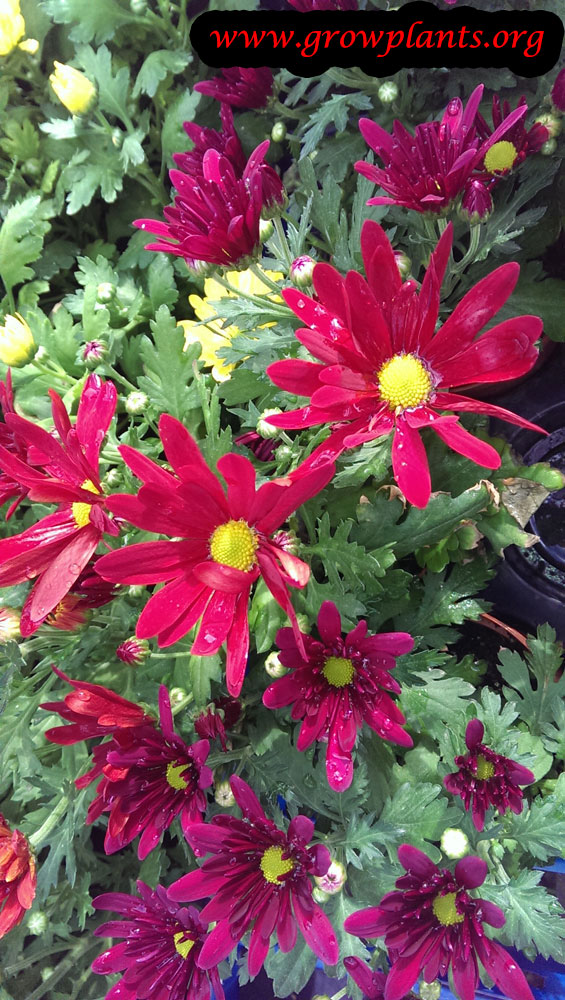
- Flower Characteristics: Large disc or fully double flowers in many colours, including multicoloured ‘rainbow’ forms (full detail in the Bloom section).
Primary Uses & Landscape Value
- Functional & Ornamental Roles: Ornamental pot and border plant, florist’s cut flower, and pollinator plant.
Care Guide: Planting, Soil & Watering
Overview: This large-flowered florist’s chrysanthemum prefers full sun and cool growing weather in rich, moist, well-drained soil. It needs a moderate, even supply of water and dislikes both drying out and heat.
Quick Care Requirements
| Requirement | Ideal Condition |
|---|---|
| Planting Season | Spring to summer in zones 2-10a; autumn to winter in zones 10b-12 |
| Growth Rate | Moderate to fast |
| Soil Type | Rich, moist, well-draining |
| Water Need | Moderate – keep evenly moist; do not let it dry out or overwater |
Planting & Establishment
- Best Planting Season: From spring to summer in zones 2-10a, and from autumn to winter in the warmer zones 10b-12.
- How to Plant:
- Hole Preparation: Dig a hole about twice the width of the root ball and just as deep, loosening the sides so young roots spread easily.
- Soil Amendments: Mix compost or well-rotted organic matter into the backfill to give these hungry plants a rich, fertile root run.
- Planting Depth: Set the plant so the root collar sits level with the surrounding soil; never bury the stem or trunk base.
- Growth Speed & Expectations: A moderate to fast grower usually 20-50 cm tall, occasionally reaching 1.5 m.
Soil, Watering & Drainage Care
- Soil Mix & Drainage Needs: Grow in rich, free-draining soil kept lightly moist; good drainage prevents rot while steady moisture supports the large blooms. In containers use a potting or peat mix with perlite, refreshing the soil each year if grown on as a perennial.
- Watering Schedule & Technique:
- Young / Newly Planted: Keep the soil evenly moist while the plant establishes, without letting it sit wet.
- Established: Water to keep the root zone consistently moist – do not let it dry out, but avoid overwatering.
- Seasonal Adjustments: Water more in warm growth and reduce in winter; it dislikes prolonged heat.
Climate, Light & Hardiness
Chrysanthemum grandiflorum is a cool-climate bloomer that performs best in temperate, Mediterranean, and subtropical regions with bright light and moderate temperatures; it struggles and can die back where summers turn intensely hot. In cold-winter regions with hard freezes it is usually grown as a returning perennial only within its hardy zone range, or replanted as an annual further outside it.
Quick Climate Specifications
| Climate Zones | Temperate, Mediterranean, subtropics; also grown as a houseplant |
|---|---|
| USDA Hardiness Zones | Approximately 5–10 as a returning perennial; commonly grown as an annual in zones 2–5 and zone 11 |
| Frost Tolerance | Moderate for the roots/crown within its hardy zones; flowers and soft new growth are frost-tender |
| Light Conditions | Full sun to half shade; full shade is possible but not recommended |
Sunlight & Light Exposure
Optimal Light Setup
Full sun produces the most compact growth and heaviest bloom; half shade is well tolerated, especially in hot climates where some afternoon shade reduces stress.
Shade & Heat Management
Full shade is possible but not recommended, since it tends to produce leggy stems and fewer flowers. In hot-summer climates, afternoon shade or light dappled cover helps, because this species genuinely struggles - and can die back - once temperatures turn intensely hot.
Best Exposure / Orientation
An open, sunny bed or a bright, well-lit indoor spot (when grown as a houseplant) gives the best flowering; avoid deep interior corners with weak light.
Temperature Extremes & Hardiness
USDA Hardiness & Regional Limits
Hardy as a perennial in approximately USDA zones 5–10, where the crown survives winter and regrows. Outside that range - zones 2–5 and zone 11 - it is commonly grown as an annual: the coldest zones can't reliably carry the crown through winter, while zone 11 tends to be too warm for its dormancy needs. Cold tolerance and bloom performance also vary by cultivar.
Cold Damage & Winter Protection
Flowers and tender new growth are damaged by frost well before the crown itself is killed; a mulch layer over the root zone helps hardy types carry through freezing winters within their hardy range.
Extreme Heat Tolerance
Low - this species is noted to decline and can die back in hot temperatures, so gardeners in hot-summer climates should prioritize afternoon shade, generous watering, and a site away from reflected heat.
Wind, Humidity & Microclimate
Microclimate Recommendations
Choose an open but not scorching site: cool nights and bright days encourage the strongest bloom, while sheltered warm pockets that trap summer heat should be avoided.
Growing in Pots, Balconies & Indoors
Florist’s chrysanthemums make showy container and balcony plants and, as the grower notes, can be grown indoors with plenty of light – short of that they stretch and flower poorly, so treat them as bright-windowsill plants rather than deep-room houseplants.
Quick Details
- Container Size: Roughly 5-20 L (1-5 gal), depending on the cultivar
- Indoor Suitability: Possible indoors only with a lot of direct light (grower’s note); best on a bright, sunny sill
- Best Spot: Full sun to part shade for the strongest flowering
- Soil & Drainage: Potting mix or peat soil with perlite (grower’s mix); must drain freely
- Watering in Pots: Keep evenly moist – the grower advises never to let it dry out and never to overwater
Indoors & On the Windowsill
- Houseplant note: The grower says indoor growing is possible but only with a lot of light; in a dim room it grows weak and flowers poorly.
- Windowsill growing: A bright, sunny sill is best. Indoors it is especially prone to aphids, so check the shoot tips often and treat early.
- Safety: Chrysanthemums are toxic to cats and dogs and can irritate skin – keep them out of reach of pets and children.
On a Balcony or Patio
- Light, wind & heat: Part sun to part shade suits it best – a spot with morning sun and afternoon shade is ideal. Reflected heat from walls and paving dries pots fast, so check moisture often and shelter from drying wind.
- Practicalities: A full pot is heavy once watered – make sure the balcony can take the load and that drainage runoff has somewhere to go.
Choosing the Pot, Soil & Long-Term Care
- Pot & drainage: Use a pot with strong drainage holes and skip a standing-water saucer to avoid root rot. Terracotta breathes and dries faster; glazed or plastic pots hold moisture longer.
- Potting mix: A well-aerated, organic-rich mix – potting mix or peat/coir blended with perlite or vermiculite for free drainage.
- Feeding: Potted plants need feeding more often than those in open ground, as nutrients leach out with each watering – feed regularly through the growing season.
- Season to season: As a short-lived plant there is no long-term repotting – empty and refill the pot with fresh, clean mix each cycle so pests and disease are not carried over.
- Fresh mix each cycle: The grower advises new potting mix each season (and swapping part of the soil yearly if kept as a perennial) to avoid carrying over pests such as aphids.
Fertilizing & Feeding
A moderate feeder grown for its abundant daisy-like flowers: balanced feeding through spring growth and bloom supports the display, then the plant rests.
Quick Fertilizing Specs
| Feeding Level | Moderate feeder |
|---|---|
| Main Nutrient Priority | Balanced feeding with adequate nitrogen; not a high-phosphorus bloom booster |
| Best Feeding Period | Spring growth through flowering |
| Organic Options | Compost worked into the bed at planting |
| Micronutrients | Usually supplied by a complete fertilizer; correct specific issues only when diagnosed |
| Soil pH | Prefers moist, well-drained soil; tolerates a range of pH |
Feeding by Growth Stage
Spring growth after planting or division
Build strong, bushy foliage before the plant’s daisy-like blooms open.
| Nutrient direction | A balanced, complete fertilizer to support steady leaf and stem growth. |
|---|---|
| Timing | Spring, as new growth resumes after planting, division, or winter dormancy. |
| Frequency | Regular light feedings through the spring growth flush. |
| Fertilizer types | Balanced complete garden or container fertilizer, Compost worked into the bed at planting |
| Precautions | Avoid heavy nitrogen, which produces weak, floppy stems. |
Bud set and flowering
Support the plant’s colorful, multi-petaled flower display, prized for beds, cut flowers, and pollinators.
| Nutrient direction | Continue balanced feeding; adequate nitrogen on a complete fertilizer drives bloom better than a high-phosphorus product. |
|---|---|
| Timing | As buds form and through the flowering display. |
| Frequency | Light, steady feeding through bud set and bloom. |
| Fertilizer types | Balanced complete fertilizer, A diluted liquid feed for container-grown plants |
| Precautions | This plant declines quickly in hot temperatures; ease feeding back if summer heat stresses the plant. |
Dormancy or winter rest
Let the plant rest after flowering or through winter dormancy.
| Nutrient direction | None – withhold fertilizer while the plant is dormant or resting after bloom. |
|---|---|
| Timing | After flowering finishes and through winter dormancy. |
| Frequency | No feeding at this stage. |
| Fertilizer types | No feeding at this stage; resume balanced feeding once spring growth resumes. |
| Precautions | Do not fertilize a dormant or resting plant. |
Nutrient Deficiency Signs & Corrections
Pale, yellow-green foliage and weak, thin stems.
| Possible causes | Low soil nitrogen, Prolonged lack of feeding, Poor, sandy or heavily leached soil |
|---|---|
| Appears first on | Older, lower leaves. |
| What to check | Recent feeding history, Soil quality and drainage, Whether the plant was recently divided or transplanted |
| Possible correction | Resume a balanced complete fertilizer at a light, regular rate. |
New leaves yellow between the veins while the veins stay green.
| Possible causes | High or alkaline soil pH limiting iron uptake, Overly wet, poorly drained soil, Root stress from recent division or transplanting |
|---|---|
| Appears first on | Youngest leaves at the growing tips. |
| What to check | Soil pH, Drainage, Recent transplant or division history |
| Possible correction | Correct soil pH where it is too high and apply a chelated iron product per its label. |
Interveinal yellowing on older leaves while the veins stay green.
| Possible causes | Low soil magnesium, Heavy potassium feeding competing with magnesium uptake, Leaching from frequent watering |
|---|---|
| Appears first on | Older, lower leaves. |
| What to check | Recent fertilizer balance, Soil type, Watering frequency |
| Possible correction | Apply a labeled magnesium source such as Epsom salt and rebalance feeding. |
Pruning, Training & Seasonal Maintenance
Garden/florist mum shares its genus’s defining pruning act – repeated pinching of young growth to build a bushy, many-flowered plant, stopped well before the day-length-triggered buds form – but this species-level entry adds two things not covered generically: pinched tips root easily and true-to-colour as cuttings, so pinching doubles as propagation, and where grown as a hardy garden perennial its winter care differs from a simple autumn cutback.
Quick Pruning & Maintenance Specs
| Pruning Tolerance | High – regrows readily from pinches; each pinched tip can also be rooted as a cutting |
| Primary Pruning Window | Repeated pinching from young growth until roughly 8–10 weeks before the target bloom time |
| Secondary Maintenance Window | Late autumn/early winter, once frost kills the top growth on perennial plantings |
| Typical Frequency | Pinch every 2–3 weeks of active growth; one seasonal cutback after frost |
| Main Objective | Build a bushy, floriferous plant; protect the crown of perennial plants over winter |
| Young Plant Priority | Pinch the growing tip once several leaf sets have formed, then pinch resulting branches again |
| Mature Plant Priority | Stop pinching on schedule; after frost, cut back but leave a short stub over the crown |
| Best Tool Type | Precision snips or fingers for pinching; bypass secateurs for the post-frost cutback |
| Avoid Heavy Pruning During | After the pinching cutoff/bud initiation; and don’t cut flush to soil level right after the first frost |
Pruning by Plant Age & Size
Newly Established
Let a young plant develop several sets of leaves before the first pinch; a fresh transplant or rooted cutting shouldn’t be pinched immediately.
Young / Formative
Pinch out the growing tip above a leaf node, then pinch each resulting side-branch again every couple of weeks. Because this species roots easily and keeps its flower colour true from cuttings, healthy pinched tips can be struck as new plants rather than discarded – a useful way to multiply a good colour form. Stop pinching in good time for buds to form and open before the season ends.
Mature / Established
Once buds are forming, stop pinching and only deadhead and remove damaged or infected leaves. On perennial plantings, wait for frost to kill the top growth before doing the main seasonal cutback.
Seasonal Pruning Schedule
Active vegetative growth: objective is branching; pinch stem tips repeatedly, saving vigorous tips as cuttings if propagation is wanted; don’t pinch past the cutoff needed for timely bud formation.
Bud set through bloom: objective is display; remove only damaged/infected leaves and deadhead; don’t pinch or cut back hard.
After frost (perennial plantings): objective is winter crown protection, not just tidiness; once top growth is killed by frost, cut the dead stems back but leave a short stub of a few centimetres above the crown rather than cutting flush to the soil – the stubble helps protect the crown through winter. Clear the remaining stub away in early spring as new growth resumes.
Special Growth to Remove
Infected or damaged leaves removed promptly; spent flower heads deadheaded. Frost-killed top growth is cut back but not flush – see the winter note above.
Container & Small-Space Pruning
Container culture is common for this species; pinch slightly more often than an in-ground planting for a compact habit, and note the plant’s own facts flag it as heat-sensitive (can die in hot conditions) – in a pot, that makes root-zone heat exposure, not just pruning, part of keeping the plant vigorous enough to respond well to pinching. Refresh or partially replace potting mix periodically on perennial plantings, since old mix can carry pests.
Tools
Fingers or precision snips for pinching soft growth (and for taking cuttings); bypass secateurs for deadheading and the post-frost cutback.
Tool Hygiene & Disease Risk
Increased – as with the genus generally, avoid moving from visibly diseased or pest-infested foliage (aphids, spider mites and slugs are all noted here) straight to healthy plants or to cuttings being taken for propagation, since a contaminated cutting carries the problem into new stock.
Cut Placement & Technique
Pinch cleanly just above a leaf node. When taking a pinched tip as a cutting, use a clean cut just below a node on the piece being rooted. For the post-frost cutback, cut above the crown, not into it.
Heavy Pruning & Rejuvenation
The post-frost cutback is the plant’s routine seasonal reset on perennial plantings; it isn’t a rejuvenation technique so much as normal annual maintenance, and the crown resprouts on its own in spring provided it wasn’t cut flush or exposed over winter.
Post-Pruning Care
No feeding is needed right after pinching or the post-frost cutback. Keep new pinches/cuttings evenly moist while they root. Watch soft regrowth for aphids and spider mites.
Common Pruning Mistakes
Cutting perennial plantings flush to the ground right after the first frost instead of leaving a protective stub; pinching too late and missing the bud window; taking cuttings from visibly pest- or disease-affected growth.
When NOT to Prune
Stop pinching once buds are initiating. Don’t cut a perennial planting flush to soil level immediately after frost – leave the stub until active spring regrowth begins.
Recommended Tools (by task)
- Repeated tip-pinching / taking cuttings: precision_snips – clean small cuts suited to both branching and propagation material.
- Deadheading and the post-frost cutback: bypass_secateurs – handles both flower stems and the coarser dead top growth.
Propagation Guide
Chrysanthemum × grandiflorum (garden and florist mums) is most reliably propagated from stem cuttings, which root easily and, unlike seed, reliably preserve the exact flower color of the parent plant. Seed germinates well and is usable, but as with other hybrid mums the resulting flower color and form can differ from the parent. Overall propagation is easy.
Quick Propagation Specs
| Best Propagation Method | Stem (tip) cuttings |
| Alternative Methods | Division of the clump; seed |
| Propagation Difficulty | Easy |
| Seed True-to-Type | Hybrid offspring vary – flower color is not guaranteed to match the parent |
| Vegetative True-to-Type | Yes – cuttings ensure the flower color stays true |
| Best Propagation Season | Spring to summer in hardiness zone 2–10a; autumn to winter in hardiness zone 10b–12 |
| Seed Germination Time | 1–4 weeks |
| Cutting Rooting Time | Usually two to three weeks under warm, humid conditions |
| Germination Temperature | 20–25°C (68–77°F) |
| Seed Sowing Depth | 0.5–1 cm (0.25–0.5 inches) |
Growing from Seed
Seed Handling & Viability
Store seed in a dry, dark location, ideally refrigerated, until sowing.
Dormancy & Pre-Sowing Treatment
Site guidance indicates the seed benefits from about a month of cold treatment (storing/holding it below 10°C/50°F) before sowing – effectively a period of cold stratification.
Sowing Season
Spring to summer in hardiness zone 2–10a; autumn to winter in hardiness zone 10b–12.
Sowing Depth & Orientation
Sow 0.5–1 cm (0.25–0.5 inches) deep, in trays or rows spaced about 20 × 30 cm (8–12 inches) apart.
Germination Conditions
Keep soil moist and humid; provide half shade in hot weather or full sun in cooler conditions, at around 20–25°C (68–77°F).
Germination Time
1–4 weeks.
Seedling Care
Keep soil moist without letting it dry out, and provide plenty of light; average, consistent watering suits both germinating seed and young seedlings.
Stem Cuttings
Cutting Type
Soft tip cuttings from vigorous, non-flowering basal shoots.
Best Timing
Spring, as new basal growth appears.
Cutting Preparation
Take a 5–8 cm (2–3 inch) tip, remove the lower leaves, and cut just below a node.
Rooting Setup
Insert into a moist, free-draining cutting mix and keep humidity high until roots form.
Rooting Hormone
Optional – not required for this easy-rooting plant, but can speed and even out rooting.
Rooting Time
Usually within two to three weeks under warm, humid conditions.
Division, Offsets, Pups & Suckers
As a clump-forming perennial (where grown as such), established plants can be lifted and divided in spring; separate rooted sections with several shoots each and replant. This is a quick way to multiply a plant while keeping its exact flower color.
Bloom & Flower Guide
Quick Details
- Bloom Season: Late summer into autumn; in warm climates, autumn through winter into spring
- Time to First Bloom: Cutting-grown plants flower within the same season
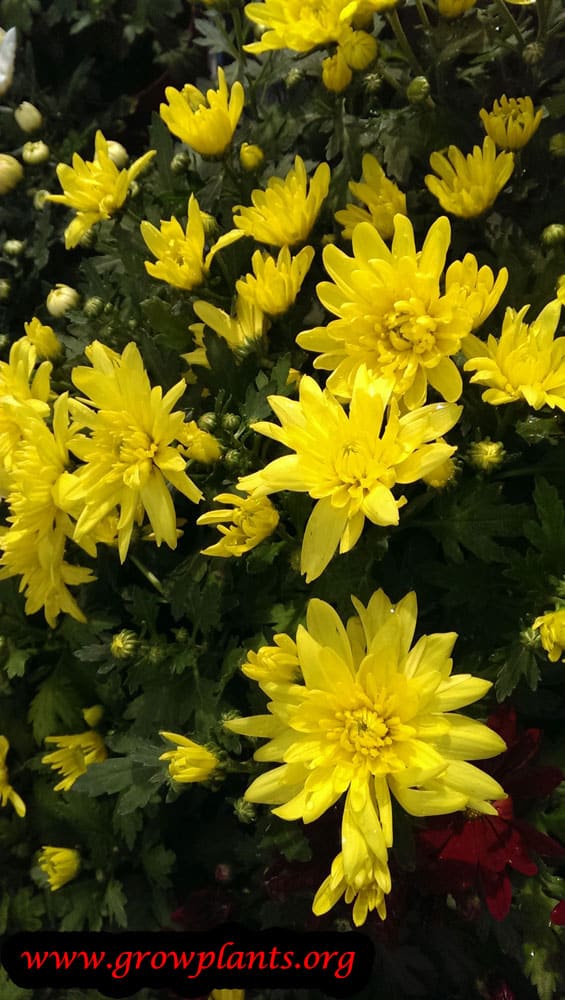
- Flower Appearance: Disc or fully double heads in pink, orange, red, green, purple, yellow, white or mixed – these cultivars include the multicoloured rainbow types
- Edibility: Ornamental – grown for display, not eaten
Detailed Blooming Overview
These large-flowered florist mums are the showpieces of the chrysanthemum world, and the source of most of the dramatic rainbow-coloured blooms. Like all mums they are short-day plants, coming into flower as the days shorten, and the heads range from open discs to fully double globes. With pinching for many blooms or disbudding for a few giant ones, they are equally at home in the border and on the cut-flower bench.
Flower Characteristics
- Heads from single discs to large, fully double forms with many petals.
- Colours span pink, orange, red, green, purple, yellow, white and multicolours, including rainbow types.
- Long-lasting in the garden and as cut flowers.
Bloom Care & Thinning
- More, bushier bloom: Pinch shoot tips through early summer to build a dense, floriferous plant.
- Bigger single blooms: Disbud – remove the side buds so each stem carries one large exhibition-quality flower.
- Upkeep: Deadhead spent heads to keep the display going; single forms also draw pollinators.
Bloom Health & Protection
- Aphids on buds: Cluster on soft buds and shoot tips; a water jet or an insecticidal soap or neem oil manages them.
- Chrysanthemum white rust: Buff pustules under the leaves near flowering; remove affected leaves, improve airflow, and use a suitable fungicide on bad outbreaks.
- Powdery mildew: A white film in humid, crowded conditions; better spacing or a sulfur-based fungicide keeps it in check.
Pests, Diseases & Troubleshooting
Overview: Chrysanthemums are prone to a distinct set of sucking and mining pests (aphids, leaf miners, thrips, spider mites) and to several serious fungal and viral diseases, most notably chrysanthemum white rust. Success comes from clean planting stock, good airflow between plants, steady but not soggy moisture, and early scouting; cultural and biological controls handle most problems before sprays are needed.
Quick Troubleshooting Overview
| Issue / Pest | Main Symptom | Primary Solution |
|---|---|---|
| Aphids | Sticky honeydew, curled shoot tips, sooty mould | Blast off with water, encourage ladybirds, insecticidal soap |
| Chrysanthemum leaf miner | Pale winding tunnels (serpentine mines) in leaves | Remove & destroy mined leaves; sticky traps; parasitic wasps |
| Thrips (virus vector) | Silvery flecking, distorted buds, spread of TSWV | Blue sticky traps, remove weeds, predatory mites |
| Spider mites | Fine stippling, bronzing, webbing in dry heat | Raise humidity, hose foliage, predatory mites, oil |
| Chrysanthemum white rust | Buff/pink pustules that turn white on leaf undersides | Destroy infected plants; a notifiable disease – improve airflow |
| Leaf spot / Septoria | Dark spots enlarging from lower leaves upward | Remove old foliage, water at base, copper if severe |
Common Pests & Management
- Aphids (Macrosiphoniella sanborni, Myzus persicae):
- Symptoms: Clusters of green, black or grey soft-bodied insects on new growth, buds and leaf undersides; sticky honeydew, sooty mould and curled, stunted tips. The chrysanthemum aphid (Macrosiphoniella sanborni) is a dark reddish-brown specialist; several species also transmit viruses.
- Prevention & Control: Knock colonies off with a firm jet of water and pinch out badly infested tips. Conserve ladybirds, lacewings and hoverflies. For persistent outbreaks use insecticidal soap or horticultural oil, covering leaf undersides; repeat weekly. Avoid heavy nitrogen feeding, which fuels soft, aphid-prone growth.
- Chrysanthemum leaf miner (Chromatomyia (Phytomyza) syngenesiae):
- Symptoms: Pale, winding serpentine tunnels within the leaf, later blotches; heavily mined leaves yellow, blister and drop. Larvae feed between the leaf surfaces, so contact sprays reach them poorly.
- Prevention & Control: Pick off and destroy mined leaves as soon as tunnels appear. Use yellow sticky traps to catch adult flies and to monitor. Conserve parasitic wasps (Diglyphus, Dacnusa), which are highly effective. Keep plants un-stressed; remove nearby weedy composites that harbour the fly.
- Thrips (Frankliniella occidentalis, Thrips tabaci):
- Symptoms: Silvery-white flecking and streaking on leaves and petals, deformed buds and browned flower edges. Tiny slender insects hide in buds and growing points. Critically, western flower thrips transmit Tomato spotted wilt virus (TSWV), which causes ringspots and dieback.
- Prevention & Control: Monitor with blue sticky traps. Remove weeds and spent blooms that shelter thrips. Introduce predatory mites (Amblyseius) or minute pirate bugs. Rogue out any virus-suspect plants immediately. If spraying, spinosad or insecticidal soap in the evening protects pollinators; rotate modes of action.
- Two-spotted spider mite (Tetranychus urticae):
- Symptoms: Fine pale stippling and bronzing of leaves, dull greyish cast, and fine webbing on undersides in hot, dry conditions; severe infestations cause leaf drop.
- Prevention & Control: Raise humidity and hose down foliage, especially undersides. Avoid dusty, drought-stressed conditions. Release predatory mites (Phytoseiulus). Treat hot-spots with horticultural oil or insecticidal soap; avoid broad-spectrum insecticides that kill mite predators and trigger flare-ups.
- Capsid bugs and caterpillars (Lygocoris pabulinus, Autographa gamma):
- Symptoms: Capsids cause ragged tattered holes and distorted, puckered young leaves; caterpillars (loopers, cutworms) chew leaves and bore into buds, leaving frass.
- Prevention & Control: Hand-pick caterpillars at dusk and squash egg batches. Keep beds weed-free. Encourage birds and predatory beetles. Bacillus thuringiensis (Bt) targets caterpillars selectively; spot-treat only where damage is active.
Diseases & Fungal Issues
- Chrysanthemum white rust (Puccinia horiana):
- Symptoms: Small pale-green to yellow spots on upper leaf surfaces with buff, pink then white waxy pustules directly beneath; leaves distort and die. This is a serious, aggressive rust.
- Treatment & Management: In many regions this is a notifiable/quarantine disease – report suspected cases and destroy affected plants. Buy certified clean stock, avoid overhead watering and wetting foliage, space for airflow, and remove infected leaves promptly. Preventive protectant fungicides are used in production; sanitation is paramount.
- Brown/common rust (Puccinia chrysanthemi):
- Symptoms: Powdery reddish-brown pustules on leaf undersides with yellow flecks above; lower leaves worst affected in humid conditions.
- Treatment & Management: Remove infected leaves, water at the base early in the day, and improve spacing and ventilation. Choose resistant cultivars. A sulfur or protectant fungicide can be applied when pressure is high.
- Septoria leaf spot (Septoria chrysanthemi / S. obesa):
- Symptoms: Round dark-brown to black spots starting on the lowest leaves and moving upward; spots merge and leaves yellow and shrivel.
- Treatment & Management: Strip and destroy affected lower leaves and all fallen debris. Water at soil level, mulch to reduce splash, and space plants. Copper or a protectant fungicide helps in wet spells; rotate planting sites.
- Powdery mildew (Golovinomyces cichoracearum (Erysiphe)):
- Symptoms: White powdery patches on leaves and stems, later distortion and yellowing; worst in crowded, shaded, humid stands with poor airflow.
- Treatment & Management: Improve spacing, light and ventilation, and avoid excess nitrogen. Remove affected foliage. Potassium bicarbonate, sulfur or horticultural oil give good control; treat early.
- Fusarium and Verticillium wilt (Fusarium oxysporum f. sp. chrysanthemi, Verticillium dahliae):
- Symptoms: Yellowing and wilting on one side of the plant, stunting, and brown streaking inside the lower stem; plants collapse. Soil-borne and persistent.
- Treatment & Management: Use disease-free cuttings and clean media, and do not replant chrysanthemums in known infested ground. Remove and destroy affected plants with their root balls. Solarise or rotate beds; maintain balanced nutrition and avoid waterlogging.
- Aster yellows (Candidatus Phytoplasma asteris):
- Symptoms: Yellowed, stunted growth, abnormal shoot proliferation and green, deformed ‘virescent’ flowers. Spread by leafhoppers.
- Treatment & Management: There is no cure – remove and destroy affected plants promptly. Control leafhoppers and weeds that host the phytoplasma; use floating row cover on young plants in high-pressure areas.
Growing Difficulties & Abiotic Problems
- Overwatering root and crown rot:
- Cause & Symptoms: Soggy, poorly drained soil suffocates roots, causing wilting despite wet soil, blackened roots and basal stem rot.
- Correction Strategy: Plant in free-draining soil, water only when the top few centimetres dry, and never leave pots standing in water. Raise beds if drainage is poor.
- Nutrient chlorosis:
- Cause & Symptoms: Uniform pale-yellow leaves (nitrogen) or yellowing between green veins (iron/manganese, common in alkaline or waterlogged soil).
- Correction Strategy: Feed a balanced fertiliser through active growth; correct pH toward slightly acidic and use chelated iron for interveinal chlorosis. Avoid overwatering, which mimics deficiency.
- Poor or leggy flowering:
- Cause & Symptoms: Weak, sparse blooms from too little light, missed pinching, or unwanted light at night disrupting the short-day bloom trigger.
- Correction Strategy: Grow in full sun, pinch young plants to build bushy branching, and keep the plant away from night lighting so natural day-length can initiate buds.
- Leaf scorch and wilting:
- Cause & Symptoms: Brown, crisp leaf margins from drought stress, salty feed, or hot drying winds; container plants dry fastest.
- Correction Strategy: Keep moisture even with mulch, water deeply before heat, flush salts occasionally, and shelter containers from harsh afternoon sun and wind.
What Helps – Products & Tools
Reach first for cultural fixes – spacing, base watering, sanitation and removal of infected leaves. Useful products for this plant include insecticidal soap and horticultural/neem oil (aphids, thrips, mites), yellow and blue sticky traps (leaf miner flies and thrips), Bacillus thuringiensis (Bt) for caterpillars, and protectant sulfur or copper fungicides plus potassium bicarbonate for rusts, leaf spot and mildew. Spray oils and soaps in the evening to protect pollinators.