
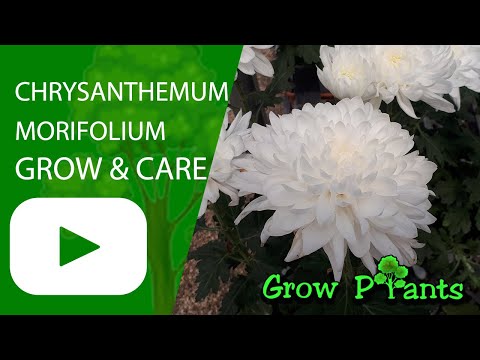

Plant Profile & Key Characteristics
Overview: A herbaceous plant, 20-80 cm (8-32 in) tall, grown as an ornamental and cut flower for its showy, many-coloured daisy-like blooms. It is a perennial (evergreen or deciduous) for temperate, Mediterranean and subtropical gardens.
Quick Specifications
| Specification | Attribute |
|---|---|
| Plant Type / Life Cycle | Perennial (evergreen or deciduous) |
| Mature Size | 20-80 cm (8-32 in) tall |
| Growth Rate | Fast to moderate |
| Toxicity | Toxic to pets (contains pyrethrins) |
| Hardiness | USDA zone 5-10 |
Growth Form & Structure
- Height & Spread: 20-80 cm (8-32 in) tall; grows well in containers and as a houseplant with plenty of light.
- Growth Habit & Form: Bushy, mounding herbaceous perennial.
- Lifespan & Maturity: Fast-to-moderate perennial; flowers the same season.
Anatomy & Physical Features
- Leaves & Foliage: Green, deeply lobed leaves.
- Flower Characteristics: Daisy-like disc or fully double flowers in many colours (full detail in the Bloom section).
Primary Uses & Landscape Value
- Functional & Ornamental Roles: Ornamental garden and pot mum, autumn bedding display, cut flower, and pollinator plant.
Care Guide: Planting, Soil & Watering
Overview: This florist’s mum prefers full sun and cool growing weather in rich, well-drained soil. It needs a moderate, steady supply of water to flower well.
Quick Care Requirements
| Requirement | Ideal Condition |
|---|---|
| Planting Season | Spring to summer, or autumn in warmer climates |
| Growth Rate | Moderate to fast |
| Soil Type | Rich, well-draining |
| Water Need | Moderate – keep evenly moist, letting the surface dry between waterings |
Planting & Establishment
- Best Planting Season: From spring to summer, or in autumn in warmer climates.
- How to Plant:
- Hole Preparation: Dig a hole about twice the width of the root ball and just as deep, loosening the sides so young roots spread easily.
- Soil Amendments: Mix compost or well-rotted organic matter into the backfill to give these hungry plants a rich, fertile root run.
- Planting Depth: Set the plant so the root collar sits level with the surrounding soil; never bury the stem or trunk base.
- Growth Speed & Expectations: A moderate to fast grower forming a bushy clump 20-80 cm tall.
Soil, Watering & Drainage Care
- Soil Mix & Drainage Needs: Grow in rich, free-draining soil improved with organic matter; good drainage prevents root and stem rot. It grows well in containers and can be kept indoors given plenty of light.
- Watering Schedule & Technique:
- Young / Newly Planted: Keep the soil evenly moist for the first several weeks, watering whenever the surface begins to dry.
- Established: Water deeply and let the top few centimetres dry before watering again, rather than giving frequent shallow sips.
- Seasonal Adjustments: Water more often through summer heat and reduce it in winter as growth slows.
Climate, Light & Hardiness
Chrysanthemum morifolium is a cool-weather-loving perennial that succeeds in temperate, mediterranean, and subtropical climates or as a bright houseplant, flowering best where nights turn cool in autumn. It is broadly hardy (USDA zone 5–10) but performs poorly in prolonged deep shade or extreme, unbroken heat.
Quick Climate Specifications
| Climate Zones | Temperate, mediterranean, subtropical, or indoors as a houseplant |
|---|---|
| USDA Hardiness Zones | 5–10 |
| Optimal Temp Range | Approximately 16–24°C (60–75°F), cooler nights favor bud set |
| Cold Damage Begins | Approximately 0°C (32°F) on open flowers and soft new growth |
| Approx. Survival Minimum | Established roots typically survive winter lows well below freezing within zone 5, with the crown protected by mulch or soil |
| Frost Tolerance | Moderate (roots/crown) to Low (open flowers) |
| Light Conditions | Full Sun / Half Shade / Full Shade (possible but not recommended) |
Sunlight & Light Exposure
Optimal Light Setup
Full sun to half shade gives the sturdiest stems and most abundant flowers; full shade is tolerated but discouraged since bloom quality drops.
Direct Sun Requirement
At least several hours of direct sun daily for good flowering.
Shade & Heat Management
In hot subtropical or desert-adjacent summers, light afternoon shade can prevent leaf wilt and flower fading during the hottest part of the day.
Best Exposure / Orientation
Grown indoors as a houseplant, place it where it gets as much bright light as possible; outdoors choose an open, sunny bed.
Temperature Extremes & Hardiness
USDA Hardiness & Regional Limits
Reliably perennial outdoors zone 5–10; blooming season shifts by climate – spring-to-summer bloom in cooler zones, and autumn-through-spring bloom in warm climates where frost is minimal.
Cold Damage & Winter Protection
Foliage dies back with hard frost (it can behave as deciduous in cold winters); mulching the crown in the coldest part of its range helps it return reliably each spring.
Frost Sensitivity
Open flowers and soft new growth are frost-sensitive, while the dormant crown is considerably hardier.
Extreme Heat Tolerance
Prefers cool weather; sustained high heat can reduce flowering and cause stress, so afternoon shade helps in hot climates.
Wind, Humidity & Microclimate
Humidity Preferences
Adapts to the humidity of temperate, mediterranean, and subtropical climates; good air circulation helps reduce fungal problems like aphid-associated issues in humid conditions.
Wind Tolerance
Moderate; taller flowering stems can benefit from a sheltered spot to avoid wind damage during bloom.
Rainfall & Seasonal Moisture
Grows well through temperate rainfall patterns with average water needs; avoid waterlogging in wet winters.
Microclimate Recommendations
An open, sunny, sheltered bed with good drainage suits it best; in the warmest part of its range, some afternoon shade extends flower quality.
Growing in Pots, Balconies & Indoors
Florist chrysanthemum (Chrysanthemum morifolium) is a bushy, flowering plant of 20-80 cm (8-32 in). The grower lists it as suitable indoors with plenty of light, and it grows well in pots on a balcony or patio.
Quick Details
- Container Size: A small to medium pot suits its bushy, compact habit
- Indoor Suitability: Yes, in a bright spot with a lot of light
- Best Spot: Full sun to half shade (full shade possible but not recommended)
- Soil & Drainage: Free-draining, organic-rich mix
- Watering in Pots: Average water; keep evenly moist, never waterlogged
Indoors & On the Windowsill
- Indoors: The grower marks it as suitable indoors provided it gets a lot of light – a bright, sunny window is ideal, as flowering fades in dim rooms.
- Safety: Chrysanthemums are toxic to cats and dogs and the foliage can irritate skin – keep it away from pets and children.
On a Balcony or Patio
- Light & wind: A sunny balcony or patio gives the best flowering. Pinch/prune to keep it bushy, and check moisture often as pots dry quickly in sun and wind.
Choosing the Pot, Soil & Long-Term Care
- Pot & drainage: A pot with strong drainage holes is essential; skip a permanently full standing-water saucer to avoid root rot. Terracotta breathes and dries faster, while glazed or plastic holds moisture longer.
- Potting mix: A well-aerated, organic-rich mix – potting mix or peat/coir with perlite or vermiculite – works best.
- Feeding: Potted plants need feeding more often than those in the ground, since watering steadily leaches nutrients out of the container.
- Repotting: Refresh the mix or pot up about every two years, lightly pruning the root ball and top growth to keep it in scale.
Growing this plant in a greenhouse
A greenhouse can give chrysanthemum morifolium frost protection and cold protection.
Greenhouse at a glance
| Greenhouse suitability | Good - clearly useful |
|---|---|
| Main benefits | frost protection, cold protection |
| Season extension | earlier spring & later autumn |
| Outdoor protection advisable below | about 5°C |
| Maintain greenhouse minimum | around 5°C for active growth |
| Suitable types | unheated greenhouse, polycarbonate greenhouse |
| Heating | Heating is optional - useful mainly for winter growing in cold areas. |
Related greenhouse guides
- Greenhouses: How to Choose the Right Greenhouse
- Polycarbonate Greenhouses: What to Look for Before Buying
Fertilizing & Feeding
Moderate – a herbaceous perennial grown for its flowers and as a cut flower; steady balanced feeding through the growing season builds the bushy habit that carries a full flush of bloom.
Quick Fertilizing Specs
| Feeding Level | Moderate – regular balanced feeding through active growth supports a strong bloom flush. |
|---|---|
| young_feeding | A balanced feed as new shoots emerge and the clump bulks up in spring. |
| mature_feeding | Continue light-to-moderate balanced feeding through bud set and flowering. |
| Main Nutrient Priority | Balanced nutrition with adequate nitrogen for foliage, tapering as flowering approaches. |
| Best Feeding Period | From spring regrowth through bud set and into bloom. |
| Organic Options | Compost or well-rotted organic matter worked in around the crown. |
| Soil pH | Prefers soil on the acidic-to-neutral side; avoid strongly alkaline ground. |
| Reduce/Stop Feeding | Stop feeding once flowering is underway and as the plant heads into its dormant rest. |
| Micronutrients | Rarely needed in garden soil; correct only if a deficiency shows, more common in container or indoor culture. |
Feeding by Growth Stage
Spring regrowth
Fuel the flush of new shoots and leafy growth as the clump wakes up.
| Nutrient direction | A balanced complete fertilizer with adequate nitrogen to build a bushy, well-branched plant. |
|---|---|
| Timing | As new shoots emerge in spring, or as active growth resumes after cool weather. |
| Frequency | Regular light-to-moderate feeding through the flush of new growth. |
| Fertilizer types | Balanced complete fertilizer, Compost or well-rotted organic matter |
| Precautions | Avoid excess nitrogen late in this stage, which can delay the shift into budding and produce weak, floppy stems. |
Bud set and bloom
Support the transition into budding and sustain the flower display.
| Nutrient direction | Shift to a balanced feed and taper nitrogen; a high-phosphorus bloom booster is not needed to force more flowers. |
|---|---|
| Timing | As buds form and through the flowering period. |
| Frequency | Light, occasional feeding tapering off as flowers open. |
| Fertilizer types | Balanced complete fertilizer |
| Precautions | Cut back nitrogen once buds appear, since lush new growth at this point competes with flowering. |
Dormancy or rest period
Let the plant rest with little to no nutrient demand after flowering.
| Nutrient direction | None – withhold fertilizer once flowering finishes and the plant enters its rest period. |
|---|---|
| Timing | After bloom, through the plant’s dormant or slow season. |
| Frequency | No feeding at this stage. |
| Fertilizer types | No feeding at this stage – withhold fertilizer until active spring growth resumes. |
| Precautions | Do not fertilize a resting plant; resume only once new spring growth is visible. |
Nutrient Deficiency Signs & Corrections
Pale, yellowish lower leaves and generally thin, weak growth.
| Possible causes | Low soil nitrogen, Root stress from waterlogged or compacted soil, Heavy competition from surrounding plants or weeds |
|---|---|
| Appears first on | Older, lower leaves first. |
| What to check | Recent feeding history, Soil drainage and structure, Crowding or competing roots nearby |
| Possible correction | Resume a balanced complete feed during active growth and improve drainage; avoid pushing nitrogen once buds have formed. |
Yellowing between the veins of the youngest leaves while veins remain green.
| Possible causes | High or alkaline soil pH locking up iron or manganese, Cold or waterlogged roots limiting micronutrient uptake, Low available iron, more common in container-grown plants |
|---|---|
| Appears first on | New growth at the shoot tips. |
| What to check | Soil pH, Drainage and watering habits, Whether the plant is grown in a container versus garden soil |
| Possible correction | Correct soil pH toward the plant’s preferred slightly acidic range, improve drainage, and if it persists apply a chelated iron or manganese product per its label. |
Vigorous leafy growth but few or delayed flower buds.
| Possible causes | Excess nitrogen late in the season favoring foliage over buds, Insufficient light or day-length cues for bud initiation, Aphid or spider mite pressure diverting the plant’s energy |
|---|---|
| Appears first on | The whole plant, most visible on the most vigorous stems. |
| What to check | Recent nitrogen inputs, Light exposure and season, Signs of aphids or spider mites |
| Possible correction | Taper nitrogen as the season progresses, ensure good light, and treat any pest pressure directly rather than adjusting fertilizer alone. |
Scorched or browned leaf margins and stunted growth, particularly in containers.
| Possible causes | Over-application of fertilizer, Poor leaching of salts in containers or heavy soil, Letting the root zone dry out between feedings |
|---|---|
| Appears first on | Leaf margins and tips, container plants first. |
| What to check | Recent fertilizer amounts, Drainage and pot size, White crusting on the soil surface |
| Possible correction | Ease off feeding, water thoroughly to flush excess salts from the root zone, then resume with only light feeding. |
Pruning, Training & Seasonal Maintenance
Garden mums tolerate frequent, light pruning and actually need it: the whole plant is built by repeated pinching rather than one-time structural cuts. The main objective is bushiness and bloom timing – pinching young shoots multiplies flowering stems, but pinching too late in the season removes the very buds you are waiting for, since mums set flower buds in response to shortening day length. The safest cutting window is spring through mid-summer for shaping; once buds begin forming, stop pinching and switch to deadheading only.
Quick Pruning & Maintenance Specs
| Pruning Tolerance | High (for pinching/deadheading); avoid cutting into set flower buds |
| Primary Pruning Window | Spring to early summer (pinching phase) |
| Secondary Maintenance Window | Bloom season (deadheading); late autumn/winter cutback after flowering finishes |
| Typical Frequency | Pinch every 2–3 weeks while shoots are under ~15 cm; deadhead continuously in bloom |
| Main Objective | Compact, many-branched habit and a full, well-timed bloom flush |
| Young Plant Priority | Repeated tip pinching to build branch number |
| Mature Plant Priority | Deadheading, removing infected foliage, controlling clump spread |
| Best Tool Type | Fingers or precision snips for soft new growth |
| Avoid Heavy Pruning During | Once flower buds have formed and through bloom |
Pruning by Plant Age & Size
Newly Established
Let a newly planted or divided mum root in for a few weeks before pinching; only remove damaged or wilted growth at planting.
Young / Formative
No woody training system applies – instead use a pinching regimen: once shoots reach 15–20 cm, pinch out the growing tip just above a leaf pair to force side branches. Repeat on the resulting side shoots through late spring/early summer. Stop pinching by mid-summer (well before bloom season) so the plant has time to initiate and mature flower buds.
Mature / Established
Established clumps need deadheading rather than shaping cuts, plus periodic division (see Heavy Pruning) to keep the invasive, spreading clump in bounds and maintain vigor.
Seasonal Pruning Schedule
| Spring (early growth) | Objective: build branching. Remove: growing tips of young shoots. Do not remove: lower foliage. Response: multiple new breaks per pinch. Bloom impact: more, but smaller, flowering stems later. |
| Early summer (last pinch) | Objective: set the final branch count before bud initiation. Remove: tips one last time. Do not remove: shoots after this point. Response: buds begin forming on stopped shoots. Bloom impact: pinching after this window delays or prevents bloom. |
| Bloom season (autumn, or per local climate) | Objective: prolong and neaten flowering. Remove: spent flower heads back to a leaf or side bud; any infected/blemished leaves. Do not remove: unopened buds or healthy foliage. Response: extended flowering, cleaner plant. |
| Late autumn/winter (post-bloom) | Objective: sanitation and dormancy prep. Remove: cut flowered stems back to a few centimetres above ground once foliage has died back or after hard frost. Do not remove: the living crown/roots. Response: fresh basal shoots the following spring. |
Special Growth to Remove
- Spent flower stems – deadhead to a leaf node to encourage further branching and flowers.
- Infected or aphid/spider-mite-damaged leaves – remove promptly to slow spread rather than waiting for a scheduled prune.
- Excess spreading basal shoots/runners – mums spread readily by basal offshoots; thin or divide clumps to stop them crowding out neighbours.
Container & Small-Space Pruning
Container mums benefit from an even more disciplined pinching schedule since pot volume limits how much the plant can compensate – pinch a little earlier and more often for a tight, self-supporting mound, and divide or repot when the clump becomes root-bound rather than letting it decline.
Tools
- Precision snips or simply fingers for pinching soft new growth and deadheading.
Tool Hygiene & Disease Risk
Increased risk when removing infected foliage: mums can carry foliar fungal issues, so leaves removed for disease (not routine pinching) should be bagged/discarded rather than composted, and blades wiped between plants if disease is visibly present.
Cut Placement & Technique
Pinch just above a leaf pair or node, not mid-internode, so the plant breaks from the node cleanly; deadhead by cutting the flower stem down to the first healthy leaf or side bud rather than leaving a bare stub.
Heavy Pruning & Rejuvenation
Tolerated well: cut the whole plant back to near ground level once top growth is finished for the season, and lift/divide the clump every 2–3 years in spring to rejuvenate vigor and control its spreading habit.
Post-Pruning Care
Water in after pinching or cutback; do not fertilize immediately after a hard autumn cutback since the plant is heading into dormancy, not active regrowth. Watch new spring growth for aphids and spider mites.
Common Pruning Mistakes
- Pinching too late in summer, which removes the flower buds needed for that season’s bloom.
- Never pinching at all, producing a tall, floppy, sparsely-branched plant that needs staking.
- Letting the clump go undivided for years, encouraging the invasive spread noted for this species.
When Not to Prune
Do not pinch once buds have formed and through the bloom period – this removes the current season’s flowers. Avoid deadheading if you want the plant to self-seed or set seed heads for collection.
Recommended Tools (by task)
- Young plant, pinching tips – precision_snips: clean, small cuts on soft new growth; fingers also work but snips avoid bruising in humid weather.
- Removing diseased/infected leaves – blade_disinfectant: wipe between cuts when handling foliar disease to avoid spreading it through the clump.
Propagation Guide
Chrysanthemum morifolium is most reliably propagated vegetatively, by stem cuttings or by dividing established clumps, since named garden mum selections will not come true from seed; grafting is never used and, per the site’s own data, neither grafting nor vegetative propagation is strictly required just to grow the plant, though it is the practical route to keep a chosen variety identical. Both cuttings and division are easy for a home grower.
Quick Propagation Specs
| Best Propagation Method | Stem Cuttings |
| Alternative Methods | Division of established clumps; Seed (species/open-pollinated forms only) |
| Propagation Difficulty | Easy |
| Seed True-to-Type | Cultivar-dependent — named selections do not come true from seed |
| Vegetative True-to-Type | Yes |
| Best Propagation Season | Spring, as new growth begins (per the site’s spring/summer planting season) |
| Cutting Rooting Time | Typically a couple of weeks under warm, humid conditions |
Growing from Seed
Seed is only worth using for species or open-pollinated forms, since named cultivars will not reproduce identically from seed; sow in spring in a moist, well-drained mix under warm conditions, and expect variability in flower color and form among the resulting seedlings.
Stem Cuttings
Cutting Type
Softwood tip cuttings, roughly 5-8 cm (2-3 inches), taken from vigorous non-flowering basal shoots.
Best Timing
Spring, when fresh basal growth is plentiful, matching the site’s spring/early-summer planting window.
Cutting Preparation
Remove the lower leaves and trim just below a node before inserting.
Rooting Setup
Root in a moist, well-drained mix kept humid (for example under a clear cover) and out of direct hot sun.
Rooting Hormone
Optional — it can speed and even out rooting but is not required for this plant to root successfully.
Rooting Time
Usually within a couple of weeks under warm, humid conditions.
Division, Offsets, Pups & Suckers
Established clumps can be lifted and divided as an easy, fast way to multiply named varieties true to type.
- Timing: spring, as new shoots emerge from the crown.
- Divide into sections that each carry several shoots with healthy roots attached; discard old, woody centre growth in favour of vigorous outer sections.
- Establishment care: replant divisions promptly at the same depth and keep evenly moist until new growth confirms they have taken.
Bloom & Edible Flower Guide
Quick Details
- Bloom Season: Autumn in cool climates; spring to summer, or autumn through winter into spring, where it is mild
- Flower Appearance: Daisy-like disc flowers or full, many-petalled blooms in pink, orange, red, purple, yellow, white and bicolours
- Edibility: The flowers and their petals are edible – famously used to brew chrysanthemum tea and as a garnish; use only untreated, pesticide-free blooms
Detailed Blooming Overview
Florist’s mum is the classic autumn flower, though in mild climates it blooms across the cooler months. Blooms range from simple daisy-like discs to fully double pompoms, in almost every warm colour. The petals have a long culinary history, above all in chrysanthemum tea.
Flower Characteristics
- Disc or fully double, many-petalled flowers in a wide colour range, sometimes more than one colour in a bloom.
- Attracts pollinators and makes a long-lasting cut flower.
Bloom Care & Thinning
- Pinching: Pinch the growing tips through early growth for bushier plants and more flowers; disbudding (removing side buds) gives fewer but larger blooms.
- Deadheading: Remove spent flowers to extend the display.
Bloom Health & Protection
- Aphids and thrips: They gather on buds and blooms; a jet of water, insecticidal soap or neem oil keeps them down.
- Powdery mildew and white rust: In damp, crowded conditions these can appear; better airflow and, if needed, a suitable fungicide help.
Pests, Diseases & Troubleshooting
Overview: Chrysanthemums are prone to a distinct set of sucking and mining pests (aphids, leaf miners, thrips, spider mites) and to several serious fungal and viral diseases, most notably chrysanthemum white rust. Success comes from clean planting stock, good airflow between plants, steady but not soggy moisture, and early scouting; cultural and biological controls handle most problems before sprays are needed.
Quick Troubleshooting Overview
| Issue / Pest | Main Symptom | Primary Solution |
|---|---|---|
| Aphids | Sticky honeydew, curled shoot tips, sooty mould | Blast off with water, encourage ladybirds, insecticidal soap |
| Chrysanthemum leaf miner | Pale winding tunnels (serpentine mines) in leaves | Remove & destroy mined leaves; sticky traps; parasitic wasps |
| Thrips (virus vector) | Silvery flecking, distorted buds, spread of TSWV | Blue sticky traps, remove weeds, predatory mites |
| Spider mites | Fine stippling, bronzing, webbing in dry heat | Raise humidity, hose foliage, predatory mites, oil |
| Chrysanthemum white rust | Buff/pink pustules that turn white on leaf undersides | Destroy infected plants; a notifiable disease – improve airflow |
| Leaf spot / Septoria | Dark spots enlarging from lower leaves upward | Remove old foliage, water at base, copper if severe |
Common Pests & Management
- Aphids (Macrosiphoniella sanborni, Myzus persicae):
- Symptoms: Clusters of green, black or grey soft-bodied insects on new growth, buds and leaf undersides; sticky honeydew, sooty mould and curled, stunted tips. The chrysanthemum aphid (Macrosiphoniella sanborni) is a dark reddish-brown specialist; several species also transmit viruses.
- Prevention & Control: Knock colonies off with a firm jet of water and pinch out badly infested tips. Conserve ladybirds, lacewings and hoverflies. For persistent outbreaks use insecticidal soap or horticultural oil, covering leaf undersides; repeat weekly. Avoid heavy nitrogen feeding, which fuels soft, aphid-prone growth.
- Chrysanthemum leaf miner (Chromatomyia (Phytomyza) syngenesiae):
- Symptoms: Pale, winding serpentine tunnels within the leaf, later blotches; heavily mined leaves yellow, blister and drop. Larvae feed between the leaf surfaces, so contact sprays reach them poorly.
- Prevention & Control: Pick off and destroy mined leaves as soon as tunnels appear. Use yellow sticky traps to catch adult flies and to monitor. Conserve parasitic wasps (Diglyphus, Dacnusa), which are highly effective. Keep plants un-stressed; remove nearby weedy composites that harbour the fly.
- Thrips (Frankliniella occidentalis, Thrips tabaci):
- Symptoms: Silvery-white flecking and streaking on leaves and petals, deformed buds and browned flower edges. Tiny slender insects hide in buds and growing points. Critically, western flower thrips transmit Tomato spotted wilt virus (TSWV), which causes ringspots and dieback.
- Prevention & Control: Monitor with blue sticky traps. Remove weeds and spent blooms that shelter thrips. Introduce predatory mites (Amblyseius) or minute pirate bugs. Rogue out any virus-suspect plants immediately. If spraying, spinosad or insecticidal soap in the evening protects pollinators; rotate modes of action.
- Two-spotted spider mite (Tetranychus urticae):
- Symptoms: Fine pale stippling and bronzing of leaves, dull greyish cast, and fine webbing on undersides in hot, dry conditions; severe infestations cause leaf drop.
- Prevention & Control: Raise humidity and hose down foliage, especially undersides. Avoid dusty, drought-stressed conditions. Release predatory mites (Phytoseiulus). Treat hot-spots with horticultural oil or insecticidal soap; avoid broad-spectrum insecticides that kill mite predators and trigger flare-ups.
- Capsid bugs and caterpillars (Lygocoris pabulinus, Autographa gamma):
- Symptoms: Capsids cause ragged tattered holes and distorted, puckered young leaves; caterpillars (loopers, cutworms) chew leaves and bore into buds, leaving frass.
- Prevention & Control: Hand-pick caterpillars at dusk and squash egg batches. Keep beds weed-free. Encourage birds and predatory beetles. Bacillus thuringiensis (Bt) targets caterpillars selectively; spot-treat only where damage is active.
Diseases & Fungal Issues
- Chrysanthemum white rust (Puccinia horiana):
- Symptoms: Small pale-green to yellow spots on upper leaf surfaces with buff, pink then white waxy pustules directly beneath; leaves distort and die. This is a serious, aggressive rust.
- Treatment & Management: In many regions this is a notifiable/quarantine disease – report suspected cases and destroy affected plants. Buy certified clean stock, avoid overhead watering and wetting foliage, space for airflow, and remove infected leaves promptly. Preventive protectant fungicides are used in production; sanitation is paramount.
- Brown/common rust (Puccinia chrysanthemi):
- Symptoms: Powdery reddish-brown pustules on leaf undersides with yellow flecks above; lower leaves worst affected in humid conditions.
- Treatment & Management: Remove infected leaves, water at the base early in the day, and improve spacing and ventilation. Choose resistant cultivars. A sulfur or protectant fungicide can be applied when pressure is high.
- Septoria leaf spot (Septoria chrysanthemi / S. obesa):
- Symptoms: Round dark-brown to black spots starting on the lowest leaves and moving upward; spots merge and leaves yellow and shrivel.
- Treatment & Management: Strip and destroy affected lower leaves and all fallen debris. Water at soil level, mulch to reduce splash, and space plants. Copper or a protectant fungicide helps in wet spells; rotate planting sites.
- Powdery mildew (Golovinomyces cichoracearum (Erysiphe)):
- Symptoms: White powdery patches on leaves and stems, later distortion and yellowing; worst in crowded, shaded, humid stands with poor airflow.
- Treatment & Management: Improve spacing, light and ventilation, and avoid excess nitrogen. Remove affected foliage. Potassium bicarbonate, sulfur or horticultural oil give good control; treat early.
- Fusarium and Verticillium wilt (Fusarium oxysporum f. sp. chrysanthemi, Verticillium dahliae):
- Symptoms: Yellowing and wilting on one side of the plant, stunting, and brown streaking inside the lower stem; plants collapse. Soil-borne and persistent.
- Treatment & Management: Use disease-free cuttings and clean media, and do not replant chrysanthemums in known infested ground. Remove and destroy affected plants with their root balls. Solarise or rotate beds; maintain balanced nutrition and avoid waterlogging.
- Aster yellows (Candidatus Phytoplasma asteris):
- Symptoms: Yellowed, stunted growth, abnormal shoot proliferation and green, deformed ‘virescent’ flowers. Spread by leafhoppers.
- Treatment & Management: There is no cure – remove and destroy affected plants promptly. Control leafhoppers and weeds that host the phytoplasma; use floating row cover on young plants in high-pressure areas.
Growing Difficulties & Abiotic Problems
- Overwatering root and crown rot:
- Cause & Symptoms: Soggy, poorly drained soil suffocates roots, causing wilting despite wet soil, blackened roots and basal stem rot.
- Correction Strategy: Plant in free-draining soil, water only when the top few centimetres dry, and never leave pots standing in water. Raise beds if drainage is poor.
- Nutrient chlorosis:
- Cause & Symptoms: Uniform pale-yellow leaves (nitrogen) or yellowing between green veins (iron/manganese, common in alkaline or waterlogged soil).
- Correction Strategy: Feed a balanced fertiliser through active growth; correct pH toward slightly acidic and use chelated iron for interveinal chlorosis. Avoid overwatering, which mimics deficiency.
- Poor or leggy flowering:
- Cause & Symptoms: Weak, sparse blooms from too little light, missed pinching, or unwanted light at night disrupting the short-day bloom trigger.
- Correction Strategy: Grow in full sun, pinch young plants to build bushy branching, and keep the plant away from night lighting so natural day-length can initiate buds.
- Leaf scorch and wilting:
- Cause & Symptoms: Brown, crisp leaf margins from drought stress, salty feed, or hot drying winds; container plants dry fastest.
- Correction Strategy: Keep moisture even with mulch, water deeply before heat, flush salts occasionally, and shelter containers from harsh afternoon sun and wind.
What Helps – Products & Tools
Reach first for cultural fixes – spacing, base watering, sanitation and removal of infected leaves. Useful products for this plant include insecticidal soap and horticultural/neem oil (aphids, thrips, mites), yellow and blue sticky traps (leaf miner flies and thrips), Bacillus thuringiensis (Bt) for caterpillars, and protectant sulfur or copper fungicides plus potassium bicarbonate for rusts, leaf spot and mildew. Spray oils and soaps in the evening to protect pollinators.


