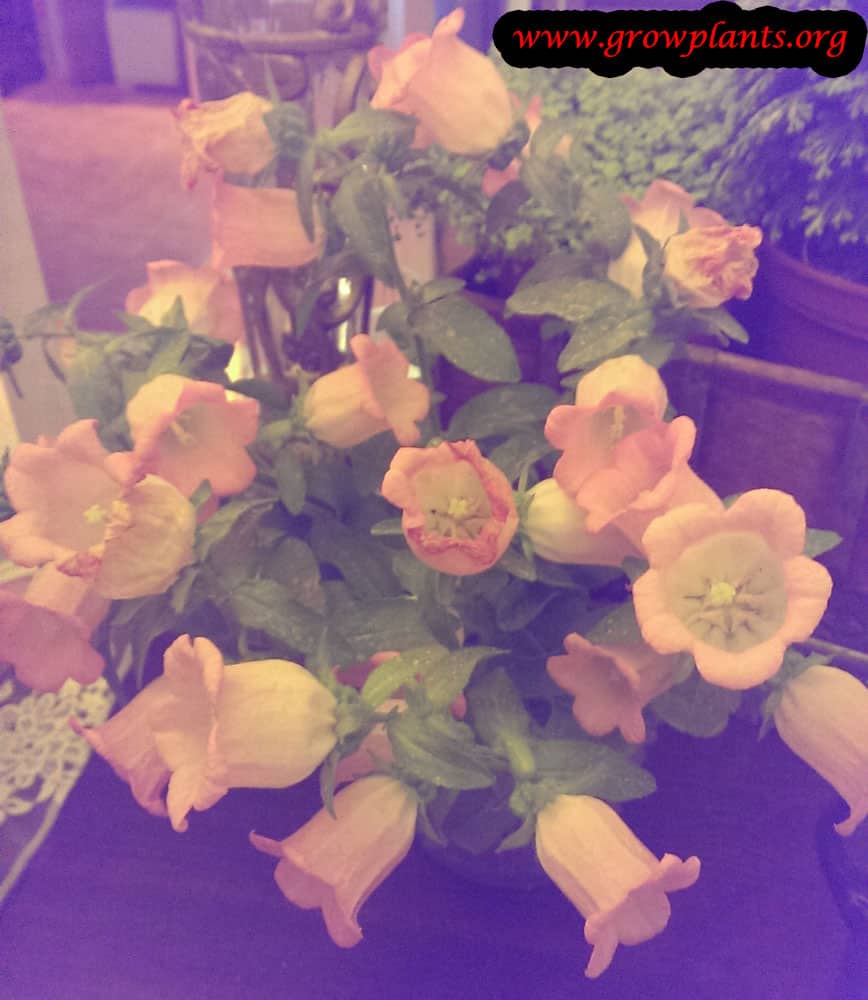

Plant Profile & Key Characteristics
Overview: A classic cottage-garden bellflower (Campanula medium) grown as an ornamental biennial, forming a leafy rosette the first year and flowering stems 50-80 cm tall the next. It carries large, bell-shaped flowers in purple, blue, pink or white and is prized as a cut flower across USDA zones 3-10.
Quick Specifications
| Specification | Attribute |
|---|---|
| Plant Type / Life Cycle | Biennial |
| Foliage Type | Evergreen |
| Mature Height | 50-80 cm (1.8-2.8 ft) |
| Growth Rate | Fast to moderate |
| Root System | Fibrous (rosette-forming) |
| Toxicity | Non-toxic (several bellflowers have edible young leaves and flowers) |
| Hardiness | USDA zones 3-10 |
Growth Form & Structure
- Height & Spread: Upright flowering stems reach 50-80 cm (1.8-2.8 ft) above a basal rosette; can also be grown in a large container.
- Growth Habit & Form: Erect biennial forming a leafy rosette, then tall bloom spikes; can self-seed and naturalise freely.
- Lifespan & Maturity: Biennial – foliage rosette the first year, flowering and seeding the second, then dying.
Anatomy & Physical Features
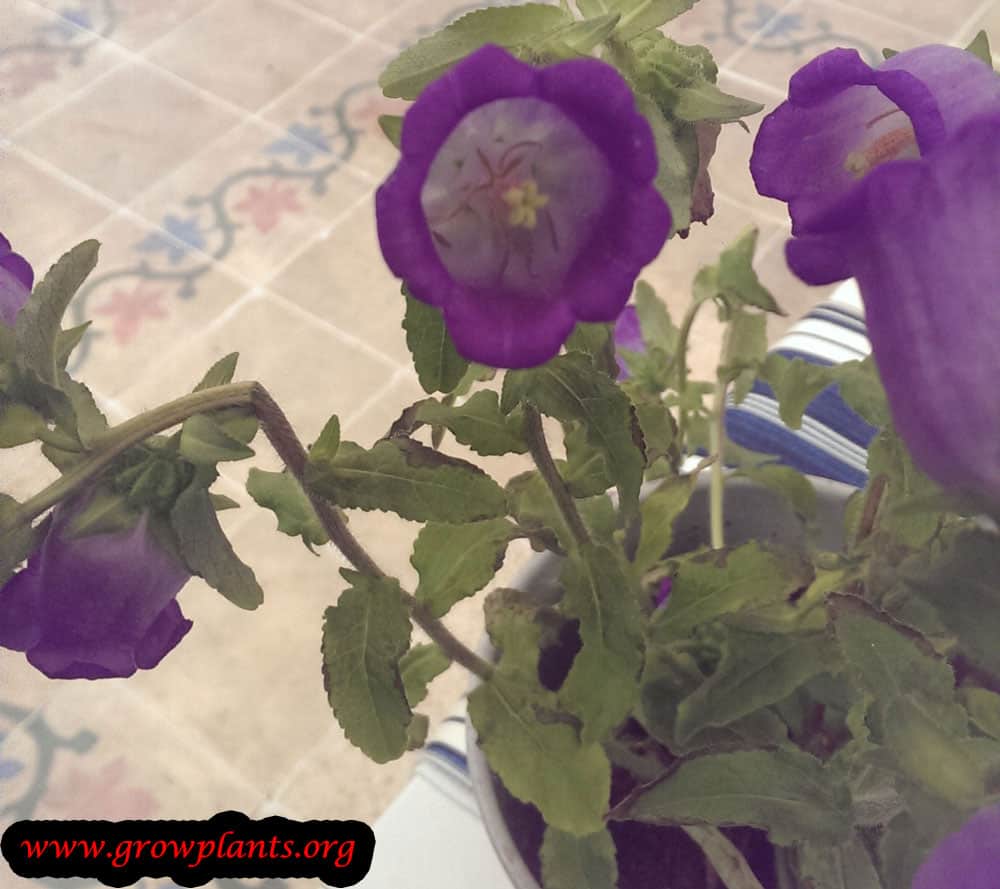
- Leaves & Foliage: Green, elliptic leaves with a serrated margin.
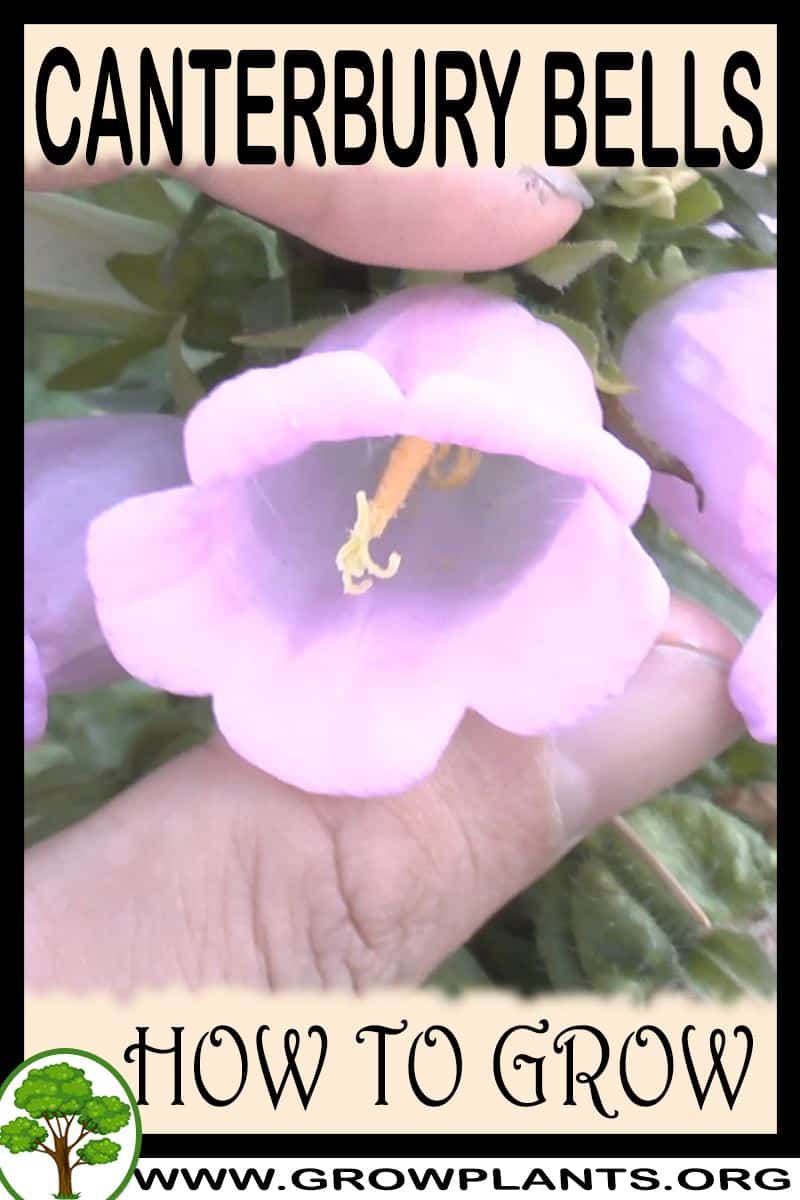
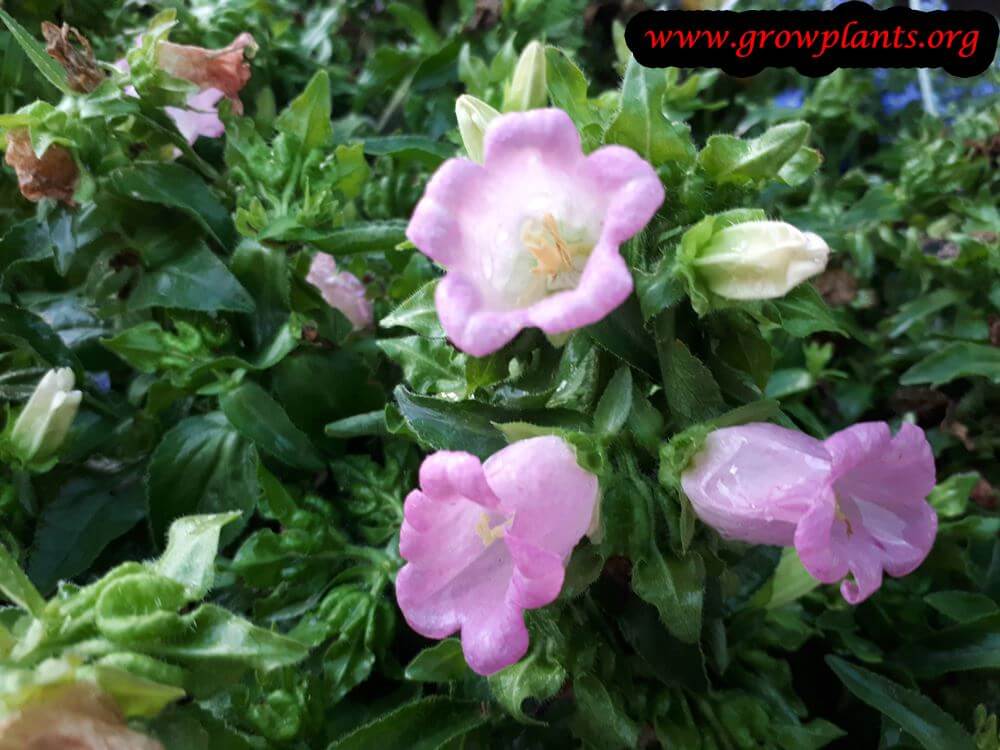
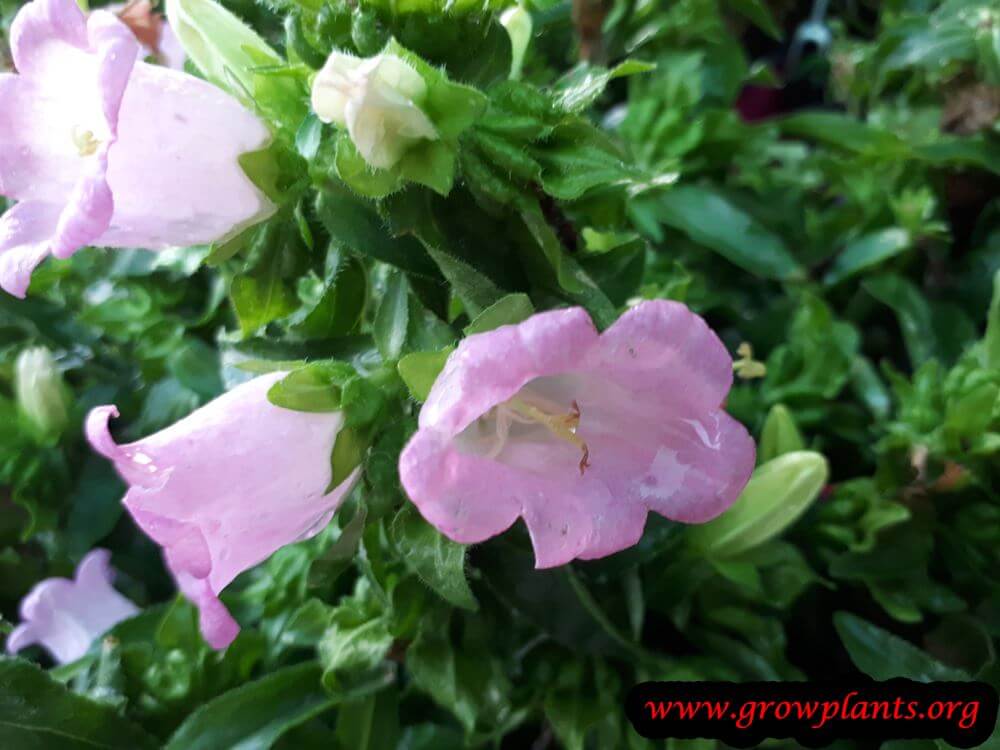
- Flower Characteristics: Large, bell-shaped flowers in purple, blue, pink or white at the stem tips (see the Bloom guide for detail).
Primary Uses & Landscape Value
- Functional & Ornamental Roles: Popular cottage-garden and cut-flower plant for borders and containers.
Care Guide: Planting, Soil & Watering
Overview: This biennial bellflower is grown for its tall spikes of bell-shaped flowers and does best in cool conditions with steady moisture, in fertile, well-drained soil. It thrives in full sun to partial shade, but the fine roots resent cold, waterlogged ground, so sharp drainage is essential.
Quick Care Requirements
| Requirement | Ideal Condition |
|---|---|
| Planting Season | Spring or summer, once the soil has warmed |
| Growth Rate | Moderate to fast |
| Soil Type | Fertile, moisture-retentive but well-draining |
| Water Need | Moderate to high – keep the soil evenly moist |
Planting & Establishment
- Best Planting Season: Plant in spring or summer once the danger of frost has passed and the soil is workable; in cooler climates a spring planting gives the strongest establishment.
- How to Plant:
- Hole Preparation: Dig a hole a little wider than the root ball and to the same depth, loosening the surrounding soil so the shallow roots can spread.
- Soil Amendments: Work in compost or leaf mould to hold moisture, and add grit or coarse sand to heavy ground to guarantee drainage.
- Planting Depth: Set the crown level with the surrounding soil – planting too deep invites crown rot in this low-growing plant.
- Growth Speed & Expectations: In cool, moist conditions it establishes at a moderate to fast pace, sending up tall flowering stems that make excellent cut flowers.
Soil, Watering & Drainage Care
- Soil Mix & Drainage Needs: It likes soil that stays lightly moist yet drains freely; in pots use a free-draining potting mix and make sure the container has ample drainage holes, as standing water rots the crown.
- Watering Schedule & Technique:
- Young / Newly Planted: Water regularly to keep the root zone consistently moist while the plant settles in.
- Established: Water deeply whenever the top few centimetres of soil begin to dry – this plant prefers not to dry out fully.
- Seasonal Adjustments: Increase watering during hot, dry spells and cut back in cool or wet weather to avoid soggy soil.
Climate, Light & Hardiness
Canterbury bells is a cool-weather bellflower suited to temperate, Mediterranean and subtropical climates, where mild temperatures and moist, free-draining soil favour steady growth. It grows best in full sun to partial shade, with afternoon shade valued in hot-summer areas, and as a very cold-hardy perennial (USDA zones 3–10) it withstands hard winters but is limited more by summer heat and humidity than by cold.
Quick Climate Specifications
| Climate Zones | Temperate, Mediterranean or subtropical |
| USDA Hardiness Zones | 3–10 |
| Optimal Temp Range | Approximately 15–24 °C / 59–75 °F (cool-season growth; approximate) |
| Approx. Survival Minimum | Established plants roughly −34 °C / −29 °F or lower (zone 3 rating) |
| Frost Tolerance | High |
| Light Conditions | Full sun to partial shade |
| Wind Tolerance | Moderate |
Sunlight & Light Exposure
Optimal Light Setup
Give bright light with some protection from the hottest afternoon sun. In cool, cloudy or high-latitude regions it takes full sun all day; where summers are hot and bright, morning sun with afternoon shade keeps foliage fresh and prolongs flowering.
Direct Sun Requirement
Adequate sun drives compact growth and free flowering; in deep shade plants stretch and bloom sparsely. Full-day direct sun is welcome only where the air stays cool - strong sun combined with heat scorches the low foliage.
Shade & Heat Management
In hot-summer or Mediterranean gardens, midday and afternoon shade is the key to keeping this cool-weather plant going; without it, growth stalls and the plant may go dormant or fade during the hottest weeks.
Temperature Extremes & Hardiness
USDA Hardiness & Regional Limits
The site data rates it for USDA zones 3–10, meaning established plants survive very cold winters. In practice its southern limit is set by summer heat rather than winter cold. As a biennial it needs a cool winter between its first-year rosette and second-year bloom; a cold season is what triggers flowering, so it performs poorly in frost-free tropics where that winter chill is lacking.
Cold Damage & Winter Protection
As a herbaceous, very cold-hardy perennial it dies back in hard winters and re-sprouts from the crown; the rootstock tolerates deep freezes down to about the zone 3 range. Evergreen or semi-evergreen foliage may brown in exposed sites, so a light winter mulch after the ground chills protects the crown in the coldest zones.
Frost Sensitivity
Frost tolerance is high; light frosts do little harm to hardened plants and only the soft top growth is cut back by hard freezes.
Extreme Heat Tolerance
Heat, not cold, is the main limit. Prolonged hot, humid weather stresses the plant, encourages leaf problems and can force early dormancy; cooler nights and good air movement help it push through summer.
Wind, Humidity & Microclimate
Humidity Preferences
Moderate humidity suits it. It is not fussy about air moisture, but stagnant, humid air over damp foliage invites mildew and mite problems - open spacing and airflow matter more than any target humidity level.
Wind Tolerance
The taller flowering stems can be flattened by strong wind or heavy rain; a sheltered spot or discreet support keeps the display upright.
Rainfall & Seasonal Moisture
It is adapted to climates with reliable moisture through the growing season and dislikes both drought and waterlogging; regions with cool, moist springs and summers suit it best, while hot, dry spells push it into early dormancy.
Microclimate Recommendations
Grow it in an open, sunny-to-part-shaded bed where the first-year rosette can over-winter; a position sheltered from strong wind protects the tall second-year flower spikes.
Growing in Pots, Balconies & Indoors
Canterbury bells (Campanula medium) is a tall biennial bellflower grown for its large, cup-and-saucer flowers – a cottage-garden favourite for borders and big patio pots, not a houseplant. It grows well in a roomy container on a sunny balcony or patio; indoors the light is too weak for it to flower.
Quick Details
- Container Size: A roomy pot of about 7-15 L (1.8-4 gal) to support its height and flower spikes
- Indoor Suitability: Not a room houseplant (grower); at most a bright, cool sunny sill while young
- Best Spot: Full sun to half shade, sheltered from strong wind
- Soil & Drainage: Aerated, organic-rich mix that drains freely – potting mix with perlite or vermiculite
- Watering in Pots: Keep evenly moist – pots dry fast – but never waterlogged
Indoors & On the Windowsill
- Not a houseplant: The grower marks it unsuitable indoors – a tall biennial that needs full sun and cool conditions to build up and flower.
- Windowsill limits: A young plant may sit on a bright, cool sunny sill for a while, but it belongs outside to reach flowering size.
- Biennial habit: It makes a leaf rosette the first year and flowers the next, then sets seed – grow on outdoors and sow afresh rather than keeping it long-term indoors.
On a Balcony or Patio
- Light & wind: Give it the sunniest spot and shelter the tall spikes from wind; staking helps on an exposed balcony. Walls and paving reflect heat, so check moisture daily in summer. A drip irrigation kit with a timer can take over that watering check automatically.
- Weight & drainage: A full, tall pot is heavy and top-heavy – use a stable, wide-based container and let excess water drain away freely.
Choosing the Pot, Soil & Long-Term Care
- Pot & drainage: A 7-15 L pot with strong drainage holes; skip a standing water saucer to avoid root rot.
- Potting mix: Well-aerated, organic-rich mix – potting mix or peat with perlite or vermiculite.
- Feeding: A balanced feed through the growing season supports the flower spikes; pot nutrients leach, so little and often works best.
- Growing on: As a biennial there is no long-term repotting – pot up a young plant once, grow it on to flower, then replace with fresh stock.
Fertilizing & Feeding
A moderate feeder that benefits from balanced feeding through the growing and flowering season; avoid overfeeding with nitrogen, which favors foliage over flowers.
Quick Fertilizing Specs
| Feeding Level | Light to moderate feeder |
|---|---|
| Main Nutrient Priority | Balanced nutrition; steady nitrogen for growth, no need for high phosphorus |
| Best Feeding Period | During the active growing and flowering season |
| Organic Options | Compost, humus and organic matter worked into the soil |
| Soil pH | Adapts to a wide range; slightly acidic to near neutral |
| Reduce/Stop Feeding | Reduce and stop feeding as growth slows into dormancy |
| Micronutrients | Usually supplied by soil and organic matter; correct only if a deficiency shows |
Feeding by Growth Stage
Spring growth flush
Support healthy leaf and stem growth as the plant breaks into active growth.
| Nutrient direction | A balanced, complete fertilizer with steady nitrogen to build foliage. |
|---|---|
| Timing | As new growth begins in the active growing season. |
| Frequency | Light feeding spread across the early growing season. |
| Fertilizer types | Balanced complete garden fertilizer, Compost or other organic matter worked into the soil |
| Precautions | Avoid heavy nitrogen, which pushes soft leafy growth at the expense of flowers. |
Blooming period
Sustain flowering without forcing excess leafy growth.
| Nutrient direction | A balanced fertilizer; adequate nitrogen and potassium support bloom while extra phosphorus offers little benefit. |
|---|---|
| Timing | Through the flowering period of the growing season. |
| Frequency | Continue light feeding while the plant is actively blooming. |
| Fertilizer types | Balanced complete fertilizer |
| Precautions | Do not rely on high-phosphorus ‘bloom booster’ products; balanced nutrition and good light drive flowering. |
Dormancy and winter rest
Let the plant rest; growth slows or dies back and nutrient demand stops.
| Nutrient direction | None – withhold fertilizer while the plant is dormant. |
|---|---|
| Timing | From late in the season through winter dormancy. |
| Frequency | No feeding at this stage. |
| Fertilizer types | No feeding at this stage while the plant is dormant. |
| Precautions | Do not fertilize until active growth resumes in spring. |
Nutrient Deficiency Signs & Corrections
Older, lower leaves turn pale green to yellow and the plant grows weakly.
| Possible causes | Low soil fertility / insufficient nitrogen, Waterlogged or poorly drained soil limiting root uptake, Cold soil slowing nutrient availability |
|---|---|
| Appears first on | Older, lower leaves |
| What to check | Recent feeding history, Soil drainage and moisture |
| Possible correction | Apply a balanced complete fertilizer and improve drainage; feed lightly during active growth. |
New leaves yellow between green veins while the veins stay green.
| Possible causes | High soil pH reducing iron and manganese availability, Poorly drained or cold, wet soil, Actual iron or manganese shortage in the root zone |
|---|---|
| Appears first on | New, young leaves at the shoot tips |
| What to check | Soil pH, Drainage and root health |
| Possible correction | Correct soil pH and drainage; if it persists, apply a chelated iron product per its label. |
The plant grows leafy but produces few flowers.
| Possible causes | Too little light, Excess nitrogen promoting foliage over flowers, Immature or recently divided plant |
|---|---|
| Appears first on | Flowering stems |
| What to check | Amount of direct light, Recent nitrogen feeding |
| Possible correction | Ensure adequate sunlight and avoid excess nitrogen; use a balanced fertilizer. |
Pruning, Training & Seasonal Maintenance
Canterbury bells (Campanula medium) is a biennial cut-flower plant: it forms a leafy rosette in its first year, then sends up 50–80cm flowering spikes and dies after setting seed in its second. Because the plant will not live beyond that second season regardless of how it is treated, pruning is entirely about prolonging and shaping the display – deadheading spent spikes to keep new side flowers coming, and cutting off faded blooms before they set seed, since the source data flags this species as an enthusiastic self-seeder that can become weedy if left unchecked.
Quick Pruning & Maintenance Specs
| Pruning Tolerance | Low – grooming/deadheading, not structural |
| Primary Pruning Window | Throughout the second-year bloom period |
| Typical Frequency | Weekly during peak bloom |
| Main Objective | Prolong bloom on side shoots, control self-seeding, supply cut flowers |
| Young Plant Priority | First-year rosette: no cutting back, just build size for next year’s spike |
| Mature Plant Priority | Second-year: deadhead the main spike to promote side shoots, remove spent flowers before seed set |
| Best Tool Type | Bypass secateurs for the thicker flower spike, precision snips for side shoots |
| Avoid Heavy Pruning During | First-year rosette growth – do not cut it back |
Pruning by Plant Age & Size
Newly Established
In its first season this is a low rosette, not a flowering plant – do not cut it back or deadhead; simply remove any damaged or diseased leaves so the rosette can bulk up ahead of next year’s spike.
Young / Formative
No formal training system; in an exposed site, staking the emerging second-year flower spike early prevents wind damage later, since the spike becomes top-heavy once in full bloom.
Mature / Established
Once flowering, deadhead the main spike after its lower bells fade to encourage lateral flowering shoots, and remove any flowers you are not cutting for the vase before they can set seed.
Seasonal Pruning Schedule
Ongoing Sanitary (second-year bloom): through spring–summer flowering, deadhead spent bells and side spikes to extend the display and to intercept seed formation before it becomes a self-seeding problem.
Post-bloom: once flowering is finished the plant is naturally finishing its life cycle; remove the entire spent spike at that point rather than trying to prune it back into growth.
Structural Pruning & Training
Height and spread control here means staking, not cutting: the tall (50–80cm) flower spike can topple in wind or rain once heavy with bells, so support it as it extends rather than trying to shorten it, which would remove the flowers it was grown for.
Special Growth to Remove
- Spent flower spikes/stems – remove promptly given this species’ tendency to self-seed aggressively if left.
- Dead or damaged rosette leaves in year one.
Container & Small-Space Pruning
Grows well in a large pot; because of its height, container-grown plants are especially prone to toppling and benefit from staking or a sheltered spot, and prompt deadheading matters more in a container where self-sown seedlings are unwelcome in the same pot.
Tools
Bypass secateurs for the main flower spike’s thicker stem; precision snips for lighter side shoots and cut-flower harvest.
Tool Hygiene & Disease Risk
Routine – reported pests (spider mites, aphids) are not tool-transmitted; ordinary clean tools are sufficient.
Cut Placement & Technique
Deadhead by cutting just above a lower leaf or side bud so a new lateral spike can develop; for cut flowers, cut low on the stem while the lowest bells are open and upper buds still closed.
Heavy Pruning & Rejuvenation
Not applicable – as a biennial the plant completes its life cycle after flowering and cannot be rejuvenated by hard pruning; renewal comes from new seedlings (self-sown or deliberately sown) rather than cutting the spent plant back.
Post-Pruning Care
Water as needed through the bloom season; no fertilizing is needed purely for deadheading. Watch the cut spike stubs are not left wet and rotting against nearby rosettes of any first-year plants nearby.
Common Pruning Mistakes
- Cutting back the first-year rosette, which removes the leaf area the plant needs to build next year’s flower spike.
- Letting spent flowers sit and set seed, given the species’ documented self-seeding/weediness tendency.
- Failing to stake before the spike is fully loaded with bells, when staking is more likely to damage the stem.
When NOT to Prune
Never cut back the first-year rosette. Avoid removing the whole spike mid-bloom if you want continued lateral flowering – deadhead in stages instead.
Recommended Tools (by task)
- bypass_secateurs – clean cuts through the main flower spike’s thicker stem.
- precision_snips – deadheading side shoots and harvesting cut flowers.
- soft_ties_stakes – supporting the tall, top-heavy second-year spike before it topples.
Propagation Guide
Canterbury bells is a classic biennial raised entirely from seed: sown one year, it forms a rosette, overwinters, and flowers the next. It is not divided; seed strains come reasonably uniform, no grafting is needed, and germination is easy, though plants can self-sow freely.
Quick Propagation Specs
| Best Propagation Method | Seed |
| Alternative Methods | None — biennial, always raised from seed |
| Propagation Difficulty | Easy |
| Seed True-to-Type | Usually uniform (named seed strains fairly consistent) |
| Best Propagation Season | Late spring to early summer (sow for bloom the next year) |
| Seed Germination Time | Usually about 2–3 weeks |
| Germination Temperature | Roughly 18–21°C (65–70°F) |
| Seed Sowing Depth | Surface-sow; do not cover (light aids germination) |
Growing from Seed
Seed Handling & Viability
Canterbury bells sets copious very fine seed; handle it dry and sow thinly. Stored cool and dry it keeps for a couple of seasons, though fresh seed is most vigorous.
Sowing Season
As a biennial it is sown in late spring to early summer of one year to flower the next: seedlings build a leafy rosette through summer and autumn, overwinter, then bolt and bloom the following season.
Sowing Depth & Orientation
Surface-sow and do not cover, or barely dust with fine grit; the seed needs light to germinate. Firm gently onto a moist, well-drained mix.
Germination Conditions
Keep evenly moist and bright at roughly 18–21°C (65–70°F); germination is usually prompt and even.
Germination Time
Seedlings normally appear within about two to three weeks.
Seedling Care
Prick out and grow the rosettes on in a nursery bed or pots over summer, then move them to their flowering positions in autumn or early spring. Plants often self-sow, and the site notes the species can be invasive, so deadhead if spread is unwanted.
Bloom & Edible Flower Guide
Quick Details
- Bloom Season: Late spring into summer, sometimes lingering longer in mild climates.
- Time to First Bloom: In its second year – as a biennial it makes a leafy rosette the first year and flowers the next.
- Flower Appearance: Large, cup-and-saucer bells in purple, blue, pink or white, carried up tall stems.
- Edibility: Edible – Canterbury bell blooms are edible, mild and slightly sweet, and are often used as a decorative garnish.
Detailed Blooming Overview
Canterbury bells are a classic cottage-garden biennial. The first year builds a rosette of elliptic, toothed leaves; the second year sends up tall stems crowded with big, inflated bells – the well-known “cup and saucer” shape. It is a superb cut flower and a magnet for bees.
Flower Characteristics
- Shape: Large, rounded bells at the ends of the stems, in some forms backed by a flared “saucer”.
- Colour: Purple, blue, pink or white.
- Also known as: Canterbury bells (Campanula medium).
- Pollinators: Bees and bumblebees, which climb right inside the bells.
Bloom Care & Thinning
- Deadheading: Snip off faded bells to keep new ones coming and to lengthen the display.
- As a cut flower: Cut stems just as the lower bells open for the longest vase life.
- Pollination: Bee-pollinated; let a few blooms set seed if you want plants for next year.
Bloom Health & Protection
- Aphids on buds: Common on the soft flowering tips; insecticidal soap or neem oil, or a firm spray of water, keeps them down.
- Grey mould (Botrytis): The big bells can rot in wet weather; good spacing, airflow and removing spent flowers is the best defence.
Fruit & Uses
Across the bellflower genus Campanula, the young leaves and the open flowers are the parts traditionally eaten — young leaves as a mild salad or pot-herb green and the bell-shaped flowers as an edible garnish. This plant is grown here as an ornamental, so treat its edibility as a minor, secondary use only and read the safety note first.
Quick Edible Specs
| Edible Parts | Young leaves and open flowers (minor, secondary use) |
|---|---|
| Main Use(s) | Culinary — young leaves as a salad or cooked green; flowers as an edible garnish |
| Eaten Raw or Cooked | Young leaves raw when tender or lightly cooked; flowers raw |
| Preparation Required | None beyond washing; use only young, tender growth and fully positively-identified plants |
| Harvest Season | Young leaves in spring; flowers during bloom (Spring / Summer (in hot climate can be until the winter)) |
| Safety/Toxicity Caveat | Eat only if the species is correctly identified; ornamental nursery plants may be treated with pesticides — do not eat those. Try a small amount first; eat in moderation. |
Leaves & Greens
The young, tender leaves are the part used as a green. Pick the small new leaves in spring while they are soft and mild; older leaves become tough and are not worth eating. Young leaves are added raw to mixed salads or lightly cooked like other leafy greens. Because harvesting leaves and letting the plant flower pull in different directions, take only a few young leaves from an established clump so the plant can still grow and bloom.
Flowers & Flower Buds
The bell-shaped flowers are used raw as a mild, decorative garnish scattered over salads, desserts and drinks. Pick them when fully open and unblemished, remove any green base and use them fresh. Flavour is delicate, so they are valued more for colour and shape than for taste.
Preparation, Uses & Safety
Preparation is simple — wash young leaves and freshly picked flowers and use them fresh. The overriding step is correct identification and clean sourcing: only eat material you are certain is an edible Campanula and that has not been sprayed. Plants bought or grown as ornamentals are frequently treated with pesticides and fungicides and should not be eaten. Keep the edible use occasional and in small amounts, and try a little first in case of individual sensitivity.
Pests, Diseases & Troubleshooting
Overview: Bellflowers (Campanula medium) are tough, floriferous perennials and biennials whose worst enemies are molluscs and, in poorly drained or crowded conditions, fungal problems. Canterbury bells is a biennial that overwinters as a leafy rosette, so slugs on the rosette and crown rot in a wet winter are the main risks, followed by rust and aphids on the flower spikes. The management philosophy is cultural first — sharp drainage, good airflow and mollusc barriers — keeping sprays as a last resort so pollinators visiting the bells are protected.
Quick Troubleshooting Overview
| Issue / Pest | Main Symptom | Primary Solution |
|---|---|---|
| Slugs & snails | Ragged holes, shredded young shoots, silvery slime trails | Night hand-picking, grit/copper barriers, iron-phosphate bait |
| Aphids | Sticky shoot tips and buds, distorted growth, sooty mould | Water jet, encourage predators, insecticidal soap |
| Spider mites | Fine pale stippling and webbing, bronzing in hot dry spells | Raise humidity, hose undersides, horticultural oil |
| Rust | Orange-brown pustules on leaf undersides, yellow flecks above | Remove infected leaves, improve airflow, sulphur if severe |
| Powdery mildew | White powdery coating in crowded, dry-root conditions | Thin for airflow, avoid drought stress, potassium bicarbonate |
| Crown / root rot | Sudden collapse, blackened crown in wet heavy soil | Improve drainage, plant high, never overwater |
Common Pests & Management
- Slugs & Snails (Deroceras reticulatum, Cornu aspersum):
- Symptoms: Irregular holes chewed in leaves and flowers, seedlings and soft new shoots shredded to stubs, tell-tale silvery slime trails; damage is worst in damp weather and on lush, low or cushion-forming plants.
- Prevention & Control: Hand-pick after dark or on wet evenings, clear boards, pots and debris that shelter them, ring vulnerable clumps with sharp grit, crushed shell or diatomaceous earth, use copper tape on containers and beer traps; where pressure is high scatter iron-phosphate pellets, which are safe around wildlife and pets.
- Aphids (Aphis spp., Myzus persicae):
- Symptoms: Dense colonies on shoot tips, flower buds and leaf undersides, sticky honeydew that turns black with sooty mould, curled or stunted new growth; aphids also transmit plant viruses.
- Prevention & Control: Dislodge with a firm jet of water, encourage ladybirds, lacewings and hoverflies with companion planting, and treat persistent outbreaks with insecticidal soap or neem, spraying in the cool of the evening to spare bees.
- Two-spotted Spider Mite (Tetranychus urticae):
- Symptoms: Fine pale stippling and a dusty, bronzed look to the foliage, with delicate webbing on leaf undersides; populations explode in hot, dry, still air.
- Prevention & Control: Raise humidity and hose the undersides of leaves regularly, avoid drought stress, release predatory mites (Phytoseiulus persimilis) under glass, and knock back heavy infestations with insecticidal soap or light horticultural oil.
- Thrips (Frankliniella occidentalis):
- Symptoms: Silvery streaking and flecking on leaves and petals, tiny black specks of frass, and distorted, discoloured buds; thrips can also carry viruses.
- Prevention & Control: Hang blue sticky traps to monitor, remove weeds that harbour them, introduce predatory mites or Orius bugs, and spot-treat with spinosad or insecticidal soap.
- Froghopper / Spittlebug (Philaenus spumarius):
- Symptoms: Blobs of white frothy “cuckoo spit” on stems and leaf axils in late spring, hiding a sap-sucking nymph; damage is largely cosmetic and rarely weakens an established plant.
- Prevention & Control: Simply hose the froth off with water; no chemical treatment is warranted for such a minor pest.
Diseases & Fungal Issues
- Rust (Coleosporium campanulae / Puccinia spp.):
- Symptoms: Powdery orange-brown pustules on leaf undersides with corresponding yellow flecks on the upper surface; heavy infection yellows and drops leaves.
- Treatment & Management: Pick off and bin affected leaves promptly, space and thin plants for airflow, water at the base rather than overhead, choose resistant strains, and apply a sulphur or copper fungicide only if it spreads.
- Powdery Mildew (Golovinomyces / Erysiphe spp.):
- Symptoms: A white, floury coating on leaves and stems, typically where plants are crowded, dry at the root but sitting in humid, stagnant air.
- Treatment & Management: Improve airflow by thinning, keep roots evenly moist to avoid stress, clear infected debris, and treat with potassium bicarbonate, sulphur or neem.
- Crown & Root Rot (Rhizoctonia, Sclerotinia, Pythium/Phytophthora):
- Symptoms: Sudden wilting or collapse, a blackened, mushy crown and rotted roots, almost always in heavy, waterlogged soil or after winter wet.
- Treatment & Management: Prevention is the cure — grow in free-draining, gritty soil, set the crown slightly proud of the surface, never let alpine and cushion types sit wet, and remove and destroy collapsed plants with the soil around them.
- Botrytis Grey Mould (Botrytis cinerea):
- Symptoms: Fuzzy grey mould on spent flowers and soft tissue in cool, damp, still conditions, spreading back into healthy growth.
- Treatment & Management: Deadhead promptly, remove faded blooms and debris, and improve ventilation; fungicide is rarely needed if hygiene is good.
Growing Difficulties & Abiotic Problems
- Winter Wet & Waterlogging:
- Cause & Symptoms: Roots and crowns standing in cold, saturated soil rot away over winter — the single biggest killer of alpine and cushion bellflowers — showing as yellowing, blackening and collapse.
- Correction Strategy: Plant in sharply drained, gritty soil or raised beds and troughs, add a collar of grit around the crown, and protect the most sensitive alpines from overhead winter rain with a pane or cloche.
- Heat & Sun Scorch:
- Cause & Symptoms: Browning, crisping leaf edges and faded flowers where cool-climate species face intense summer sun and dry heat.
- Correction Strategy: Give afternoon shade in hot regions, mulch to keep roots cool and moist, and site cushion alpines where they get bright light but not scorching midday exposure.
- Flopping & Legginess (tall species):
- Cause & Symptoms: Tall-stemmed bellflowers splay open and flatten after rain or in too much shade or rich soil.
- Correction Strategy: Provide discreet ring or twig support early, grow in full sun on leaner soil, and cut back after flowering to tidy and often re-bloom.
What Helps — Products & Tools
A bellflower rarely needs much: iron-phosphate slug bait, copper barrier tape and diatomaceous earth cover the molluscs; insecticidal soap and neem or light horticultural oil handle aphids, mites and thrips; and a sulphur or potassium-bicarbonate fungicide keeps rust and powdery mildew in check. Blue sticky traps help monitor thrips, and above all sharp drainage prevents the rots.