






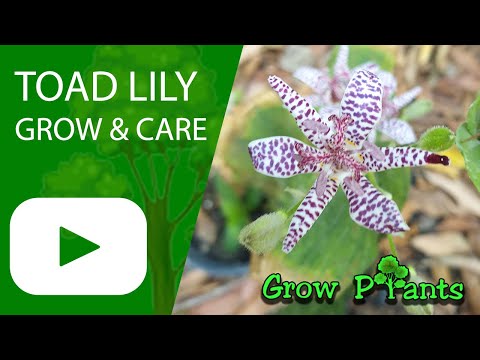
Plant Profile & Key Characteristics
Overview: Toad lily (Tricyrtis) is a hardy, shade-loving woodland perennial grown for its orchid-like, intricately spotted flowers borne in summer and autumn on arching leafy stems. It forms slowly spreading clumps and dies back to the ground each winter.
Quick Specifications
| Specification | Attribute |
|---|---|
| Plant Type / Life Cycle | Perennial (herbaceous) |
| Foliage Type | Deciduous — herbaceous, dies back in winter and re-shoots in spring |
| Mature Size | 40-60 cm (16-24 in) tall |
| Growth Rate | Moderate to fast |
| Root System | Rhizomatous — spreads by short, creeping underground rhizomes to form slowly enlarging clumps |
| Hardiness | USDA 4-8 |
Growth Form & Structure
- Height & Spread: Forms an arching clump 40-60 cm (16-24 in) tall, spreading slowly outward by rhizomes; grows well in containers — start in a pot about 30-50% larger than the rootball and pot up as it fills.
- Growth Habit & Form: Clump-forming perennial with upright to gracefully arching leafy stems that spread slowly by rhizomes into a woodland groundcover in shade.
- Lifespan & Maturity: Long-lived rhizomatous perennial; reaches mature clump size within a couple of seasons and enlarges steadily over the years. Ornamental only — does not bear edible fruit.
Anatomy & Physical Features
- Leaves & Foliage: Green leaves, sometimes shaded light and dark green, ovate and clasping the stem.
- Flower Characteristics: Star-shaped, six-tepalled flowers 2-4 cm across, yellow spotted with orange &mdash one of the earlier, yellow-flowered toad lilies.
Primary Uses & Landscape Value
- Functional & Ornamental Roles: Shade and woodland groundcover; front-to-mid shade border and stream-side planting; long-lasting cut flower valued for its late-season, orchid-like blooms; container plant for shaded patios.
Care Guide: Planting, Soil & Watering
Overview: Toad lilies (Tricyrtis) are woodland shade perennials that grow best in cool, humid positions with rich, humus-laden soil kept consistently moist. They dislike hot, dry summers, so give them a shaded spot, a generous mulch, and never let the soil dry out.
Quick Care Requirements
| Requirement | Ideal Condition |
|---|---|
| Planting Season | Plant in spring to early summer in cooler regions; spring through autumn in milder regions, avoiding the hottest part of summer. |
| Growth Rate | Moderate to fast |
| Soil Type | Rich, humus-laden, consistently moist yet free-draining woodland soil |
| Water Need | Moderate to high — keep the soil evenly moist at all times and never let it dry out |
Planting & Establishment
- Best Planting Season: Plant the rhizomes in spring or summer where summers stay cool; in warmer areas plant from spring to autumn but avoid setting them out during peak summer heat.
- How to Plant:
- Hole Preparation: Dig a hole at least twice as wide as the root ball or rhizomes.
- Soil Amendments: Backfill with plenty of organic matter — compost, humus, leaf mould and well-rotted leaves — to enrich the soil and hold moisture.
- Planting Depth: Set the rhizome or root ball so it is only lightly covered, firmed just enough to hold the plant, then top with mulch and a generous layer of leaf litter.
- Growth Speed & Expectations: Moderate to fast in cool, moist, shaded conditions.
Soil, Watering & Drainage Care
- Soil Mix & Drainage Needs: Humus-rich, moisture-retentive but free-draining soil; in containers use a potting or peat mix with perlite blended with humus and organic matter, mulched to keep the soil damp while still letting excess water escape.
- Watering Schedule & Technique:
- Young / Newly Planted: Keep the soil constantly moist while plants establish; mulch well and, in dry air, mist to raise humidity.
- Established: Water regularly and deeply so the soil never dries — moisture needs are moderate to high, especially in warm weather.
- Seasonal Adjustments: Increase watering during heat and dry spells, when the plant is most likely to scorch, and ease back as growth slows in cold weather.
Climate, Light & Hardiness
Toad lily is a shade-loving woodland perennial for cool temperate, mediterranean and subtropical climates, grown in full to partial shade. It is reliably cold-hardy, dying back to a winter-dormant rhizome that resprouts each spring, while hot, dry summers - not winter cold - are its main limitation.
Quick Climate Specifications
| Climate Zones | Temperate to subtropical; woodland shade |
| USDA Hardiness Zones | 5–7 (to zone 8a with the right care) - site data |
| Optimal Temp Range | approximately 15–24 °C (60–75 °F) |
| Cold Damage Begins | top growth is frost-tender and blackens around 0 °C (32 °F) - normal seasonal dieback, not loss of the plant |
| Approx. Survival Minimum | dormant rhizome hardy to roughly −29 °C (−20 °F) at the cold edge of zone 5 |
| Frost Tolerance | High (dies back to a hardy rhizome; foliage itself is frost-tender) |
| Light Conditions | Full to partial shade |
| Wind Tolerance | Low to moderate (tall stems flop) |
Sunlight & Light Exposure
Optimal Light Setup
Dappled woodland shade is ideal. In warm regions it wants full shade; only in cool-summer climates can it take partial shade or gentle morning sun, and even then hot afternoon sun should be avoided.
Shade & Heat Management
Hot, direct sun scorches and burns the foliage, and the plant suffers on hot days generally. Deep shade, a mulched root zone and steady moisture are the key defences against heat and leaf burn.
Best Exposure / Orientation
A north- or east-facing, sheltered woodland-edge position gives the cool, softly lit conditions it thrives in.
Temperature Extremes & Hardiness
USDA Hardiness & Regional Limits
It is hardy across USDA zones 5–7, and can be pushed to zone 8a with the right care where summers stay cool and shaded. Crucially, that warm-end limit is set by summer heat, not by winter cold - in hot-summer areas it struggles even within its nominal zone unless kept cool, shaded and moist. A cold winter dormant period is part of its natural cycle before spring growth resumes.
Cold Damage & Winter Protection
As a herbaceous perennial it dies down after the first autumn frosts and overwinters as a dormant rhizome, hardy to about roughly −29 °C (−20 °F) at the cold edge of zone 5. A winter mulch of leaf litter protects the rhizome at the colder end of its range.
Frost Sensitivity
The soft top growth has essentially no frost tolerance and blackens with the first hard frost, but this is normal seasonal dieback - the rhizome below ground is unharmed and resprouts in spring.
Extreme Heat Tolerance
Heat is the real weakness: on hot days the foliage scorches and the plant suffers, so it needs shade, cool soil and reliable moisture. In hot-summer climates the warm-zone limit is reached well before any cold limit.
Wind, Humidity & Microclimate
Humidity Preferences
It enjoys the moist, humid air of a shaded woodland setting; dry air (including next to indoor heaters, vents or air-conditioning) stresses it.
Dry-Air Tolerance
Dry air is poorly tolerated - a sheltered, humid, mulched microclimate keeps the foliage in good condition far better than an open, arid position.
Wind Tolerance
The arching flower stems are prone to flopping, so a wind-sheltered spot - and, for taller species, some discreet support - keeps the plant upright and undamaged.
Rainfall & Seasonal Moisture
It is adapted to climates with dependable growing-season moisture; cool, evenly moist, humus-rich ground that never bakes dry matches its woodland origins.
Microclimate Recommendations
A cool, shaded, sheltered and moisture-retentive microclimate - the shady woodland border, mulched to keep the roots cool - is exactly what brings out its best.
Growing in Pots, Balconies & Indoors
Tricyrtis latifolia (Tricyrtis latifolia) is one of the rare flowering perennials the grower rates as a genuine houseplant – a shade-loving woodland plant that also does well in pots on a cool, bright patio or a shaded balcony. Indoors it needs good light (even a little direct sun) to flower, so give it the brightest spot that stays cool and away from dry, heated air.
Quick Details
- Container Size: Start in a pot only about 30-50% larger than the plant and pot up as the roots fill it; expect a mature size of roughly 40-60 cm (16-24 in).
- Indoor Suitability: A good houseplant in bright, indirect light – keep it cool and away from radiators, fans and air-conditioning.
- Best Spot: Shade to part shade outdoors (morning sun in cooler climates); a bright, cool position indoors.
- Soil & Drainage: Potting mix or peat with perlite, enriched with humus and organic matter; moisture-retentive but free-draining.
- Watering in Pots: Keep evenly moist – a chopped mulch on the surface holds moisture; never let the mix dry out or sit waterlogged.
Indoors & On the Windowsill
- A genuine houseplant: The grower confirms toad lily can be grown indoors. Give it bright light – even a little direct sun helps it bloom – and keep it in a cool position.
- Keep the air right: Do not stand it next to heaters, fans or air-conditioning, which dry the plant out; a surface mulch and steady moisture keep the cool, humid conditions it likes.
- Cool winter rest: Toad lily is a hardy perennial that naturally dies back and rests over winter – let a potted plant have a cool dormant period rather than forcing it in a warm room.
On a Balcony or Patio
- Light & shelter: Unlike most container flowers this one wants shade – a north or east aspect, or a spot shaded by walls, is ideal, and it dislikes hot afternoon sun. Walls and paving still reflect heat and dry pots quickly, so check moisture often and mulch the surface.
- Practicalities: Grouping pots together or tucking them among taller plants keeps the roots cool and the humidity up on an exposed balcony.
Choosing the Pot, Soil & Long-Term Care
- Pot & drainage: Any pot with strong drainage holes; skip a permanently full saucer to avoid root rot (see the grower’s bottom-watering tip below). Terracotta breathes and dries fast, while glazed or plastic holds moisture longer – handy for a plant that likes to stay damp.
- Potting mix: Well-aerated and moisture-retentive – potting mix or peat with perlite, mixed with humus and organic matter.
- Feeding: Potted plants exhaust their mix faster as nutrients leach with watering, so feed lightly through the growing season.
- Repotting: Pot up to the next size in winter once the root ball fills the container; when it reaches the size you want, refresh the mix every few years – for a small pot, tip it out, trim some roots and prune the top – and clear away worn-out old plants after flowering.
Grower’s Container Tip
- Right-sized pots and same-day bottom watering: Keep it in a pot just 30-50% bigger than the plant and step it up gradually, moving to a larger pot in winter as the roots outgrow it. Top the mix with chopped mulch to hold moisture, and when you water from below let the base of the pot stand in water only briefly – it should take up what it needs and be dry again the same day, never left sitting wet.
Fertilizing & Feeding
A moderate feeder: steady balanced feeding through the growing season supports both foliage and flowers, with feeding tapering off as the plant slows for its rest period.
Quick Fertilizing Specs
| Feeding Level | Moderate |
|---|---|
| Main Nutrient Priority | Balanced nutrition with adequate nitrogen; no high-phosphorus bloom boosters |
| Best Feeding Period | Through the active growing and blooming season |
| Organic Options | Compost, well-rotted manure, or a balanced organic fertilizer |
| Soil pH | Slightly acidic to near neutral |
| Reduce/Stop Feeding | Reduce and stop feeding as growth slows into dormancy |
Feeding by Growth Stage
Spring growth flush
Support strong new leaves and stems as the plant breaks into active growth.
| Nutrient direction | A balanced complete fertilizer with adequate nitrogen to fuel foliage and stems. |
|---|---|
| Timing | As new growth begins in spring. |
| Frequency | Feed steadily through the active growth period, easing back as blooming approaches. |
| Fertilizer types | Balanced complete garden fertilizer, Slow-release granular fertilizer, Compost or other organic matter worked into the soil |
| Precautions | Avoid heavy nitrogen, which can push soft leafy growth at the expense of flowers. |
Blooming period
Sustain flowering with steady, balanced nutrition without forcing excess foliage.
| Nutrient direction | A balanced complete fertilizer; adequate nitrogen alongside potassium supports continued bloom, and high-phosphorus bloom boosters are not needed. |
|---|---|
| Timing | Through the flowering season. |
| Frequency | Keep feeding light and steady while the plant is in bloom. |
| Fertilizer types | Balanced complete fertilizer, Liquid feed for garden and container plants |
| Precautions | Skip high-phosphorus bloom formulas; they do not increase flowering and can build up in the soil. |
Dormancy and winter rest
Let the plant rest through dormancy without pushing new growth.
| Nutrient direction | None – withhold fertilizer during dormancy. |
|---|---|
| Timing | Autumn into winter as growth stops. |
| Frequency | No feeding at this stage. |
| Fertilizer types | No feeding at this stage; do not fertilize while the plant is dormant. |
| Precautions | Do not fertilize until active growth resumes in spring. |
Nutrient Deficiency Signs & Corrections
Older, lower leaves turn pale green to yellow and overall growth slows.
| Possible causes | Low soil nitrogen or infrequent feeding, Nitrogen leached out by heavy watering or from sandy soil, Cold soil early in the season limiting uptake |
|---|---|
| Appears first on | Older, lower leaves |
| What to check | Recent feeding history, Soil drainage and watering habits, Soil temperature in early spring |
| Possible correction | Apply a balanced complete fertilizer at its labeled rate and make sure the soil is warm and evenly moist. |
New leaves yellow between the veins while the veins themselves stay green.
| Possible causes | High soil pH reducing iron availability, Poor drainage or waterlogged roots, Genuinely low iron in the soil |
|---|---|
| Appears first on | Youngest leaves |
| What to check | Soil pH, Drainage and root health, Signs of overwatering |
| Possible correction | Correct soil pH and improve drainage; apply a chelated iron product per its label if the problem persists. |
Leaf edges and tips brown and scorch, sometimes with a whitish crust on the soil surface.
| Possible causes | Over-application of fertilizer and salt buildup, Insufficient leaching, especially in containers, Underwatering that concentrates salts in the root zone |
|---|---|
| Appears first on | Leaf tips and margins |
| What to check | Recent fertilizer amounts, Salt crust on the soil or pot rim, Whether watering wets the whole root zone |
| Possible correction | Cut back on feeding and leach the root zone thoroughly with plain water to flush out the excess salts. |
The plant makes lush leafy growth but produces few flowers.
| Possible causes | Excess nitrogen from over-feeding, Too much shade or insufficient light, An immature or heavily pruned plant |
|---|---|
| Appears first on | Whole plant, where vegetative growth dominates |
| What to check | Nitrogen inputs and fertilizer type, Light exposure, Plant maturity and recent pruning |
| Possible correction | Ease off nitrogen, switch to a balanced fertilizer, and make sure the plant gets enough light. |
Pruning, Training & Seasonal Maintenance
Broad-leaved toad lily (Tricyrtis latifolia) is a shade-loving, rhizomatous herbaceous perennial that flowers in late summer and autumn from the tips and leaf axils of the current season’s arching stems — which is the fact that governs its pruning: cut those stems back in spring or summer and you remove the very shoots that were going to bloom. So the plant is left largely uncut through the growing season; the useful interventions are an optional early-summer pinch to reduce height and flopping, discreet support for lax stems, and cutting the dead stems to the ground once dormant. This is one of the earlier and more vigorous toad lilies, spreading steadily by rhizome to form a broad-leaved groundcover and blooming from summer, so it both fills space and needs dividing sooner than the daintier kinds.
Quick Pruning & Maintenance Specs
| Pruning Tolerance | Low in season (flowers on current stems); high in dormancy |
| Primary Pruning Window | Late autumn/winter cut-down once foliage dies back |
| Secondary Maintenance Window | Optional early-summer pinch; staking as stems lengthen |
| Typical Frequency | Once for the dormant cut-down, plus optional pinch/support |
| Main Objective | Protect the late bloom; manage height and floppy stems |
| Young Plant Priority | Leave stems intact; support if they flop |
| Mature Plant Priority | Pinch/stake for form; dormant cut-down; divide to renew |
| Best Tool Type | Precision snips and soft ties/stakes |
| Avoid Cutting Back During | Spring and summer — you would remove the flowering shoots |
Pruning by Plant Age & Size
Newly Established
Leave a young clump’s stems entirely; simply support them if they lean and keep the soil cool and moist. Cutting stems back only delays or removes the first bloom.
Young / Formative
No structural training exists. The one optional shaping is an early-summer pinch of the growing tips — taken once when the stems are roughly a third grown — which makes the plant shorter, bushier and better-branched, trading a little height for more, sturdier flowering shoots. At a moderate 40–60 cm it flops less than the tallest species, so a pinch is optional — use it mainly to keep a tidy, even groundcover.
Mature / Established
Through the season the clump is left to arch and bloom; stake or ring lax stems so the late flowers show. After frost blackens the foliage, cut all the dead stems down to the ground. As a stronger rhizome-spreader it is the one most likely to need lifting and dividing every few years to control its spread and rejuvenate flowering. An old, congested clump is renewed by lifting and dividing the rhizome in spring, not by cutting the top.
Seasonal Pruning Schedule
Early Summer (optional pinch)
Objective: control height and flopping. Remove: just the soft growing tips, once. Do NOT remove: more than the tips, or you delay and reduce bloom. Response: shorter, branchier stems with more flowering points.
Late Autumn / Dormant Cut-Down
Objective: sanitation and tidiness. Remove: all dead top growth to ground level once it has died back. Impact: none on next year’s flowers, which come from new stems off the rhizome.
Ongoing Sanitary
Objective: health. Remove: leaves scorched by heat or dry wind and any fungal-spotted foliage this genus is prone to in stagnant, wet conditions. Impact: cosmetic and preventive.
Structural Pruning & Training
There is no woody structure to build; “training” here means keeping the arching stems presentable — an early-summer pinch for compactness and a discreet stake or grow-through support for stems that would otherwise sprawl on the ground and hide the late flowers. An old, congested clump is renewed by lifting and dividing the rhizome in spring, not by cutting the top.
Special Growth to Remove
The plant spreads slowly by rhizome; there are no suckers or runners to cut. The only routine removals are spent, dead or scorched stems and leaves. Do not deadhead for rebloom — the display is a single late-season show, and cutting the flowering stems mid-season simply removes it.
Container & Small-Space Pruning
In a pot the plant is kept cool, shaded and moist; the same rules apply — do not cut stems back in the growing season, pinch early if you want it shorter, and cut down in autumn. Refresh and divide the root ball every few years, ideally in winter, as a congested container clump flowers poorly; a small amount of root trimming at repotting is tolerated.
Cut Placement & Technique
Pinch by nipping out only the soft tip above a leaf pair. Cut spent stems to near ground level in dormancy. Support stems with soft ties to a discreet stake or a grow-through ring rather than cutting them shorter mid-season to reduce flopping.
Post-Pruning Care
After the autumn cut-down, mulch to protect the rhizome and hold moisture. No feeding is prompted by cutting; the plant’s real needs are cool roots, shade and steady moisture — it scorches in heat and dry wind, which is a siting issue, not a pruning one.
Common Pruning Mistakes
- Cutting the stems back in spring or summer — this removes the shoots that carry the late-season flowers.
- Deadheading in the hope of rebloom, when the plant flowers once, late.
- Skipping the early-summer pinch on tall clumps and then finding the flowering stems flopped on the ground.
- Cutting scorched foliage and blaming pruning, when the real cause is a hot, dry, or too-sunny position.
When NOT to Prune
Do not cut stems back during spring and summer growth or through the late bloom — you would lose the flowers. Avoid the dormant cut-down until the foliage has actually died back and fed the rhizome. Do not disturb or divide during hot, dry spells when the plant is already stressed.
Recommended Tools (by task)
- precision_snips — pinching soft tips in early summer and cutting spent stems down in dormancy.
- soft_ties_stakes — supporting lax, arching stems so the late flowers are held up and visible.
- garden_spade — lifting and dividing the rhizome clump in spring to renew and multiply it.
Pruning Troubleshooting
| Problem | Possible Cause | What to Check | Corrective Action |
| Few or no flowers despite healthy leaves | Stems cut back in spring/summer, removing flowering shoots | Whether the plant was trimmed during the growing season | Leave stems uncut in season; confine cutting to the dormant clean-up and an optional early pinch |
| Stems flopping and hiding the flowers | Tall clump not pinched or supported | Stem height and whether an early pinch or stake was used | Pinch tips in early summer and add a discreet stake or grow-through support |
| Leaf edges scorched and brown | Too much sun, heat or dry wind — not a pruning fault | Exposure, soil moisture, wind protection | Move to cooler shade, keep evenly moist and mulch; simply trim off badly scorched leaves |
| Clump spreading wider than wanted | Vigorous rhizome growth in this spreading species | How far new shoots have crept from the original clump | Lift and divide in spring, replanting only the pieces you want |
Propagation Guide
Tricyrtis latifolia are most reliably increased by division of the rhizomatous clump, which is quick, keeps flower colour and any variegation true, and follows the plant’s natural habit of spreading by rhizomes; stem cuttings, ground layering and seed all work too. Seed of the species is mostly uniform, but toad lilies hybridise freely, so garden-collected seed raised near other Tricyrtis can vary, and named or variegated selections must be propagated vegetatively to stay true — overall an easy plant to propagate.
Quick Propagation Specs
| Best Propagation Method | Rhizome / clump division |
| Alternative Methods | Seed, stem cuttings, ground (tip) layering |
| Propagation Difficulty | Easy |
| Seed True-to-Type | Mostly uniform for the species; hybrids & variegated cultivars vary |
| Vegetative True-to-Type | Yes |
| Best Propagation Season | Early spring for division; spring or autumn for seed; spring–summer for cuttings |
| Seed Germination Time | About 4–8 weeks from spring sowing; autumn sowings usually germinate the following spring |
| Cutting Rooting Time | Usually a few weeks under warm, humid conditions |
| Germination Temperature | 16–21°C (60–70°F) |
| Seed Sowing Depth | About 1–2 cm (0.5–1 inch), kept in bright light |
Growing from Seed
Seed Handling & Viability
Sow fresh seed for the best results. Seed keeps better cool, so store it in the refrigerator — either in barely-moist peat or in a paper bag — until sowing.
Dormancy & Pre-Sowing Treatment
Germination is more even after a cold, moist spell of at least a month. Sowing fresh in autumn lets winter supply that chill naturally; in mild-winter areas give the seed a comparable cold period in the coldest part of the refrigerator before spring sowing.
Sowing Season
Sow in spring or autumn. Autumn sowing of fresh seed is preferred so it receives the winter cold; in hot (zone 10) climates autumn sowing also avoids summer heat.
Sowing Depth & Spacing
Sow shallowly, about 1–2 cm (0.5–1 inch) deep, and keep the surface in bright light, which the seed needs to germinate. Space seedlings about 20 × 20 cm (8 × 8 inches).
Germination Conditions
Keep the soil consistently moist — never letting it dry out — in bright light at about 16–21°C (60–70°F).
Germination Time
Spring sowings usually germinate in about 4–8 weeks; autumn sowings generally come up the following early spring.
Seedling Care
Grow seedlings on in moist soil and out of strong heat.
Stem Cuttings
Cutting Preparation & Rooting Setup
Root stem cuttings in a moist peat-based mix (the more reliable option) or in water. Keep them under high humidity with regular misting until roots and new growth appear.
Rooting Hormone
Rooting hormone is optional; these soft stems root readily without it.
Rooting Time
Cuttings usually root within a few weeks under warm, humid conditions.
Air & Ground Layering
Toad lilies layer very easily. Bend a lax stem down to the soil and cover a section with soil, leaving the tip exposed; kept moist, the buried section roots and can then be severed and lifted as a new plant once established. This is a simple way to renew a clump before old stems die back.
Rhizome Division
These rhizomatous perennials spread by underground rhizomes and divide easily — the most reliable method, and one that keeps flower colour and any variegation true. Lift and split established clumps in early spring, making sure each division carries healthy rhizome with roots and at least one growth bud, then replant and keep moist and lightly shaded until re-established.
Timing for planting divided rhizomes: Planting can be spring or summer in hardiness zone 4–7, in hardiness zone 8a spring to autumn but if the summer is too much hot not in the summer. In hardiness zone 8, spring to autumn planting is workable.
Bloom & Flower Guide
Quick Details
- Bloom Season: Summer into autumn – valued especially for late-season colour
- Time to First Bloom: Established clumps flower reliably from their first or second year
- Flower Appearance: Upward-facing, star-shaped flowers, yellow with orange dots and spots; six outer tepals with three small upright inner segments, about 2-4 cm across
- Edibility: Not edible – grown as an ornamental for its flowers. A toad lily (Tricyrtis), not a true lily
Detailed Blooming Overview
Toad lilies are prized woodland perennials that come into their own as the rest of the garden winds down, carrying curiously exotic, orchid-like flowers along their arching stems. Toad lily (Tricyrtis latifolia) opens blooms yellow with orange dots and spots, each intricately spotted – the marking that gives these plants their common name. The blooms open flat and star-like, facing upward along the stems. They shine in a shaded border and also make unusual, long-lasting cut flowers.
Flower Characteristics
- Flowers yellow with orange dots and spots, finely speckled with the spotting typical of toad lilies.
- Six spreading outer tepals with three smaller upright inner segments, about 2-4 cm across. The segments spread wide into an open star.
- A prominent central column of stamens and styles rises from the middle of each bloom.
Bloom Care & Thinning
- Placement: Flowers best in cool, moist, humus-rich soil in part to full shade, sheltered from hot afternoon sun.
- Protecting the buds: Never let the roots dry out during budding and bloom, or the buds may drop before opening.
- Pollination: The flowers are worked by bumblebees and other insects.
- Cutting: Stems last well in water and can be enjoyed as cut flowers.
Bloom Health & Protection
- Slugs and snails: The classic toad-lily pest, chewing new shoots, buds and open flowers; hand-picking or an iron-phosphate slug bait helps, and keeping mulch back from the crown removes their hiding places.
Pests, Diseases & Troubleshooting
Overview: Toad lilies are shade-loving woodland perennials that are largely pest-resistant but have two classic weak points: slugs and snails devouring the emerging spring shoots, and leaf scorch when the soil dries or the plant catches too much sun or wind. Diseases are mainly minor fungal leaf spots and rust in damp, crowded plantings. Grow them cool, moist and shaded with good airflow and the problems largely take care of themselves — reach for sprays only when needed.
Quick Troubleshooting Overview
| Issue / Pest | Main Symptom | Primary Solution |
|---|---|---|
| Slugs & snails | Emerging shoots and leaves shredded; slime trails | Hand-pick at night, barriers, iron-phosphate bait |
| Aphids | Colonies on soft new growth and buds; sticky honeydew | Water jet, encourage beneficials, insecticidal soap if severe |
| Spider mites | Fine stippling and webbing on stressed, dry plants | Keep soil moist and cool; horticultural oil / insecticidal soap |
| Leaf spot / anthracnose | Brown blotches on leaves in humid, crowded sites | Remove leaves, improve airflow, avoid wetting foliage |
| Rust | Orange-brown pustules on leaf undersides | Bin infected leaves, thin clumps, sulphur if persistent |
| Leaf scorch | Crispy brown leaf tips and margins | Shade, wind shelter, steady soil moisture, mulch |
Common Pests & Management
- Slugs & snails:
- Symptoms: The number-one toad-lily pest — tender young spring shoots and leaves are grazed to ragged stumps, leaving holes and silvery slime trails, worst in the damp, shaded conditions these plants love.
- Prevention & Control: Patrol after dark to hand-pick, clear leaf litter and boards that shelter them, ring emerging crowns with grit or copper barriers, and scatter iron-phosphate bait in wet spells. Beer traps help in small beds.
- Aphids (Aphis / Myzus spp.):
- Symptoms: Green or black soft-bodied colonies on new shoots, flower stalks and buds; distorted growth, honeydew and sooty mould. They can also transmit mosaic viruses.
- Prevention & Control: Wash them off with a water jet, pinch out badly infested tips, and encourage ladybirds and lacewings. Use insecticidal soap or a light neem spray only for stubborn colonies.
- Two-spotted spider mite (Tetranychus urticae):
- Symptoms: Fine pale stippling and faint webbing on the undersides, mostly when the plant is drought-stressed or grown too hot and dry — a sign it needs more moisture and shade.
- Prevention & Control: Fix the underlying dryness first: keep the soil evenly moist, mulch, and shade the plant. Rinse foliage and treat with insecticidal soap or horticultural oil, repeating to break the cycle.
- Foliar nematodes (Aphelenchoides spp.):
- Symptoms: Angular brown patches bounded by the leaf veins, spreading upward on the plant in wet conditions — an occasional problem of shade perennials.
- Prevention & Control: Remove and destroy affected leaves, avoid overhead watering and splashing, space plants to dry quickly, and discard badly infested crowns; there is no home cure once inside the leaf.
Diseases & Fungal Issues
- Fungal leaf spot / anthracnose (Colletotrichum, Cercospora spp.):
- Symptoms: Brown or tan spots and blotches, sometimes with darker margins or yellow halos, on leaves kept wet or grown in stagnant, crowded shade.
- Treatment & Management: Pick off spotted leaves, thin and space clumps for airflow, water at the base in the morning, and clear fallen debris in autumn. A copper spray is only needed for spreading outbreaks.
- Rust (Puccinia spp.):
- Symptoms: Raised orange-to-brown powdery pustules on leaf undersides, with yellow flecking above, in damp, humid weather.
- Treatment & Management: Remove and bin infected leaves (do not compost), open up congested clumps, and avoid wetting foliage. Sulphur fungicide helps in a persistent, wet season.
- Grey mould / Botrytis (Botrytis cinerea):
- Symptoms: Fuzzy grey mould rotting flowers, buds and soft foliage in cool, damp, still air, especially on the late-season blooms.
- Treatment & Management: Remove faded flowers and mouldy tissue promptly, improve ventilation and spacing, and avoid evening overhead watering; sanitation usually suffices.
- Crown & root rot (Pythium / Sclerotium spp.):
- Symptoms: Wilting and collapse from a soft, rotting crown, typically after standing winter wet in heavy soil.
- Treatment & Management: Plant in humus-rich but free-draining soil, never let the crown sit waterlogged over winter, and lift and divide healthy pieces if a clump begins to rot from the centre.
Growing Difficulties & Abiotic Problems
- Leaf scorch (brown tips & margins):
- Cause & Symptoms: The classic toad-lily complaint — crispy brown leaf edges and tips caused by too much sun, drying wind, or the soil going dry, since these woodlanders demand cool shade and steady moisture.
- Correction Strategy: Site in dappled to full shade with shelter from wind, mulch to hold moisture, and water deeply and consistently through dry spells so the roots never parch.
- Drought stress & wilting:
- Cause & Symptoms: Shallow-rooted and moisture-loving, the plant flags, browns and drops leaves when the soil dries out, and mite attacks follow.
- Correction Strategy: Enrich the soil with leaf-mould and compost to hold water, mulch annually, and keep watering even during flowering in late season.
- Winter crown rot in wet soil:
- Cause & Symptoms: Heavy, waterlogged ground over winter rots the dormant crown, so the clump fails to reshoot in spring.
- Correction Strategy: Improve drainage with grit and organic matter, avoid low wet spots, and grow on a slightly raised bed where winters are soggy.
- Poor flowering / sparse growth:
- Cause & Symptoms: Too much dry shade, root competition from trees, or a starved clump gives weak, sparse growth and few of the orchid-like autumn blooms.
- Correction Strategy: Feed with an annual mulch of compost, keep it out of dry root-filled soil, and divide tired congested clumps every few years to reinvigorate them.
What Helps — Products & Tools
The most valuable ‘products’ for toad lilies are cultural: shade, wind shelter, a moisture-holding leaf-mould mulch and iron-phosphate slug bait to protect the spring shoots. Keep insecticidal soap and neem or horticultural oil on hand for aphids and spider mites, copper fungicide for spreading leaf spot, and sulphur for rust. Grit or copper barriers deter slugs and snails around emerging crowns. Follow all labels and protect pollinators when the plant is in bloom.