Plant Profile & Key Characteristics
Overview: A slow-growing evergreen succulent forming rosettes of thick, gel-filled leaves. Best known for its edible and medicinal inner leaf gel, it is also grown as a drought-tolerant ornamental and houseplant.
Quick Specifications
| Specification | Attribute |
|---|---|
| Plant Type / Life Cycle | Perennial |
| Foliage Type | Evergreen (succulent) |
| Mature Size | Rosette to about 30-60 cm (12-24 in), spreading by offsets; flower spike taller |
| Growth Rate | Slow |
| Root System | Fibrous, shallow |
| Toxicity | Leaf latex is a purgative and toxic to pets; the clear inner gel is the edible, medicinal part. |
| Hardiness | USDA zone 10b and warmer (zone 10a with winter protection) |
Growth Form & Structure
- Height & Spread: In the ground it forms clumping, offsetting rosettes; in a pot use a container about 30-50% larger than the root ball, filled with a free-draining cactus or gritty mix.
- Growth Habit & Form: Clump-forming rosette succulent that spreads by offsets into clusters.
- Lifespan & Maturity: Long-lived perennial; slow to reach mature size, gradually forming clumps through offsets.
Anatomy & Physical Features
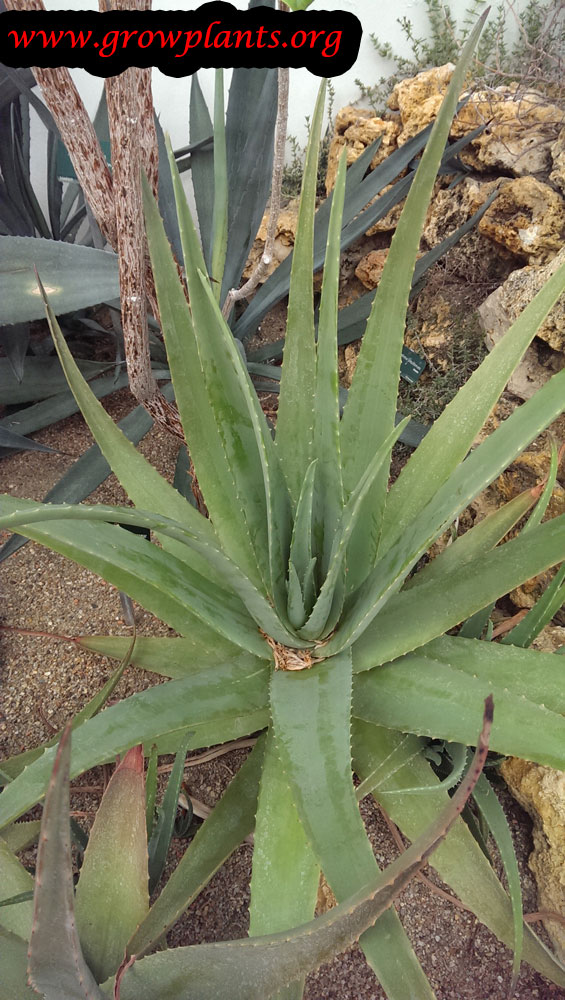
- Leaves & Foliage: Fleshy, edible leaves 30-80 cm long with serrated spiny margins, holding a clear, gel-filled inner flesh.
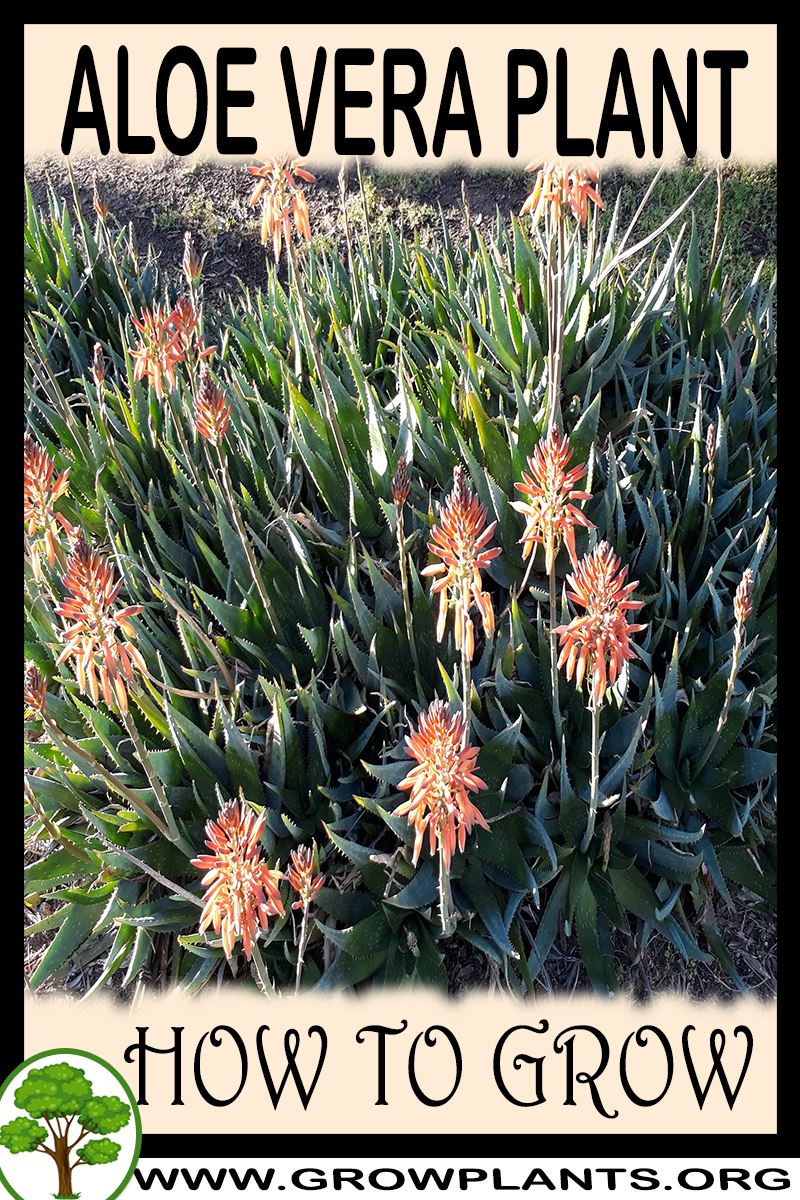
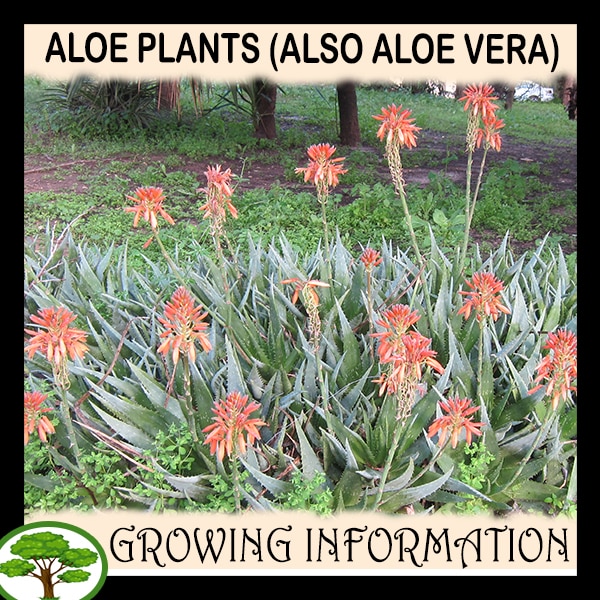
- Flower Characteristics: Yellow to orange or red tubular flowers on a tall spike (summer); bee- and moth-pollinated.
Primary Uses & Landscape Value
- Edible Uses: Clear inner leaf gel is edible and medicinal, used in beverages and juices (the yellow leaf latex is a purgative and not for casual use).
- Functional & Ornamental Roles: Ornamental and medicinal succulent for rock gardens, xeriscaping and containers, valued for its useful gel. It can also be grown indoors as a houseplant in bright light.
Care Guide: Planting, Soil & Watering
Overview: Aloe vera plant is a drought-tolerant, evergreen succulent that grows best in bright light and fast-draining, gritty soil. It stores moisture in its fleshy leaves, so it needs only occasional watering and will rot if left in soggy ground.
Quick Care Requirements
| Requirement | Ideal Condition |
|---|---|
| Planting Season | Spring in zone 10a, spring through autumn in zone 10b, and year-round in zone 11 and warmer |
| Growth Rate | Slow |
| Soil Type | Sandy, gritty and sharply draining (cactus or succulent mix) |
| Water Need | Low — allow the soil to dry out completely between waterings |
Planting & Establishment
- Best Planting Season: Plant during the warm season once the risk of frost has passed — in spring in zone 10a, spring through autumn in zone 10b, and at any time of year in zone 11 and above.
- How to Plant:
- Hole Preparation: Dig the planting hole about 50–100% wider than the root ball so the roots can spread into loosened soil.
- Soil Amendments: Blend only a small amount of organic matter into gritty, free-draining soil; add coarse sand, grit or pumice if the ground holds water.
- Planting Depth: Set the plant with the base of the rosette at soil level and cover the roots lightly — never bury the crown. Where rainfall is heavy, plant slightly above the surrounding ground so water cannot pool around the base.
- Growth Speed & Expectations: A slow grower, so expect steady, modest growth as the rosette gradually fills out and produces offsets.
Soil, Watering & Drainage Care
- Soil Mix & Drainage Needs: Grow in a sandy, sharply draining medium — a cactus or succulent mix, or garden soil amended with grit and lava rock or pumice — with only a little organic matter. In containers make sure there are plenty of drainage holes and never leave the pot standing in water; excellent drainage is the single most important factor in preventing root rot.
- Watering Schedule & Technique:
- Young / Newly Planted: Water lightly after planting, then water sparingly, letting the mix almost dry out before watering again.
- Established: Water deeply but infrequently, always letting the soil dry out fully between waterings — overwatering is the most common cause of failure.
- Seasonal Adjustments: Cut back further in cool, wet weather and through winter dormancy, and water a little more often only during prolonged heat.
Climate, Light & Hardiness
Aloe vera is a heat- and drought-adapted succulent that grows in full sun to partial shade and needs sharp drainage. It is frost-tender - the site data places it in hardiness zone 10b and warmer (10a with the right overwintering care) and notes it prefers to stay above about −5°C (23°F).
Quick Climate Specifications
| Climate Zones | Desert, Mediterranean, subtropical, tropical, or indoor |
|---|---|
| USDA Hardiness Zones | Approximately 10a–10b and warmer |
| Optimal Temp Range | ~20–30°C (68–86°F) |
| Cold Damage Begins | Near 0 to 2°C (32–36°F) |
| Approx. Survival Minimum | Around −3 to −5°C (27–23°F) briefly, only if the plant is dry; varies |
| Frost Tolerance | Low |
| Light Conditions | Full sun to partial shade |
| Wind Tolerance | Moderate |
Sunlight & Light Exposure
Optimal Light Setup
Full sun to light shade gives firm, well-coloured leaves and encourages flowering. Indoors it needs the brightest possible window and may not bloom.
Shade & Heat Management
It grows in shade but becomes softer and more prone to pests; move plants gradually into strong sun to avoid sunburn.
Temperature Extremes & Hardiness
USDA Hardiness & Regional Limits
Reliably outdoors only in near-frost-free climates (about zone 10a–10b and warmer). In colder areas it is grown in pots and sheltered or brought indoors over winter.
Cold Damage & Winter Protection
For a succulent, the key distinction is that cold combined with wet soil is far more damaging than dry cold. It survives brief light frost only when kept dry and sheltered; wet, cold conditions cause rot. In frosty spells, keep plants dry, out of wind, and mulched.
Extreme Heat Tolerance
Excellent - well suited to intense desert heat with dry air.
Wind, Humidity & Microclimate
Dry-Air Tolerance
Very high - thrives in dry air; this is separate from its heat tolerance and from its poor tolerance of cold, wet conditions.
Microclimate Recommendations
A hot, sunny, sharply drained spot - raised ground or a gritty container - keeps roots dry and frost risk low; a container root zone freezes faster and should be sheltered in cold weather.
Growing in Pots, Balconies & Indoors
Aloe vera is one of the easiest and most popular houseplants – the grower confirms it grows well indoors, though it needs good light and may not flower in a room. It is equally at home in a pot on a sunny balcony or patio.
Quick Details
- Container Size: Choose a pot 30-50% larger than the root ball
- Indoor Suitability: A genuine houseplant – give it the brightest spot you can; blooming is unlikely indoors
- Best Spot: Bright light to full sun; tolerates some shade (but is more pest-prone in shade)
- Soil & Drainage: Sandy soil with lava grit or other inert material (a cactus mix works; also fine in regular potting mix), a little organic matter, and plenty of drainage holes
- Watering in Pots: A small amount only – let the mix dry between waterings, never overwater
Indoors & On the Windowsill
- A real houseplant: Grows well indoors given enough light; a bright windowsill is perfect. Turn the pot occasionally so it grows evenly.
- Flowering: It may not bloom indoors – that is normal and does not affect the plant’s health.
- Safety: The gel and leaf latex are toxic to cats and dogs if chewed – keep the plant out of reach of pets and small children.
On a Balcony or Patio
- Light & heat: Thrives in a sunny, sheltered spot; reflected heat from walls and paving suits it. Move it in before frost in cold climates.
Choosing the Pot, Soil & Long-Term Care
- Pot & drainage: A pot 30-50% larger than the root ball with plenty of holes; terracotta breathes and dries fast, which suits a succulent. Skip a standing saucer, or empty it the same day to prevent root rot.
- Potting mix: Free-draining and gritty – cactus mix or regular potting mix with added grit and a little organic matter.
- Feeding: Light feeder – once a year is plenty.
- Repotting: Pot up every couple of years, or when offsets crowd the pot; you can pot up the ‘pups’ separately.
Grower’s Container Tip
- The grower’s method: Choose a container 30-50% larger than the root ball; use sandy soil with lava grit or other inert material (a cactus mix, or regular potting mix) with a little organic matter; make enough holes for good drainage; you can feed once a year; water sparingly and let it dry between waterings; better to skip the saucer, but if used make sure it is dry by the end of the day.
Growing this plant in a greenhouse
A greenhouse can give aloe vera plant frost protection, cold protection, humidity control and extra warmth.
Greenhouse at a glance
| Greenhouse suitability | Good - clearly useful |
|---|---|
| Main benefits | frost protection, cold protection, humidity control, extra warmth |
| Outdoor protection advisable below | about 2°C |
| Maintain greenhouse minimum | around 2°C for active growth |
| Suitable types | unheated greenhouse, polycarbonate greenhouse |
| Heating | Heating is optional - useful mainly for winter growing in cold areas. |
Related greenhouse guides
- Greenhouses: How to Choose the Right Greenhouse
- Polycarbonate Greenhouses: What to Look for Before Buying
- Greenhouse Climate Control: Temperature, Ventilation and Humidity
Fertilizing & Feeding
A light feeder: Aloe vera stores water and nutrients in its fleshy leaves, so an occasional light, low-nitrogen feeding during active growth is enough, whether it is grown outdoors in the garden or indoors as a houseplant, with feeding held back while growth slows.
Quick Fertilizing Specs
| Feeding Level | Light feeder |
|---|---|
| Main Nutrient Priority | A low-nitrogen fertilizer formulated for cacti and succulents |
| Best Feeding Period | Spring into summer while actively growing |
| Organic Options | A small amount of organic matter worked into a fast-draining mix at planting |
| Reduce/Stop Feeding | Hold off feeding through cold weather, frost protection, and any dormant rest |
| Micronutrients | Not typically needed for this low-demand succulent beyond what a complete feeding provides |
Feeding by Growth Stage
Active growing season
Support leaf growth and gel production while the plant is actively growing, indoors or out.
| Nutrient direction | A diluted, low-nitrogen fertilizer made for cacti and succulents supports steady growth without forcing soft, weak leaves. |
|---|---|
| Timing | During the warm active growing months in spring and summer, or the brighter part of the year for indoor plants. |
| Frequency | An occasional light feeding is enough for this slow-growing succulent; more is not better. |
| Fertilizer types | A diluted, low-nitrogen cactus/succulent fertilizer, A small amount of organic matter worked into the mix |
| Precautions | Keep feeding light and infrequent; overfeeding encourages soft, weak leaves and raises the risk of rot in slow-draining soil. |
Cool-season or low-light rest
Let the plant rest without pushing new growth during cool weather, frost protection, or low indoor light.
| Nutrient direction | None – withhold fertilizer while the plant is resting. |
|---|---|
| Timing | During cool weather, winter rest outdoors, or the darker part of the year indoors. |
| Frequency | No feeding at this stage. |
| Fertilizer types | No feeding at this stage; do not fertilize until active growth resumes. |
| Precautions | Do not fertilize during this rest – feeding a plant that is not actively growing wastes nutrients and can encourage rot in cold or overly damp soil. |
Nutrient Deficiency Signs & Corrections
Older leaves fade to pale green or yellow and overall growth slows further than this naturally slow grower’s usual pace.
| Possible causes | an extended stretch with no feeding in a very lean, fast-draining mix, nutrient leaching from heavy rain or frequent watering, an old, depleted potting mix that has not been refreshed |
|---|---|
| Appears first on | older, lower leaves |
| What to check | time since the last feeding, potting mix age and drainage, recent watering or rainfall volume |
| Possible correction | Apply a diluted, low-nitrogen cactus/succulent fertilizer during the next active growth period. |
New leaves emerge pale yellow while the veins stay green.
| Possible causes | high soil or potting mix pH tying up available iron, waterlogged or compacted roots limiting uptake, cold, slow-draining soil |
|---|---|
| Appears first on | new growth |
| What to check | soil or mix pH and drainage, root health and any signs of rot, recent overwatering |
| Possible correction | Correct drainage first, then apply a chelated iron product per its label if the chlorosis persists. |
Leaf tips and margins turn brown or scorched even though the plant is being watered.
| Possible causes | fertilizer salt buildup in a container with limited drainage, under-watering that concentrates salts in the mix, excessive or too-frequent feeding for this light feeder |
|---|---|
| Appears first on | leaf tips and margins |
| What to check | recent feeding amount and frequency, pot drainage and watering routine, any visible salt crust on the soil surface |
| Possible correction | Flush the potting mix thoroughly with water to leach excess salts, then return to lighter, less frequent feeding. |
Pruning, Training & Seasonal Maintenance
Aloe vera stays low-pruning-tolerance at the level of any single rosette — there is one growing point and it is never headed back — but it offsets far more prolifically than its dwarf relatives and older primary rosettes can develop a short visible stem, so real clump management and occasional stem rejuvenation apply here in a way they don’t for smaller Aloe species. The safest window for removing the spent flower spike is after the Summer bloom finishes; dead-leaf and offset cleanup can happen any time. It is also the most cold-tolerant plant in this Aloe grouping’s data (to roughly -5°C), which widens its safe working season somewhat, though fresh cuts should still not meet a cold snap.
Quick Pruning & Maintenance Specs
| Pruning Tolerance | Low for an individual rosette; Low-to-Moderate for the clump overall |
| Primary Pruning Window | After the Summer bloom fades |
| Secondary Maintenance Window | Any time, for dead leaves and offset (pup) management |
| Typical Frequency | 1–2 times per year sanitary; clump division only occasionally, as pups fill in |
| Main Objective | Manage a heavily offsetting clump + sanitary cleanup; occasional stem rejuvenation on old rosettes |
| Young Plant Priority | Leave undisturbed; remove only damaged leaves |
| Mature Plant Priority | Thin/divide crowding pups; remove spent flower spike and dead leaves; rejuvenate any leggy old stem |
| Best Tool Type | Precision snips (spike, leaves); knife (pup division); secateurs (thicker offset/stem material) |
| Avoid Heavy Pruning During | Cold snaps — more frost-tolerant than most relatives here, but fresh cuts are still vulnerable |
Pruning by Plant Age & Size
Newly Established
Remove only damaged or transport-crushed leaves while the plant roots in.
Young / Formative
No formal training system applies, but because Aloe vera offsets prolifically almost from the start, decide early whether to remove pups to keep one dominant rosette or let them fill in as a clump.
Mature / Established
Thin or divide congested offset clumps, remove the spent flower spike at its base, clear dead lower leaves, and on old primary rosettes that have developed a visible short stem, consider a rejuvenation cut if it becomes leggy or top-heavy.
Seasonal Pruning Schedule
| Post-Flowering (Summer) | Cut the spent inflorescence spike at its base once flowers finish | Do not remove healthy leaves or developing pups | Tidier crown; no effect on next season’s bloom |
| Ongoing Sanitary | Remove dried lower leaves; thin or divide crowded offset clumps | Do not strip green, functional leaves for tidiness | Better airflow through the clump, reduced rot/pest harborage |
Structural Pruning & Training
Canopy/clump density is genuinely relevant here given how readily this species offsets: a congested colony traps moisture and dead material between rosettes, so periodic thinning or division improves airflow. Renewal pruning also applies on old, stemmed rosettes that have become leggy — these can be cut back and re-rooted much as with the more shrub-like Aloe principis.
Special Growth to Remove
Offsets (pups) are the dominant growth to manage — more actively than for sparser dwarf relatives — keep some for propagation or a fuller clump, or remove and pot up surplus pups once they have 2–3 leaves of their own. Remove the spent flower spike at its base after bloom, plus dead or dry lower leaves. There are no true rootstock suckers or watersprouts, as this plant is not typically grafted.
Container & Small-Space Pruning
Aloe vera is well suited to growing as a houseplant, but its prolific offsetting means pots fill in faster here than with slower, sparser aloes — proactive pup removal or periodic division matters more in containers, both to keep a manageable specimen and to protect root space and nutrients for the main rosette(s).
Tools
Precision snips for the flower spike and leaf cleanup; bypass secateurs for thicker offset or short-stem material on older clumps; a clean knife for pup division. Loppers, saws, and hedge shears are not warranted at this plant’s scale.
Tool Hygiene & Disease Risk
Increased, not routine: fleshy tissue is prone to rot entering fresh cuts, particularly on the larger basal cuts made during pup division or stem rejuvenation. Use a clean blade and let cuts callus/dry before any contact with moist soil.
Cut Placement & Technique
Cut the flower spike close to its base. Remove dead leaves at their point of attachment. For pup division, cut cleanly through the connecting tissue at the base and let both the pup and the parent wound callus before watering or replanting. For stem rejuvenation, cut through firm healthy tissue below the leggy portion and let the cut top dry before re-rooting.
Heavy Pruning & Rejuvenation
Tolerated only on old, stemmed rosettes that have become leggy or top-heavy: the stem can be cut back (“beheaded”) and the top re-rooted, while the remaining base often resprouts offsets. This is occasional, not routine, and young rosettes without stem development should never be cut this way — clump size is normally controlled by dividing pups instead.
Post-Pruning Care
Let all cut surfaces dry and callus before watering; this matters more on the larger cuts from division or rejuvenation. Skip fertilizing after cutting — it isn’t needed to force regrowth. Watch cut and division sites for rot, and give a freshly beheaded or divided plant light shade until new growth resumes.
Common Pruning Mistakes
Stripping healthy green leaves for tidiness, which reduces the plant’s stored reserves and photosynthetic area; letting offset clumps become overcrowded without dividing; cutting into a young rosette’s single growing point; watering immediately over large fresh cuts and inviting rot.
When NOT to Prune
Avoid pruning right after transplanting, during active bloom, ahead of frost or cold snaps (even though this is the most cold-tolerant aloe in this group, fresh cuts remain vulnerable), and during prolonged wet weather that favors rot at cut sites.
Recommended Tools (by task)
- Spent flower spike removal (mature plant) → precision_snips: clean cut on a soft-tissue spike.
- Pup division or stem rejuvenation cut → grafting_knife: sterile, clean blade limits rot on fleshy tissue.
- Thicker offset or short-stem material on an older clump → bypass_secateurs: needed once tissue exceeds what a knife handles cleanly.
Propagation Guide
Aloe vera plant can be propagated by separating naturally produced offsets or divisions and can also be raised from seed. Individual leaf cuttings are not recommended.
Quick Propagation Specs
| Best Propagation Method | Offsets or pups; seed also possible |
| Seed | Valid for raising the species |
| Leaf Cuttings | Not recommended |
Seed Propagation
Sow fresh, mature seed in a clean, well-drained succulent propagation medium. Keep the medium lightly moist rather than wet and provide warm, bright conditions while seedlings establish. Avoid fixed germination times, temperatures or sowing depths unless they are documented for the exact species.
Vegetative Propagation
Separate a healthy offset or division only when it has enough basal tissue to establish independently. Pot it into a very well-drained succulent growing medium.
Aftercare
Keep newly propagated plants in excellent drainage and avoid prolonged wet conditions around developing roots. Increase light gradually after seedlings or vegetative propagules are established.
Bloom & Flower Guide
Quick Details
- Bloom Season: Summer
- Time to First Bloom: Only on mature plants, usually from around three to four years old
- Flower Appearance: Tubular yellow, orange or red flowers on a tall unbranched spike (raceme)
- Edibility: Ornamental bloom – the plant’s leaf gel is used, but the flowers are not a food (and the yellow leaf latex is a strong laxative)
Detailed Blooming Overview
A well-grown, mature aloe vera sends up a tall flower spike in summer, lined with slender tubular flowers in yellow, orange or red. Young plants rarely bloom – flowering is a sign the plant has settled in and reached a good size.
Flower Characteristics
- Tubular, pendulous flowers in yellow, orange or red
- Carried in a dense spike (raceme) held well above the rosette
Bloom Care & Thinning
- Encouraging bloom: Plenty of light, a mature root system and a cooler winter rest help trigger flowering.
- Pollination: The nectar-rich tubular flowers draw bees, moths and nectar-feeding birds.
- After flowering: Cut the spent flower spike down at the base.
Bloom Health & Protection
- Aloe mite can distort the flower spikes and growing points into warty galls; there is no easy cure, so remove and destroy affected tissue promptly to slow its spread.
Fruit & Uses
Safety note first: only the clear inner gel of the Aloe vera leaf is eaten – the rind and the yellow latex (sap) just beneath it are bitter, laxative and not meant to be consumed. Once the rind and latex are trimmed away, the gel is eaten raw or blended into juice and beverages.
Quick Edible Specs
| Edible Parts | Leaves (inner gel only) |
|---|---|
| Main Use(s) | Culinary (juice/beverage); traditionally used topically and medicinally, no health claims implied here |
| Eaten Raw or Cooked | Raw (gel), typically blended into a drink |
| Preparation Required | Peel/trim rind and remove the yellow latex layer (Remove toxic part) before using the gel |
| Harvest Season | All year |
| Time to First Harvest | Once the plant has established several mature leaves – see Care/Propagation for growth timing |
| Storage | Best used fresh; cut leaves keep only briefly, so harvest as needed rather than storing |
| Safety/Toxicity Caveat | Whole-leaf extract and the yellow latex are a strong laxative/irritant and are not food-safe in quantity; only the clear inner fillet gel, with rind and latex removed, is used as food |
Leaves
The thick, fleshy, spiny-serrated leaves are harvested at the base of the leaf, close to the stem, and can be cut any time of year. After cutting, stand or lay the leaf so the cut end drains, then slice off the outer rind and scrape or rinse away the yellow latex layer just under the skin before using the clear gel inside. The cleaned gel is used raw, blended into juice and other beverages, or added in small amounts to smoothies.
Harvesting
Harvest outer, mature leaves first and leave the central rosette intact so the plant keeps producing; taking too many leaves at once stresses the plant (see Pruning/Care for general leaf removal guidance). There is no single ripeness cue beyond leaf size and firmness – plump, fully formed leaves yield the most gel.
Preparation, Uses & Safety
Always trim away the rind and rinse or scrape off the yellow latex (aloin) before eating the gel – this latex is bitter and has a strong laxative effect, and is generally advised against for regular consumption, young children, and pregnant or nursing individuals. Once cleaned, the gel is used fresh in juice/beverages; it is also traditionally used topically and referenced as a medicinal plant, but no dosing or health claims are made here – consult a health professional for medicinal use.
Pests, Diseases & Troubleshooting
Overview: Aloes are tough, drought-adapted succulents whose troubles come far more from water and light management than from insects; the classic killers are root and basal rot from overwatering and cold-and-wet soil. The few real pests are sap-suckers (scale, mealybug, aphids) plus the disfiguring aloe mite and the stem-boring snout weevil, and the guiding principle is a lean, gritty, sharply drained mix, bright light, and restraint with the watering can. The medicinal aloe is prone to aloe rust and to basal/root rot in wet pots, and to root mealybug when grown long-term in containers.
Quick Troubleshooting Overview
| Issue / Pest | Main Symptom | Primary Solution |
|---|---|---|
| Aloe mite (aloe cancer) | Warty, cauliflower-like galls on leaves, flowers or stem | Cut out and destroy galled tissue; isolate the plant |
| Scale | Flat brown or white limpet-like discs on leaves, sticky film | Scrape off; horticultural oil to smother crawlers |
| Mealybugs | White cottony fluff in leaf axils and on roots | Dab with alcohol; systemic or oil for heavy cases |
| Aloe snout weevil | Sudden collapse, rot at base, notched leaf margins | Remove and destroy grubs; keep plants unstressed |
| Root / basal rot | Soft, brown, mushy base; leaves yellow and topple | Dry out, cut to clean tissue, re-root; gritty mix |
| Sunburn / etiolation | Bleached scorched patches, or pale stretched growth | Acclimatise to sun; move to brighter light gradually |
Common Pests & Management
- Aloe mite / aloe wart mite (Aceria aloinis):
- Symptoms: A microscopic eriophyid mite whose feeding hormones trigger warty, lumpy, cauliflower-like galls (“aloe cancer”) of orange-green distorted tissue on leaves, stems and especially flower spikes; the growth is permanent and spreads plant to plant.
- Prevention & Control: There is no easy cure once galling starts: cut galled tissue well back into clean growth, bag and destroy it, and isolate affected plants and tools. Buy clean stock, and reserve a miticide or systemic only for prized collections where surgery cannot keep pace.
- Scale (Aspidiotus nerii and allies):
- Symptoms: Flat, brown or greyish-white limpet-like discs stuck along leaves and in axils; heavy colonies sap vigour, yellow the leaf, and leave a sticky, sooty-mould film.
- Prevention & Control: Scrape or wipe off with an alcohol-dipped cloth and inspect new plants before introducing them. Smother crawlers with horticultural oil or insecticidal soap, repeating to catch successive generations; encourage ladybirds and parasitic wasps outdoors.
- Mealybugs (Pseudococcus / Planococcus spp.):
- Symptoms: Tufts of white, waxy, cottony fluff tucked into leaf axils and the crown, with honeydew and sooty mould; a root form (Rhizoecus) coats roots in white meal and stunts potted plants.
- Prevention & Control: Spot-treat clusters with a cotton bud dipped in rubbing alcohol and rinse the crown. For persistent or root infestations, drench or spray with insecticidal soap, neem or horticultural oil, and repot into fresh gritty mix after washing the roots.
- Aphids (Aloephagus myersi / Aphis spp.):
- Symptoms: Soft green, grey or black insects clustering on tender new growth and, above all, on developing flower stalks, causing distortion, honeydew and sooty mould.
- Prevention & Control: Blast off with a jet of water and squash small colonies by hand; conserve ladybirds, lacewings and hoverflies. Use insecticidal soap or neem for stubborn build-ups, focusing on the flower spikes where they gather.
- Aloe snout weevil (Brachycerus spp.):
- Symptoms: A serious, often fatal pest of larger aloes; adults notch leaf margins and lay eggs at the base, and the fat grubs tunnel into the stem and crown, so the first obvious sign is sudden collapse and rot from within.
- Prevention & Control: Inspect the crown and base regularly, remove and destroy grubs, and cut out and burn tunnelled tissue. Keep plants healthy and unstressed, clear debris that shelters adults, and treat the crown of valued specimens preventively where the weevil is known.
- Spider mites (Tetranychus urticae):
- Symptoms: Fine pale stippling and a dull, bronzed look to the leaves with faint webbing in the axils, worst on plants kept hot, dry and dusty indoors or under glass.
- Prevention & Control: Raise humidity and rinse the foliage to knock mites back and lay dust; avoid drought stress. Treat flare-ups with horticultural oil or insecticidal soap and conserve predatory mites by avoiding broad-spectrum sprays.
Diseases & Fungal Issues
- Aloe rust (Uromyces aloes):
- Symptoms: Round, hard, black or dark-brown sunken spots on the leaf surface, sometimes with a yellow halo; the blackened areas are permanent scars where the fungus has killed the tissue, worst in cool, damp, humid conditions.
- Treatment & Management: Improve airflow and light, keep water off the foliage, and avoid crowding. Remove badly spotted leaves; the damage is cosmetic and rarely fatal, so fungicide is seldom needed, though a copper or sulfur product helps in a persistent damp season.
- Root & basal stem rot (Pythium / Phytophthora / Fusarium spp.):
- Symptoms: The commonest killer: the base turns soft, brown and mushy, lower leaves yellow and wilt, and the rosette eventually topples from a rotten core – almost always the result of cold, wet, poorly drained soil or overwatering.
- Treatment & Management: This is a cultural problem first. Unpot, cut away all soft brown tissue back to firm white flesh, let the wound callus, and re-root the clean top in dry gritty mix. Prevent it with sharp drainage, lean soil, and watering only when the mix is dry.
- Bacterial soft rot (Pectobacterium / Erwinia spp.):
- Symptoms: A fast, foul-smelling collapse in which leaves turn to translucent, water-soaked mush, often after cold damage or a wound in warm, wet conditions; it can destroy a plant in days.
- Treatment & Management: There is no cure for the rotted tissue. Cut out and destroy affected parts immediately, salvage clean offsets or leaf tops, keep the plant dry and warm, and sterilise tools between cuts. Prevention is dry, airy, uninjured growth.
- Leaf spot / anthracnose (Alternaria / Colletotrichum spp.):
- Symptoms: Soft, sunken, tan-to-brown or blackish spots, sometimes concentric or water-soaked at the edge, appearing on leaves kept too wet or splashed overhead.
- Treatment & Management: Water at the base, keep foliage dry, and give bright airy conditions. Remove spotted leaves and improve spacing; copper fungicide is only warranted where spotting spreads in a damp spell.
Growing Difficulties & Abiotic Problems
- Overwatering & root rot:
- Cause & Symptoms: By far the most common cause of decline – soggy soil, heavy potting mix, or an unglazed of drainage suffocates the roots; leaves go soft, yellow or translucent and the base rots. Aloes tolerate drought far better than wet feet.
- Correction Strategy: Use a fast-draining cactus/succulent mix with extra grit or pumice and pots with drainage holes; let the mix dry fully between waterings and water sparingly in cool weather. Rescue rotting plants by cutting to clean tissue and re-rooting dry.
- Sunburn / sun scorch:
- Cause & Symptoms: Plants moved abruptly from shade or indoors into full sun develop bleached, straw-coloured or brown scorched patches on the most exposed faces; the marks are permanent.
- Correction Strategy: Acclimatise gradually over one to two weeks, giving light afternoon shade at first, and provide some shade in the fiercest summer heat. Bright but filtered light produces the best colour without scorching.
- Cold & frost damage:
- Cause & Symptoms: Most aloes are frost-tender; freezing turns leaves translucent, water-soaked and mushy, and cold-plus-wet invites soft rot. Tips and margins may brown even from a light chill.
- Correction Strategy: Keep plants above freezing, dry and sheltered through cold spells, and move containers under cover. Withhold water in cold weather – dry aloes shrug off far more cold than wet ones – and remove frost-damaged tissue once growth resumes.
- Etiolation (weak, stretched growth):
- Cause & Symptoms: Too little light makes the rosette stretch, pale and open, with weak, floppy leaves reaching toward the window and loss of compact form and colour.
- Correction Strategy: Move to the brightest position available or add a grow light, turning the plant for even growth. New growth will be tight and coloured again; the stretched section stays as it is unless the plant is beheaded and re-rooted.
What Helps – Products & Tools
For aloes the kit is minimal and mostly cultural: a gritty free-draining succulent mix and a clean sharp knife are the real tools. Reach for rubbing alcohol and horticultural oil or insecticidal soap for scale, mealybug, aphids and mites; copper or sulfur fungicide only for persistent rust or leaf spot in damp spells; and rooting after surgery to save rot-struck plants. The source’s generic “aphids, slugs, snails” misses the aloe’s real threats – the aloe mite, snout weevil, scale, and above all rot from overwatering.
Frequently Asked Questions
How often should I water an aloe vera plant?
Water deeply but infrequently, always letting the soil dry out fully between waterings — overwatering is the most common cause of failure. Cut back further in cool, wet weather and through winter dormancy, and water a little more often only during prolonged heat.
Can I grow aloe vera as a houseplant indoors?
Yes — aloe vera is one of the easiest and most popular houseplants and grows well indoors, though it needs good light and may not flower in a room. Give it the brightest spot you can, since blooming is unlikely indoors.
When does aloe vera bloom?
A well-grown, mature aloe vera sends up a tall flower spike in summer, lined with slender tubular flowers in yellow, orange or red. Flowering only happens on mature plants, usually from around three to four years old; young plants rarely bloom, since flowering is a sign the plant has settled in and reached a good size.
What is the best soil for growing aloe vera?
Grow aloe vera in a sandy, sharply draining medium — a cactus or succulent mix, or garden soil amended with grit and lava rock or pumice — with only a little organic matter. Excellent drainage is essential, since it is the single most important factor in preventing root rot.
Why is my aloe vera turning soft and mushy at the base?
This is almost always root or basal rot from overwatering — soggy soil, a heavy potting mix, or poor drainage suffocates the roots, so leaves go soft, yellow or translucent and the base rots. Fix it with a fast-draining cactus or succulent mix, extra grit or pumice, and pots with drainage holes, letting the mix dry out fully between waterings and watering sparingly in cool weather.