Plant Profile & Key Characteristics
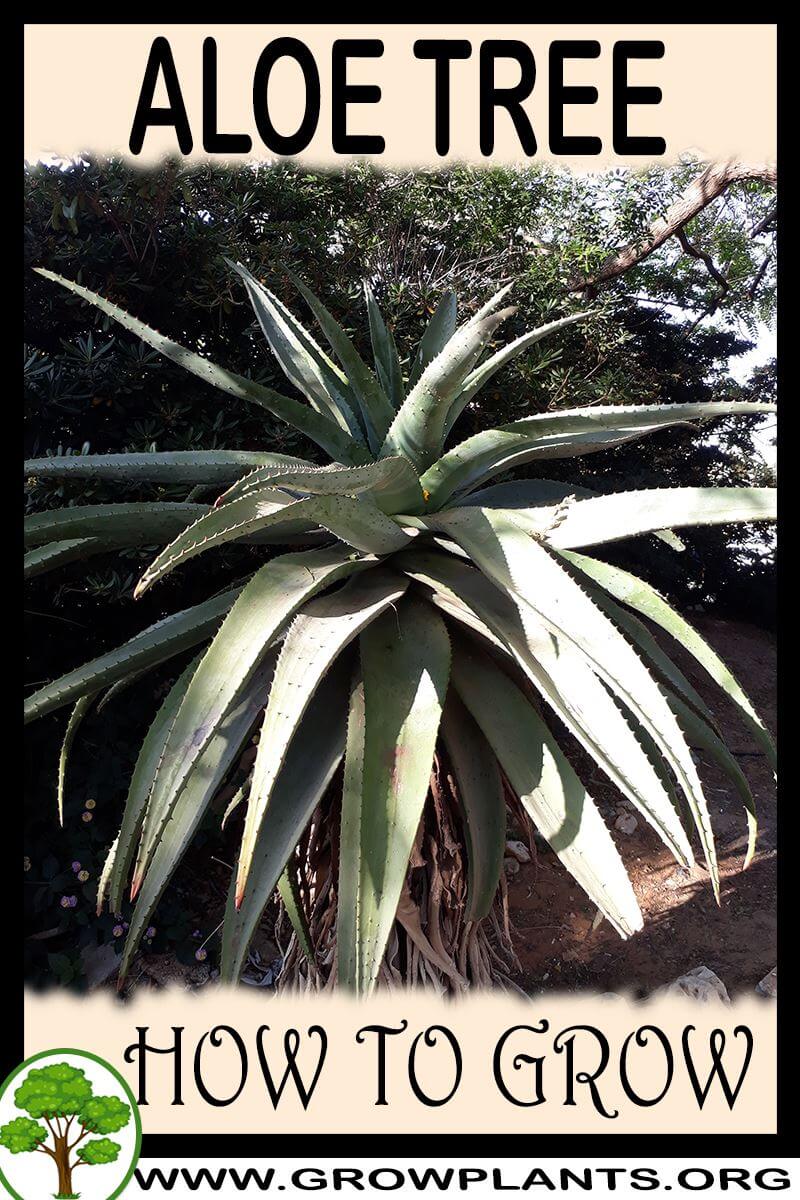
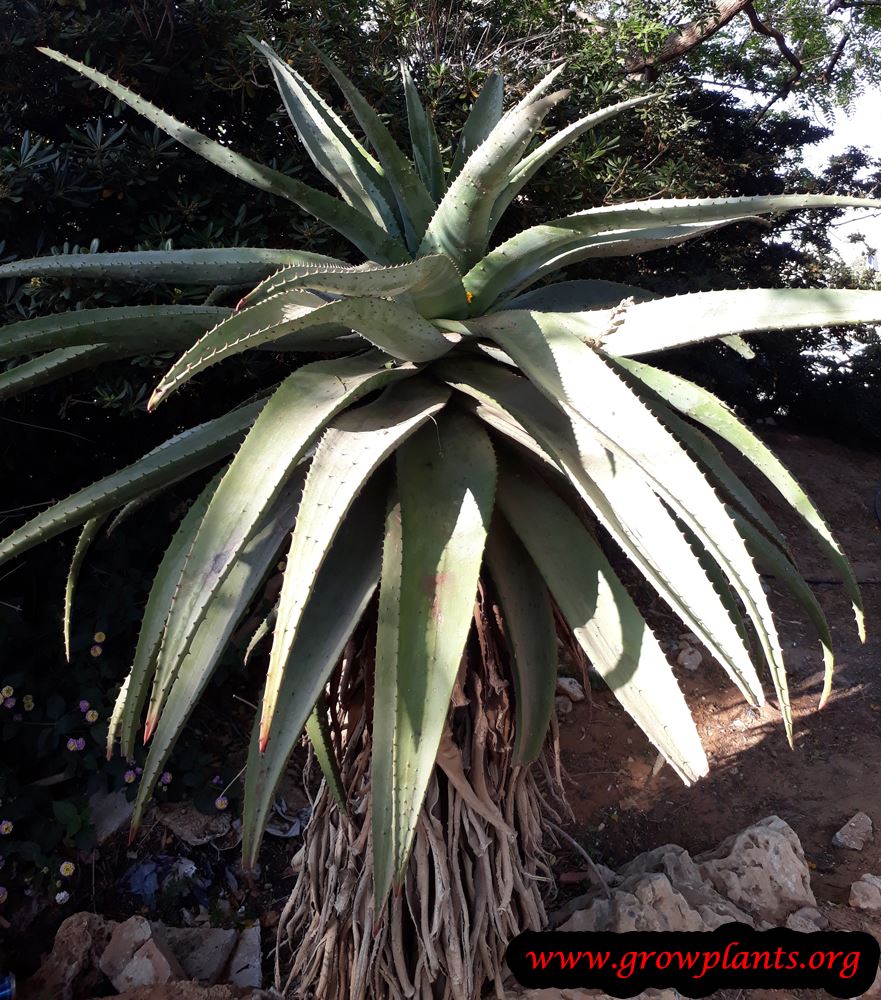
Overview: Aloe barberae is the largest of the aloes – a slow-growing, evergreen tree aloe that develops a thick branching trunk and can eventually reach 10-18 m (33-60 ft) tall. This drought-tolerant perennial is grown as a spectacular specimen tree, valued for its sculptural form and orange flower spikes.
Quick Specifications
| Specification | Attribute |
|---|---|
| Plant Type / Life Cycle | Perennial succulent |
| Foliage Type | Evergreen |
| Mature Size | A true tree aloe – reaching ~10-18 m (33-60 ft) tall over many years |
| Growth Rate | Slow |
| Root System | Shallow, fibrous root system |
| Toxicity | Leaf sap/latex contains aloin, a bitter purgative – mildly toxic if ingested; the genus is listed as toxic to dogs and cats. Handle the cut sap with care. |
| Hardiness | USDA zone 10b+ (to zone 10a with winter protection) |
Growth Form & Structure
- Height & Spread: In the ground a mature plant reaches tree-like proportions of roughly 10-18 m (33-60 ft) tall with a wide crown over decades. It grows readily in pots, where it stays more compact and portable. Best grown outdoors or in a container in full sun; not suited to low-light indoor culture.
- Growth Habit & Form: Large tree aloe with a stout, smooth trunk that branches repeatedly into a broad, rounded crown, each branch tipped with a rosette of long recurved leaves; the tallest of all aloes.
- Lifespan & Maturity: Very long-lived; slow-growing but ultimately develops into a large tree over several decades.
Anatomy & Physical Features
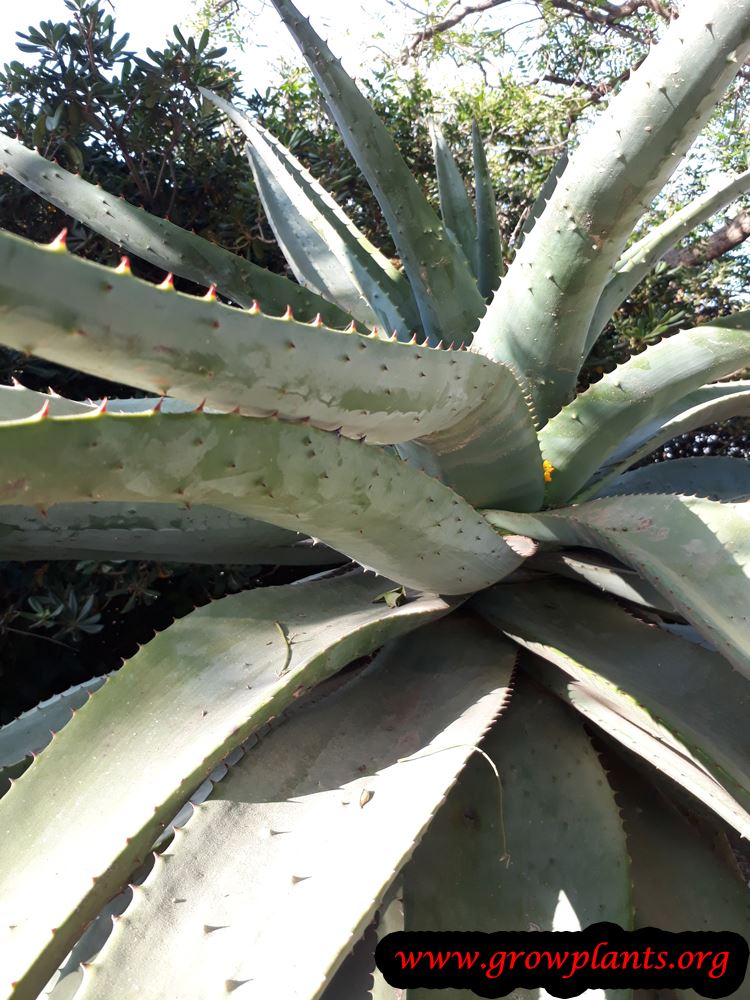
- Leaves & Foliage: Green, fleshy, recurved leaves 30-60 cm (12-26 in) long with finely toothed edges, held in terminal rosettes.
- Flower Characteristics: Orange, tubular flowers borne in a conical raceme on an upright stalk above the foliage (blooms in autumn, winter, summer).
Primary Uses & Landscape Value
- Functional & Ornamental Roles: Grown almost exclusively as an ornamental, valued for its sculptural rosette and fleshy, often colourful foliage. Well suited to xeriscape and rock gardens, dry sunny borders, gravel and coastal plantings, and containers; drought-tolerant and low-maintenance once established. Used as a dramatic specimen or feature tree and focal point in large, frost-free dry gardens.
Care Guide: Planting, Soil & Watering
Overview: Aloe tree is a drought-tolerant succulent that grows best in full sun to light shade with frost-free warmth, storing water in its fleshy, rosette-forming leaves. It needs sharply well-draining, sandy or gritty soil and only light, infrequent watering, as it rots quickly in heavy or waterlogged ground.
Quick Care Requirements
| Requirement | Ideal Condition |
|---|---|
| Planting Season | Warm season — spring in zone 10a, spring to autumn in 10b, year-round in zone 11+ |
| Growth Rate | Slow |
| Soil Type | Well-draining, sandy or gritty (cactus / succulent mix) |
| Water Need | Low — let the soil dry out between waterings |
Planting & Establishment
- Best Planting Season: Plant in the warm season once frost risk has passed — spring in zone 10a, spring through autumn in 10b, and any time of year in zone 11 and warmer.
- How to Plant:
- Hole Preparation: Dig a hole about 50–100% wider than the root ball so the roots can spread into loosened soil.
- Soil Amendments: Mix in only a small amount of organic matter and, if the ground is heavy, add coarse sand or grit to sharpen drainage.
- Planting Depth: Set the plant with its root collar at soil level and cover lightly; in high-rainfall spots, plant slightly raised above grade so water cannot pool around the base.
- Growth Speed & Expectations: A slow grower — expect steady, unhurried growth even in ideal conditions, so give it room and be patient.
Soil, Watering & Drainage Care
- Soil Mix & Drainage Needs: Fast drainage is essential. In the ground use sandy, gritty soil; in pots use a cactus/succulent mix (or regular potting mix opened up with sand and lava grit) in a container with generous drainage holes to prevent root rot.
- Watering Schedule & Technique:
- Young / Newly Planted: Water lightly to settle the soil, then keep watering sparing while the plant establishes.
- Established: Water deeply but infrequently, always letting the soil dry out almost completely before watering again — never leave it sitting in water.
- Seasonal Adjustments: Cut back sharply in winter, and water a little more often only during prolonged heat.
Climate, Light & Hardiness
Aloe tree (Aloe barberae) is a large tree-form aloe suited to dry, frost-free climates - desert, Mediterranean, subtropical, and tropical regions - grown in full sun to half shade. It is more cold-sensitive than many smaller aloes, reliably hardy only to about USDA zone 10b, with established plants briefly tolerating zone 10a conditions.
Quick Climate Specifications
| Climate Zones | Desert, Mediterranean, subtropical, and tropical |
|---|---|
| USDA Hardiness Zones | Typically zone 10b and warmer; established plants may overwinter in zone 10a with protection |
| Frost Tolerance | Low; best treated as frost-free |
| Light Conditions | Full Sun to Half Shade |
| Wind Tolerance | Moderate |
| Salt / Coastal Tolerance | Moderate |
Sunlight & Light Exposure
Optimal Light Setup
Full sun to half shade suits this large tree-form aloe well, encouraging a sturdy trunk and dense rosette growth at the branch tips.
Direct Sun Requirement
Several hours of direct sun daily support strong, healthy growth.
Shade & Heat Management
Handles hot, sunny climates well; little to no supplemental shade is typically needed given its full-sun tolerance.
Best Exposure / Orientation
A south- or west-facing site with excellent drainage and shelter from strong wind suits this large, eventually tree-sized succulent.
Temperature Extremes & Hardiness
USDA Hardiness & Regional Limits
Hardy outdoors only in roughly USDA zone 10b and warmer, more cold-sensitive than many smaller Aloe species; with a sheltered, well-drained site, established plants can persist through occasional dips into zone 10a. Cold tolerance varies with plant age and exposure duration - young plants are more vulnerable. Not suited to growing indoors as a houseplant, so gardeners in marginal climates need a warm, frost-free outdoor microclimate rather than relying on winter shelter indoors.
Cold Damage & Winter Protection
Plant in a location sheltered from wind, and mulch and cover the base with dead leaves ahead of any cold snap; frost can scorch or blacken foliage.
Frost Sensitivity
Frost-sensitive; best treated as a frost-free plant, since it lacks the option of being moved indoors for winter given its eventual tree size and light needs.
Extreme Heat Tolerance
Very heat tolerant and well matched to hot desert, Mediterranean, and subtropical summers.
Wind, Humidity & Microclimate
Humidity Preferences
Prefers dry to moderate humidity, consistent with its semi-arid native range.
Dry-Air Tolerance
Good tolerance of dry air and low-humidity climates.
Wind Tolerance
Moderate wind tolerance once established; a sheltered site reduces wind stress and helps limit cold-wind damage in winter.
Coastal / Salt Tolerance
Tolerates coastal conditions reasonably well in warm climates, though direct salt spray on foliage is best avoided.
Rainfall & Seasonal Moisture
Adapted to climates with a dry season; avoid consistently wet, humid conditions which raise the risk of rot.
Microclimate Recommendations
A wind-sheltered, sun-facing spot with sharp drainage benefits this large succulent, and container culture with winter shelter is an option in marginal zones while the plant is young and small.
Growing in Pots, Balconies & Indoors
The tree aloe is a striking, tree-forming succulent that in time reaches 1-3 m (3-10 feet), so it is not a long-term houseplant – indoors it has neither the light nor the room it needs. It is, however, an excellent container plant while young, and a potted specimen can spend the warm season on a sunny patio and be sheltered indoors over winter in cold climates.
Quick Details
- Container Size: A pot about 30-50% larger than the root ball; pot up a size as it grows
- Indoor Suitability: Not a true houseplant – too large and light-hungry; young plants can be sheltered indoors only over winter
- Best Spot: Full sun to light (half) shade
- Soil & Drainage: Sandy, gritty, free-draining mix – cactus/succulent mix or regular potting mix with lava grit; plenty of drainage holes
- Watering in Pots: Water sparingly and let the mix dry out between waterings; never overwater
Indoors & On the Windowsill
- Houseplant limits: The grower’s answer is clear – it is not suited to indoor life as a houseplant. It grows into a small tree and needs full sun, more than a room can give.
- Young plants: A young plant can sit in the brightest, sunniest window you have, but plan to move it outdoors or into a conservatory as it gains size.
- Overwintering: In cold-winter climates, keep a potted young plant frost-free indoors or under glass through the cold months, then return it to full sun.
- Safety: Aloe sap is toxic to pets and children if chewed – keep young indoor or overwintering plants out of reach.
On a Balcony or Patio
- Light & wind: Give it the sunniest, most sheltered spot; the top-heavy rosette can catch the wind, so stand the pot where it is stable and shielded from strong gusts. Walls and paving throw back heat and dry pots fast – check moisture in hot spells.
- Practicalities: A maturing potted specimen is heavy – use a sturdy, stable container and make sure drainage water can escape and run away freely.
Choosing the Pot, Soil & Long-Term Care
- Pot & drainage: Choose a container about 30-50% bigger than the root ball with plenty of drainage holes. It is better not to stand the pot in a saucer; if you do, empty it so the base is dry by the end of the day – standing water rots the roots.
- Potting mix: A sandy, gritty, free-draining mix – lava grit and other inert grit suit it; a cactus/succulent mix works, and it also grows well in regular potting mix with only a little organic matter.
- Feeding: Feed lightly, about once a year – it is not a hungry plant.
- Repotting: Pot up into the next size when roots fill the container, refreshing the gritty mix as you go.
Grower’s Container Tip
- Keep the base dry: The grower prefers not to use a saucer under the pot at all; if you must, tip out any water that collects so the base is dry by the end of the day.
Fertilizing & Feeding
A very light feeder; this drought-adapted succulent grows slowly and needs only occasional, dilute feeding during active growth, and none while resting. Overfeeding does more harm than too little.
Quick Fertilizing Specs
| Feeding Level | Light |
|---|---|
| Main Nutrient Priority | Lean, nitrogen-light feeding; avoid rich, high-nitrogen fertilizers |
| Best Feeding Period | Warm, active growing season only |
| Organic Options | A little compost or worm castings worked into a gritty mix; slow-release granular made for cacti and succulents |
| Micronutrients | Not routinely needed; correct only if a specific deficiency appears |
| Soil pH | Tolerates a wide range; prefers sharply drained, gritty media |
| Reduce/Stop Feeding | Taper off as growth slows and stop entirely during dormancy |
Feeding by Growth Stage
Active growth (warm season)
Support steady, compact growth without forcing soft, leggy stems.
| Nutrient direction | Lean, nitrogen-light feeding using a dilute balanced or low-nitrogen fertilizer; this succulent stores water and grows slowly, so it feeds sparingly. |
|---|---|
| Timing | During the warm, actively growing months when new leaves or stems are forming. |
| Frequency | Infrequent, light feeding through the growing season is usually enough; err toward under-feeding. |
| Fertilizer types | A dilute, balanced or low-nitrogen liquid fertilizer, A slow-release granular formulated for cacti and succulents |
| Precautions | Overfeeding is the main risk; excess fertilizer and salts scorch roots and cause soft, floppy growth. Feed less rather than more, and never feed dry, stressed plants. |
Dormant rest (cool or dry season)
Let the plant rest; growth halts and nutrient demand disappears.
| Nutrient direction | None – withhold fertilizer while the plant is dormant. |
|---|---|
| Timing | During cool winter months or hot, dry rest periods when the plant is not actively growing. |
| Frequency | No feeding at this stage. |
| Fertilizer types | No feeding at this stage; resume only when active growth returns. |
| Precautions | Do not fertilize until warm weather and active growth resume. |
Nutrient Deficiency Signs & Corrections
Pale, stretched, or unusually soft new growth with washed-out color.
| Possible causes | Insufficient light causing etiolation, Low nitrogen availability in an exhausted mix, Root confinement in a small pot |
|---|---|
| Appears first on | Newest growth at the stem tips. |
| What to check | Light exposure and day length, How long since the plant was last repotted or fed, Whether roots fill the container |
| Possible correction | Move to brighter light, refresh the mix, and offer a light, dilute low-nitrogen feeding during active growth rather than heavy fertilizing. |
Browned, dried leaf tips or edges and crusty deposits on the soil surface or pot.
| Possible causes | Accumulated fertilizer salts from overfeeding, Poor drainage or infrequent leaching, Underwatering that concentrates salts in the mix |
|---|---|
| Appears first on | Leaf tips and margins, oldest leaves first. |
| What to check | Recent fertilizer amounts and how often it was fed, Drainage and how freely the mix dries, Salt crust on the soil or container rim |
| Possible correction | Stop feeding, flush the mix thoroughly with plain water to leach salts, and resume only very light feeding once the plant recovers. |
Yellowing between the veins on newer leaves while the veins stay greener.
| Possible causes | Iron becoming unavailable in alkaline or overly wet mix, Waterlogged, poorly aerated roots, High soil pH reducing micronutrient uptake |
|---|---|
| Appears first on | Newest leaves. |
| What to check | Alkalinity of the mix and the irrigation water, Drainage and root health, Whether the mix stays wet too long |
| Possible correction | Improve drainage and correct alkalinity; if it persists, apply a chelated iron product according to its label. |
Pruning, Training & Seasonal Maintenance
Aloe tree is a genuinely arborescent succulent – a woody trunk (or trunks) topped by rosettes of leaves only at the branch tips, growing to 1–3m – so, unlike a stemless Aloe, cutting decisions here really do shape the plant’s structure over time, not just its tidiness. Each rosette is a single growing point: removing it (by pruning or damage) stops that particular branch tip extending further but commonly prompts new branching lower down, which is the main lever for controlling the plant’s eventual shape. Flowering does not harm the plant – it blooms repeatedly across autumn, winter and summer – so pruning is timed around growth and shape, not around protecting a bloom.
Quick Pruning & Maintenance Specs
| Pruning Tolerance | Low to Moderate – sanitary and occasional branch-tip decisions, not routine shaping |
| Primary Pruning Window | Any time for dead leaves; after a bloom cycle finishes for spent flower stalks |
| Typical Frequency | Occasional |
| Main Objective | Remove dead leaves and old stems; manage branch structure only when a tip is lost or when a specific shape is wanted |
| Young Plant Priority | Let the trunk/leader establish; avoid removing growing tips unless branching is specifically desired |
| Mature Plant Priority | Remove dead leaves and any fully dead branch; deadhead spent bloom stalks |
| Best Tool Type | Bypass secateurs for leaves and stalks; loppers or a pruning saw for woody branches/trunk work |
| Avoid Heavy Pruning During | Do not remove a healthy growing tip without accepting that branch will not extend further from that point |
Pruning by Plant Age & Size
Newly Established
Leave the young plant’s single growing tip alone so it can establish a leader trunk; remove only dead or transplant-damaged leaves.
Young / Formative
This is effectively a single-leader tree in its early years. If a branching, multi-headed form is wanted eventually, that typically develops on its own once the plant matures, flowers, or the tip is lost to damage – it is not something to force early.
Mature / Established
Remove dead leaves at the rosette base and any branch that has fully died back. Deadhead spent flower stalks after each bloom. If a specific branch is removed for size or shape, expect new growth to break lower on that same stem rather than the cut tip regrowing.
Seasonal Pruning Schedule
Post-Flowering
Objective: tidy the plant and redirect energy. Remove: spent flower stalks once bloom has finished. Do not remove: the rosette itself – it will flower again in a future cycle. Expected response: no impact on the plant’s survival or next bloom, since flowering is not a one-time event here.
Ongoing Sanitary
Objective: general upkeep. Remove: dead leaves and any fully dead stem/branch. Do not remove: leaves that are still more than half green, or a live growing tip without reason.
Structural Pruning & Training
Branch/tip selection is the real structural tool on this species: removing a growing tip forces branching below the cut, which is how a denser, more candelabra-like form is achieved over time, while leaving tips alone keeps a taller, more open form. Because each cut tip does not regrow from that exact point, structural decisions should be made deliberately and are effectively permanent for that stem.
Special Growth to Remove
- Dead leaves at the base of each rosette – remove as they finish.
- Fully dead branches or stems – remove back to healthy tissue.
- Spent flower stalks – deadhead after each bloom cycle.
Container & Small-Space Pruning
Container growing is possible outdoors (this species is not suited to growing as an indoor houseplant), and in a container its eventual size can be kept more compact by choosing not to remove growing tips (which would otherwise force wider branching) and by root-limiting through the pot itself, rather than by size-reduction pruning of the canopy.
Tools
- Bypass secateurs – leaves and flower stalks.
- Loppers – smaller branch removal.
- Pruning saw – thicker, woody trunk or branch cuts on a mature specimen.
Tool Hygiene & Disease Risk
Routine – clean, sharp tools are enough for leaf and stalk work; the genus’ listed pests (aphids, slugs, snails) are not tool-transmitted. For larger branch/trunk cuts, letting the wound dry and callus in the open air (rather than sealing it) is the standard succulent-tree practice to reduce rot risk.
Cut Placement & Technique
Cut dead leaves close to their base. For branch removal, cut back to a clean junction rather than leaving a stub, and expect new growth to emerge just below the cut. Leaf margins carry spines – wear gloves when handling cut material.
Heavy Pruning & Rejuvenation
Whole-plant rejuvenation in the woody-shrub sense is not how this species is managed – there is no framework of renewable canes or spurs. A single overgrown or damaged branch can be removed and the plant will typically respond with new growth lower on that stem, but this is a targeted, occasional correction, not a routine hard-pruning cycle.
Post-Pruning Care
No feeding after routine leaf or stalk removal. After any branch or trunk cut, let the wound dry in the open air, keep watering on the normal dry-between-waterings schedule, and avoid overwatering the plant while a large cut is healing.
Common Pruning Mistakes
- Removing a growing tip casually, not realising the branch will not regrow from that exact point.
- Assuming this species can be hedged or hard-pruned like a shrub – it cannot.
- Sealing large cuts with wound paint instead of letting them air-dry and callus, which suits succulent tissue better.
When NOT to Prune
- Do not remove a healthy growing tip unless deliberately choosing to force branching there.
- Do not cut large branches during cool, wet weather, when cut succulent tissue is more prone to rot.
Recommended Tools (by task)
- bypass_secateurs – dead leaves and spent flower stalks; a clean cut on fleshy tissue.
- loppers – smaller branch removal on a young or mid-sized plant.
- pruning_saw – woody trunk or major branch cuts on a mature tree-form specimen.
Propagation Guide
Aloe tree is a genus-level Aloe page. Seed is a valid biological propagation method. Vegetative propagation by offsets or pups is appropriate only when the particular Aloe naturally produces them. Individual detached leaves are not recommended as a routine propagation method.
Quick Propagation Specs
| Seed | Valid for Aloe species generally |
| Offsets / Pups | Use only when naturally produced by the plant |
| Leaf Cuttings | Not recommended as a routine method |
Growing from Seed
Sow fresh mature Aloe seed in a clean, well-drained succulent propagation medium. Keep the medium lightly moist rather than wet and provide warm, bright conditions while seedlings establish.
Vegetative Propagation
Separate offsets or pups only when the plant has produced distinct basal growth capable of establishing independently. Do not assume every Aloe species clusters or produces offsets.
Aftercare
Maintain excellent drainage and avoid prolonged wet conditions around developing roots.
Bloom & Flower Guide
Quick Details
- Bloom Season: Mainly autumn and winter, sometimes into summer
- Time to First Bloom: Only once the plant is well grown and tree-like, which takes several years
- Flower Appearance: Orange, cone-shaped heads of tubular flowers on upright stalks
- Edibility: Not an edible flower; aloe leaf sap is bitter and acts as a purgative, so keep it away from children and pets
Detailed Blooming Overview
Aloe barberae, the tree aloe, is grown mainly for its bold form, but a mature specimen also flowers in the cooler months. Branched, cone-shaped flower heads rise above the rosettes and are rich in nectar, drawing sunbirds and other nectar-feeders through autumn and winter when little else is in bloom.
Flower Characteristics
- Orange, cone-shaped flower heads made up of many slim, tubular flowers.
- Carried in an inflorescence on an upright stalk held clear of the foliage.
- Nectar-rich and bird-pollinated, a valuable cool-season food source.
Bloom Care & Thinning
- Managing the bloom: Full sun and free-draining soil give the strongest flowering; the plant is very drought tolerant.
- Tidying up: Cut spent flower stalks back to the base once they have finished.
- Safety: The plant is not for eating – aloe sap contains bitter compounds that are a purgative and can upset pets.
Bloom Health & Protection
- Aloe gall mite: This tiny mite can distort growing tips and flower spikes into warty galls. Cutting out and disposing of affected spikes, and treating with a suitable miticide, helps limit its spread.
- Aphids on the flower stalk: Aphids may gather on soft flower stalks and encourage sooty mould; a firm jet of water or insecticidal soap keeps them down.
Pests, Diseases & Troubleshooting
Overview: Aloes are tough, drought-adapted succulents whose troubles are overwhelmingly cultural rather than biotic – the single biggest killer is overwatering, which triggers basal stem and root rot far faster than any insect. As a giant tree aloe (syn. A. bainesii), watch the thick trunk and branch crotches for scale, and note the stem is more susceptible to rot and to wind/frost cracks that invite soft rot. When pests do appear they are the usual succulent-house culprits (the gall-forming aloe mite is the one signature problem worth learning to recognise), and a healthy, gritty-potted, well-lit plant shrugs off most of them. Manage organically first: correct watering and light, keep foliage dry and airy, inspect new arrivals, and reach for oils or soaps only when a real infestation is confirmed.
Quick Troubleshooting Overview
| Issue / Pest | Main Symptom | Primary Solution |
|---|---|---|
| Aloe mite (aloe wart mite) | Warty, lumpy galls / cancer-like growths on leaves, stem or flower spike | Cut out and destroy galled tissue; isolate; miticide only if spreading |
| Overwatering rot | Soft, mushy, translucent base; leaves yellow and collapse | Stop watering; unpot, cut to clean tissue, re-root in gritty mix |
| Soft brown scale & mealybugs | Sticky honeydew, sooty mould, white fluff in leaf axils / on roots | Wipe off, horticultural oil or insecticidal soap; check roots |
| Spider mites | Fine stippling, dull bronzed leaves, faint webbing in dry heat | Raise humidity/airflow, hose off, miticidal oil |
| Aloe rust | Round black/brown corky spots with yellow halo on leaves | Mostly cosmetic; remove worst leaves, improve airflow |
| Sunburn / cold damage | Bleached tan patches or translucent frost-scorched leaves | Acclimatise to sun gradually; protect from frost |
Common Pests & Management
- Aloe mite / aloe wart mite (Aceria aloinis):
- Symptoms: The signature aloe pest. This microscopic eriophyid mite injects a growth-hormone-like toxin that causes abnormal, lumpy, warty galls – often called “aloe cancer” – on leaf edges, the stem, or especially the flower spike. Growth is distorted, corky and orange-tan. The mites themselves are invisible to the naked eye; you diagnose by the galls.
- Prevention & Control: There is no cure for galled tissue. Cut out and destroy every galled part well into clean tissue, sterilising the blade between cuts. Isolate the plant immediately – it spreads on wind, hands and tools to nearby aloes. For prized specimens a systemic/miticidal acaricide (e.g. a labelled abamectin or a sulfur-based miticide) applied to new growth can suppress spread; badly cancered plants are best discarded to protect a collection.
- Soft brown scale (Coccus hesperidum):
- Symptoms: Flat, oval, tan-to-brown limpet-like bumps clustered along leaf bases, undersides and the stem. They excrete sticky honeydew that turns leaves shiny then black with sooty mould. Heavy scale drains vigour and yellows leaves.
- Prevention & Control: Inspect leaf axils regularly. Scrub off small numbers with a fingernail or a cotton bud dipped in dilute alcohol. For wider infestations spray thoroughly with horticultural oil or insecticidal soap to smother them, repeating every 1–2 weeks; oil also clears the sooty mould. Encourage lacewings and parasitic wasps outdoors.
- Mealybugs, incl. root mealybugs (Planococcus citri / Rhizoecus spp.):
- Symptoms: Cottony white tufts tucked into leaf axils and the crown; foliar mealybugs leave honeydew and sooty mould. Root mealybugs are sneakier – white “mould-like” wax and grey insects on the roots and inner pot wall of a plant that is inexplicably stalling, yellowing or wilting despite correct care.
- Prevention & Control: Dab foliar colonies with an alcohol-tipped swab, then treat with horticultural oil or insecticidal soap. For root mealybugs, unpot and bare-root the plant, wash the roots, discard the old soil, and repot into fresh gritty mix and a clean pot; a systemic soil drench helps for persistent cases. Always quarantine new plants – this is how root mealybug arrives.
- Aphids (Aphis spp.):
- Symptoms: Soft green, grey or black insects crowding tender new growth and – most of all – the emerging flower stalk, which becomes sticky with honeydew and may distort. Ants farming the aphids are a giveaway.
- Prevention & Control: Dislodge with a firm jet of water. Small colonies wipe off easily; larger ones respond to insecticidal soap or a light horticultural oil. Preserve ladybirds, lacewings and hoverflies, which usually keep aphids in check outdoors.
- Spider mites (Tetranychus urticae):
- Symptoms: A hot, dry, still atmosphere (often indoors) brings fine pale stippling, a dull bronzed or greyish cast to the leaves, and in bad cases delicate webbing across leaf tips. Mites are pinprick specks on the undersides.
- Prevention & Control: They hate humidity and airflow – improving both is half the cure. Rinse the plant, then apply insecticidal soap or a fine horticultural/miticidal oil to leaf undersides, repeating to break the fast breeding cycle. Predatory mites are effective in greenhouses.
- Snout / vine weevil (Otiorhynchus sulcatus and relatives):
- Symptoms: Adults notch ragged bites out of leaf margins at night; the far more damaging cream, legless, C-shaped larvae live in the soil and devour roots and the corm-like base, causing sudden collapse of an apparently healthy plant – easily mistaken for rot.
- Prevention & Control: Check the root ball when repotting. Drench the soil with parasitic entomopathogenic nematodes (Steinernema/Heterorhabditis) in warm conditions to kill grubs biologically; a diatomaceous-earth ring deters adults. Remove and squash night-feeding adults by torchlight.
- Snails & slugs (Gastropoda):
- Symptoms: Most troublesome on aloes grown in shade or kept damp – they rasp irregular holes and silvery grazed scars into soft leaf tissue and seedlings overnight, leaving slime trails. (These are the real culprits behind much of the “pest” damage on shaded aloes.)
- Prevention & Control: Grow in brighter light and let the surface dry – both discourage them. Hand-pick after dark, set beer traps, and ring vulnerable plants with grit or diatomaceous earth; iron-phosphate pellets are a pet-safer bait if needed.
Diseases & Fungal Issues
- Basal stem & root rot (Fusarium / Pythium / Phytophthora spp.):
- Symptoms: The classic aloe killer. The base of the plant turns soft, brown-black, translucent and foul; lower leaves yellow, go limp and pull away easily. Almost always follows wet, cold, poorly drained soil.
- Treatment & Management: Prevention is everything – a fast-draining gritty/mineral mix, a pot with drainage, and watering only when dry. If caught early, unpot, cut away all soft tissue back to firm white flesh, dust the wound with sulfur or cinnamon, let it callus for several days, and re-root in dry gritty mix. Discard hopelessly rotted plants; a soil-drench fungicide is only a support to the cultural fix.
- Aloe rust (Phakopsora / Uromyces spp.):
- Symptoms: Round, hard, black-brown corky spots, often with a yellow halo, mainly on lower/older leaves. The black colour comes from oxidised phenols the leaf uses to wall off the fungus, so spots are self-limiting but permanent.
- Treatment & Management: Largely cosmetic and rarely fatal. Improve airflow, avoid wetting the foliage and reduce humidity. Remove the most disfigured leaves for looks. Fungicides are seldom warranted; a copper spray can slow spread on a valued plant.
- Bacterial soft rot (Pectobacterium / Erwinia spp.):
- Symptoms: Rapid, wet, mushy collapse of leaves or the whole rosette, often with a slimy texture and a distinct sour/rotten smell; can liquefy a plant within days in warm, humid, waterlogged conditions, frequently entering through a wound or frost/sun crack.
- Treatment & Management: No chemical cure. Cut out affected tissue far into clean flesh with a sterilised blade, or salvage a clean offset/leaf and discard the rest. Keep plants dry, uncrowded and unwounded; copper can offer some protective help but sanitation and dryness are decisive.
- Fungal leaf spot / anthracnose (Colletotrichum / Alternaria spp.):
- Symptoms: Sunken tan-to-black spots or blotches, sometimes with concentric rings or a watery margin, appearing on leaves kept wet or splashed, especially in still, humid air.
- Treatment & Management: Water at the soil, never over the leaves; space plants for airflow and give bright light. Remove spotted leaves and clear debris. A copper or sulfur fungicide checks stubborn outbreaks, but cultural drying usually suffices.
Growing Difficulties & Abiotic Problems
- Overwatering & poor drainage (the #1 killer):
- Cause & Symptoms: Soggy soil suffocates and rots roots; leaves yellow, soften, become translucent and mushy from the base, and the plant collapses. Far more aloes die from kindness (water) than from neglect.
- Correction Strategy: Use a sharply draining gritty/mineral mix and a pot with holes; water thoroughly only when the soil is fully dry, and much less in cool, dark or dormant periods. If rot has begun, treat as basal rot above.
- Sunburn & sun-stress reddening:
- Cause & Symptoms: A plant moved abruptly into fierce sun scorches into permanent bleached tan or white patches. Milder heat/drought/cold stress instead flushes leaves red, bronze or purple – protective pigment that is harmless and reversible.
- Correction Strategy: Acclimatise to full sun gradually over a couple of weeks, and give light shade in the fiercest midday heat of very hot climates. Read reddening as a signal to check water and exposure rather than as damage.
- Cold & frost damage:
- Cause & Symptoms: Frost ruptures leaf cells, leaving translucent, water-soaked, then brown mushy tissue; these wounds are prime entry points for soft rot. Most aloes are frost-tender.
- Correction Strategy: Keep plants above freezing; move containers under cover or fleece them before frost. Leave damaged leaves in place until danger passes (they shield the core), then trim once the plant is growing again.
- Etiolation (too little light):
- Cause & Symptoms: In deep shade the rosette stretches, pales, loses its tight symmetry and leans toward the light, with weak, widely spaced leaves; shaded plants are also softer and more pest-prone.
- Correction Strategy: Give bright light – ideally several hours of direct sun (acclimatised) or a very bright indoor spot. Stretched growth won’t retighten, but new growth will be compact.
- Edema (oedema):
- Cause & Symptoms: When roots take up water faster than leaves transpire it – typically cool, damp, overcast spells with wet soil – cells burst and leave corky, blister-like bumps or scabs on the undersides of leaves. Harmless but permanent.
- Correction Strategy: Ease off watering in cool, humid, low-light conditions and improve air movement and light. New leaves emerge clean.
What Helps – Products & Tools
For this genus the toolkit is deliberately simple and cultural-first: a gritty, fast-draining succulent/mineral mix and a well-drained pot are your primary “disease control.” For the occasional pest, reach for horticultural (neem) oil and insecticidal soap against scale, mealybugs, aphids and spider mites; isopropyl alcohol on a swab for spot-treating; a sulfur or copper fungicide for stubborn rust or leaf spot; sulfur/cinnamon as a wound dressing after cutting out rot; diatomaceous earth and iron-phosphate bait against weevils, snails and slugs; and entomopathogenic nematodes for soil grubs. A systemic soil drench is the fallback for hidden root mealybug or heavy scale. Always follow the label, and spray oils in the cool of the evening to protect the plant and pollinators.