



Plant Profile & Key Characteristics
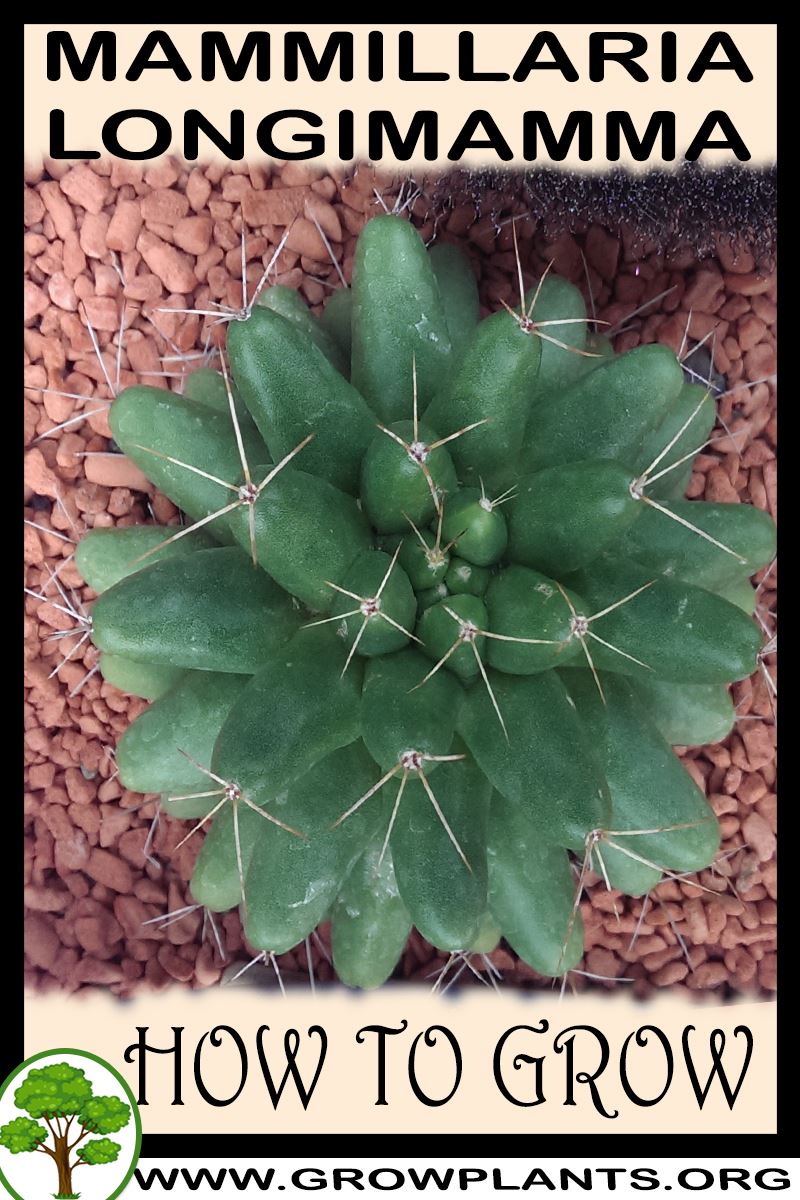
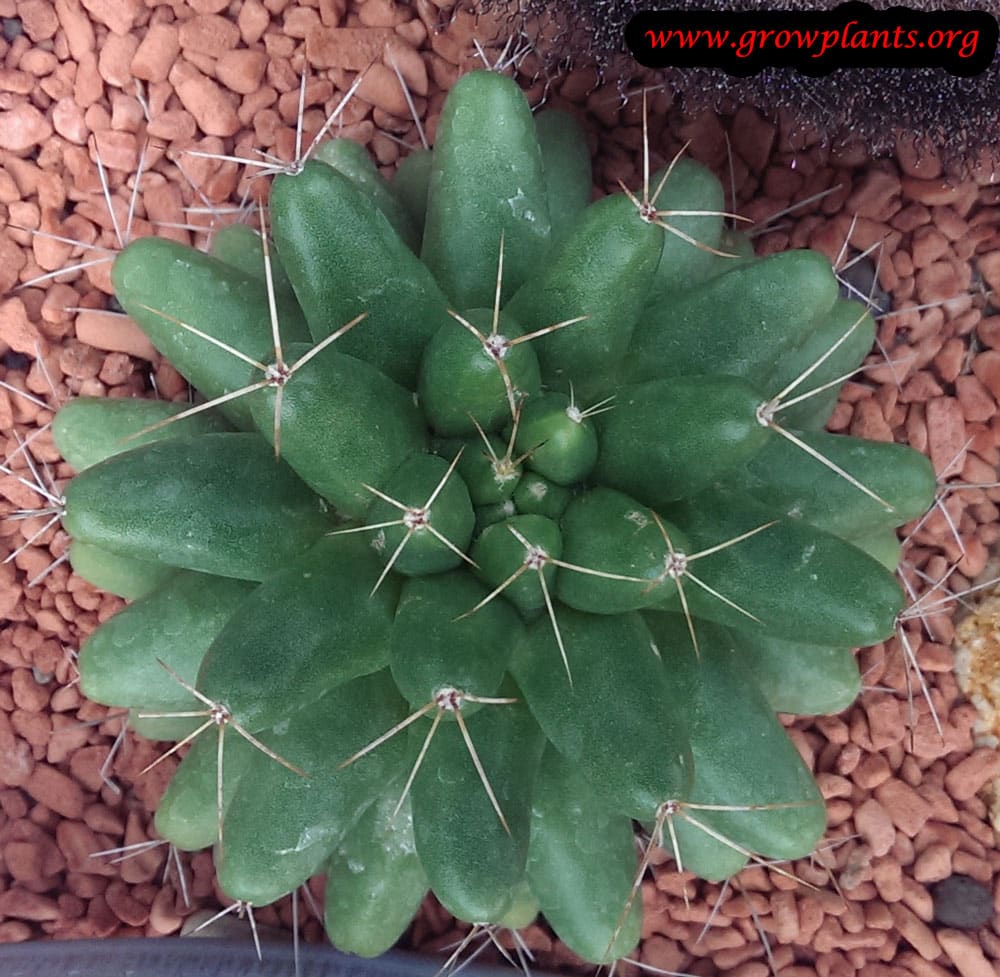
Overview: Mammillaria longimamma is a small, slow-growing perennial cactus 5-15 cm high with long finger-like tubercles, forming low clusters; grown as a drought-tolerant ornamental succulent.
Quick Specifications
| Specification | Attribute |
|---|---|
| Plant Type / Life Cycle | Perennial (succulent cactus) |
| Foliage Type | Evergreen (leafless succulent stems) |
| Mature Size | 5-15 cm (2-6 in) |
| Growth Rate | Slow |
| Root System | Shallow, fibrous |
| Toxicity | Non-toxic (spines are the physical hazard) |
| Hardiness | USDA 10-11 (12 with care) |
Growth Form & Structure
- Height & Spread: 5-15 cm (2-6 in); suits shallow containers 20-50% wider than the plant.
- Growth Habit & Form: Clustering stems with long, prominent tubercles, forming a low mound or half-ball.
- Lifespan & Maturity: Long-lived, slow-growing perennial succulent.
Anatomy & Physical Features
- Leaves & Foliage: Leafless; green stems with long tubercles tipped by white, red or yellow spines.
- Flower Characteristics: Relatively large yellow trumpet-shaped flowers in a crown at the top (see Bloom guide).
Primary Uses & Landscape Value
- Functional & Ornamental Roles: Ornamental pot, rockery and windowsill succulent; popular collector’s cactus.
Care Guide: Planting, Soil & Watering
Overview: Mammillaria longimamma (Mammillaria longimamma) is a slow-growing, drought-tolerant desert cactus for full sun (zones 10–11 (12 with care)). It needs a gritty, fast-draining cactus mix and only sparse watering, and it must stay above about -2°C.
Quick Care Requirements
| Requirement | Ideal Condition |
|---|---|
| Planting Season | Spring to summer/autumn (warm season) |
| Growth Rate | Slow |
| Soil Type | Gritty, fast-draining cactus/succulent mix |
| Water Need | Low – let soil dry out fully between waterings |
Planting & Establishment
- Best Planting Season: Spring to summer in zone 10, spring to autumn in zone 11, and year-round in zone 12.
- How to Plant:
- Hole Preparation: Set into a shallow hole matching the small, shallow root system, in a sharply drained, sunny spot; a shallow clay pot works well.
- Soil Amendments: Use a gritty cactus mix and add a layer of gravel, lava rock or pebbles at the base for drainage; avoid rich, moisture-holding compost.
- Planting Depth: Set the base of the stem at soil level and firm gently so the plant is stable; stake with a stick if it tends to topple.
- Growth Speed & Expectations: A slow grower that gradually clusters into a mound; patience is needed as it builds size over years.
Soil, Watering & Drainage Care
- Soil Mix & Drainage Needs: A sharply drained, gritty cactus/succulent mix is essential — poor drainage quickly causes rot. In a pot 20–50% larger than the plant, add gravel or lava rock at the base, ensure drainage holes, and refresh the mix every 2–4 years.
- Watering Schedule & Technique:
- Young / Newly Planted: Water sparingly after planting, letting the mix dry out fully before watering again.
- Established: Water only when the soil has dried right through, then give a modest soak — established plants store water and tolerate long dry spells.
- Seasonal Adjustments: Keep almost completely dry through the cool winter months and water a little more only in active summer growth; check drainage and protect from heavy snow.
Climate, Light & Hardiness
Mammillaria longimamma is a sun-loving, drought-tolerant, rosette-forming cactus suited to desert, mediterranean and subtropical climates. It is hardy in roughly USDA zone 10–11, and with the right care it can also succeed in zone 12, briefly tolerating cold to about −2°C (28°F).
Quick Climate Specifications
| Climate Zones | Desert, mediterranean, subtropics |
|---|---|
| USDA Hardiness Zones | 10–11; also possible in zone 12 with the right care |
| Optimal Temp Range | Approximately 18–30°C (64–86°F) during active growth |
| Approx. Survival Minimum | Established plants may briefly tolerate temperatures down to about −2°C (28°F) in well-drained soil |
| Frost Tolerance | Low |
| Light Conditions | Full sun |
Sunlight & Light Exposure
Optimal Light Setup
Full sun keeps the cone-shaped, rosette-clustering stems compact and is needed for the crown of yellow, trumpet-shaped flowers; it is not typically grown as an indoor houseplant.
Direct Sun Requirement
Direct sun is important for healthy, tight growth and flowering.
Shade & Heat Management
Handles intense desert and mediterranean summer sun well once established.
Best Exposure / Orientation
An open, unshaded rockery, raised bed, or clay container in full sun.
Temperature Extremes & Hardiness
USDA Hardiness & Regional Limits
Reliable outdoors in USDA zones 10–11, and the site notes it can also be grown in zone 12 with the right care. Its own planting-season guidance lengthens with warmth: spring-to-summer planting in zone 10, spring-to-autumn in zone 11, and possible all year in zone 12.
Cold Damage & Winter Protection
Keep the soil on the dry side going into winter and protect from heavy snow; well-drained soil and reduced watering are what allow it to briefly tolerate cold near −2°C without rotting.
Frost Sensitivity
Low to moderate for an established, dry-rooted plant; hard or prolonged freezes are damaging.
Extreme Heat Tolerance
Very good; well adapted to hot, dry desert and mediterranean summers.
Wind, Humidity & Microclimate
Humidity Preferences
Prefers the low-to-moderate humidity typical of desert and mediterranean climates.
Dry-Air Tolerance
High - well adapted to dry air.
Rainfall & Seasonal Moisture
Adapted to climates with a pronounced dry season; sharply drained soil matters more than rainfall amount, since wet conditions around the shallow roots and stem base invite rot.
Microclimate Recommendations
A raised, gritty, well-drained spot in full sun suits it best; in marginal zone 12 sites, siting under an eave or similar rain shelter through winter reduces rot risk without blocking light.
Growing in Pots, Balconies & Indoors
This little globular Mammillaria stays tiny (5-15 cm) – not a shade-tolerant houseplant, but a perfect small subject for the sunniest windowsill or a hot balcony pot.
Quick Details
- Container Size: A clay or plastic pot only 20-50% wider than the plant – no need for depth, as the roots are shallow (grower)
- Indoor Suitability: Not a general houseplant; grows and flowers best on the brightest, sunniest sill
- Best Spot: Full sun
- Soil & Drainage: Cactus potting mix over a base layer of gravel, lava rock or pebbles; drainage holes essential (grower). A ready-made cactus and succulent soil mix provides that structure without mixing it yourself.
- Watering in Pots: Small amounts – let it dry out between waterings
Indoors & On the Windowsill
- Not a deep-room houseplant: The grower marks it as not suited to indoor life as a general houseplant – it wants far more light than a room interior offers.
- Windowsill growing: On the sunniest sill it does very well; its small size makes it an ideal sill or shelf cactus, flowering with enough direct sun.
- Winter rest: Keep it cool and nearly dry through the dormant season to encourage flowering.
On a Balcony or Patio
- Light & heat: It loves a hot, sunny, sheltered spot, with reflected heat off walls and railings; the small pot dries fast, so keep it on the dry side.
- Practicalities: Move it under cover before cold, wet weather arrives.
Choosing the Pot, Soil & Long-Term Care
- Pot & drainage (grower): A clay or plastic pot 20-50% larger than the plant, no need for depth given the shallow roots; put a layer of gravel, lava rock or pebbles in the base and make sure there are drainage holes.
- Potting mix (grower): A proper cactus potting mix – free-draining and mineral.
- Pot material: Unglazed clay breathes and dries fast, which desert cacti prefer over moisture-holding glazed or plastic.
- Safety: Spiny – site it out of reach of children and pets, and handle with folded paper or thick gloves.
Grower’s Container Tip
- Repotting a spiny cactus (grower): Change the soil every two to four years. To lift it without getting spined, wrap the plant in folded paper or plastic wrap and ease it out onto a sheet of paper. Prepare the new pot with the gravel or rock layer in the base and part of the cactus mix, set the plant in place, then fill around it – for a small plant, spoon the mix in; for a larger one, use a small garden trowel – and firm the soil so the cactus sits stable and will not topple. If it is still unsteady, add a small stake to hold it.
Fertilizing & Feeding
A slow-growing, rosette-forming cactus that clusters into dense mounds from a shared base, needing only minimal supplemental feeding to stay compact and flower well.
Quick Fertilizing Specs
| Feeding Level | Light feeder |
|---|---|
| Main Nutrient Priority | Low-nitrogen, cactus-formulated feed during active growth |
| Best Feeding Period | Warm-season active growth |
| Reduce/Stop Feeding | Stop feeding as growth slows going into cooler weather |
| Soil pH | Prefers a gritty, very well-drained cactus mix; wide tolerance rather than a narrow pH target |
Feeding by Growth Stage
Active Growth
Support rosette clustering and yellow crown flowers without pushing soft growth that destabilizes the mounding clump.
| Nutrient direction | A diluted, low-nitrogen cactus fertilizer favoring compact, firm growth over rapid soft growth. |
|---|---|
| Timing | During the warm season while the plant is actively clustering and soil dries fully between waterings. |
| Frequency | A few light feedings spread through the active growing season is generally enough. |
| Fertilizer types | Diluted, low-nitrogen cactus fertilizer, Balanced liquid feed used at reduced strength |
| Precautions | Feed only into already-moist soil and keep concentrations light – since offsets share a common base, overfeeding one area can promote rot that spreads through the clump. |
Dormant / Rest Period
Let the plant rest through its natural cool-season slowdown without pushing new growth it cannot support.
| Nutrient direction | None – withhold fertilizer entirely while the plant is resting. |
|---|---|
| Timing | Cooler months when growth naturally slows or stops and watering is reduced. |
| Frequency | No feeding at this stage. |
| Fertilizer types | No feeding at this stage – resume only once active growth restarts. |
| Precautions | Do not fertilize during dormancy; this species’ shallow, clustered root base makes it especially prone to rot if fed while inactive. |
Nutrient Deficiency Signs & Corrections
Dull or pale stem color with visibly slower rosette offsetting during the active season.
| Possible causes | Long period without any feeding in a very lean potting mix, Root stress from compacted or old soil limiting nutrient uptake, Insufficient sun exposure reducing overall vigor |
|---|---|
| Appears first on | New offsets at the rosette margins |
| What to check | Confirm soil is fast-draining and not compacted, Check light exposure matches full-sun preference, Review how long it has been since the last feeding |
| Possible correction | If soil and light are ruled out, resume a light, diluted feeding during the next active growth window. |
Newest growth showing pale yellow coloring while older stem tissue stays green.
| Possible causes | High soil pH limiting iron availability, Overly wet or poorly aerated soil restricting root function, Root damage from repotting, pests, or rot reducing nutrient uptake |
|---|---|
| Appears first on | Newest areoles near the crown |
| What to check | Test soil drainage and confirm the mix is not staying wet, Check for old, compacted potting mix due for a change, Inspect roots for damage or rot |
| Possible correction | Correct drainage and soil condition first; if chlorosis persists, apply a chelated iron product per its label. |
Pruning, Training & Seasonal Maintenance
Mammillaria longimamma is a small, slow-growing cactus (5–15 cm) with cone-shaped stems bearing long, finger-like tubercles, connecting at the base and clustering into a rosette that can merge into a half-ball mass. It has no woody framework and no persistent flowering wood — its yellow, trumpet-shaped flowers form fresh each summer — so real "pruning" is limited to removing rot and, optionally, separating offsets, both allowed year-round per its own care data.
Quick Pruning & Maintenance Specs
| Pruning Tolerance | Low — sanitary cuts and offset separation only |
| Primary Pruning Window | Any time rot or dead tissue appears (per its own care data) |
| Typical Frequency | As needed — not a scheduled task |
| Main Objective | Remove rot to protect the rosette; separate offsets to propagate or manage cluster density |
| Young Plant Priority | Leave undisturbed while the first cone-shaped stem establishes |
| Mature Plant Priority | Remove rot promptly; thin or divide the rosette cluster if wanted |
| Best Tool Type | Sterile grafting knife |
| Avoid Heavy Pruning During | Not applicable — heavy/structural pruning is never performed on this plant |
Pruning by Plant Age & Size
Newly Established
No pruning; check soil drainage rather than cutting anything, since drainage failure is the main early risk in this plant’s own care notes.
Young / Formative
No structural training — the cone-shaped stem and later rosette-clustering habit develop entirely on their own.
Mature / Established
As the rosette clusters and stems connect at the base, remove any rotten stems as soon as spotted, and separate healthy offsets (rooted or as calloused cuttings) if propagation or a looser cluster is wanted. Given its small mature size (5–15 cm), even a modest cluster can fill a pot, so division is mainly about propagation rather than crowding relief.
Special Growth to Remove
- Rotten stem tissue — cut back to clean, firm flesh immediately.
- Offsets, optionally — the rosette-clustering habit is natural, not a problem; remove and root unwanted offsets to propagate new plants or keep a tighter specimen.
Container & Small-Space Pruning
Grown in a wide, shallow pot (20–50% larger than the root ball, shallow roots) with gritty, fast-draining cactus mix. No canopy pruning applies; container maintenance is watching drainage and, at a repot every 2–4 years, checking between the clustered rosette stems for hidden rot, where moisture can linger against the tubercles.
Tools
A sterile, sharp grafting knife for cutting out rot or separating offsets — spines make hand separation risky, and the cuts are small and precise given the plant’s compact size.
Tool Hygiene & Disease Risk
Increased when cutting rot — disinfect the blade before and after so decay is not carried into a healthy offset or another plant. Routine hygiene otherwise.
Cut Placement & Technique
Cut well into clean, firm tissue beyond any visible rot; when separating an offset, cut close to its point of attachment and let both the parent’s scar and the offset’s base dry/callus in a shaded spot before potting.
Heavy Pruning & Rejuvenation
Not tolerated and not applicable — there is no oversized woody growth to cut back. A badly rotted cluster is better saved by removing affected stems and rerooting clean offsets than by any hard-prune style rejuvenation.
Post-Pruning Care
Keep cut material dry and shaded while wounds callus; resume this plant’s normal small watering only once cuts have fully dried, and protect the low rosette from heavy snow/rain per its own care notes.
Common Pruning Mistakes
- Leaving rot in place between the clustered rosette stems, where it can spread unseen.
- Handling offsets bare-handed given the spines.
- Watering too soon after a cut, before it has calloused.
When NOT to Prune
- Avoid unnecessary cutting on a healthy plant — there is no shaping need for this naturally clustering rosette form.
- Avoid dividing offsets during cold, wet, or heavy-snow conditions.
Recommended Tools (by task)
- grafting_knife — a sterile blade for precise rot removal and clean offset division on this spiny, clustering cactus.
Propagation Guide
The easiest way to propagate Mammillaria longimamma is by separating the daughter plants (offsets) that form where its clustering, cone-shaped stems join at the base, or by taking stem cuttings from a healthy plant; seed grows true species plants but takes longer to reach a similar size. All three methods are reliable, making this a genuinely easy cactus to propagate at home.
Quick Propagation Specs
| Best Propagation Method | Division of offsets (daughter plants) |
| Alternative Methods | Stem cuttings; seed |
| Propagation Difficulty | Easy |
| Seed True-to-Type | Usually true-to-type (species cactus, not a hybrid) |
| Vegetative True-to-Type | Yes |
| Best Propagation Season | Spring to summer, matching the plant’s recommended planting window |
| Seed Germination Time | Typically 1–4 weeks under warm conditions (general guidance for the genus; not specified in site data) |
| Cutting Rooting Time | A few weeks to a couple of months after the cut surface has fully callused |
| Germination Temperature | Roughly 21–27°C (70–80°F) |
| Seed Sowing Depth | Surface-sow, pressed lightly into the mix (typical for fine Mammillaria seed) |
Growing from Seed
Sowing Season
Sow in spring to summer in cooler hardiness zones (10), extending into autumn in zone 11, and possible year-round in zone 12, matching the site’s recommended planting window for this species.
Germination Conditions
Use a well-drained, sandy cactus mix in full sun once seedlings establish; keep lightly moist but never waterlogged. Germination can be uneven, so allow several weeks before judging success.
Seedling Care
Water sparingly and increase light gradually; young seedlings are slow-growing, like the mature plant.
Stem Cuttings
Cutting Type
Per the site’s method, take a cutting from the cactus body itself — for a clustering plant like this, that can mean cutting the whole cactus into pieces rather than removing a single tip.
Cutting Preparation
Cut with a sterile knife. Let the cut surface heal (callus) in the shade before planting — this can take a few weeks and even months, longer than for many other cacti.
Rooting Setup
Once callused, set the cutting on well-drained soil with a stake or other support so it doesn’t fall over, cover lightly with soil at the base and sides, and water sparingly.
Rooting Hormone
Not necessary; the site’s method relies on callusing rather than hormone treatment.
Division, Offsets, Pups & Suckers
This species naturally clusters, with multiple cone-shaped stems joining at the base to eventually form a mound. When separating a daughter plant, dig around it carefully and lift it with as much of its own root system intact as possible — a plastic spatula (or a firmer tool, depending on the soil) works well to uncover the roots, and an air blower or a gentle stream of water can clear soil without damaging them; let the roots dry before replanting. Offsets that come away with their own roots establish quickly. Watch for spines when handling.
Bloom & Flower Guide
Quick Details
- Bloom Season: Summer.
- Time to First Bloom: Typically within a few years of maturity.
- Flower Appearance: Yellow, trumpet-shaped flowers near the crown – notably large and showy for a Mammillaria.
- Edibility: Ornamental only; not grown as an edible flower.
Detailed Blooming Overview
Mammillaria longimamma stands out for its long, finger-like tubercles and, especially, for its flowers: they are among the largest in the genus, bright yellow and funnel-shaped, opening around the top of the plant in summer. The generous size of the blooms relative to the plant makes a flowering specimen particularly rewarding.
Flower Characteristics
- Colour: yellow.
- Form: large, trumpet-shaped flowers.
- Position: around the top of the plant, in a loose crown.
Bloom Care & Thinning
- Cool, dry winter rest: the main trigger for good summer flowering.
- Full sun through the growing season builds the reserves for those large blooms.
- Resume watering gently in spring to swell the buds; no deadheading beyond removing spent flowers.
Bloom Health & Protection
- Mealybugs can nestle between the fat tubercles near the buds – spot-treat with surgical spirit on a cotton bud or a light horticultural oil.
Fruit & Uses
Mammillaria longimamma (finger or pineapple cactus) is expected to produce the small red “chilito”-type berries typical of the Mammillaria genus after its yellow, crown-like flowers fade, though a species-specific record of this exact fruit being eaten was not found. Any fruit, if eaten, is taken raw, as with other Mammillaria.
Quick Edible Specs
| Edible Parts | Fruit |
|---|---|
| Main Use(s) | Occasional raw snack, by extension from the wider Mammillaria genus |
| Eaten Raw or Cooked | Raw |
| Preparation Required | None beyond avoiding the spines while picking |
| Harvest Season | Weeks after the summer bloom (see Blooming) |
| Time to First Harvest | Only once the plant is mature enough to flower and fruit |
| Storage | Best eaten fresh |
| Safety/Toxicity Caveat | No known toxicity reported for the genus; species-specific edibility for this exact species is not independently confirmed, so treat any tasting as a curiosity, not a food source |
Fruit
Small, elongated berries are expected to form among the long, cone-shaped tubercles and spines after the yellow flowers fade, following the pattern of the wider Mammillaria genus. If harvested, pick once the fruit is fully coloured and slightly soft, working carefully around the spines.
Preparation, Uses & Safety
If eaten, it would be raw and unprocessed like other Mammillaria chilitos. Because a species-specific edibility record was not found, this is presented cautiously as inferred from the genus rather than a confirmed fact – the plant’s ornamental and collector value should take priority over any fruit use.
Pests, Diseases & Troubleshooting
Overview: Globular Mammillaria cacti are tough, largely pest-resistant succulents whose biggest threats come from moisture rather than insects: overwatering and poor drainage cause fatal root and stem rot, while sap-sucking mealybugs (including hidden root mealybugs) are the main insect problem. Management is overwhelmingly cultural — a gritty, fast-draining mix, restrained watering, bright light and good airflow prevent nearly every issue.
Quick Troubleshooting Overview
| Issue / Pest | Main Symptom | Primary Solution |
|---|---|---|
| Mealybugs | White cottony fluff in the axils, tubercle bases and spine clusters; sticky honeydew | Wipe/dab with alcohol; rinse; horticultural oil or insecticidal soap; inspect roots |
| Root mealybugs | Stalled growth, waxy white specks in the rootball at repotting | Bare-root, wash roots, treat soil drench; repot into fresh dry mix |
| Spider mites | Fine bronzing/rusty scarring on the sunniest side of the stem, faint webbing | Raise humidity/airflow, rinse, insecticidal soap or miticide |
| Scale insects | Immobile brown or grey bumps on the stem; sticky residue | Scrape off; alcohol swab; horticultural oil |
| Root & crown rot | Soft, blackening, sunken base; plant topples or turns mushy | Cut to firm tissue, dry/callus, replant in dry gritty mix; water sparingly |
| Corking / etiolation | Brown corky base (natural) or pale stretched growth (too little light) | Corking is normal ageing; move stretched plants to brighter light |
Common Pests & Management
- Mealybugs (Pseudococcus spp. / Planococcus citri):
- Symptoms: Cottony white masses tuck into the wool between tubercles, in the crown and around the spine areoles, with sticky honeydew and sometimes sooty mould; heavy infestations weaken the plant and cause slow decline. Easy to overlook because the fluff mimics the plant’s own natural wool.
- Prevention & Control: Isolate the plant; dab colonies with a cotton bud dipped in 70% isopropyl alcohol, then rinse. For recurring problems spray with insecticidal soap or a light horticultural/neem oil, coating the crevices; repeat every 7–10 days for two or three cycles. Encourage predatory ladybirds (Cryptolaemus) under glass.
- Root mealybugs (Rhizoecus spp.):
- Symptoms: Waxy white powder and small insects on the roots and inner pot wall, seen only when you unpot; growth stalls, the plant looks thirsty despite watering, and roots may die back. A very common, silent killer of potted cacti collections.
- Prevention & Control: Bare-root the plant, wash all soil from the roots under a tap, and cut away dead roots. Soak or drench the cleaned roots with insecticidal soap or a systemic soil drench, then repot into fresh, dry, gritty mix in a clean pot. Keep dry for a week before resuming light watering; check neighbouring pots.
- Spider mites (Tetranychus / red spider mite):
- Symptoms: In hot, dry, still air the epidermis develops fine rusty-bronze scarring, usually on the most exposed sunward face, with almost invisible fine webbing over the apex. Damage is permanent scarring rather than recovery, so early detection matters.
- Prevention & Control: Improve airflow and avoid baking the plant against glass; a firm water rinse dislodges colonies. Treat with insecticidal soap or a labelled miticide, covering the growing point; repeat to break the life cycle. Mites hate humidity, so occasional misting in dry spells helps as prevention.
- Scale insects (Diaspididae / Coccidae):
- Symptoms: Small immobile brown, tan or grey limpet-like bumps stuck to the stem, often along tubercle grooves, with sticky honeydew and sooty mould from soft scale. They resist casual watering and stay put.
- Prevention & Control: Scrape or pick off individuals and swab with alcohol. For larger numbers apply horticultural oil to smother them, repeating in 10–14 days; a systemic option can be used for stubborn infestations. Keep new acquisitions quarantined before adding them to a collection.
Diseases & Fungal Issues
- Root & stem (basal) rot (Fusarium / Phytophthora / Pythium):
- Symptoms: The base or roots turn soft, brown-black, sunken and mushy, often after cool wet spells or overwatering; rot creeps up the stem and the plant collapses or topples. By far the commonest cause of death in this genus.
- Treatment & Management: Prevention is everything: use a very free-draining mineral mix, unglazed pots, water only when the soil is fully dry, and never leave the plant standing in water. If rot appears, cut back to clean firm green tissue with a sterile blade, dust with sulphur or cinnamon, let the wound callus in dry air, then re-root the healthy top.
- Fungal / bacterial spotting:
- Symptoms: Sunken orange, brown or black spots and blemishes on the epidermis, favoured by water sitting on the plant and by poor ventilation; usually cosmetic but can become an entry point for rot.
- Treatment & Management: Water at the base and avoid wetting the body in cool weather; give strong light and moving air. Remove badly marked segments and improve conditions; a copper or sulphur fungicide can be used if spread is active, but cultural correction usually suffices.
Growing Difficulties & Abiotic Problems
- Overwatering / edema:
- Cause & Symptoms: Soft translucent patches, splitting skin or a bloated look from too much water and too little drainage — the fast track to rot.
- Correction Strategy: Switch to a gritty mineral mix, water thoroughly then let it dry completely, and reduce watering sharply in the cool, low-light rest period.
- Etiolation (weak stretching):
- Cause & Symptoms: The normally squat body elongates and pales, tubercles spread out and spines thin — a sign of insufficient light.
- Correction Strategy: Move to the brightest position available or add grow-lighting; acclimatise gradually to avoid scorch. Stretched growth will not shrink back but new growth firms up.
- Sunburn / scorch:
- Cause & Symptoms: Bleached white or tan patches on the sun-facing side after a sudden move into fierce direct sun or against hot glass.
- Correction Strategy: Introduce strong sun gradually and provide light shade during the fiercest midday heat; damaged tissue scars permanently, so prevention is key.
- Corking:
- Cause & Symptoms: A brown, bark-like corky layer spreading up from the base — often mistaken for rot but firm and dry to the touch.
- Correction Strategy: This is natural ageing and needs no treatment; confirm it is firm (corking) rather than soft (rot) and carry on with normal care.
What Helps – Products & Tools
For this cactus reach first for cultural fixes — a gritty mineral potting mix, unglazed pots and disciplined watering. Useful products are 70% isopropyl alcohol and cotton buds for spot-treating mealybugs, insecticidal soap and light horticultural or neem oil for mealybugs, scale and mites, a labelled miticide for persistent spider mite, and a sulphur or copper fungicide plus cinnamon/sulphur powder for sealing rot cuts.