Plant Profile & Key Characteristics
Overview: Helleborus dumetorum is a compact evergreen perennial reaching about 40-70 cm, valued as an ornamental and cut-flower plant for its early flat five-petalled blooms. It is a hardy clump-forming herbaceous species suited to shade and part-shade in zones 5-9.
Quick Specifications
| Specification | Attribute |
|---|---|
| Plant Type / Life Cycle | Perennial (herbaceous) |
| Foliage Type | Evergreen |
| Mature Size | 40-70 cm tall (16-28 inches) |
| Growth Rate | Moderate |
| Root System | Clump-forming from a short fibrous rootstock |
| Toxicity | Toxic – all parts are poisonous; not for consumption |
| Hardiness | USDA zones 5-9 |
Growth Form & Structure
- Height and Spread: Reaches 40-70 cm (16-28 inches) in the ground; also grown in planters and containers, and can be kept indoors.
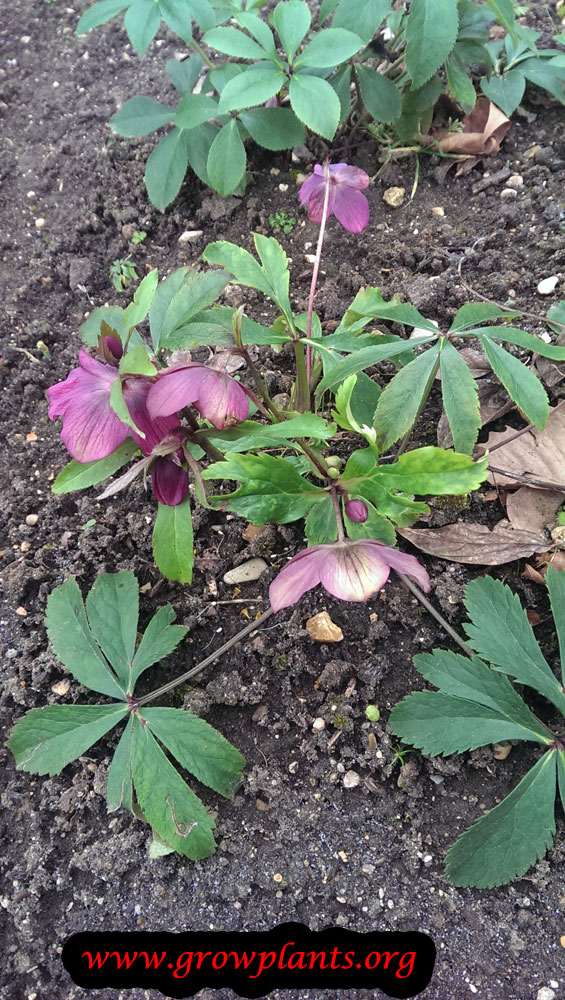
- Growth Habit and Form: Low, clump-forming herbaceous perennial with basal, divided foliage.
- Lifespan and Maturity: Long-lived perennial that establishes into a spreading clump at a moderate pace.
Anatomy & Physical Features
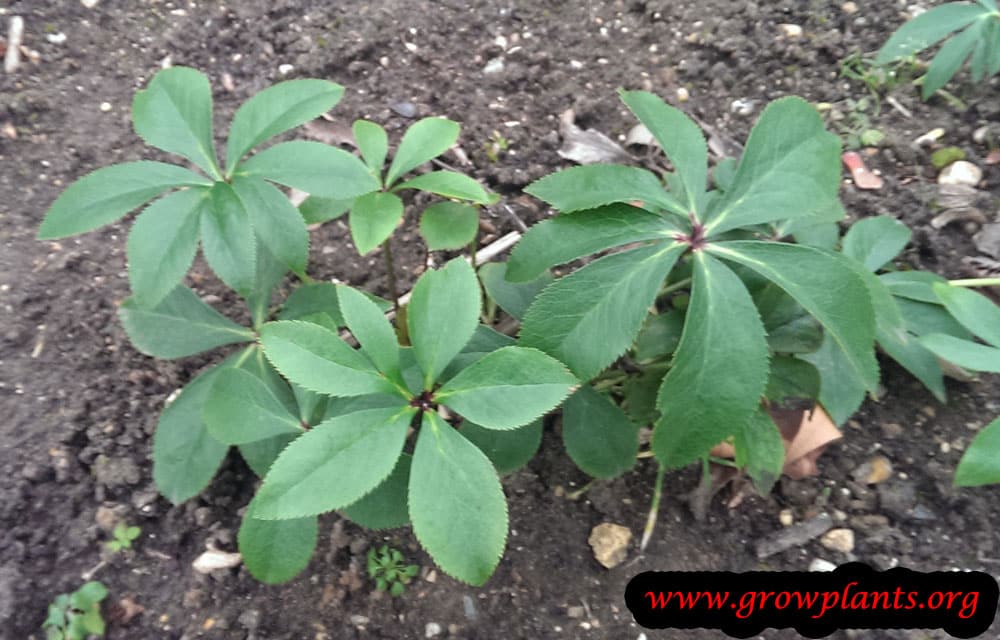
- Leaves and Foliage: Green, pedate (divided) leaves; some forms have spiny leaf edges.
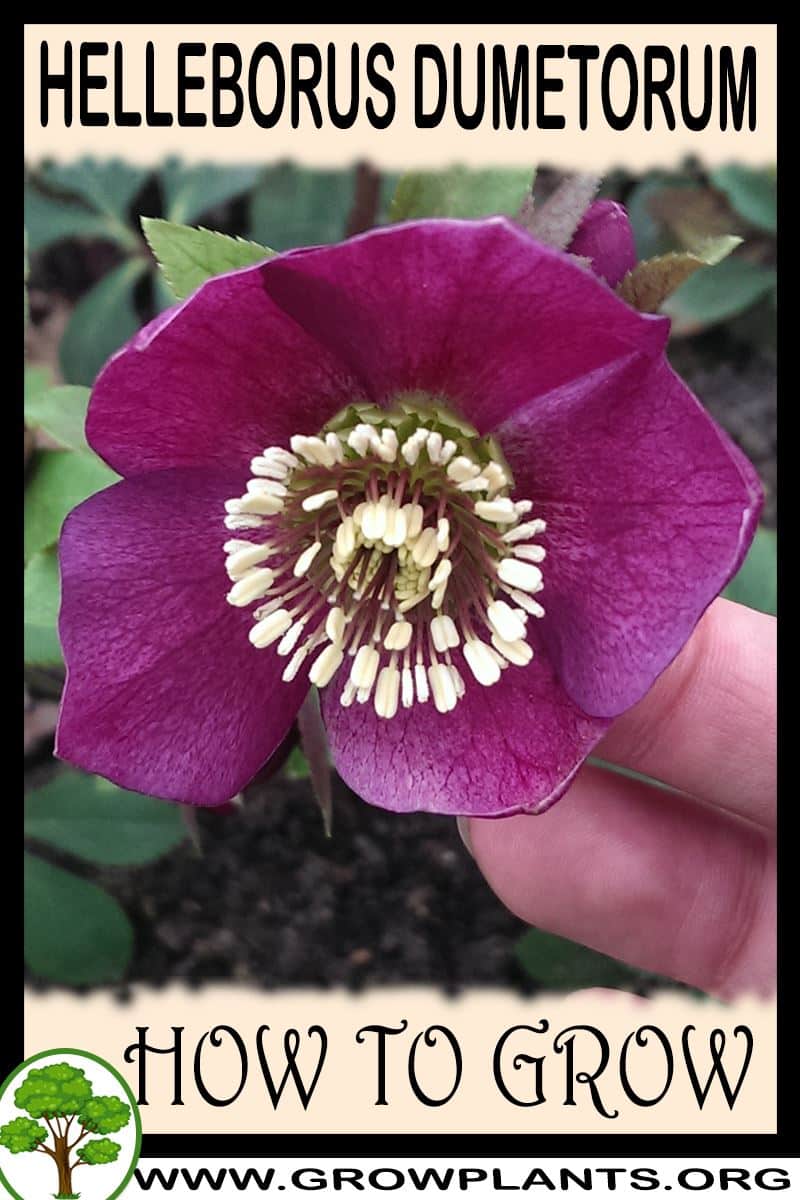
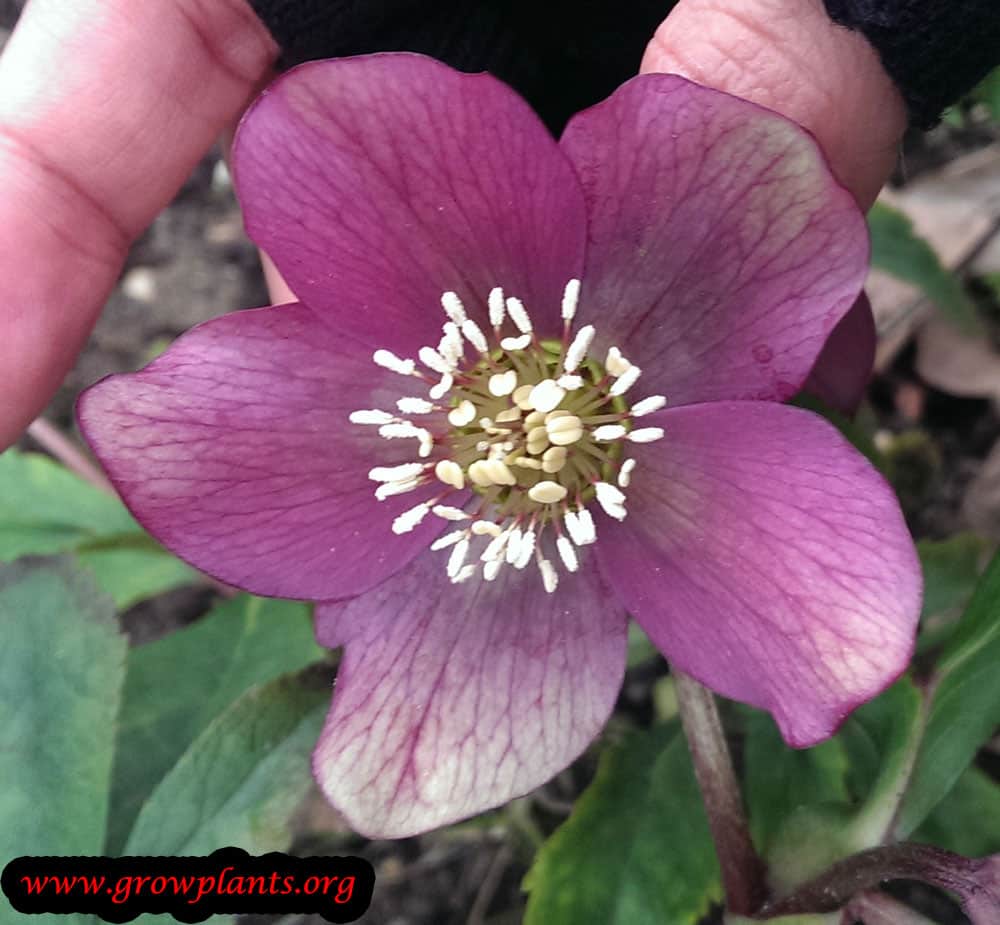
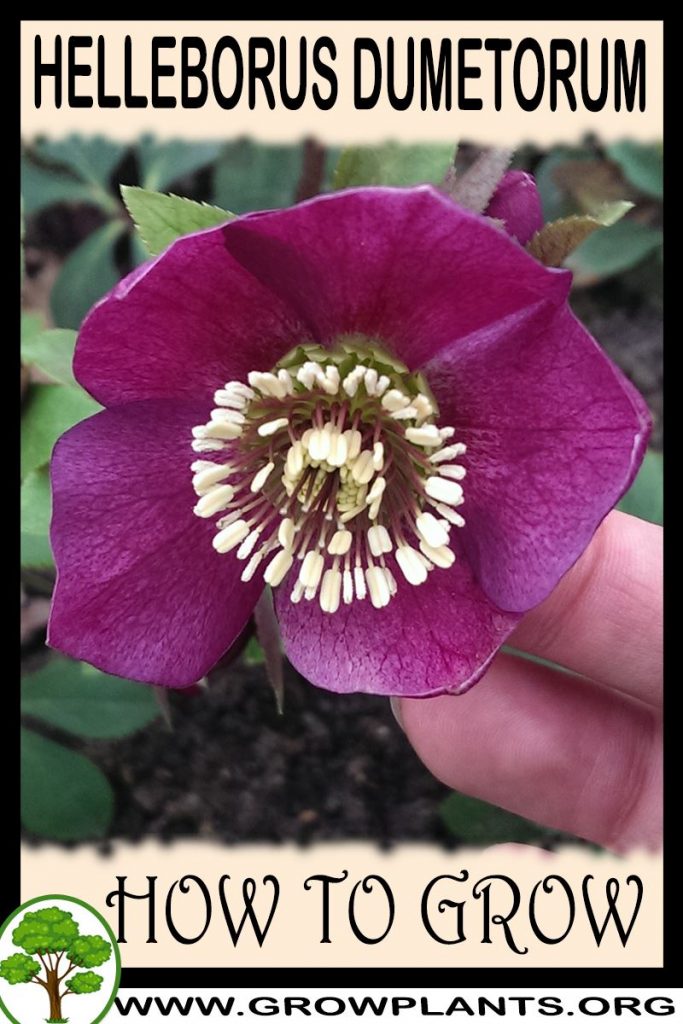
- Flower Characteristics: Flat, five-petalled flowers in green or purple, opening in winter to spring (full detail in the Bloom accordion).
Primary Uses & Landscape Value
- Functional and Ornamental Roles: Ornamental woodland and shade-garden perennial, also grown as a cut flower.
Care Guide: Planting, Soil & Watering
Overview: Helleborus dumetorum is a shade-tolerant evergreen perennial that grows best in dappled to full shade in cool conditions. It likes a rich, moist but well-drained soil and resents both drying out and waterlogging.
Quick Care Requirements
| Requirement | Ideal Condition |
|---|---|
| Planting Season | In autumn |
| Growth Rate | Moderate |
| Soil Type | Rich, moist, well-draining |
| Water Need | Moderate to High – keep evenly moist |
Planting & Establishment
- Best Planting Season: Plant in autumn so the roots establish before spring flowering.
- How to Plant:
- Hole Preparation: Dig a hole about twice the width of the root ball and of equal depth, loosening the surrounding soil; hellebores dislike disturbance once settled.
- Soil Amendments: Enrich with plenty of compost or leaf mould for a rich, moisture-retentive yet well-drained soil.
- Planting Depth: Set the crown level with the soil surface — planting too deep can prevent flowering; do not bury it.
- Growth Speed & Expectations: A moderate grower reaching about 40-70 cm (16-28 in).
Soil, Watering & Drainage Care
- Soil Mix & Drainage Needs: Provide rich, moisture-retentive soil that still drains freely; good drainage through winter prevents crown and root rot.
- Watering Schedule & Technique:
- Young / Newly Planted: Keep the soil consistently moist after planting while the roots establish.
- Established: Water to keep the soil evenly moist, especially in dry spells; avoid letting it bake dry or sit waterlogged.
- Seasonal Adjustments: Water more in dry summer weather; in winter it needs less, but the soil should not dry out completely.
Climate, Light & Hardiness
Helleborus dumetorum is a shade-loving evergreen perennial for subtropical and Mediterranean climates, growing best in partial to full shade and cooler conditions. It is a cold-hardy winter- and spring-flowering plant (site data lists USDA zones 5–9); hot, dry summers - not winter cold - are usually its main limit.
Quick Climate Specifications
| Climate Zones | subtropical and Mediterranean |
|---|---|
| USDA Hardiness Zones | 5–9 |
| Optimal Temp Range | Cool, roughly 10–20°C (50–68°F) |
| Cold Damage Begins | Open flowers and soft new growth can be nipped by severe frost, though the plant itself is hardy |
| Approx. Survival Minimum | Zone 5 corresponds to winter lows near −29°C (−20°F) |
| Frost Tolerance | High (established plant) / Moderate (open blooms) |
| Light Conditions | Partial to full shade (full sun only where summers stay cool) |
| Wind Tolerance | Moderate |
Sunlight & Light Exposure
Optimal Light Setup
Grows best in partial or dappled shade, and tolerates full shade with a little light. Winter sun with summer shade - as under deciduous trees - suits it well.
Shade & Heat Management
Full sun is acceptable only where summers are not hot; in warm regions shade and a cool, mulched root zone are important to prevent heat and moisture stress.
Best Exposure / Orientation
A sheltered, shaded woodland-type position protected from hot afternoon sun gives the healthiest foliage and longest-lasting flowers.
Temperature Extremes & Hardiness
USDA Hardiness & Regional Limits
The site data lists hardiness zones 5–9. The plant is genuinely cold-hardy and often blooms in late winter; a "frost-free" note in its care refers mainly to protecting the open flowers, not the crown, which withstands hard freezes.
Cold Damage & Winter Protection
Established crowns need no special winter protection within range. During severe frost the flowers and leaves may temporarily wilt or brown, then recover as it thaws; a light mulch steadies soil temperature.
Frost Sensitivity
The plant is frost-hardy; only the open blooms and tender new growth are frost-sensitive.
Extreme Heat Tolerance
Heat is the real constraint - prolonged hot, dry weather stresses the foliage and shortens the plant's life, so shade and cool, moist soil matter most in warm climates.
Wind, Humidity & Microclimate
Humidity Preferences
Prefers average to somewhat moist air; it dislikes hot, dry, exposed positions.
Wind Tolerance
Wind tolerance is moderate; a sheltered position keeps the evergreen leaves and winter flowers in good condition.
Microclimate Recommendations
A cool, shaded, sheltered spot with a mulched, moisture-retentive root zone is ideal - think woodland edge or the north side of a wall.
Growing in Pots, Balconies & Indoors
This hellebore is a shade-loving woodland perennial that the grower confirms grows well both in containers and indoors. It is happiest cool and out of harsh sun, which makes it a fine plant for a shaded patio, a balcony that does not bake, or a cool, bright room. In a pot it stays neat at 40-70 cm (16-28 in) and can be moved to wherever the light suits it.
Quick Details
- Container Size: A pot of about 5-15 L (1.3-4 gal) suits its clump-forming 40-70 cm size
- Indoor Suitability: Grows indoors in a cool, bright spot – it dislikes hot, dry rooms and deep shade
- Best Spot: Half shade to full shade with some light; full sun only where it is not hot
- Soil & Drainage: Rich, organic, free-draining mix that stays evenly moist – potting mix with perlite or vermiculite
- Watering in Pots: Average to generous – keep evenly moist but never waterlogged
Indoors & On the Windowsill
- Grows indoors: The grower confirms it can be a houseplant. It does best in a cool, bright room out of direct hot sun – an unheated porch, a north or east window, or a cool sill suits it far better than a warm living room.
- Care indoors: Keep the soil evenly moist, give it good light without scorching sun, and avoid dry heat from radiators. It flowers in the cool season, so cool conditions actually help it bloom.
- Overwintering: It is hardy and benefits from cool winters; a potted plant is happy outdoors in a shaded, sheltered spot, brought to a cool bright room only if you want the flowers up close.
On a Balcony or Patio
- Light & shelter: It prefers a shaded or part-shaded corner rather than a hot, sunny balcony; too much direct heat scorches the leaves and flowers. A sheltered north- or east-facing spot is ideal.
- Water & wind: Pots dry faster than open ground, so keep the mix moist, especially in warmth; the evergreen leaves shrug off cold but appreciate shelter from drying wind.
Choosing the Pot, Soil & Long-Term Care
- Pot & drainage: A pot with strong drainage holes; skip a standing water saucer to avoid root rot. Glazed or plastic pots hold the steady moisture it likes better than fast-drying terracotta.
- Potting mix: Rich, organic and free-draining – potting mix with perlite or vermiculite and added leaf mould or compost.
- Feeding: Potted plants leach nutrients with watering, so feed through the growing season with a balanced feed for strong leaves and flowers.
- Repotting: Refresh the mix or pot on every year or two; divide congested clumps in the cool season and remove tired old leaves as new growth appears.
- Safety: The grower records it as poisonous – all parts can cause irritation and upset if eaten, so keep it away from children and pets, especially indoors.
Fertilizing & Feeding
Helleborus dumetorum is a light-feeding shade perennial; a little balanced complete fertilizer or compost through the cool growing season is enough, and it does not need high-phosphorus bloom products.
Quick Fertilizing Specs
| Feeding Level | Light |
|---|---|
| Best Feeding Period | Through the cool active season, autumn into spring. |
| Main Nutrient Priority | A balanced complete fertilizer. |
| Soil pH | Near neutral to slightly alkaline. |
| Organic Options | Compost or leaf mould worked in or top-dressed. |
| Reduce/Stop Feeding | Ease off through hot summer when growth stalls. |
Feeding by Growth Stage
Cool-season growth
Support leaf and root growth during the cool growing season.
| Nutrient direction | A balanced, complete fertilizer at a light rate to support steady foliage growth. |
|---|---|
| Timing | As cool-season growth is active, from autumn through spring. |
| Frequency | Light feeding during the cool active season is usually enough. |
| Fertilizer types | Balanced complete fertilizer, Compost or leaf mould as a top dressing |
| Precautions | This shade perennial is a light feeder; keep feeding gentle to avoid soft, floppy growth. |
Winter to spring bloom
Support flowering through the late-winter and spring bloom.
| Nutrient direction | A balanced complete fertilizer; adequate nitrogen and potassium support bloom better than high-phosphorus products. |
|---|---|
| Timing | Through the winter-to-spring flowering period. |
| Frequency | Continue gentle feeding across the bloom. |
| Fertilizer types | Balanced complete fertilizer |
| Precautions | High-phosphorus bloom products are unnecessary for hellebores. |
Hot-summer rest
Let the plant coast through hot summer weather when growth stalls.
| Nutrient direction | None – withhold fertilizer while the plant is resting. |
|---|---|
| Timing | During the hottest part of summer when growth pauses. |
| Frequency | No feeding at this stage. |
| Fertilizer types | No feeding at this stage – a resting plant is not taking up nutrients. |
| Precautions | Do not fertilize until active growth resumes. |
Nutrient Deficiency Signs & Corrections
Older, lower leaves turn uniformly pale green to yellow and overall growth slows.
| Possible causes | Low available nitrogen in the soil, Cold or waterlogged soil limiting root uptake, Nitrogen leached away after heavy watering or rain |
|---|---|
| Appears first on | Older, lower leaves. |
| What to check | Whether paling starts on old lower leaves, Recent feeding history, Soil moisture and drainage |
| Possible correction | Apply a balanced complete fertilizer at a light rate and improve drainage; nitrogen-hungry plants green up as growth resumes. |
Youngest leaves show yellowing between green veins (interveinal chlorosis).
| Possible causes | High or alkaline soil pH locking up iron, Waterlogged or poorly aerated soil, Genuinely low available iron |
|---|---|
| Appears first on | Newest, youngest leaves. |
| What to check | Whether yellowing is on new versus old growth, Soil pH, Soil drainage and watering habits |
| Possible correction | Confirm soil pH and correct it if it is too high, improve drainage, and apply a chelated iron product following its label directions. |
Pruning, Training & Seasonal Maintenance
Helleborus dumetorum is a herbaceous, non-woody evergreen perennial, so its “pruning” is really foliage and flower-stalk maintenance rather than structural cutting. It tolerates this light, targeted trimming well: the safest and most useful time is in spring/summer, when spent flower stalks can be trimmed back after bloom, though the plant also benefits from removing old, tattered leaves before flowering (typically autumn/winter) so the winter/spring flowers aren’t hidden and so old, disease-prone foliage doesn’t linger through the flowering period.
Quick Pruning & Maintenance Specs
| Pruning Tolerance | Moderate (light, targeted trimming – not structural pruning) |
| Primary Pruning Window | Spring/summer, to trim spent flower stalks after bloom |
| Secondary Maintenance Window | Autumn/winter, to remove old tattered leaves before the winter/spring flowers open |
| Typical Frequency | Once or twice a year (old-leaf removal before bloom, stalk trimming after) |
| Main Objective | Reduce old-leaf disease pressure, showcase the flowers, and tidy spent flower stalks |
| Young Plant Priority | Minimal – let the clump establish; remove only damaged leaves |
| Mature Plant Priority | Annual old-leaf strip before bloom plus post-bloom stalk trimming |
| Best Tool Type | Precision snips or bypass secateurs for individual leaf and stalk bases |
| Avoid Heavy Pruning During | While the plant is actively flowering (winter/spring) – trim stalks after bloom, not mid-display |
Pruning by Plant Age & Size
Newly Established
Remove only damaged or dead leaves while the clump settles in after autumn planting; there is no structural framework to build on a herbaceous plant like this.
Young / Formative
No training system applies – this is a clump-forming herbaceous perennial, not a shrub or vine. Light removal of any damaged leaves is all that’s needed as it fills out.
Mature / Established
Each year, strip old, tattered or leaf-spot-affected foliage before the winter/spring bloom so the flat, five-petaled flowers aren’t obscured, then trim spent flower stalks back once blooming finishes in spring/summer.
Seasonal Pruning Schedule
Pre-Growth (autumn/early winter, ahead of the winter/spring bloom)
Objective: clear old foliage before flowers emerge. Remove: tattered, yellowing or disease-marked older leaves at the base. Do not remove: fresh, healthy new leaves emerging for the season. Expected response: flowers display more visibly against a cleaner clump, and disease pressure carried on old leaves is reduced. Flowering impact: none negative – this timing is chosen specifically to protect the coming bloom.
Post-Flowering (spring/summer)
Objective: tidy the plant once flowering finishes, matching the plant’s own “trim the stalk” guidance. Remove: spent flower stalks, cut back to the base once bloom is over (or leave selected stalks briefly if seed collection/self-seeding is wanted). Do not remove: the plant’s evergreen leaf rosette itself – only the flowering stalks. Expected response: a tidier clump heading into the growing season.
Special Growth to Remove
- Old, tattered or disease-marked leaves: remove at the base before the winter/spring bloom, the single most useful maintenance cut for this species.
- Spent flower stalks: trim back after flowering, per the plant’s own pruning guidance, unless seed set/self-seeding is wanted.
Container & Small-Space Pruning
Container growth (well tolerated per this plant’s data) follows the same light leaf-strip and stalk-trim routine as in-ground plants; the main container-specific task is dividing or refreshing the root ball if the clump becomes congested, rather than any different pruning technique.
Tools
- Precision snips or bypass secateurs for cutting individual old leaves and flower stalks at their base.
Tool Hygiene & Disease Risk
Increased: this species carries a genuine leaf-spot disease risk on old foliage, so when stripping tattered or disease-marked leaves, clean blades between plants (and dispose of removed leaves rather than composting them nearby) to avoid spreading the pathogen to healthy foliage or neighboring hellebores.
Cut Placement & Technique
Cut old leaves and spent flower stalks close to their base at the crown, rather than leaving long stubs, since this is a clump of individual stalks rather than a branching woody structure. The plant is documented as poisonous, so wear gloves when handling cut material and avoid contact with the sap.
Post-Pruning Care
Water normally after the seasonal leaf strip or stalk trim; no extra feeding is needed for this light maintenance-level cutting. Keep the crown’s growing point clear of fallen debris after trimming, since that debris is part of what carries leaf-spot disease over from season to season.
Common Pruning Mistakes
- Leaving old, disease-marked leaves in place through the flowering season instead of stripping them beforehand, both hiding the blooms and carrying over leaf-spot disease.
- Cutting into the evergreen leaf rosette itself when the intent was only to remove spent flower stalks.
- Handling cut leaves and stalks without gloves, given the plant’s documented toxicity.
When NOT to Prune
Avoid removing flower stalks while they are still actively blooming in winter/spring – wait until flowering has finished, per the plant’s own guidance, rather than cutting mid-display.
Recommended Tools (by task)
- precision_snips – trimming old leaves and spent flower stalks at the crown.
- blade_disinfectant – between cuts/plants when removing leaf-spot-affected foliage, given the documented disease risk.
Pruning Troubleshooting
| Problem | Possible Cause | What to Check | Corrective Action |
| Flowers hidden or hard to see | Old leaves left in place over winter, screening the emerging blooms | Whether last season’s foliage was stripped before flowering | Cut old leaves back at the base before the next bloom cycle |
| Dark or spotted patches on leaves | Leaf-spot disease carried over on old foliage | Older leaves for dark blotches; tool hygiene during last leaf strip | Remove and dispose of affected leaves promptly, disinfecting blades between cuts |
Propagation Guide
Helleborus dumetorum is best raised from seed, which comes reasonably true to the species when the plant is grown away from other Helleborus species (hellebores hybridize readily where several species grow together); to guarantee an exact copy of a particular plant, divide an established clump instead. Grafting or other vegetative techniques are not required for this species. Overall propagation is moderate in difficulty – seed germination is slow and irregular, and while division is straightforward in principle, the plant resents root disturbance and can be slow to re-establish.
Quick Propagation Specs
| Best Propagation Method | Seed (for the species, grown in isolation) |
| Alternative Methods | Division of mature clumps |
| Propagation Difficulty | Moderate |
| Seed True-to-Type | Usually true-to-type when isolated from other Helleborus species |
| Vegetative True-to-Type | Yes |
| Best Propagation Season | Sow fresh seed in summer as soon as ripe; divide clumps in autumn |
| Seed Germination Time | Slow and often erratic – commonly several months, sometimes not until the following autumn or winter |
| Seed Sowing Depth | Surface-sow or cover very lightly, about 0.5–1 cm (¼–½ inch) |
Growing from Seed
Seed Handling & Viability
Seed loses viability quickly if allowed to dry out and be stored – collect and sow it fresh as soon as the ripening pods split open, rather than drying and storing it.
Dormancy & Pre-Sowing Treatment
Fresh seed needs a warm summer period followed by a cold winter period to break dormancy (a warm-then-cold requirement); no scarification is needed, but seed will not sprout until this fluctuating temperature sequence has been experienced, which happens naturally outdoors or in an unheated cold frame.
Sowing Season
Sow immediately after collecting the seed, in summer (planting season for the species overall is autumn).
Sowing Depth & Orientation
Surface-sow or cover only very lightly, roughly 0.5–1 cm (¼–½ inch); deep burial delays or prevents germination.
Germination Conditions
Keep pots or seed beds outdoors or in a shaded cold frame so they experience natural seasonal temperature swings; keep the medium consistently moist but not waterlogged.
Germination Time
Irregular and slow – seedlings may not appear until the following autumn, winter, or even the second spring, so avoid discarding pots too early.
Seedling Care
Once seedlings have a couple of true leaves, prick them out carefully, since hellebore roots are brittle; young plants typically take a couple of years to reach flowering size.
Division, Offsets, Pups & Suckers
Divide established, multi-crowned clumps in autumn once the plant has several years of growth and multiple growth crowns. Lift the whole clump and use a sharp knife to separate sections, each with several buds/growth points and a good portion of roots attached – a piece with too few roots or buds will establish poorly. Trim back old foliage to reduce moisture loss, replant promptly, and keep divisions shaded and consistently moist while they recover, as hellebores can be slow to resume active growth after being disturbed.
Bloom & Flower Guide
Quick Details
- Bloom Season: Winter into spring
- Flower Appearance: Flat, five-parted flowers in green to purple (some shading toward pink)
- Edibility: Not edible – all parts of hellebore are toxic
Detailed Blooming Overview
This woodland hellebore is valued for flowering in the quiet of winter and early spring, when little else is out. The flat blooms are subtle in green and purple tones. What look like petals are botanically the sepals, which is why the flowers hold their colour so long on the plant and in the vase.
Flower Characteristics
- Flat, five-parted flowers in green to purple, sometimes with a pink cast.
- Long-lasting, as the coloured parts are durable sepals rather than true petals.
Bloom Care & Thinning
- Managing the bloom: Remove tatty old leaves as buds appear so the flowers show clearly; it makes a good, long-lasting cut flower.
- Pollination: Visited by early bees and other insects on mild winter days.
Bloom Health & Protection
- Safety: Every part of the plant is toxic if eaten and the sap can irritate skin – enjoy the flowers as an ornamental or cut flower, and wear gloves when handling.
Pests, Diseases & Troubleshooting
Overview: Helleborus dumetorum is a small, deciduous woodland hellebore. Hellebores are generally tough, long-lived woodland perennials, but they are prone to a handful of signature problems: the sap-sucking hellebore aphid (which also spreads the incurable “hellebore black death” virus), fungal leaf spot, slug damage on new growth, and crown rot in wet, poorly drained soil. Manage them culturally first — good airflow, annual removal of old foliage, and sharp drainage prevent most trouble. Note that all parts of the plant are toxic and the sap is a skin irritant, so wear gloves when cutting.
Quick Troubleshooting Overview
| Issue / Pest | Main Symptom | Primary Solution |
|---|---|---|
| Hellebore aphid | Grey-green colonies on flower stalks & leaf undersides, sticky honeydew | Blast off / insecticidal soap; controls virus spread |
| Leaf spot (black spot) | Black-brown blotches with concentric rings, dying leaves | Remove & destroy affected foliage; copper fungicide |
| Black death (virus) | Black streaks/rings, stunted distorted growth | No cure — dig up and destroy the whole plant |
| Slugs & snails | Ragged holes in new leaves and flower stems | Barriers, iron-phosphate pellets, hand-picking |
| Crown / root rot | Collapsing crown, blackened base in wet soil | Improve drainage; remove rotted tissue |
Common Pests & Management
- Hellebore aphid (Macrosiphum hellebori):
- Symptoms: Distinctive grey-green aphids clustering on flower stalks, buds and the undersides of leaves, coating them in sticky honeydew that later turns black with sooty mould. This species is specific to hellebores and is the main vector of hellebore black death.
- Prevention & Control: Inspect flower stems early in the season and dislodge colonies with a firm jet of water. Encourage ladybirds, lacewings and hoverflies. For heavier infestations use insecticidal soap or a neem/horticultural-oil spray, applied in the evening to protect pollinators. Prompt aphid control is the best defence against the virus.
- Slugs & snails (Deroceras / Helix spp.):
- Symptoms: Irregular holes and shredded edges on emerging leaves and flower stems, with slime trails; worst in damp, shaded conditions and early in the growing season.
- Prevention & Control: Clear leaf litter and hiding places, water in the morning so the surface dries by night, and ring plants with grit, crushed shell or copper tape. Iron-phosphate pellets are a wildlife-safe option; hand-pick after dark.
- Vine weevil (Otiorhynchus sulcatus):
- Symptoms: Adults notch the leaf margins at night; the far more damaging C-shaped white larvae eat roots and the crown, causing sudden wilting or collapse — especially in container-grown plants.
- Prevention & Control: Check pots for grubs when repotting, encourage ground beetles and birds, and drench with beneficial nematodes (Steinernema / Heterorhabditis) when soil is warm and moist.
Diseases & Fungal Issues
- Hellebore leaf spot / black spot (Microsphaeropsis hellebori, syn. Coniothyrium hellebori):
- Symptoms: Round to irregular black-brown blotches, often with concentric rings, on leaves, stems and even petals; badly affected leaves yellow and die. The most common hellebore disease.
- Treatment & Management: Cut off and destroy all old and spotted foliage in late dormancy before new growth and flowers emerge — this single step breaks most of the disease cycle. Improve airflow, avoid overhead watering, and apply a copper-based fungicide in wet spells if pressure is high.
- Hellebore black death (Helleborus net necrosis virus, HeNNV):
- Symptoms: Black streaking and ringspots along veins, distorted, stunted and blackened new growth. Fatal and incurable; spread plant-to-plant by the hellebore aphid.
- Treatment & Management: There is no cure — dig up and destroy affected plants promptly (do not compost) and control aphids rigorously to protect neighbouring plants. Disinfect tools between plants.
- Downy mildew (Peronospora pulveracea):
- Symptoms: Greyish, furry growth on leaf undersides with corresponding pale, distorted or puckered areas above; worst in cool, wet, still air.
- Treatment & Management: Improve spacing and airflow, remove affected leaves, avoid wetting foliage. Copper fungicide gives some protection in prolonged wet weather.
- Crown & root rot (Phytophthora / Sclerotinia spp.):
- Symptoms: Collapsing crown, blackened, mushy tissue at the base and dying leaves, typically in heavy or waterlogged soil.
- Treatment & Management: Prevention is everything — plant in free-draining, humus-rich soil and never bury the crown. Cut away rotted tissue, improve drainage, and avoid replanting hellebores in the same rotted spot.
Growing Difficulties & Abiotic Problems
- Waterlogging & crown rot:
- Cause & Symptoms: Wet, compacted or badly drained soil suffocates roots and rots the crown, giving yellowing, wilting and collapse. Correction Strategy: Raise beds or add grit and compost to open the soil; site plants where winter wet drains away.
- Leaf scorch & heat stress:
- Cause & Symptoms: Too much direct summer sun bleaches and browns leaf edges. Correction Strategy: Grow in dappled shade under deciduous trees; mulch to keep roots cool and moist.
- Transplant shock / dislike of disturbance:
- Cause & Symptoms: Sulking, poor flowering and slow establishment after being moved or divided. Correction Strategy: Site them permanently, disturb roots as little as possible, and be patient — they resent frequent division.
- Toxicity / sap irritation:
- Cause & Symptoms: All parts contain irritant glycosides; sap can cause skin and eye irritation, and the plant is poisonous if eaten. Correction Strategy: Wear gloves when cutting old foliage, wash hands, and keep away from pets and children.
H. dumetorum is deciduous, so old foliage naturally dies back — clearing it promptly each year is easy and greatly reduces leaf-spot carry-over.
What Helps — Products & Tools
For hellebores the core toolkit is insecticidal soap or neem/horticultural oil for aphids, wildlife-safe iron-phosphate slug pellets plus copper tape and grit for barriers, beneficial nematodes for vine weevil grubs, and a copper-based fungicide for leaf spot and downy mildew. The single most valuable “tool” is a clean pair of secateurs used to strip and destroy old foliage each dormant season.