

Plant Profile & Key Characteristics
Overview: A bold tuberous perennial grown mainly for its large green or purple heart-shaped elephant-ear foliage, reaching about 0.4-1.8 m tall. It is evergreen in frost-free climates but dies back to its corm where winters are cold.
Quick Specifications
| Specification | Attribute |
|---|---|
| Plant Type / Life Cycle | Perennial (tuberous geophyte) |
| Foliage Type | Evergreen in frost-free climates; herbaceous / deciduous (dies back) where cold |
| Mature Size | 0.4-1.8 m tall (16-68 in) |
| Growth Rate | Moderate to slow |
| Root System | Tuberous / cormous (edible corm) |
| Toxicity | Toxic raw — leaves and corm contain calcium-oxalate raphides; edible only after thorough cooking |
| Hardiness | USDA zone 8+ |
Growth Form & Structure
- Height & Spread: 0.4-1.8 m (16-68 in) in the ground; readily container-grown and can be kept as a houseplant
- Growth Habit & Form: Clump-forming herbaceous perennial arising from a central corm, with large long-stalked leaves
- Lifespan & Maturity: Long-lived from its corm; reaches full leaf size within a growing season
Anatomy & Physical Features
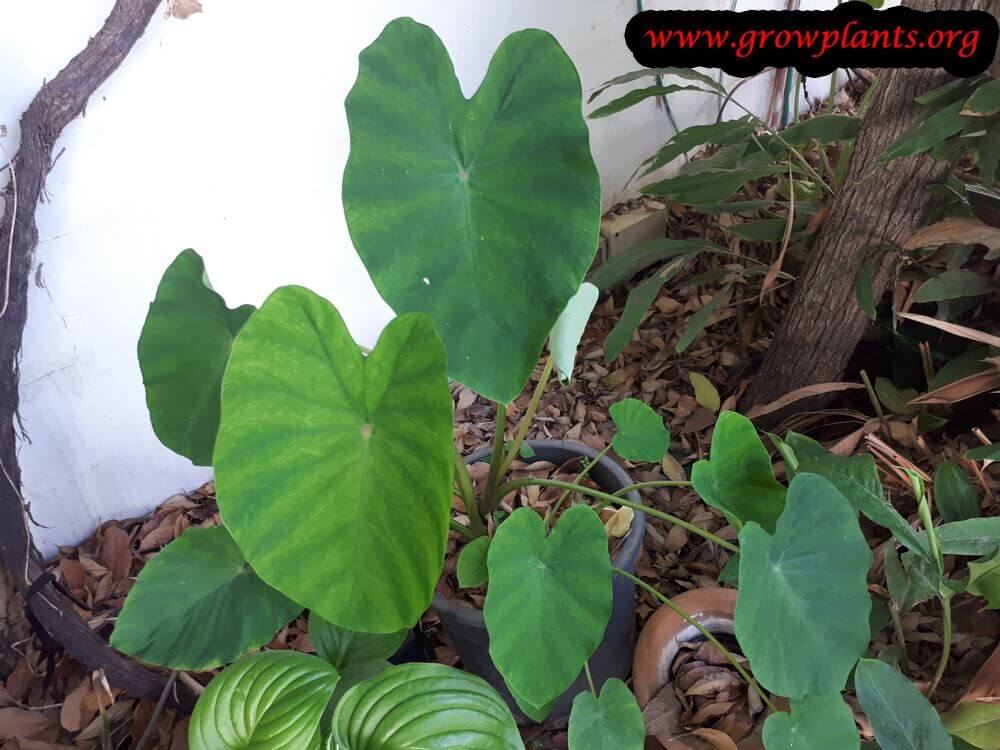
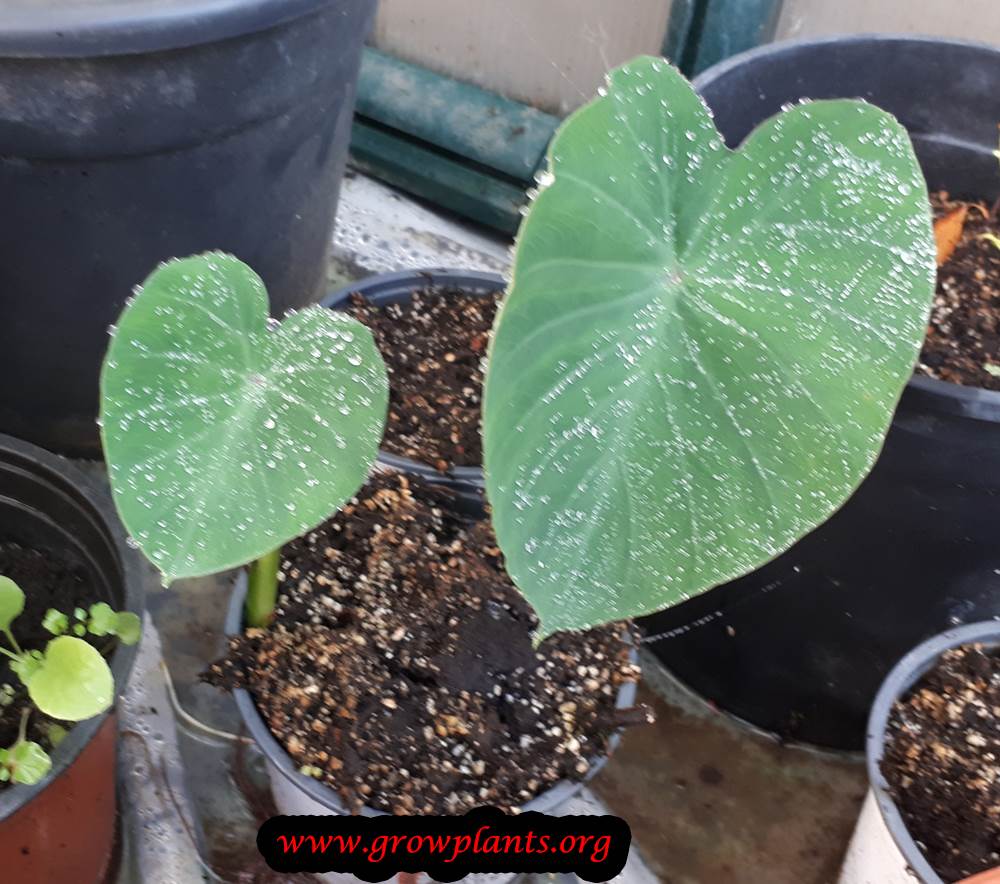
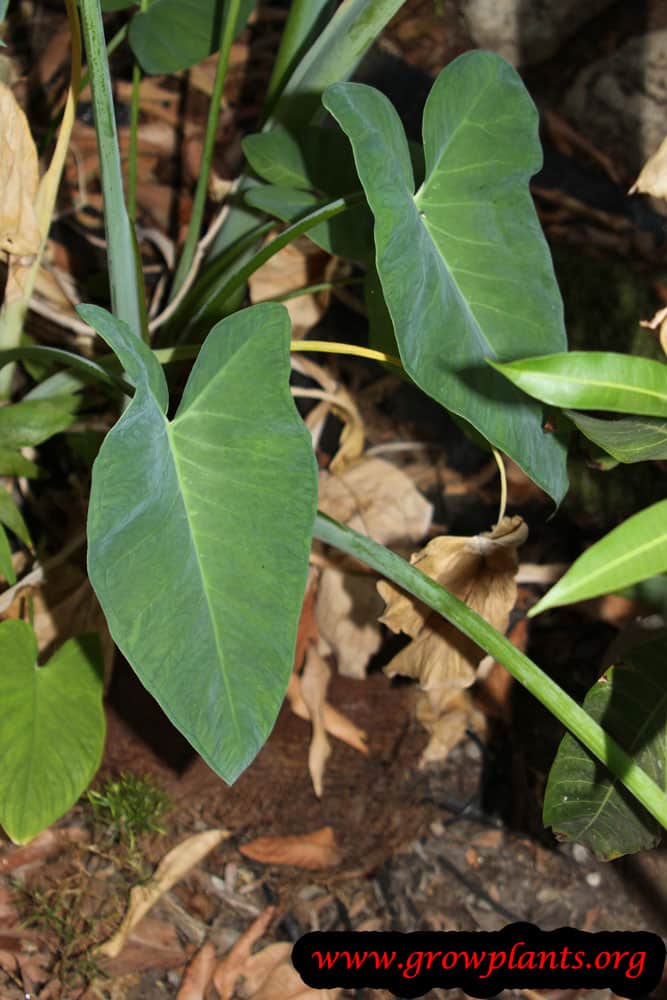
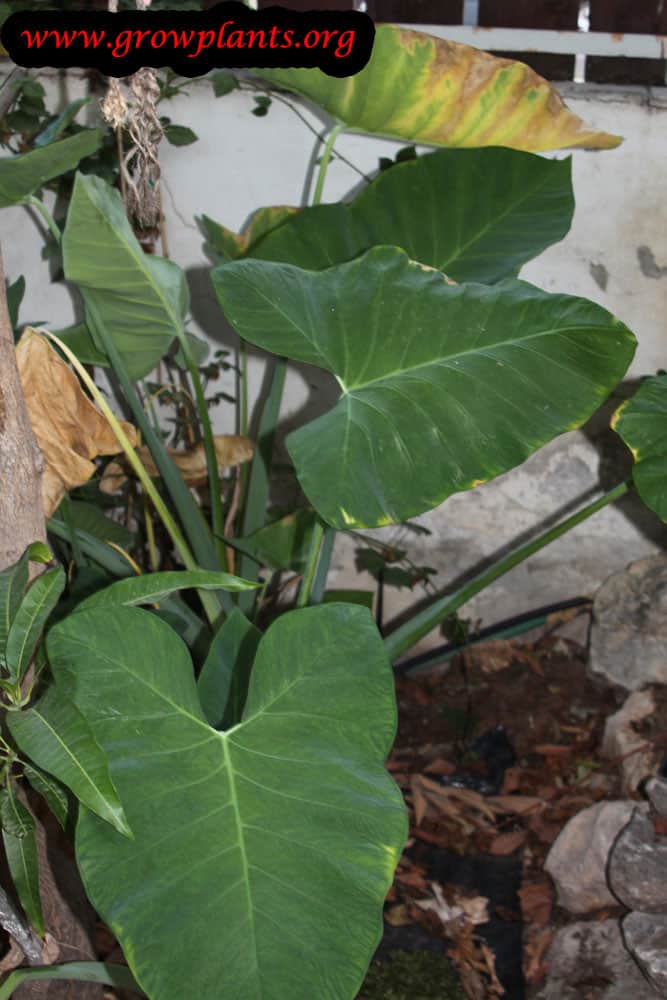
- Leaves & Foliage: Large heart-shaped (elephant-ear) leaves, green or purple, held on tall stalks — the plant’s main ornamental feature
- Flower Characteristics: Occasional white-yellowish arum-type spathe about 10-30 cm; grown for foliage rather than flowers
Primary Uses & Landscape Value
- Edible Uses: Corm cooked or baked; young leaves cooked or eaten rolled — all parts must be cooked before eating
- Functional & Ornamental Roles: Bold ornamental foliage plant for beds, waterside plantings, large containers and as a houseplant
Care Guide: Planting, Soil & Watering
Overview: Colocasia esculenta (taro) is a moisture-loving leaf geophyte (hardy to about zone 8, elsewhere lifted or grown as a houseplant) that grows in full sun through to full shade. It wants rich soil, warmth above about 8 °C, and generous, constant moisture — it even tolerates boggy, waterlogged ground.
Quick Care Requirements
| Requirement | Ideal Condition |
|---|---|
| Planting Season | In spring or autumn |
| Growth Rate | Slow to Moderate |
| Soil Type | Rich, moisture-retentive (tolerates boggy soil) |
| Water Need | High – keep constantly moist to wet |
Planting & Establishment
- Best Planting Season: Plant tubers in spring or autumn once the soil is warm (above about 8 °C).
- How to Plant:
- Hole Preparation: Dig a hole wider than the tuber or root ball in ground that can stay moist.
- Soil Amendments: Work in plenty of compost and organic matter for a rich, water-holding soil.
- Planting Depth: Set the tuber with the growing tip upward just below the soil surface, or the root collar of a potted plant at soil level.
- Growth Speed & Expectations: A slow-to-moderate grower reaching 40–180 cm (16–68 in), with large dramatic leaves in a warm, wet season.
Soil, Watering & Drainage Care
- Soil Mix & Drainage Needs: Rich, moisture-retentive soil is ideal, and it tolerates wet, boggy conditions or even standing water; in containers use a heavy, water-retentive mix and never let it dry out.
- Watering Schedule & Technique:
- Young / Newly Planted: Keep newly planted taro constantly moist — never let it dry — while it establishes.
- Established: Water very generously and frequently so the soil stays wet; taro thrives with more water than most plants.
- Seasonal Adjustments: Water heavily in the warm growing season; in cold zones reduce water as the plant dies back and store or protect the tuber over winter.
Climate, Light & Hardiness
Taro (Colocasia esculenta) is a tropical edible geophyte for tropical, temperate-margin, Mediterranean and subtropical gardens, also grown ornamentally and as a houseplant, thriving in warmth and abundant water. Its foliage is frost sensitive, but the corm can overwinter in the ground within its zones and re-sprout in spring.
Quick Climate Specifications
| Climate Zones | Tropical, subtropical, Mediterranean, mild temperate; also a houseplant |
|---|---|
| USDA Hardiness Zones | 8+ (site data) |
| Optimal Temp Range | Approx. 20–30°C (68–86°F) |
| Cold Damage Begins | Growth slows below about 10°C (50°F); foliage at light frost near 0°C (32°F) |
| Approx. Survival Minimum | Foliage keeps above about 8°C (46°F) for active growth; the dormant corm can survive to roughly zone 8, about −9°C (16°F), with mulch |
| Frost Tolerance | Foliage None to Very Low; corm Low to Moderate with protection |
| Light Conditions | Full sun to full shade |
Sunlight & Light Exposure
Optimal Light Setup
Grows in full sun to full shade; full sun gives the fastest growth and largest crop but demands constant moisture.
Shade & Heat Management
In hot, dry regions part shade with wet soil prevents leaf scorch; in cooler climates more sun maximises the season.
Best Exposure / Orientation
A warm, sheltered, consistently wet position, including flooded or pond-edge beds, suits this crop.
Temperature Extremes & Hardiness
USDA Hardiness & Regional Limits
Site data lists it for zone 8 and warmer. Hardiness reflects corm survival: taro is grown as a warm-season, die-back crop where winters freeze, but grows year-round in frost-free climates.
Cold Damage & Winter Protection
Growth slows below about 10°C (50°F), and light frost kills the leaves; the corm then rests and, mulched, overwinters in zone 8 to resprout in spring. A hard, prolonged freeze can still destroy the corm, so in colder areas the corms are lifted and stored.
Frost Sensitivity
The foliage has essentially no frost tolerance; the dormant corm is the hardy, overwintering part.
Extreme Heat Tolerance
Excellent in warm, humid heat as long as the soil stays wet.
Frost-Free Growing Season
A long, warm, frost-free season is needed to size up the edible corms; short cool summers give smaller yields even where the corm can overwinter.
Wind, Humidity & Microclimate
Humidity Preferences
Loves high humidity and wet soil, and is often grown in standing water.
Dry-Air Tolerance
Low; dry air and dry soil scorch the large leaves.
Wind Tolerance
Low; the broad leaves tear in wind, so provide shelter.
Rainfall & Seasonal Moisture
Suited to consistently wet conditions and high rainfall; it needs irrigation or flooding in dry climates.
Microclimate Recommendations
A warm, humid, sheltered, wet-soil site - bog, paddy or pond margin - produces the best crop.
Growing in Pots, Balconies & Indoors
Taro, or elephant ear, is grown for its big lush leaves – and, in the ground, its edible tubers. The grower rates it for both indoors and containers; in a pot it is a bold tropical foliage plant that loves water and warmth.
Quick Details
- Container Size: A roomy pot for a 40-180 cm (16-68 in) plant
- Indoor Suitability: Yes – a bold foliage plant, given bright light and humidity
- Best Spot: Full sun to full shade, with plenty of water in stronger light
- Soil & Drainage: Rich, moisture-retentive mix
- Watering in Pots: Average to plenty – it loves water and never wants to dry out
Indoors & On the Windowsill
- A statement houseplant: Can be grown indoors with bright light and high humidity; in a dark spot the leaves shrink.
- Loves water & warmth: Keep the mix constantly moist (it tolerates boggy conditions), keep it warm and mist often.
- Safety: All parts are toxic if eaten raw (calcium oxalate) and are edible only when properly cooked – keep the raw plant away from children and pets.
On a Balcony or Patio
- Sun & moisture: Takes full sun on a balcony if kept wet; the big leaves transpire fast, so a large pot may need daily water in heat.
- Wind: Shelter the big soft leaves from wind, which tatters them.
Choosing the Pot, Soil & Long-Term Care
- Pot & mix: A roomy pot with a rich, moisture-retentive mix; it tolerates a saucer of water but still needs drainage to avoid stagnation.
- Feeding: Hungry – feed regularly through the growing season.
- Overwintering: Tender – in cold climates lift the tubers or move the pot to a warm, frost-free place for winter.
Growing this plant in a greenhouse
A greenhouse can give colocasia esculenta frost protection, cold protection, humidity control and extra warmth.
Greenhouse at a glance
| Greenhouse suitability | Good - clearly useful |
|---|---|
| Main benefits | frost protection, cold protection, humidity control, extra warmth |
| Season extension | earlier spring & later autumn |
| Outdoor protection advisable below | about 10°C |
| Maintain greenhouse minimum | around 15°C for active growth |
| Suitable types | heated greenhouse, polycarbonate greenhouse |
| Heating | Heating is recommended in cold climates for continuous growth. |
Related greenhouse guides
- Greenhouses: How to Choose the Right Greenhouse
- Best Greenhouse Heaters
- Greenhouse Climate Control: Temperature, Ventilation and Humidity
- Polycarbonate Greenhouses: What to Look for Before Buying
Fertilizing & Feeding
A moderate feeder: build the soil with organic matter, favor nitrogen while the leafy canopy expands, shift toward potassium as tubers bulk, and stop feeding as the tops die back for harvest. Taro is a hungry, moisture-loving crop: build rich soil, feed nitrogen through the leafy canopy, favor potassium as the corm bulks, and stop as the tops die back. A fertilizer formulated for tomatoes and vegetables supports that feeding pattern through harvest.
Quick Fertilizing Specs
| Feeding Level | Moderate feeder |
|---|---|
| Main Nutrient Priority | Nitrogen for canopy early, shifting to potassium as tubers bulk |
| Best Feeding Period | From establishment through active canopy and tuber bulking |
| Organic Options | Compost and well-rotted manure worked in before planting |
| Reduce/Stop Feeding | Taper and stop feeding as the tops yellow and die back before harvest |
| Micronutrients | Usually met by a complete fertilizer and organic matter; correct only diagnosed shortages |
| Soil pH | Slightly acidic, in consistently moist to wet soils |
Feeding by Growth Stage
Establishment after planting
Get roots and the first shoots growing in well-prepared, enriched soil.
| Nutrient direction | A balanced complete fertilizer over soil already enriched with organic matter. |
|---|---|
| Timing | At and shortly after planting, as shoots emerge. |
| Frequency | A modest starter feeding as growth begins. |
| Fertilizer types | A balanced complete fertilizer, Compost or well-rotted manure worked in before planting |
| Precautions | Do not overdo nitrogen this early; steady establishment matters more than fast top growth. |
Leafy canopy growth
Drive the large leafy canopy that powers tuber formation.
| Nutrient direction | A nitrogen-forward complete fertilizer to build vigorous leaves and stems. |
|---|---|
| Timing | Through the main leafy growth phase in warm weather. |
| Frequency | Regular feeding while the canopy is actively expanding. |
| Fertilizer types | A nitrogen-forward complete fertilizer, Compost top-dressed as growth continues |
| Precautions | Keep soil evenly moist; these are thirsty plants and dry spells check canopy growth. |
Tuber bulking
Support tuber sizing and starch storage as canopy growth slows.
| Nutrient direction | Shift toward potassium with a complete fertilizer to favor tuber development over more leaf. |
|---|---|
| Timing | Once the canopy is full and tubers begin to enlarge. |
| Frequency | A feeding aimed at bulking, easing back on heavy nitrogen. |
| Fertilizer types | A complete fertilizer supplying potassium, Compost or wood-ash-free organic potassium sources |
| Precautions | Avoid pushing more nitrogen now; excess late nitrogen delays bulking and favors leaves over tubers. |
Maturation and dieback before harvest
Let the tops mature and die back so tubers finish and firm up for harvest and storage.
| Nutrient direction | None – withhold fertilizer while the plant is not in active growth. |
|---|---|
| Timing | As the leaves yellow and the tops die down toward the end of the season. |
| Frequency | No feeding at this stage; resume only when active growth returns. |
| Fertilizer types | No feeding at this stage; hold off fertilizing until active growth resumes. |
| Precautions | Withhold fertilizer now; feeding a plant that is not actively growing wastes nutrients and risks salt buildup in the root zone. |
Nutrient Deficiency Signs & Corrections
Older, lower leaves fade to pale green or uniform yellow and overall growth slows.
| Possible causes | low available soil nitrogen, nitrogen leaching from heavy watering or rain, thin, low-organic-matter soil |
|---|---|
| Appears first on | older, lower leaves |
| What to check | recent feeding history, soil organic matter, watering and drainage |
| Possible correction | Apply a nitrogen-containing complete fertilizer and build soil organic matter, then water evenly. |
Older leaves show yellowing and browning along the margins while inner tissue stays greener.
| Possible causes | low available soil potassium, sandy soils that leach potassium, heavy demand during bulking or fruiting |
|---|---|
| Appears first on | older, lower leaves |
| What to check | recent feeding balance, soil texture and leaching, overall crop load |
| Possible correction | Apply a complete fertilizer that supplies potassium and maintain even soil moisture. |
Leaf margins and tips brown or scorch and growth stalls despite adequate watering.
| Possible causes | fertilizer salt buildup in the root zone, under-watering that concentrates salts, excessive or too-frequent feeding |
|---|---|
| Appears first on | leaf margins and tips |
| What to check | recent fertilizer amounts, watering consistency, drainage and watering consistency |
| Possible correction | Ease off feeding, water thoroughly to flush accumulated salts from the root zone, then return to lighter feeding. |
Pruning, Training & Seasonal Maintenance
Taro is the widely grown edible form of Colocasia — a tender, corm-forming geophyte cultivated for its starchy corm and its (cooked) heart-shaped leaves. Being herbaceous, it has no framework to prune; maintenance is grooming spent leaves through the season and cutting the foliage down as it yellows toward autumn/winter dormancy, when the corm is harvested or, in mild zones, left in the ground. Multiplication and renewal are by dividing offset cormels. All raw tissue is an irritant and must be cooked; wear gloves when cutting.
Pruning & the Edible Harvest
Taro offers two edible parts — the cooked leaves and the starchy corm — and pruning sets the balance between them. Every green leaf feeds the developing corm, so harvesting leaves for the pot directly shrinks the corm you lift at dormancy: a grower after a big corm should take few or no leaves, while one wanting leaf greens accepts a smaller corm. The autumn/winter cut-back coincides with corm harvest, and dividing offset cormels renews the planting.
Quick Pruning & Maintenance Specs
| Pruning Tolerance | Grooming only; whole-plant cut-back at dormancy (regrows/harvested from corm) |
| Primary Pruning Window | Autumn / winter — cut back foliage at dormancy / corm harvest |
| Secondary Maintenance Window | Growing season — remove old and yellowing leaves |
| Typical Frequency | Ongoing leaf grooming; seasonal cut-back at harvest |
| Main Objective | Keep foliage productive; harvest/overwinter the corm; divide cormels |
| Best Tool Type | Bypass secateurs / snips for petioles; spade for corm lifting and division |
| Avoid Heavy Pruning During | While leaves are green and bulking the corm |
Pruning by Plant Age & Size
Young plants need only damaged leaves removed. On an established clump, groom old outer petioles at the base and let the green leaves keep feeding the developing corm. The major seasonal event is the die-back cut-back at harvest; increase the planting by dividing offset cormels.
Seasonal Pruning Schedule
Growing Season — Leaf grooming
Objective: keep the canopy healthy and photosynthesising into the corm. Remove yellowed or torn leaves at the petiole base. Do NOT strip green leaves — leaf area drives corm yield.
Autumn / Winter — Dormancy cut-back and harvest
Objective: take or rest the corm. As foliage yellows, cut it back; lift and harvest the corm in cold zones, or leave it in the ground in frost-free areas to reshoot. Expected response: new leaves emerge from the retained corm in spring.
Structural Pruning & Training
Not applicable in a woody sense. Manage the clump by removing tired petioles and by dividing congested corms, not by shaping branches.
Special Growth to Remove
Remove yellowing leaves and spent petioles, and any occasional flower to keep energy in the corm. Offset cormels are the crop’s natural increase — retain them to bulk the stand or lift and divide for new plantings.
Container & Small-Space Pruning
In pots or bog/water culture, groom old leaves and cut back for dormancy the same way; overwinter frost-free and divide the corm when it fills the container. Do not force it to stay in leaf through its natural rest.
Tools
Bypass secateurs or stout snips for the thick, juicy petioles, and a spade for lifting and dividing corms. No saw or loppers are needed.
Tool Hygiene & Disease Risk
Routine for disease under normal culture; keep blades clean. Wear gloves — raw taro sap contains calcium oxalate and irritates skin and mucous membranes.
Cut Placement & Technique
Cut petioles at the base near the corm; when dividing, split the corm so each division retains a viable growing point.
Heavy Pruning & Rejuvenation
The seasonal cut-to-the-ground at dormancy/harvest is the normal cycle, and the corm reshoots strongly — there is no woody rejuvenation. Refresh a tired planting by dividing and replanting cormels.
Post-Pruning Care
After harvest cut-back, store lifted corms cool and dry, or keep an in-ground corm barely moist until spring; resume heavy feeding and abundant water when growth restarts.
Common Pruning Mistakes
- Removing green, corm-feeding leaves and reducing corm size.
- Delaying clean-up of frost-damaged foliage.
- Cutting raw tissue without gloves and getting an irritant reaction.
When NOT to Prune
Do not cut healthy green foliage while the corm is still bulking, and do not cut the plant back before natural dormancy or harvest time.
Recommended Tools (by task)
- bypass_secateurs — cutting thick petioles and the seasonal foliage cut-back.
- garden_spade — lifting corms and dividing cormels.
Propagation Guide
Taro is increased almost entirely by vegetative means — separating cormels and offset suckers from the parent corm, or replanting the leafy corm top (a "huli" sett) — because it seldom flowers or sets viable seed in cultivation and any seedlings are variable. Vegetative divisions come true to the parent, establish quickly in warm soil, and make this an easy plant to multiply.
Quick Propagation Specs
| Best Propagation Method | Division of cormels & offset suckers |
| Alternative Methods | Corm-top (huli) setts; seed (rarely) |
| Propagation Difficulty | Easy |
| Seed True-to-Type | Variable (seldom used) |
| Vegetative True-to-Type | Yes |
| Best Propagation Season | Spring, as growth resumes (site plants spring & autumn) |
Division, Offsets, Pups & Suckers
In spring, as the clump breaks dormancy, detach cormels (small side corms) and rooted offset suckers from around the base of the main corm. Each division should carry its own roots and at least one shoot or growing point. Reduce the large leaves to cut water loss while new roots form, and replant into warm, rich, consistently moist soil.
Rhizomes, Tubers, Bulbs & Corms
Corm Division
The swollen storage organ is a corm. It can be cut into sections, each carrying a bud, or the corm top with the leaf-base plate attached can be used as a sett (huli). Because the corm is moisture-rich, replant promptly rather than curing it for long periods — it does not tolerate extended drying.
Growing from Seed
Taro flowers infrequently and rarely produces viable seed in cultivation; where seed is available it is variable and slow, so it is used mainly in breeding rather than for routine propagation.
Bloom & Flower Guide
Quick Details
- Bloom Season: Summer
- Time to First Bloom: Flowering is infrequent – the plant is grown mainly for foliage and tubers
- Flower Appearance: An aroid bloom – a pale white-yellow spathe (10-30 cm) around a spadix with a beehive-like surface
- Edibility: The flower is not eaten; all raw parts contain calcium oxalate (leaves and corms are safe only after thorough cooking)
Detailed Blooming Overview
Taro is grown for its edible cooked corms and large leaves; it flowers only occasionally, producing a pale aroid spathe and spadix in summer.
Flower Characteristics
- White-yellow spathe, 10-30 cm.
- Spadix with a beehive-like surface.
Bloom Care & Thinning
- Managing the bloom: Blooms are often removed to keep energy in the leaves and corms.
- Safety: Raw tissue is an irritant (calcium oxalate); the flower is not for eating.
Fruit & Uses
Taro is a classic edible geophyte grown for its starchy underground tuber and its large heart-shaped leaves — both are eaten. Neither part is safe raw: the leaves and tuber must be cooked thoroughly to break down the calcium oxalate (sharp, acrid needle crystals) they contain.
Quick Edible Specs
| Edible Parts | Tuber (corm) and leaves |
|---|---|
| Main Use(s) | Culinary staple — tuber cooked and baked; leaves cooked, often rolled or stuffed |
| Eaten Raw or Cooked | Cooked only |
| Preparation Required | Peel and thoroughly cook the tuber; cook the leaves fully (harvest blades without the stems) — never raw |
| Harvest Season | Leaves spring through autumn; tuber lifted in autumn and winter |
| Storage | The tuber keeps in a cool, dry place; use the leaves fresh |
| Safety/Toxicity Caveat | Raw or undercooked leaves and tuber contain calcium oxalate and are acrid and irritant — always cook thoroughly |
Leaves & Greens
The large, heart-shaped leaves (green or purple) are harvested spring through autumn, taking just the leaf blades without the stems. They are always eaten cooked — commonly rolled or stuffed and simmered — and never raw. Harvesting a lot of leaves competes with the plant’s ability to build up the tuber below.
Roots & Tubers
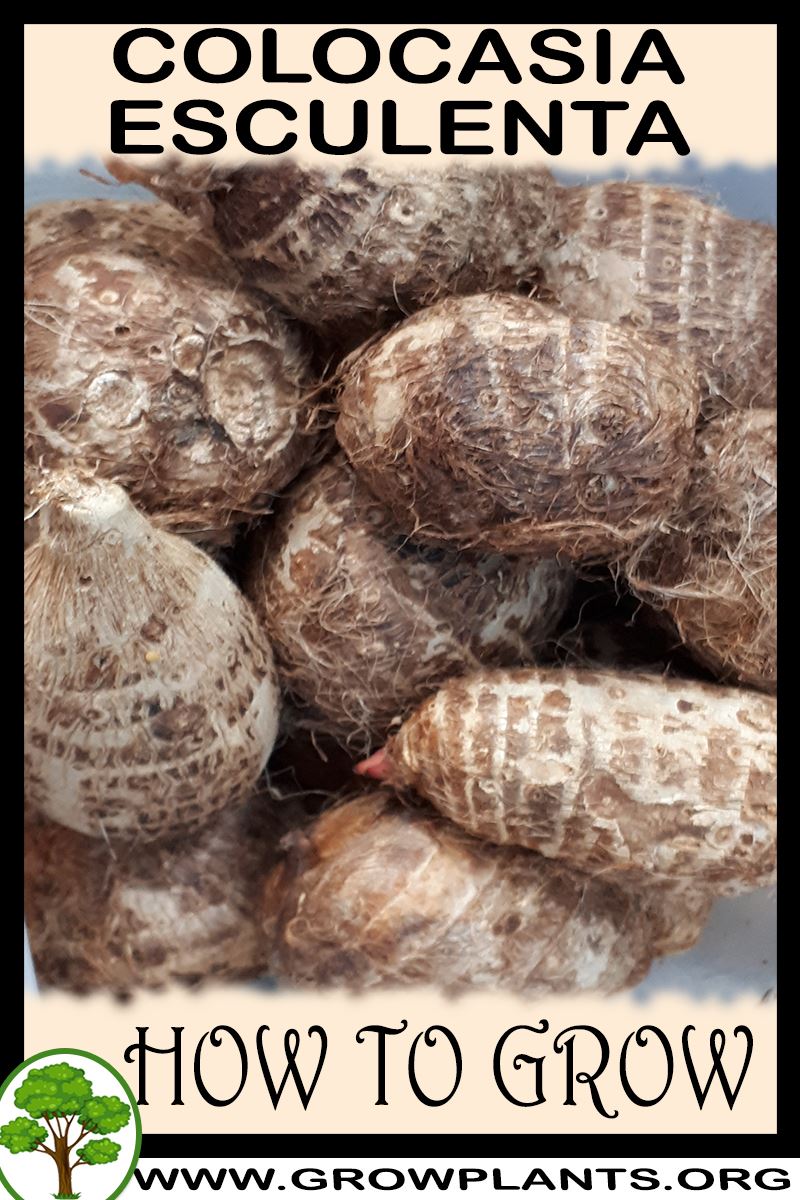
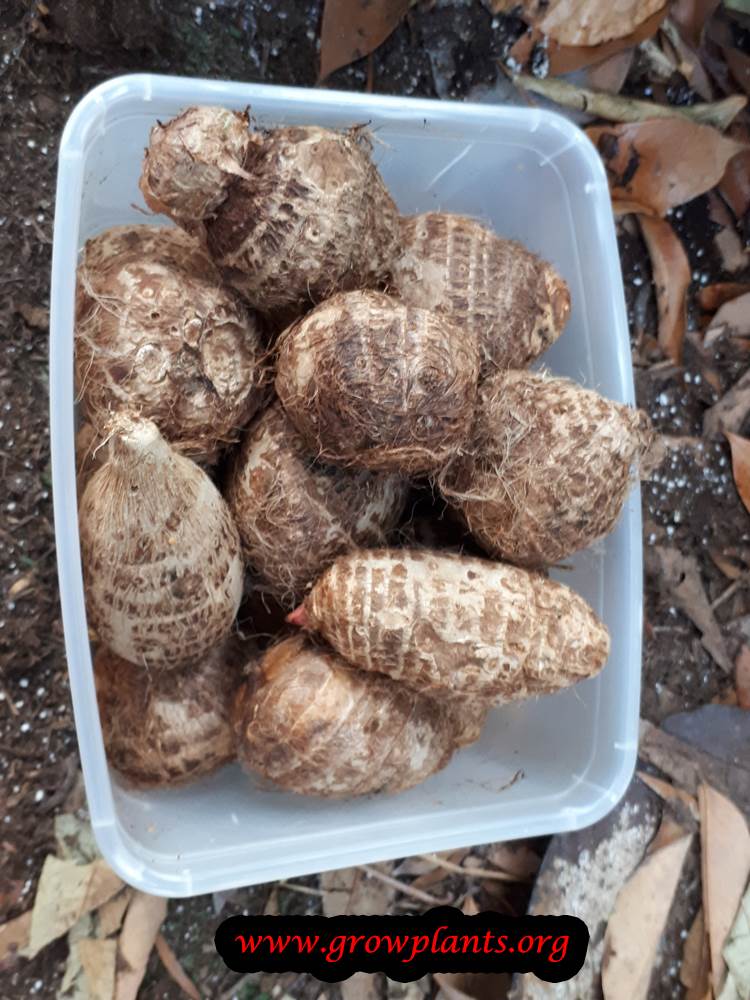
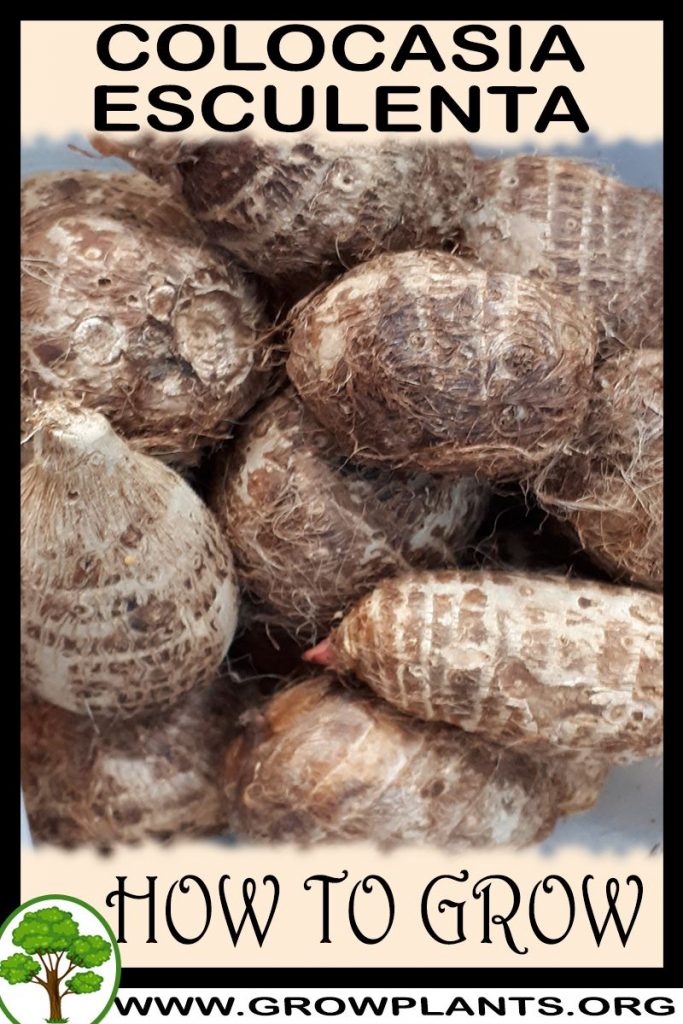
The tuber has a brown skin and white, starchy inner flesh, roundish but somewhat irregular in shape. Lift it in autumn or winter as the top growth dies back. It is peeled and then boiled or baked as a starchy staple, and must be cooked thoroughly — the raw tuber is acrid and irritant.
Preparation, Uses & Safety
Safety first: every edible part of taro must be cooked thoroughly. Raw leaves and tuber contain calcium oxalate raphides that cause intense mouth and throat irritation. Peel the tuber and boil or bake it until fully tender (it is commonly mashed); cook the leaves completely before eating. Remember that taking many leaves reduces the crop of tubers.
Pests, Diseases & Troubleshooting
Overview: Taro is a lush, moisture-loving aroid grown for its edible corms and huge leaves, and its problems track that wet, humid culture. Sap-feeding insects (aphids, leafhoppers, spider mites) and chewing hornworms hit the foliage, but the truly serious threats are water-borne pathogens – above all taro leaf blight (Phytophthora colocasiae) – plus Pythium corm/soft rots and Dasheen mosaic virus. Manage it culturally first: clean planting material, good airflow between plants, and avoiding overhead wetting late in the day.
Quick Troubleshooting Overview
| Issue / Pest | Main Symptom | Primary Solution |
|---|---|---|
| Taro leaf blight | Water-soaked lesions with yellow halos, later brown holes; leaf collapse | Remove infected leaves, space plants, apply copper/phosphonate preventively |
| Aphids & leafhoppers | Curled/yellow new leaves, sticky honeydew, sooty mold | Blast off with water, insecticidal soap, encourage lady beetles |
| Spider mites | Fine stippling, bronzing and webbing on dry, dusty foliage | Raise humidity, hose undersides, horticultural oil |
| Taro hornworm | Large chewed notches and stripped leaf blades overnight | Hand-pick larvae, apply Bacillus thuringiensis (Bt) |
| Pythium corm/soft rot | Mushy, foul-smelling corms; stunted, yellow plants | Improve drainage, rotate, plant only firm clean corms |
| Dasheen mosaic virus | Feathery yellow mosaic and leaf distortion | Rogue infected plants, control aphids, use clean stock |
Common Pests & Management
- Taro/aphid complex (Aphis gossypii and allies):
- Symptoms: Clusters of soft green to black aphids on new growth and leaf undersides; leaves curl and yellow, honeydew makes surfaces sticky and sooty. They also transmit Dasheen mosaic virus, which makes their control doubly important.
- Prevention & Control: Dislodge colonies with a firm water jet; conserve lady beetles, lacewings and hoverflies. For persistent infestations use insecticidal soap or a light horticultural oil on leaf undersides, and avoid over-feeding with high-nitrogen fertilizer that fuels soft, aphid-prone growth.
- Taro leafhopper (Tarophagus spp. / Empoasca leafhoppers):
- Symptoms: Small wedge-shaped insects that hop when disturbed; feeding causes stippling, marginal yellowing (“hopperburn”) and stunting, and they can vector disease. Look for cast skins and quick sideways movement.
- Prevention & Control: Keep plantings weeded and open for airflow; hose foliage and encourage spiders and predatory bugs. Insecticidal soap or neem suppresses nymphs; treat in the cooler evening hours to protect pollinators.
- Spider mites (Tetranychus spp.):
- Symptoms: Fine pale stippling that turns to bronzing, with delicate webbing on leaf undersides in hot, dry, dusty conditions; heavy infestations desiccate whole leaves.
- Prevention & Control: Taro loves humidity, so keep it well watered and mist/hose the undersides regularly to break mite cycles. Remove dust, introduce predatory mites, and spray horticultural oil or insecticidal soap if numbers climb.
- Taro hornworm & leaf-eating caterpillars (Hippotion celerio and others):
- Symptoms: Large green or brown caterpillars that chew ragged holes and can strip a leaf overnight; look for dark droppings (frass) beneath damaged leaves.
- Prevention & Control: Hand-pick at dusk when they feed; a spray of Bacillus thuringiensis (Bt) targets caterpillars selectively without harming beneficials. Encourage parasitic wasps and birds.
- Taro beetle (Papuana spp.) / root grubs:
- Symptoms: Black beetles and their grubs tunnel into corms below ground, causing holes, rot entry points and wilting; a serious pest where present in tropical taro.
- Prevention & Control: Rotate away from infested ground, keep the area free of decaying organic matter that breeds grubs, flood-fallow paddies where possible, and lift and inspect corms; drench with entomopathogenic nematodes for grubs.
- Mealybugs & scale (Planococcus, various soft scales):
- Symptoms: Cottony or shell-like clusters in leaf axils and on corms, with honeydew and sooty mold; slow decline of stressed or containerized plants.
- Prevention & Control: Wipe off small colonies with an alcohol-dipped swab; treat with horticultural oil or insecticidal soap and repeat, and inspect corms before replanting.
Diseases & Fungal Issues
- Taro leaf blight (Phytophthora colocasiae) – the major disease:
- Symptoms: Small water-soaked spots enlarge into brown-to-purplish lesions with yellow halos and, in humid mornings, a whitish sporulating edge; lesions coalesce, leaves disintegrate into holes and collapse, and severe outbreaks devastate whole plantings and reduce corm yield.
- Treatment & Management: This is a water-mould, so cultural control is everything: use resistant/tolerant varieties and clean planting material, widen spacing for airflow, avoid overhead irrigation and evening leaf wetness, and promptly remove and destroy infected leaves. Preventive copper or phosphonate (phosphorous-acid) sprays protect new foliage in wet, warm weather.
- Pythium corm & soft rot (Pythium spp.):
- Symptoms: Yellowing, stunting and wilting above ground; below, corms turn soft, watery and foul-smelling, especially in waterlogged or poorly drained ground.
- Treatment & Management: Plant only firm, clean corms in well-drained soil or well-managed paddy; avoid mechanical wounding, rotate crops, and improve drainage. Discard rotted corms and do not replant from affected stock.
- Dasheen mosaic virus (DsMV):
- Symptoms: Feathery light-and-dark green mosaic, vein-banding and leaf distortion or narrowing; growth is stunted though plants rarely die.
- Treatment & Management: There is no cure – rogue and destroy clearly infected plants, source virus-tested clean planting material, and control aphid vectors that spread it between plants. Disinfect cutting tools between plants.
- Sclerotium / bacterial soft rots (postharvest & base rots):
- Symptoms: Collapse at the leaf base or stem, white fungal threads or slimy bacterial breakdown of stored corms.
- Treatment & Management: Handle corms gently to avoid wounds, cure and store in cool, dry, ventilated conditions, and keep the growing area free of rotting debris; sanitation is the main defense.
Growing Difficulties & Abiotic Problems
- Root/corm rot from stagnant water
- Cause & Symptoms: Although taro tolerates standing water in flowing paddy culture, stagnant, oxygen-poor container mixes suffocate roots and rot the corm, giving yellow, wilting, collapsing plants.
- Correction Strategy: Use large containers with abundant drainage or keep water gently moving; never let potted taro sit in stale, warm standing water for long periods.
- Leaf scorch & sunburn
- Cause & Symptoms: In hot climates or after a move to full sun, thin-textured leaves develop bleached or brown crispy patches and margins.
- Correction Strategy: Give bright light with some afternoon shade in the hottest regions, keep the root zone consistently moist, and acclimatize gradually to stronger light.
- Nutrient chlorosis
- Cause & Symptoms: Heavy-feeding taro shows overall pale-yellow older leaves (nitrogen) or interveinal yellowing (iron/manganese) when starved or in cold, wet soil.
- Correction Strategy: Feed regularly through the growing season with a balanced fertilizer; correct interveinal yellowing with chelated micronutrients and warm, well-aerated soil.
- Cold damage & dormancy
- Cause & Symptoms: Taro is frost-tender; chilling blackens leaves and can rot corms held cold and wet.
- Correction Strategy: Lift and store corms frost-free and barely moist in cold climates, and resume watering only as warmth returns.
What Helps – Products & Tools
Reach first for cultural tools – a strong hose spray, wider spacing, and prompt removal of blighted leaves. For insects, insecticidal soap, neem or horticultural oil (applied to leaf undersides in the evening) handle aphids, mites, leafhoppers, mealybugs and scale, while Bacillus thuringiensis (Bt) targets hornworms. Against the key water-moulds – taro leaf blight and corm rots – use a copper fungicide or phosphonate (phosphorous-acid) product preventively and improve drainage; always follow the label and protect pollinators.
Varieties & Cultivars
- Black Magic — Learn more about Black Magic · Shop Black Magic on Amazon