Plant Profile & Key Characteristics
Also known as: Mother of thyme, Creeping thyme, Wild thyme, Thymus minus
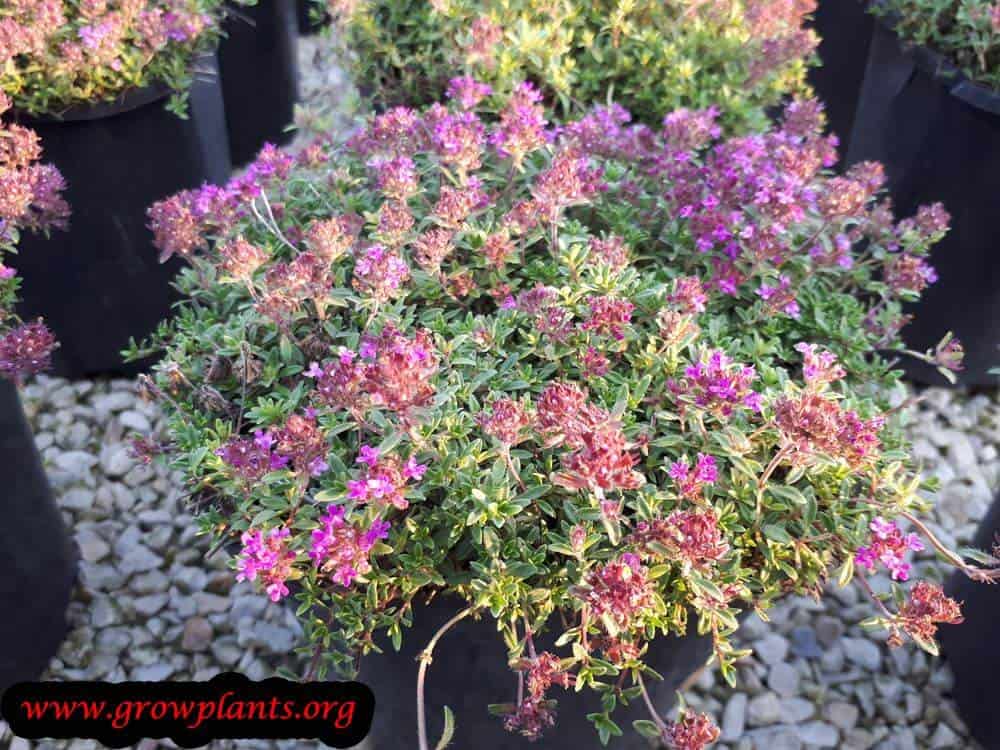
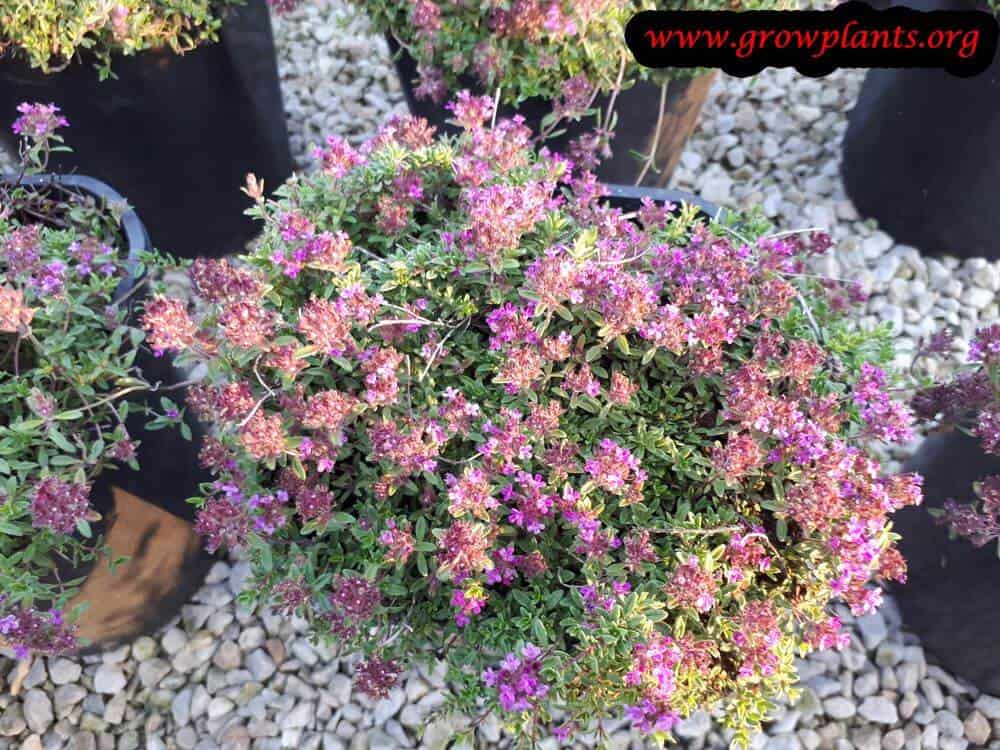
Overview: Mother of thyme (Thymus praecox) is a low, mat-forming evergreen subshrub reaching only 5-30 cm (2-12 in) high, grown as an aromatic culinary herb and as a fragrant ornamental groundcover. It is a hardy perennial for well-drained, sunny sites.
Quick Specifications
| Specification | Attribute |
|---|---|
| Plant Type / Life Cycle | Perennial (woody-based subshrub) |
| Foliage Type | Evergreen |
| Mature Size | 5-30 cm x spreading (2-12 in high) |
| Growth Rate | Moderate to fast |
| Root System | Fibrous and shallow; stems root readily where they touch the soil (natural layering) |
| Toxicity | Non-toxic / edible culinary herb |
| Hardiness | USDA zones 5-10 |
Growth Form & Structure
- Height & Spread: 5-30 cm (2-12 in) tall in the ground, forming a wide spreading mat; stays compact in a container, where a small pot 200-400% larger than the root ball is used and stepped up as roots fill it
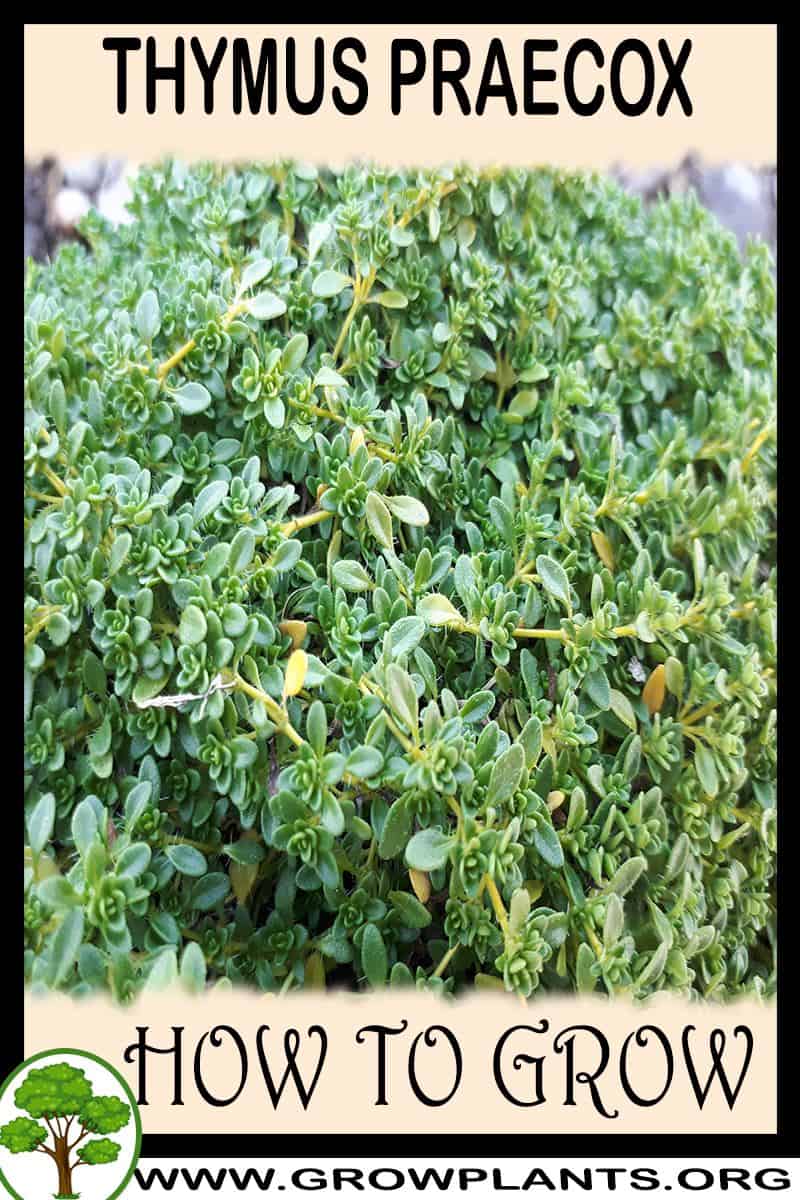
- Growth Habit & Form: Low, spreading, mat-forming subshrub with a woody base and slender trailing stems; classic groundcover form
- Lifespan & Maturity: Reaches full spread within a season or two; a long-lived perennial that is best renewed by layering or replacing every few years as the centre goes woody
Anatomy & Physical Features
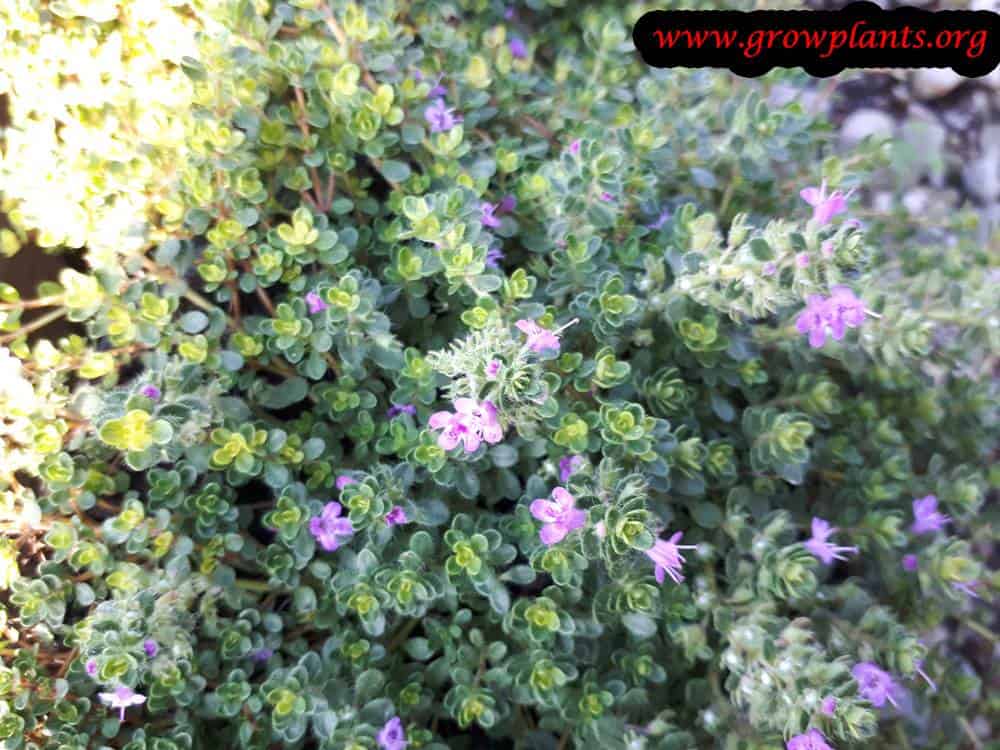
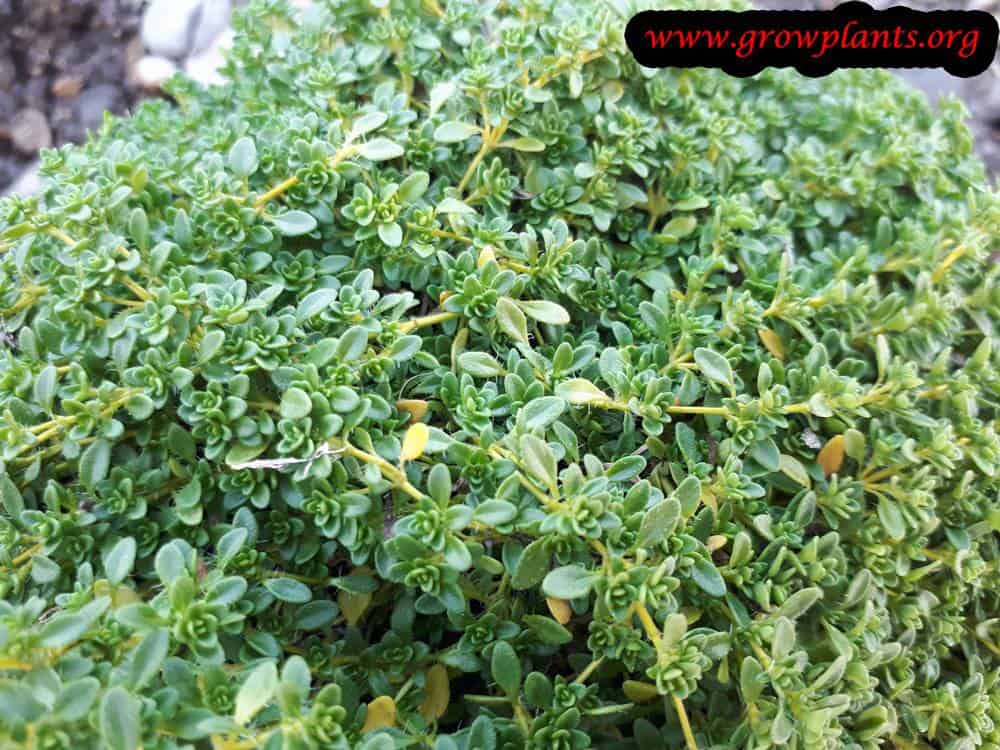
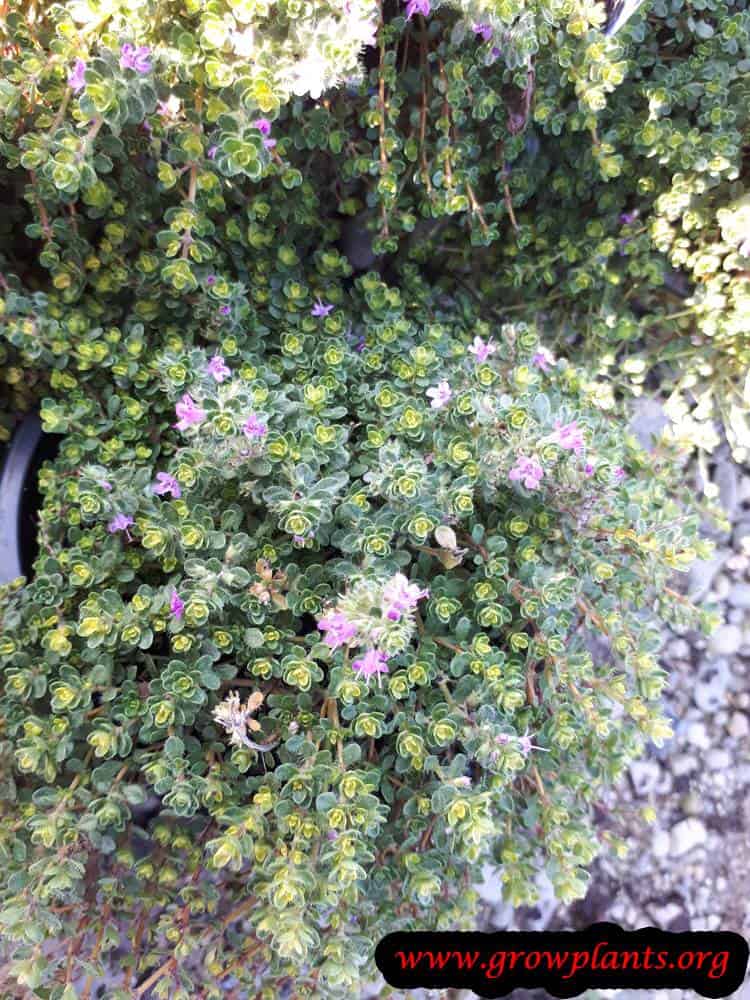
- Leaves & Foliage: Small green oval, 3-12 mm, hard-textured leaves, highly aromatic; some cultivars show yellowing (variegated) leaf edges
- Flower Characteristics: Small purple, pink, red or white flowers borne on stalks in loose inflorescences, very attractive to bees
Primary Uses & Landscape Value
- Edible Uses: Leaves used fresh or dried as a culinary herb, spice and in spreads; the flower buds are also edible
- Functional & Ornamental Roles: Aromatic groundcover, edging and rockery plant, container and windowsill herb, and a strong pollinator attractant
Care Guide: Planting, Soil & Watering
Overview: Thymus praecox (mother of thyme) is a tough, sun-loving Mediterranean subshrub that thrives in poor, gritty, sharply drained soil and full sun. It is drought tolerant once established and far more sensitive to excess moisture than to dryness, so lean soil and restrained watering suit it best.
Quick Care Requirements
| Requirement | Ideal Condition |
|---|---|
| Planting Season | Spring after the last frost in cooler zones; autumn to spring in frost-free zones |
| Growth Rate | Moderate to fast |
| Soil Type | Light, gritty, sharply well-draining; tolerates poor, lean soil |
| Water Need | Low to moderate — let the soil dry out between waterings |
Planting & Establishment
- Best Planting Season: In cooler zones (roughly 5–9) plant in spring once the last frost has passed; in warmer, frost-free zones plant from autumn through spring so roots establish before the summer heat.
- How to Plant:
- Hole Preparation: Dig a hole a little larger than the root ball so the roots can spread into loosened soil.
- Soil Amendments: Mix a little organic matter or compost through the planting soil, but keep the bed lean and free-draining rather than rich — heavy, fertile soil holds too much moisture for thyme.
- Planting Depth: Set the plant at the same depth it sat in its pot, keeping the crown at soil level; trailing stems can be pegged down and lightly covered to root as the plant spreads.
- Growth Speed & Expectations: Expect a moderate to fast pace, with plants knitting together into a low, fragrant mat or groundcover within a season or two. Thyme competes poorly with weeds, so keep the area weed-free (especially while plants are getting established) by pulling or hoeing out nearby weeds by hand.
Soil, Watering & Drainage Care
- Soil Mix & Drainage Needs: Provide light, gritty, well-aerated soil that drains fast; in containers use a free-draining, ventilated potting mix and a pot with good drainage holes, sized well above the root ball so excess water never sits around the roots.
- Watering Schedule & Technique:
- Young / Newly Planted: Keep the soil lightly moist while young plants root in, watering when the surface dries, but never leave it soggy.
- Established: Water sparingly once established — soak deeply, then let the top of the soil dry out before watering again, as thyme is far happier a little dry than wet.
- Seasonal Adjustments: Cut watering right back in winter when growth slows, and water a little more in prolonged summer heat, while still letting the soil dry between drinks.
Climate, Light & Hardiness
Mother of thyme is a compact, mat-forming culinary and ornamental herb suited to temperate, subtropical, and mediterranean climates. It is reliably hardy USDA zone 5–9, extending into zone 10 with good care, and needs full sun and dry, airy conditions rather than humidity.
Quick Climate Specifications
| Climate Zones | Temperate, Subtropical, Mediterranean |
|---|---|
| USDA Hardiness Zones | 5–9, extending into zone 10 with favorable care |
| Frost Tolerance | High |
| Light Conditions | Full Sun |
Sunlight & Light Exposure
Optimal Light Setup
Needs full sun for a dense, low mat and good flowering; performs poorly in shade.
Direct Sun Requirement
Essential - a genuinely sun-loving mediterranean-scrub herb.
Temperature Extremes & Hardiness
USDA Hardiness & Regional Limits
Reliably hardy zone 5–9; the source data notes it can also succeed in zone 10 with the right care, though this is more marginal than its core range.
Cold Damage & Winter Protection
Its low, ground-hugging subshrub habit gives it good winter cold tolerance within its hardy range; no special protection is normally needed in zone 5–9.
Frost Sensitivity
Low.
Extreme Heat Tolerance
Good; comfortable in hot, dry mediterranean and subtropical summer conditions.
Wind, Humidity & Microclimate
Dry-Air Tolerance
High; the source data specifically flags sensitivity to persistent moisture/humidity as a difficulty, so dry, airy conditions around the foliage matter as much as soil drainage.
Wind Tolerance
High - a low, resilient groundcover well suited to open, breezy sites.
Microclimate Recommendations
Choose an open, sunny, well-ventilated position; avoid humid, still, sheltered pockets where moisture lingers on the foliage.
Growing in Pots, Balconies & Indoors
Creeping thyme is a low, sun-loving mat-forming herb rather than a true houseplant, but it takes very happily to pots, troughs and edging on a bright balcony or patio. Indoors it needs the sunniest windowsill you have; in a dim room it stretches and weakens.
Quick Details
- Container Size: Start in a small pot, then step up – the grower keeps pots 2-4x (200-400%) wider than the root ball and upsizes as roots fill in
- Indoor Suitability: Not a deep-room houseplant; grows well on a hot, sunny windowsill
- Best Spot: Full sun – the brightest sill, balcony rail or patio edge
- Soil & Drainage: Well-drained, well-ventilated gritty mix; never waterlogged
- Watering in Pots: Sparing – let the surface dry between waterings; pots must never stay soggy
Indoors & On the Windowsill
- Houseplant limits: The grower does not rate it as an indoor houseplant – it wants full sun, which a typical room cannot give.
- Windowsill growing: On a bright, sun-drenched sill it does fine; grow a compact form, turn it for even light and keep it lean and dry.
- Overwintering: In cold climates a potted plant is easy to shelter over winter in a cool, bright spot and set back out once mild.
On a Balcony or Patio
- Light & wind: Give it the sunniest, most open spot; it shrugs off heat and reflected warmth from walls and paving, but small pots dry fast so check moisture in hot spells.
- Practicalities: Shallow troughs and edging pots suit its spreading, mat habit and make excellent aromatic groundcover on a balcony.
Choosing the Pot, Soil & Long-Term Care
- Pot & drainage: Use a pot with strong drainage holes and skip a standing-water saucer (or empty it promptly) to avoid root rot; terracotta breathes and dries faster, while glazed or plastic pots hold moisture longer.
- Potting mix: A gritty, free-draining herb mix – loosen a standard potting soil with extra grit or perlite for the sharp drainage thyme prefers.
- Feeding: Potted plants exhaust their mix faster than those in open ground – nutrients leach away with each watering – so feed lightly through the active growing season. Thyme is lean-loving, so feed only lightly.
- Repotting: The grower renews the soil about every two years and, when roots outgrow the pot, prunes both roots and top growth and lets the plant regrow.
Grower’s Container Tip
- Upsize gradually, then rejuvenate: Begin in a small pot 2-4x the root ball, moving up a size as the roots fill each one; every couple of years, or once roots crowd the pot, change the soil and cut back both the roots and the foliage so the plant flushes fresh growth.
Fertilizing & Feeding
Thyme is a light feeder – established plants in well-drained soil often get by on little more than an occasional light feeding during active growth, and overfeeding tends to dilute the aromatic oils that give the leaves their flavor and scent.
Quick Fertilizing Specs
| Feeding Level | Light feeder |
|---|---|
| Main Nutrient Priority | A modest balanced feed at establishment, then lean low-nitrogen to keep growth dense and aromatic |
| Best Feeding Period | The active growing season, spring through summer |
| Organic Options | Compost or well-rotted organic matter worked in at planting |
| Soil pH | Tolerates a wide range of soil pH provided drainage is excellent |
| Reduce/Stop Feeding | Ease off feeding as growth slows heading into autumn and winter |
Feeding by Growth Stage
Establishment After Planting
Support root establishment without pushing soft, disease-prone growth.
| Nutrient direction | A balanced, modest feeding supports root establishment while keeping growth compact. |
|---|---|
| Timing | At planting and through the first few weeks as roots establish. |
| Frequency | A light feeding as the plant settles in is usually enough; hold off afterward until active growth is underway. |
| Fertilizer types | A balanced, general-purpose fertilizer applied lightly, Compost or well-rotted organic matter worked into the planting hole |
| Precautions | Avoid heavy feeding at planting, which can push lush, less aromatic growth in soil this plant expects to be well-drained. |
Active Growing Season
Maintain steady, compact growth and good leaf and oil quality through the growing season.
| Nutrient direction | Keep feeding light and lean toward lower nitrogen so growth stays dense and aromatic rather than soft and diluted. |
|---|---|
| Timing | During the active growing season, spring through summer. |
| Frequency | Feed sparingly through the growing season; established plants in reasonable soil rarely need much at all. |
| Fertilizer types | A diluted, balanced or low-nitrogen fertilizer used sparingly, A light topdressing of compost in poor soils |
| Precautions | Overfeeding tends to produce lanky, less flavorful growth and can worsen this plant’s known sensitivity to excess moisture. |
Nutrient Deficiency Signs & Corrections
Overall growth is slow and foliage looks pale or thin rather than dense and richly colored.
| Possible causes | low soil fertility, compacted or poorly draining soil restricting root growth, roots stressed by excess moisture |
|---|---|
| Appears first on | new growth across the plant |
| What to check | soil drainage and texture, recent watering habits, how long since the last feeding |
| Possible correction | Improve drainage, avoid overwatering, and apply a balanced fertilizer per its label rate during active growth. |
Younger leaves yellow between the veins while the veins themselves stay green.
| Possible causes | iron chlorosis from high soil pH or waterlogged roots, root stress from consistently wet soil, poor root function in compacted soil |
|---|---|
| Appears first on | newer growth |
| What to check | soil pH and drainage, recent watering frequency, root health at the base of the plant |
| Possible correction | Correct drainage and watering first, then apply a chelated iron product per its label if chlorosis persists. |
Stems soften or blacken near the soil line and the plant wilts or declines despite normal watering elsewhere in the bed.
| Possible causes | prolonged soil moisture in poorly drained soil, overwatering, given this plant’s known sensitivity to moist conditions, dense nearby growth limiting airflow around the base |
|---|---|
| Appears first on | stems and crown near the soil line |
| What to check | soil drainage, watering frequency, airflow and spacing around the plant |
| Possible correction | Improve drainage, reduce watering frequency, and thin nearby growth to increase airflow; hold off on feeding until the plant recovers. |
Pruning, Training & Seasonal Maintenance
Thymus praecox – commonly sold as Mother of thyme, creeping thyme, or wild thyme – is a low, mat-forming, woody-based subshrub grown for its edible, fragrant leaves as much as for its flowers. It tolerates moderate pruning: a summer trim of the flowered stems once bloom fades (which the source notes favors leaf growth over seed-set) plus an autumn/winter tidy of dead material, but as with related creeping thymes, cuts should stay in green growth – this species does not reliably resprout from bare, leafless old wood.
Quick Pruning & Maintenance Specs
| Pruning Tolerance | Moderate (green growth only; avoid cutting into bare old wood) |
| Primary Pruning Window | Autumn to winter, for dead leaf/stem cleanup |
| Secondary Maintenance Window | Summer, trimming flowered stems once bloom fades |
| Typical Frequency | One to two light trims per year, plus ongoing leaf harvest |
| Main Objective | Keep the mat dense and leafy; prevent a bare woody center; favor leaf growth over seed-set |
| Young Plant Priority | Pinch tips early to build a low, evenly spreading mat |
| Mature Plant Priority | Annual post-bloom trim into green growth to stop the center going bare and woody |
| Best Tool Type | Precision snips / small hand shears sized to a low mat, not full hedge shears |
| Avoid Heavy Pruning During | Any cut into brown, leafless wood; also avoid pruning during hot, dry stress |
Pruning by Plant Age & Size
Newly Established
Pinch growing tips to build low, dense branching before the mat has filled its space.
Young / Formative
No upright training applies to this spreading groundcover – the aim is even, dense branching outward rather than a leader or framework.
Mature / Established
Give an annual light trim of the flowered stems once bloom fades, staying in green growth, to keep the mat dense and productive and prevent the bare, woody center that untrimmed mats develop over years.
Seasonal Pruning Schedule
Post-Flowering/Summer
Objective: favor leaf growth over seed-set and refresh the mat, per the source guidance that thinning the bloom benefits leaf growth. Remove: spent flowering stems, cut back into green growth. Do not remove: stem tissue that has already gone bare/brown, since it will not resprout. Response: a flush of fresh, compact, harvestable leafy growth.
Dormant/Winter
Objective: general tidy. Remove: dead leaves and stems. Do not remove: live green growth, which may not harden off before frost if cut too late in the colder parts of its zone 5–9(10) range.
Flowering & Fruiting Wood
Flowers form on the current season’s new growth rather than on old wood, so the summer post-bloom trim does not remove next year’s flowering – each year’s new stems carry their own flower spikes.
Structural Pruning & Training
A regular light shear of the mat surface, into green growth only, is what keeps a spreading ring of leafy growth from forming around an increasingly bare, woody center. This renewal trim is the plant’s main structural need; there is no branch selection or leader work involved.
Special Growth to Remove
- Spent flowering stems, per the source guidance to prune the flowers for better leaf growth.
- Dead leaves and stems, especially heading into winter.
Container & Small-Space Pruning
When repotting an overgrown container plant, prune both the roots and the top leaf growth together and let it regrow – this combined root-and-leaf cutback keeps a potted specimen in proportion with its container.
Tools
- Precision snips or small hand shears for the mat-wide post-bloom trim and routine leaf harvest, scaled to a low, small-stemmed subshrub rather than full hedge shears.
Tool Hygiene & Disease Risk
Routine: clean, sharp tools are enough. Only aphids are noted as a pest issue, with no documented tool-transmitted disease risk for this species.
Cut Placement & Technique
Shear or snip lightly across the mat into green, leafy stem tissue only; never cut into stems that have already turned bare and woody, since they carry no dormant buds to regrow from.
Heavy Pruning & Rejuvenation
Not tolerated. Once a mat has developed a bare, woody center from being left untrimmed for years, cutting hard into that old wood generally will not revive it, the same limitation seen in other woody Lamiaceae subshrubs. A badly overgrown plant is better propagated fresh from healthy edge growth (this species roots readily from a bent, soil-covered stem) or replaced than hard-pruned.
Post-Pruning Care
Water lightly after trimming, taking care not to overwater a species already noted as sensitive to excess soil moisture. No feeding is needed.
Common Pruning Mistakes
- Leaving the mat unclipped for years until the center is bare, woody stems, at which point pruning can no longer fix it.
- Cutting into old brown wood expecting it to resprout.
- Overwatering after a trim on a species that is naturally sensitive to excess moisture.
When NOT to Prune
Never cut into bare, woody stem tissue. Avoid trimming during hot, dry stress, and consider leaving some bloom uncut where its flowers’ pollinator value or edible buds/flowers are wanted, since thinning them is a leaf-growth choice rather than a requirement.
Recommended Tools (by task)
- precision_snips – covers the post-bloom mat trim, routine leaf harvest, and dead-growth cleanup at this low subshrub’s scale.
Pruning Troubleshooting
| Problem | Possible Cause | What to Check | Corrective Action |
| Bare, woody center with leafy growth only around the edges | Years without a post-bloom trim, letting the core of the mat age into bare wood | Whether an annual light trim has been kept up | Begin annual post-bloom trims while growth is still young; propagate a replacement from healthy edge growth rather than hard-cutting the old wood |
| No regrowth after a cutback | Cut made into bare, leafless wood with no dormant buds | Where the cut was placed relative to green tissue | In future, trim only into green growth; for the current plant, wait to see if edge growth recovers or propagate a replacement |
Propagation Guide
The easiest way to increase Thymus praecox (Mother of Thyme) is vegetatively – either by pegging a low, trailing stem into the soil so it roots while still attached to the parent plant, or from short tip cuttings; seed also works and stays reasonably true to the species since this is not a hybrid cultivar. Overall propagation is easy, and layering in particular is close to foolproof because the mat-forming stems root readily wherever they touch soil.
Quick Propagation Specs
| Best Propagation Method | Layering (bending a stem into the soil) |
| Alternative Methods | Stem cuttings; seed |
| Propagation Difficulty | Easy |
| Seed True-to-Type | Usually true-to-type (species plant) |
| Vegetative True-to-Type | Yes |
| Best Propagation Season | Spring or autumn for layering/cuttings; seed sown spring after last frost through summer in hardiness zone 5–9, spring to autumn in zone 10a, autumn to spring in zone 10b |
| Seed Germination Time | 2–8 weeks |
| Cutting/Layering Rooting Time | 2–4 weeks |
| Germination Temperature | 20–26°C (68–79°F) |
| Seed Sowing Depth | 2–3mm |
Growing from Seed
Seed Handling & Viability
Store saved seed in a cool, dry location until sowing.
Sowing Season
Spring after the last frost through summer in hardiness zone 5–9; spring to autumn in zone 10a; autumn to spring in zone 10b.
Sowing Depth & Orientation
Very shallow – about 2–3mm deep. Sowing indoors is also possible.
Germination Conditions
Keep the soil moist at around 20–26°C (68–79°F); water lightly and avoid overwatering.
Germination Time
Typically 2–8 weeks and can be uneven.
Seedling Care
Keep seedlings lightly moist with medium humidity. Transplant into larger pots once seedlings reach about 10 leaves, spacing them roughly 4x5cm (1.4x2in) apart.
Stem Cuttings
Short, non-flowering tip cuttings are a practical alternative to layering and generally root in a similar timeframe under the same cautious, not-too-wet conditions this thyme prefers (it is noted as sensitive to excess moisture). A light rooting hormone is not reported as necessary but can speed and even out rooting.
Air & Ground Layering
This is the method the site itself highlights as the easy way to increase this plant.
Technique
Bend a low, flexible stem down onto the soil surface and cover the contacted section with soil; roots will form along the buried part of the stem.
Wounding
Lightly breaking or nicking the stem where it will be buried is sometimes recommended to encourage rooting.
Moisture
Keep the soil covering the buried stem moist.
Best Timing
Spring or autumn.
Rooting Time
Roots typically form in about 2–4 weeks, after which the rooted section can be cut away from the mother plant and grown on independently.
Bloom & Edible Flower Guide
Quick Details
- Bloom Season: Late spring into summer
- Flower Appearance: Clouds of tiny purple flowers in small heads over the mat of foliage
- Edibility: Flowers are edible and fragrant, lovely used alongside the leaves
Detailed Blooming Overview
Creeping mother-of-thyme smothers itself in tiny purple flowers in early summer, alive with bees — one of the best edible flowering groundcovers.
Flower Characteristics
- Small purple, two-lipped flowers clustered at the stem tips on short inflorescences.
- Strongly aromatic and a magnet for pollinators.
Bloom Care & Thinning
- Thinning: shearing off the flowers, as the grower recommends, keeps growth compact and encourages fresh leafy shoots for the kitchen.
- Pollination: by bees and flies.
- Edible use: flowering sprigs can be used just like the leaves.
Fruit & Uses
Thymus praecox (Mother of Thyme) is grown for its aromatic leaves and flower buds, both of which are edible and used fresh. The leaves and tender buds are eaten raw as a fresh herb, in spice blends, and in spreads, with no cooking required.
Quick Edible Specs
| Edible Parts | Leaves, flower buds |
|---|---|
| Main Use(s) | Culinary herb (fresh leaf, spice, spread) |
| Eaten Raw or Cooked | Raw (also usable dried or cooked as a seasoning) |
| Preparation Required | None – rinse before use |
| Harvest Season | All year |
| Time to First Harvest | Once the plant is established |
| Storage | Best used fresh; can be air-dried for later use |
| Safety/Toxicity Caveat | None known – a common culinary herb |
Leaves & Greens
The small, hard-textured green leaves (3–12 mm) are the main edible part, harvested by cutting stems once the plant is established. They are eaten raw as a fresh herb or used as a spice and in spreads, with the typical thyme flavor.
Flowers & Flower Buds
The unopened, drop-shaped flower buds are also edible and can be picked along with young leafy stems. The small purple flowers that follow, borne in stalked inflorescences, can likewise be used fresh as a mild, thyme-flavored garnish.
Harvesting
Leaves and buds can be cut year-round once the plant is established, taking whole stems as needed. Harvesting little and often encourages fresh new growth (see Pruning for how cutting affects flowering).
Preparation, Uses & Safety
Leaves and buds need no special preparation beyond rinsing and are used raw as a fresh herb, in spice mixes, and in spreads; they can also be air-dried for storage. No toxicity or safety concerns are associated with this plant.
Pests, Diseases & Troubleshooting
Overview: Thyme is an aromatic Mediterranean subshrub whose essential oils make it one of the more pest-resistant herbs in the garden; the vast majority of problems are cultural rather than insect-driven. Its single greatest enemy is excess moisture, which triggers root and crown rot. Manage it with sharp drainage, airflow and restraint – reach for sprays only for genuine infestations, favouring organic and cultural controls first.
Quick Troubleshooting Overview
| Issue / Pest | Main Symptom | Primary Solution |
|---|---|---|
| Root / crown rot | Sudden wilting, blackened woody base, plant collapses | Improve drainage; water only when dry; avoid winter wet |
| Grey mould (Botrytis) | Fuzzy grey growth on dense, damp foliage | Thin and prune for airflow; remove affected stems |
| Spider mites | Fine stippling, dull leaves, webbing (hot/dry or indoors) | Rinse foliage; insecticidal soap or horticultural oil |
| Aphids | Sticky new growth, distorted soft tips | Blast with water; encourage ladybirds; soap if needed |
| Legginess / woodiness | Bare woody centre, sparse growth with age | Hard-prune in growth; replace plants every few years |
Common Pests & Management
- Spider Mites (Tetranychus urticae):
- Symptoms: Fine pale stippling and a dusty, faded look to the leaves, with delicate webbing on undersides and shoot tips; worst on plants grown hot, dry or indoors. Distinguish from nutrient deficiency by the mobile specks and webbing under magnification.
- Prevention & Control: Raise humidity and rinse foliage with a firm spray of water to knock populations down; keep plants in good airflow. Introduce predatory mites indoors. If persistent, treat with insecticidal soap or horticultural oil, covering leaf undersides thoroughly.
- Aphids (Aphidoidea):
- Symptoms: Small green, grey or black soft-bodied insects clustered on tender new shoots, causing sticky honeydew, curled tips and sometimes sooty mould. Usually minor on established thyme.
- Prevention & Control: Dislodge with a strong jet of water and pinch out badly infested tips. Encourage ladybirds, lacewings and hoverflies. Only if colonies persist, apply insecticidal soap or a light neem/horticultural oil, sprayed in the evening to protect pollinators.
- Spittlebugs (Froghoppers) (Philaenus spumarius):
- Symptoms: Frothy white ‘cuckoo-spit’ blobs in leaf axils, sheltering a soft green nymph. Largely cosmetic and rarely damaging.
- Prevention & Control: Simply hose off the foam and nymphs with water; no chemical control is warranted for such a minor, transient pest.
- Mealybugs (Pseudococcidae):
- Symptoms: White cottony masses tucked into stem joints and leaf bases, mainly on stressed or indoor/potted thyme, with sticky residue and weak growth.
- Prevention & Control: Dab colonies with a cotton bud dipped in dilute alcohol and isolate affected pots. Improve light and airflow. Follow up with insecticidal soap or horticultural oil for heavier infestations.
Diseases & Fungal Issues
- Root & Crown Rot (Rhizoctonia / Pythium / Fusarium spp.):
- Symptoms: The classic thyme killer: plants wilt and yellow despite moist soil, the woody base turns brown-black and mushy, and roots are dark and sloughing. Almost always follows heavy, wet or poorly drained soil.
- Treatment & Management: Prevention is everything – plant in gritty, free-draining soil or raised beds, water sparingly and let the surface dry between waterings, and never leave pots standing in saucers. There is no cure once advanced; lift and discard collapsed plants and replant in fresh, sharply drained ground.
- Grey Mould (Botrytis cinerea):
- Symptoms: Fuzzy grey-brown mould on stems and leaves in cool, damp, crowded conditions, with soft rotting patches spreading through congested growth.
- Treatment & Management: Increase spacing and prune to open the canopy for airflow, avoid overhead watering, and remove affected material promptly to bin (not compost). Copper-based products can help in persistent damp spells.
- Alternaria / Leaf Blight (Alternaria spp.):
- Symptoms: Dark brown spots and blighted, dying shoot tips in warm, humid weather, sometimes with a general dieback of foliage.
- Treatment & Management: Improve airflow, avoid wetting foliage, and clear fallen debris. Remove affected stems; a copper fungicide can be used preventively where the problem recurs.
- Powdery Mildew (Erysiphales):
- Symptoms: White powdery coating on leaves in humid conditions with poor air movement – uncommon on thyme but possible on shaded, crowded plants.
- Treatment & Management: Space and prune for ventilation, site in full sun, and treat with a sulfur or potassium-bicarbonate fungicide if it takes hold.
Growing Difficulties & Abiotic Problems
- Overwatering & Poor Drainage:
- Cause & Symptoms: The number-one cause of failure – soggy soil suffocates roots and invites rot, showing as yellowing, wilting and blackened stems even while the soil is wet.
- Correction Strategy: Grow in gritty, alkaline-to-neutral, fast-draining soil, water deeply but infrequently, and let it dry out between waterings. In pots use a cactus/herb mix and terracotta.
- Winter Wet & Frost:
- Cause & Symptoms: Cold combined with wet soil rots the crown; a mild damp winter is more lethal than a dry cold one.
- Correction Strategy: Ensure perfect drainage, mulch the crown with grit rather than organic matter, and in heavy soils grow in raised beds or containers that can be sheltered.
- Legginess & Woodiness:
- Cause & Symptoms: With age thyme becomes bare and woody at the centre with growth pushed to the tips, reducing vigour and flavour.
- Correction Strategy: Trim lightly after flowering and hard-prune in the growing season to force fresh basal growth; replace tired plants every three to four years from cuttings or layering.
- Poor Sun / Excess Feeding:
- Cause & Symptoms: In shade or over-rich soil thyme grows soft, sparse and flavourless, and is far more disease-prone.
- Correction Strategy: Site in full sun and lean soil; avoid nitrogen-rich feeds, which produce lush weak growth at the expense of the aromatic oils.
What Helps – Products & Tools
For the occasional insect issue, thyme responds well to gentle organic tools – a strong water rinse, insecticidal soap, and light neem or horticultural oil for mites, aphids and mealybugs. Disease control is mostly cultural, backed by copper or sulfur/potassium-bicarbonate fungicides for grey mould, blight or mildew. Grit for drainage is the most valuable ‘product’ of all.