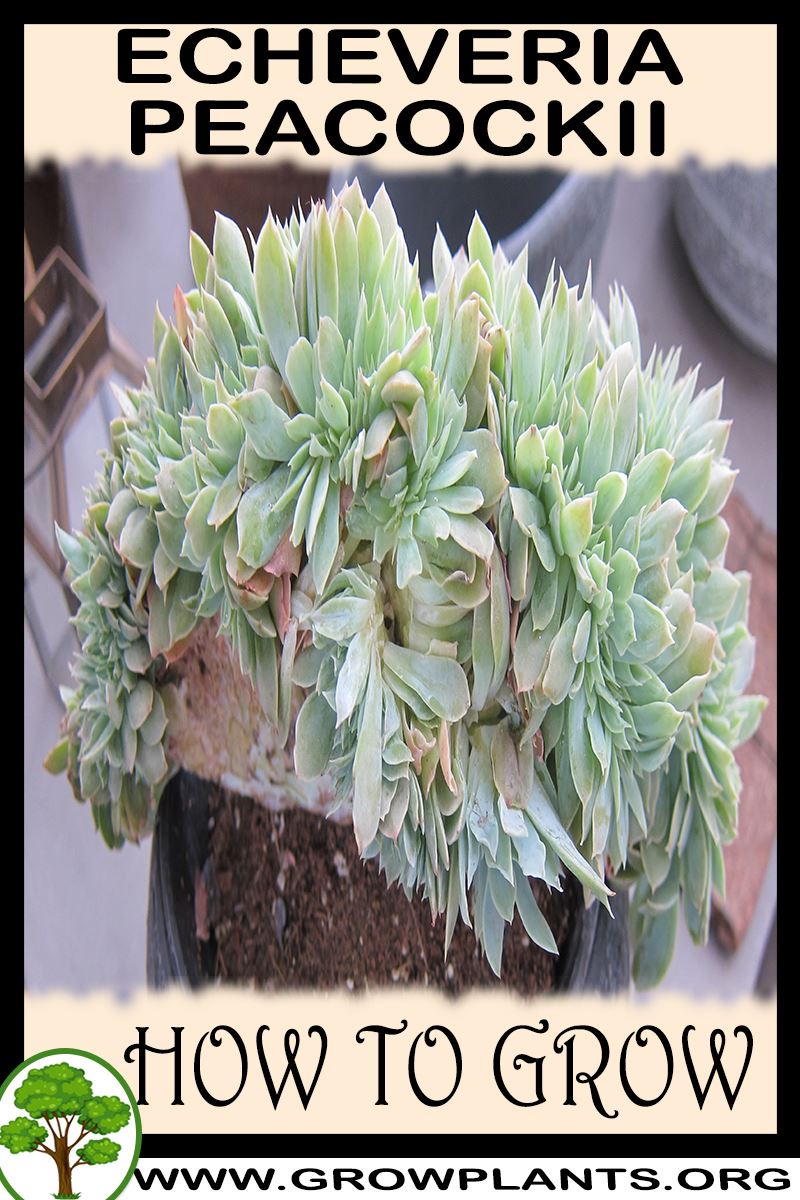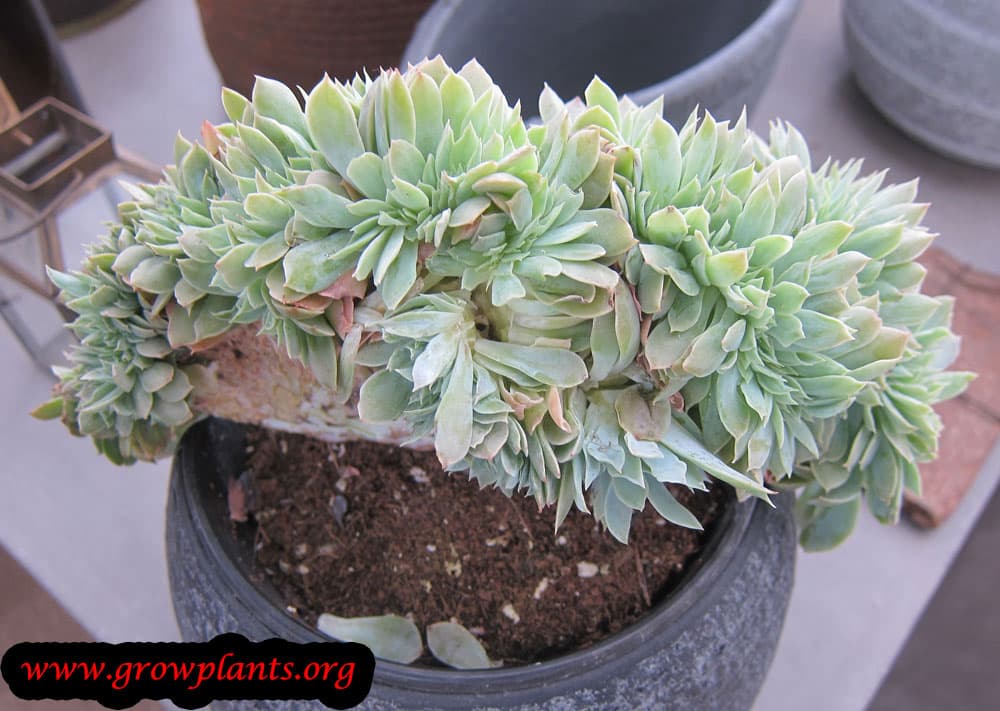

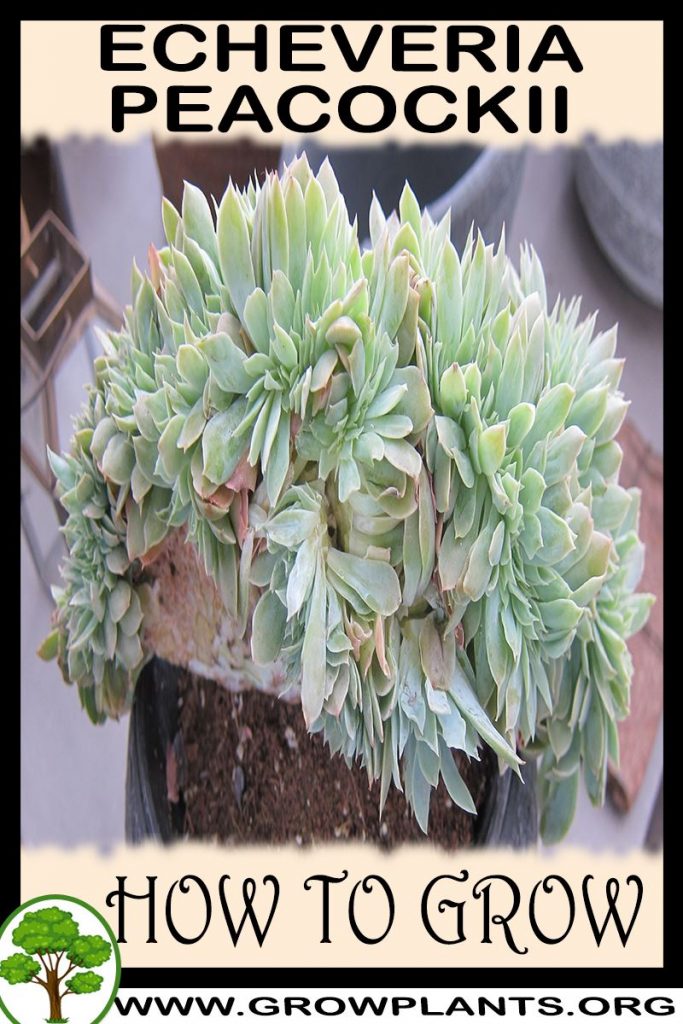
Plant Profile & Key Characteristics
Overview: A compact evergreen perennial succulent forming a symmetrical leaf rosette 15-30 cm (6-12 in) across. Grown as an ornamental, drought-tolerant plant for gardens, containers and windowsills.
Quick Specifications
| Specification | Attribute |
|---|---|
| Plant Type / Life Cycle | Perennial (succulent) |
| Foliage Type | Evergreen |
| Mature Size | 15-30 cm (6-12 in) |
| Growth Rate | Slow |
| Root System | Shallow, fibrous |
| Toxicity | Non-toxic / pet-safe |
| Hardiness | USDA zone 9+ |
Growth Form & Structure
- Height & Spread: Rosette 15-30 cm (6-12 in); well suited to shallow pots and containers 15-30% larger than the root ball, with free-draining soil.
- Growth Habit & Form: Low, symmetrical rosette of fleshy leaves; offsets around the base to form clusters (hence the name Hens and Chicks).
- Lifespan & Maturity: Long-lived perennial; slow-growing, especially when young.
Anatomy & Physical Features
- Leaves & Foliage: Fleshy leaves in green, blue or purple, often with pink, yellow, purple or orange margins, elliptic to wedge-shaped with a pointed tip.
- Flower Characteristics: Bell-shaped flowers in red to orange, held on arching stems.
Primary Uses & Landscape Value
- Functional & Ornamental Roles: Ornamental drought-tolerant succulent for rockeries, dish gardens, containers and as a low-care houseplant.
Care Guide: Planting, Soil & Watering
Overview: Echeveria is a drought-tolerant succulent for full sun to light shade that demands fast-draining, sandy or gritty soil. It stores water in its leaves, so water sparingly on a soak-and-dry cycle and never let it sit in soggy soil, which quickly causes rot.
Quick Care Requirements
| Requirement | Ideal Condition |
|---|---|
| Planting Season | Spring in zone 9; spring to summer in 10a; spring to autumn in 10b–11a; year-round in 11b+ |
| Growth Rate | Slow |
| Soil Type | Sandy, gritty, sharply well-draining soil (cactus / succulent mix) |
| Water Need | Low — soak-and-dry; let the mix dry out fully between waterings |
Planting & Establishment
- Best Planting Season: Plant in spring as growth resumes; in warmer frost-free zones the window extends into summer, autumn, or year-round.
- How to Plant:
- Hole Preparation: Dig a hole a little larger than the root ball in loose, well-ventilated soil.
- Soil Amendments: Work in sand or grit for sharp drainage; in wet, rainy locations plant on a raised bed or mound so water can’t pool around the roots.
- Planting Depth: Set the rosette so its base sits just at soil level — don’t bury the lower leaves or crown.
- Growth Speed & Expectations: Slow-growing, especially while the plant is young.
Soil, Watering & Drainage Care
- Soil Mix & Drainage Needs: Use a gritty, fast-draining mix — potting or cactus mix with added gravel, lava rock or pebbles; drainage is everything, and since it declines over a few years, refresh the mix periodically. Skip a pot saucer so water drains away freely.
- Watering Schedule & Technique:
- Young / Newly Planted: Water lightly and infrequently, letting the mix dry between waterings; overwatering is the main killer.
- Established: Follow a soak-and-dry routine — water thoroughly, then let the soil dry out completely before watering again.
- Seasonal Adjustments: Water even less in cool or wet winter weather; the plant tolerates drought far better than excess moisture.
Climate, Light & Hardiness
Echeveria peacockii is a rosette succulent suited to Mediterranean, desert, subtropical, temperate, and tropical climates. It prefers full sun to bright light with some protection from the harshest summer sun, is hardy to about USDA zone 9 and warmer, and grows best kept above roughly 7°C (45°F) although it can tolerate some frost.
Quick Climate Specifications
| Climate Zones | Mediterranean, desert, subtropical, temperate, and tropical climates |
|---|---|
| USDA Hardiness Zones | Approximately Zone 9 and warmer |
| Optimal Temp Range | Generally above about 7°C (45°F), with typical warm-season growing temperatures roughly 18–27°C (65–80°F) |
| Cold Damage Begins | Growth and leaf condition typically decline below approximately 7°C (45°F) |
| Approx. Survival Minimum | Can tolerate occasional light frost, but exact survival limits vary with duration, exposure, and plant age |
| Frost Tolerance | Low–Moderate |
| Light Conditions | Full Sun (may scorch in hot summer areas; fine in winter within zones 9–10a) / Half Shade (preferable in hot climates) / Full Shade with bright ambient light |
| Wind Tolerance | Moderate |
Sunlight & Light Exposure
Optimal Light Setup
Grows best with strong, bright light; good sun exposure brings out the blue-grey leaf tones and pink-to-orange margin coloring.
Direct Sun Requirement
Direct sun is well tolerated in winter and in mild climates (roughly zones 9–10a); in hot-summer areas, half shade generally gives better leaf condition.
Shade & Heat Management
In hot climates, filtering the harshest midday-to-afternoon sun helps prevent leaf burn while keeping the rosette compact.
Best Exposure / Orientation
An east-facing or lightly filtered south/west exposure balances strong light with protection from the most intense summer sun.
Temperature Extremes & Hardiness
USDA Hardiness & Regional Limits
Hardy to roughly USDA zone 9 and warmer. Outdoor planting timing reflects this limit: recommended for spring planting in zone 9, spring through summer in zone 10a, spring through autumn in zones 10b–11a, and possible year-round in zone 11b and warmer.
Cold Damage & Winter Protection
Performs best kept above about 7°C (45°F); in climates colder than its hardiness zone, grow in containers that can be moved indoors or under cover for winter.
Frost Sensitivity
Can tolerate some frost, but is not a reliably frost-hardy plant; protect young offsets more carefully than established rosettes.
Extreme Heat Tolerance
Handles heat well as a drought-tolerant succulent, though intense, direct summer sun can still scorch foliage without some shade relief.
Wind, Humidity & Microclimate
Humidity Preferences
Adapts to the ambient humidity of Mediterranean, desert, subtropical, temperate, and tropical climates alike; not dependent on high humidity.
Dry-Air Tolerance
High, consistent with its drought-tolerant succulent nature.
Wind Tolerance
The compact rosette generally tolerates moderate garden wind well.
Rainfall & Seasonal Moisture
Best suited to climates or garden positions with limited standing moisture; in high-rainfall locations it does better planted in a raised bed or well-drained mound rather than a low spot prone to puddling.
Microclimate Recommendations
Choose a well-drained, sun-exposed site, raised above grade in wet climates; in marginal cold zones, container culture that can be brought under cover through winter extends where it can be grown successfully.
Growing in Pots, Balconies & Indoors
Echeveria peacockii is a small, slow succulent rosette (15-30 cm / 6-12 in) that makes an easy, good-looking houseplant – the grower confirms it is not hard to grow indoors, as long as you give it plenty of light. It is just as happy in a pot on a bright windowsill, balcony or patio.
Quick Details
- Container Size: A snug pot about 15-30% larger than the root ball (up to 50-80% is fine); it will also grow in a smaller pot if you trim the roots at planting
- Indoor Suitability: A genuine houseplant – easy indoors; move it to more light if it starts to look drawn or pale
- Best Spot: Bright light – a sunny windowsill indoors, or full sun to light shade outside (very hot midday sun can scorch the leaves)
- Soil & Drainage: Gritty, fast-draining cactus or potting mix; drainage is critical
- Watering in Pots: Little and seldom – let it dry between waterings; overwatering will rot and kill it
Indoors & On the Windowsill
- Good houseplant: Easy to grow indoors. Its one real need is light – if the rosette stretches, loses colour or looks poor, move it somewhere brighter.
- Windowsill growing: A sunny sill with direct light is ideal; its compact size makes it a perfect windowsill or desk plant. Turn the pot now and then so it grows evenly.
- Overwintering: It is tender (frost-free zones only), so in cold climates keep it in a pot and bring it to a bright, cool, frost-free window for winter, watering very little.
On a Balcony or Patio
- Light & wind: It loves a bright balcony, but shelter it from harsh midday summer sun, which can burn the leaves, and from heavy rain. Walls and paving reflect heat and dry small pots quickly – check moisture, but still err on the dry side.
- Practicalities: Light and easy to move; make sure water drains freely and never collects in a tray under the pot.
Choosing the Pot, Soil & Long-Term Care
- Pot & drainage: A pot about 15-30% bigger than the roots with strong drainage holes; do not stand it on a saucer of water. Terracotta breathes and dries fast, which suits this rot-prone succulent better than glazed or plastic.
- Potting mix: Fast-draining – cactus mix, or potting mix opened up with perlite, pumice or coarse grit. A ready-made cactus and succulent soil mix provides that structure without mixing it yourself.
- Feeding: Very little – a weak feed once or twice in the growing season is plenty; potted succulents need far less than leafy plants.
- Refreshing the mix: After a few years the mix stops draining well – replace all or part of it (and pot up if needed) to keep the roots healthy.
Grower’s Container Tip
- Guaranteed drainage: The grower mixes in a little gravel, lava rock or pebbles for drainage and never stands the pot on a saucer. You can also keep a plant in a smaller pot by cutting the roots back when you plant it.
Growing this plant in a greenhouse
A greenhouse can give echeveria peacockii frost protection and cold protection.
Greenhouse at a glance
| Greenhouse suitability | Conditional - depends on your climate |
|---|---|
| Main benefits | frost protection, cold protection |
| Outdoor protection advisable below | about 7°C |
| Maintain greenhouse minimum | around 7°C for active growth |
| Suitable types | unheated greenhouse, polycarbonate greenhouse |
| Heating | Heating is optional - useful mainly for winter growing in cold areas. |
Related greenhouse guides
- Greenhouses: How to Choose the Right Greenhouse
- Polycarbonate Greenhouses: What to Look for Before Buying
- Greenhouse Climate Control: Temperature, Ventilation and Humidity
Fertilizing & Feeding
Succulents are very light feeders; a little dilute fertilizer during the warm active growing season is plenty, and none while the plant rests.
Quick Fertilizing Specs
| Feeding Level | Light – minimal fertilizer needed |
|---|---|
| Main Nutrient Priority | A balanced, nitrogen-light feed |
| Best Feeding Period | Warm active growing season |
| Organic Options | Diluted balanced liquid feed or a light topdressing of worm castings |
| Micronutrients | Not usually needed; a complete fertilizer supplies trace elements |
| Soil pH | Slightly acidic to near neutral |
| Reduce/Stop Feeding | Stop feeding during cool-season dormancy and rest |
Feeding by Growth Stage
Active growth (warm season)
Support steady, compact growth and good leaf color during the warm months.
| Nutrient direction | A balanced, nitrogen-light fertilizer; go easy so growth stays compact rather than soft and stretched. |
|---|---|
| Timing | During the warm, actively growing season. |
| Frequency | A few light feedings across the growing season is plenty. |
| Fertilizer types | Diluted balanced liquid fertilizer, Cactus and succulent fertilizer, A light topdressing of worm castings or compost |
| Precautions | Feed sparingly and only while the plant is in growth; over-feeding causes weak, stretched growth and can burn roots. Always apply to moist soil, never bone-dry soil. |
Cool-season rest
Let the plant rest through its cool, low-light dormant period.
| Nutrient direction | None – withhold fertilizer while the plant is resting. |
|---|---|
| Timing | Cool season and any period of dormancy or slowed growth. |
| Frequency | No feeding at this stage. |
| Fertilizer types | No feeding at this stage – do not fertilize until warm-season growth resumes. |
| Precautions | Do not fertilize dormant or cold, wet plants; feeding now promotes weak growth and risks root rot. Resume only when active growth returns. |
Nutrient Deficiency Signs & Corrections
Older, lower leaves fade to pale green or yellow while the plant looks generally weak.
| Possible causes | Low nitrogen in a long-unfed potting mix, Roots damaged or suffocated by soggy, poorly drained soil, Old potting mix that has lost its fertility |
|---|---|
| Appears first on | Older, lower leaves |
| What to check | Whether the plant has gone a long time without any feeding, Soil drainage and whether the mix stays wet, Root health when unpotting |
| Possible correction | Refresh into fresh, gritty succulent mix and give a light, balanced feed when active growth resumes; improve drainage if the soil stays soggy. |
New, upper leaves turn pale or yellow between the veins while the veins stay greener.
| Possible causes | Iron made unavailable by overly alkaline soil or water, Cold, waterlogged soil limiting root uptake, Rarely, a genuine shortage of available iron |
|---|---|
| Appears first on | New, upper leaves |
| What to check | Soil and irrigation-water alkalinity, Whether the soil is cold and staying wet, Root health and drainage |
| Possible correction | Correct the cause first – improve drainage and lower excess alkalinity; if it persists, apply a chelated iron product per its label. |
Leaf tips and edges turn brown and dry, sometimes soon after feeding.
| Possible causes | Fertilizer salts built up from over-feeding or feeding a dry plant, Low humidity combined with underwatering, Mineral salts from hard tap water |
|---|---|
| Appears first on | Leaf tips and margins |
| What to check | Recent feeding strength and whether the soil was dry when fed, Salt crust on the soil surface or pot rim, Watering consistency |
| Possible correction | Ease off feeding, flush the pot thoroughly with plain water to leach built-up salts, and afterwards feed only lightly onto moist soil. |
Pruning, Training & Seasonal Maintenance
Echeveria peacockii forms a clustering rosette coated in a heavy powdery bloom (farina) over blue-grey leaves with pink-tinted margins – the trait it’s named for. Pruning tolerance is low and purely sanitary: the priority is keeping that bloom intact while removing dead leaves, spent flower stems and crowded offsets. Cutting has no effect on rebloom, and the plant’s own guidance points to winter as the safest time for any reshaping work, since the rosette isn’t pushing new growth or flowers then.
Quick Pruning & Maintenance Specs
| Pruning Tolerance | Low – sanitary care only, plus occasional rejuvenation |
| Primary Pruning Window | Winter (safest for reshaping or offset separation) |
| Secondary Maintenance Window | Year-round light clean-up as lower leaves dry |
| Typical Frequency | About once a year, plus spot clean-up |
| Main Objective | Preserve the powdery bloom while removing dead leaves and spent bloom stems; thin crowded offsets |
| Young Plant Priority | Leave alone beyond removing transplant-damaged leaves |
| Mature Plant Priority | Thin offset clusters; deadhead after summer bloom |
| Best Tool Type | Fingers or precision snips, handled by leaf base rather than leaf face |
| Avoid Heavy Pruning During | Active summer bloom and hot, humid stretches |
Pruning by Plant Age & Size
Newly Established
Minimal – remove only leaves damaged during transplant; the young rosette’s bloom is easily marked, so handle it as little as possible.
Young / Formative
No structural training applies to a rosette succulent; offsets form naturally around the mother rosette without any pinching or direction.
Mature / Established
Thin overcrowded offsets so the clump doesn’t pack in on itself, remove dried lower leaves, and cut spent bloom stalks once flowering finishes.
Seasonal Pruning Schedule
| Ongoing Sanitary | Objective: keep the rosette clean and reduce harborage for the snails, slugs, aphids and mealybug this species is prone to. Remove: fully dried, brown lower leaves. Do not remove: leaves still showing green or firmness. Response: cosmetic only. Flowering impact: none. |
| Post-Flowering | Objective: stop the spent red-to-orange bell-shaped flower stalk from drawing further energy. Remove: the stem, cut near its base. Do not remove: flowers still opening. Response: tidies the rosette. Flowering impact: none – no rebloom from the same stalk. |
| Dormant/Winter | Objective: the plant’s own care notes flag winter as the season for “design” cuts. Remove/thin: offsets, if separating or relieving crowding. Response: lowest-stress window, no active bloom to disrupt. Flowering impact: none. |
Structural Pruning & Training
As a clustering species, the main structural concern is clump density – crowded offsets trap debris and moisture at the mat’s center, a real risk given this plant’s sensitivity to overwatering. Thin excess offsets periodically to keep the clump open.
Special Growth to Remove
- Dead or dried lower leaves – remove as they senesce, working from the leaf base rather than gripping the face.
- Spent flower stems – cut close to the base once bloom is fully finished.
- Basal offsets – thin where crowded; otherwise leave to fill in or separate to propagate.
Container & Small-Space Pruning
In a pot, thin offsets a little more assertively than an in-ground clump, since a fixed root volume means crowded pups compete harder for the same limited reservoir.
Tools
Precision snips for deadheading and dead-leaf removal without crushing the fleshy tissue. A grafting knife gives one clean pass when separating an offset that shares tissue with the parent’s base.
Tool Hygiene & Disease Risk
Routine – clean, sharp tools suffice for ordinary clean-up. Wipe the blade after cutting any leaf showing soft rot or mealybug damage before it touches healthy tissue.
Cut Placement & Technique
Cut spent bloom stalks close to their base rather than partway up. Handle leaves by gripping near the base or using a tool rather than pressing on the leaf face – the powdery bloom that gives this species its name rubs off permanently on contact, leaving a dull green mark where the glaucous coating was. Separate offsets with a clean cut as close to the parent stem as possible so the pup keeps enough base to root.
Heavy Pruning & Rejuvenation
Not routinely hard-pruned, but a rosette that has stretched from low light and lost its tight form can be beheaded: cut off the top rosette, let it callus for several days, then root it as a fresh cutting, matching the plant’s own leaf/stem-cutting propagation method. The remaining stem base often resprouts offsets afterward.
Post-Pruning Care
Hold off watering the cut area until fully callused, given this species’ overwater sensitivity. Keep it in its usual light rather than deep shade so removing outer leaves doesn’t suddenly expose shaded inner leaves to harsher sun. Watch for snails, slugs, aphids and mealybug around fresh cuts.
Common Pruning Mistakes
Handling or wiping the leaf faces during clean-up and rubbing off the signature powdery bloom; leaving spent bloom stalks to dry in place instead of cutting them out; letting offsets pack tightly without ever thinning; cutting into leaf tissue instead of removing whole leaves at their base.
When NOT to Prune
Skip cosmetic cutting while the plant is actively flowering. Avoid cutting right after transplanting until the rosette re-establishes. Hold off in prolonged wet weather, since fresh wounds on an overwater-sensitive plant raise infection risk.
Recommended Tools (by task)
- precision_snips – clean, small cuts for deadheading and dead-leaf removal without crushing fleshy tissue or requiring a grip on the leaf face.
- grafting_knife – a single sterile pass for separating offsets or beheading a stretched rosette.
Propagation Guide
Echeveria peacockii is most easily propagated from leaf or stem cuttings, which reliably root and reproduce the plant’s silvery blue-purple rosette. Seed germinates but does not guarantee true-to-type offspring and grows very slowly, so cuttings are preferred. Overall propagation difficulty is easy.
Quick Propagation Specs
| Best Propagation Method | Leaf cuttings |
| Alternative Methods | Stem cuttings; seed (slow, not true-to-type) |
| Propagation Difficulty | Easy |
| Seed True-to-Type | Variable – cultivated Echeveria cross-pollinate readily, so seedlings may not match the parent |
| Vegetative True-to-Type | Yes |
| Best Propagation Season | Late spring to early summer outdoors; cuttings can be started indoors year-round |
| Seed Germination Time | 3–6 weeks |
| Cutting Rooting Time | A few weeks to about a month |
| Germination Temperature | 23–27°C (73–80°F) |
| Seed Sowing Depth | Surface-sow, only very lightly covered (about 0.5cm / 0.25in) |
Growing from Seed
Seed Handling & Viability
Keep saved seed dry and dark at room temperature until sowing.
Sowing Season
Spring after the last frost in hardiness zone 10a, spring to summer in zone 10b, spring to autumn in zone 11, and possible year-round in zone 12+.
Sowing Depth & Orientation
Surface-sow and cover only very lightly, about 0.5cm (0.25in).
Germination Conditions
Bright light (not necessarily full sun), sandy well-ventilated soil, kept slightly moist without waterlogging – overwatering causes germination problems. Temperature around 23–27°C (73–80°F).
Germination Time
Usually 3–6 weeks.
Seedling Care
Bright light with evenly moist, well-ventilated soil; transplant seedlings at roughly 5x5cm (2x2in) spacing once large enough.
Stem Cuttings
Cutting Type
Stem cuttings root the same way as leaf cuttings.
Best Timing
Late spring to early summer is best outdoors; can be started indoors any time of year.
Cutting Preparation
Take the cutting and allow the cut end to callus for several days until healed before planting.
Rooting Setup
Place the callused cutting on well-drained, sandy soil; water every few days, letting it dry between waterings but not fully dry out.
Rooting Hormone
Not necessary – rooting occurs without it; optional to speed the process.
Rooting Time
Roots typically begin forming after a few weeks to about a month.
Leaf & Root Cuttings
Leaf cuttings are the easiest way to propagate this plant. Detach a leaf at its base by hand rather than cutting it with a blade, then let the wound callus at least 24 hours (longer is better). Lay the leaf on well-drained sandy soil and water every few days, keeping it lightly moist but never soggy. A new rosette forms at the leaf base within a few weeks to a month.
Bloom & Edible Flower Guide
Quick Details
- Bloom Season: Summer
- Time to First Bloom: Once the rosette is mature, usually within a year or two
- Flower Appearance: Red to orange bell-shaped flowers on slender, arching stems
- Edibility: Edible – Echeveria is non-toxic and the flowers are sometimes used as a mild, decorative garnish; it is also safe around pets
Detailed Blooming Overview
A mature Echeveria peacockii sends up slender, arching flower stalks from the sides of the rosette in summer. Because the bloom stem rises from the side rather than the centre, flowering does not kill the plant – the rosette simply carries on afterwards. The nodding, bell-shaped flowers open in sequence along the stalk and are a favourite of bees and hummingbirds.
Flower Characteristics
- Red to orange flowers, bell- to urn-shaped, hanging in a row along one side of the arching stem.
- Long-lasting, opening a few at a time from the base of the stalk upward.
Bloom Care & Thinning
- Managing the bloom: Give bright light and let the soil dry between waterings so the flower stalks stay sturdy.
- Tidying up: Trim the flower stalk once the last blooms fade; the rosette is unharmed by flowering.
Bloom Health & Protection
- Aphids on the flower stalk: Aphids very commonly cluster on the soft, developing bloom stems. A firm jet of water, insecticidal soap or neem oil keeps them in check.
- Mealybugs: Watch where the stalk meets the leaves; a cotton bud dipped in alcohol, or a neem-oil spray, helps.
Pests, Diseases & Troubleshooting
Echeverias are hardy rosette succulents whose most serious threats are not leaf-chewers but sap-sucking insects that hide deep in the rosette and, above all, rot caused by overwatering and poor drainage. Its heavy silvery-blue farina is easily marked, so keep hands and water off the leaves. Management is overwhelmingly cultural: a sharp, gritty, fast-draining mix, cautious watering, bright airy conditions, and routine inspection of the crown and roots.
Quick Troubleshooting Overview
| Issue / Pest | Main Symptom | Primary Solution |
|---|---|---|
| Mealybugs | White cottony fluff in leaf axils and on roots | Dab with alcohol; systemic drench for root infestations |
| Root / crown rot | Mushy, blackened, collapsing base and stem | Stop watering, unpot, cut to clean tissue, re-root dry |
| Vine weevil | Notched leaf edges; roots eaten, plant topples | Beneficial nematodes; check root-ball; systemic if severe |
| Spider mites | Fine pale stippling and faint webbing in hot, dry air | Raise humidity/airflow; horticultural oil or soap |
| Aphids | Clusters on soft new growth and flower stalks | Rinse off; insecticidal soap; encourage ladybirds |
| Overwatering / edema | Translucent, swollen, or blister-spotted leaves | Water less, improve drainage and light |
Common Pests & Management
- Mealybugs, incl. root mealybug (Planococcus citri, Pseudococcus spp., Rhizoecus spp.):
- Symptoms: The number-one Echeveria pest. White cottony tufts lodge in leaf axils, at the rosette center, and on the roots, where root mealybugs coat the root-ball in white “mold-like” wax. Sucking causes stunting, distorted new leaves, and sticky honeydew followed by sooty mould. Look deep into the crown and always check the roots at repotting.
- Prevention & Control: Isolate affected plants. Dab visible colonies with a cotton swab of 70% isopropyl alcohol; rinse the rosette. For root mealybug, bare-root, wash the roots, and repot into fresh gritty mix in a clean pot, or apply a systemic soil drench. Encourage lacewings and ladybirds outdoors; avoid over-feeding, which fuels soft, pest-prone growth.
- Vine weevil (Otiorhynchus sulcatus):
- Symptoms: Adults chew tell-tale notches from leaf margins at night, but the C-shaped white larvae in the potting mix are the real danger, devouring roots until a seemingly healthy rosette suddenly loosens and topples. Especially damaging to container plants.
- Prevention & Control: Inspect the root-ball whenever repotting and crush any grubs. Drench the mix with entomopathogenic nematodes (Steinernema/Heterorhabditis) in warm conditions. Trap adults at night; a systemic soil treatment is a last resort for valued potted specimens.
- Aphids (Aphis spp., Myzus persicae):
- Symptoms: Soft green, black, or grey colonies mass on tender new growth and emerging flower stalks, sucking sap and secreting honeydew that turns black with sooty mould and attracts ants. New leaves may curl or stall.
- Prevention & Control: Knock them off with a firm water spray, then treat persistent colonies with insecticidal soap or a light horticultural-oil spray. Conserve natural enemies (ladybirds, hoverfly and lacewing larvae). Avoid excess nitrogen.
- Spider mites (Tetranychus urticae):
- Symptoms: A hot, dry, still-air problem, worst indoors. Leaves develop a fine pale or bronzed stippling, and in bad cases delicate webbing bridges the rosette; the mites are just visible as moving dots on the undersides.
- Prevention & Control: Improve airflow and raise humidity slightly. Rinse the plant, then spray insecticidal soap or horticultural oil, covering leaf undersides and repeating at intervals to break the life cycle. Predatory mites (Phytoseiulus) help in collections.
- Scale insects (Coccus, Diaspididae spp.):
- Symptoms: Small, immobile brown or tan bumps cling to leaves and stems, sucking sap and, in the soft-scale forms, dripping honeydew. Heavy infestations weaken the plant and dull its colour.
- Prevention & Control: Scrape off or dab with alcohol on a swab; treat with horticultural oil to smother crawlers, repeating as needed. Isolate new acquisitions and inspect leaf bases where scale hides.
- Fungus gnats (Bradysia spp.):
- Symptoms: Tiny black flies drift up from the soil surface; their larvae live in constantly moist mix and can nibble fine roots of seedlings and offsets. Their presence is mainly a warning sign of an over-wet, poorly drained pot.
- Prevention & Control: Let the top of the mix dry fully between waterings; add a gritty top-dressing. Use yellow sticky traps for adults and Bacillus thuringiensis israelensis or nematodes for larvae. Fixing the watering usually ends the problem.
- Slugs & snails (Deroceras spp., Cornu aspersum):
- Symptoms: Outdoors and in greenhouses they rasp irregular holes and notches in fleshy leaves overnight and leave silvery slime trails, disfiguring the tidy rosette.
- Prevention & Control: Hand-pick after dark, remove daytime hiding places, and set beer traps or a ring of grit/diatomaceous earth. Iron-phosphate baits are a pet-safe option.
Diseases & Fungal Issues
- Root & crown rot (Fusarium, Pythium, Phytophthora spp.):
- Symptoms: The classic Echeveria killer. Excess water and cold, airless soil cause the roots and the base of the rosette to turn brown-black, soft, and foul; the plant loses its grip and the lower leaves pull away mushy. It often advances unseen until sudden collapse.
- Treatment & Management: Prevention is everything: gritty, fast-draining mix, unglazed pots with drainage, water only when the mix is dry, and never leave the rosette sitting wet. If caught early, unpot, cut away all rot to clean firm tissue, dust with sulfur, let it callus, and re-root in dry mix. Behead and re-root the healthy top if the base is lost.
- Botrytis / grey mould (Botrytis cinerea):
- Symptoms: In cool, damp, crowded conditions a fuzzy grey mould settles on dead flower stalks, damaged leaves, and water trapped in the rosette, causing soft brown decay that spreads into healthy tissue.
- Treatment & Management: Improve ventilation, avoid overhead watering and water sitting in the crown, and promptly remove spent flowers and dead leaves. Reduce humidity; a fungicide is rarely needed if hygiene and airflow are good.
- Fungal leaf spot / anthracnose (Colletotrichum, Cercospora spp.):
- Symptoms: Sunken tan-to-black spots, sometimes with reddish margins or a moist rot, appear on leaves in warm, humid, wet-foliage conditions and can enlarge to spoil the rosette.
- Treatment & Management: Remove affected leaves, keep foliage dry, and space plants for airflow. A copper-based fungicide can check spread if the problem persists; correct the humid, wet conditions that allowed it.
- Powdery mildew (Erysiphe/Oidium spp.):
- Symptoms: Uncommon on echeverias but possible in still, humid air: a light dusty white coating on leaves that can distort new growth. Not to be confused with the natural farina (see below).
- Treatment & Management: Increase airflow and light and reduce humidity. Sulfur or potassium-bicarbonate sprays control it if it takes hold, but on farinose types test first, as sprays can mark the powdery coating.
Growing Difficulties & Abiotic Problems
- Overwatering & edema:
- Cause & Symptoms: Too-frequent watering leaves the rosette limp and translucent and, in edema, raises corky brown bumps or water-blisters on the undersides where cells burst from taking up water faster than they lose it.
- Correction Strategy: Water only when the mix is fully dry, use a gritty free-draining medium, and give bright light with good airflow so the plant transpires. Damaged leaves will not heal but new growth firms up once watering is corrected.
- Loss of farina (natural bloom):
- Cause & Symptoms: The prized powdery, waxy “farina” that gives this plant its blue-grey or pastel finish rubs off permanently at a touch, leaving shiny green fingerprints and marks, and water droplets or oil sprays can etch it.
- Correction Strategy: Handle by the stem, not the leaves, avoid overhead watering, and site out of hard rain. Test any oil or fungicide spray on one leaf first. New leaves emerge freshly coated as the plant grows.
- Etiolation (low light):
- Cause & Symptoms: In too little light the rosette stretches, the stem elongates, leaves space out and point upward, and colours fade to pale green as the plant reaches for light.
- Correction Strategy: Move to the brightest spot available or add a grow light, acclimating gradually. Behead and re-root a badly stretched rosette to restart it compact.
- Sunburn / scorch:
- Cause & Symptoms: Moved abruptly into intense sun, leaves develop bleached white or dry brown scorched patches that are permanent, most often on the sun-facing side of the rosette.
- Correction Strategy: Acclimate to strong light in stages over a couple of weeks and provide light shade during the fiercest midday heat. Scarred leaves are eventually shed as the plant grows out.
- Cold & frost damage:
- Cause & Symptoms: Frost turns the fleshy leaves translucent, then mushy and brown as the water in them freezes and ruptures cells; a hard freeze can kill the whole rosette.
- Correction Strategy: Keep echeverias above freezing and dry in cold spells; move containers under cover. Remove damaged tissue afterward and hold off watering while the plant recovers.
What Helps — Products & Tools
Reach for gentle, targeted tools first: 70% isopropyl alcohol on a cotton swab for spot-treating mealybugs and scale, insecticidal soap or a light horticultural/neem oil for aphids, mites, and scale crawlers (apply in the cool of evening and, on farinose or hairy types, test on one leaf first), and entomopathogenic nematodes for vine-weevil grubs and fungus-gnat larvae. Diatomaceous earth or iron-phosphate bait handles slugs and snails, yellow sticky traps monitor gnats and adults, and a systemic soil drench is the reliable answer for stubborn root mealybug or vine weevil. The single most important “product” is a sharp, gritty, free-draining succulent mix in a pot with drainage, which prevents the rots that kill more echeverias than any insect.