Plant Profile & Key Characteristics
Overview: Dutch iris (Iris x hollandica) is a bulbous perennial geophyte 50-80 cm tall, grown as an ornamental for its elegant, colourful spring flowers. Its narrow foliage is summer-deciduous, dying back once flowering is over.
Quick Specifications
| Specification | Attribute |
|---|---|
| Plant Type / Life Cycle | Perennial geophyte |
| Foliage Type | Deciduous (summer-dormant) |
| Mature Size | 50-80 cm (20-32 in), sometimes over 1 m (3 ft) |
| Growth Rate | Moderate |
| Root System | Bulb (geophyte) |
| Toxicity | Toxic if ingested – bulbs contain irritant compounds; keep from pets |
| Hardiness | USDA zone 5-10 |
Growth Form & Structure
- Height & Spread: 50-80 cm (20-32 in) flower stems in ground; also grows well in planters and containers.
- Growth Habit & Form: Upright clump of narrow, straight leaves from a bulb, topped by tall flower stems.
- Lifespan & Maturity: Perennial; in cold climates the bulbs are lifted over winter.
Anatomy & Physical Features
- Leaves & Foliage: Green, narrow, straight and rather brittle, growing in linked groups.
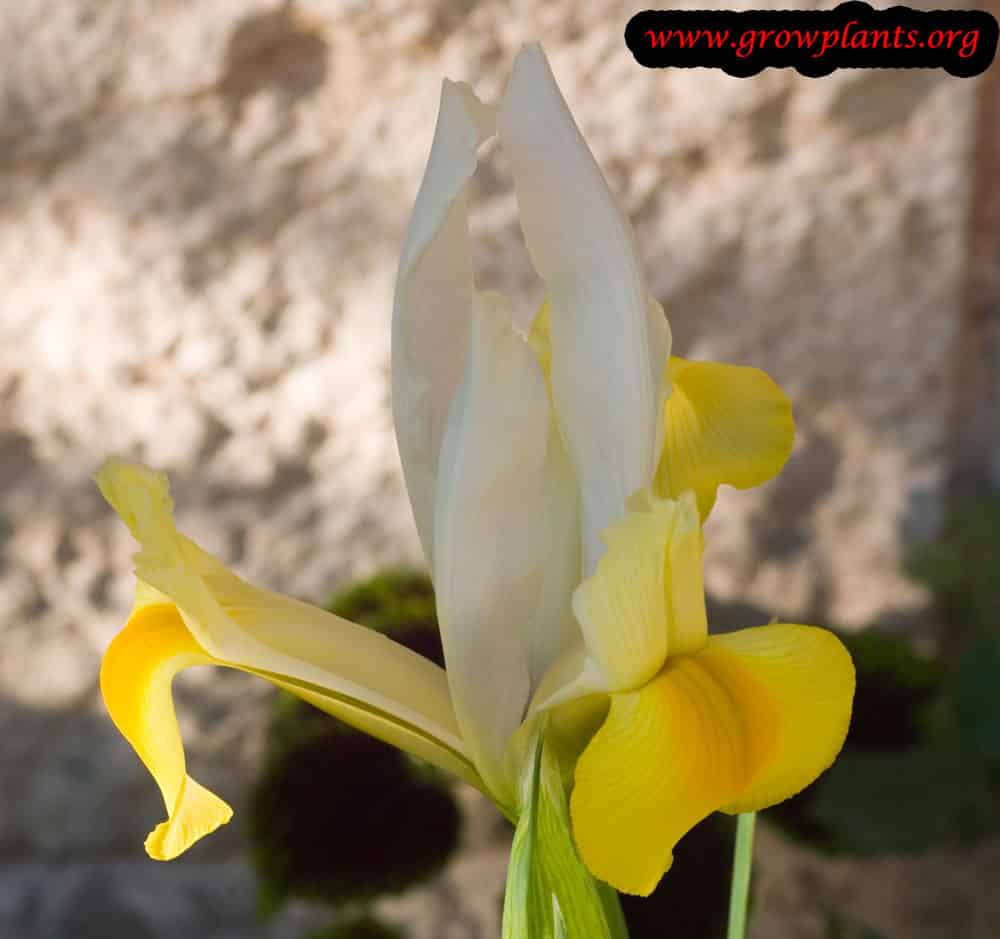
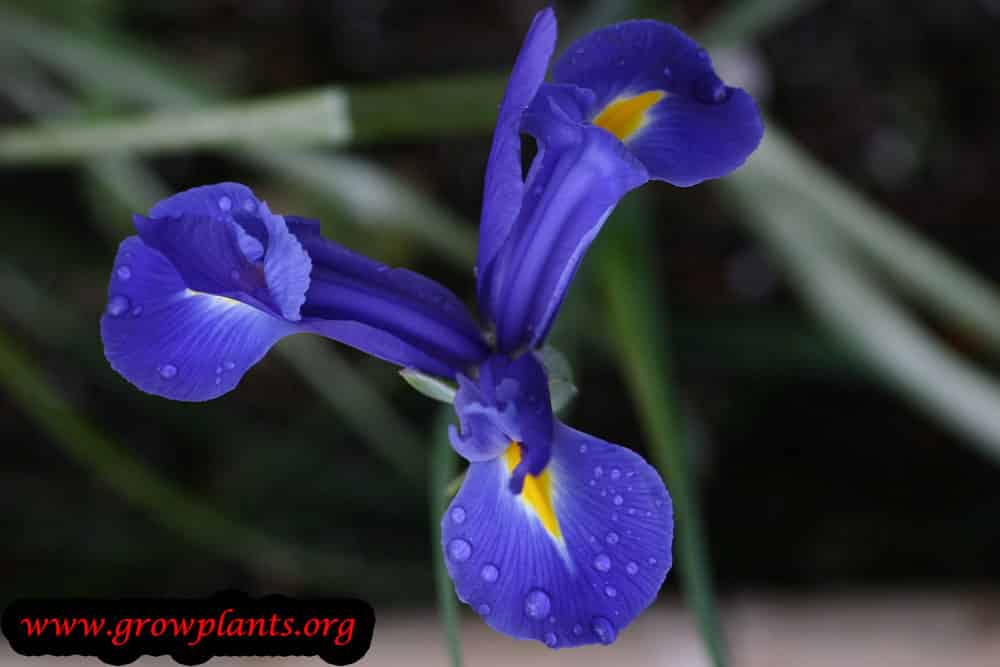
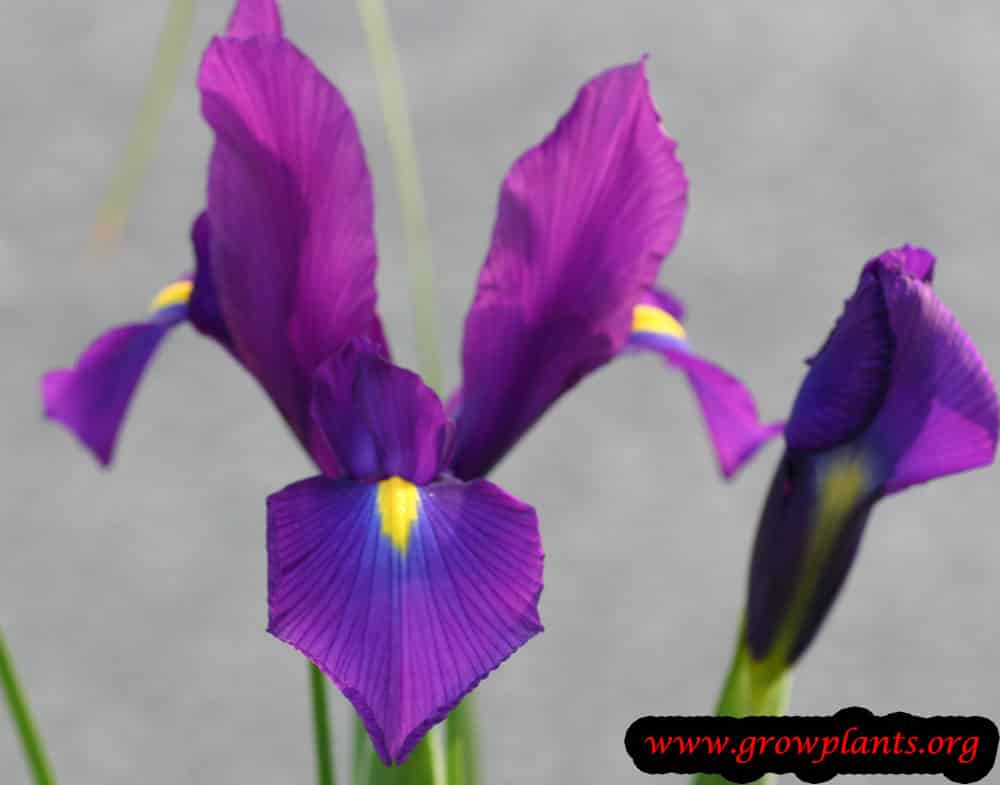
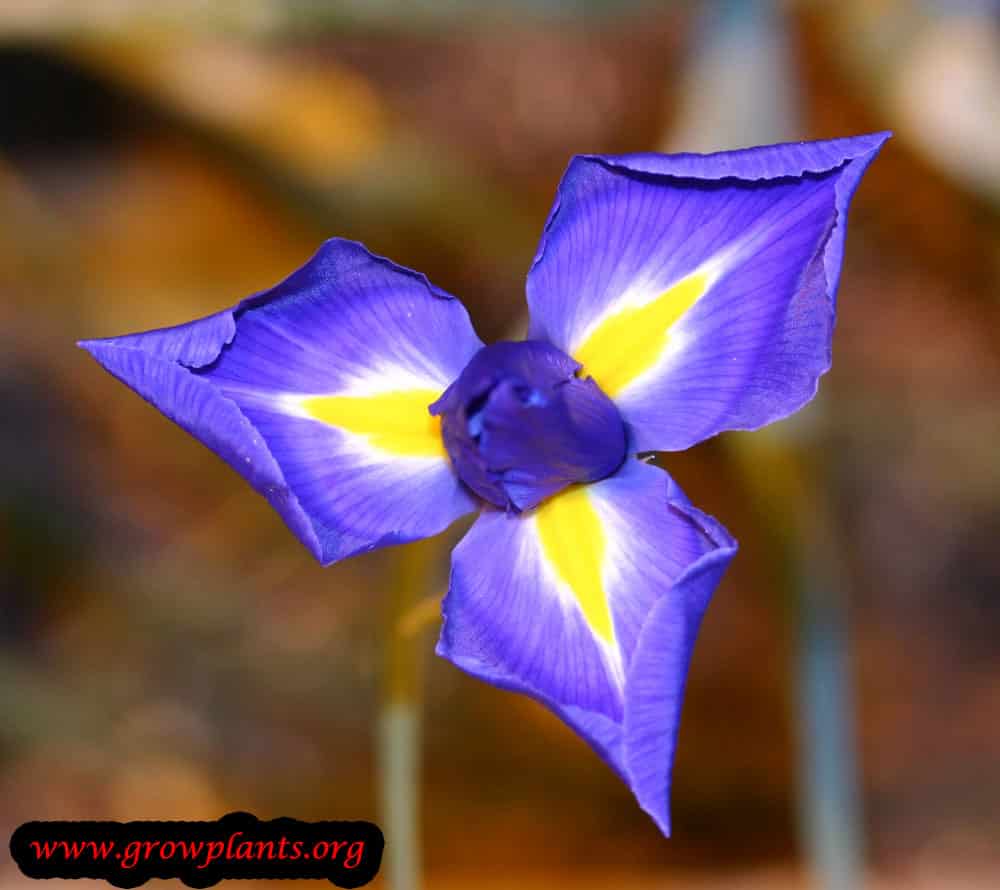
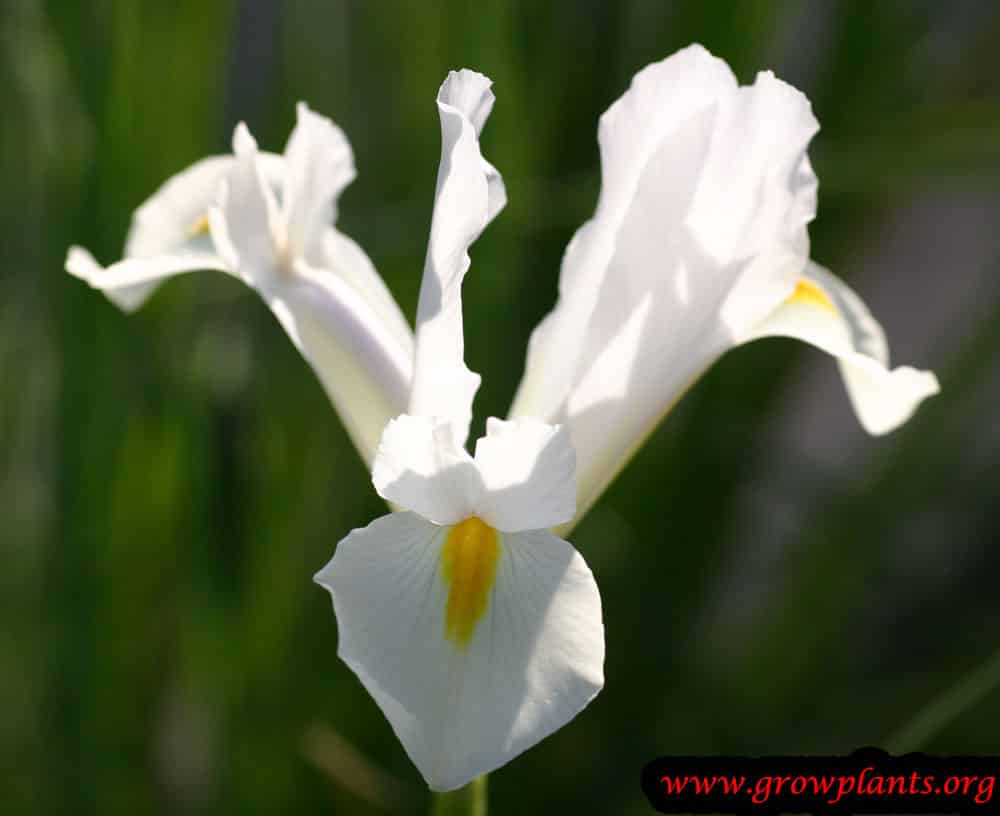
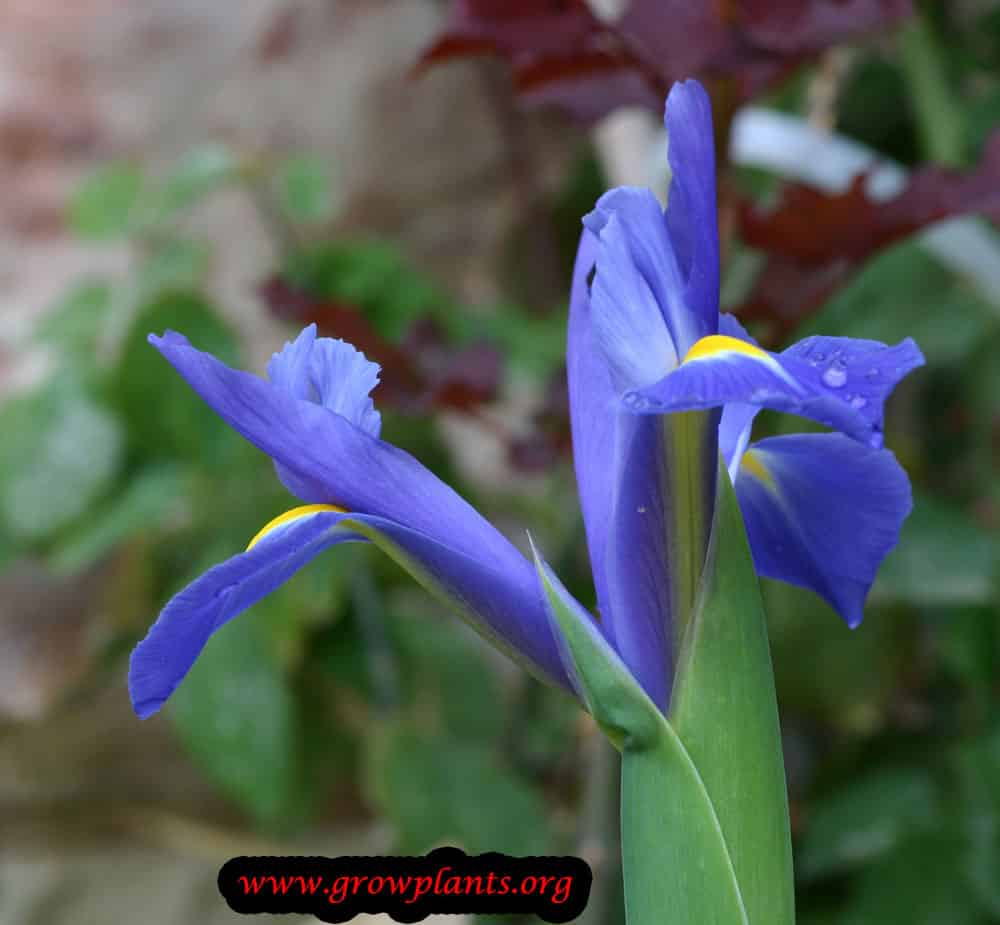
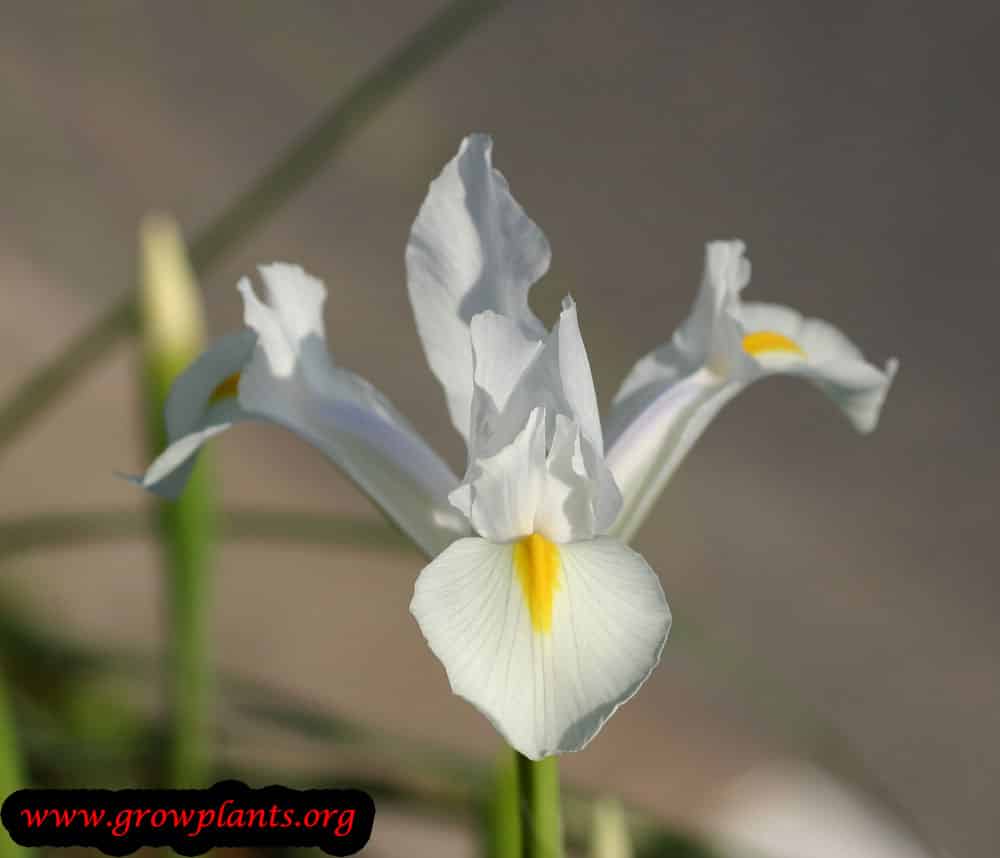
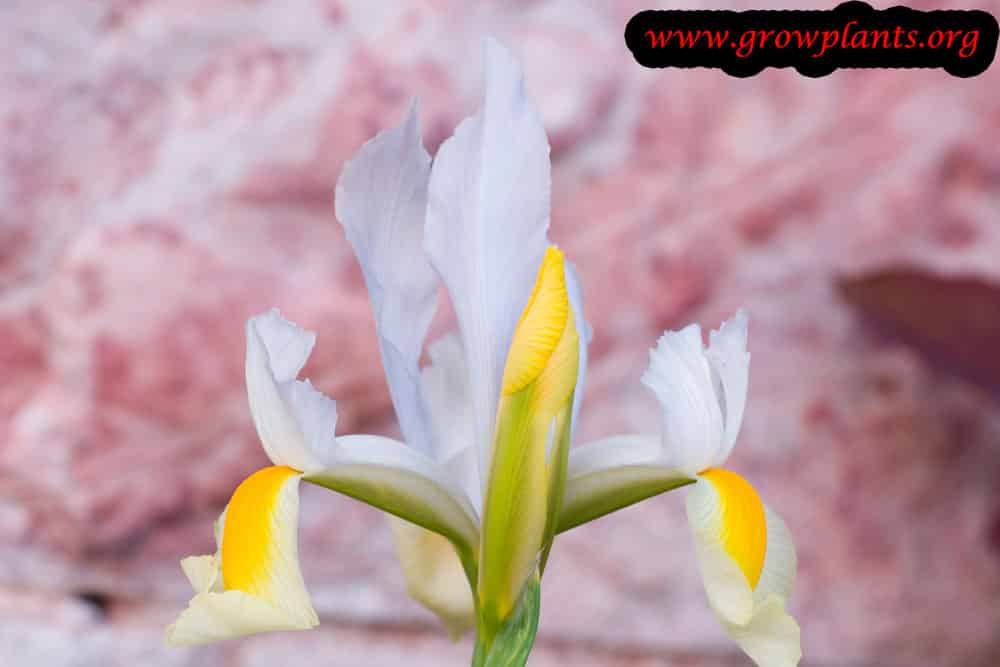
- Flower Characteristics: Six-petalled flowers in blue, purple, orange, white, maroon or yellow, often bi-coloured with a yellow signal (full detail in the Bloom guide).
Primary Uses & Landscape Value
- Functional & Ornamental Roles: Ornamental for borders and containers; an excellent cut flower.
Care Guide: Planting, Soil & Watering
Overview: This bulbous Dutch iris grows best in full sun in a well-drained bed, sending up slender flower stems from autumn-planted bulbs. It needs sharply draining soil that stays on the drier side once the leaves die back in summer.
Quick Care Requirements
| Requirement | Ideal Condition |
|---|---|
| Planting Season | In autumn to winter in mild climates; in spring where winters are cold |
| Growth Rate | Moderate |
| Soil Type | Well-draining, gritty |
| Water Need | Moderate while in growth; keep dry during summer dormancy |
Planting & Establishment
- Best Planting Season: In mild-winter climates plant the bulbs in autumn to winter; in cold-winter climates plant in spring, and lift the bulbs to store dry over winter where the ground freezes.
- How to Plant:
- Hole Preparation: Loosen a free-draining, sunny bed and dig planting holes several times the bulb’s own height deep.
- Soil Amendments: Add grit or coarse sand to heavy soil to keep drainage sharp; it does not need rich ground.
- Planting Depth: Set the bulbs pointed-end up, roughly 8-10 cm deep, on firmed soil.
- Growth Speed & Expectations: A moderate grower flowering in its season then dying back to dormancy for the summer; the foliage snaps easily, so site it out of heavy traffic.
Soil, Watering & Drainage Care
- Soil Mix & Drainage Needs: Sharp drainage is essential to prevent bulb rot; in containers use a gritty, free-draining mix and never leave pots standing in water.
- Watering Schedule & Technique:
- Young / Newly Planted: Water in after planting and keep the soil lightly moist while roots and leaves grow.
- Established: Give moderate, even water through the growing and flowering season.
- Seasonal Adjustments: Reduce sharply and keep dry once the foliage yellows and dies back for summer dormancy.
Climate, Light & Hardiness
Dutch Iris (Iris ×hollandica) is a summer-dormant bulb suited to Mediterranean, subtropical, or temperate climates in full sun to half shade. It is rated for USDA hardiness zone 5–10, but in the colder part of that range the bulb is commonly lifted and stored over winter rather than left in the ground, since in-ground survival through hard freezes is not reliable for this hybrid.
Quick Climate Specifications
| Climate Zones | Mediterranean, subtropical, or temperate |
|---|---|
| USDA Hardiness Zones | 5–10 |
| Optimal Temp Range | approximately 10–22°C (50–72°F) during active growth and flowering |
| Cold Damage Begins | Emerged foliage and flower buds are damaged by hard frost, roughly below 0–2°C (32–36°F). |
| Approx. Survival Minimum | The dormant bulb can survive cold soil in milder parts of the zone range, but site data specifically calls for lifting the bulb over winter in cold-climate areas rather than relying on in-ground survival. |
| Frost Tolerance | Low |
| Light Conditions | Full Sun / Half Shade (shade can reduce flowering) |
| Wind Tolerance | Moderate |
| Salt / Coastal Tolerance | Low |
Sunlight & Light Exposure
Optimal Light Setup
Full sun gives the best, most reliable flowering.
Direct Sun Requirement
Recommended; site data notes that half shade is tolerated but can affect blooming, so full sun is preferable wherever flower quantity matters.
Shade & Heat Management
In hot climates, some afternoon shade can extend bloom life, though it is not required.
Best Exposure / Orientation
An open, sunny bed with good drainage suits it best.
Temperature Extremes & Hardiness
USDA Hardiness & Regional Limits
Grows outdoors within USDA zone 5–10, but practical cold-climate culture differs by region: in warm climates, plant in autumn/winter and leave the bulb in place; in cold climates, plant in spring and lift the bulb again before hard freezes return, per site guidance.
Cold Damage & Winter Protection
Where winters bring hard, sustained freezes, lifting and dry-storing the bulb over winter is the standard practical solution rather than relying on mulch or in-ground protection.
Frost Sensitivity
Moderate; the bulb itself is hardier than the emerged foliage and flower stalk, which are frost-tender.
Extreme Heat Tolerance
Good during its dry summer dormancy, consistent with its Mediterranean-climate origins.
Wind, Humidity & Microclimate
Humidity Preferences
Average; no special humidity requirement.
Dry-Air Tolerance
Good, particularly during summer dormancy.
Wind Tolerance
Moderate; slender flower stalks can bend or snap in strong, exposed wind, so a somewhat sheltered bed helps preserve blooms.
Coastal / Salt Tolerance
Low; not specifically adapted to coastal salt exposure.
Rainfall & Seasonal Moisture
Needs a dry summer dormancy and only moderate moisture during active growth; wet, poorly drained soil, especially during dormancy, risks bulb rot.
Microclimate Recommendations
A sunny, well-drained, wind-sheltered bed suits it well; in cold-winter regions, plan around lifting the bulb rather than depending on in-ground overwintering.
Growing in Pots, Balconies & Indoors
The grower rates Dutch iris as not a houseplant, but it grows well in containers outdoors – a classic pot bulb for a sunny balcony or patio. In cold regions the grower notes the bulbs should be lifted after the leaves die down.
Quick Details
- Container Size: A 20-30 cm (8-12 in) pot, several bulbs grouped for effect
- Indoor Suitability: Not a houseplant – grow it outdoors in a container
- Best Spot: Full sun (half shade can reduce flowering)
- Soil & Drainage: Free-draining mix – bulbs rot in wet soil
- Watering in Pots: Average while growing; keep dry after flowering
Indoors & On the Windowsill
- Not an indoor plant: The grower marks it unsuitable as a houseplant; it needs strong sun to flower, so grow it outside.
- Lifting in cold areas (grower): Where the ground and pots freeze hard, the grower advises lifting the bulbs once the foliage dies back and storing them dry until replanting.
On a Balcony or Patio
- Light & position: Give it the sunniest spot on the balcony or patio – shade thins the flowering.
- Moisture: Water while in growth, then let the pot dry off as leaves yellow; wet dormant bulbs rot.
Choosing the Pot, Soil & Long-Term Care
- Pot & drainage: Use a pot with strong drainage holes and skip a standing-water saucer to avoid root rot. Terracotta breathes and dries out faster, while glazed or plastic holds moisture longer. Sharp drainage is essential for bulbs.
- Potting mix: A well-aerated, organic-rich mix – peat or coir blended with perlite or vermiculite – keeps roots oxygenated in a pot. Add grit for extra drainage.
- Long-term care: Group several bulbs per pot; lift, divide and renew the mix when clumps congest or after cold-season storage.
Growing this plant in a greenhouse
A greenhouse can give dutch iris frost protection, cold protection, a longer growing season and winter growing.
Greenhouse at a glance
| Greenhouse suitability | Good - clearly useful |
|---|---|
| Main benefits | frost protection, cold protection, a longer growing season, winter growing |
| Season extension | can grow through winter |
| Outdoor protection advisable below | about 2°C |
| Suitable types | unheated greenhouse, polycarbonate greenhouse |
| Heating | No added heat is normally needed. |
Related greenhouse guides
- Greenhouses: How to Choose the Right Greenhouse
- Polycarbonate Greenhouses: What to Look for Before Buying
- Greenhouse Propagation Equipment
Fertilizing & Feeding
A moderate feeder: balanced feeding as leaves and flower stems grow, followed by a nitrogen-leaning feeding while the foliage stays green after bloom, rebuilds the bulb before its summer dormancy.
Quick Fertilizing Specs
| Feeding Level | Moderate feeder |
|---|---|
| Main Nutrient Priority | Balanced feeding through growth to bloom, then nitrogen-leaning feeding while foliage remains green afterward |
| Best Feeding Period | From leaf emergence through bloom and while the foliage stays green afterward |
| Organic Options | Compost or organic matter worked into well-drained soil |
| Reduce/Stop Feeding | Stop feeding once the foliage yellows and dies back for summer dormancy |
| Micronutrients | Usually met by a complete fertilizer; correct only diagnosed deficiencies |
| Soil pH | Tolerates a wide range in well-drained soil |
Feeding by Growth Stage
Leaf growth to bloom
Support the narrow leaves and flower stems as they grow toward the distinctive six-petaled blooms.
| Nutrient direction | A balanced complete fertilizer supports steady leaf and flower-stem development. |
|---|---|
| Timing | As leaves emerge and grow toward bloom. |
| Frequency | A light feeding as growth resumes is enough. |
| Fertilizer types | A balanced complete fertilizer, Compost worked into well-drained soil |
| Precautions | Avoid heavy feeding directly against the bulb; work fertilizer into the surrounding soil instead, and watch for iris borer damage that can compound stress. |
Post-bloom foliage and bulb buildup
Keep the foliage productive after flowering so the bulb rebuilds its reserves for next year’s bloom.
| Nutrient direction | A nitrogen-leaning complete fertilizer supports continued foliage growth after bloom, recharging the bulb. |
|---|---|
| Timing | After flowering, while the foliage remains green. |
| Frequency | A few light feedings while foliage stays green after bloom are usually enough. |
| Fertilizer types | A nitrogen-leaning complete fertilizer, Compost or organic matter worked into the soil |
| Precautions | Keep feeding moderate and stop as soon as foliage begins to yellow, signaling the start of summer dormancy. |
Summer dormancy
Let the bulb rest once its foliage yellows and dies back for the summer, whether left in the ground or lifted in colder climates.
| Nutrient direction | None – withhold fertilizer once the bulb goes dormant. |
|---|---|
| Timing | Once the foliage yellows and dies back in summer. |
| Frequency | No feeding during dormancy. |
| Fertilizer types | No feeding at this stage; do not fertilize a dormant or lifted bulb. |
| Precautions | Do not fertilize while the bulb is dormant or in storage; resume only as new leaf growth begins the next cycle. |
Nutrient Deficiency Signs & Corrections
Leaves emerge pale green or yellowish and flower stems are weak.
| Possible causes | low available soil nitrogen, nitrogen leaching from watering or rain, an undersized or exhausted bulb from a previous poor season |
|---|---|
| Appears first on | the newly emerging leaves |
| What to check | recent feeding history, bulb size and vigor, soil organic matter |
| Possible correction | Feed with a balanced to nitrogen-leaning complete fertilizer during active growth and work in organic matter. |
New leaves emerge pale yellow while the veins stay green.
| Possible causes | high soil pH limiting iron availability, waterlogged, poorly drained soil restricting root uptake, naturally low soil iron |
|---|---|
| Appears first on | newest leaves |
| What to check | soil pH, drainage around the bulb, recent watering pattern |
| Possible correction | Correct soil pH, improve drainage around the bulb, and apply a chelated iron product per its label if chlorosis persists. |
Leaf tips brown or scorch despite adequate watering, and flowering can weaken as a result.
| Possible causes | fertilizer salt buildup around the bulb, especially in containers, underwatering that concentrates salts, feeding too heavily or too often for the bulb’s needs |
|---|---|
| Appears first on | leaf tips and margins |
| What to check | recent feeding amounts, watering consistency, container or bed drainage |
| Possible correction | Ease off feeding and flush the soil thoroughly with plain water, then return to lighter feeding. |
Pruning, Training & Seasonal Maintenance
Dutch Iris is a summer-deciduous bulb that needs no pruning while in leaf; the entire top growth is cut back only once it has died down naturally in autumn. This isn’t just tidying – old iris foliage is a known overwintering site for iris borer, so clearing it out in autumn is a real sanitation step, not cosmetic. In cold climates the bulb is also lifted for winter storage rather than left to overwinter in the ground.
Quick Pruning & Maintenance Specs
| Pruning Tolerance | Low – one full foliage cut-back per cycle, nothing before that |
| Primary Pruning Window | Autumn, once the leaves have died down on their own |
| Typical Frequency | Once per growing cycle |
| Main Objective | Remove spent foliage cleanly and reduce iris borer overwintering sites |
| Young Plant Priority | None; first-season bulbs need no cutting back |
| Mature Plant Priority | Cut all leaves back once fully dead; in cold climates, lift the bulb for winter storage at the same time |
| Best Tool Type | Bypass secateurs or garden scissors |
| Avoid Heavy Pruning During | Any point while foliage is still green – premature cutting weakens the bulb and removes photosynthetic capacity it needs before dormancy |
Pruning by Plant Age & Size
Newly Established
No pruning; let the first full leaf cycle run so the bulb builds size.
Young / Formative
No structural training applies to this bulb.
Mature / Established
One annual full cut-back of the foliage clump once it has died down in autumn.
Seasonal Pruning Schedule
| Autumn (foliage die-back) | Cut all leaves back to near ground level once fully dead; dispose of the old foliage rather than composting it in place, since it can harbor iris borer eggs; in cold climates, lift the bulb for storage at the same time |
Special Growth to Remove
- Dead leaves – cut back entirely once the clump has died down in autumn
- Old flower stems – remove once bloom has finished
Container & Small-Space Pruning
Dutch Iris grows well in containers. The same die-back rule applies; container-grown bulbs in cold climates are simplest to lift by tipping out the pot at the same autumn cut-back rather than digging in open ground.
Tools
- Bypass secateurs or garden scissors for the autumn foliage cut-back – no loppers or saws needed on this herbaceous bulb
Tool Hygiene & Disease Risk
Increased – iris borer, this species’ listed pest, overwinters in old leaf debris, so the main hygiene step is removing and discarding cut foliage away from the bed rather than disinfecting the tool itself between cuts.
Cut Placement & Technique
Cut foliage close to ground level across the whole clump once it is fully dead, rather than leaving partial stubs that can still harbor pests.
Heavy Pruning & Rejuvenation
Not applicable – there is no woody structure to rejuvenate; overcrowded clumps are refreshed by lifting and dividing bulbs after the foliage cut-back, not by harder pruning.
Post-Pruning Care
No feeding is needed after the autumn cut-back. In cold-climate growing, store lifted bulbs in a cool, dry, well-ventilated spot until replanting.
Common Pruning Mistakes
- Cutting back green foliage before it has died down, which weakens the bulb
- Leaving old cut foliage lying in the bed, which can carry over iris borer eggs to next season
When NOT to Prune
Do not cut leaves while they are still green and upright, even once flowering has finished – wait for natural die-back in autumn.
Recommended Tools (by task)
- bypass_secateurs – clean, single cut-back of the whole dead foliage clump in autumn.
Propagation Guide
Dutch Iris is propagated by bulb division rather than seed – as a hybrid grex, it does not come true from seed, so the site correctly lists only planting the bulb and vegetative reproduction as ways to start it, and marks vegetative propagation as necessary. This is an easy, reliable method, simply separating the small offset bulbs that form around the mother bulb.
Quick Propagation Specs
| Best Propagation Method | Bulb division (offsets) |
| Propagation Difficulty | Easy |
| Vegetative True-to-Type | Yes |
| Best Propagation Season | Lift and divide once foliage dies back in autumn; replant per climate – autumn to winter in warm climates, spring in cold climates |
Division, Offsets, Pups & Suckers
Dutch Iris bulbs naturally produce small offset bulbs (bulblets) beside the mother bulb. Lift clumps once the foliage dies back in autumn (the same point at which the site recommends cutting all the leaves), separate the offsets from the mother bulb, and replant according to climate: autumn to winter where winters are mild, or spring where winters are cold. In colder areas the site notes that bulbs need to be lifted out of the ground for winter, so offsets are conveniently separated at that same lifting. Small offset bulbs may need a year or more of growing on before they reach flowering size.
Bloom & Flower Guide
Quick Details
- Bloom Season: Winter to early spring in warm climates; early summer in cold climates
- Time to First Bloom: The first season after the bulbs are planted
- Flower Appearance: Classic six-petalled iris flowers in blue, purple, orange, white, maroon or yellow, often bicoloured – three outer falls (usually with a yellow signal) and three inner standards
- Edibility: Not edible – irises are toxic; grown as ornamental / cut flowers
Detailed Blooming Overview
Dutch iris is a bulbous iris grown widely as a cut flower for its crisp, sculptural blooms. Each flower has six petals: three outer “falls” that arch outward, usually marked with a yellow signal, and three inner “standards” that stand more upright, with the inner and outer petals sometimes in contrasting colours. It flowers in winter to early spring in mild areas and in early summer where winters are cold. Note that irises are toxic if eaten, so enjoy them in the vase, not on the plate.
Flower Characteristics
- Six petals: three outer falls and three inner standards.
- Colours blue, purple, orange, white, maroon or yellow, often more than one colour on a flower.
- The outer falls usually carry a yellow signal patch.
Bloom Care & Thinning
- After flowering: Deadhead spent blooms and let the foliage die back naturally so the bulb can build up for next year.
- For cutting: Cut when the buds are just showing full colour and beginning to open.
Pests, Diseases & Troubleshooting
Overview: Bulbous irises grow from true bulbs and, unlike the rhizomatous kinds, are rarely troubled by the iris borer; their real enemies are bulb and basal rots, ‘ink disease’, bulb flies and aphid-borne viruses, plus slugs on the emerging foliage. Sharp drainage, healthy dry storage and clean stock are the heart of prevention.
Quick Troubleshooting Overview
| Issue / Pest | Main Symptom | Primary Solution |
|---|---|---|
| Basal / bulb rot | Bulbs soft, moldy, fail to emerge | Sharp drainage, healthy stock, fungicide dip |
| Ink disease | Black crusty blotches on bulb scales | Discard infected bulbs, rotate, clean stock |
| Aphids & viruses | Distorted, mottled or streaked leaves/flowers | Control aphids, rogue infected plants |
| Narcissus bulb fly | Soft bulbs hollowed by a fat maggot | Firm/discard soft bulbs, disturb soil at dieback |
| Slugs & snails | Ragged holes in emerging foliage | Iron-phosphate bait, traps |
| Grey/blue mold in storage | Fuzzy mold on stored bulbs | Dry, airy storage; discard damaged bulbs |
Common Pests & Management
- Aphids (Aphis / Myzus persicae):
- Symptoms: Colonies on emerging leaves and buds causing distortion and honeydew; their main harm is transmitting iris mosaic and other viruses that mottle and streak foliage and flowers.
- Prevention & Control: Rinse off with water, encourage ladybirds, and remove nearby infected plants. Insecticidal soap or neem controls colonies; keeping aphids down is the best defense against virus.
- Narcissus bulb fly (Merodon equestris):
- Symptoms: A single fat, grey maggot tunnels into the bulb, hollowing and softening it so it rots or fails to sprout; the adult resembles a small bumblebee.
- Prevention & Control: Handle only firm bulbs and discard any that feel soft. Firm the soil and cultivate lightly around plants as the foliage dies down to deter egg-laying, and hot-water treat valued bulbs where infestation is known.
- Slugs and snails (Gastropoda):
- Symptoms: Ragged holes in the emerging leaves and flowers with slime trails, worst in damp, mild conditions.
- Prevention & Control: Keep beds tidy, hand-pick after dark, and use iron-phosphate bait or copper barriers around plantings.
- Thrips (Frankliniella spp.):
- Symptoms: Silvery streaking and distortion of leaves and flowers in warm dry weather; can also blemish bulbs in storage.
- Prevention & Control: Remove weeds, hose plants, and use blue sticky traps; insecticidal soap or spinosad controls active thrips. Inspect and clean bulbs before storage.
Diseases & Fungal Issues
- Fusarium basal rot (Fusarium oxysporum):
- Symptoms: Rot starting at the base plate of the bulb and spreading up, with pinkish or white mold; bulbs go soft, fail to emerge, or produce weak yellowing plants.
- Treatment & Management: Plant only firm, healthy bulbs in sharply drained soil, avoid waterlogging, and lift and cure bulbs dry after foliage dies down. A fungicide bulb dip before storage or planting helps in problem soils; discard any soft bulbs.
- Ink disease (Drechslera (Bipolaris) iridis):
- Symptoms: Black, crusty, ink-like blotches and streaks on the bulb scales and leaf bases, mainly on reticulata-type irises; infected bulbs weaken and die out.
- Treatment & Management: There is no cure – dig up and destroy affected bulbs and the surrounding soil, plant clean stock elsewhere, and rotate. Inspect bulbs carefully at purchase and before storage.
- Iris mosaic virus (Iris mosaic potyvirus):
- Symptoms: Pale mottling, streaking or feathering of leaves and colour-breaking in flowers; spread by aphids and through infected bulbs, with no cure.
- Treatment & Management: Buy virus-free stock, control aphids diligently, and rogue out and destroy symptomatic plants to protect the rest of the planting.
- Grey and blue storage molds (Botrytis / Penicillium spp.):
- Symptoms: Fuzzy grey or blue-green mold on bulbs held in warm, damp, poorly ventilated storage.
- Treatment & Management: Cure bulbs dry, store them cool and airy in mesh or paper, and discard any bruised or soft bulbs before storage. Handle gently to avoid the wounds that let mold in.
Growing Difficulties & Abiotic Problems
- Bulb rot from wet or heavy soil:
- Cause & Symptoms: Bulbous irises need a dry summer rest; heavy, poorly drained or summer-irrigated soil rots the dormant bulbs.
- Correction Strategy: Plant in sharply drained soil or raised beds/gravel, keep them dry through summer dormancy, or lift and store bulbs after the foliage dies down and replant in autumn.
- Blindness / no flowers after the first year:
- Cause & Symptoms: Small dwarf bulbous irises (e.g. reticulata types) often flower well the first year then split into non-flowering ‘grass’, especially in rich, moist or shaded ground.
- Correction Strategy: Plant deeply in a hot, well-drained, sunny spot that bakes dry in summer, feed after flowering to build the bulb, and be prepared to treat them as short-lived and replant.
- Frost heave / cold damage to early flowers:
- Cause & Symptoms: Very early blooms can be browned by hard frost, and shallow bulbs can heave in freeze-thaw soils.
- Correction Strategy: Plant at the correct depth, mulch lightly in hard-frost areas, and accept that the earliest flowers occasionally take weather damage in exposed spots.
What Helps – Products & Tools
Useful tools are a sharp sanitized knife for cutting out borers and rot, slug traps/iron-phosphate bait and copper barriers, insecticidal soap or horticultural oil for aphids and thrips, and – for foliar disease – a copper or mancozeb-type fungicide; systemic insecticide is a last resort for borer where cultural control fails. Bulbous types benefit from a fungicide bulb dip before storage. Always follow the label and protect pollinators.