Plant Profile & Key Characteristics
Also known as: Rubus tricolour
Overview: A low, creeping bramble only 5-10 cm (2-4 in) tall but spreading widely, grown mainly as an ornamental ground cover; it also bears small edible red berries. The stems root as they run to knit dense cover.
Quick Specifications
| Specification | Attribute |
|---|---|
| Plant Type / Life Cycle | Perennial (woody shrub/cane fruit) |
| Foliage Type | Deciduous or evergreen |
| Mature Size | 5-10 cm (2-4 in) tall, spreading wide as a ground cover |
| Growth Rate | Moderate |
| Root System | Stoloniferous — stems root along the ground as they creep |
| Toxicity | Non-toxic / edible |
| Hardiness | USDA zones 7-10a (to 10b with the right care) |
Growth Form & Structure
- Height & Spread: 5-10 cm (2-4 in) tall, spreading wide as a ground cover in the ground, spreading wider over a few years; also grown in large containers (a pot of at least about 12 litres / 3 gallons), potted on as it fills the space.
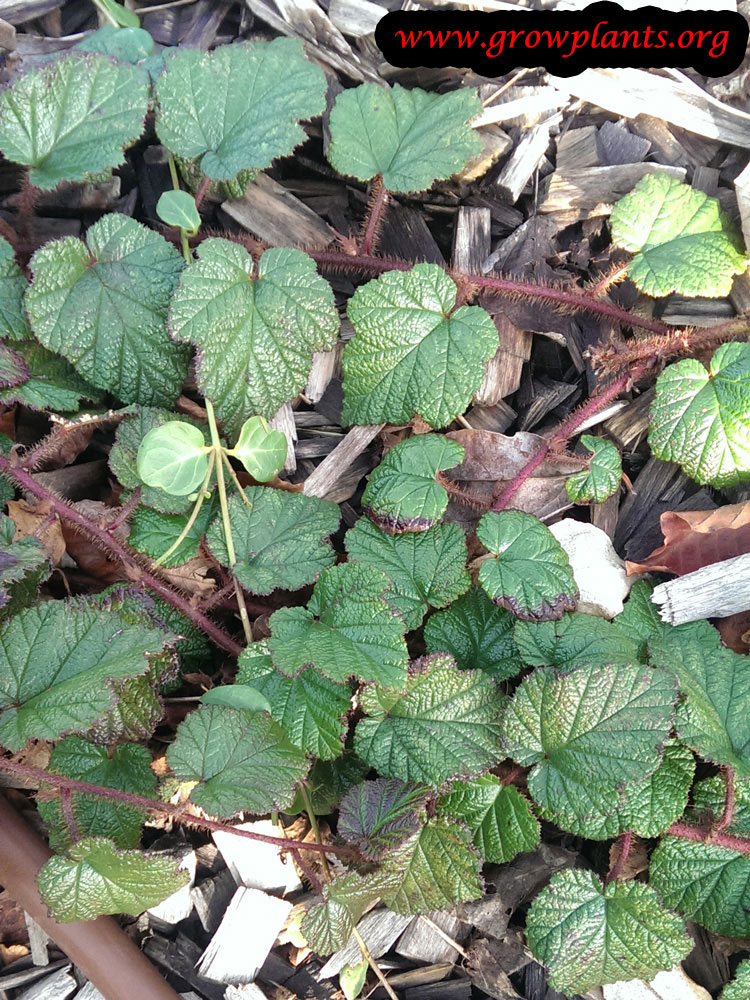
- Growth Habit & Form: A vigorous, creeping/trailing bramble that runs along the ground and roots at the nodes to form dense ground cover; needs plenty of room.
- Lifespan & Maturity: A perennial from the root/crown that renews its canes yearly; plants usually begin bearing fruit within about 2-3 years.
Anatomy & Physical Features
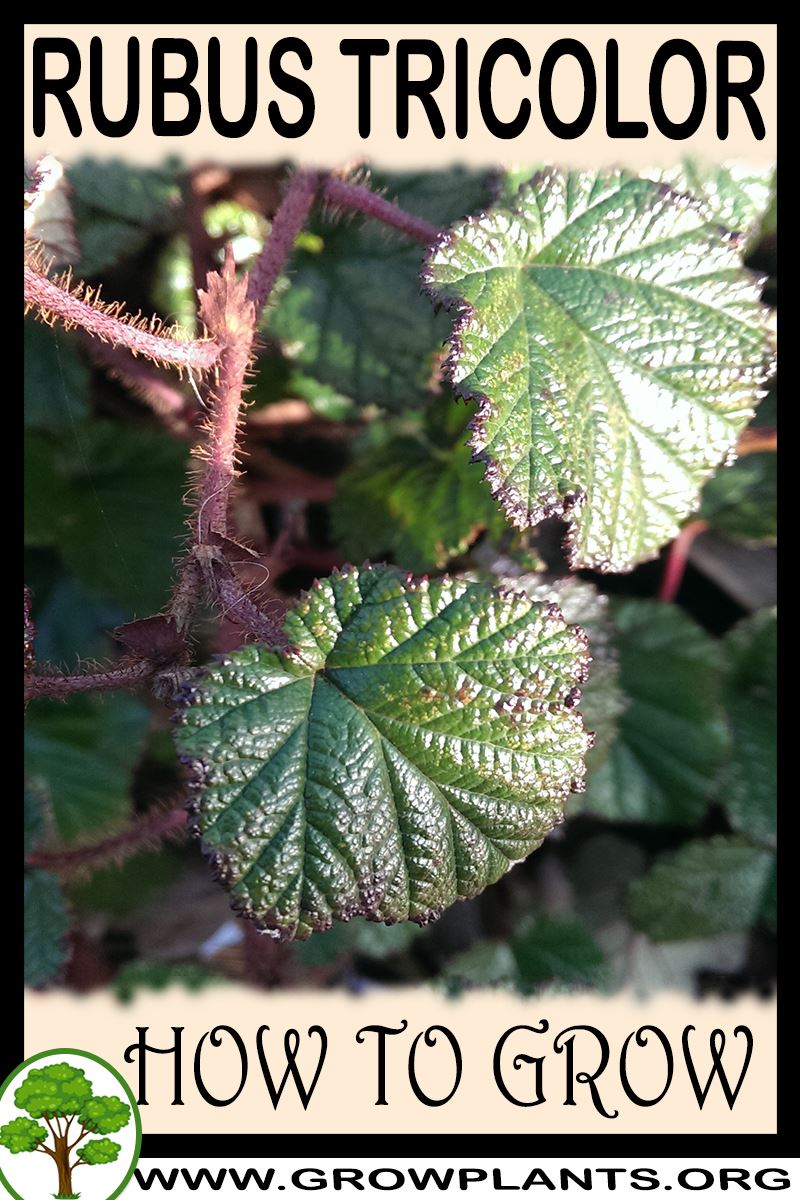
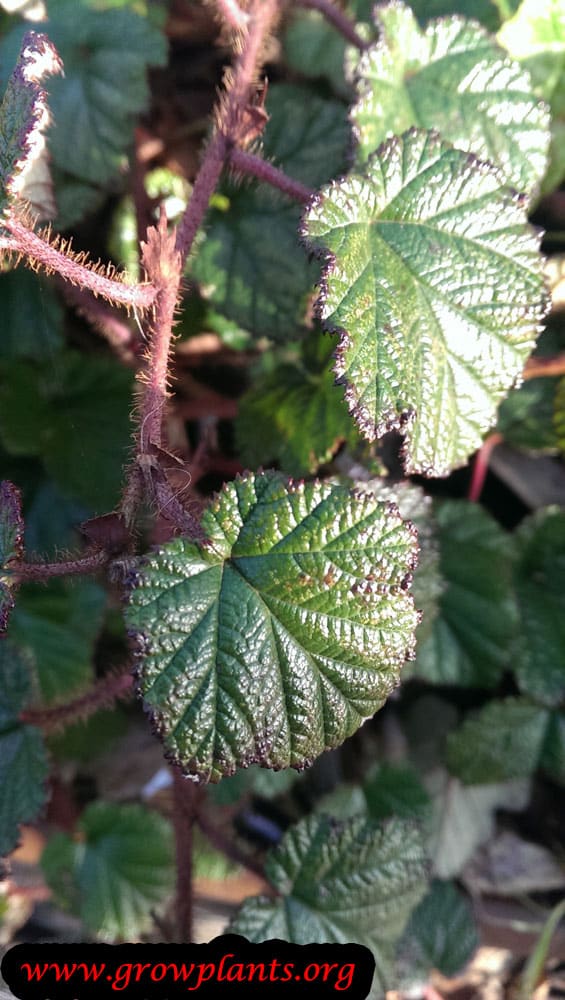
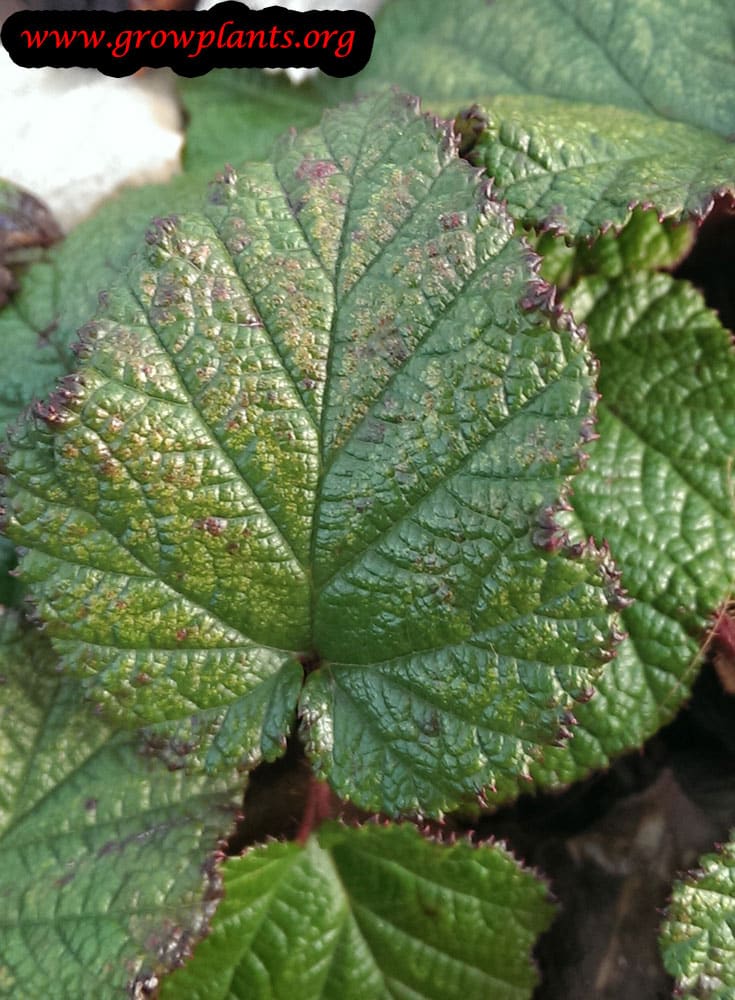
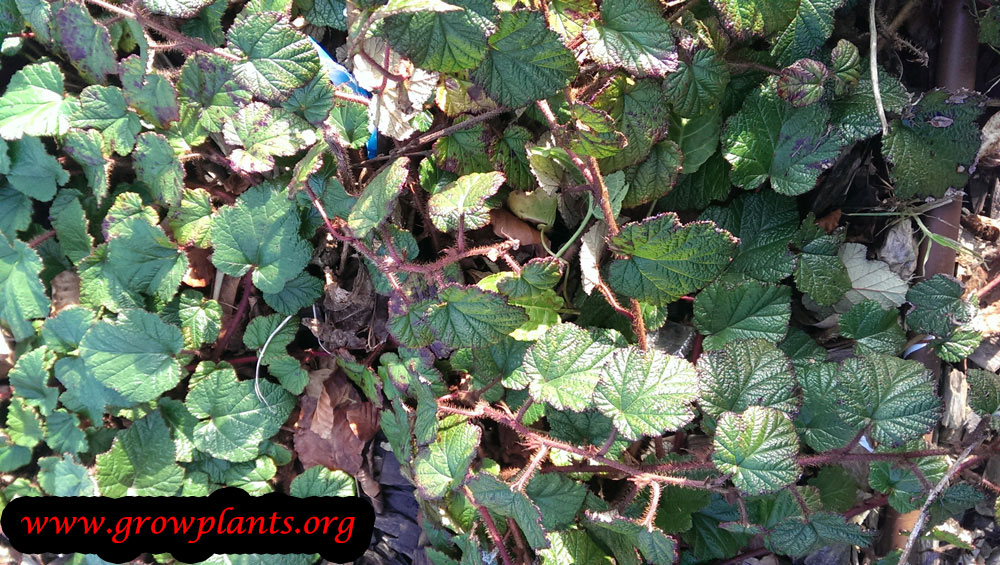
- Leaves & Foliage: Green (purple when young) small leaves with 5 round-edged lobes, hairy at the leaf base.
- Flower Characteristics: Small white (occasionally purple-tinged) 5-petalled flowers, mostly in clusters, worked by bees.
- Fruit Profile: Small red aggregate berries with fine hairs; edible but a secondary feature to the plant’s ground-cover use.
Primary Uses & Landscape Value
- Edible Uses: The berries are eaten fresh and used for cakes, cooking and juice.
- Functional & Ornamental Roles: Grown chiefly as an ornamental, weed-suppressing ground cover; the small red fruits can be eaten or used like other brambles.
Care Guide: Planting, Soil & Watering
Overview: Rubus tricolor is a creeping, ground-covering bramble that grows best in full sun in rich, well-drained soil. It takes moderate, steady watering through growth while needing free drainage so the roots never waterlog.
Quick Care Requirements
| Requirement | Ideal Condition |
|---|---|
| Planting Season | While dormant, from winter through spring into summer |
| Growth Rate | Moderate |
| Soil Type | Rich, well-drained soil |
| Water Need | Moderate — keep evenly moist, letting the surface dry between waterings |
Planting & Establishment
- Best Planting Season: Plant while dormant, from late winter through spring and into early summer; in hot climates avoid planting during the peak heat of summer.
- How to Plant:
- Hole Preparation: Dig a planting hole at least 50–100% wider than the root ball.
- Soil Amendments: Mix the backfill with rich soil, well-rotted leaves, compost, humus and plenty of organic matter.
- Planting Depth: Set the plant at the depth it grew before, keeping the crown at soil level, and firm it in.
- Growth Speed & Expectations: A moderate grower that stays low but spreads widely as a ground cover, rooting as it creeps.
Soil, Watering & Drainage Care
- Soil Mix & Drainage Needs: Give it rich, well-aerated soil that drains freely; in containers use a free-draining mix (peat or compost with a little perlite) rich in organic matter and mulched to stay moist, and make sure excess water drains away to prevent root rot.
- Watering Schedule & Technique:
- Young / Newly Planted: Water thoroughly at planting and keep the soil consistently moist while the young plant roots in — never let it dry out completely.
- Established: Water deeply and regularly through the growing season, especially as flowers and fruit develop, keeping the soil evenly moist while letting the very surface dry between waterings.
- Seasonal Adjustments: Increase watering in summer heat and while fruiting, and reduce it over the cooler, dormant months.
Climate, Light & Hardiness
Rubus tricolor (creeping bramble) suits temperate, subtropical, and Mediterranean climates and is typically grown as a full-sun ground cover. It is reliably hardy from about USDA zone 7 through 10a, with careful siting possibly extending use into the milder parts of zone 10b.
Quick Climate Specifications
| Climate Zones | Temperate, subtropical, Mediterranean |
|---|---|
| USDA Hardiness Zones | Approximately 7–10a, and marginally into 10b with attentive care |
| Optimal Temp Range | Generally mild, roughly 15–25°C (59–77°F) during active growth |
| Cold Damage Begins | Around 0°C (32°F) on young growth and open flowers |
| Approx. Survival Minimum | Roughly −18°C (0°F) or slightly lower briefly for established plants (typical zone 7 winter minimum) |
| Frost Tolerance | Moderate (established plants) / Low (young growth) |
| Light Conditions | Full sun |
Sunlight & Light Exposure
Optimal Light Setup
Full sun is the documented preference for this creeping ground-cover bramble.
Direct Sun Requirement
Direct sun supports the densest, most even ground-cover growth and best fruit set.
Shade & Heat Management
No shade requirement is noted for this species; it is grown in open, sunny positions rather than shaded ones.
Temperature Extremes & Hardiness
USDA Hardiness & Regional Limits
Rubus tricolor is generally suited to zones 7–10a. Cultivation may extend into zone 10b for growers who give it a bit of extra attention, consistent with how the closely related Tayberry and Golden raspberry are described in this dataset.
Cold Damage & Winter Protection
As with other brambles, frost near or below freezing is most likely to affect soft new growth and flowers rather than established woody stems.
Frost Sensitivity
Moderate once established; young transplants are more vulnerable to late spring frosts.
Extreme Heat Tolerance
No specific heat-stress data is documented for this species beyond its suitability for subtropical and Mediterranean climates, which suggests reasonable warm-season tolerance.
Wind, Humidity & Microclimate
Humidity Preferences
Grown across temperate to subtropical climates, it generally prefers consistent moisture rather than very dry conditions.
Dry-Air Tolerance
Not well documented for this species; cautious growers should assume only moderate tolerance for prolonged dry air.
Rainfall & Seasonal Moisture
Best suited to climates with regular seasonal rainfall rather than prolonged drought.
Microclimate Recommendations
As a low, spreading ground cover, it benefits from an open sunny site without deep shade from taller plantings, and some winter shelter at the cooler edge of its range.
Growing in Pots, Balconies & Indoors
The rubus tricolor (Rubus tricolor) is a fruiting bramble of a low, wide-spreading ground-cover of 5-10 cm (2-4 in), not a houseplant, but it grows and crops well in a pot on a sunny balcony, patio or terrace when kept in check. It likes full sun to half shade and is best grown outdoors where it gets the light and seasonal chill it needs to fruit.
Quick Details
- Container Size: Start 40-60% bigger than the root ball and pot up in stages; a wide, shallow pot suits its spreading habit
- Indoor Suitability: Not a houseplant – a fruiting bramble for outdoors
- Best Spot: Full sun to half shade outdoors
- Soil & Drainage: Acidic, organic-rich mix with good drainage; keep it moist under a mulch
- Watering in Pots: Average to generous with free drainage – never let the water sit; low-mineral water is better
Indoors & On the Windowsill
- Houseplant limits: The grower marks it as no for indoors – it needs open sun and room to cane, which a warm room and windowsill can’t give.
On a Balcony or Patio
- Light & wind: Give it a bright, open spot and tie in or support the canes. Walls and paving reflect heat, so pots dry quickly – check moisture in warm weather and keep the mulch topped up.
- Practicalities: A cropping bramble in a filled pot is heavy and can be thorny – stand it clear of walkways where you can water freely and let drainage run off.
Choosing the Pot, Soil & Long-Term Care
- Pot & drainage: A pot with strong drainage holes so water never sits; skip a standing water saucer to avoid root rot. Terracotta breathes and dries faster, glazed or plastic holds moisture longer.
- Potting mix: An acidic, organic-rich mix kept moist with a mulch of pine needles/bark or peat plus humus; refresh the soil in the dormant season as it loses vitality over time.
- Feeding: Potted brambles need feeding more often than those in the ground because nutrients leach with watering – feed through the growing season.
- Repotting: Pot up a size when the roots fill the pot and remove spent canes each dormant season, keeping a few young canes for next year’s crop.
Grower’s Container Tip
- Start bigger and pot up: Start in a pot 40-60% larger than the root ball and move up a size each time the roots fill it, until it reaches the size you want – this staged method keeps the plant healthy because potting soil loses vitality over time. Change the soil in the middle of the dormant (cold) season. Water with good drainage, ideally with low-mineral water, and keep the mix moist with an acidic mulch – pine needles or bark, peat or similar – plus humus and plenty of organic matter.
Growing this plant in a greenhouse
A greenhouse can give rubus tricolor frost protection, cold protection and protection from rain.
Greenhouse at a glance
| Greenhouse suitability | Conditional - depends on your climate |
|---|---|
| Main benefits | frost protection, cold protection, protection from rain |
| Season extension | earlier spring & later autumn |
| Outdoor protection advisable below | about 0°C |
| Suitable types | unheated greenhouse, polycarbonate greenhouse, lean-to |
| Heating | Heating is optional - useful mainly for winter growing in cold areas. |
Related greenhouse guides
- Greenhouses: How to Choose the Right Greenhouse
- Best Lean-To Greenhouses
- Polycarbonate Greenhouses: What to Look for Before Buying
Fertilizing & Feeding
Rubus tricolor is grown mainly as a low, spreading ground-cover vine rather than for fruit production, so it is a light feeder: modest feeding to help it fill in and stay dense is enough, and it does not need the heavier feeding a fruit-focused bramble would get.
Quick Fertilizing Specs
| Main Nutrient Priority | A balanced feeding to support dense, even ground-cover spread |
|---|---|
| Best Feeding Period | Spring as new growth begins covering the ground |
| Organic Options | Compost or aged organic matter worked into rich, well-drained soil supports steady spread |
| Soil pH | Grows in well-drained, rich soil |
| Reduce/Stop Feeding | Ease off feeding once the ground-cover patch has filled in and growth slows |
Feeding by Growth Stage
Establishment After Planting
Support root establishment and early spread as the plant begins covering ground
| Nutrient direction | Light, balanced feeding focused on root development |
|---|---|
| Timing | At planting and through the first growing season |
| Frequency | A light feeding as new growth begins, then only as needed |
| Fertilizer types | A balanced, complete fertilizer worked lightly into the root zone at planting, Rich soil amended with dead leaves and organic matter at planting time |
| Precautions | Avoid heavy feeding right at planting, which can stress newly forming roots |
Active Ground-Cover Spread
Support dense, even spread of trailing stems and foliage across the planting area
| Nutrient direction | A balanced feeding, leaning slightly toward nitrogen to encourage leafy, well-covered growth |
|---|---|
| Timing | Spring into early summer as the plant is actively spreading |
| Frequency | Light, occasional feeding through the main spread period |
| Fertilizer types | A balanced, complete fertilizer applied around the root zone, A refresh of organic mulch to keep the soil fertile as the patch fills in |
| Precautions | Avoid heavy nitrogen once the area is well covered, since it mainly encourages growth that then needs more pruning to keep in bounds |
Seasonal Slowdown
Let growth wind down naturally as the growing season ends
| Nutrient direction | None – withhold fertilizer as growth slows |
|---|---|
| Timing | Autumn into winter, or during any dry or cool rest period depending on climate |
| Frequency | No feeding at this stage |
| Fertilizer types | No feeding at this stage; let existing mulch continue to break down into the soil |
| Precautions | Do not fertilize during this slowdown period; resume light feeding only once active spring growth restarts |
Nutrient Deficiency Signs & Corrections
New leaves turn pale yellow between dark green veins while the veins themselves stay green
| Possible causes | High or alkaline soil pH limiting iron availability to the roots, Waterlogged or compacted soil restricting root uptake, True iron shortage in very sandy or heavily leached soil |
|---|---|
| Appears first on | Newest leaves at the growing tips first |
| What to check | Soil drainage and compaction across the planting area, Recent changes to soil pH such as lime application or hard irrigation water, Whether older foliage stays green while only new growth is affected |
| Possible correction | Improve drainage and correct soil pH toward a more neutral to slightly acidic range first; apply a chelated iron product per its label only if pH correction alone does not resolve it |
Foliage looks pale and thin and the ground-cover patch fills in slowly or leaves gaps
| Possible causes | Insufficient nitrogen in the soil or feeding program, Sandy or fast-draining soil that leaches nutrients quickly, Root competition from nearby trees, shrubs, or weeds |
|---|---|
| Appears first on | Older leaves and thinner, weaker trailing stems first |
| What to check | Overall density and color of the ground-cover patch compared to earlier in the season, Whether mulch or organic matter has been refreshed recently, Presence of competing roots or weeds nearby |
| Possible correction | Resume a light, balanced feeding during active growth and refresh organic mulch across the planting area |
Patchy thinning or dieback appears within an otherwise healthy ground-cover planting
| Possible causes | Waterlogged or compacted soil restricting root function in that patch, Drought stress from uneven watering across the planting area, General nutrient shortfall on top of the underlying soil stress |
|---|---|
| Appears first on | Isolated patches rather than evenly across the planting |
| What to check | Drainage and soil compaction in the affected patch specifically, Watering consistency across the whole planting area, Whether the dieback lines up with foot traffic, equipment, or other physical stress |
| Possible correction | Address the underlying drainage, compaction, or watering issue first; only add a light balanced feeding once the physical soil problem is corrected |
Pruning, Training & Seasonal Maintenance
Rubus tricolor is grown as a low, mat-forming groundcover – it stays only 5–10cm tall but spreads widely via trailing stems that root where they touch soil. Pruning here is not about cane renewal for a fruit crop; it is about containing spread and periodically rejuvenating the mat. It tolerates shearing well. The safest window is autumn, after fruiting and before winter dormancy, matching this plant’s own recorded pruning season; cutting hard in spring instead would remove the flower flush.
Quick Pruning & Maintenance Specs
| Pruning Tolerance | Moderate–High (shears/renews well; avoid removing rooted runners you want to keep) |
| Primary Pruning Window | Autumn, after fruiting |
| Secondary Maintenance Window | Spring – edge-trim regrowth before it spreads further |
| Typical Frequency | 1–2x per year for edging; full renewal cutback only every few years |
| Main Objective | Contain spread within the intended bed; keep the mat dense rather than thin and leggy |
| Young Plant Priority | Pinch trailing stem tips to encourage branching and faster ground coverage |
| Mature Plant Priority | Edge-containment trimming; occasional renewal cutback of old woody centers |
| Best Tool Type | Hand/hedge shears for edging, bypass secateurs for selective stems |
| Avoid Heavy Pruning During | Spring bloom flush |
Pruning by Plant Age & Size
Newly Established
Pinch growing tips only, to encourage side-branching and denser early coverage; no cutting back otherwise.
Young / Formative
No structural training in the tree/shrub sense – this is a spreading groundcover. Direct runners into the intended bed area rather than building a framework.
Mature / Established
Trim spreading runners back to the bed edge; every few years, cut back the oldest, most woody central growth hard to keep the mat from thinning out in the middle.
Seasonal Pruning Schedule
Ongoing Sanitary
Objective: tidiness. Remove: dead or damaged trailing stems any time. Do not remove: actively rooting runners you want to keep as fill-in growth. Expected response: none significant. Flowering/fruiting impact: none.
Post-Flowering/Fruiting (Autumn)
Objective: contain and renew. Remove: runners that have rooted outside the bed, old woody sections for renewal. Do not remove: the current season’s flowering/fruiting side-shoots before they have finished. Expected response: denser regrowth from the cut line the following spring. Flowering/fruiting impact: minimal since flowering is already finished for the season.
Structural Pruning & Training
No formal framework. The only “structure” to manage is mat density and bed edges: periodically remove or shorten the oldest woody stems at the center of the mat to keep it filling in rather than becoming a hollow, leggy ring.
Special Growth to Remove
Trailing runners/stolons that have rooted beyond the intended planting area – this plant spreads readily and needs space to fruit well, so left unchecked it will colonize adjacent beds, lawn edges or paths.
Container & Small-Space Pruning
In containers, trim trailing stems back to the pot rim regularly rather than letting them spill over and root wherever they touch soil; light, frequent edging suits a pot better than one large annual cutback.
Tools
Hedge or hand shears for routine mat-edge trimming; bypass secateurs for selective removal of individual old stems during renewal.
Tool Hygiene & Disease Risk
Routine. No significant transmissible disease is noted for this plant (aphids are the recorded pest, not a pathogen spread by tools); clean, sharp tools are sufficient.
Cut Placement & Technique
Shear to a consistent edge line rather than cutting into old bare wood that may resprout poorly; when renewing the center, cut old stems back to a point with visible live buds/side-shoots.
Heavy Pruning & Rejuvenation
Tolerated in moderation: an overgrown or thin-centered mat can be cut back hard after fruiting (autumn) to rejuvenate it, but avoid removing more than about half the mat at once, and expect a lighter flower/fruit display the following spring while it regrows.
Post-Pruning Care
Water after any significant autumn cutback if the season is dry; otherwise no special aftercare beyond normal spring fertilizing already recommended for this plant.
Common Pruning Mistakes
Shearing hard in spring instead of autumn, which removes the flower flush; letting runners root unchecked outside the bed instead of edge-trimming; always shearing to exactly the same line, which can leave a woody dead zone with little fresh regrowth.
When NOT to Prune
Avoid hard cutback during the spring flowering flush, and avoid cutting back hard right before the first frost in the cooler end of its hardiness range (7–10a), since fresh regrowth is frost-tender.
Recommended Tools (by task)
- hedge_shears – efficient for routine edge/mass trimming of a low spreading mat, the main recurring task here.
- bypass_secateurs – for selective removal of individual old woody stems during a renewal cutback.
Propagation Guide
Rubus tricolor is propagated vegetatively – the site notes this is necessary, with seed possible but not recommended. As a trailing, creeping groundcover, its stems root readily where nodes touch soil, making stem cuttings and simple layering the most practical home methods, and this species is generally easy to propagate this way.
Quick Propagation Specs
| Best Propagation Method | Stem cuttings or layering the trailing stems |
| Alternative Methods | Seed (possible, not recommended) |
| Propagation Difficulty | Easy |
| Vegetative True-to-Type | Yes |
| Best Propagation Season | Spring |
Stem Cuttings
Take cuttings from healthy trailing stems and root them in moist, humid conditions; as with other creeping Rubus species, warm, humid conditions typically give the most reliable rooting, though the site does not specify an exact rooting time for this entry.
Air & Ground Layering
Because the stems are naturally trailing and creep along the ground, sections that stay in contact with moist soil will often root on their own at the nodes; pinning a stem section to the soil and keeping it consistently moist speeds this up. Once a layered section has developed its own roots, it can be severed from the parent plant.
Bloom & Flower Guide
Quick Details
- Bloom Season: Spring
- Time to First Bloom: Usually the second year, once the creeping stems are established
- Flower Appearance: White flowers about 1 cm, with five petals, in clusters
- Edibility: Grown mainly as ornamental groundcover; the flowers are not eaten
Detailed Blooming Overview
This creeping bramble is grown chiefly as a groundcover, and in spring it scatters small white five-petalled flowers over its low mat of foliage. The blooms are followed by modest red fruit, though the plant earns its place mainly for its evergreen carpet.
Flower Characteristics
- White flowers about 1 cm across, with five petals, borne in clusters.
Bloom Care & Thinning
- Managing early bloom: while the plant is settling in, it is worth removing the first flowers until it is established.
- Pollination: bees and other insects work the flowers.
Bloom Health & Protection
- Grey mould (Botrytis): in damp spells it can settle on the blossom and cause it to brown and drop; good airflow through the mat and, if needed, a suitable fungicide help limit it.
Fruit & Uses
Rubus tricolor is grown mainly as an evergreen ground-cover bramble, but it does produce a genuine edible fruit: small, red, semi-hairy berries that ripen from spring into early summer and can be eaten raw or cooked. The berries are a secondary bonus on this ornamental plant rather than its main purpose, and they tend to be milder and seedier than cultivated raspberries.
Quick Edible Specs
| Edible Parts | Fruit (aggregate berries) |
|---|---|
| Main Use(s) | Culinary – fresh eating, cooking, juice (secondary to its use as ornamental groundcover) |
| Eaten Raw or Cooked | Raw or cooked |
| Preparation Required | None (rinse before eating) |
| Harvest Season | Spring, early summer |
| Time to First Harvest | Plants typically need a couple of growing seasons to establish before fruiting well (see Care) |
| Storage | Best eaten fresh; can also be picked slightly under-ripe and left to finish ripening indoors |
| Safety/Toxicity Caveat | No significant toxicity known |
Fruit
The small round berries are red with fine hairs and, like other brambles, are made of tiny drupelets clustered together. They ripen from spring into early summer and can be picked slightly under-ripe and left to finish ripening at home. Because the plant is grown chiefly as a spreading groundcover rather than trained for cropping, fruiting is light and the berries are more of an incidental snack than a real harvest; flavour is mild and seedy compared with red raspberries.
Preparation, Uses & Safety
Berries can be eaten straight off the plant or cooked into jam/juice like other brambles. No special preparation or safety precaution is needed beyond a rinse.
Pests, Diseases & Troubleshooting
Overview: Rubus tricolor is a vigorous evergreen ornamental groundcover bramble, grown for foliage rather than fruit, and is notably tough and pest-resistant. Occasional problems are the general genus ones: aphids on soft new growth, spider mites in hot dry sites, slugs and snails on tender shoots, and, in wet dense growth, grey mould or leaf spot. It rarely needs more than cultural care.
Quick Troubleshooting Overview
| Issue / Pest | Main Symptom | Primary Solution |
|---|---|---|
| Aphids | Curled tips, sticky honeydew, spread of virus | Protect predators, water jet, insecticidal soap |
| Cane borers | Wilting tips or swollen galls; canes die | Prune out and burn affected canes below damage |
| Spider / redberry mite | Stippled leaves; uneven, hard red drupelets | Hose foliage, horticultural oil, remove old canes |
| Spotted wing drosophila | Soft, collapsing, maggoty ripe fruit | Pick often, cool fast, sanitation, monitor traps |
| Cane & spur blight / anthracnose | Purple-brown cane lesions; buds die back | Prune out old canes, airflow, sanitation, copper |
| Grey mould (botrytis) | Fuzzy grey rot on ripening berries | Airflow, pick promptly, avoid wet dense canopy |
Common Pests & Management
- Aphids (Amphorophora agathonica / Aphis idaei):
- Symptoms: Colonies of small green aphids on shoot tips and leaf undersides cause curling and stunting, but the real danger is their role spreading raspberry mosaic and leaf-curl viruses from plant to plant; sticky honeydew and sooty mould follow.
- Prevention & Control: Because virus spread matters more than the direct feeding, keep plants vigorous and rogue out any virus-symptomatic canes. Protect ladybirds, lacewings and parasitic wasps, and knock aphids off with a water jet. Use insecticidal soap or light horticultural oil on undersides for heavy colonies, and start with certified virus-free stock.
- Spotted wing drosophila (Drosophila suzukii):
- Symptoms: Unlike common vinegar flies, this fruit fly lays eggs in sound, ripening fruit; berries soften, weep and collapse within a day or two and contain small white maggots. It is now the most serious pest of soft brambles in many regions.
- Prevention & Control: Harvest ripe fruit frequently and completely, and chill it immediately to stop larvae developing. Remove and destroy (do not compost) overripe and fallen berries to break the cycle. Keep the canopy open and pick clean. Monitor with vinegar/yeast cup traps; where pressure is severe, fine mesh netting or an evening-applied spinosad program per label may be needed.
- Two-spotted spider mite (Tetranychus urticae):
- Symptoms: Fine pale stippling, bronzing and webbing on leaf undersides in hot, dry, dusty conditions; heavy feeding yellows leaves and reduces fruit size and vigour.
- Prevention & Control: Avoid drought and dust stress and hose foliage undersides in hot spells. Protect and encourage predatory mites. Removing old fruited canes after harvest reduces overwintering sites. Horticultural oil or insecticidal soap on leaf undersides controls outbreaks; rotate products to avoid resistance.
- Slugs and snails (Gastropoda):
- Symptoms: Ragged holes chewed in tender new leaves and shoot tips, with slime trails, mainly in damp shady spots where this groundcover thrives.
- Prevention & Control: Encourage predators, remove daytime hiding places, and hand-pick at night in damp weather. Barriers of grit or copper tape protect key plants, and iron-phosphate slug pellets are a wildlife-safer option if needed.
Diseases & Fungal Issues
- Cane blight (Leptosphaeria coniothyrium):
- Symptoms: Dark brown-to-purple lesions develop on canes, often where they were wounded by pruning or borers; the bark cracks, canes become brittle and snap, and shoots above the lesion wilt and die, especially in the fruiting year.
- Treatment & Management: Prune only in dry weather with clean tools and avoid wounding canes. Cut out and burn infected canes well below the lesion. Keep rows open and airy, remove old fruited canes each year, and control cane borers that create entry wounds. A copper or labelled fungicide at pruning helps where blight is chronic.
- Spur blight (Didymella applanata):
- Symptoms: Purple-brown blotches appear around the buds and nodes on first-year canes, later turning silvery-grey with black dots; affected buds die or produce weak, unproductive laterals the next year.
- Treatment & Management: Thin canes to improve air movement and light penetration, and avoid excess nitrogen that causes soft, crowded growth. Remove and burn infected canes. Keep the base weed-free and mulch to reduce spore splash. Fungicides used for cane blight also help suppress spur blight.
- Anthracnose (Elsinoe veneta):
- Symptoms: Small purple spots on canes enlarge into sunken grey-centred pits with purple margins (“cat’s-eye” spots); leaves show small spots that drop out, and fruit can ripen unevenly. Black raspberries are especially prone.
- Treatment & Management: Start with clean stock and grow resistant types where available. Prune out and burn old and infected canes, thin for airflow, and avoid overhead irrigation. A dormant/delayed-dormant lime-sulfur or copper spray at bud break, repeated per label, is the mainstay where anthracnose is severe.
- Grey mould / fruit rot (Botrytis cinerea):
- Symptoms: A fuzzy grey mould rots ripening and picked berries, spreading fast in wet weather and dense canopies; infected flowers may fail to set.
- Treatment & Management: Open the canopy by thinning and trellising so fruit dries quickly, and pick ripe berries frequently and gently. Remove rotted and mummified fruit. Avoid overhead watering and excess nitrogen. Good airflow and sanitation usually suffice; a botrytis-labelled fungicide at bloom helps in persistently wet seasons.
- Phytophthora root rot (Phytophthora spp.):
- Symptoms: Canes are weak, leaves yellow or scorch and wilt despite moist soil, and the plant collapses; scraping the crown reveals reddish-brown dead tissue. It is worst on heavy, wet, poorly drained ground.
- Treatment & Management: Prevention is everything: plant on raised beds or ridges in free-draining soil and never let the crown sit waterlogged. Improve drainage and avoid overwatering. Choose tolerant cultivars. Once established the rot is very hard to cure, so remove badly affected plants and do not replant brambles in the same wet spot.
Growing Difficulties & Abiotic Problems
- Winter cane dieback:
- Cause & Symptoms: Canes brown and die back from the tip over winter, worst on tender or over-vigorous late growth and in exposed sites, reducing the next crop.
- Correction Strategy: Grow types hardy for your climate, stop feeding nitrogen late in the season so wood ripens, and shelter or lower canes where winters are harsh. Prune out dead tips back to healthy wood in late dormancy.
- Iron chlorosis on alkaline soil:
- Cause & Symptoms: Youngest leaves yellow between green veins on chalky or high-pH soils, where brambles (which prefer slightly acid soil) struggle to take up iron.
- Correction Strategy: Mulch with organic matter to acidify gradually, keep soil evenly moist, and apply chelated iron for quick green-up. Avoid over-liming and improve drainage, since waterlogging worsens chlorosis.
- Crumbly, seedy or sunscalded fruit:
- Cause & Symptoms: Berries fall apart into loose drupelets (crumbly fruit) or develop white, hard sunburned patches on the exposed side in intense heat; drought and poor pollination make it worse.
- Correction Strategy: Water evenly and deeply during fruit development and mulch to buffer moisture, and ensure good pollinator activity. Note that persistent crumbly fruit across a plant usually signals virus — replace with certified stock. Light shade or leaf cover on the hottest afternoons reduces sunscald.
What Helps — Products & Tools
For brambles the core toolkit is insecticidal soap and light horticultural or neem oil for aphids and mites, a delayed-dormant horticultural oil or lime-sulfur for redberry mite and anthracnose, and copper or lime-sulfur fungicide for cane and spur blight. Vinegar/yeast cup traps monitor spotted wing drosophila, fine mesh netting excludes it and birds, and evening-applied spinosad is a last resort for the fly. Chelated iron corrects lime chlorosis. The single most powerful tools, though, are cultural: removing and burning old fruited canes each year, thinning for airflow, frequent clean harvesting and starting with certified virus-free plants; always follow the label and protect pollinators.