
Plant Profile & Key Characteristics
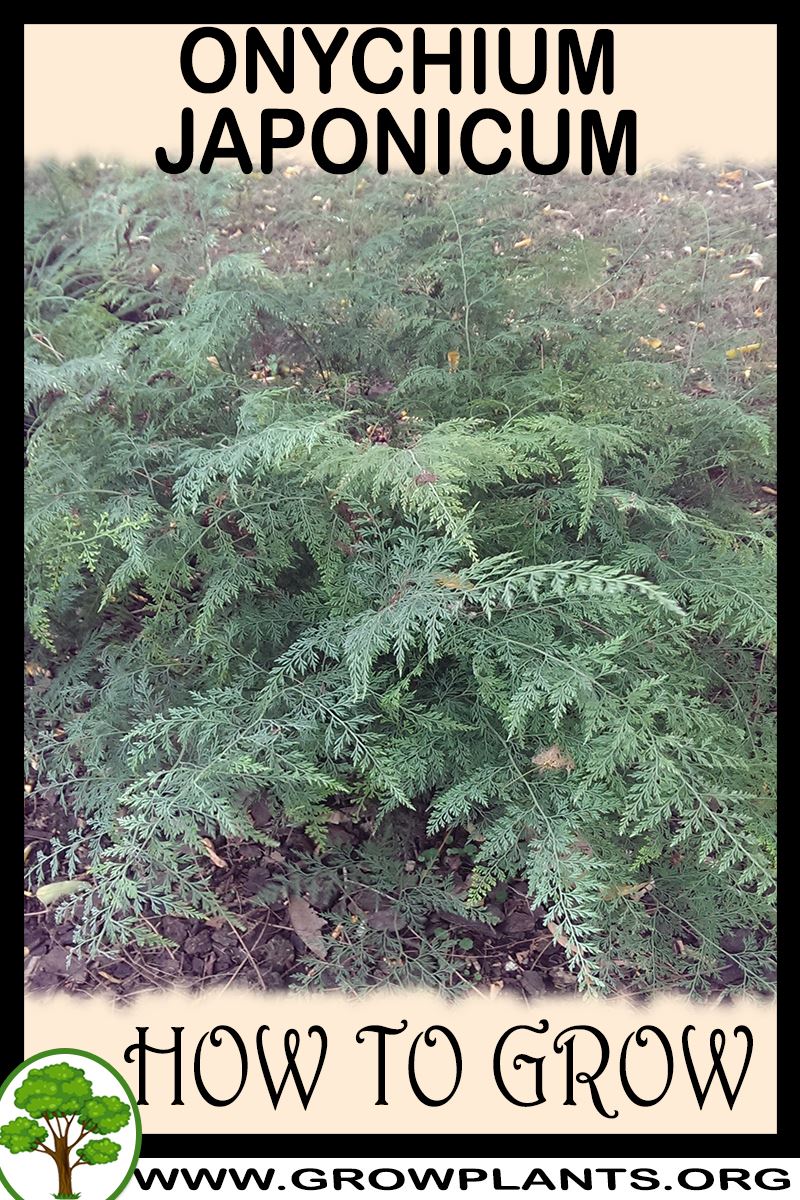
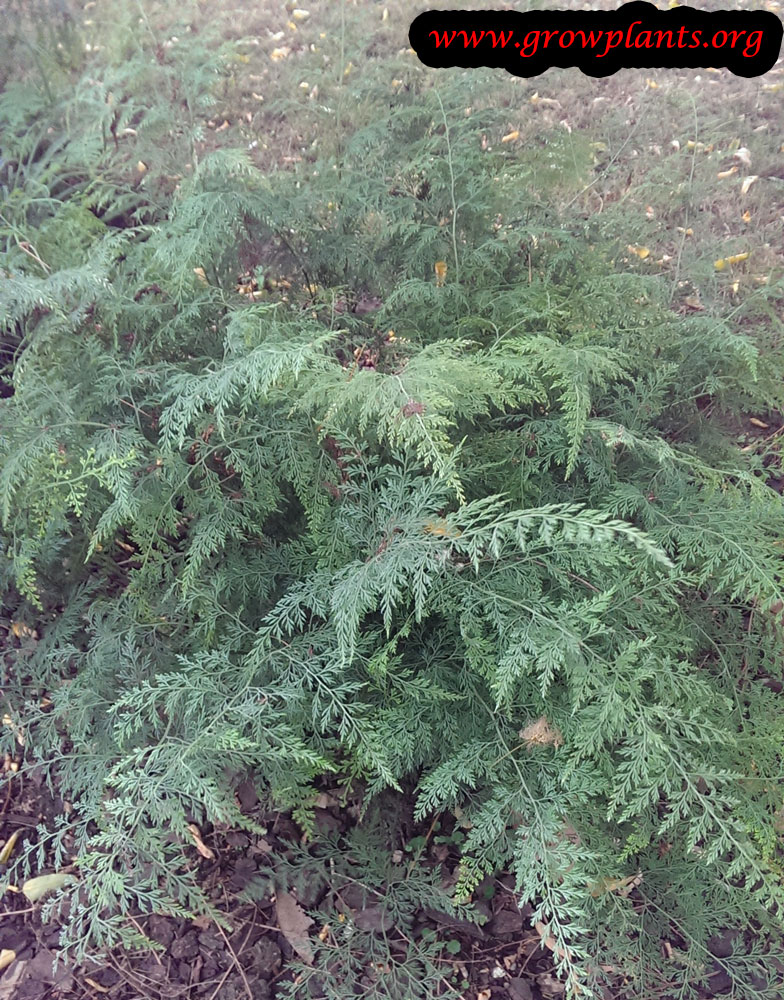
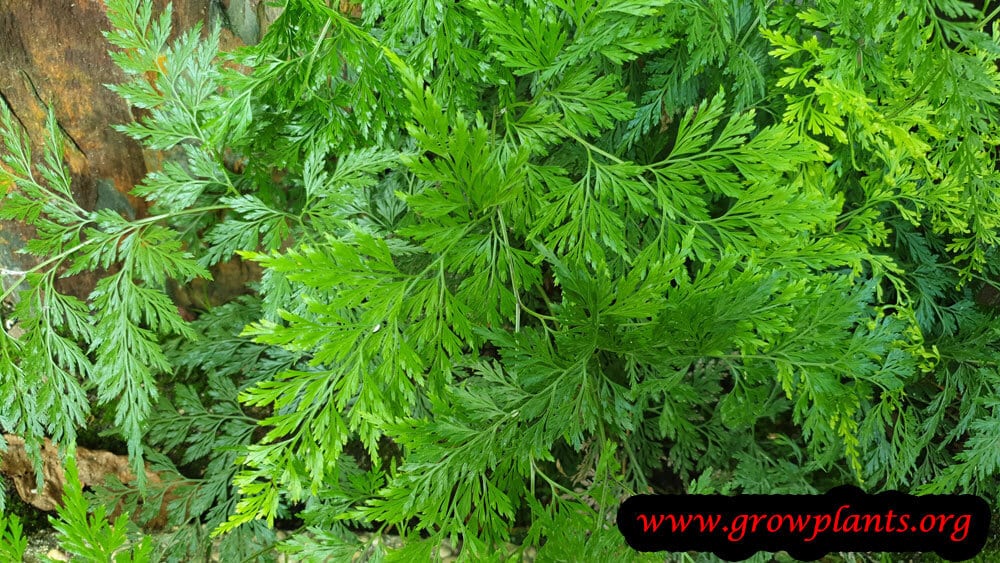
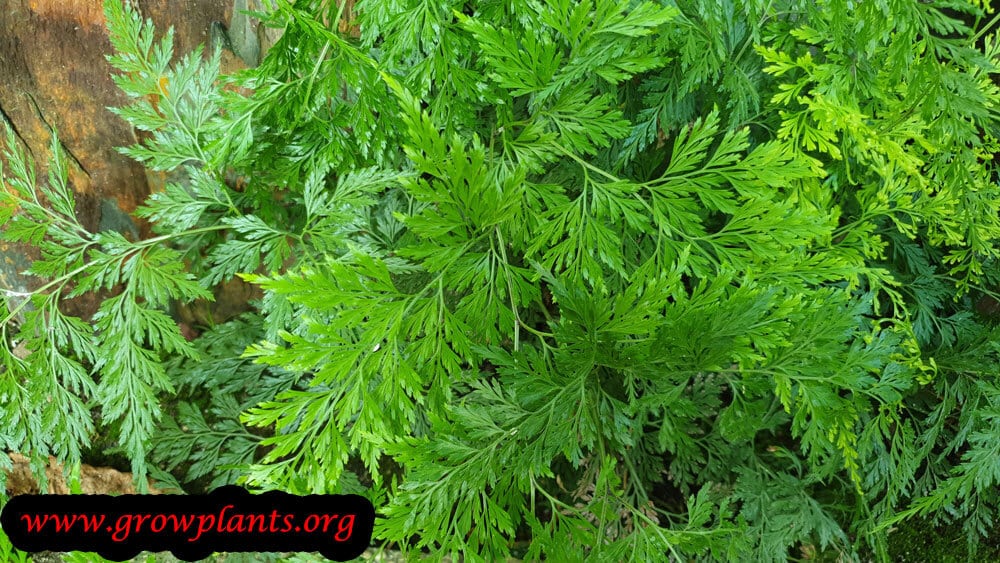
Overview: Onychium japonicum (carrot fern) is a finely divided ornamental fern about 30-70 cm (12-28 in) tall. It is an evergreen or deciduous perennial grown for its delicate, feathery, carrot-like foliage.
Quick Specifications
| Specification | Attribute |
|---|---|
| Plant Type / Life Cycle | Perennial |
| Foliage Type | Evergreen or deciduous |
| Mature Size | 30-70 cm (12-28 in) tall |
| Growth Rate | Moderate |
| Root System | Rhizomatous (creeping) |
| Hardiness | USDA zones 9-11 |
Growth Form & Structure
- Height & Spread: 30-70 cm (12-28 in) tall in the ground; also grown in pots and planters.
- Growth Habit & Form: Clump-forming fern that spreads slowly by creeping rhizomes.
- Lifespan & Maturity: Moderate-growing perennial fern that fills out over a season or two.
Anatomy & Physical Features
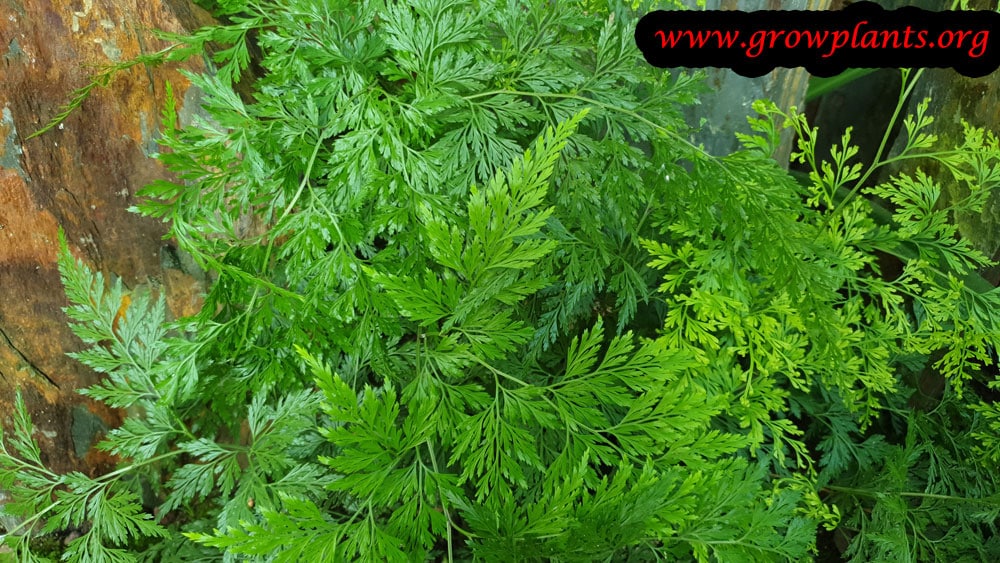
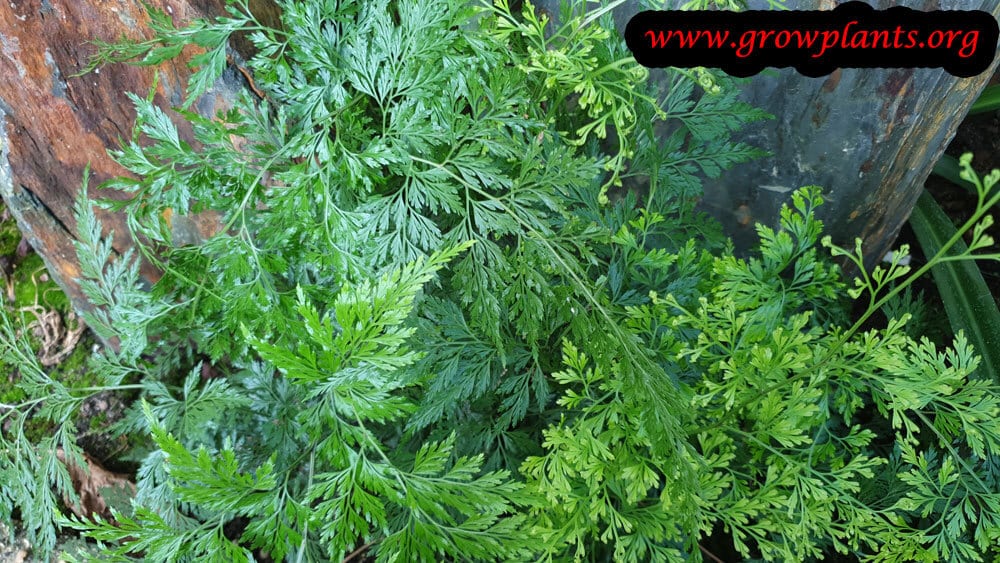
- Leaves & Foliage: Finely divided, triangular, feather-like fronds of pinnate structure resembling carrot foliage, emerging reddish when young and maturing green.
Primary Uses & Landscape Value
- Functional & Ornamental Roles: Ornamental foliage fern for shady borders and containers; can be grown indoors as a houseplant.
Care Guide: Planting, Soil & Watering
Overview: The carrot fern is a delicate fern that thrives in moist, rich soil in shade to part shade, needing consistently damp conditions and protection from drying out.
Quick Care Requirements
| Requirement | Ideal Condition |
|---|---|
| Planting Season | In spring, summer or autumn during the warm growing season |
| Growth Rate | Moderate |
| Soil Type | Moist, rich, organic soil |
| Water Need | Moderate to high — keep the soil consistently moist |
Planting & Establishment
- Best Planting Season: Plant during the warm growing season, in spring, summer or autumn.
- How to Plant:
- Hole Preparation: Dig a hole slightly wider than the root ball.
- Soil Amendments: Work in compost or leaf mould to hold moisture.
- Planting Depth: Set the crown level with the soil surface.
- Growth Speed & Expectations: Moderate, steady growth in shaded, humid conditions.
Soil, Watering & Drainage Care
- Soil Mix & Drainage Needs: A humus-rich, moisture-retentive mix that stays damp without becoming stagnant suits it best.
- Watering Schedule & Technique:
- Young / Newly Planted: Keep consistently moist as it establishes.
- Established: Water regularly and never let it dry out.
- Seasonal Adjustments: More in heat, slightly less in cool weather.
Climate, Light & Hardiness
Onychium japonicum (Carrot Fern) grows in subtropical or Mediterranean climates outdoors, or as a houseplant elsewhere, and does best in half to full shade. Rated for USDA hardiness zone 9–11, it has moderate winter cold tolerance for a fine-textured fern but is not suited to hard freezes.
Quick Climate Specifications
| Climate Zones | Subtropical or Mediterranean, or indoors as a houseplant |
|---|---|
| USDA Hardiness Zones | 9–11 |
| Optimal Temp Range | approximately 15–26°C (59–79°F) |
| Cold Damage Begins | Its delicate, carrot-leaf-like fronds brown once temperatures approach freezing, roughly below 0–2°C (32–36°F). |
| Approx. Survival Minimum | The rhizome generally survives through the stated zone range and can resprout after losing fronds to a light frost; a hard freeze is likely to kill the whole plant. |
| Frost Tolerance | Low |
| Light Conditions | Half Shade / Full Shade |
| Wind Tolerance | Low |
| Salt / Coastal Tolerance | Not suitable |
Sunlight & Light Exposure
Optimal Light Setup
Bright, filtered shade suits it best - enough light to keep the fine foliage dense without scorching it.
Shade & Heat Management
More shade and consistent moisture are needed as heat rises; the fine-textured fronds dry out and brown quickly in hot, unshaded spots.
Best Exposure / Orientation
An east-facing bed or a spot under open canopy works well outdoors; indoors, bright ambient light away from direct sun is preferable.
Temperature Extremes & Hardiness
USDA Hardiness & Regional Limits
Reliable outdoors year-round within zone 9–11; elsewhere it is best grown as a houseplant or given winter protection.
Cold Damage & Winter Protection
A sheltered site and mulch over the rhizome help it survive brief cold snaps at the cool edge of its range; container plants should be moved under cover before frost.
Frost Sensitivity
Moderate-to-high; frost typically damages exposed fronds, though the rootstock can sometimes survive and resprout.
Extreme Heat Tolerance
Tolerated with high humidity and consistent soil moisture; hot, dry conditions cause rapid frond browning.
Wind, Humidity & Microclimate
Humidity Preferences
High; consistently humid air supports its fine, dense foliage.
Dry-Air Tolerance
Low; dry air browns the delicate fronds relatively quickly.
Wind Tolerance
Low; the fine-cut foliage is easily damaged by strong or constant wind, so a sheltered position is preferred.
Coastal / Salt Tolerance
Not suitable for salt spray or exposed coastal conditions.
Rainfall & Seasonal Moisture
Best suited to climates with fairly even year-round moisture; a long, hot dry season is poorly tolerated.
Microclimate Recommendations
A shaded, humid, wind-protected spot - such as a courtyard, shaded border, or grouped container planting - keeps the foliage densest and healthiest.
Growing in Pots, Balconies & Indoors
A lacy, shade-loving fern that the grower confirms makes a genuine houseplant and grows happily in containers. Because it wants half to full shade and steady moisture, it is far easier indoors or on a shaded balcony than most flowering plants – the low light indoors actually suits it.
Quick Details
- Container Size: A 20-30 cm (8-12 in) pot is ample for its 30-70 cm (12-28 in) fronds
- Indoor Suitability: A good houseplant – thrives in the moderate light of a room
- Best Spot: Bright shade to shade, out of direct midday sun
- Soil & Drainage: Rich, organic, free-draining mix that stays evenly moist
- Watering in Pots: Keep the mix consistently damp – never let it dry out
Indoors & On the Windowsill
- A real houseplant: The grower marks it suitable indoors. It tolerates the lower light of a living space, so a spot near a window that never bakes in direct sun is ideal.
- Windowsill growing: An east- or north-facing sill with soft, indirect light keeps the fronds fresh; strong direct sun will scorch them.
- Humidity: Like most ferns it appreciates humidity – group it with other plants or stand the pot on a damp pebble tray in dry rooms.
On a Balcony or Patio
- Light & shelter: A shaded, sheltered balcony or patio corner is perfect; keep it off hot, sun-blasted walls and out of drying wind, which crisps the fronds.
- Moisture: Pots dry quickly in open air, so check the mix often and water before it dries – reflected heat from paving speeds evaporation.
Choosing the Pot, Soil & Long-Term Care
- Pot & drainage: Use a pot with strong drainage holes and skip a standing-water saucer to avoid root rot. Terracotta breathes and dries out faster, while glazed or plastic holds moisture longer.
- Potting mix: A well-aerated, organic-rich mix – peat or coir blended with perlite or vermiculite – keeps roots oxygenated in a pot. Ferns like plenty of organic matter that holds moisture.
- Feeding: Potted plants need feeding a little more often than those in open ground, as regular watering leaches nutrients from the mix. A dilute, balanced feed through the growing season is plenty.
- Repotting: Refresh the top of the mix each year and pot up or renew the mix roughly every couple of years; when doing so, lightly trim the root ball to keep the plant in scale with its container.
Growing this plant in a greenhouse
A greenhouse can give onychium japonicum frost protection and cold protection.
Greenhouse at a glance
| Greenhouse suitability | Good - clearly useful |
|---|---|
| Main benefits | frost protection, cold protection |
| Season extension | earlier spring & later autumn |
| Outdoor protection advisable below | about 5°C |
| Maintain greenhouse minimum | around 5°C for active growth |
| Suitable types | unheated greenhouse, polycarbonate greenhouse |
| Heating | Heating is optional - useful mainly for winter growing in cold areas. |
Related greenhouse guides
- Greenhouses: How to Choose the Right Greenhouse
- Polycarbonate Greenhouses: What to Look for Before Buying
Fertilizing & Feeding
A light feeder: rich, consistently moist soil plus an occasional light balanced fertilizer during active growth is enough, with feeding held off whenever new fronds are not actively forming.
Quick Fertilizing Specs
| Feeding Level | Light feeder |
|---|---|
| Main Nutrient Priority | Balanced feeding with adequate nitrogen for fresh frond growth |
| Best Feeding Period | The warm active growing season |
| Organic Options | Compost or leaf mold worked into rich, moist soil |
| Reduce/Stop Feeding | Hold off feeding during shaded, cool, or low-light slowdowns |
| Micronutrients | Iron and manganese usually supplied by a complete fertilizer; correct only diagnosed deficiencies |
| Soil pH | Slightly acidic to near neutral |
Feeding by Growth Stage
Establishment after planting or repotting
Let fine new roots settle into rich, moist soil before asking the fern to support any new feeding.
| Nutrient direction | None – withhold fertilizer while roots establish in freshly disturbed or new soil. |
|---|---|
| Timing | The first few weeks after planting or repotting. |
| Frequency | No feeding at this stage. |
| Fertilizer types | No feeding at this stage; do not fertilize until new fronds show active growth. |
| Precautions | Do not fertilize newly disturbed roots; focus on steady moisture and humidity instead. |
Active fern growth
Support flushes of the carrot-leaf-shaped new fronds while the plant grows in rich, evenly moist soil.
| Nutrient direction | A balanced, nitrogen-leaning complete fertilizer supports flushes of fresh fronds. |
|---|---|
| Timing | Through the warm active growing season. |
| Frequency | Light feeding is usually enough; this fern is not a heavy feeder. |
| Fertilizer types | A diluted balanced complete fertilizer, Compost or leaf mold worked into rich soil |
| Routine trace nutrients | iron, manganese |
| Precautions | Keep feeding light; rich, organic soil already supplies much of what this fern needs, and overfeeding can scorch delicate young fronds. |
Shaded or cool-season slowdown
Let the fern rest through shaded, low-light, or cool conditions without pushing soft new growth.
| Nutrient direction | None – hold fertilizer while growth is slow in shade or cool weather. |
|---|---|
| Timing | During shaded, low-light, or cool-season periods when new fronds are not forming. |
| Frequency | No feeding during this slowdown; resume once active frond growth returns. |
| Fertilizer types | No feeding at this stage; withhold fertilizer until growth resumes. |
| Precautions | Avoid fertilizing a fern that isn’t actively pushing new fronds; unused nutrients can build up as salts in the soil. |
Nutrient Deficiency Signs & Corrections
Older fronds fade to pale green or yellow overall and new fronds emerge smaller than usual.
| Possible causes | low available soil nitrogen, nitrogen leaching from frequent watering, thin, low-organic-matter soil |
|---|---|
| Appears first on | older, lower fronds |
| What to check | recent feeding history, soil organic matter content, watering frequency and drainage |
| Possible correction | Resume light balanced feeding during active growth and refresh organic matter in the soil. |
New fronds emerge pale yellow while the veins stay green.
| Possible causes | high soil pH tying up available iron, waterlogged or compacted soil limiting root uptake, naturally low soil iron |
|---|---|
| Appears first on | newest, innermost fronds |
| What to check | soil or potting mix pH, drainage and root health, recent watering pattern |
| Possible correction | Correct soil pH toward the slightly acidic to neutral range this fern prefers, improve drainage, and apply a chelated iron product per its label if the pattern persists. |
Frond tips and margins brown or scorch even with regular watering.
| Possible causes | fertilizer salt buildup in the potting mix, underwatering that concentrates salts, overly frequent feeding |
|---|---|
| Appears first on | frond tips and margins |
| What to check | recent feeding amounts, watering consistency, container drainage |
| Possible correction | Ease off feeding and flush the soil thoroughly with plain water to move accumulated salts through, then return to light feeding. |
Pruning, Training & Seasonal Maintenance
Onychium japonicum is a delicate, spreading rhizomatous fern that is listed as evergreen in warmer parts of its range but can behave as deciduous where winters are cooler within its zone 9–11 tolerance. Pruning is limited to grooming spent fronds; where it dies back seasonally, a single cleanup pass in late winter or early spring removes frost-damaged growth ahead of the new flush, while in mild climates fronds are simply removed as they age throughout the year. Pruning has no effect on flowering, since ferns reproduce by spores.
Quick Pruning & Maintenance Specs
| Pruning Tolerance | Low – foliage grooming only |
| Primary Pruning Window | All year in mild climates; late winter/early spring where frost-deciduous |
| Typical Frequency | Ongoing, light |
| Main Objective | Remove dead fronds; manage rhizome spread in containers |
| Young Plant Priority | Minimal – let the young clump fill in |
| Mature Plant Priority | Groom spent fronds; thin spreading rhizomes if contained growth is wanted |
| Best Tool Type | Precision snips |
Pruning by Plant Age & Size
Newly Established
Remove only transplant-damaged fronds; the fine, feathery foliage is easily stressed while roots are establishing in the moist, rich soil this species needs.
Young / Formative
No structural training applies. As a rhizomatous, spreading fern rather than a single-crown one, its spread can be guided by containing or dividing rhizomes rather than by cutting fronds.
Mature / Established
Ongoing removal of aged or frost-damaged fronds at the base, plus occasional thinning of the spreading rhizome mat if a more contained clump is preferred, especially in pots.
Seasonal Pruning Schedule
Pre-Growth / Early-Spring
Objective: clear away winter-damaged fronds where this fern has behaved as deciduous. Remove: collapsed, frost-blackened fronds. Do not remove: any fronds that are still green, even if tattered, ahead of the spring flush. No flowering/fruiting impact.
Ongoing Sanitary
Objective: keep the fine foliage tidy in evergreen situations. Remove: fully browned fronds as they occur. Do not remove: green, actively growing fronds.
Special Growth to Remove
- Dead or frost-damaged fronds, cut at the base.
- Excess spreading rhizome growth where a contained clump is wanted, particularly in containers.
Container & Small-Space Pruning
In containers, this rhizomatous fern can fill and overrun a pot faster than it would spread in the ground; periodically trimming or dividing the rhizome mat keeps it in bounds, in addition to the routine removal of spent fronds.
Tools
- precision_snips – for frond removal and cutting through the fine rhizome mat.
Tool Hygiene & Disease Risk
Routine – clean, sharp snips are adequate; no specific pathogen risk is noted for this species.
Cut Placement & Technique
Cut spent fronds at the base of the stalk; when thinning rhizomes, cut cleanly through the rhizome section being removed rather than tearing it.
Heavy Pruning & Rejuvenation
Not typically needed: this fern renews itself continuously from its spreading rhizome, so a hard cutback of the whole plant is unnecessary – simply removing old fronds keeps it looking fresh.
Post-Pruning Care
Keep the soil consistently moist and rich as this species requires regardless of pruning; no extra feeding is needed just because fronds were trimmed.
Common Pruning Mistakes
- Cutting back green fronds before frost has actually damaged them, in climates where this fern stays evergreen.
- Letting the rhizome mat spread unchecked in a shared container without ever thinning it.
When NOT to Prune
Avoid removing fronds while new fiddleheads are actively unfurling in spring, since nearby cuts risk damaging the tender new growth.
Recommended Tools (by task)
- precision_snips – for both routine frond grooming and rhizome thinning on this fine-textured, soft-tissue fern.
Propagation Guide
Carrot fern spreads by creeping rhizomes, so dividing an established clump is the most practical and reliable way to increase it, giving new plants that establish quickly. Spores will also reproduce the species but are slower and more exacting, so division is generally the easier, preferred route.
Quick Propagation Specs
| Best Propagation Method | Division of the rhizome clump |
| Alternative Methods | Spores |
| Propagation Difficulty | Easy (division); Specialist (spores) |
| Vegetative True-to-Type | Yes |
| Best Propagation Season | Spring, also possible through summer and autumn |
Division, Offsets, Pups & Suckers
Lift the clump and separate the creeping rhizomes into sections, making sure each division has healthy roots and at least one active growing point along with some fronds. Replant divisions promptly into moist, rich soil and keep them consistently moist while new growth establishes, matching this fern’s normal preference for moist, rich soil.
Spores
Spores can be sown on a sterile, constantly moist medium kept humid and in bright indirect light, but germination and establishment take considerably longer than division, so this method is better suited to patient or specialist growers than to quick propagation at home.
Pests, Diseases & Troubleshooting
Overview: Carrot fern is a delicate, lacy Pteridaceae fern; like most ferns it is chemically defended and rarely bothered by chewing insects, so its problems are the classic fern trio – scale, mealybug and fern-loving sap-suckers – plus abiotic frond browning from low humidity and rots from soggy soil. It uses no pesticides well (fronds scorch easily), so lean on humidity, airflow, clean water and hand-removal.
Quick Troubleshooting Overview
| Issue / Pest | Main Symptom | Primary Solution |
|---|---|---|
| Scale (incl. fern scale) | Brown/white specks along fronds and midribs | Wipe/pick off, dilute oil (test first), prune worst fronds |
| Mealybugs | White cottony fluff in crowns and frond bases | Alcohol swab, isolate, remove infested fronds |
| Fungus gnats | Small flies over wet soil; larvae at roots | Let surface dry, sticky traps, bottom-water |
| Slugs / snails | Chewed young fronds, slime trails | Night patrols, iron-phosphate bait, barriers |
| Brown/crispy fronds | Edges and tips browning | Raise humidity, steady moisture, shade from sun |
| Root rot | Blackened base, collapse in wet mix | Improve drainage, ease watering |
Common Pests & Management
- Fern scale & soft scale (Pinnaspis aspidistrae / Coccidae):
- Symptoms: Tiny elongated white (male) and brown (female) scales lined along the frond undersides and midribs; yellow speckling and general weakening. The main pest of cultivated ferns.
- Prevention & Control: Wipe or pick off light infestations and cut out badly encrusted fronds. Ferns are oil-sensitive – use only a very dilute horticultural oil or insecticidal soap, tested on a frond first, and prefer physical removal and isolation of new plants.
- Mealybugs (Pseudococcus spp.):
- Symptoms: White cottony masses nestled in the crown and frond bases and among roots, with sticky honeydew and stunted new growth.
- Prevention & Control: Dab with an alcohol-moistened cotton bud, remove the worst fronds, and isolate. Check roots at repotting.
- Aphids & thrips:
- Symptoms: Aphids on tender unfurling croziers cause distortion; thrips give silvery flecking on fronds.
- Prevention & Control: Rinse gently, use a weak soap solution sparingly, and remove affected new growth. Avoid strong sprays that burn the fronds.
- Fungus gnats (Sciaridae):
- Symptoms: Small dark flies around the pot; larvae in the constantly moist mix nibble fine roots and weaken young plants.
- Prevention & Control: Let the surface dry between waterings, use yellow sticky traps and a Bti (mosquito-bite) drench, and avoid waterlogged mix.
- Slugs & snails:
- Symptoms: Ragged holes and grazed young fronds overnight, with slime trails, in damp shady sites.
- Prevention & Control: Night patrols, iron-phosphate bait, and grit or copper barriers around pots; keep debris cleared.
Diseases & Fungal Issues
- Root & crown rot (Pythium / Rhizoctonia / Phytophthora):
- Symptoms: Blackened, mushy crown and roots with wilting and collapse in soggy, airless mix – the most likely killer of a fern.
- Treatment & Management: Grow in open, humus-rich but free-draining mix, keep evenly moist not wet, and never leave the pot standing in water. Remove and repot if rot sets in early.
- Leaf/tip blight & fungal spots (Cylindrocladium / Cercospora):
- Symptoms: Brown or black spots and blackening frond tips spreading in warm, wet, crowded, poorly ventilated conditions.
- Treatment & Management: Remove affected fronds, cut watering on the foliage, and increase airflow; avoid wetting fronds late in the day. Fungicides are a last resort on sensitive fern tissue.
- Bacterial leaf blight (Pseudomonas / Xanthomonas):
- Symptoms: Water-soaked translucent spots that turn brown and spread along frond veins in warm, wet, overhead-watered conditions.
- Treatment & Management: Remove infected fronds, stop overhead watering, and improve air movement; there is no chemical cure – sanitation is key.
Growing Difficulties & Abiotic Problems
- Brown, crispy frond edges (low humidity):
- Cause & Symptoms: Dry air, draughts or heat cause the fine fronds to brown at the tips and margins – the commonest complaint with this fern.
- Correction Strategy: Raise humidity (grouping, tray, humid room), keep out of hot draughts and heating vents, and maintain steady soil moisture.
- Sun scorch:
- Cause & Symptoms: Direct sun bleaches and burns the delicate fronds, which want bright shade to dappled light.
- Correction Strategy: Site in filtered light or morning sun only; move indoor plants away from hot glass.
- Yellowing / over- and under-watering:
- Cause & Symptoms: Overall yellowing and limpness from soggy roots, or dry crisping and dieback from drought – ferns dislike both extremes.
- Correction Strategy: Keep the mix consistently, lightly moist; water with clean, low-salt water (fern fronds are sensitive to hard/chlorinated water and fertiliser salts).
- Fertiliser / salt burn:
- Cause & Symptoms: Scorched frond tips from over-feeding or accumulated salts.
- Correction Strategy: Feed at half strength at most, and flush the pot with plain water occasionally.
What Helps — Products & Tools
Treat this fern gently: physical removal, isolation and a cotton bud of rubbing alcohol handle scale and mealybug, with only very dilute (test-first) insecticidal soap or horticultural oil for wider spread. Yellow sticky traps plus a Bti drench manage fungus gnats, and iron-phosphate bait deters slugs. Most care is environmental – humidity, filtered light, clean low-salt water and free-draining mix – rather than sprays, which scorch fern fronds.