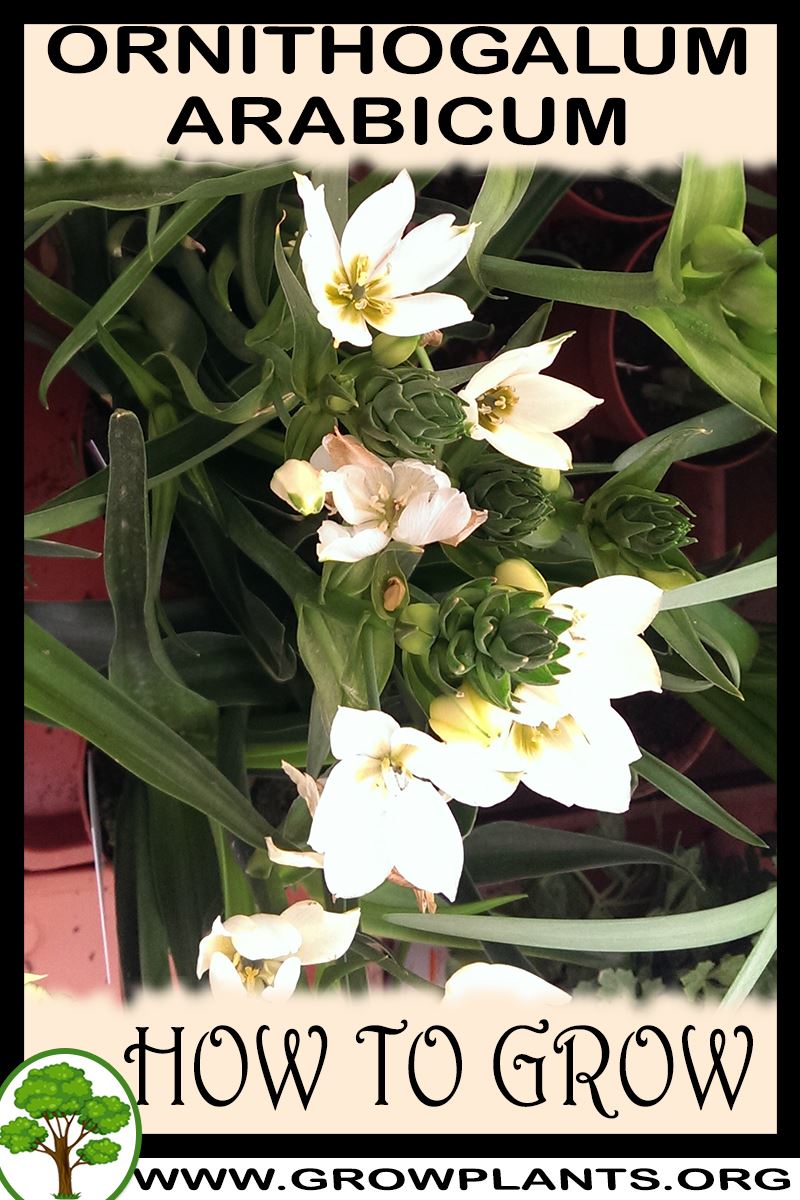
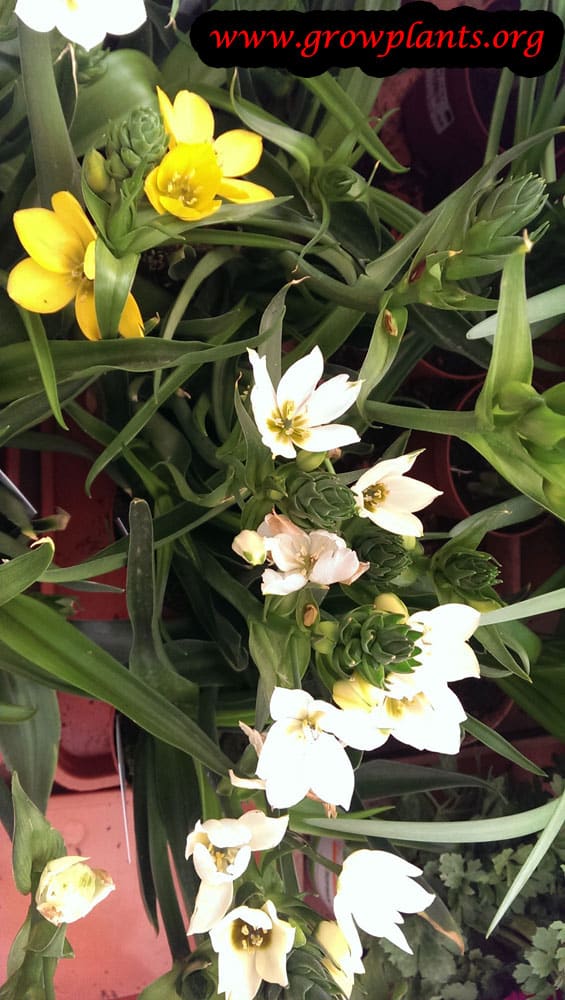
Plant Profile & Key Characteristics
Overview: Ornithogalum arabicum (Arabian star of Bethlehem) is a bulbous perennial geophyte 20-40 cm tall, grown as an ornamental and cut flower for its white star-shaped blooms with a glossy dark centre.
Quick Specifications
| Specification | Attribute |
|---|---|
| Plant Type / Life Cycle | Perennial (bulbous geophyte, summer-dormant) |
| Foliage Type | Deciduous |
| Mature Size | 20-40 cm (8-16 in) |
| Growth Rate | Moderate |
| Root System | Bulb (geophyte) |
| Toxicity | Toxic – bulbs and foliage contain cardiac glycosides and are poisonous if eaten |
| Hardiness | USDA zones 6-10 (bulb left in ground) / 4-7 (lifted) |
Growth Form & Structure
- Height & Spread: 20-40 cm (8-16 in); grows well in containers.
- Growth Habit & Form: A clump of basal linear leaves with flowers on erect stalks, all arising from an underground bulb.
- Lifespan & Maturity: Perennial that returns from its bulb each year and multiplies by offsets.
Anatomy & Physical Features
- Leaves & Foliage: Green, linear leaves growing from the bulb.
- Flower Characteristics: White star-shaped 6-petalled flowers with a glossy dark centre, carried on stalks (full detail in the Bloom guide).
Primary Uses & Landscape Value
- Functional & Ornamental Roles: Ornamental bedding and rockery bulb, and a long-lasting cut flower.
Care Guide: Planting, Soil & Watering
Overview: Ornithogalum arabicum (Arabian starflower) is a bulbous geophyte that grows through the cool, moist season and rests through a dry summer. It needs well-draining soil and moderate water while in leaf, then must be kept dry (or the bulb lifted) once it dies back.
Quick Care Requirements
| Requirement | Ideal Condition |
|---|---|
| Planting Season | Autumn to winter in warm climates; spring in cold climates |
| Growth Rate | Moderate |
| Soil Type | Light, well-draining soil that dries out over summer |
| Water Need | Moderate during active growth; keep nearly dry in summer dormancy |
Planting & Establishment
- Best Planting Season: Plant the bulbs as the growing season begins – autumn to winter in warm climates, or spring in cold climates.
- How to Plant:
- Hole Preparation: Plant each bulb a few centimetres deep, roughly two to three times its own height, with the pointed nose facing up.
- Soil Amendments: Work a little compost plus some grit or coarse sand into the bed so the soil is fertile but drains freely.
- Planting Depth: Cover the bulb with about 5 cm (2 in) of soil; planting into free-draining ground stops it from rotting during its summer rest.
- Growth Speed & Expectations: Growth is moderate – leaves emerge first, followed by the star-shaped flowers on their stalks in winter to spring.
Soil, Watering & Drainage Care
- Soil Mix & Drainage Needs: Sharp drainage is essential, as the dormant bulb rots in wet summer soil; in containers use a free-draining, gritty mix. Choose a spot that dries out naturally in summer.
- Watering Schedule & Technique:
- Young / Newly Planted: Keep the soil evenly moist as shoots and leaves develop through the cool growing season.
- Established: Water regularly during active growth, letting the surface dry slightly between waterings.
- Seasonal Adjustments: Taper off watering as the foliage yellows and dies back, then keep the bulb dry (or lift and store it) through the summer dormancy; resume when growth restarts.
Climate, Light & Hardiness
Ornithogalum arabicum is hardy in the ground from roughly zone 6–10 with a dry summer dormancy; in colder zones (4–7) the bulb is commonly lifted and stored indoors over winter rather than left in the ground. It grows well in full sun to half shade.
Quick Climate Specifications
| Climate Zones | Mediterranean, desert, subtropical, temperate |
|---|---|
| USDA Hardiness Zones | Approximately 6–10 left in the ground; possible in zones 4–7 by lifting and overwintering the bulb indoors |
| Light Conditions | Full sun; half shade |
Temperature Extremes & Hardiness
USDA Hardiness & Regional Limits
In-ground hardiness is roughly zone 6–10. Gardeners in colder zones (4–7) commonly dig and store the bulb over winter rather than relying on in-ground survival.
Wind, Humidity & Microclimate
Rainfall & Seasonal Moisture
Needs a dry summer dormancy period; where summers are wet, lifting the bulb helps prevent rot.
Growing in Pots, Balconies & Indoors
Ornithogalum arabicum is a small sun-loving bulb of 20-40 cm. The grower marks it No as a houseplant, but it grows well in pots and a compact, budding plant can sit on a bright, sunny windowsill while in flower.
Quick Details
- Container Size: Small pots of 2-8 L; group several bulbs for a fuller display
- Indoor Suitability: Not a permanent houseplant, but a compact potted bulb suits a bright, sunny sill in bloom
- Best Spot: Full sun to part shade – the brightest spot available
- Soil & Drainage: Free-draining, gritty potting mix – bulbs rot in soggy soil
- Watering in Pots: Keep lightly moist in growth and dry during dormancy; avoid waterlogging
Indoors & On the Windowsill
- Windowsill in bloom: The grower marks it No as a houseplant, but a compact potted bulb can be enjoyed on a bright, sunny sill while flowering, then rested.
- Needs a dormant rest: Let the foliage die back and keep the bulb dry and cool during dormancy so it flowers again.
- Safety: Ornithogalum is highly toxic if any part is eaten – keep it well away from children and pets.
On a Balcony or Patio
- Light, wind & heat: Give it the sunniest spot you have. Walls and paving reflect heat so pots dry quickly – check moisture often in warm weather. On an exposed balcony, stake tall stems and shelter from strong wind.
- Practicalities: A full pot is heavy once watered – make sure the balcony can take the load and that drainage runoff has somewhere to go.
Choosing the Pot, Soil & Long-Term Care
- Pot & drainage: Use a pot with strong drainage holes and skip a standing-water saucer to avoid root rot. Terracotta breathes and dries faster; glazed or plastic pots hold moisture longer.
- Potting mix: A well-aerated, organic-rich mix – potting mix or peat/coir blended with perlite or vermiculite for free drainage.
- Feeding: Potted plants need feeding more often than those in open ground, as nutrients leach out with each watering – feed regularly through the growing season.
- Long-term care: As a perennial bulb, let the foliage die back after flowering; lift and divide crowded clumps and refresh the mix every couple of years.
Fertilizing & Feeding
A light feeder: this fragrant, white-flowered bulb thrives in well-drained soil with a dry summer rest and needs only a light balanced feeding while its leaves are actively growing.
Quick Fertilizing Specs
| Feeding Level | Light feeder |
|---|---|
| Main Nutrient Priority | Balanced feeding with adequate potassium to help the bulb rebuild after bloom |
| Best Feeding Period | While the linear leaves are actively growing, from planting through winter-to-spring bloom |
| Organic Options | Compost worked into well-drained soil at planting |
| Reduce/Stop Feeding | Feeding stops as bloom finishes and foliage dies back for the required dry summer rest |
| Micronutrients | Rarely an issue in well-drained soil; correct only a diagnosed deficiency |
| Soil pH | Tolerates a wide range of soil, preferring it well-drained |
Feeding by Growth Stage
Planting and root establishment
Support root development in well-drained soil as this geophyte settles in, distinguished by its dark-centered white flower clusters.
| Nutrient direction | A balanced fertilizer worked into well-drained soil at planting supports early root growth. |
|---|---|
| Timing | At planting, timed to the local season for cold or hot climates. |
| Frequency | A light feeding at planting is generally sufficient to start this easy-care bulb. |
| Fertilizer types | A balanced, complete fertilizer worked into the planting hole, Compost mixed into the soil at planting |
| Precautions | Keep feeding light at planting and avoid waterlogged soil, which this bulb does not tolerate well. |
Leaf growth and fragrant bloom
Support the linear leaves and the clustered, dark-centered white star flowers through the winter-to-spring bloom period.
| Nutrient direction | Balanced feeding with adequate potassium while leaves are green helps the bulb build reserves for future flowering. |
|---|---|
| Timing | From leaf emergence through the winter or spring bloom. |
| Frequency | A light feeding while foliage is actively green is generally enough. |
| Fertilizer types | A balanced complete fertilizer, potassium-forward to support bulb reserves, A bulb-specific fertilizer applied as leaves grow |
| Precautions | Let foliage die back naturally after bloom rather than removing it early, since it is still feeding the bulb. |
Foliage dieback and dry-summer dormancy
Let the bulb finish storing reserves and rest through the dry summer it requires.
| Nutrient direction | None – withhold fertilizer once foliage yellows and dies back for the season. |
|---|---|
| Timing | As leaves die back after bloom and through the dry summer rest, including any period the bulb is lifted for storage. |
| Frequency | No feeding during foliage dieback or dormancy. |
| Fertilizer types | No feeding at this stage; do not fertilize a dormant or lifted bulb. |
| Precautions | Withhold fertilizer until the bulb is replanted or new growth resumes. |
Nutrient Deficiency Signs & Corrections
Leaves emerge pale green and overall growth looks weak.
| Possible causes | low available soil nitrogen, nutrients leached from light, fast-draining soil, a planting bed that has not been amended in several seasons |
|---|---|
| Appears first on | emerging leaves |
| What to check | soil fertility and amendment history, drainage and leaching, bulb age and vigor |
| Possible correction | Work a balanced fertilizer or compost into the bed at planting and during active leaf growth. |
Leaf and root tips brown or scorch despite otherwise reasonable care.
| Possible causes | fertilizer salt buildup from over-application near the bulb, insufficient watering to move salts away from roots, fertilizer placed too close to or in direct contact with the bulb |
|---|---|
| Appears first on | leaf tips and root tips |
| What to check | how and where fertilizer was applied, watering after feeding, soil drainage |
| Possible correction | Reduce fertilizer amounts, keep it away from direct bulb contact, and water thoroughly after any feeding. |
New leaves yellow between the veins while the veins remain green.
| Possible causes | high soil pH limiting iron availability, waterlogged or compacted soil restricting root uptake, cold, wet soil slowing root activity early in the season |
|---|---|
| Appears first on | youngest leaves |
| What to check | soil pH, drainage, soil temperature and root activity |
| Possible correction | Improve drainage and, if pH is the cause, apply a chelated iron product per its label. |
Pruning, Training & Seasonal Maintenance
Ornithogalum arabicum needs the same light, non-structural maintenance shared by dry-summer-dormant Ornithogalum species: deadhead the spent flower stalk after its single showy white bloom, then leave foliage untouched until it yellows fully. As a popular cut flower with a tall, sturdy stalk, spent stalks are easy to cut cleanly at the base. Sap and bulb are toxic, so handle cut material with gloves.
Quick Pruning & Maintenance Specs
| Pruning Tolerance | Low (non-woody bulb) |
| Primary Pruning Window | Summer, once foliage has fully yellowed |
| Typical Frequency | Once per year, at end of season |
| Main Objective | Recharge the bulb ahead of dry-summer dormancy |
| Best Tool Type | Precision snips (with gloves) |
| Avoid Heavy Pruning During | While foliage is green; during bloom |
Pruning by Plant Age & Size
Newly Established
Leave all foliage intact through the first full cycle so the bulb can establish; don’t remove green leaves even after its first bloom.
Young / Formative
No structural training applies. Just deadhead consistently and allow full foliage dieback each year.
Mature / Established
Mature bulbs follow the same rhythm: cut the spent stalk after bloom (or harvest it as a cut flower before it fully fades), then clear dead leaves once fully yellowed.
Seasonal Pruning Schedule
Post-Flowering
Objective: stop energy loss once flowering is done. Remove: the spent flower stalk at its base. Do not remove: green foliage. Response: stronger bulb reserves for next winter/spring’s bloom.
Summer Dieback / Dormancy Prep
Objective: ready the bulb for dry dormancy. Remove: dead leaves and any stalk remnants once fully dried. Do not remove: anything still green. Response: clean entry into summer rest.
Special Growth to Remove
- Spent flower stalk — cut at the base after bloom or once cut for indoor display.
- Dead leaves — cleared once fully died back.
No suckers or watersprouts on this bulb.
Container & Small-Space Pruning
Suits outdoor containers well (not typically a houseplant). Container-grown bulbs dry down faster, so judge cutback timing by leaf color rather than a fixed date.
Tools
Precision snips for the flower stalk (also useful for cutting stems for indoor display) and for leaf removal; wear gloves given the bulb’s toxicity.
Tool Hygiene & Disease Risk
Routine. No transmissible disease reported; the main handling caution is toxic sap, not pathogen spread.
Cut Placement & Technique
Cut the flower stalk cleanly at its base, useful both for deadheading and for harvesting as a cut flower. Remove dead leaves at soil level once dry.
Heavy Pruning & Rejuvenation
Not applicable — no woody structure exists. A crowded, weaker-blooming clump needs lifting and dividing, not pruning.
Post-Pruning Care
Let soil dry through summer dormancy; in wet-summer regions consider lifting the bulb rather than leaving it in damp ground. No feeding needed after cutback.
Common Pruning Mistakes
- Cutting green leaves prematurely instead of waiting for full yellowing.
- Handling cut stems and sap bare-handed.
- Overwatering through its summer dormancy period.
When NOT to Prune
Don’t cut green foliage, and avoid disturbing the plant while it’s actively flowering (unless harvesting stems for cut-flower use).
Recommended Tools (by task)
| Task | Tool Category | Why |
| Deadheading, cut-flower harvest, end-of-season foliage clearance | precision_snips | Clean small cuts suit the soft stalk and leaf tissue. |
Propagation Guide
Ornithogalum arabicum grows readily from both seed and the offset bulbs it forms around the parent bulb, and vegetative propagation is not required to keep it true; division is simply the quicker way to a flowering-size bulb. Propagation is Easy.
Quick Propagation Specs
| Best Propagation Method | Bulb offset division |
| Alternative Methods | Seed |
| Propagation Difficulty | Easy |
| Seed True-to-Type | Yes |
| Vegetative True-to-Type | Yes |
| Best Propagation Season | Spring in cold climates; autumn or winter in hot climates |
Growing from Seed
Seed Handling & Viability
Seed sets and germinates without special treatment.
Germination Time
Germination is generally straightforward, though seedlings need a season or more to reach flowering size.
Rhizomes, Tubers, Bulbs & Corms
Bulb Offset Division
Offset bulbs form around the base of the parent bulb and can be separated when the clump is lifted during dormancy. Replant in the spring planting window in cold climates, or autumn/winter in hot climates, in well-drained soil. Because the bulb is poisonous, wear gloves and wash hands after handling or dividing it.
Bloom & Flower Guide
Quick Details
- Bloom Season: Late winter into spring
- Time to First Bloom: From an autumn-planted bulb, it flowers in its first spring
- Flower Appearance: Clusters of star-shaped white flowers, each with six elliptic tepals and a striking dark central ovary, on tall stalks
- Edibility: Toxic – not edible; contains cardiac glycosides
Detailed Blooming Overview
Arabian star of Bethlehem is prized for its bold, clean flower clusters – each stem topped with a head of gleaming white, star-shaped blooms. The dark spot at the centre of each flower is the prominent ovary, which gives the display real depth and contrast. Lightly fragrant and remarkably long-lasting once cut, it is a favourite for the vase – but the bulbs and all parts are toxic, so it is grown for looks alone.
Flower Characteristics
- Star-shaped white flowers, each with six elliptic tepals.
- A dark, prominent ovary at the centre of every flower.
- Gathered into rounded heads on tall, upright stalks.
Bloom Care & Thinning
- Cut flowers: One of the longest-lasting of all cut flowers; cut as the lower buds begin to open.
- After flowering: Let the foliage die down to recharge the bulb for next season.
- Safety: Keep bulbs and all plant parts away from children and pets, as they are toxic if eaten.
Pests, Diseases & Troubleshooting
Overview: Arabian star-flower (Ornithogalum arabicum) is a bulbous plant whose above-ground growth is troubled mainly by sap-sucking aphids and thrips, while its real vulnerabilities lie underground – bulb rots and mites in wet, poorly drained soil – and in the viruses that these insects spread. Keep the bulbs in gritty, sharply drained soil, dry during dormancy, and control sucking pests to break the virus cycle.
Quick Troubleshooting Overview
| Issue / Pest | Main Symptom | Primary Solution |
|---|---|---|
| Aphids | Sticky, distorted growth; also spread virus | Water jet, insecticidal soap, control ants |
| Thrips | Silvery streaks and flecking on leaves/flowers | Blue sticky traps, soap/neem, remove debris |
| Bulb mites | Rotting, crumbly bulbs with white mites | Discard soft bulbs; dry storage; clean stock |
| Ornithogalum mosaic virus | Yellow mottling and streaking on leaves | Rogue out; control aphids; clean tools |
| Bulb / basal rot | Soft, brown, foul bulbs; no emergence | Improve drainage; dry dormancy; discard rotten |
| Grey mould | Fuzzy grey mould on flowers in damp air | Improve airflow; remove spent blooms |
Common Pests & Management
- Aphids (Aphididae):
- Symptoms: Clusters of soft green or black insects on flower stalks, buds and young leaves, causing sticky honeydew, sooty mould and distorted growth. Their most serious effect is spreading Ornithogalum mosaic virus from plant to plant.
- Prevention & Control: Rinse off with a firm water spray and encourage ladybirds and lacewings. Control the ants that farm them. Use insecticidal soap or neem oil for heavier infestations, and rogue out any virus-symptomatic plants first so aphids cannot spread infection.
- Thrips (Thrips / Frankliniella spp.):
- Symptoms: Tiny slender insects whose rasping feeding leaves silvery streaks, pale flecking and distorted, browning petals; they hide in buds and leaf sheaths. Also virus vectors.
- Prevention & Control: Monitor with blue sticky traps, remove weeds and plant debris that harbour them, and spray insecticidal soap or neem oil into the buds, repeating to catch successive generations. Beneficial predatory mites help under cover.
- Bulb mites (Rhizoglyphus spp.):
- Symptoms: Slow-moving, shiny white-and-brown mites that infest soft, damaged or already-rotting bulbs, hastening their breakdown into a crumbly mush; often noticed at lifting or storage.
- Prevention & Control: Buy and plant only firm, blemish-free bulbs, avoid wounding them, and keep storage cool, dry and airy. Discard any soft or infested bulbs rather than replanting them; good drainage that prevents rot is the best defence.
- Spider mites (Tetranychus urticae):
- Symptoms: Fine stippling and faint webbing on foliage in hot, dry conditions, mostly on plants grown under glass or indoors.
- Prevention & Control: Raise humidity, rinse the foliage, and treat with insecticidal soap or neem oil on leaf undersides, repeating at intervals.
Diseases & Fungal Issues
- Ornithogalum mosaic virus (Ornithogalum mosaic virus (OrMV)):
- Symptoms: Yellow or pale-green mottling, mosaic patterning and streaking on the leaves, sometimes with distorted growth and reduced vigour; spread mainly by aphids and by sap on tools.
- Treatment & Management: There is no cure. Remove and destroy affected plants, buy virus-tested stock, disinfect blades between plants, and keep aphids and thrips under control to stop spread.
- Bulb and basal rot (Fusarium / Pythium spp.):
- Symptoms: Soft, brown, sometimes foul-smelling bulbs that fail to sprout or collapse in growth, typically after sitting in cold, wet, poorly drained soil or being stored damp.
- Treatment & Management: Prevent with gritty, sharply drained soil, restrained watering, and a proper dry dormancy; lift and store bulbs dry where winters are wet. Discard any soft or discoloured bulbs and do not replant into infected wet ground.
- Grey mould (Botrytis spp.):
- Symptoms: A fuzzy grey mould and browning on flowers and leaves in cool, damp, crowded conditions, spoiling the long-lasting blooms this genus is prized for.
- Treatment & Management: Improve air circulation, avoid wetting the flowers, and remove faded blooms and dead leaves promptly. Fungicides are seldom needed if spacing and ventilation are corrected.
Growing Difficulties & Abiotic Problems
- Bulb rot from overwatering:
- Cause & Symptoms: The commonest cause of failure: bulbs left in wet, heavy soil – especially during summer dormancy – suffocate and rot.
- Correction Strategy: Plant in free-draining soil or raised beds, water only in active growth, and keep bulbs dry once foliage dies back; in wet climates lift and store them dry.
- Poisonous bulbs and sap:
- Cause & Symptoms: All parts, and the bulbs in particular, are toxic if eaten and the sap can irritate skin, as the source notes.
- Correction Strategy: Wear gloves when handling and dividing, wash hands afterwards, and site plants away from children, pets and grazing animals; this is a handling caution rather than a disease.
- Failure to flower:
- Cause & Symptoms: Sparse or absent blooms usually follow too much shade, overcrowded clumps, or bulbs that were kept growing (not rested) after flowering.
- Correction Strategy: Give a bright, sunny position, divide congested clumps during dormancy, and allow the foliage to die back naturally to recharge the bulb for next season.
- Leaf yellowing / chlorosis:
- Cause & Symptoms: Pale, yellowing leaves can signal waterlogging, poor drainage or, less often, nutrient shortage.
- Correction Strategy: Correct drainage first; if the soil is sound, feed lightly with a balanced fertiliser during active growth.
What Helps – Products & Tools
Useful here are a water jet and insecticidal soap or neem oil for aphids and thrips, blue and yellow sticky traps for monitoring, and gloves for safe handling of the toxic bulbs. Against the underground problems, the real ‘products’ are gritty free-draining soil, dry dormant storage and strict sanitation – rogue out virus-infected plants and disinfect tools. Reserve any sulphur or copper fungicide for stubborn Botrytis under cover.