


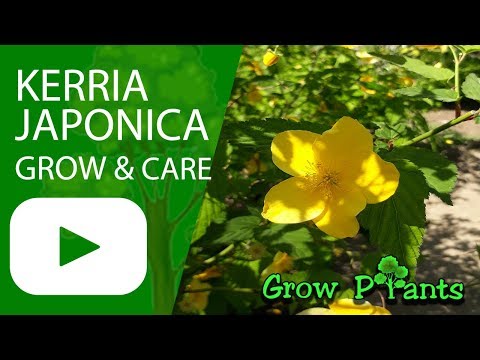
Plant Profile & Key Characteristics
Overview: Kerria japonica ‘Picta’ is a deciduous, suckering shrub of about 1.2–3 m (4–10 ft) with arching green stems and variegated foliage. It is grown as an ornamental for its spring bloom and bright leaves in part shade.
Quick Specifications
| Specification | Attribute |
|---|---|
| Plant Type / Life Cycle | Perennial |
| Foliage Type | Deciduous |
| Mature Size | 1.2–3 m tall (4–10 ft), of similar spread |
| Growth Rate | Moderate to fast |
| Root System | Suckering / rhizomatous (forms spreading thickets) |
| Hardiness | USDA zones 4–9 |
Growth Form & Structure
- Height & Spread: 1.2–3 m (4–10 ft) tall and wide in the ground; readily kept smaller and container-grown, though it is not suited to indoor culture.
- Growth Habit & Form: Deciduous, suckering shrub with slender, arching, bright-green stems that form an open, rounded, thicket-like mound.
- Lifespan & Maturity: Long-lived perennial shrub that reaches full size within a few years and continually renews itself from basal suckers.
Anatomy & Physical Features
- Leaves & Foliage: Variegated green edged and marbled with white, elliptic with a serrated margin.
- Flower Characteristics: Single, five-petalled yellow flowers in spring.
Primary Uses & Landscape Value
- Functional & Ornamental Roles: Grown as an ornamental for its spring bloom; suited to shrub borders, informal hedging, woodland and part-shade plantings, with green stems giving winter interest.
Care Guide: Planting, Soil & Watering
Overview: Japanese kerria is a deciduous shrub for temperate and subtropical climates (hardy zones 4 to 9) that grows in part shade to full sun and flowers in spring. It likes a moist but well-draining loamy soil, a cool winter, and steady, moderate watering.
Quick Care Requirements
| Requirement | Ideal Condition |
|---|---|
| Planting Season | In spring |
| Growth Rate | Moderate to fast |
| Soil Type | Well-draining loam, kept moist; rich in organic matter |
| Water Need | Moderate – keep the soil evenly moist but not waterlogged |
Planting & Establishment
- Best Planting Season: Plant in spring so the shrub establishes over the growing season ahead.
- How to Plant:
- Hole Preparation: Dig a hole about twice the width of the root ball and the same depth, loosening the surrounding soil.
- Soil Amendments: Work compost or leaf mould into the backfill to build a moisture-retentive but free-draining loam.
- Planting Depth: Set the top of the root ball level with the surrounding soil, keeping the stem base at grade.
- Growth Speed & Expectations: Moderate to fast; it forms an arching, suckering clump and can spread, so allow space or contain it.
Soil, Watering & Drainage Care
- Soil Mix & Drainage Needs: It prefers a loamy soil that holds moisture yet still drains; avoid ground that stays wet. In pots use a good loam-based potting mix.
- Watering Schedule & Technique:
- Young / Newly Planted: Keep newly planted shrubs evenly moist through the first season while roots establish.
- Established: Water during dry spells to keep the soil from drying out; it prefers not to be left bone dry.
- Seasonal Adjustments: Water more in summer heat, and reduce over the cool, dormant winter it needs for good flowering.
Climate, Light & Hardiness
Japanese kerria is a tough, deciduous temperate-to-subtropical shrub that flowers well in full sun or partial shade. It is very cold-hardy, dying back into full winter dormancy and returning reliably each spring, though late-spring frosts can nip emerging shoots and open blooms.
Quick Climate Specifications
| Climate Zones | Temperate to subtropical |
| USDA Hardiness Zones | 4–9 (site data) |
| Optimal Temp Range | approximately 15–24 °C (60–75 °F) |
| Cold Damage Begins | fully hardy when dormant; late-spring frosts can damage new shoots and flowers, and stem tips may die back in severe winters |
| Approx. Survival Minimum | roughly −34 °C (−29 °F) at the cold edge of zone 4 |
| Frost Tolerance | High (deciduous, winter-dormant) |
| Light Conditions | Full sun to partial shade |
| Wind Tolerance | Moderate |
Sunlight & Light Exposure
Optimal Light Setup
This variegated 'Picta' form pairs single yellow flowers with grey-green leaves edged in creamy white. In cooler climates it flowers freely in full sun; where summers are hot, light afternoon shade holds the flower colour longer and keeps the foliage fresh.
Direct Sun Requirement
A good half day of sun or more gives the most generous flowering, but this is an adaptable shrub that also blooms respectably in bright partial shade.
Shade & Heat Management
The white-variegated foliage is noticeably more prone to scorch than plain green kerria, so in warm or bright climates give it partial to afternoon shade and steady moisture to keep the leaf margins clean.
Best Exposure / Orientation
An east-facing or lightly shaded aspect that avoids the harshest afternoon sun suits it best, giving strong flowering without bleached blooms or scorched leaf margins.
Temperature Extremes & Hardiness
USDA Hardiness & Regional Limits
It is dependable across USDA zones 4–9, from cold-winter temperate gardens through to mild subtropical ones. It needs a genuine cool winter dormancy, so it is not a plant for frost-free tropics; at the warm end, expect a shorter, less showy flowering flush.
Cold Damage & Winter Protection
Established plants are root-hardy to about roughly −34 °C (−29 °F) at the cold edge of zone 4. In the harshest winters the green stems can suffer tip dieback, which is simply pruned out in spring; no special protection is needed within its zone range.
Frost Sensitivity
The dormant, leafless shrub shrugs off hard frost, but soft new spring growth and any early open flowers can be browned by a late frost. Growth resumes unharmed from lower, undamaged wood.
Extreme Heat Tolerance
It takes summer warmth in stride, though in intense, dry heat the yellow flowers fade fast and foliage can scorch - afternoon shade and a cool, mulched root zone ease both.
Wind, Humidity & Microclimate
Wind Tolerance
The slender, arching canes are moderately wind-tolerant; in very exposed sites they whip about and look untidy, so a sheltered position keeps the fountain-like habit at its best.
Rainfall & Seasonal Moisture
It suits climates with reliable seasonal moisture and a cool winter, preferring ground that stays evenly moist yet well-drained rather than baking dry or waterlogged.
Microclimate Recommendations
A sheltered woodland-edge microclimate with morning sun, afternoon shade in hot regions, and a cool, moist, mulched root run brings out the best flowering and foliage.
Growing in Pots, Balconies & Indoors
Kerria japonica Picta (Kerria japonica) is a hardy, arching deciduous shrub grown for its bright yellow spring flowers; this cultivar also carries pretty white-edged variegated leaves. It is not a houseplant, but it makes a good large-container shrub for a patio or a shadier balcony, where many flowering shrubs struggle. It drops its leaves and rests over winter.
Quick Details
- Container Size: A large, sturdy pot – it reaches about 1.2-3 m (4-10 ft) and suckers, so give it room.
- Indoor Suitability: Not a houseplant – a fully hardy outdoor shrub.
- Best Spot: Half shade to full sun; it tolerates shade better than most flowering shrubs.
- Soil & Drainage: Ordinary, organic, free-draining potting mix.
- Watering in Pots: Average, even moisture; pots dry faster than open ground.
Indoors & On the Windowsill
- Not for indoors: It is a hardy shrub that needs the outdoor cycle of seasons, including a winter dormancy – it will not grow as a houseplant.
- Winter in a pot: Hardy to about zone 4-9, so it needs no bringing indoors; just shelter the container from the hardest freezes, since potted roots are more exposed than those in the ground.
On a Balcony or Patio
- Shade-friendly: Happy in part shade, so it is a good choice for cooler, shadier balconies. The arching stems and suckers need space, and being deciduous it stands bare through winter. Reflected heat from walls dries pots, so check moisture in warm spells.
Choosing the Pot, Soil & Long-Term Care
- Pot & drainage: A large pot with strong drainage holes; skip a standing saucer of water to avoid root rot.
- Potting mix: Ordinary, organic and free-draining.
- Feeding: Feed through the growing season, as potted shrubs leach nutrients faster.
- Repotting & pruning: Refresh the mix and pot up or divide every couple of years; prune right after flowering, since it blooms on older wood, and rooted suckers can be split off to make new plants.
Fertilizing & Feeding
A moderate feeder: steady balanced feeding through the growing season supports both foliage and flowers, with feeding tapering off as the plant slows for its rest period.
Quick Fertilizing Specs
| Feeding Level | Moderate |
|---|---|
| Main Nutrient Priority | Balanced nutrition with adequate nitrogen; no high-phosphorus bloom boosters |
| Best Feeding Period | Through the active growing and blooming season |
| Organic Options | Compost, well-rotted manure, or a balanced organic fertilizer |
| Soil pH | Slightly acidic to near neutral |
| Reduce/Stop Feeding | Reduce and stop feeding as growth slows into dormancy |
Feeding by Growth Stage
Spring growth flush
Support strong new leaves and stems as the plant breaks into active growth.
| Nutrient direction | A balanced complete fertilizer with adequate nitrogen to fuel foliage and stems. |
|---|---|
| Timing | As new growth begins in spring. |
| Frequency | Feed steadily through the active growth period, easing back as blooming approaches. |
| Fertilizer types | Balanced complete garden fertilizer, Slow-release granular fertilizer, Compost or other organic matter worked into the soil |
| Precautions | Avoid heavy nitrogen, which can push soft leafy growth at the expense of flowers. |
Blooming period
Sustain flowering with steady, balanced nutrition without forcing excess foliage.
| Nutrient direction | A balanced complete fertilizer; adequate nitrogen alongside potassium supports continued bloom, and high-phosphorus bloom boosters are not needed. |
|---|---|
| Timing | Through the flowering season. |
| Frequency | Keep feeding light and steady while the plant is in bloom. |
| Fertilizer types | Balanced complete fertilizer, Liquid feed for garden and container plants |
| Precautions | Skip high-phosphorus bloom formulas; they do not increase flowering and can build up in the soil. |
Dormancy and winter rest
Let the plant rest through dormancy without pushing new growth.
| Nutrient direction | None – withhold fertilizer during dormancy. |
|---|---|
| Timing | Autumn into winter as growth stops. |
| Frequency | No feeding at this stage. |
| Fertilizer types | No feeding at this stage; do not fertilize while the plant is dormant. |
| Precautions | Do not fertilize until active growth resumes in spring. |
Nutrient Deficiency Signs & Corrections
Older, lower leaves turn pale green to yellow and overall growth slows.
| Possible causes | Low soil nitrogen or infrequent feeding, Nitrogen leached out by heavy watering or from sandy soil, Cold soil early in the season limiting uptake |
|---|---|
| Appears first on | Older, lower leaves |
| What to check | Recent feeding history, Soil drainage and watering habits, Soil temperature in early spring |
| Possible correction | Apply a balanced complete fertilizer at its labeled rate and make sure the soil is warm and evenly moist. |
New leaves yellow between the veins while the veins themselves stay green.
| Possible causes | High soil pH reducing iron availability, Poor drainage or waterlogged roots, Genuinely low iron in the soil |
|---|---|
| Appears first on | Youngest leaves |
| What to check | Soil pH, Drainage and root health, Signs of overwatering |
| Possible correction | Correct soil pH and improve drainage; apply a chelated iron product per its label if the problem persists. |
Leaf edges and tips brown and scorch, sometimes with a whitish crust on the soil surface.
| Possible causes | Over-application of fertilizer and salt buildup, Insufficient leaching, especially in containers, Underwatering that concentrates salts in the root zone |
|---|---|
| Appears first on | Leaf tips and margins |
| What to check | Recent fertilizer amounts, Salt crust on the soil or pot rim, Whether watering wets the whole root zone |
| Possible correction | Cut back on feeding and leach the root zone thoroughly with plain water to flush out the excess salts. |
The plant makes lush leafy growth but produces few flowers.
| Possible causes | Excess nitrogen from over-feeding, Too much shade or insufficient light, An immature or heavily pruned plant |
|---|---|
| Appears first on | Whole plant, where vegetative growth dominates |
| What to check | Nitrogen inputs and fertilizer type, Light exposure, Plant maturity and recent pruning |
| Possible correction | Ease off nitrogen, switch to a balanced fertilizer, and make sure the plant gets enough light. |
Pruning, Training & Seasonal Maintenance
Variegated Kerria ‘Picta’ (Kerria japonica ‘Picta’) is a deciduous, thicket-forming shrub that flowers in spring on wood made the previous year, which is the single fact that governs all its pruning: cut it in autumn or winter and you remove the very stems that were about to bloom. The correct time to prune is right after flowering, cutting spent stems back to strong new shoots and taking a share of the oldest canes down to the base each year to keep the plant young. This is the white-variegated form — daintier and less vigorous than the green types — and its defining maintenance task is removing all-green reverting shoots, which are more vigorous and will swamp the variegation if left. It suckers freely, so managing spread is as much a part of upkeep as shaping the top.
Quick Pruning & Maintenance Specs
| Pruning Tolerance | High — regrows vigorously from the base and from suckers |
| Primary Pruning Window | Immediately after the spring flowers fade |
| Secondary Maintenance Window | Any time for removing dead wood and unwanted suckers |
| Typical Frequency | Annually, just after bloom |
| Main Objective | Renew flowering wood and contain the spreading clump |
| Young Plant Priority | Let canes establish; remove only dead or wayward stems |
| Mature Plant Priority | Cut back flowered stems and remove the oldest canes at the base |
| Best Tool Type | Bypass secateurs and loppers (canes are thin — no saw) |
| Avoid Heavy Pruning During | Autumn and winter (this removes next spring’s flower buds) |
Pruning by Plant Age & Size
Newly Established
Let a young plant build its cane framework; remove only dead, damaged or badly placed stems. Hard-cutting a new plant simply delays the flowering display.
Young / Formative
No formal leader or scaffold training — Kerria is grown as a natural, arching, multi-stemmed clump. The aim is a thicket of well-spaced canes; thin out only crowded or crossing stems so light reaches the whole clump. Because it is weaker-growing, thin and renew canes more lightly than on the green forms; the priority is keeping the variegated growth healthy and well-lit without over-cutting.
Mature / Established
After each spring bloom, cut the stems that just flowered back to a strong new sideshoot or low bud, and remove about a quarter to a third of the oldest, twiggy or dying canes right down to ground level. This cane-renewal keeps a steady supply of vigorous one-year wood, which is what flowers best the following spring.
Seasonal Pruning Schedule
Post-Flowering (the key window)
Objective: renew flowering wood. Remove: flowered stems back to fresh shoots, plus the oldest canes at the base. Do NOT remove: this season’s strong new shoots — they carry next spring’s flowers. Response: a flush of new canes that ripen over summer and bloom the following year. Watch for plain-green shoots as the new canes extend and cut them out at their base — catching reversion early is what preserves this cultivar’s character.
Ongoing Sanitary
Objective: health and containment. Remove: dead or winter-killed cane tips and unwanted suckers, at any time of year. Impact: none on bloom.
Flowering & Fruiting Wood
Kerria blooms on one-year-old wood — stems that grew the previous season. Prune too late (autumn or winter) and you cut off the flower buds; prune right after bloom and the new shoots have all summer to mature into next year’s flowering canes. This old-wood habit is the reason renewal is timed to the moment the flowers finish.
Structural Pruning & Training
Work stem-by-stem with thinning cuts rather than shearing: remove whole old canes at the base and shorten flowered stems to a bud, keeping an open, arching clump. Keep an open, well-spaced clump and take out only a modest share of the oldest canes each year, since the plant is less vigorous and slower to replace them. Height and spread are controlled by taking the tallest and outermost canes out at ground level, not by clipping the tops into a formal shape.
Special Growth to Remove
This shrub spreads by underground suckers and can form a wide thicket (it is noted as invasive), so the main “special growth” job is removing suckers at the clump’s edge to hold its footprint. Sever them below soil with a spade or secateurs. Its most important removal is not suckers but reverted shoots: any wholly green stem must be traced to its origin and cut out, or it will dominate the plant.
Container & Small-Space Pruning
In a pot the plant stays smaller but suckers fill the container fast, so renew canes after bloom as in the ground and divide or root-prune every couple of years to relieve congestion. Keep the same after-flowering timing — container plants still flower on last year’s wood.
Cut Placement & Technique
Make thinning cuts flush with the base for whole-cane removal, and shorten flowered stems just above an outward-facing bud or a healthy new sideshoot. Avoid leaving long dead stubs, which die back and look untidy. The canes are slim and green — clean secateur and lopper cuts are all that is needed.
Heavy Pruning & Rejuvenation
Kerria tolerates hard renovation well: a congested, over-old clump can be cut close to the ground and it will regrow strongly from the base. Do this right after flowering; expect to sacrifice much of the next season’s bloom in exchange for a rejuvenated, freshly-caned plant that flowers well the year after.
Post-Pruning Care
Water in dry spells while the new canes flush, and mulch to keep the roots cool and moist. No routine feeding is needed after pruning — this vigorous shrub regrows readily on its own; over-feeding simply drives more suckering.
Common Pruning Mistakes
- Pruning in autumn or winter (as generic “tidy-up” advice suggests) and cutting off the wood that would have flowered.
- Shearing the clump into a formal shape instead of renewing whole canes from the base.
- Never removing old canes, so the clump becomes a congested tangle of twiggy, poorly-flowering wood.
- Ignoring suckers until the shrub has spread well beyond its intended space. Most importantly, remove every all-green reverting shoot the moment you see it — leaving it lets the plain-green growth outcompete and eventually replace the variegated form.
When NOT to Prune
Do not prune in autumn, winter or early spring before flowering — you would remove the flower buds. Avoid cutting during the bloom itself; wait until the flowers finish. Hold off hard renovation on a plant already stressed by drought.
Recommended Tools (by task)
- bypass_secateurs — shortening flowered stems to a bud and cutting out suckers.
- loppers — removing the oldest whole canes at the base during annual renewal. Prune more lightly overall, and site the plant out of harsh afternoon sun — the pale variegated leaves scorch more readily than green foliage.
Pruning Troubleshooting
| Problem | Possible Cause | What to Check | Corrective Action |
| Few or no flowers in spring | Pruned in autumn/winter, removing the flower buds | When the last prune was done | Switch to pruning right after bloom; leave one-year wood intact over winter |
| Congested, twiggy clump with weak bloom | Old canes never renewed | Age and density of canes | Remove a quarter to a third of the oldest canes at the base each year after flowering |
| Shrub spreading well beyond its spot | Suckers left to run | New shoots appearing away from the crown | Sever and remove edge suckers below soil level as they appear |
| Plant slowly turning all green | Reverted plain-green shoots left in place | Presence of vigorous fully-green stems | Cut out every reverting shoot at its origin as soon as it appears |
| Pale leaves scorching at the edges | Variegated foliage exposed to harsh sun after a hard prune | Sun exposure and how much canopy was removed | Prune more lightly and give afternoon shade in hot spells |
Propagation Guide
The white-variegated Kerria ‘Picta’ is propagated only vegetatively — by stem cuttings, division, or its freely-produced suckers — because the variegation does not come from seed. It reverts easily, so cut out any all-green shoots to keep the cream-edged foliage. Overall an Easy plant to propagate.
Quick Propagation Specs
| Best Propagation Method | Division / rooted suckers |
| Alternative Methods | Softwood or hardwood stem cuttings |
| Propagation Difficulty | Easy |
| Seed True-to-Type | Not used — the variegation will not reproduce from seed |
| Vegetative True-to-Type | Yes — take propagating material only from healthy variegated (not reverted green) shoots |
| Best Propagation Season | Softwood cuttings late spring to early summer; hardwood cuttings and division in the dormant season |
| Cutting Rooting Time | Softwood cuttings root within a few weeks; hardwood over the dormant season |
Growing from Seed
Seed is not used for ‘Picta’: the white variegation is not carried reliably through seed, so the cultivar is kept entirely by vegetative propagation.
Stem Cuttings
Cutting Type & Timing
Take softwood or greenwood cuttings from new growth in late spring to early summer, or hardwood cuttings of dormant stems in autumn to winter.
Rooting Setup & Hormone
Root in a free-draining, moist mix; rooting hormone is optional. Softwood cuttings root within a few weeks under humidity, while hardwood cuttings root more slowly over the dormant season.
Division, Offsets, Pups & Suckers
Division and rooted suckers are the simplest methods for this suckering shrub.
- Lift rooted, well-variegated suckers in the dormant season and replant them.
- Always propagate from variegated shoots — remove and discard any all-green reverted growth, which is more vigorous and will take over if kept.
Bloom & Flower Guide
Quick Details
- Bloom Season: Mid to late spring, sometimes with light later flowers
- Time to First Bloom: Usually within a year or two of planting, on established stems
- Flower Appearance: Single, five-petalled flowers in clear yellow, set against white-variegated foliage
- Edibility: Not edible – grown as an ornamental for display, not for eating
Detailed Blooming Overview
‘Picta’ is the variegated Japanese kerria, its grey-green leaves edged in creamy white. Against that soft, bright foliage the single, five-petalled yellow flowers stand out crisply through spring, giving a lighter, more delicate effect than the plain-leaved forms.
Flower Characteristics
- Single flowers with five petals, in clear yellow.
- Set off by white-variegated foliage on slender, arching green stems.
- The open single flowers are accessible to bees.
Bloom Care & Thinning
- Pruning: Flowers on older wood – prune just after flowering and remove a few of the oldest canes to the base to keep growth fresh.
- Reversion: Cut out any all-green shoots that appear so the variegation is not lost.
Bloom Health & Protection
- Kerria twig and leaf blight: Wet spring conditions can cause leaf spotting and stem cankers; cut out affected canes and keep the foliage dry.
Pests, Diseases & Troubleshooting
Overview: Japanese kerria is a resilient, largely pest-free shrub; its only notable disease is kerria twig and leaf blight, which causes leaf spotting, cankers and cane dieback, and it may pick up a few aphids or leaf-rolling caterpillars. Good sanitation, airflow and routine removal of dead and old canes keep it healthy.
Quick Troubleshooting Overview
| Issue / Pest | Main Symptom | Primary Solution |
|---|---|---|
| Kerria twig/leaf blight | Brown leaf spots, cankers and stem dieback | Prune out dead wood; sanitation; airflow |
| Aphids | Sticky, distorted new shoots | Water jet; insecticidal soap |
| Leaf rollers & caterpillars | Rolled or chewed leaves | Hand-pick; Bt on young larvae |
| Leaf spot | Dark spots on leaves | Rake debris; base watering; copper if heavy |
| Root rot | Wilting, dieback in wet heavy soil | Improve drainage; avoid waterlogging |
| Stem dieback | Canes brown and die back | Cut out to healthy wood; thin old canes |
Common Pests & Management
- Aphids (Aphis spp.):
- Symptoms: Small colonies of soft insects on tender new shoots with sticky honeydew and some leaf curl – a minor, occasional issue.
- Prevention & Control: Dislodge with a water jet, encourage ladybirds and lacewings, and use insecticidal soap only for persistent clusters.
- Leaf rollers & caterpillars (Tortricidae / various):
- Symptoms: Leaves rolled and bound with silk or chewed at the margins, with caterpillars sheltering inside; cosmetic on an established shrub.
- Prevention & Control: Pick off rolled leaves and caterpillars by hand, encourage birds and parasitic wasps, and use Bacillus thuringiensis on young larvae if damage is heavy.
- Scale insects (Coccus / Parthenolecanium spp.):
- Symptoms: Occasional brown bumps on stems with a little sticky honeydew and sooty mold.
- Prevention & Control: Scrape off or prune out light infestations and treat with horticultural oil at the crawler stage; rarely a serious problem.
Diseases & Fungal Issues
- Kerria twig & leaf blight (Blumeriella kerriae (Coccomyces kerriae)):
- Symptoms: Reddish-brown spots on leaves and, importantly, tan-to-brown cankers on the stems that girdle and kill canes; the signature disease of kerria, spreading in wet weather and causing patchy dieback.
- Treatment & Management: Prune out and destroy blighted and cankered canes well below the damage in dry weather, sterilizing tools between cuts; rake up fallen leaves, thin for airflow, and apply a copper fungicide to protect new growth in wet springs where the disease is chronic.
- Leaf spot (Cercospora / Phyllosticta spp.):
- Symptoms: Small brown or purplish spots scattered on the leaves, worst in wet, crowded conditions; usually cosmetic.
- Treatment & Management: Rake and destroy fallen leaves, water at the base, improve airflow, and use copper only if spotting becomes severe.
- Root & crown rot (Phytophthora / Armillaria):
- Symptoms: Wilting, sparse growth and dieback with decay at the base in heavy, waterlogged soils.
- Treatment & Management: Plant in well-drained soil, avoid overwatering and deep planting, and remove plants killed by root rot; kerria prefers moist but not soggy ground.
Growing Difficulties & Abiotic Problems
- Cane dieback:
- Cause & Symptoms: Individual canes brown and die back with age, winter injury, or following blight cankers.
- Correction Strategy: Cut dead and weak canes to the ground, thin old wood after flowering to renew the clump, and keep the shrub vigorous; it suckers freely and regenerates well.
- Suckering / spread:
- Cause & Symptoms: Kerria spreads by suckers and can colonize beyond its intended space.
- Correction Strategy: Not a disease – dig out unwanted suckers or install a root barrier to contain the clump.
- Leaf scorch / poor color:
- Cause & Symptoms: Bleached, scorched leaves in hot, exposed full sun, and reduced flowering in deep shade.
- Correction Strategy: Grow in part shade to filtered light for the best foliage and bloom; keep the roots cool and evenly moist with mulch.
- Reversion of variegation:
- Cause & Symptoms: On variegated forms, all-green shoots appear and, being more vigorous, can overtake and swamp the variegated growth.
- Correction Strategy: Prune out reverted all-green shoots as soon as they show, cutting back into variegated wood, to keep the leaf pattern true.
What Helps – Products & Tools
Kerria needs little more than good sanitation. Prune out dead and cankered canes and rake fallen leaves to keep twig-and-leaf blight in check, using a copper fungicide only where the disease is chronic. A water jet and insecticidal soap handle the occasional aphid, Bacillus thuringiensis targets leaf-rolling caterpillars, and horticultural oil covers scale. Thin old canes after flowering to renew the shrub, and spray any oils in the evening to protect pollinators.


