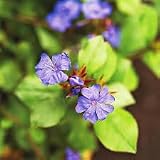


Plant Profile & Key Characteristics
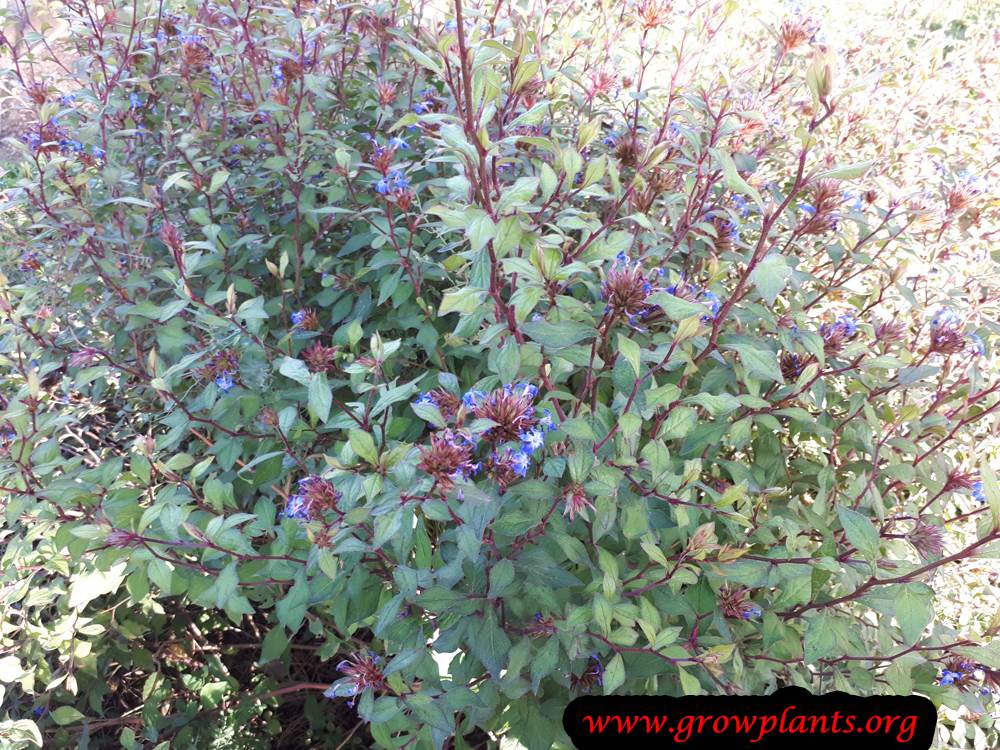
Overview: A low subshrub to shrub about 20-90 cm (8-36 in) tall, grown as a drought-tolerant ornamental ground cover (leadwort / plumbago). It is a perennial that is evergreen to cold-deciduous, sometimes grown as an annual in cold-winter regions.
Quick Specifications
| Specification | Attribute |
|---|---|
| Plant Type / Life Cycle | Perennial (grown as annual in cold climates) |
| Foliage Type | Semi-evergreen (evergreen to cold-deciduous) |
| Mature Size | 20-90 cm (8-36 in) tall |
| Growth Rate | Fast to moderate |
| Toxicity | Reported as poisonous if ingested |
| Hardiness | USDA zone 7a+ (zone 6 with winter protection) |
Growth Form & Structure
- Height & Spread: 20-90 cm (8-36 in) tall, spreading as a low mound; grows in containers of about 5-10 L with periodic root pruning.
- Growth Habit & Form: Low, spreading subshrub/shrub used as a drought-tolerant ground cover.
- Lifespan & Maturity: Fast-to-moderate perennial that quickly forms a low flowering mound.
Anatomy & Physical Features
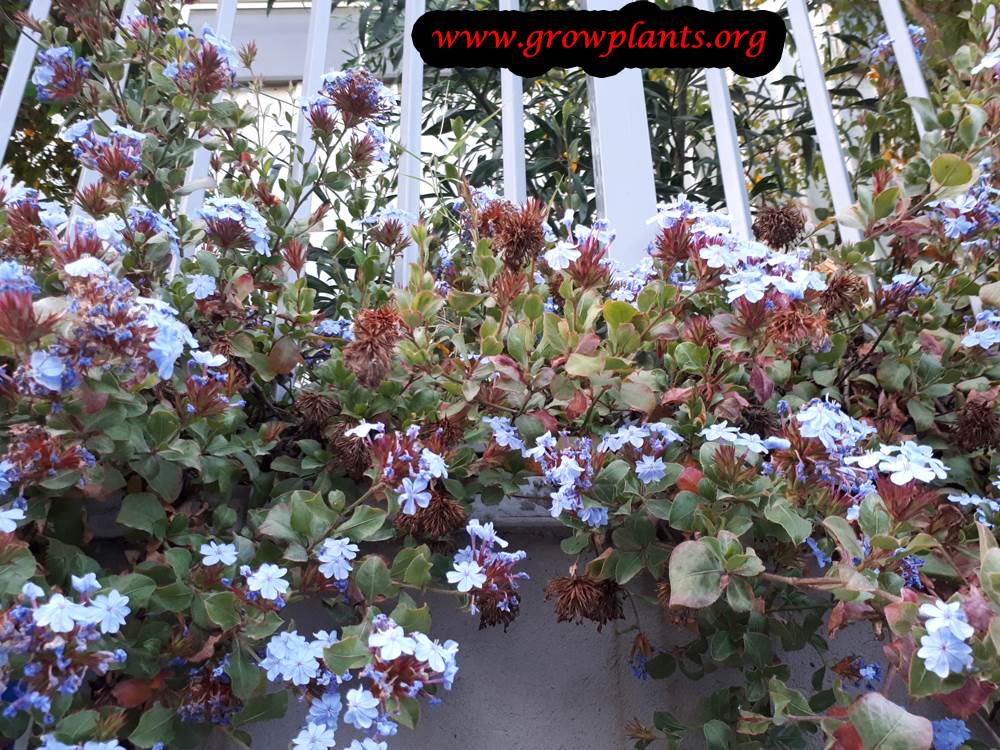
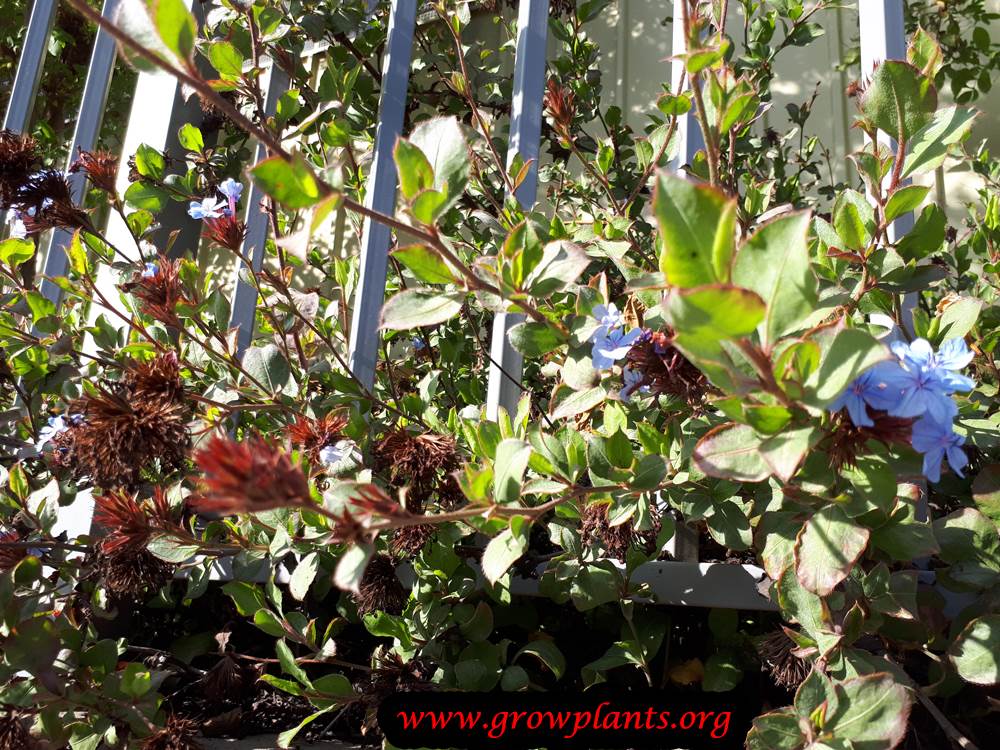
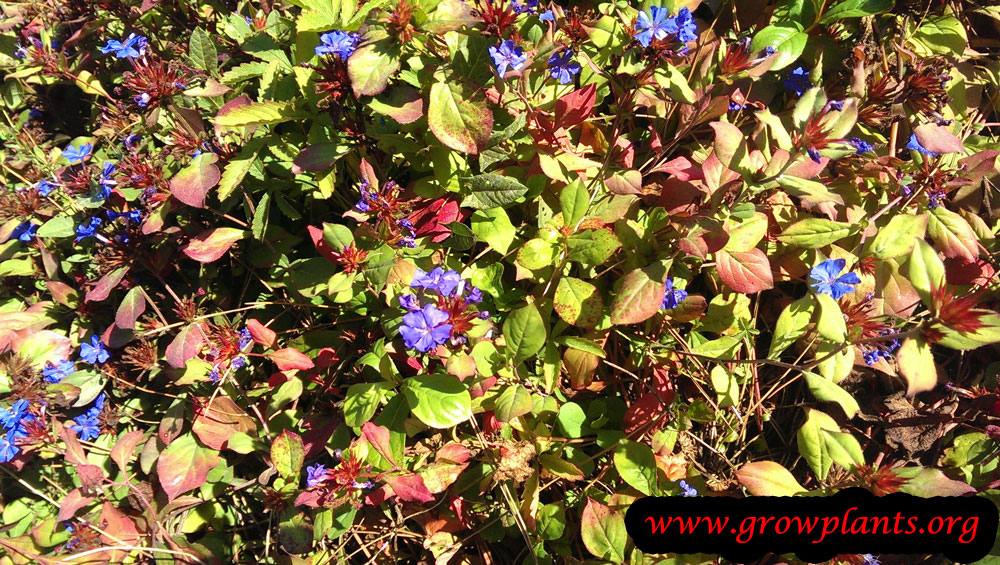
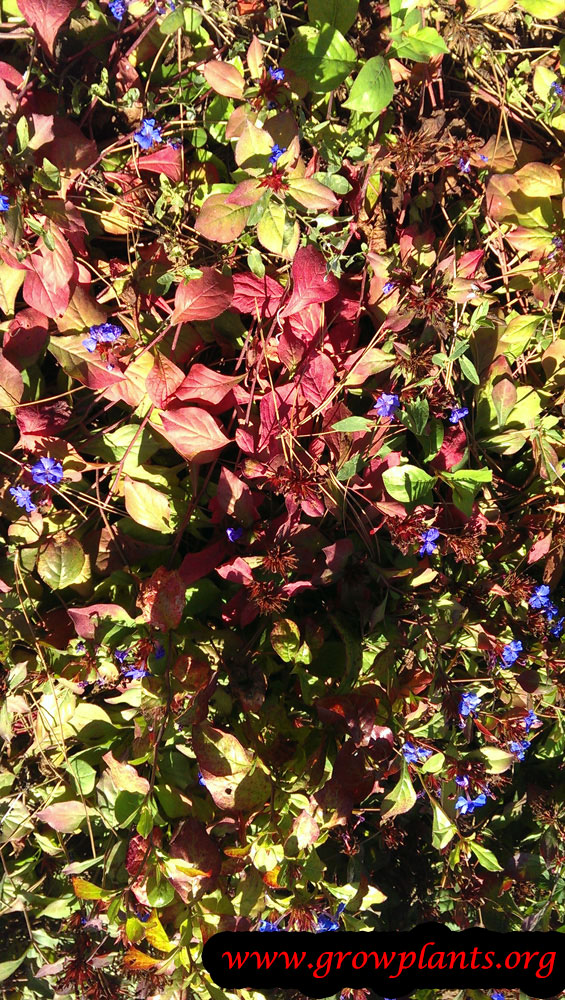
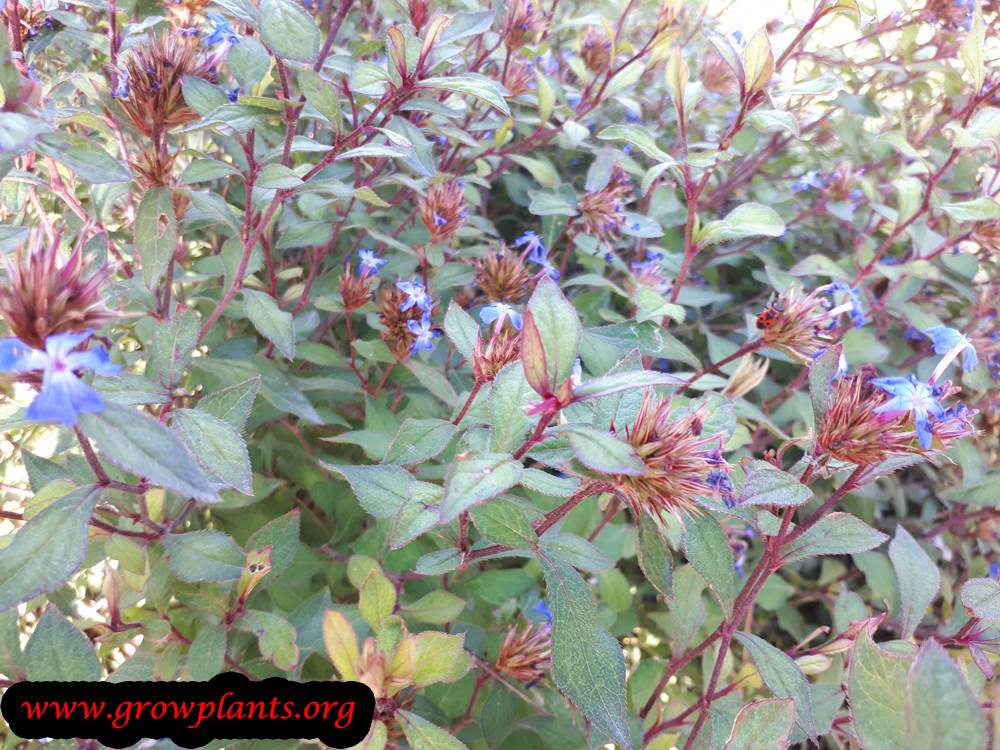
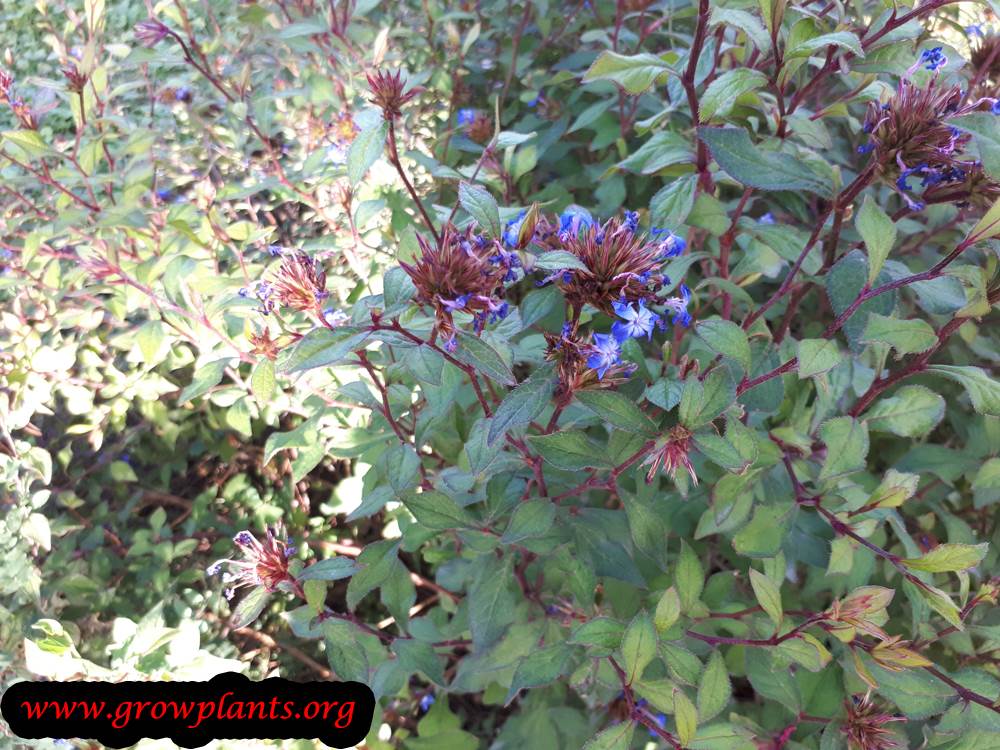
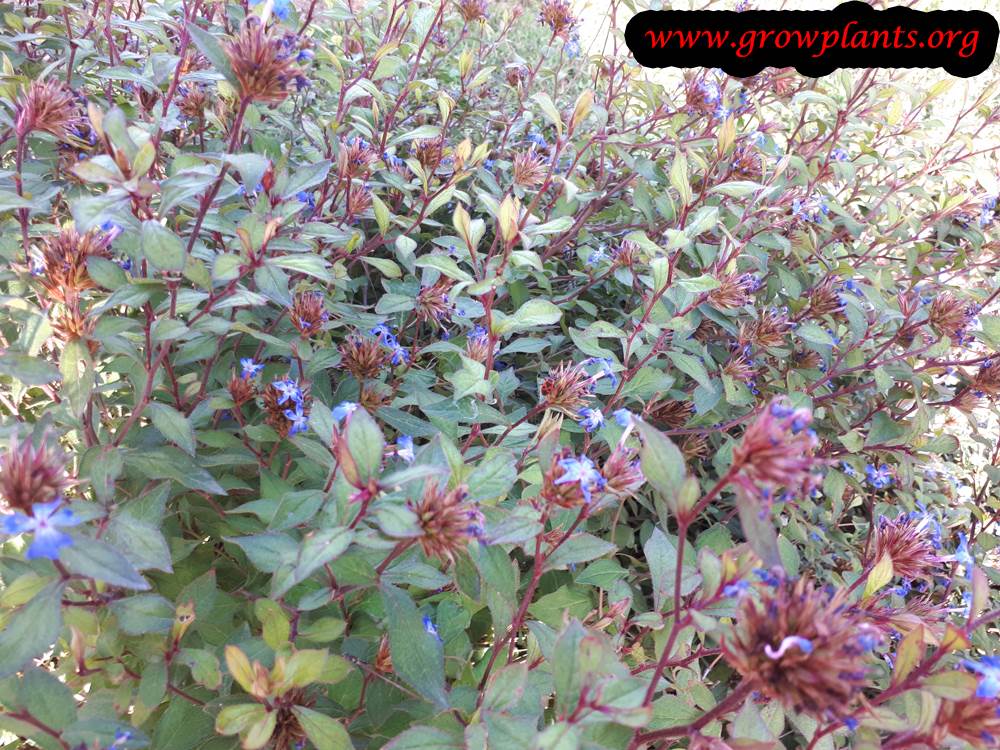
- Leaves & Foliage: Green leaves that turn red or purple near the flowers.
- Flower Characteristics: Blue to purple five-petalled flowers in clusters (full detail in the Bloom section).
Primary Uses & Landscape Value
- Functional & Ornamental Roles: Drought-tolerant ornamental ground cover; also grown in containers or indoors.
Care Guide: Planting, Soil & Watering
Overview: This drought-tolerant subshrub thrives in warm, sunny positions in subtropical to mild-temperate gardens and grows quickly once settled. It does best in rich, organic soil kept lightly moist and well mulched, needing a moderate, steady supply of water rather than heavy soaking.
Quick Care Requirements
| Requirement | Ideal Condition |
|---|---|
| Planting Season | Spring in zones 6-8; spring to summer in zones 9-10a; spring to autumn in zones 10b-11a |
| Growth Rate | Moderate to fast |
| Soil Type | Rich, organic, moisture-retentive and well mulched |
| Water Need | Moderate – keep lightly moist, letting the surface dry between waterings |
Planting & Establishment
- Best Planting Season: Spring in cooler zones 6-8, extending to summer in zones 9-10a and through autumn in zones 10b-11a.
- How to Plant:
- Hole Preparation: Dig a hole roughly twice the size of the root ball so the roots have loose, open soil to establish into.
- Soil Amendments: Work organic matter, dead leaves and humus through the backfill to build the rich, moisture-holding soil this plant favours.
- Planting Depth: Set the root collar level with the surrounding soil and firm gently, keeping the stem base unburied.
- Growth Speed & Expectations: A moderate to fast grower reaching about 20-90 cm, quickly forming ornamental ground cover in good conditions.
Soil, Watering & Drainage Care
- Soil Mix & Drainage Needs: Give it rich, organic soil that holds a little moisture yet still drains freely; a peat-based or moisture-retentive mix suits it well. In containers use a potting or peat mix blended with perlite, humus and organic matter, top with chopped mulch, and make sure the pot drains fully so the base never sits in water.
- Watering Schedule & Technique:
- Young / Newly Planted: Keep the soil evenly moist for the first several weeks, watering whenever the surface begins to dry.
- Established: Water deeply and let the top few centimetres dry before watering again, rather than giving frequent shallow sips.
- Seasonal Adjustments: Water more often through summer heat and reduce it in winter as growth slows.
Climate, Light & Hardiness
Ceratostigma (leadwort / plumbago) is an adaptable, drought-tolerant groundcover genus for subtropical, mediterranean, desert, temperate, and tropical climates or as a houseplant, growing evergreen where winters are mild and dying back to the ground where they are cold. As a genus it is reliably hardy from USDA zone 7a and can succeed in zone 6 with the right overwinter care, though individual species vary.
Quick Climate Specifications
| Climate Zones | Subtropics, mediterranean, desert, temperate, tropics, or indoors as a houseplant |
|---|---|
| USDA Hardiness Zones | 7a+ as a genus-level approximation; possible in zone 6 with appropriate overwinter care (individual species may differ) |
| Frost Tolerance | Moderate (root/crown) / Low (top growth) |
| Light Conditions | Full Sun / Half Shade / Full Shade |
Sunlight & Light Exposure
Optimal Light Setup
Adaptable from full sun to full shade, though full sun to half shade typically gives the best flowering.
Direct Sun Requirement
Tolerates direct sun well but is not strictly required, given its shade tolerance.
Best Exposure / Orientation
Flexible siting from open sun to shaded borders, useful as a groundcover under varied light.
Temperature Extremes & Hardiness
USDA Hardiness & Regional Limits
As a genus, reliably hardy outdoors from USDA zone 7a southward/warmer, with zone 6 achievable given the right overwinter care; individual species can differ in their exact cold limit, so this figure should be treated as a genus-wide approximation.
Cold Damage & Winter Protection
In cold winters the top growth dies back (behaving as deciduous); a heavy mulch layer over the crown in autumn and winter helps it return reliably each spring at the cooler edge of its range.
Frost Sensitivity
Top growth is frost-sensitive and dies back with hard freezes, while the root system is considerably hardier within its zone range.
Extreme Heat Tolerance
Good – noted as drought-tolerant and successful in desert and subtropical heat.
Wind, Humidity & Microclimate
Wind Tolerance
Good for a low, spreading groundcover (20–90 cm).
Rainfall & Seasonal Moisture
Drought-tolerant once established, needing only average water; mulch helps retain soil moisture through summer and winter extremes.
Microclimate Recommendations
A sheltered spot with mulch over the crown extends its usable range into the colder part of the genus’s hardiness; in milder zones it is flexible enough for sun or shaded beds alike.
Growing in Pots, Balconies & Indoors
Ceratostigma (leadwort) is a low, spreading perennial the grower rates as growable indoors, and it also does well in pots on a patio or balcony. Indoors it will live in a bright room, but the more direct light it gets the better its clear-blue flowers – a very sunny sill or an outdoor container gives the strongest bloom.
Quick Details
- Container Size: From about 5-10 L, and shallow pots are fine; the pot size sets how large the plant grows
- Indoor Suitability: Can be grown indoors in a bright spot – keep it near strong light for good flowering
- Best Spot: Full sun for best bloom; tolerates half to full shade with fewer flowers
- Soil & Drainage: Free-draining, organic-rich mix with plenty of holes in the pot
- Watering in Pots: Average water – let the base drain and never leave it standing wet
Indoors & On the Windowsill
- Houseplant: The grower marks it as suitable indoors. Give it the brightest window you have; in a darker room it stays leafy but flowers little.
- Overwintering: In cold climates a potted plant is easy to shelter from frost over winter and move back outside once it warms.
- Safety: The plant is listed as poisonous – keep it away from children and pets and never eat any part.
On a Balcony or Patio
- Light, wind & heat: Give it the brightest, sunniest spot; walls and paving throw heat back so pots dry quickly – check moisture daily in warm spells, and stake or shelter anything tall or exposed from wind. A drip irrigation kit with a timer can take over that watering check automatically.
- Weight & runoff: A filled pot drains coloured water – stand it where runoff won’t stain the balcony.
Choosing the Pot, Soil & Long-Term Care
- Pot & drainage: Start in a pot at least twice the size of the plant, with strong drainage holes; a mulch on top keeps the mix moist, and if the base fills with water let it drain dry the same day.
- Potting mix: Well-aerated and organic-rich – a peat- or coir-based mix opened up with perlite or vermiculite and enriched with compost.
- Feeding: Potted plants use up their food faster because frequent watering leaches nutrients away – feed a little more often through the growing season than plants in open ground.
- Repotting: Refresh the mix and pot up roughly every couple of years; for perennials, lightly prune the root ball and top growth at the same time.
Grower’s Container Tip
- Keep it small by root pruning: To hold it in a small pot, cut the roots back every year or two and let it regrow to size. Left unpruned, the roots overgrow the pot and the plant stops flowering and slows down.
Fertilizing & Feeding
A light feeder overall: one modest feeding as spring growth begins is usually enough for this spreading groundcover subshrub, with little or nothing further needed through bloom.
Quick Fertilizing Specs
| Feeding Level | Light feeder |
|---|---|
| Main Nutrient Priority | Balanced feeding with enough nitrogen to support fresh stems and leaves |
| Best Feeding Period | As new growth begins in spring |
| Organic Options | Mulch and organic matter worked into the soil |
| Reduce/Stop Feeding | Hold off entirely once the plant is dormant or has died back for winter |
| Micronutrients | Usually met by rich, organic soil; correct only a diagnosed deficiency |
| Soil pH | Tolerates a wide range; does best in rich, well-drained soil |
Feeding by Growth Stage
Spring flush of new growth
Support fresh shoots and leaves as the plant breaks dormancy or resumes active growth in spring.
| Nutrient direction | A balanced, nitrogen-forward feeding to fuel new stems and foliage. |
|---|---|
| Timing | As new growth begins in spring. |
| Frequency | A single light feeding at the start of the season is usually enough. |
| Fertilizer types | A balanced complete fertilizer, Organic matter or mulch worked into the soil surface |
| Precautions | Keep the feeding light; this groundcover spreads readily and heavy feeding can push aggressive, leggy growth. |
Bloom period
Sustain the clusters of blue-to-purple flowers and the reddening foliage that develops around them through the warm season.
| Nutrient direction | Continued balanced feeding supports flowering; extra phosphorus is not needed to drive bloom. |
|---|---|
| Timing | Through the summer-into-autumn bloom season. |
| Frequency | Feed sparingly if at all beyond the spring feeding; established plantings often need nothing further. |
| Fertilizer types | A balanced complete fertilizer only if growth looks weak or pale, Mulch renewed as it breaks down |
| Precautions | Avoid heavy feeding during bloom; excess nitrogen favors leafy growth over flowers and can dull the red-purple leaf coloring. |
Winter dieback or dormancy
Let the plant rest through cold-season dieback in cooler climates, or slowed winter growth elsewhere, without pushing new growth.
| Nutrient direction | None – withhold fertilizer while the plant is dormant or not actively growing. |
|---|---|
| Timing | Late autumn through winter, or whenever top growth has died back in colder climates. |
| Frequency | No feeding during this rest period; resume only once new spring growth appears. |
| Fertilizer types | No feeding at this stage; do not fertilize dormant or dieback growth. |
| Precautions | Do not fertilize bare or dormant crowns; wait for visible new growth before feeding again. |
Nutrient Deficiency Signs & Corrections
Overall pale or yellow-green foliage and slowed, thin new growth.
| Possible causes | low available soil nitrogen, nitrogen leaching after heavy rain or watering, thin, low-organic-matter soil |
|---|---|
| Appears first on | older, lower leaves |
| What to check | recent feeding history, soil organic matter and mulch depth, overall watering and drainage |
| Possible correction | Apply a balanced, nitrogen-containing fertilizer and refresh the organic mulch layer. |
Interveinal yellowing on the newest leaves while the veins themselves stay green.
| Possible causes | alkaline soil limiting iron availability, waterlogged or compacted soil restricting root function, recent root disturbance or transplant stress |
|---|---|
| Appears first on | newest growth |
| What to check | soil pH, drainage and soil compaction, recent transplanting or root damage |
| Possible correction | Correct the underlying soil pH or drainage issue and apply a chelated iron product per its label. |
Leaf margins brown or scorch and growth stalls despite adequate watering.
| Possible causes | fertilizer salt buildup in the root zone, under-watering that concentrates salts, feeding more heavily or more often than this light feeder needs |
|---|---|
| Appears first on | leaf margins and tips |
| What to check | recent fertilizer amounts, watering consistency, drainage around the root zone |
| Possible correction | Ease off feeding, water thoroughly to help flush accumulated salts, then return to a lighter feeding routine. |
Pruning, Training & Seasonal Maintenance
Ceratostigma species and cultivars are low, spreading subshrubs (roughly 20–90 cm) that, depending on the specific species and climate, behave anywhere from a light evergreen shrub in mild areas to a fully die-back, herbaceous-like perennial toward the cold edge of the genus’s hardiness (zone 7a, or 6 with extra winter care). Because flowers form on current-season growth across the genus, the single most valuable cut – regardless of species – is an annual hard renewal prune in late winter or very early spring, timed just before new growth begins, alongside light shaping and deadheading through the rest of the growing season.
Quick Pruning & Maintenance Specs
| Pruning Tolerance | Moderate–High |
| Primary Pruning Window | Late winter / very early spring (renewal cutback) |
| Secondary Maintenance Window | Light shaping and deadheading through the growing season |
| Main Objective | Renewal for flowering vigour, spread control, tidiness |
| Mature Plant Priority | Annual/periodic renewal cutback plus ongoing deadheading |
| Best Tool Type | Precision snips / bypass secateurs |
| Avoid Heavy Pruning During | Peak bloom display; right before a late frost toward the cold edge of the genus’s range |
Pruning by Plant Age & Size
Newly Established
Leave alone beyond removing any transplant damage; allow the plant to root in.
Young / Formative
No structural training applies to these low, naturally spreading subshrubs, whichever species is grown.
Mature / Established
Cut back hard toward the base each late winter as a general-purpose default across the genus – this is essential where the top growth dies back over winter, and still beneficial where it doesn’t, since it forces the freshest, most floriferous new growth. In milder climates, some of the more shrubby species in this genus can instead be given a lighter shaping cut if they are holding a persistent woody framework; when in doubt about a particular species or cultivar’s habit, the harder annual cutback is the safer default.
Seasonal Pruning Schedule
Pre-Growth / Early-Spring
- Objective: renew the plant before its main growth flush
- Remove: winter-killed or frost-damaged stems; cut back hard toward the base as the general-purpose approach for this genus
- Do not remove: live, budding basal growth
- Expected response: a strong flush of new flowering stems
- Flowering impact: positive – this cut drives the season’s best bloom across the genus, since flowers form on the resulting new growth
Ongoing Sanitary
- Objective: keep the plant tidy and encourage continued bloom through the season
- Remove: spent flower clusters, damaged stems
- Do not remove: actively flowering or budding growth
- Expected response: continued flowering
- Flowering impact: positive, via deadheading
Flowering & Fruiting Wood
Across the genus, flowers form on current-season growth, so a hard late-winter renewal cut does not sacrifice bloom – it is what triggers the fresh growth that carries the summer–autumn flower clusters. Delaying the cut into the growing season wastes energy on old or winter-damaged stems rather than driving new flowering shoots.
Structural Pruning & Training
Control the genus’s noted invasive/aggressive spreading habit by trimming back stems that reach beyond the intended bed edge. Height and density are otherwise managed through the annual renewal cut rather than any formal framework.
Special Growth to Remove
- Spent or dead flower clusters (deadheading)
- Winter-killed or frost-damaged stem tips – cut back to visibly live tissue in spring
- Stems rooting where they touch soil, if spread needs to be contained given this genus’s aggressive habit
Plants in this genus are noted as poisonous – wear gloves when handling cut material.
Container & Small-Space Pruning
Per its documented container care, root-prune every year or two at repotting alongside a top cutback – the source specifically notes that without this, roots will overgrow the plant and it will stop blooming and growing well. Container specimens otherwise follow the same renewal-pruning logic as in-ground plants.
Tools
- Precision snips for deadheading and thin stem growth
- Bypass secateurs for the base renewal cutback
Tool Hygiene & Disease Risk
Routine – no specific transmissible disease is flagged beyond aphid and spider mite pest pressure, which are insect issues rather than blade-transmitted ones; clean, sharp tools are sufficient. Gloves are recommended for personal safety given this genus’s toxicity.
Cut Placement & Technique
For the renewal cut, take the plant back to a few centimetres above ground level, or to the lowest visibly live buds. Deadhead spent clusters just above a leaf pair or node. Remove frost-damaged tips back to clearly live green tissue.
Heavy Pruning & Rejuvenation
Well tolerated across the genus – a hard renewal cutback nearly to the base is the standard, expected annual practice, especially toward the colder end of the hardiness range, and an occasional rejuvenation option elsewhere if a plant becomes sparse or woody at the base. Regrowth is fast, matching this genus’s fast-to-medium growth rate.
Post-Pruning Care
Water normally to support the spring flush, and mulch after the hard cutback – the source specifically notes mulch is valuable in both summer and winter for this genus. Watch for aphids and spider mites on the resulting tender new growth.
Common Pruning Mistakes
- Leaving old, winter-damaged stems uncut, which delays and reduces the new flowering flush
- Letting the genus’s aggressive spreading habit go unchecked into neighbouring beds
- Skipping root pruning on long-term container specimens, causing the plant to stop blooming as it becomes rootbound
When NOT to Prune
Avoid a hard cutback in the middle of the main bloom display if flowering is the priority that season. Toward the coldest part of the genus’s range, wait until clear frost risk has passed before the hard spring renewal cut, so tender regrowth is not caught by a late freeze.
Recommended Tools (by task)
- precision_snips – deadheading and light shaping through the growing season
- bypass_secateurs – the annual hard renewal cutback at the base
Propagation Guide
Stem cuttings are the fastest and most reliable way to propagate Ceratostigma, rooting readily in the right conditions; seed is possible but slower and used less often in cultivation. Overall propagation difficulty for a home grower is easy.
Quick Propagation Specs
| Best Propagation Method | Stem Cuttings |
| Alternative Methods | Division of rooted rhizome sections; Seed |
| Propagation Difficulty | Easy |
| Vegetative True-to-Type | Yes |
| Best Propagation Season | Spring is best, though cuttings can be started at other times as long as temperatures stay above 25°C (77°F) |
| Cutting Rooting Time | Not precisely stated by the site; typically a few weeks under warm, humid conditions |
Stem Cuttings
Cutting Type
Stem cuttings taken from the current season’s growth.
Best Timing
Spring is the preferred season, but cuttings can be started at other times of year as long as temperatures stay above 25°C (77°F).
Cutting Preparation
Insert stems into peat-based soil, though other mixes such as a standard potting mix also work.
Rooting Setup
Keep the soil consistently moist and provide high humidity around the cutting.
Rooting Hormone
Not stated as required by the site; optional, and may speed rooting.
Rooting Time
Not precisely documented; expect roots to form within a few weeks under warm, humid conditions.
Division, Offsets, Pups & Suckers
The site describes Ceratostigma as an aggressive, spreading ground cover, consistent with its rhizomatous growth habit. Established clumps can be lifted and divided in spring; separate rooted sections with roots attached and replant immediately, keeping the soil moist until re-established.
Growing from Seed
Seed is listed by the site as an option, but no further detail on handling or timing is given, and cutting propagation is described as easier. Expect germination to be slower and less predictable than starting from cuttings.
Bloom & Flower Guide
Quick Details
- Bloom Season: Summer into autumn, at its best as the weather cools
- Flower Appearance: Vivid blue to purple, five-petaled flowers in small clusters
- Edibility: Ornamental — the sap can irritate skin, so it is not eaten
Detailed Blooming Overview
Ceratostigma — the leadworts or hardy plumbagos — are grown above all for their intense blue, five-petaled flowers, which cluster over the plant from summer into autumn. As they bloom the foliage often flushes red or purple, so the late-season show combines rich blue flowers with warm autumn leaf color.
Flower Characteristics
- Five-petaled flowers in strong blue to purple.
- Carried in small clusters, set against reddening autumn foliage.
- Popular with butterflies.
Bloom Care & Thinning
- Encouraging bloom: These plants flower on new wood — cut back in late winter or early spring for a strong flush of fresh flowering shoots.
- Position: A sunny spot gives the most flowers and the best autumn color.
Pests, Diseases & Troubleshooting
Overview: Hardy plumbago is a tough, largely trouble-free groundcover and sub-shrub prized for late blue flowers; its main risks are sap-suckers under stress and, more importantly, root rot in cold wet soils. Grow it in a warm, well-drained spot and it needs very little intervention.
Quick Troubleshooting Overview
| Issue / Pest | Main Symptom | Primary Solution |
|---|---|---|
| Aphids | Curled shoot tips, honeydew | Water jet; soap if persistent |
| Spider mites | Stippled, bronzed leaves in heat | Raise humidity; oil/soap |
| Whitefly | White flies rise when disturbed | Sticky traps; soap |
| Slugs & snails | Ragged holes in soft new growth | Handpick at night; barriers |
| Root rot | Collapse in cold wet soil | Improve drainage; ease watering |
| Powdery mildew | White coating in humid shade | Improve airflow; sun |
Common Pests & Management
- Aphids (Aphidoidea):
- Symptoms: Clusters of small green, black or grey soft-bodied insects on new shoots, buds and leaf undersides; curled distorted growth, honeydew and sooty mould.
- Prevention & Control: Blast off with a strong jet of water and squash colonies early. Encourage ladybirds, lacewings and hoverflies; avoid excess nitrogen that fuels soft growth. Use insecticidal soap or neem for stubborn outbreaks, sprayed in the evening to spare pollinators.
- Spider mites (Tetranychus urticae):
- Symptoms: Fine pale stippling on leaves, a dull bronzed look, and fine webbing on undersides in hot, dry conditions. Leaves dry and drop as numbers build.
- Prevention & Control: Raise humidity and hose down foliage to break the cycle; mites thrive on dry, dusty plants. Release predatory mites where practical, and treat with insecticidal soap or horticultural oil, coating leaf undersides over repeat applications.
- Whitefly (Trialeurodes / Bemisia spp.):
- Symptoms: Tiny white moth-like insects that flutter up in clouds when foliage is disturbed; honeydew, sooty mould and yellowing weaken the plant.
- Prevention & Control: Hang yellow sticky traps to monitor and trim heavy populations; encourage Encarsia parasitic wasps under cover. Spray insecticidal soap or horticultural oil to leaf undersides, repeating to catch new hatches.
- Slugs & snails (Gastropoda):
- Symptoms: Irregular holes and shredded edges on tender new spring growth, with slime trails; worst in damp shaded plantings.
- Prevention & Control: Hand-pick after dark, clear damp hiding places and use grit, copper tape or beer traps around clumps. Iron-phosphate bait is a pet-safer option if pressure is high.
Diseases & Fungal Issues
- Powdery mildew (Erysiphe / Golovinomyces spp.):
- Symptoms: White powdery patches on leaves and stems, mainly in crowded, humid or shady sites late in the season.
- Treatment & Management: Space and thin for airflow, grow in good light, and avoid overhead watering. Remove affected leaves; a sulfur or potassium-bicarbonate spray helps only in stubborn cases.
- Root & crown rot (Phytophthora / Pythium / Rhizoctonia spp.):
- Symptoms: Wilting despite moist soil, blackened mushy roots or stem base, yellowing lower leaves and collapse. Cold, wet, poorly drained soil over winter is the classic trigger.
- Treatment & Management: This is a water-management disease first: plant in free-draining soil, avoid waterlogging and never let pots stand in saucers of water. Remove and destroy collapsed plants, improve drainage, and drench with a labelled biofungicide only as a support measure.
- Leaf spot (Fungal (minor)):
- Symptoms: Small brown spots in wet weather; usually cosmetic.
- Treatment & Management: Remove spotted leaves and improve airflow; fungicides are rarely needed.
Growing Difficulties & Abiotic Problems
- Winter cold / dieback:
- Cause & Symptoms: Stems blacken and die back in hard winters – normal for this die-back sub-shrub.
- Correction Strategy: Leave old top-growth over winter for protection and cut back to live wood in spring; mulch the crown in cold areas.
- Slow spring emergence:
- Cause & Symptoms: Bare gaps and worry that plants are dead – Ceratostigma breaks dormancy late.
- Correction Strategy: Be patient into late spring before assuming loss; avoid overwatering dormant crowns.
- Poor flowering in shade:
- Cause & Symptoms: Sparse blooms and leggy growth in too much shade.
- Correction Strategy: Move to a sunnier, warm position for the best late-season flower and autumn leaf colour.
What Helps – Products & Tools
Reach first for cultural fixes – sun, sharp drainage and airflow. Backups are insecticidal soap or neem/horticultural oil for aphids, mites and whitefly, iron-phosphate slug bait, and a sulfur or potassium-bicarbonate spray only if mildew persists.