Plant Profile & Key Characteristics
Also known as: White windflower, Autumn zephyrlily, Peruvian swamp lily
Overview: Zephyranthes candida (autumn zephyrlily) is a compact deciduous bulbous perennial of 10-25 cm (4-10 in), forming dense rush-like clumps of narrow leaves. It is grown as an ornamental for its clean white, crocus-like flowers borne mainly in late summer and autumn.
Quick Specifications
| Specification | Attribute |
|---|---|
| Plant Type / Life Cycle | Perennial (bulbous geophyte) |
| Foliage Type | Deciduous (near-evergreen in mild climates) |
| Mature Size | 10-25 cm tall (4-10 in) |
| Growth Rate | Moderate |
| Root System | Bulb (clumping geophyte) |
| Toxicity | Toxic if ingested (bulbs contain lycorine alkaloids) |
| Hardiness | USDA zones 7-10 |
Growth Form & Structure
- Height & Spread: Forms tight clumps 10-25 cm (4-10 in) tall in the ground; a single bulb suits about a 5 L (1 gallon) pot and clumps quickly fill a container.
- Growth Habit & Form: Grassy, rush-like tufted clump rising from underground bulbs.
- Lifespan & Maturity: Long-lived; multiplies readily by offsets, mature bulbs flowering the same year.
Anatomy & Physical Features
- Leaves & Foliage: Narrow, linear, glossy green leaves growing in linked grassy groups.
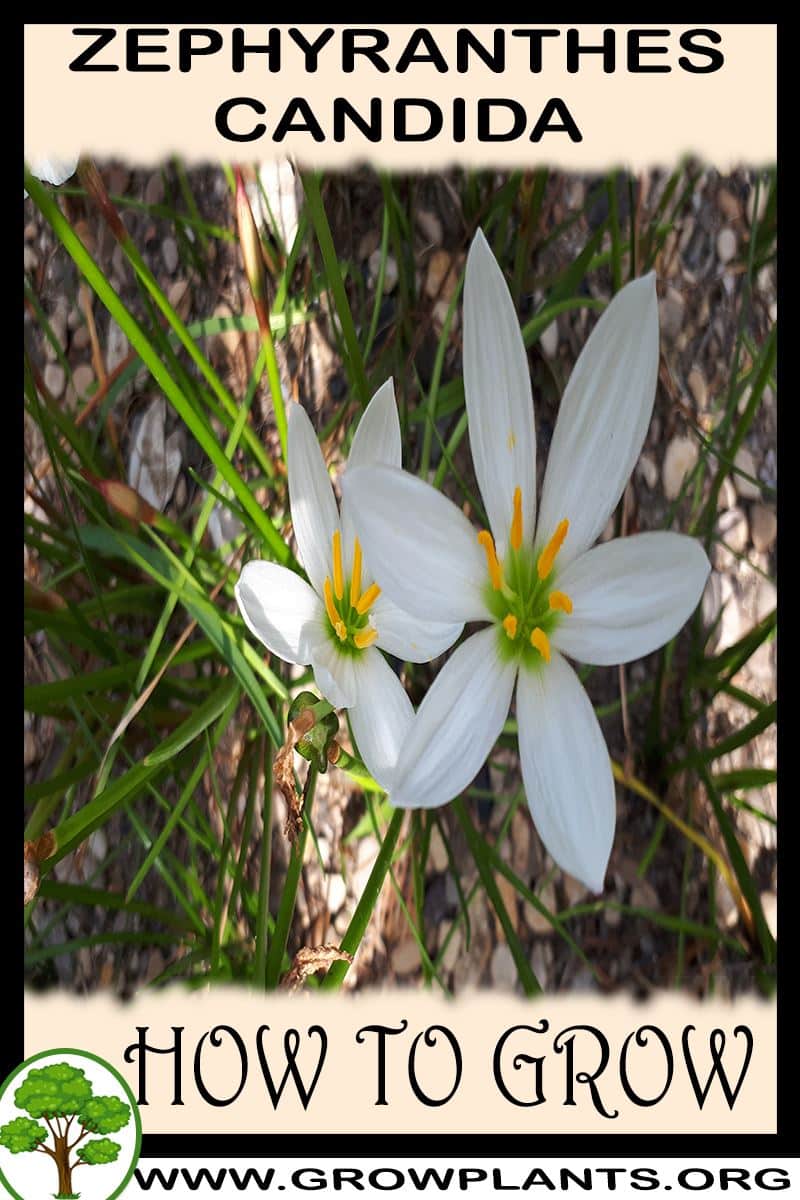
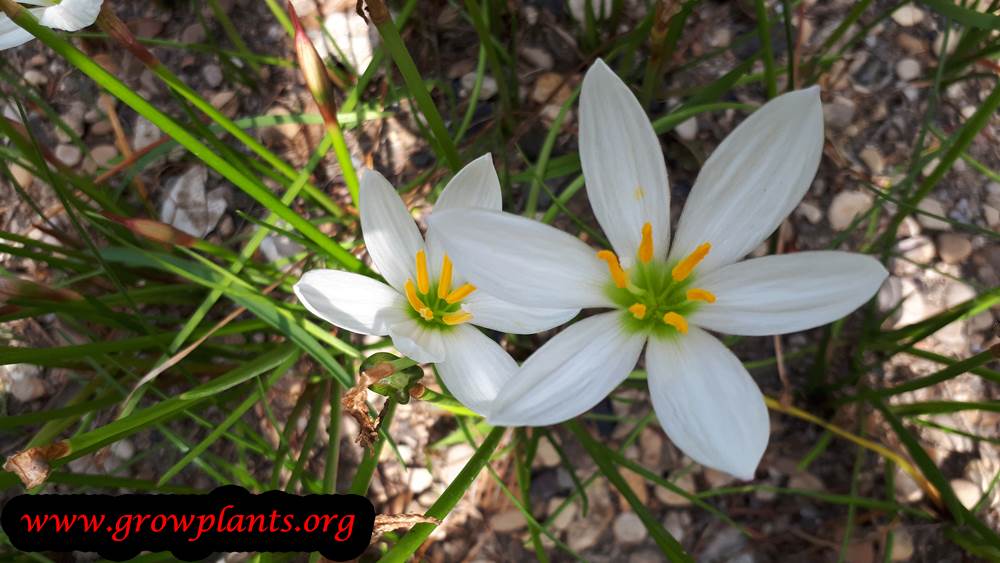
- Flower Characteristics: White crocus-shaped flowers with a yellow centre, six petals and six yellow stamens, flushing after rain.
Primary Uses & Landscape Value
- Functional & Ornamental Roles: Ornamental groundcover edging, path borders, rockeries and containers; an easy, free-flowering bulb.
Care Guide: Planting, Soil & Watering
Overview: Zephyranthes candida is a small, easy bulb that grows in well-draining soil enriched with organic matter and mulch, in full sun. It takes moderate, steady watering and flowers freely, often bursting into bloom after rain.
Quick Care Requirements
| Requirement | Ideal Condition |
|---|---|
| Planting Season | Spring, summer or autumn during the warm season |
| Growth Rate | Moderate |
| Soil Type | Well-draining soil enriched with organic matter, topped with mulch |
| Water Need | Moderate — keep lightly moist in growth without waterlogging |
Planting & Establishment
- Best Planting Season: Plant bulbs in the warm season, from spring through autumn.
- How to Plant:
- Hole Preparation: Dig a hole a bit larger than the bulb and enrich it with organic material and rich soil before planting.
- Soil Amendments: Mix in compost or other organic matter and mulch the surface to hold moisture and feed the developing bulb.
- Planting Depth: Set small bulbs shallowly, roughly one to two times their own depth, with the neck near the surface.
- Growth Speed & Expectations: Growth is moderate; mature bulbs flower the same year, while seed-grown plants take several years to bloom.
Soil, Watering & Drainage Care
- Soil Mix & Drainage Needs: Provide well-draining soil; in containers allow about 5 L per bulb with a free-draining potting mix, and let the base drain rather than stand in water.
- Watering Schedule & Technique:
- Young / Newly Planted: Water in and keep lightly moist as growth begins.
- Established: Water moderately and regularly, keeping the soil just moist; a good soak often triggers a flush of flowers.
- Seasonal Adjustments: Water through the growing and flowering season and keep drier while the bulb is dormant.
Climate, Light & Hardiness
Zephyranthes candida (autumn zephyrlily / rain lily) is a bulb suited to mediterranean, subtropical, and temperate climates in full sun, with flowering triggered by the season's first rains. It is winter-hardy from about USDA zone 7 through 10.
Quick Climate Specifications
| Climate Zones | Mediterranean, subtropical, temperate |
|---|---|
| USDA Hardiness Zones | 7–10 |
| Frost Tolerance | Moderate |
| Light Conditions | Full Sun |
Sunlight & Light Exposure
Optimal Light Setup
Full sun gives the best flowering response.
Temperature Extremes & Hardiness
USDA Hardiness & Regional Limits
Reliable outdoors from about zone 7 through 10; this deciduous bulb dies back seasonally as part of its normal cycle rather than solely from cold.
Frost Sensitivity
Foliage dies back with cold as expected for a deciduous geophyte; the bulb itself is the hardy, persistent structure within its recommended zone range.
Wind, Humidity & Microclimate
Rainfall & Seasonal Moisture
Flowering is directly cued by the first seasonal rains, so reliable rainfall patterns (or equivalent irrigation timing) matter more for bloom than for survival.
Growing in Pots, Balconies & Indoors
Rain lily is a small bulb (10-25 cm) grown for its crocus-like white flowers – the grower rates it as not a houseplant, but it grows well in pots on a sunny balcony or patio.
Quick Details
- Container Size: About 5 L (1 gal) for a single bulb
- Indoor Suitability: Not a houseplant – an outdoor container bulb
- Best Spot: Full sun
- Soil & Drainage: Well-drained mix (potting mix or similar)
- Watering in Pots: Average; drier when resting
Indoors & On the Windowsill
- Not a houseplant: The grower rates it unsuitable indoors; grow it outdoors in a sunny pot.
- Safety: The bulbs are toxic if eaten – keep them away from children and pets.
On a Balcony or Patio
- Full sun: A sunny balcony or patio suits it; flowers flush after warm, dry spells break with water.
- Light & heat: Walls, railings and paving reflect heat and wind dries pots fast, so check moisture often and water more in hot spells.
Choosing the Pot, Soil & Long-Term Care
- Pot & drainage: A well-drained pot with a good potting mix; do not leave it standing in water.
- Refreshing soil: Every few years check the mix is still good and wash/replace it if not.
- Feeding: Container plants use up food faster because watering washes nutrients out – feed a little and often through the growing season.
Grower’s Container Tip
- Do not let it get pot-bound: One bulb grows well in about 5 L. To keep it flowering over the years, make sure the roots do not fill the whole pot – if it becomes crowded, reduce the number of bulbs or move up to a bigger container.
Fertilizing & Feeding
A light feeder: this rain-triggered bulb blooms well with minimal feeding once established, mainly benefiting from organic matter and mulch worked into well-drained soil.
Quick Fertilizing Specs
| Feeding Level | Light feeder |
|---|---|
| Main Nutrient Priority | A balanced feeding that supports leaf growth after flowering, when the bulb is recharging for next season |
| Best Feeding Period | While the strap-like leaves are actively growing, after flowering begins |
| Organic Options | Mulch and organic matter worked into well-drained soil |
| Reduce/Stop Feeding | Stop feeding once leaves begin to yellow and die back after the growing season |
| Micronutrients | Usually met by a complete fertilizer; correct only diagnosed issues |
| Soil pH | Tolerates a range in well-drained soil |
Feeding by Growth Stage
Establishing the planting
Let newly planted bulbs settle in and root before pushing growth with fertilizer.
| Nutrient direction | Keep feeding minimal at first and rely on rich, organic-matter-enriched planting soil. |
|---|---|
| Timing | The first season after planting. |
| Frequency | Feeding needs are minimal while the bulb establishes. |
| Fertilizer types | Organic matter and rich soil worked into the planting hole |
| Precautions | Let the bulb establish before fertilizing; newly planted bulbs are easily stressed by heavy feeding. |
Active leaf growth after flowering
Recharge the bulb for next season’s bloom by supporting the strap-like leaves that follow the flowers.
| Nutrient direction | A balanced complete fertilizer during active leaf growth helps the bulb rebuild its reserves. |
|---|---|
| Timing | After flowering, while the leaves are actively growing, typically through summer into autumn. |
| Frequency | An occasional light feeding through the leaf-growth period is sufficient. |
| Fertilizer types | A balanced complete fertilizer, Mulch and organic matter renewed as needed |
| Precautions | Keep the leaves growing as long as possible before they die back naturally; cutting them early or over-feeding late in the season can reduce next year’s bloom. |
Dormancy after leaf die-back
Let the bulb rest once its leaves have dried and died back for the season.
| Nutrient direction | None – withhold fertilizer once the leaves have dried back. |
|---|---|
| Timing | Once the leaves dry and die back, typically going into winter. |
| Frequency | No feeding at this stage. |
| Fertilizer types | No feeding at this stage; do not fertilize until new leaf growth resumes. |
| Precautions | Do not fertilize a dormant bulb; nutrients it cannot use simply build up as salts in the soil. |
Nutrient Deficiency Signs & Corrections
Leaves are pale, yellow-green, and shorter than expected during the active leaf-growth period.
| Possible causes | low available soil nitrogen, nutrient leaching from heavy rain or watering, thin, low-organic-matter soil |
|---|---|
| Appears first on | the strap-like leaves |
| What to check | recent feeding history, soil organic matter, bed drainage |
| Possible correction | Apply a balanced complete fertilizer during active leaf growth and work in organic matter. |
Reduced flowering or smaller flowers despite otherwise healthy-looking leaves.
| Possible causes | low soil potassium, sandy, leaching soil, heavy nitrogen feeding without balancing potassium |
|---|---|
| Appears first on | flowering performance rather than leaf color |
| What to check | soil potassium status, soil texture and drainage, recent feeding balance |
| Possible correction | Use a balanced fertilizer rather than a nitrogen-only feed and check soil potassium status. |
New leaves show yellowing between the veins while the veins stay green.
| Possible causes | high or alkaline soil pH limiting iron availability, waterlogged, poorly drained soil, low soil iron |
|---|---|
| Appears first on | newest leaves |
| What to check | soil pH and drainage, recent watering pattern, bulb and root health |
| Possible correction | Improve drainage, correct pH toward the bulb’s preferred range, and apply a chelated iron product per its label. |
Pruning, Training & Seasonal Maintenance
Zephyranthes candida (autumn zephyrlily) is a bulb with narrow, grassy foliage – it has no woody structure and no pruning-controlled flowering; blooming is triggered by rainfall rather than by any cut. Pruning tolerance is low and the objective is strictly sanitary: remove foliage only once it has fully dried, since green leaves are still feeding the bulb for next season’s bloom. The plant’s own guidance is to prune all the foliage once it is dry, with only dead leaves removed mid-season if needed – never cutting back green, functional leaves.
Quick Pruning & Maintenance Specs
| Pruning Tolerance | Low – foliage only, once fully dry |
| Primary Pruning Window | Summer, once the foliage has dried down |
| Typical Frequency | Once per die-back cycle, with occasional mid-season removal of individual dead leaves |
| Main Objective | Tidy the bulb bed after dieback without cutting into green, photosynthesizing foliage |
| Young Plant Priority | Leave foliage fully intact to build up the young bulb |
| Mature Plant Priority | Remove dried foliage after each cycle; deadhead spent bloom stalks |
| Best Tool Type | Precision snips |
| Avoid Heavy Pruning During | While foliage is still green, and while the plant is actively flowering |
Pruning by Plant Age & Size
Newly Established
Leave all foliage in place on a newly planted bulb; it needs every leaf to build up reserves before its first strong bloom.
Young / Formative
No structural training applies to a bulb – there is nothing to shape besides removing spent, dried leaves as they appear.
Mature / Established
Once foliage has fully dried following a bloom cycle, cut it back; through the season, individual dead leaves can be tidied out without disturbing the rest of the clump.
Special Growth to Remove
- Fully dried foliage, once yellowed/browned after a bloom-and-growth cycle.
- Individual dead leaves found mid-season.
- Spent flower stalks after blooming has finished.
Container & Small-Space Pruning
In a pot, the same rule applies – remove foliage only once it is fully dry. Because container bulbs are more visible and root space is limited, check the pot periodically as recommended for this species: if the bulb clump has filled the container and stopped flowering well, reduce the number of bulbs or move up to a larger pot rather than pruning the plant harder.
Tools
- Precision snips – the only tool needed, for cutting dried foliage and spent flower stalks at the base.
Tool Hygiene & Disease Risk
Routine – clean, sharp snips are sufficient; this species’ listed pests (slugs, snails) are not pruning-transmitted disease risks.
Cut Placement & Technique
Cut dried foliage at the base, at soil level, once it has fully browned; deadhead spent flower stalks similarly at their base.
Heavy Pruning & Rejuvenation
Not applicable – there is no woody or overgrown structure to rejuvenate. If a clump becomes crowded and blooms poorly, the fix is lifting and dividing the bulbs, not a hard prune.
Post-Pruning Care
Water normally after removing dried foliage; no extra feeding is needed beyond the plant’s normal once-a-year fertilizing.
Common Pruning Mistakes
- Cutting back green foliage before it has fully died down, which weakens the bulb’s reserves for next season’s bloom.
- Removing foliage right after flowering instead of waiting for it to dry, mistaking post-bloom leaves for spent growth.
When NOT to Prune
Never cut back foliage while it is still green – wait until it has fully dried after a bloom-and-growth cycle.
Recommended Tools (by task)
- precision_snips – removing dried foliage and spent flower stalks without disturbing neighboring green leaves.
Propagation Guide
Zephyranthes candida is most easily and quickly propagated by dividing the offset bulbs that form around a mature bulb – plants started this way can bloom the same year. Growing from seed works but, as the site notes, takes considerably longer, potentially many years, before flowering begins. Overall this is an easy plant to propagate by bulb division, and much more of a patience project from seed.
Quick Propagation Specs
| Best Propagation Method | Bulb division (offsets) |
| Alternative Methods | Seed |
| Propagation Difficulty | Easy (bulb division); Specialist patience needed (seed, slow to flower) |
| Seed True-to-Type | Usually true-to-type |
| Vegetative True-to-Type | Yes |
| Best Propagation Season | Spring, summer or autumn |
Growing from Seed
Seed is a workable but slow route to new plants – expect a long wait, potentially several years, before seedlings reach flowering size, which the site specifically notes as a drawback compared with starting from bulbs. Sow during the spring–autumn growing season in well-drained soil and keep consistently moist while seedlings establish.
Rhizomes, Tubers, Bulbs & Corms (Bulb Division)
Zephyranthes candida naturally produces offset bulbs around the base of the mature bulb over time. Lift and separate these offsets at planting time in spring through autumn, keeping some roots attached where possible, and replant promptly into well-drained soil enriched with organic matter, as recommended for planting this species. Mature-sized offset bulbs planted out can be expected to flower in their first year, unlike seed-grown plants.
Bloom & Flower Guide
Quick Details
- Bloom Season: Summer into autumn, often flushing after rain
- Time to First Bloom: From a planted bulb, flowers appear in the first season
- Flower Appearance: White crocus-like flowers with a yellow throat, six petals and six yellow stamens
- Edibility: Not edible — the bulbs and foliage are toxic if eaten; grown for ornament only
Detailed Blooming Overview
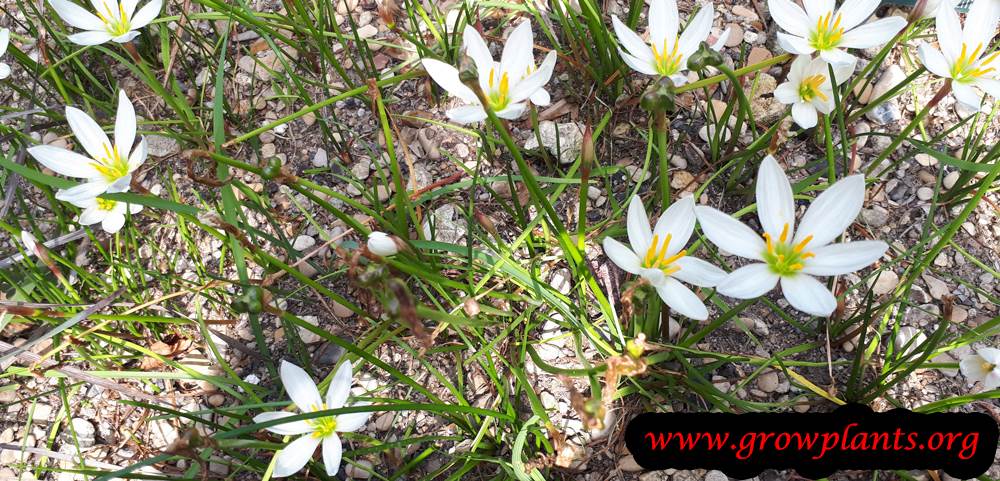
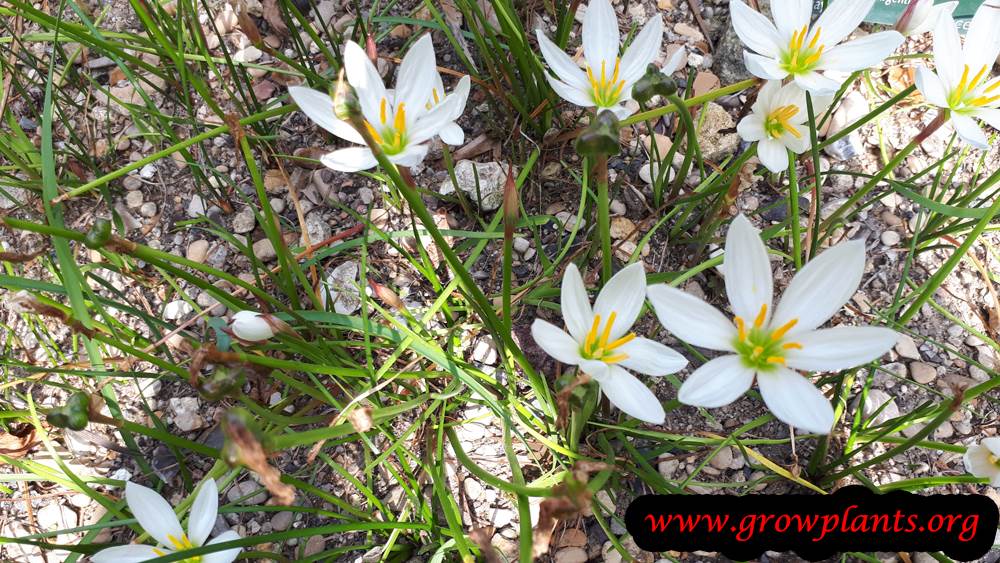
Zephyranthes candida, the autumn zephyrlily or rain lily, earns its common name by flowering in sudden flushes a few days after rain. The bright white, upward-facing flowers rise on short stalks among the narrow, rush-like leaves. A well-settled clump will repeat this trick several times through late summer and autumn whenever a good shower follows a dry spell.
Flower Characteristics
- Crisp white flowers with a soft yellow centre, six petals and six yellow stamens.
- Crocus- to star-shaped, held singly on short stalks.
- Opening in synchronised flushes after rain, drawing bees and butterflies.
Bloom Care & Thinning
- Trigger the flush: A deep watering after a dry period mimics rain and can bring on a wave of flowers.
- Leave clumps undisturbed: Bulbs flower best when crowded, so divide only when bloom starts to thin.
- Safety: All parts are poisonous — keep bulbs and plants away from children and pets, and wash hands after handling.
Pests, Diseases & Troubleshooting
Overview: Rain lilies (Zephyranthes candida) are tough, bulbous perennials whose main enemies are moisture-related – bulb rots and bulb-fly maggots below ground, and slugs, snails and aphids on the tender leaves and short-lived flowers above. Manage them culturally first: sharp drainage, a genuine dry rest to prime flowering, and vigilant slug patrol around bloom time.
Quick Troubleshooting Overview
| Issue / Pest | Main Symptom | Primary Solution |
|---|---|---|
| Slugs / snails | Ragged holes in leaves and flowers, slime trails | Night hand-picking, copper/grit barriers, iron-phosphate bait |
| Bulb fly maggots | Weak, non-flowering plants; hollow, soft bulbs | Buy firm bulbs, keep necks covered, destroy infested bulbs |
| Aphids | Sticky new growth, distortion, virus streaking | Water jet, beneficials, insecticidal soap |
| Red blotch / leaf scorch | Red streaks on leaves, stalks and bulb scales | Remove marked foliage, improve airflow, copper spray |
| Basal / bulb rot | Yellowing, collapse, soft brown basal plate | Improve drainage, avoid waterlogging, discard rotted bulbs |
| No flowers | Healthy leaves but few or no blooms | Full sun, divide clumps, give a dry rest then soak |
Common Pests & Management
- Slugs & Snails (Gastropoda):
- Symptoms: Ragged, irregular holes chewed in tender new leaves and, most damagingly, in the short-lived flowers; slimy silver trails on foliage and soil after damp nights.
- Prevention & Control: Cultural first: remove hiding places (boards, mulch heaped on crowns), water in the morning so the surface dries by dusk, and hand-pick after dark. Encircle prized clumps with a copper band or a ring of sharp grit/diatomaceous earth; set beer traps. Use iron-phosphate baits only if pressure is high.
- Narcissus & Lesser Bulb Flies (Merodon equestris / Eumerus spp.):
- Symptoms: Plants weaken, produce few or distorted leaves and fail to flower; lifted bulbs are soft, brown and hollowed inside where a fat maggot has tunnelled the basal plate.
- Prevention & Control: Prevention is everything: buy firm, blemish-free bulbs and discard any that feel spongy. Keep necks covered with soil or grit as foliage dies down so egg-laying flies cannot reach the neck; cultivate the surface to disrupt them. Destroy infested bulbs – do not compost.
- Aphids (Myzus persicae and others):
- Symptoms: Clusters of soft green or black insects on new leaf bases and flower stalks, sticky honeydew and sooty mould; distorted growth. Most serious as virus vectors that cause streaking and weak bulbs over time.
- Prevention & Control: Blast off with a firm water jet, encourage ladybirds and lacewings, and remove badly infested flower stems. Insecticidal soap or a light horticultural-oil spray if colonies persist; rogue out virus-symptomatic clumps.
- Bulb Mites & Mealybugs (Rhizoglyphus spp. / Pseudococcus spp.):
- Symptoms: White, cottony mealybug colonies in leaf axils and on stored bulbs; microscopic bulb mites accompany and worsen basal rot, leaving bulbs soft and crumbling.
- Prevention & Control: Inspect and cure bulbs in a dry, airy place before storage; discard soft ones. Improve drainage and avoid the warm, wet, damaged conditions mites exploit. Dab mealybugs with an alcohol-tipped swab or treat with horticultural oil.
Diseases & Fungal Issues
- Red Blotch / Leaf Scorch (Stagonospora curtisii (Peyronellaea curtisii)):
- Symptoms: Red-brown streaks and blotches on leaves, flower stalks and the outer bulb scales; stalks may bend or ‘scorch’ at the lesion. A signature disease of Amaryllidaceae bulbs.
- Treatment & Management: Sanitation-led: cut and destroy marked foliage, avoid overhead watering, and space clumps for airflow. Inspect bulbs at planting and discard heavily marked ones; a copper or broad-spectrum fungicide protects new growth in wet springs.
- Basal & Bulb Rot (Fusarium oxysporum / Sclerotium):
- Symptoms: Yellowing, collapsing foliage; the basal plate turns brown and mushy and roots die, often after waterlogging or storing damaged bulbs warm and damp.
- Treatment & Management: Plant in gritty, free-draining soil, never let bulbs sit in standing water, and handle gently to avoid wounds. Lift and destroy rotted bulbs; a dry cure before replanting reduces spread.
- Botrytis (Grey Mould) (Botrytis spp.):
- Symptoms: Fuzzy grey mould and water-soaked spotting on flowers and foliage during cool, humid, still weather; blooms rot quickly.
- Treatment & Management: Improve airflow, deadhead spent flowers promptly, and avoid wetting the foliage late in the day. Remove infected tissue; fungicide is rarely needed if hygiene is good.
Growing Difficulties & Abiotic Problems
- Bulb Rot from Overwatering / Poor Drainage:
- Cause & Symptoms: Heavy, wet soil or excessive irrigation during dormancy suffocates and rots the bulb – the commonest killer of rain lilies.
- Correction Strategy: Grow in sharply drained, gritty soil or raised beds; water to trigger the flush of bloom after their natural dry spell, then ease off. Let the soil dry between waterings.
- Failure to Flower:
- Cause & Symptoms: Overcrowded, congested clumps, too much shade, or year-round moisture that denies the dry rest that primes flowering.
- Correction Strategy: Give full sun to light shade, lift and divide congested clumps, and allow a distinct dry, warm rest before restarting water – the sudden soaking after dryness triggers the classic ‘rain lily’ flush.
- Frost / Cold Damage to Foliage:
- Cause & Symptoms: Tender evergreen or semi-evergreen foliage is blackened by hard frost, though established bulbs usually resprout.
- Correction Strategy: Mulch crowns in cold areas or grow in containers that can be moved under cover; tidy damaged leaves once the risk passes.
What Helps – Products & Tools
A light rain-lily kit covers most problems: iron-phosphate slug bait and copper barrier tape or diatomaceous earth for molluscs, insecticidal soap or horticultural oil for aphids and mealybugs, and a copper fungicide for red blotch in wet springs. Grit for improving drainage does more good than any spray.