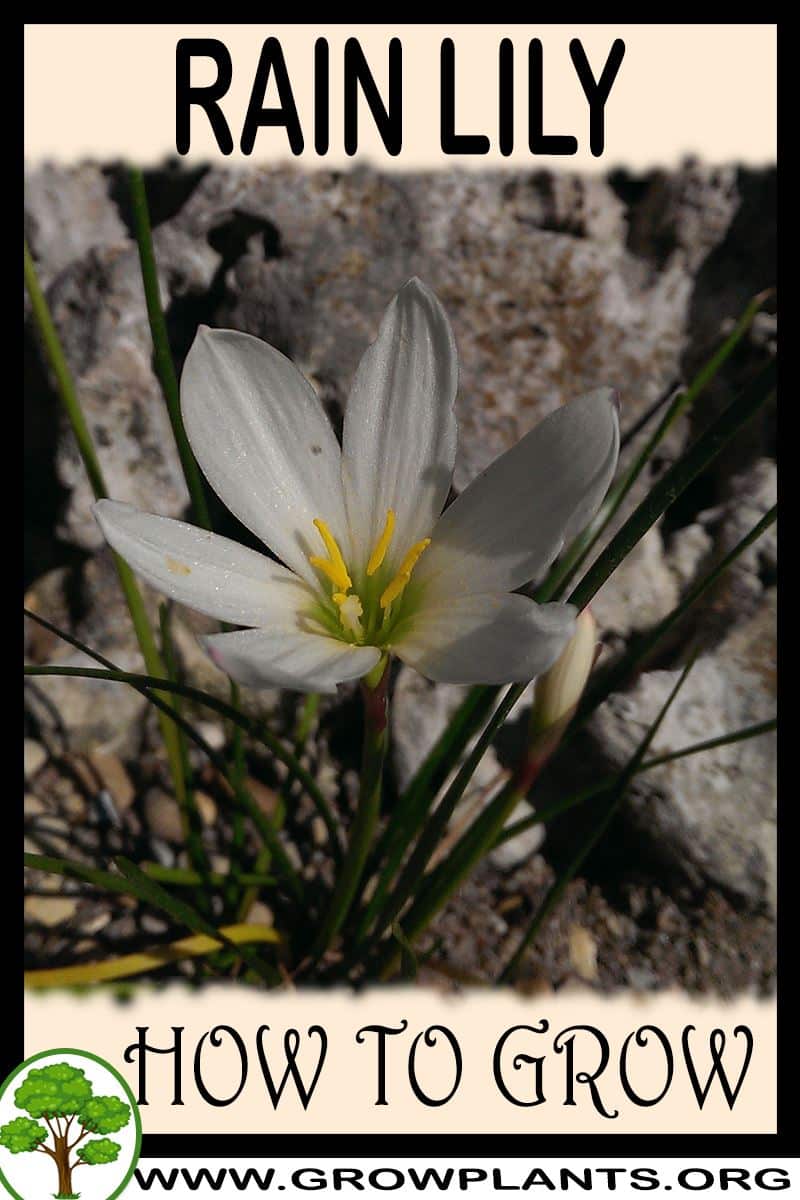
Plant Profile & Key Characteristics
Overview: Rain lily is a small deciduous bulbous perennial reaching only 10-25 cm (4-10 in) tall, with narrow grass-like leaves that appear alongside the flush of flowers triggered by the first rains. It is grown purely as an ornamental for its cheerful crocus-like blooms in beds, edging and containers.
Quick Specifications
| Specification | Attribute |
|---|---|
| Plant Type / Life Cycle | Perennial (bulbous geophyte) |
| Foliage Type | Deciduous |
| Mature Size | 10-25 cm tall (4-10 in) |
| Growth Rate | Moderate |
| Root System | Bulb (clumping geophyte) |
| Toxicity | Toxic if ingested (bulbs contain lycorine alkaloids) |
| Hardiness | USDA zones 7-10 (lift bulbs where colder) |
Growth Form & Structure
- Height & Spread: Reaches 10-25 cm (4-10 in) in the ground and spreads slowly into clumps; a single bulb grows well in about a 5 L (1 gallon) container.
- Growth Habit & Form: Low tufted clump of upright, grassy foliage rising from an underground bulb.
- Lifespan & Maturity: Long-lived perennial that multiplies by offset bulbs; mature bulbs flower the same season, while seed-raised plants take several years.
Anatomy & Physical Features
- Leaves & Foliage: Narrow, linear, grass-like green leaves that emerge in linked groups from the bulb.
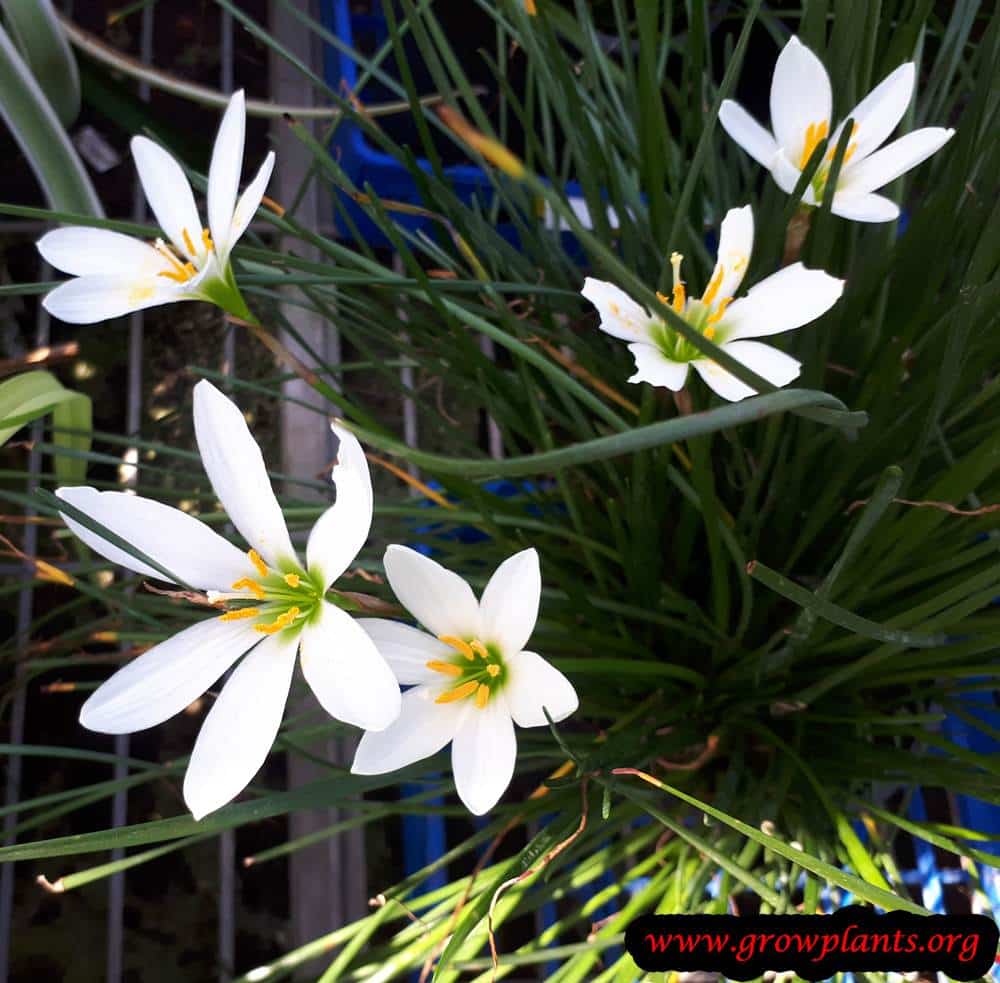
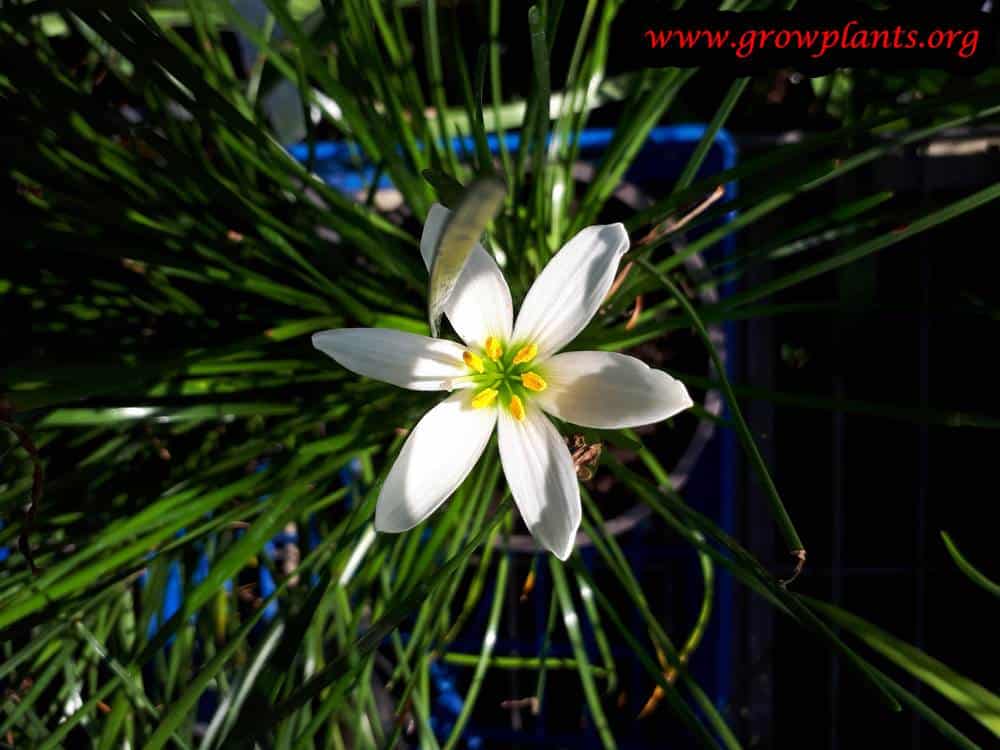
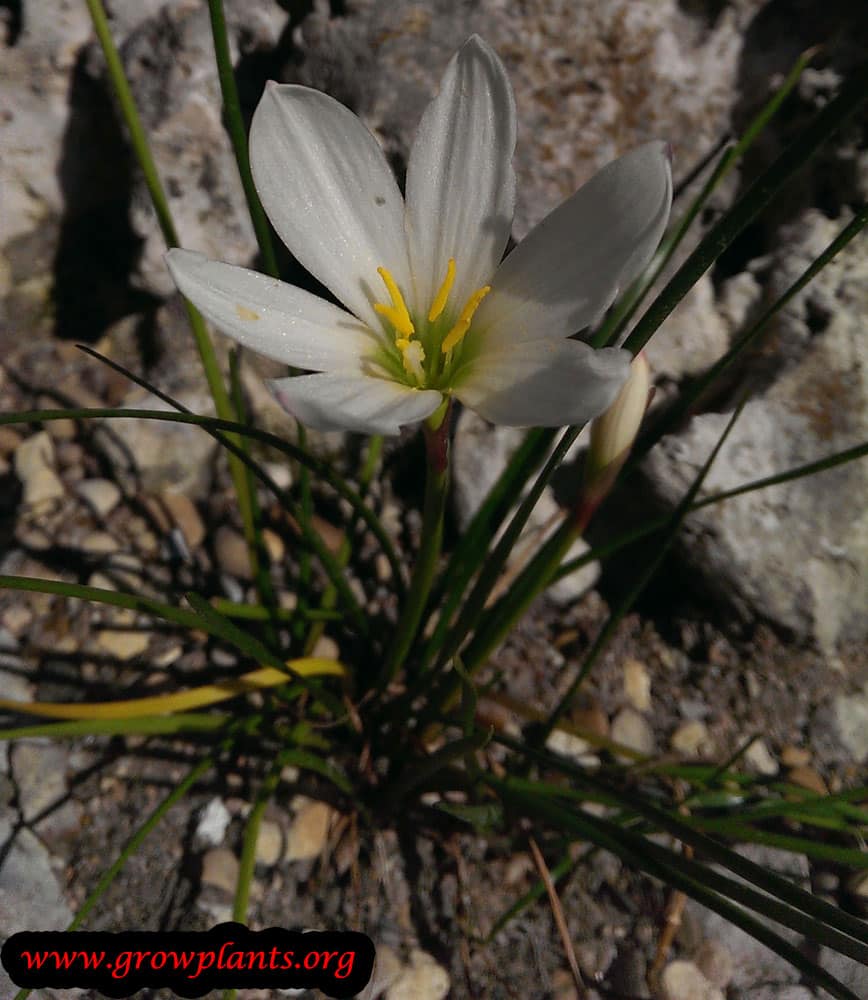
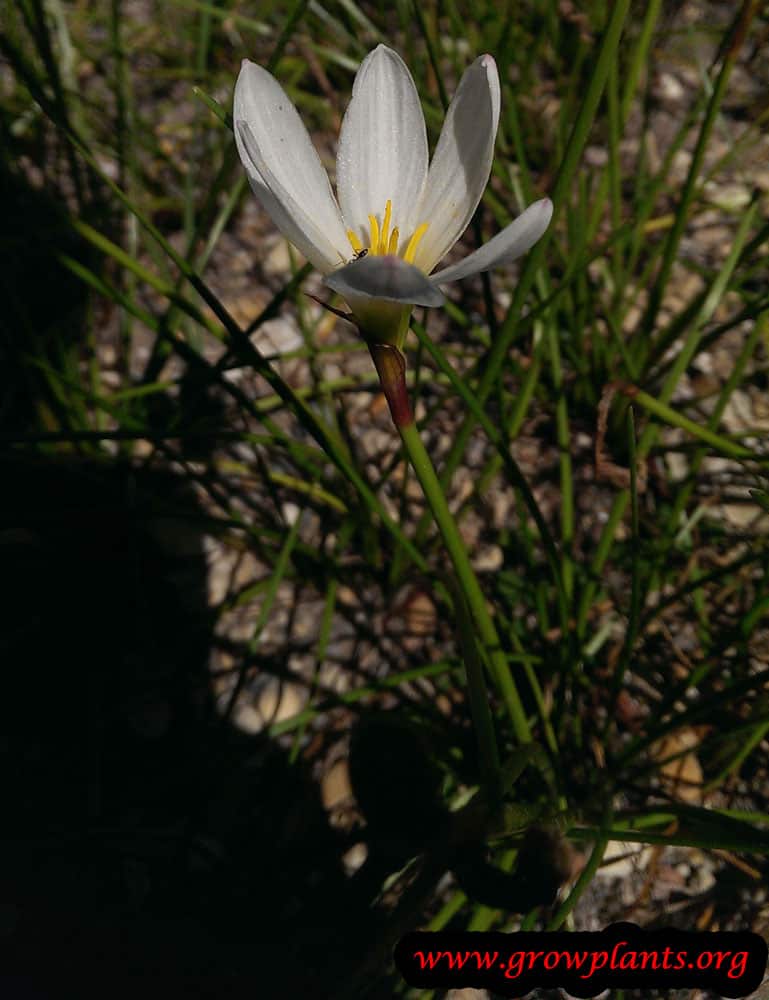
- Flower Characteristics: Solitary funnel-shaped flowers in white, yellow, pink or purple, with six petals and six yellow stamens, opening after rain.
Primary Uses & Landscape Value
- Functional & Ornamental Roles: Ornamental edging, rockeries, mass bulb plantings and containers; valued for its sudden rain-triggered bloom.
Care Guide: Planting, Soil & Watering
Overview: Rain lilies are small, easy bulbs that grow in well-draining soil enriched with organic matter and mulch, in full sun. They take moderate, steady watering and famously burst into bloom after rain.
Quick Care Requirements
| Requirement | Ideal Condition |
|---|---|
| Planting Season | Spring, summer or autumn during the warm season |
| Growth Rate | Moderate |
| Soil Type | Well-draining soil enriched with organic matter, topped with mulch |
| Water Need | Moderate — keep lightly moist in growth without waterlogging |
Planting & Establishment
- Best Planting Season: Plant bulbs in the warm season, from spring through autumn.
- How to Plant:
- Hole Preparation: Dig a hole a bit larger than the bulb and enrich it with organic material and rich soil before planting.
- Soil Amendments: Mix in compost or other organic matter and mulch the surface to hold moisture and feed the developing bulb.
- Planting Depth: Set small bulbs shallowly, roughly one to two times their own depth, with the neck near the surface.
- Growth Speed & Expectations: Growth is moderate; mature bulbs flower the same year, while seed-grown plants take several years to bloom.
Soil, Watering & Drainage Care
- Soil Mix & Drainage Needs: Provide well-draining soil; in containers allow about 5 L per bulb with a free-draining potting mix, and let the base drain rather than stand in water.
- Watering Schedule & Technique:
- Young / Newly Planted: Water in and keep lightly moist as growth begins.
- Established: Water moderately and regularly, keeping the soil just moist; a good soak often triggers a flush of flowers.
- Seasonal Adjustments: Water through the growing and flowering season and keep drier while the bulb is dormant.
Climate, Light & Hardiness
Rain lily (Zephyranthes) is a deciduous geophyte genus of Mediterranean, subtropical and temperate climates that needs full sun and well-drained, mulched soil; like other rain lilies, flowering is triggered by the first rains after a dry spell. Its USDA zone 7–10 range can be extended by lifting the bulbs and keeping them indoors.
Quick Climate Specifications
| Climate Zones | Mediterranean, Subtropical, Temperate |
|---|---|
| USDA Hardiness Zones | 7–10 (extendable if bulbs are lifted) |
| Frost Tolerance | Moderate |
| Light Conditions | Full Sun |
Sunlight & Light Exposure
Optimal Light Setup
Needs full sun - no shade tolerance is noted for this genus.
Direct Sun Requirement
Yes, essential for healthy growth and flowering.
Best Exposure / Orientation
An open, unshaded bed or border position.
Temperature Extremes & Hardiness
USDA Hardiness & Regional Limits
Reliably hardy outdoors in USDA zones 7–10; the site notes it can be grown outside that range if the bulbs are taken out of the ground and kept indoors when conditions turn unfavorable.
Cold Damage & Winter Protection
No special protection is generally needed within its zone range; outside it, lifting and indoor storage substitutes for in-ground winter hardiness.
Frost Sensitivity
Moderate frost tolerance, consistent with its zone-7 rating.
Wind, Humidity & Microclimate
Rainfall & Seasonal Moisture
True to its common name, flowering is directly cued by the first rains after dry weather; mulching helps maintain the moisture balance it needs between rain events.
Microclimate Recommendations
An open, sunny bed with a distinct seasonal rainfall pattern suits it best; where the local climate doesn't provide this, container culture with seasonal lifting is a practical alternative.
Growing in Pots, Balconies & Indoors
Rain lily is a small, full-sun bulb the grower does not consider a houseplant, but it grows very well in containers – he even gives a planting density (about one bulb per 5 L). It shines on a sunny patio or balcony, with a bright windowsill the only workable indoor spot.
Quick Details
- Container Size: About 5 L (1 gal) per bulb, well-drained
- Indoor Suitability: Not a houseplant; a very sunny sill only
- Best Spot: Full sun
- Soil & Drainage: Well-drained potting mix
- Watering in Pots: Average; keep the mix moist but never sodden, and let it dry in dormancy
Indoors & On the Windowsill
- Houseplant limits: The grower marks rain lily as not suited to indoor life – it needs full sun.
- Windowsill growing: A bright, direct-sun sill can carry a small pot, particularly during its flowering flushes.
- Overwintering: A pot makes it easy to shelter tender bulbs somewhere frost-free for their rest.
On a Balcony or Patio
- Light & exposure: The sunniest spot is best; flowers often appear in flushes after rain or watering.
- Practicalities: Reflected heat dries pots quickly – check moisture, but avoid keeping the mix wet.
Choosing the Pot, Soil & Long-Term Care
- Pot & drainage: About 5 L (1 gal) per bulb, well-drained – use a container with strong drainage holes; skip a standing-water saucer to avoid root rot.
- Pot material: Terracotta breathes and dries fast (good where you tend to overwater); glazed or plastic pots hold moisture longer.
- Potting mix: a light, aerated potting mix – peat or coir blended with perlite or vermiculite, plus some organic matter/compost.
- Feeding: Potted plants exhaust their feed faster because water washes nutrients out, so feed a little more often than plants in open ground during active growth.
- Repotting: Refresh the top of the mix each growing season and pot up or divide roughly every couple of years, trimming crowded roots.
- Grower’s soil care: Every few years check the mix is still good – if not, wash off the old soil and repot in fresh.
- Keep it flowering: If the roots fill the whole container, blooming drops off – divide out some bulbs or move up to a larger pot.
Fertilizing & Feeding
A light feeder: minimal feeding while newly planted bulbs establish, then an occasional light balanced feeding through active growth and bloom, with feeding withheld while the bulb is dormant.
Quick Fertilizing Specs
| Feeding Level | Light feeder |
|---|---|
| Main Nutrient Priority | Balanced feeding to support establishment and repeat flowering |
| Best Feeding Period | During active growth after the plant is established, following rain-triggered bloom |
| Organic Options | Compost or organic matter worked into the soil at planting |
| Reduce/Stop Feeding | Feeding eases off once leaves die back and the bulb rests |
| Micronutrients | Usually met by organic matter and a complete fertilizer |
| Soil pH | Near neutral, well-drained |
Feeding by Growth Stage
First-year establishment
Let newly planted bulbs settle in and build a root system before pushing supplemental feeding.
| Nutrient direction | Minimal feeding is usually enough while a newly planted bulb establishes; organic matter worked into the soil supports root growth. |
|---|---|
| Timing | In the first season after planting, while the bulb is establishing. |
| Frequency | Feeding is rarely needed this first season beyond organic matter at planting. |
| Fertilizer types | Compost or organic matter worked into the soil at planting, A diluted balanced fertilizer only if growth is weak |
| Precautions | Avoid feeding a newly planted bulb heavily; let it establish before adding fertilizer. |
Established active growth and bloom
Support leaf growth and rain-triggered flowering once the plant is established.
| Nutrient direction | A light, balanced feeding during active growth supports flowering without pushing soft, weak growth. |
|---|---|
| Timing | During the active growing season, once the bulb is established, especially around rain-triggered bloom. |
| Frequency | An occasional light feeding through the active season is enough for an established bulb. |
| Fertilizer types | A balanced, diluted complete fertilizer, Compost or organic matter renewed as a top-dressing |
| Precautions | Keep feeding light; established rain lilies can naturalize and spread readily without heavy feeding. |
Dormant rest between flushes
Let the bulb rest when leaves die back between growth flushes.
| Nutrient direction | None – withhold fertilizer while the bulb is dormant. |
|---|---|
| Timing | Between rain-triggered growth flushes, when leaves die back. |
| Frequency | No feeding during this rest. |
| Fertilizer types | No feeding at this stage; do not fertilize a resting bulb. |
| Precautions | Do not fertilize while dormant; resume only as new growth appears. |
Nutrient Deficiency Signs & Corrections
Leaves are pale and flowering flushes are weak or sparse.
| Possible causes | low soil nitrogen availability, thin, low-organic-matter soil, competition from naturalized nearby plants |
|---|---|
| Appears first on | newest leaves |
| What to check | soil organic matter, recent feeding history, crowding from naturalized bulbs |
| Possible correction | Work compost or a diluted balanced fertilizer into the soil as active growth resumes. |
New leaves show interveinal yellowing while veins remain green.
| Possible causes | high soil pH limiting iron availability, waterlogged soil reducing root function, compacted or poorly drained soil |
|---|---|
| Appears first on | newest emerging leaves |
| What to check | soil pH and drainage, planting site conditions, root health |
| Possible correction | Improve drainage and soil conditions; apply a chelated iron product per its label if chlorosis persists. |
Leaf tips brown or bulbs fail to sprout despite adequate watering.
| Possible causes | fertilizer salt buildup from overfeeding, poor drainage in containers or heavy soil, fungal rot in wet, resting bulbs |
|---|---|
| Appears first on | leaf tips and the bulb base |
| What to check | recent fertilizer amounts, container or soil drainage, bulb firmness when dormant |
| Possible correction | Reduce feeding, improve drainage, and refresh potting soil periodically for container-grown bulbs. |
Pruning, Training & Seasonal Maintenance
Rain lily is a deciduous geophyte whose pruning is entirely about foliage, not flowers – the source states deadheading is not needed. Leaves are mostly left alone through the growing season, with the source permitting occasional spot-removal of individual dead leaves mid-season, and the full leaf set is only cut back once entirely dry, in summer per the source.
Quick Pruning & Maintenance Specs
| Pruning Tolerance | Low |
| Primary Pruning Window | Summer, full clump, once all leaves are dry |
| Secondary Maintenance Window | Mid-season, spot-removal of individual dead leaves only |
| Typical Frequency | Occasional light spot-checks plus one full annual cutback |
| Main Objective | Keep dead leaf litter down without touching green leaves; deadheading is not required |
| Young Plant Priority | Let a newly planted bulb establish before any cutting, per the source’s care note |
| Mature Plant Priority | Spot-remove dead leaves as they appear; full cutback in summer |
| Best Tool Type | Precision snips |
| Avoid Heavy Pruning During | While leaves are green and actively growing |
Pruning by Plant Age & Size
Newly Established
No cutting – the source specifically advises letting the plant establish first.
Young / Formative
No structural training applies to a bulb.
Mature / Established
Remove individual dead leaves as spotted through the season; cut back the full dry leaf set in summer.
Seasonal Pruning Schedule
Ongoing Sanitary (through the growing season)
Objective: tidiness. What to remove: only individual leaves that are fully dead. What not to remove: any leaf still green, and flowers – the source says deadheading is not needed for this species.
Summer (dormancy prep)
Objective: prepare the bulb for rest. What to remove: the entire dry leaf set, per the source’s summer pruning season. What not to remove: green leaves. Expected response: clean dormancy.
Special Growth to Remove
- Individual dead leaves, spot-removed any time through the season.
- The full dry leaf set in summer.
The source notes this species can naturalize in favorable areas; thin unwanted self-sown seedlings if spread beyond the intended bed becomes a problem, as a tidiness task rather than a required cut.
Container & Small-Space Pruning
The source gives specific container guidance for this species: roughly one bulb per 5L (1 gallon) pot in well-drained, potting-mix-type soil. Because flowering can decline once the root system fills the container after several years, check periodically for a root-bound clump and either divide/thin the bulbs or move up to a larger pot – the one place a root intervention, not a leaf cut, matters for this plant.
Tools
- precision_snips – for all routine leaf work.
- garden_spade – only if dividing an overgrown, root-bound container clump.
Tool Hygiene & Disease Risk
Routine – clean, sharp snips are enough; the source’s pest note (slugs, snails) is not tool-transmitted.
Cut Placement & Technique
Cut individual dead leaves at the base as spotted; cut back the full dry leaf set at the base in summer.
Heavy Pruning & Rejuvenation
Not applicable in the pruning sense – there is no woody growth. Renewal comes from dividing an overcrowded, root-bound container clump, not from cutting back hard.
Post-Pruning Care
The source recommends fertilizing once a year as general care, not as a response to cutting; after any leaf removal, keep watering at the plant’s normal average level and let it taper naturally as the plant heads into its own dieback.
Common Pruning Mistakes
- Pulling green leaves for tidiness instead of waiting for them to dry, which weakens the bulb.
- Leaving a container unchecked for years so the bulbs become root-bound and stop flowering well.
When NOT to Prune
Avoid cutting green, actively growing leaves; there is no need to deadhead spent blooms at all per the source.
Recommended Tools (by task)
- precision_snips – routine leaf work, both spot-removal and the summer cutback.
- garden_spade – only for dividing a root-bound container clump.
Propagation Guide
Rain lily is most easily and quickly propagated by separating the offset bulbs it forms, since the site’s own data notes bulb-grown plants often flower the same year while seed-grown plants take considerably longer to reach flowering size; seed remains a viable, true-to-type option when more plants are wanted. Propagation is easy.
Quick Propagation Specs
| Best Propagation Method | Bulb offset division |
| Alternative Methods | Seed |
| Propagation Difficulty | Easy |
| Seed True-to-Type | Yes (species) |
| Vegetative True-to-Type | Yes |
| Best Propagation Season | Sow seed spring through summer in hardiness zone 8–11 (possible year-round in zone 12+); bulbs can be divided whenever clumps are repotted |
| Seed Germination Time | 2–8 weeks |
| Seed Sowing Depth | 0.5–1 cm (0.25–0.5 in) |
Growing from Seed
Seed Handling & Viability
Store seed in a dry, dark place until sowing.
Dormancy & Pre-Sowing Treatment
Refrigerate the seed before sowing, giving it enough cold hours at a minimum of about 6°C (43°F).
Sowing Season
Spring to summer in hardiness zone 8–11; sowing is possible year-round in hardiness zone 12 and warmer.
Sowing Depth & Orientation
Sow at 0.5–1 cm (0.25–0.5 in) deep, ideally into vermiculite, and keep it consistently moist. Where sowing in rows or trays, the site’s own spacing guidance is about 20 x 30 cm (8 x 12 in).
Germination Conditions
A sunny location with good drainage, moist soil with light humidity, and an average amount of water – keep the medium moist but not waterlogged, and don’t let it dry out.
Germination Time
2–8 weeks.
Seedling Care
Grow seedlings in full sun with regular watering, keeping the soil moist; let new plants establish before adding fertilizer.
Rhizomes, Tubers, Bulbs & Corms
Bulb Offset Division
Rain lily naturally produces offset bulbs around the base of the mother bulb. Divide and replant these when a clump is repotted or has become congested – the site’s own container-growing guidance notes that once the root system fills the pot, the number of bulbs should be thinned or moved to a larger container. Bulb-grown divisions typically flower the same year, unlike plants raised from seed.
Bloom & Flower Guide
Quick Details
- Bloom Season: Autumn (some species in spring)
- Time to First Bloom: Bulbs flower in their first season, flushing after rain
- Flower Appearance: Crocus- to lily-like flowers in white, yellow, pink or purple, with six petals and six yellow stamens
- Edibility: Not edible – rain lilies contain toxic alkaloids
Detailed Blooming Overview
Rain lilies flower on cue after rain, the blooms opening first with the leaves following close behind. Given a dry spell and then a good soaking, a clump will send up flush after flush of upward-facing flowers through its season.
Flower Characteristics
- Six petals in white, yellow, pink or purple, with six yellow stamens.
- Short-lived individually but produced generously after rain.
Bloom Care & Thinning
- Thinning: None needed – simply deadhead spent flowers if you like.
- Encouraging bloom: A dry rest followed by watering or rain triggers new flushes.
- Pollination: Bees and butterflies visit the flowers.
- Safety: Contains toxic alkaloids (lycorine) – not for eating.
Pests, Diseases & Troubleshooting
Overview: Rain lilies (Zephyranthes) are tough, bulbous perennials whose main enemies are moisture-related – bulb rots and bulb-fly maggots below ground, and slugs, snails and aphids on the tender leaves and short-lived flowers above. Manage them culturally first: sharp drainage, a genuine dry rest to prime flowering, and vigilant slug patrol around bloom time.
Quick Troubleshooting Overview
| Issue / Pest | Main Symptom | Primary Solution |
|---|---|---|
| Slugs / snails | Ragged holes in leaves and flowers, slime trails | Night hand-picking, copper/grit barriers, iron-phosphate bait |
| Bulb fly maggots | Weak, non-flowering plants; hollow, soft bulbs | Buy firm bulbs, keep necks covered, destroy infested bulbs |
| Aphids | Sticky new growth, distortion, virus streaking | Water jet, beneficials, insecticidal soap |
| Red blotch / leaf scorch | Red streaks on leaves, stalks and bulb scales | Remove marked foliage, improve airflow, copper spray |
| Basal / bulb rot | Yellowing, collapse, soft brown basal plate | Improve drainage, avoid waterlogging, discard rotted bulbs |
| No flowers | Healthy leaves but few or no blooms | Full sun, divide clumps, give a dry rest then soak |
Common Pests & Management
- Slugs & Snails (Gastropoda):
- Symptoms: Ragged, irregular holes chewed in tender new leaves and, most damagingly, in the short-lived flowers; slimy silver trails on foliage and soil after damp nights.
- Prevention & Control: Cultural first: remove hiding places (boards, mulch heaped on crowns), water in the morning so the surface dries by dusk, and hand-pick after dark. Encircle prized clumps with a copper band or a ring of sharp grit/diatomaceous earth; set beer traps. Use iron-phosphate baits only if pressure is high.
- Narcissus & Lesser Bulb Flies (Merodon equestris / Eumerus spp.):
- Symptoms: Plants weaken, produce few or distorted leaves and fail to flower; lifted bulbs are soft, brown and hollowed inside where a fat maggot has tunnelled the basal plate.
- Prevention & Control: Prevention is everything: buy firm, blemish-free bulbs and discard any that feel spongy. Keep necks covered with soil or grit as foliage dies down so egg-laying flies cannot reach the neck; cultivate the surface to disrupt them. Destroy infested bulbs – do not compost.
- Aphids (Myzus persicae and others):
- Symptoms: Clusters of soft green or black insects on new leaf bases and flower stalks, sticky honeydew and sooty mould; distorted growth. Most serious as virus vectors that cause streaking and weak bulbs over time.
- Prevention & Control: Blast off with a firm water jet, encourage ladybirds and lacewings, and remove badly infested flower stems. Insecticidal soap or a light horticultural-oil spray if colonies persist; rogue out virus-symptomatic clumps.
- Bulb Mites & Mealybugs (Rhizoglyphus spp. / Pseudococcus spp.):
- Symptoms: White, cottony mealybug colonies in leaf axils and on stored bulbs; microscopic bulb mites accompany and worsen basal rot, leaving bulbs soft and crumbling.
- Prevention & Control: Inspect and cure bulbs in a dry, airy place before storage; discard soft ones. Improve drainage and avoid the warm, wet, damaged conditions mites exploit. Dab mealybugs with an alcohol-tipped swab or treat with horticultural oil.
Diseases & Fungal Issues
- Red Blotch / Leaf Scorch (Stagonospora curtisii (Peyronellaea curtisii)):
- Symptoms: Red-brown streaks and blotches on leaves, flower stalks and the outer bulb scales; stalks may bend or ‘scorch’ at the lesion. A signature disease of Amaryllidaceae bulbs.
- Treatment & Management: Sanitation-led: cut and destroy marked foliage, avoid overhead watering, and space clumps for airflow. Inspect bulbs at planting and discard heavily marked ones; a copper or broad-spectrum fungicide protects new growth in wet springs.
- Basal & Bulb Rot (Fusarium oxysporum / Sclerotium):
- Symptoms: Yellowing, collapsing foliage; the basal plate turns brown and mushy and roots die, often after waterlogging or storing damaged bulbs warm and damp.
- Treatment & Management: Plant in gritty, free-draining soil, never let bulbs sit in standing water, and handle gently to avoid wounds. Lift and destroy rotted bulbs; a dry cure before replanting reduces spread.
- Botrytis (Grey Mould) (Botrytis spp.):
- Symptoms: Fuzzy grey mould and water-soaked spotting on flowers and foliage during cool, humid, still weather; blooms rot quickly.
- Treatment & Management: Improve airflow, deadhead spent flowers promptly, and avoid wetting the foliage late in the day. Remove infected tissue; fungicide is rarely needed if hygiene is good.
Growing Difficulties & Abiotic Problems
- Bulb Rot from Overwatering / Poor Drainage:
- Cause & Symptoms: Heavy, wet soil or excessive irrigation during dormancy suffocates and rots the bulb – the commonest killer of rain lilies.
- Correction Strategy: Grow in sharply drained, gritty soil or raised beds; water to trigger the flush of bloom after their natural dry spell, then ease off. Let the soil dry between waterings.
- Failure to Flower:
- Cause & Symptoms: Overcrowded, congested clumps, too much shade, or year-round moisture that denies the dry rest that primes flowering.
- Correction Strategy: Give full sun to light shade, lift and divide congested clumps, and allow a distinct dry, warm rest before restarting water – the sudden soaking after dryness triggers the classic ‘rain lily’ flush.
- Frost / Cold Damage to Foliage:
- Cause & Symptoms: Tender evergreen or semi-evergreen foliage is blackened by hard frost, though established bulbs usually resprout.
- Correction Strategy: Mulch crowns in cold areas or grow in containers that can be moved under cover; tidy damaged leaves once the risk passes.
What Helps – Products & Tools
A light rain-lily kit covers most problems: iron-phosphate slug bait and copper barrier tape or diatomaceous earth for molluscs, insecticidal soap or horticultural oil for aphids and mealybugs, and a copper fungicide for red blotch in wet springs. Grit for improving drainage does more good than any spray.
Frequently Asked Questions
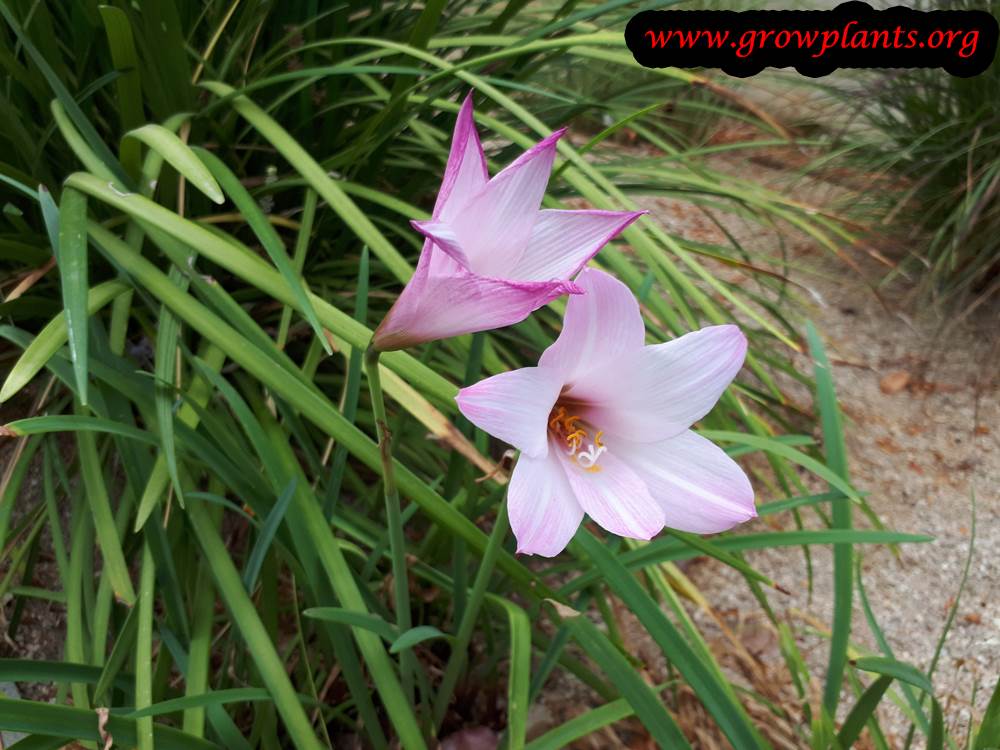
Do rain lilies have pink flowers?
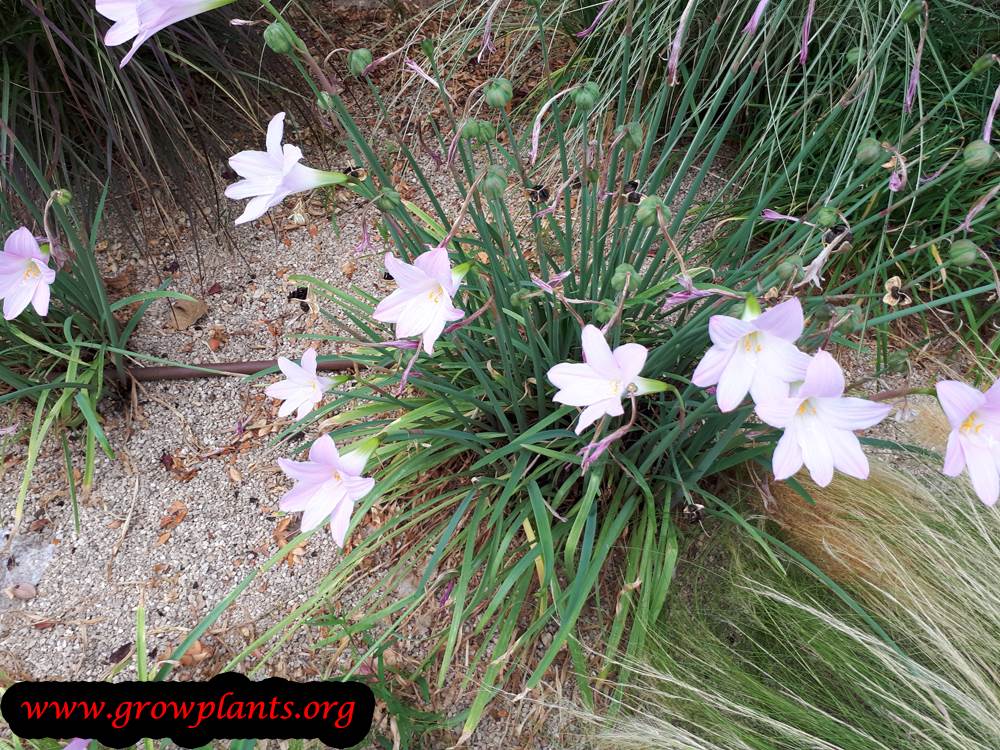
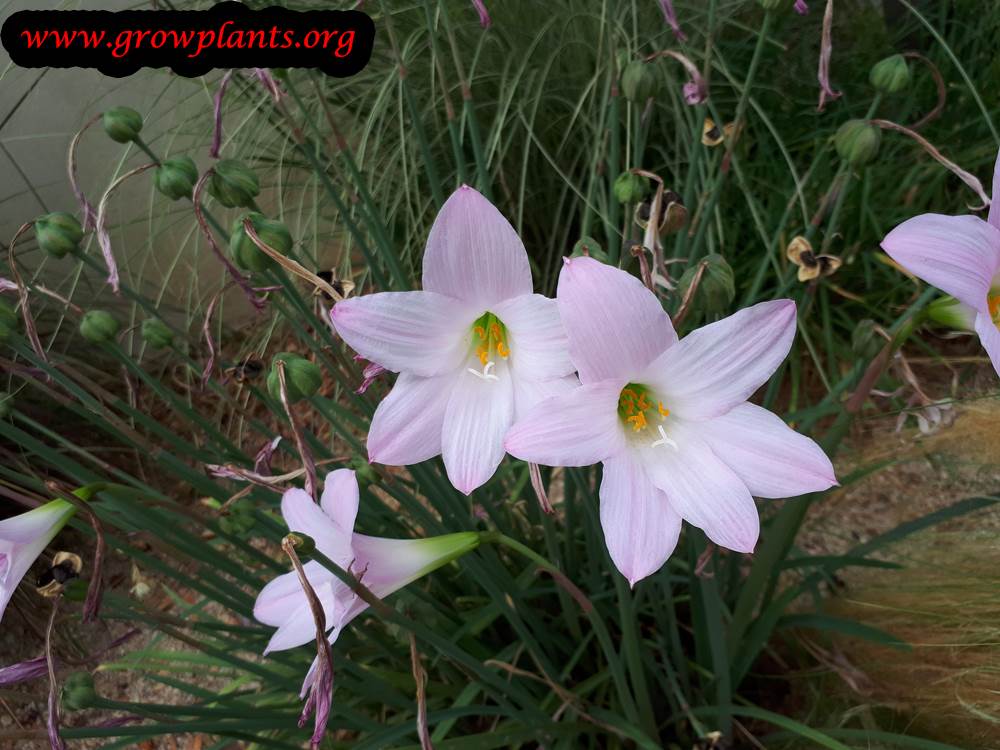
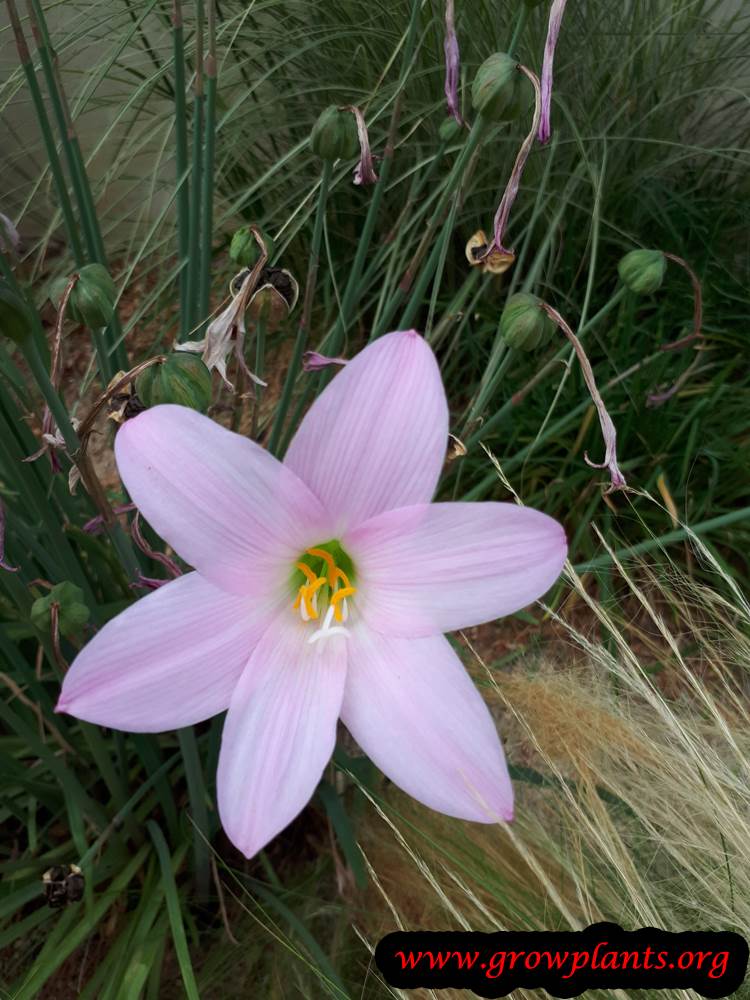
Yes, rain lily flowers come in white, yellow, pink or purple, each with six petals and six yellow stamens, opening in flushes after rain.
Why won’t my rain lily bloom, and how can I encourage more flowers?
Rain lilies won’t flower well if the clump has become overcrowded, if it’s getting too much shade, or if it never gets a dry rest between waterings. Give it full sun to light shade, divide congested clumps, and allow a distinct dry, warm rest before restarting water – the sudden soak after dryness triggers a fresh flush of flowers.
Are rain lily bulbs poisonous?
Yes – rain lily bulbs are toxic if ingested because they contain lycorine alkaloids, so the plant is not edible and should be kept away from anyone who might chew on the bulbs.
Do rain lilies need to be deadheaded?
No – deadheading is not needed for rain lilies. You can leave spent flowers alone or remove them if you like the tidier look, but it isn’t required for the plant’s health or reblooming.
What size container do rain lilies need?
A single rain lily bulb grows well in a container of about 5 L (1 gallon) with a well-drained, free-draining potting mix. Use a pot with strong drainage holes and skip a standing-water saucer, since the bulb needs to dry out between waterings rather than sit wet.