Plant Profile & Key Characteristics
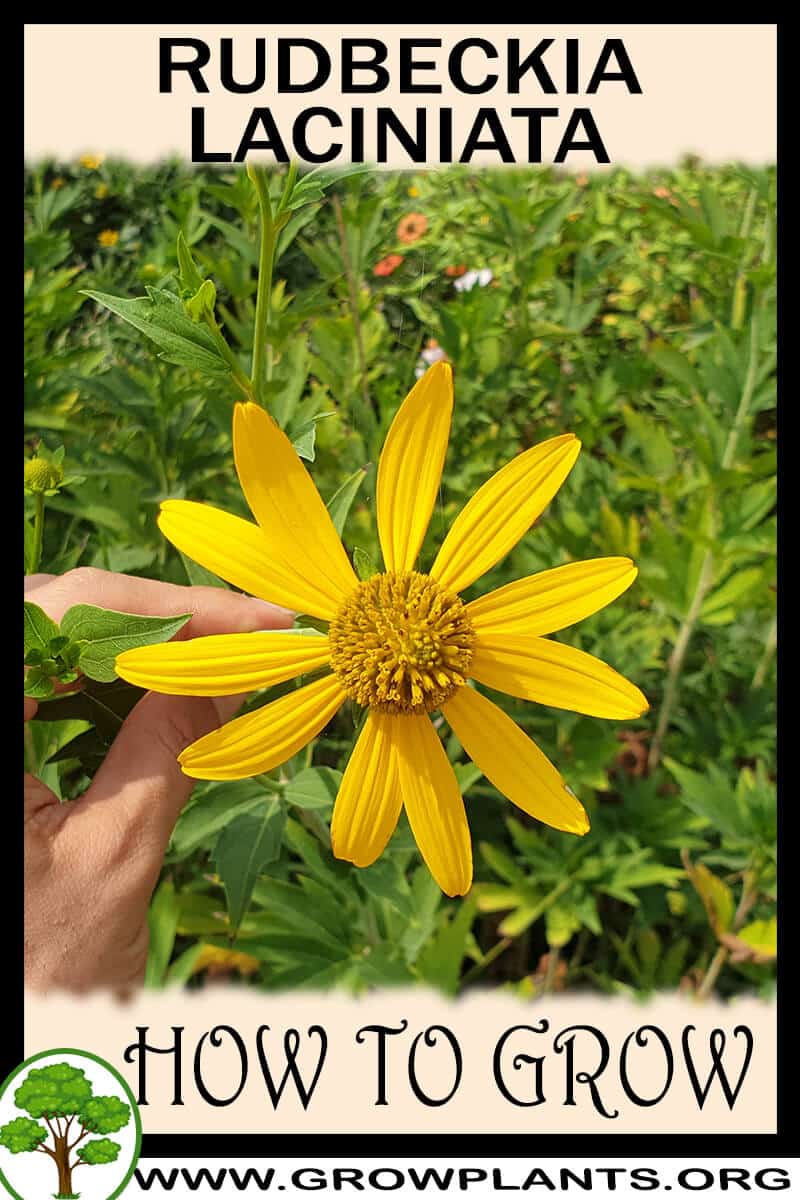
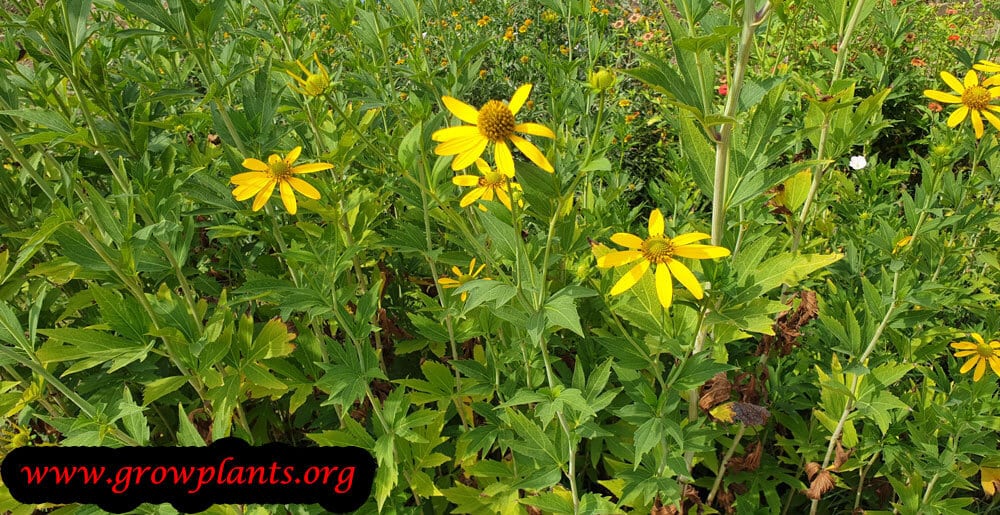
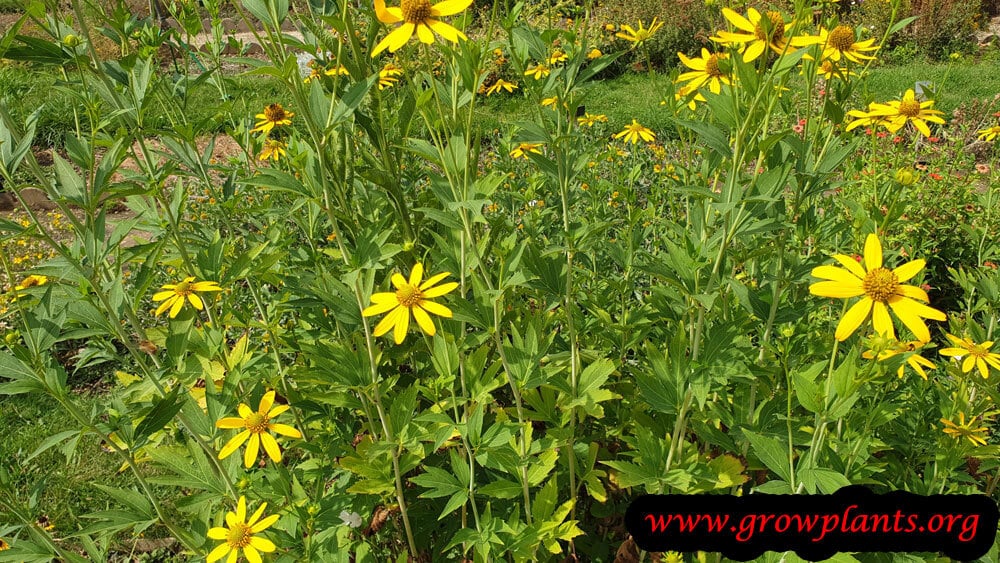
Overview: The cutleaf coneflower, a tall herbaceous perennial (or annual) 30-100 cm (12-40 in) and more, grown for its yellow green-centred daisies. It is a vigorous pollinator plant and cut flower.
Quick Specifications
| Specification | Attribute |
|---|---|
| Plant Type / Life Cycle | Herbaceous perennial or annual |
| Foliage Type | Deciduous (evergreen basal rosette in mild areas) |
| Mature Size | 30-100 cm (12-40 in) tall, often taller in rich soil |
| Growth Rate | Moderate to fast |
| Root System | Rhizomatous, spreading |
| Toxicity | Non-toxic |
| Hardiness | USDA zones 3-9 (to 11 with autumn planting) |
Growth Form & Structure
- Height & Spread: Upright clumps 30-100 cm (12-40 in) that spread by rhizomes into colonies; grows well in a 5-15 L container refreshed every couple of years.
- Growth Habit & Form: Clump- to colony-forming herbaceous plant with tall, branching flower stems; can be aggressive.
- Lifespan & Maturity: Flowers in its first or second season and returns for years from spreading rhizomes.
Anatomy & Physical Features
- Leaves & Foliage: Green, deeply cut and lobed leaves, roughly hairy.
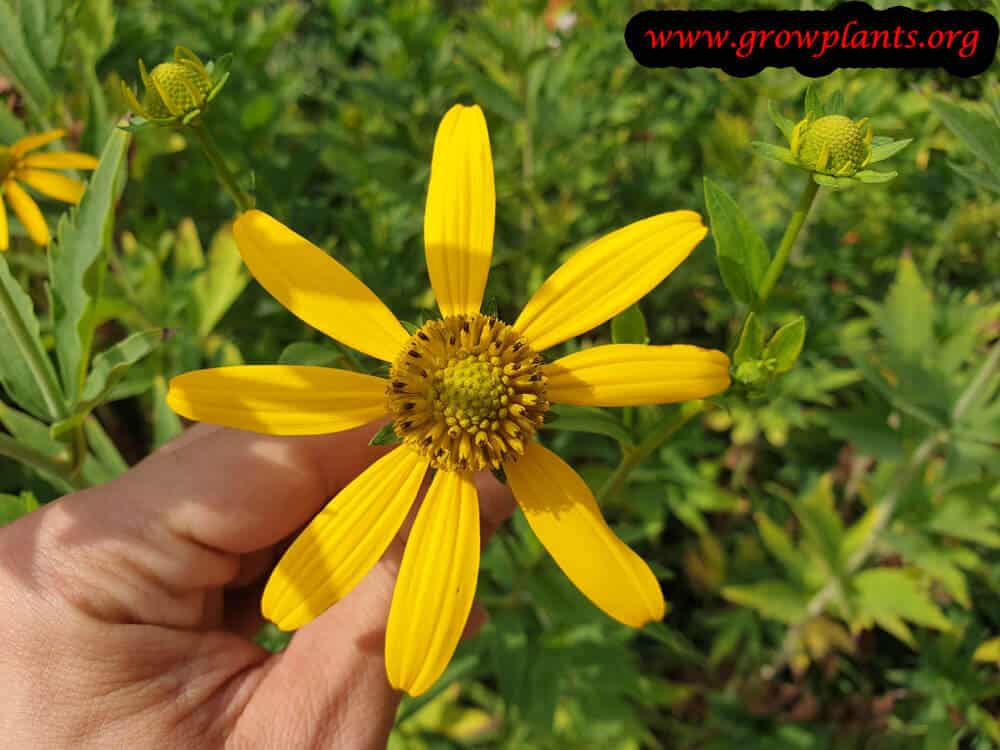
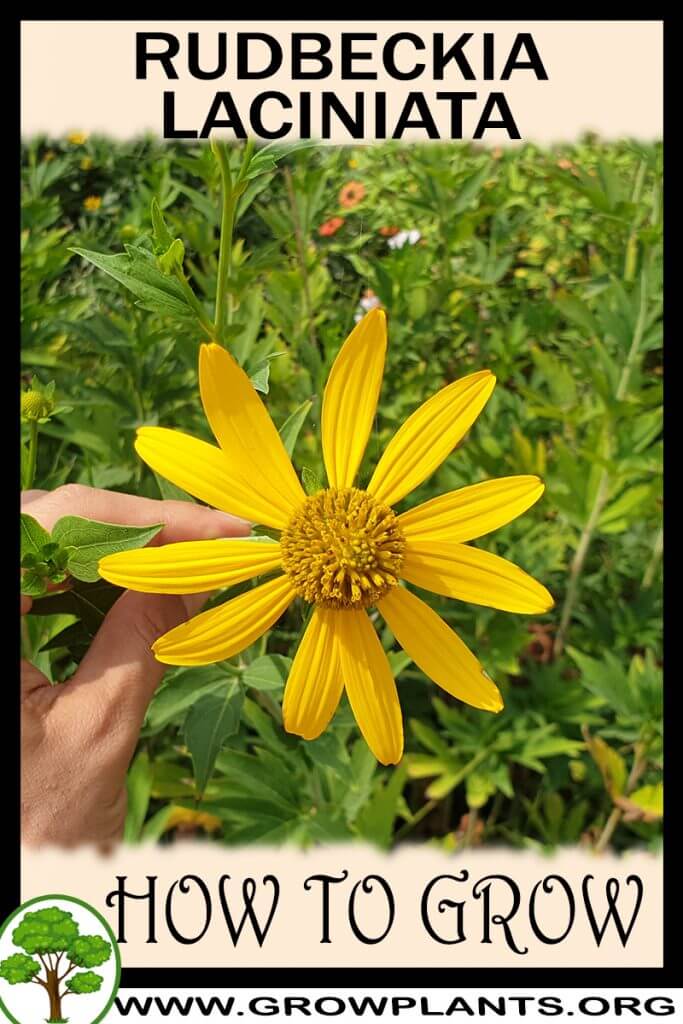
- Flower Characteristics: Daisy flowers with yellow rays around a green-to-yellow central cone.
Primary Uses & Landscape Value
- Functional & Ornamental Roles: Back-of-border and naturalistic ornamental that attracts pollinators, a good cut flower, and used medicinally.
Care Guide: Planting, Soil & Watering
Overview: Rudbeckia laciniata (Rudbeckia laciniata), the cutleaf coneflower, is an easy, sun-loving daisy grown as a perennial or annual for its bright, pollinator-friendly blooms. It performs best in full sun in rich, well-draining soil with steady moisture, and tolerates a range of conditions once established.
Quick Care Requirements
| Requirement | Ideal Condition |
|---|---|
| Planting Season | Warm season – spring after the last frost through summer; autumn to spring in frost-free zones |
| Growth Rate | Moderate to Fast |
| Soil Type | Rich, well-draining; mulched while young |
| Water Need | Moderate to high; keep the soil evenly moist |
Planting & Establishment
- Best Planting Season: Set plants out in spring once the frost has passed and through summer in cooler zones; in warm, frost-free zones plant from autumn through spring. Grown in zones 3-9 for spring planting and 9-11 for autumn planting.
- How to Plant:
- Hole Preparation: Dig a hole a little wider than the root ball and loosen the surrounding soil so the roots can spread.
- Soil Amendments: Enrich the backfill with compost and organic matter, and lay a light mulch over the root zone to hold moisture while the young plant establishes.
- Planting Depth: Set the plant at the depth it grew in its pot, keeping the crown level with the soil surface.
- Growth Speed & Expectations: A moderate to fast grower reaching about 30-100 cm; it fills out quickly in rich soil and flowers freely in its first or second season, and can spread vigorously.
Soil, Watering & Drainage Care
- Soil Mix & Drainage Needs: Give it rich, well-ventilated soil with good drainage so the roots never sit wet. In containers use a potting mix or peat soil with perlite or vermiculite in a 5-15 litre pot, and let excess water drain freely.
- Watering Schedule & Technique:
- Young / Newly Planted: Keep the soil evenly moist while seedlings and new plants establish, watering often enough that they never dry out.
- Established: Once established the plants are fairly tough but flower best with regular deep watering that keeps the soil moist but not soggy.
- Seasonal Adjustments: Water more generously through summer heat and blooming, and reduce watering in cool weather and over the dormant winter period.
Climate, Light & Hardiness
Cutleaf coneflower is a cold-hardy herbaceous perennial across temperate climates, wanting full sun to half shade, and in its hottest subtropical range it is instead grown as an autumn-planted cool-season planting rather than a summer-long perennial.
Quick Climate Specifications
| Climate Zones | Temperate, Mediterranean, Subtropical |
|---|---|
| USDA Hardiness Zones | 3–9 (perennial, spring planting); grown as an autumn-planted annual in zones 9–11 |
| Frost Tolerance | High (root system) / Low (top growth in season) |
| Light Conditions | Full Sun / Half Shade |
Sunlight & Light Exposure
Optimal Light Setup
Full sun supports the strongest flowering; half shade is tolerated with somewhat reduced bloom.
Direct Sun Requirement
Full sun is the clear preference for best performance and flower production.
Shade & Heat Management
In its hot subtropical range, site data shows it is planted in autumn rather than spring, effectively growing it through the cooler months to avoid the stress of a full hot summer.
Temperature Extremes & Hardiness
USDA Hardiness & Regional Limits
Naturally hardy from zone 3 through zone 9 as a returning perennial. In hotter zones 9–11 it is instead planted in autumn and grown through the cooler months, since it doesn't handle that region's summer heat the way it does in temperate climates - a difference in cultivation timing, not a contradiction of its underlying cold hardiness.
Cold Damage & Winter Protection
As a herbaceous perennial hardy to zone 3, top growth dies back naturally each autumn and winter, with the plant regrowing from its roots in spring; this dieback is a normal part of its life cycle rather than cold damage.
Frost Sensitivity
Foliage and flowers are killed by frost each autumn as part of normal seasonal dormancy, while the root system itself is very cold hardy.
Extreme Heat Tolerance
In the hottest parts of its subtropical range it is better suited to autumn-through-spring growth than to enduring a full hot summer, hence the shift to autumn planting there.
Wind, Humidity & Microclimate
Microclimate Recommendations
In warm-winter zones 9–11, autumn planting takes advantage of the cooler growing season; in cold-winter zones 3–9, no special winter protection is generally needed, though mulching over the crown can help in especially exposed sites.
Growing in Pots, Balconies & Indoors
Rudbeckia laciniata is a tall, sun-loving perennial coneflower that grows well in a container but is not a houseplant – it needs full sun and open air. In a free-draining pot it flowers freely on a patio or balcony.
Quick Details
- Container Size: 5-15 L (1.5-4 gal), depending on the cultivar (grower’s value)
- Indoor Suitability: Not a houseplant – it needs full sun; a very bright spot at most
- Best Spot: Full sun to half shade, outdoors
- Soil & Drainage: Well-ventilated, free-draining mix rich in organic matter (grower’s spec)
- Watering in Pots: Average to generous water – keep the mix moist so water runs from the drainage holes
Indoors & On the Windowsill
- Houseplant limits: The grower does not rate it as a houseplant – it is a full-sun perennial that grows tall and leggy and flowers poorly in a room’s weak light.
- Overwintering: Hardy perennial – it dies back and overwinters outdoors; no indoor shelter is needed.
On a Balcony or Patio
- Light & wind: Give it the sunniest spot; stake the tall stems on an exposed balcony to stop them flopping.
- Practicalities: Reflected heat dries pots quickly – check moisture in hot spells, as it likes steady moisture.
Choosing the Pot, Soil & Long-Term Care
- Pot & drainage: A 5-15 L pot with strong drainage holes; the grower advises against a standing-water tray beneath it. Terracotta breathes and dries faster; glazed or plastic holds moisture longer.
- Potting mix: Well-ventilated, free-draining, organic-rich mix – potting mix or peat with perlite or vermiculite (grower’s spec).
- Feeding: Potted plants run through their soil faster as nutrients leach away with each watering, so feed a little more often than plants in open ground.
- Repotting (as a perennial): The grower changes the soil every two years and prunes back part of the roots and top growth; divide the clump at the same time.
Fertilizing & Feeding
A moderate feeder in rich, well-drained garden soil: balanced feeding through spring growth supports this vigorous, sometimes aggressive perennial’s rapid growth and its daisy-shaped yellow flowers that attract pollinators.
Quick Fertilizing Specs
| Feeding Level | Moderate feeder |
|---|---|
| Main Nutrient Priority | Balanced feeding through spring growth, continuing through the summer-to-autumn bloom period |
| Best Feeding Period | From spring growth through the summer and autumn flowering season |
| Organic Options | Rich organic matter worked into well-drained soil, especially valuable for container-grown plants |
| Micronutrients | Usually adequate from a complete fertilizer and rich garden soil; correct specific issues only when diagnosed |
| Soil pH | Tolerates a wide range; performs best in rich, well-drained soil |
| Reduce/Stop Feeding | Taper off feeding as bloom stems finish and foliage begins its autumn dieback |
Feeding by Growth Stage
Spring emergence and vegetative growth
Support vigorous spring growth of the elliptic spoon-shaped foliage ahead of summer flowering.
| Nutrient direction | A balanced complete fertilizer to establish strong stems and leaves. |
|---|---|
| Timing | As new growth emerges in spring through early stem development. |
| Frequency | Regular light feedings through the spring growth flush. |
| Fertilizer types | A balanced complete garden fertilizer, Rich organic matter worked into the soil |
| Precautions | Grow in well-drained soil when feeding; this vigorous, spreading perennial can become overly aggressive with excess nitrogen and rich, wet soil combined. |
Summer and autumn flowering
Support the yellow daisy-shaped flowers, valuable both as cut flowers and for pollinators.
| Nutrient direction | Continue balanced feeding with adequate nitrogen; a high-phosphorus “bloom booster” is not needed to drive flowering in this plant. |
|---|---|
| Timing | Through summer and into autumn while flower stems are actively forming. |
| Frequency | Steady, moderate feeding through the bloom season, easing off as flowering slows. |
| Fertilizer types | A balanced complete garden fertilizer, Organic matter maintained in the root zone |
| Precautions | Avoid heavy nitrogen feeding late in the season, which can delay bloom stem maturity and encourage floppy growth. |
Autumn dieback and winter dormancy
Let the plant wind down naturally ahead of autumn or winter pruning and, where grown as a perennial, winter rest.
| Nutrient direction | None – withhold fertilizer as foliage and bloom stems die back. |
|---|---|
| Timing | From autumn dieback through winter dormancy. |
| Frequency | No feeding at this stage. |
| Fertilizer types | No feeding at this stage – allow the plant to go dormant undisturbed |
| Precautions | Do not fertilize once foliage is dying back; late-season feeding can push soft growth vulnerable to frost. |
Nutrient Deficiency Signs & Corrections
The plant produces vigorous foliage but fewer flower heads than expected through the bloom season.
| Possible causes | excess nitrogen favoring leafy growth over blooms, insufficient sun exposure, crowding from this plant’s own aggressive spread |
|---|---|
| Appears first on | the whole plant, seen as an absence of flower stems |
| What to check | recent feeding balance and nitrogen levels, sun exposure, how densely the clump has spread and whether it needs dividing |
| Possible correction | Ease back on nitrogen, confirm full sun to half shade, and divide overcrowded clumps in the dormant season. |
Stems grow tall and floppy, bending or lodging before or during bloom.
| Possible causes | excess nitrogen relative to available light, overcrowded planting reducing airflow and stem strength, insufficient sun causing stretched, weak growth |
|---|---|
| Appears first on | flowering stems |
| What to check | recent feeding rate, especially nitrogen, plant spacing and sun exposure, whether staking or division is needed |
| Possible correction | Reduce nitrogen-heavy feeding, improve spacing and sun exposure, and divide crowded clumps. |
Lower leaves yellow or the plant wilts despite adequate moisture, with weak overall vigor.
| Possible causes | poorly drained or waterlogged soil, root rot from excess moisture combined with rich feeding, salt buildup from over-feeding in heavy soil |
|---|---|
| Appears first on | lower and older leaves first |
| What to check | soil drainage and recent rainfall or irrigation, root condition near the base, feeding frequency relative to drainage |
| Possible correction | Improve soil drainage, let soil dry appropriately between waterings, and hold off on feeding until the plant shows active recovery. |
Pruning, Training & Seasonal Maintenance
Rudbeckia laciniata is a herbaceous, rhizome-spreading perennial (grown as an annual in the coldest zones), so its “pruning” is really seasonal cutting-back plus deadheading rather than shaping woody structure. It tolerates being cut hard to the ground and regrows readily each season. The main objectives are extending the summer–autumn bloom by deadheading, cutting the whole plant back in autumn or winter once it dies down, and periodically controlling its spread – it is noted as an aggressive colonizer that runs by rhizomes. Cutting back does not affect next year’s flowering, since new growth arises fresh from the crown each spring.
Quick Pruning & Maintenance Specs
| Pruning Tolerance | High (dies back to the crown each year regardless) |
| Primary Pruning Window | Autumn/winter cutback, after flowering finishes |
| Secondary Maintenance Window | Deadheading through summer/autumn while it blooms |
| Typical Frequency | Deadhead every week or two in bloom; one full cutback per year |
| Main Objective | Prolong bloom; tidy dieback; control rhizome spread |
| Young Plant Priority | Let the clump establish; no shaping needed |
| Mature Plant Priority | Deadhead, cut back seasonally, divide the clump to manage spread |
| Best Tool Type | Precision snips for deadheading; bypass secateurs for the autumn cutback |
| Avoid Heavy Pruning During | Active flowering, if continued bloom or seed for pollinators/birds is wanted |
Pruning by Plant Age & Size
Newly Established
No cutting back in the first season beyond removing any damaged growth; let the clump root in.
Young / Formative
No structural training applies – this is an herbaceous perennial with no framework to build. Pinching very young shoots is not typically needed or recommended for this species.
Mature / Established
Deadhead spent flower heads to keep the plant blooming and to prevent excessive self-seeding; divide the clump every couple of years to keep the rhizome spread in bounds and to renew vigor.
Seasonal Pruning Schedule
Ongoing Sanitary / Deadheading (Summer–Autumn)
Objective: extend the bloom period. Remove: individual spent flower heads, cut back to the next bud or side shoot. Do not remove: all flower heads late in the season if seed heads are wanted for birds. Expected response: continued flowering from side buds. Flowering impact: positive – deadheading prolongs bloom.
Dormant / Winter Cutback
Objective: remove the season’s dead top growth. Remove: dead leaves and bloom stems, cut down near the crown. Do not remove: the crown itself or emerging basal growth. Expected response: fresh growth from the crown the following spring. Flowering impact: none – next year’s flowers come from new growth regardless.
Structural Pruning & Training
There is no branch framework to train. The relevant structural task is renewal division of the clump: because this species spreads by rhizome and is rated an aggressive grower, lifting and dividing it every couple of years both controls its footprint and keeps the clump flowering well rather than crowding itself out.
Special Growth to Remove
Spent flower stems (deadheading) and, at the seasonal cutback, all dead top growth. Where the rhizome has spread beyond its intended area, remove or divide out the unwanted sections rather than leaving them to colonize further.
Container & Small-Space Pruning
In a container, growers are advised to switch the soil and prune back part of the roots and top growth roughly every two years when grown as a perennial – this substitutes for the clump-division that an in-ground planting would get, since a pot restricts the rhizome spread that would otherwise happen naturally.
Tools
Precision snips handle individual deadheading cleanly on the soft flower stems. Bypass secateurs are better suited to the coarser autumn/winter cutback of the whole plant.
Tool Hygiene & Disease Risk
Routine risk – clean tools are enough for normal deadheading and cutback; this species is not noted for a transmissible disease that would require disinfecting between cuts.
Cut Placement & Technique
Deadhead just above the next side bud or leaf node to encourage a further round of bloom. At the seasonal cutback, cut stems down near the crown rather than leaving tall bare stubs.
Heavy Pruning & Rejuvenation
Cutting the entire plant to the ground at the autumn/winter cutback is normal, not a rejuvenation measure – the plant regrows fully from the crown each spring. True rejuvenation of an overcrowded, weaker-flowering clump is done by lifting and dividing it rather than by any above-ground cut.
Post-Pruning Care
After the seasonal cutback, no special aftercare is needed beyond normal seasonal watering; avoid feeding immediately, since fresh growth will resume on its own in spring. Watch new spring growth for aphids and slugs, both noted pests of this species.
Common Pruning Mistakes
Deadheading every single flower late into autumn, which removes the seed heads that goldfinches and other birds rely on. Cutting the plant down mid-season instead of waiting for it to finish flowering and die back naturally. Never dividing the clump, which lets an already aggressive spreader crowd out neighboring plants.
When NOT to Prune
Avoid a full cutback while the plant is still actively flowering; avoid dividing the clump in the heat of summer – do it in the plant’s dormant or early-growth window instead.
Recommended Tools (by task)
| Task | Plant Age/Size | Stem Size | Tool Category | Why |
| Deadhead spent blooms | Flowering mature plant | Under 0.5cm | precision_snips | Clean cuts on soft flower stems without crushing them |
| Seasonal autumn/winter cutback | Mature clump, 30–100cm | Up to 1cm | bypass_secateurs | Faster cutting of the whole clump’s dieback stems near the crown |
Propagation Guide
Cutleaf coneflower is easily and most commonly grown from seed, which the site’s own sowing data supports in detail, though stem cuttings taken in spring before flowering are a workable way to increase a favorite clump. Since vegetative propagation is not required for this species, seed-grown plants are perfectly serviceable, making this an easy plant to propagate.
Quick Propagation Specs
| Best Propagation Method | Seed |
| Alternative Methods | Stem cuttings; clump division |
| Propagation Difficulty | Easy |
| Vegetative True-to-Type | Yes |
| Best Propagation Season | Spring (indoor sowing in late winter where seasons are short) |
| Seed Germination Time | 1–3 weeks |
| Germination Temperature | 20–26°C (68–80°F), best around 25°C (77°F) |
| Seed Sowing Depth | 0.5–1 cm (0.25–0.5 in) |
Growing from Seed
Seed Handling & Viability
Store saved seed in a dry, dark place at room temperature until sowing.
Sowing Season
Sow in spring after the last frost through summer in hardiness zones 3–10a (better started indoors in late winter); autumn to spring in zones 10b–11a; year-round in zone 11b and warmer. Grown as an annual, it is best sown indoors in winter and moved outdoors after the last frost.
Sowing Depth & Orientation
Sow at 0.5–1 cm (0.25–0.5 in) deep, with nursery-row/tray spacing of about 15 x 20 cm (6 x 8 in) before thinning or transplanting.
Germination Conditions
Keep soil moist in full sun, with an average to generous amount of water.
Germination Time
Typically 1–3 weeks.
Seedling Care
Keep seedlings in moist soil under full sun, ideally above 20°C (68°F).
Stem Cuttings
Best Timing
Spring, before the plant begins to bloom.
Cutting Preparation
Take cuttings from stems that are actively growing, favoring sections with visible buds, as these root and establish more readily than older flowering stems.
Division, Offsets, Pups & Suckers
As a clump-forming herbaceous perennial, this species can likely also be increased by dividing an established clump in spring, each division kept with its own roots and shoots; this is a common supplemental method for perennial Rudbeckia species, though it is not detailed in the site’s own data.
Bloom & Flower Guide
Quick Details
- Bloom Season: Summer into autumn (earlier, in spring, in warmer climates)
- Flower Appearance: Daisy heads with yellow rays around a raised green-yellow to dark central cone
- Edibility: Ornamental – grown for pollinators and cut flowers
Detailed Blooming Overview
Cutleaf coneflower (Rudbeckia laciniata) produces classic daisy-form flowers from summer into autumn. Golden-yellow rays surround a raised central cone that ranges from green-yellow to nearly black, and the plants flower freely, drawing in pollinators and standing well as cut flowers.
Flower Characteristics
- Daisy-shaped heads with yellow ray petals.
- A prominent raised central cone, green-yellow to dark.
Bloom Care & Thinning
- Prolonging the display: Deadhead spent heads to keep new flowers coming; leave some late heads standing to feed birds through winter.
- Pollination: The open discs are a magnet for bees and butterflies.
Bloom Health & Protection
- Powdery mildew: A common late-season issue on the foliage and buds; better airflow helps, and a sulfur-based fungicide can check it.
- Aphids on buds: They gather on soft buds; a firm jet of water or a neem-oil spray usually keeps them down.
Fruit & Uses
The young spring leaves and shoots of Rudbeckia laciniata are traditionally gathered and cooked as a wild potherb known as “sochan,” a food long used by the Cherokee and other communities of the Southern Appalachians. The greens are always cooked, never eaten raw, and are best picked before the plant sends up its flowering stems, after which the foliage becomes tougher and more bitter.
Quick Edible Specs
| Edible Parts | Young leaves and shoots (spring growth, before flowering) |
|---|---|
| Main Use(s) | Traditional foraged culinary green (“sochan”); the plant is also noted on this site as used as a medicinal plant (no medical claims made here) |
| Eaten Raw or Cooked | Cooked only |
| Preparation Required | Cook (boil or sauté); harvest only young, pre-bloom growth |
| Harvest Season | Spring, before flower stalks form |
| Time to First Harvest | From the plant’s first flush of spring growth once established (qualitative; see Propagation for establishment details) |
| Storage | Best used fresh like other leafy greens; not suited to long storage |
| Safety/Toxicity Caveat | Correct identification is essential before foraging any wild Rudbeckia, as it can resemble other daisy-family plants; only young, pre-bloom leaves are traditionally eaten, and always after cooking |
Leaves & Greens
The part eaten is the young basal and lower-stem foliage, green and elliptic to spoon-shaped, picked while still tender in early-to-mid spring. As the plant matures and begins forming its yellow daisy-shaped flowerheads, the leaves become coarser, tougher and more bitter, so harvest is concentrated on the pre-bloom growth. The greens are cooked as a potherb, typically boiled or sautéed in the same manner as other cooked wild or garden greens; they are not eaten raw.
Harvesting
Pick young leaves and tender shoots by hand in spring, taking the newest, most tender growth and leaving the plant’s crown intact so it can continue producing. Because the traditional harvest targets leafy growth before flowering, picking greens for food reduces the number of flowering stems that season; gardeners who also want the ornamental daisy-shaped blooms (see Blooming) should leave some stems unharvested. Once the plant bolts toward flowering, the window for tender edible greens closes for that flush.
Preparation, Uses & Safety
Only the young, pre-bloom leaves and shoots are used, and they should always be cooked (boiled or sautéed) rather than eaten raw. Because Rudbeckia laciniata can be confused with other similar-looking wild plants, positive identification is important before foraging it in the wild; when in doubt, source leaves from a plant you have grown and identified yourself. The site notes a traditional use of this plant as a medicinal plant; no dosing or health claims are made here.
Pests, Diseases & Troubleshooting
Overview: Cutleaf coneflower (Rudbeckia laciniata) is a tough, largely trouble-free perennial daisy whose main weaknesses are foliar fungal diseases in humid, crowded plantings rather than insects; sap-feeding pests and leaf-chewers are usually minor. This tall, spreading species may flop and can be prone to powdery mildew in crowded stands. Grow it in full sun with good spacing and airflow, water at the base, and clear old foliage each dormant season – cultural hygiene prevents most problems before any spray is needed.
Quick Troubleshooting Overview
| Issue / Pest | Main Symptom | Primary Solution |
|---|---|---|
| Aphids | Sticky, curled shoot tips and buds | Water jet, beneficial insects, insecticidal soap |
| Slugs & snails | Ragged holes in seedlings and low leaves | Hand-pick at night, traps, grit/iron-phosphate baits |
| Powdery mildew | White powdery film on leaves | Space plants, improve airflow, sulphur if needed |
| Septoria / angular leaf spot | Dark brown-black spots spreading up the plant | Remove infected leaves, avoid overhead water |
| Rust | Orange-brown pustules on leaf undersides | Remove infected foliage, sanitation |
| Aster yellows | Green, deformed, tufted flowers | Remove and destroy whole affected plants |
Common Pests & Management
- Aphids (Aphis / Myzus spp.):
- Symptoms: Small green, black or yellow insects massing on tender shoot tips, buds and flower stems, causing distorted growth, sticky honeydew and sooty mould; they can also spread viruses.
- Prevention & Control: Dislodge with a water jet and support lady beetles, lacewings and hoverflies; avoid excess nitrogen that fuels soft growth. Treat stubborn colonies with insecticidal soap or a light horticultural oil on affected tips.
- Slugs and snails (Deroceras / Cornu spp.):
- Symptoms: Irregular ragged holes chewed in seedlings, basal leaves and flower stems, with slime trails visible in the morning; young plants can be stripped overnight.
- Prevention & Control: Hand-pick after dark, remove hiding places such as debris and boards, and set beer or shelter traps. A ring of grit, or iron-phosphate slug bait, protects vulnerable young plants; encourage ground beetles, frogs and birds.
- Leafminers (Liriomyza / Nemorimyza posticata):
- Symptoms: Pale, winding or blotchy tunnels within the leaf where larvae mine between the surfaces; heavy mining reduces vigour and looks unsightly but rarely kills established plants.
- Prevention & Control: Pick off and destroy mined leaves as they appear, keep plants vigorous, and conserve the tiny parasitic wasps that control miners by avoiding broad-spectrum insecticides. Floating row cover on young plants excludes egg-laying flies.
- Cucumber beetles / chewing beetles (Diabrotica / Acalymma spp.):
- Symptoms: Adults chew ragged holes in leaves and petals and may scar flowers; spotted and striped beetles are the usual culprits on late-summer blooms.
- Prevention & Control: Hand-pick beetles into soapy water in the cool of the day and use yellow sticky traps to monitor. Healthy, well-grown plants tolerate light feeding; reserve an approved botanical spray for heavy infestations and apply in the evening to spare pollinators.
- Sawfly larvae (Tenthredinidae):
- Symptoms: Caterpillar-like larvae feed in groups on leaf margins, chewing tissue back to the veins and skeletonising foliage in patches.
- Prevention & Control: Hand-pick larvae or dislodge with a water jet, and encourage birds and predatory insects. Spot-treat serious outbreaks with insecticidal soap; the caterpillar-specific Bt does not work on sawflies, which are not true caterpillars.
Diseases & Fungal Issues
- Powdery mildew (Golovinomyces / Erysiphe spp.):
- Symptoms: A white to grey powdery coating on upper leaf surfaces and stems, worst in late season, crowded plantings and damp nights with dry days; leaves may yellow and die back.
- Treatment & Management: Space and thin plants for airflow, site in full sun, and avoid overhead watering; remove badly affected leaves. Where needed, apply sulphur, potassium bicarbonate or a light horticultural oil, and choose mildew-tolerant selections.
- Septoria / angular leaf spot (Septoria rudbeckiae):
- Symptoms: Numerous small dark brown to black angular spots begin on lower leaves and spread upward in warm wet weather, causing leaves to yellow, brown and drop – a very common blemish on black-eyed Susan.
- Treatment & Management: Remove and destroy spotted leaves and all debris at season’s end, water at the base only, and mulch to stop soil splash. Improve spacing; a copper or approved fungicide protects new growth in wet climates but sanitation is the main tool.
- Rust (Coleosporium / Puccinia spp.):
- Symptoms: Orange to reddish-brown powdery pustules erupt on leaf undersides with yellow flecks above; heavy rust yellows and withers foliage.
- Treatment & Management: Pick off and destroy infected leaves promptly, avoid wetting foliage, and open up crowded clumps. Sulphur or an approved fungicide gives partial protection where rust is a recurring problem.
- Downy mildew (Plasmopara / Peronospora spp.):
- Symptoms: Pale yellow blotches on upper leaves with a grey-purple fuzzy growth on the undersides in cool, wet conditions; differs from powdery mildew, which coats the upper surface.
- Treatment & Management: Improve drainage and airflow, avoid overhead irrigation, and remove affected leaves. Copper-based products help in persistently wet weather; resistant plants and good spacing are the durable fix.
- Aster yellows (phytoplasma (vectored by leafhoppers)):
- Symptoms: Flowers turn green, deformed and tufted, growth is stunted and yellowed, and blooms fail – an incurable phytoplasma spread by leafhoppers.
- Treatment & Management: There is no cure: dig out and destroy affected plants promptly to stop spread, control leafhoppers, and remove weedy reservoirs such as wild asters and plantain around the bed.
- Botrytis grey mould (Botrytis cinerea):
- Symptoms: Fuzzy grey-brown rot on faded flowers, buds and soft stems in cool, wet, crowded conditions; spreads from dying tissue into healthy growth.
- Treatment & Management: Deadhead and remove faded flowers and debris, improve airflow and avoid overhead watering. Good hygiene usually suffices; a protectant fungicide is rarely needed outdoors.
Growing Difficulties & Abiotic Problems
- Root and crown rot from wet soil:
- Cause & Symptoms: Plants wilt, blacken at the base and collapse in heavy, poorly drained or overwatered soil where crown and root fungi thrive.
- Correction Strategy: Plant in free-draining soil or raised beds, water deeply but let the surface dry between waterings, and avoid mulch piled against the crown. Divide congested clumps to renew vigour.
- Flopping / leggy stems:
- Cause & Symptoms: Tall stems flop and flowering is sparse in too much shade, over-rich soil or excess nitrogen.
- Correction Strategy: Grow in full sun, keep feeding modest, and pinch or cut back early for a bushier, self-supporting habit; stake tall cultivars if needed.
- Leaf scorch and wilting in heat/drought:
- Cause & Symptoms: Leaf edges brown and flowers fade quickly during prolonged heat and dry soil.
- Correction Strategy: Mulch to conserve moisture and water deeply during dry spells; deadhead to prolong bloom and reduce stress.
- Short-lived clumps / self-sown spread:
- Cause & Symptoms: Some black-eyed Susans are short-lived perennials or biennials and either fade out or self-seed aggressively after a few years.
- Correction Strategy: Divide every two to three years to renew clumps, deadhead to limit self-seeding where unwanted, and leave a few seed heads for birds and re-sowing where more plants are welcome.
What Helps – Products & Tools
Useful helpers here are insecticidal soap or light horticultural/neem oil for aphids, mites and beetles; iron-phosphate slug bait and grit for slugs and snails; yellow sticky traps for monitoring; and fungicides – sulphur or potassium bicarbonate for powdery mildew and rust, copper for leaf spot and downy mildew – used only when hygiene and spacing are not enough. Apply oils and sprays in the evening to protect pollinators.