
Plant Profile & Key Characteristics
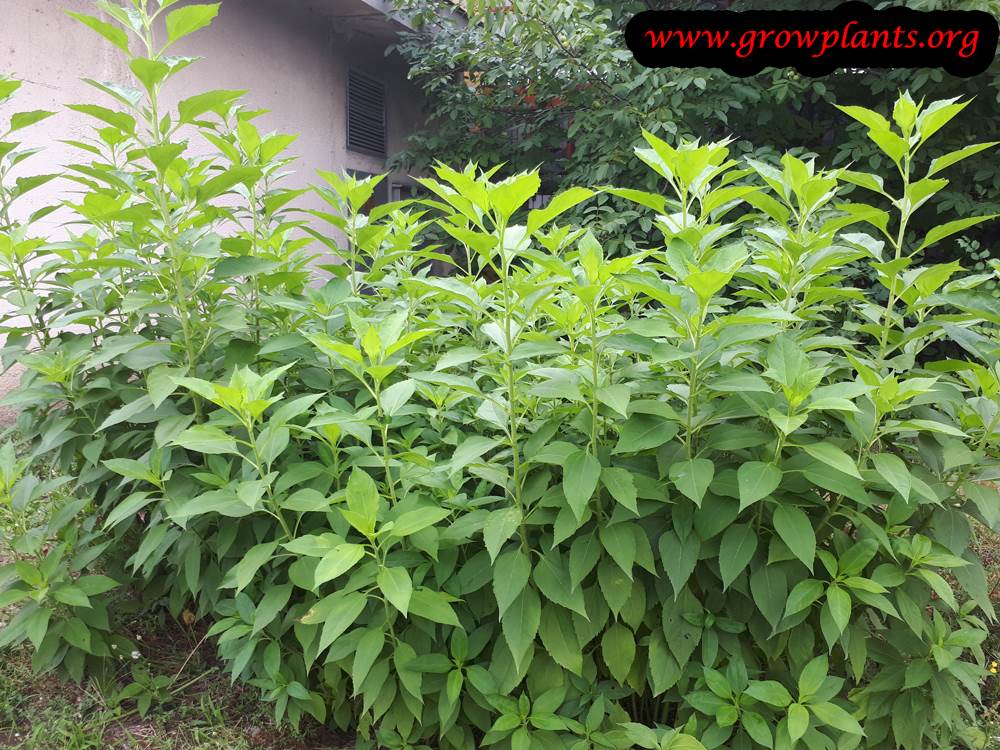
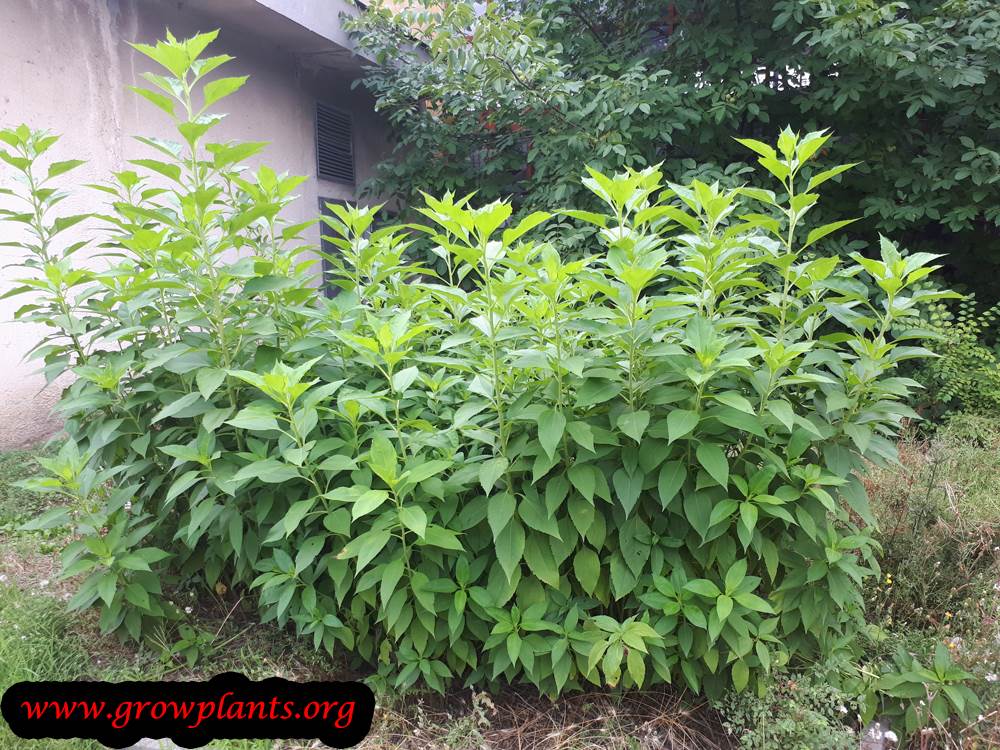
Overview: A tall herbaceous perennial 1-2 m (40-80 in) grown mainly for its edible underground tubers (sunchokes), and also as a bee-friendly ornamental. It grows fast, dies back in cold winters and spreads aggressively by its tubers.
Quick Specifications
| Specification | Attribute |
|---|---|
| Plant Type / Life Cycle | Perennial (grown as annual in cold climates) |
| Foliage Type | Deciduous in cold areas (evergreen where mild) |
| Mature Size | 1-2 m (40-80 in) |
| Growth Rate | Fast |
| Root System | Tuberous rhizomes bearing edible tubers |
| Toxicity | Non-toxic / edible (tubers eaten cooked) |
| Hardiness | USDA zone 4+ |
Growth Form & Structure
- Height & Spread: Erect leafy stems 1-2 m (40-80 in) tall; can also be grown in large containers.
- Growth Habit & Form: Clump of tall, coarse leafy stems spreading underground by tubers; an aggressive coloniser.
- Lifespan & Maturity: Perennial; tubers are lifted the first autumn to winter after spring planting.
Anatomy & Physical Features
- Leaves & Foliage: Green rhomboid (diamond-shaped) leaves.
- Flower Characteristics: Yellow daisy-like flowers with 8-12 ray petals, pollinated by bees.
Primary Uses & Landscape Value
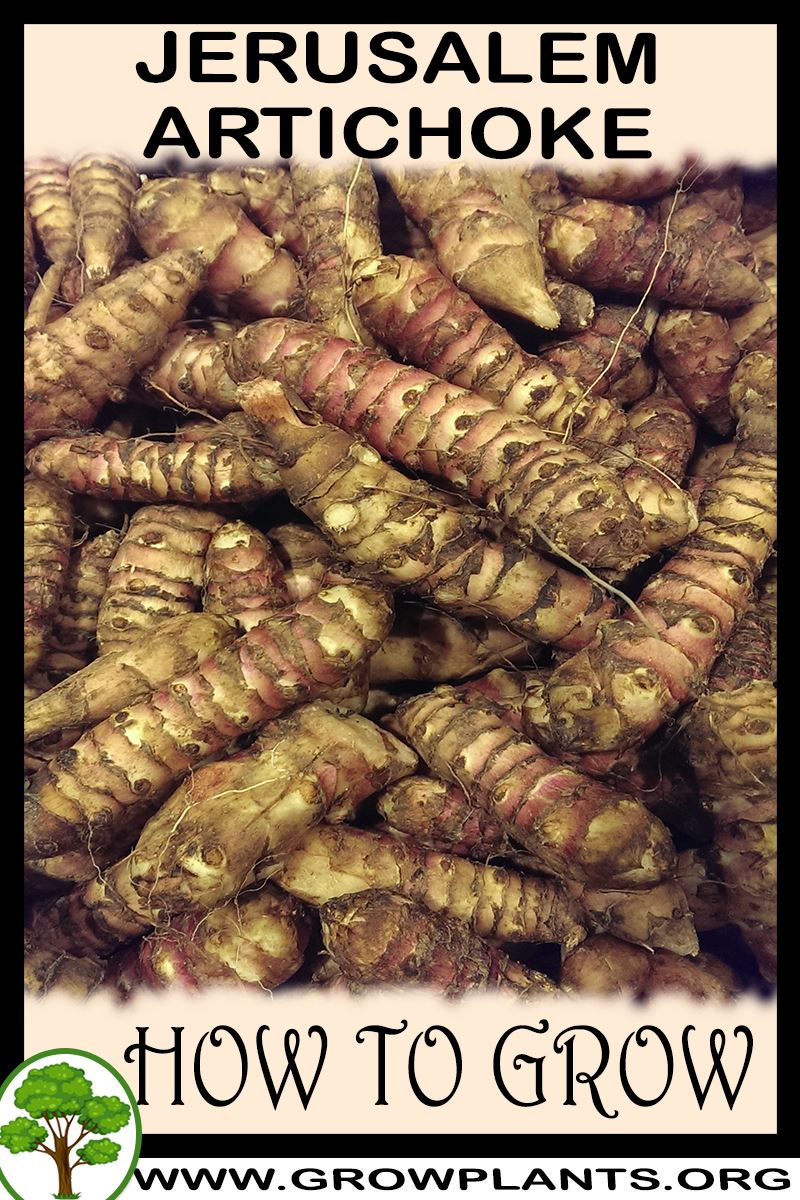
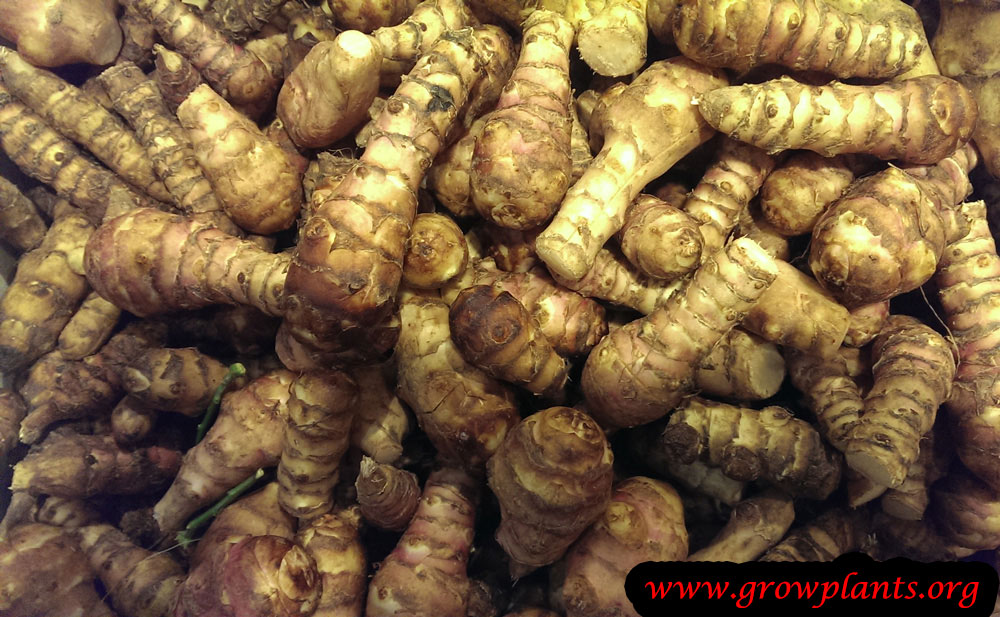
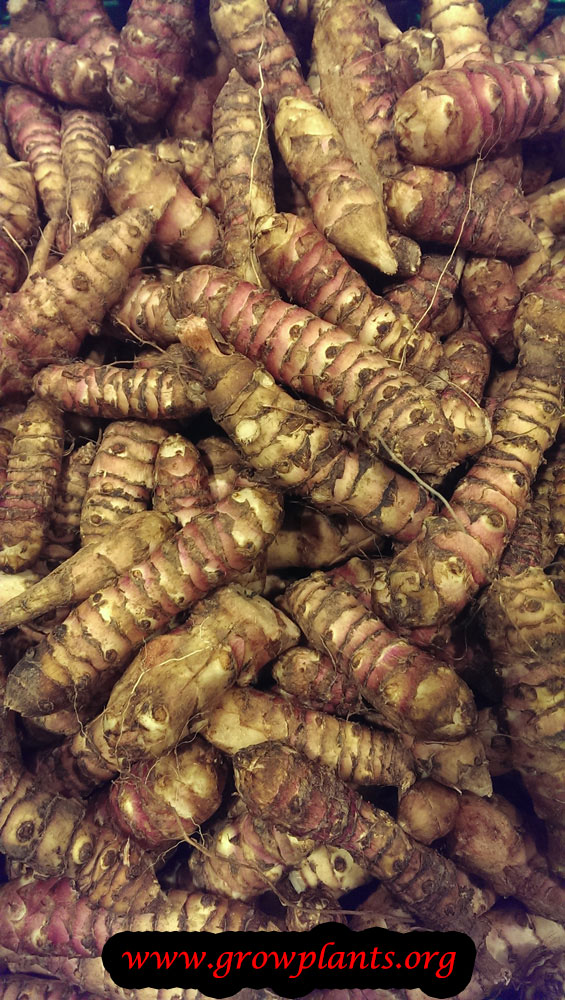
- Edible Uses: Knobbly tubers with white flesh and brown skin, eaten cooked, mashed or roasted, and also fermented for alcohol.
- Functional & Ornamental Roles: Edible tuber crop and a tall ornamental or screening plant that supports pollinators.
Care Guide: Planting, Soil & Watering
Overview: Jerusalem artichoke (Helianthus tuberosus) is a tall, vigorous perennial grown for its edible tubers, thriving in full sun. It grows in most well-drained soils and appreciates steady moisture and a mulch through the growing season.
Quick Care Requirements
| Requirement | Ideal Condition |
|---|---|
| Planting Season | In spring through summer once frost has passed |
| Growth Rate | Fast |
| Soil Type | Well-draining, mulched |
| Water Need | Moderate to High |
Planting & Establishment
- Best Planting Season: Plant tubers in spring to summer after the last frost; note the plant is aggressive and spreads readily, so contain it or give it a dedicated bed.
- How to Plant:
- Hole Preparation: Plant the tubers into loosened, well-drained soil, digging them in rather than setting a root ball.
- Soil Amendments: Enrich with compost and apply a mulch to conserve moisture and suppress weeds.
- Planting Depth: Set the tubers about 10-15 cm (4-6 in) below the surface.
- Growth Speed & Expectations: A fast, tall grower reaching 1-2 m (40-80 in) in a single season.
Soil, Watering & Drainage Care
- Soil Mix & Drainage Needs: Provide well-drained soil; while adaptable, it crops best with a mulch and consistent moisture.
- Watering Schedule & Technique:
- Young / Newly Planted: Keep the soil evenly moist after planting to support strong shoot and tuber development.
- Established: Water regularly and generously through the growing season, especially as the tubers bulk up.
- Seasonal Adjustments: Water freely in summer heat; reduce as the tops die back in autumn before lifting the tubers.
Climate, Light & Hardiness
Jerusalem artichoke is an exceptionally cold-hardy, sun-loving plant adapted to a very wide range of climates from tropical and desert to cold temperate; the underground tubers reliably survive freezing winter soil, while the top growth dies back to the ground each year like a typical perennial with a hard autumn die-back.
Quick Climate Specifications
| Climate Zones | Tropic, Mediterranean, subtropical, desert, temperate |
|---|---|
| USDA Hardiness Zones | Approximately 4 and warmer (tubers overwinter in the ground) |
| Frost Tolerance | High for the underground tubers; top growth is killed by the first frosts each autumn |
| Light Conditions | Full sun |
Sunlight & Light Exposure
Optimal Light Setup
Full sun is preferred for the strongest growth and best tuber yield.
Temperature Extremes & Hardiness
USDA Hardiness & Regional Limits
Hardy from about zone 4 and warmer. The tubers survive freezing winter soil and resprout in spring, so the plant behaves as a true perennial below ground even though the top growth is treated as an annual, dying back completely with the season's first hard frosts.
Cold Damage & Winter Protection
Frost blackens and kills the foliage and stems in autumn; this is a normal part of the plant's cycle and does not harm the tubers below ground. No winter protection is generally needed within its hardy range.
Frost Sensitivity
Foliage and stems: highly sensitive, killed by the first frosts. Tubers: essentially frost-proof once below the soil surface.
Extreme Heat Tolerance
Good - the plant is grown successfully across desert and tropical climates as well as cooler ones, given adequate moisture.
Growing in Pots, Balconies & Indoors
At 1-2 m tall with vigorous tubers, Jerusalem artichoke is far too big and hungry to be a houseplant, but the grower confirms it crops well in a large container on a sunny patio or balcony.
Quick Details
- Container Size: A large, deep tub of at least 30-40 L (8-10 gal) per plant for a worthwhile tuber crop
- Indoor Suitability: Not an indoor plant – too tall and needs full outdoor sun
- Best Spot: Full sun, outdoors – a sheltered corner keeps the tall stems upright
- Soil & Drainage: Well-aerated, organic-rich mix (potting mix or peat/coir with perlite or vermiculite); must drain freely
- Watering in Pots: Water generously and keep the mix consistently moist – pots dry fast; ensure excess drains away and never leave it standing in water
Indoors & On the Windowsill
- Not a houseplant: The grower marks it No for indoors – it grows too tall and needs full outdoor sun to build tubers.
- Windowsill note: A windowsill cannot house a 1-2 m tuber crop; grow it outdoors in a big tub instead.
On a Balcony or Patio
- Light, wind & heat: Give it the sunniest spot you have. Walls and paving reflect heat so pots dry quickly – check moisture often in warm weather. On an exposed balcony, stake tall stems and shelter from strong wind.
- Practicalities: A full pot is heavy once watered – make sure the balcony can take the load and that drainage runoff has somewhere to go.
Choosing the Pot, Soil & Long-Term Care
- Pot & drainage: Use a pot with strong drainage holes and skip a standing-water saucer to avoid root rot. Terracotta breathes and dries faster; glazed or plastic pots hold moisture longer.
- Potting mix: A well-aerated, organic-rich mix – potting mix or peat/coir blended with perlite or vermiculite for free drainage.
- Feeding: Potted plants need feeding more often than those in open ground, as nutrients leach out with each watering – feed regularly through the growing season.
- Season to season: As a short-lived plant there is no long-term repotting – empty and refill the pot with fresh, clean mix each cycle so pests and disease are not carried over.
- Contain the spread: Growing it in a tub is a good way to stop its tubers running – harvest cleanly and start fresh mix next season.
Fertilizing & Feeding
A moderate feeder grown for its edible tubers: balanced feeding at planting, nitrogen while the tall canopy builds, then a shift to potassium as tubers bulk, with feeding stopped as the plant matures toward harvest.
Quick Fertilizing Specs
| Feeding Level | Moderate feeder |
|---|---|
| young_feeding | A balanced starter feeding with organic matter worked into the bed |
| mature_feeding | Shift toward potassium as tubers bulk, then stop before harvest |
| Best Feeding Period | From establishment through tuber bulking |
| Main Nutrient Priority | Balanced early, nitrogen for canopy growth, then potassium for bulking |
| Soil pH | Tolerates a wide range of well-drained soils |
| Organic Options | Compost or aged organic matter worked into the bed, plus mulch |
| Reduce/Stop Feeding | Stop feeding as foliage yellows and the crop approaches harvest |
Feeding by Growth Stage
Establishment after planting
Help planted tubers root in and send up strong shoots before the tall, fast-growing canopy develops.
| Nutrient direction | A balanced complete fertilizer with organic matter worked into the bed. |
|---|---|
| Timing | At planting in spring or summer. |
| Frequency | A modest starter feeding as shoots emerge and establish. |
| Fertilizer types | Balanced complete fertilizer, Compost or aged organic matter worked into the soil |
| Precautions | This vigorous, aggressive spreader needs little encouragement; avoid over-enriching the planting site. |
Canopy growth
Build the tall stems and leaf canopy that power tuber formation later in the season.
| Nutrient direction | A nitrogen-forward complete fertilizer to drive canopy growth. |
|---|---|
| Timing | During early-to-mid season canopy growth. |
| Frequency | Feed moderately while the canopy is expanding. |
| Fertilizer types | Complete fertilizer with a nitrogen emphasis |
| Precautions | Do not overdo nitrogen, which favors tall top growth at the expense of tuber formation. |
Tuber bulking
Support sizing-up of the developing tubers underground.
| Nutrient direction | Shift toward potassium with a complete fertilizer as tubers bulk. |
|---|---|
| Timing | As the plant flowers and tubers begin to form and enlarge. |
| Frequency | Feed moderately through the bulking period. |
| Fertilizer types | Complete fertilizer with a potassium emphasis |
| Precautions | Excess late nitrogen delays and reduces tuber development. |
Maturation before harvest
Let tubers finish sizing before the autumn-to-winter harvest.
| Nutrient direction | None – withhold fertilizer as the plant winds down toward dormancy. |
|---|---|
| Timing | As foliage yellows in autumn, approaching harvest. |
| Frequency | No feeding at this stage. |
| Fertilizer types | No feeding at this stage – the plant is winding down, not taking up nutrients. |
| Precautions | Do not fertilize until active growth resumes the following season. |
Nutrient Deficiency Signs & Corrections
Older, lower leaves turn uniformly pale green to yellow and overall growth slows.
| Possible causes | Low available nitrogen in the soil, Cold or waterlogged soil limiting root uptake, Nitrogen leached away after heavy watering or rain |
|---|---|
| Appears first on | Older, lower leaves. |
| What to check | Recent feeding history, Soil moisture and drainage, Whether paling starts on old lower leaves |
| Possible correction | Apply a balanced complete fertilizer at a light rate and improve drainage. |
Older leaves show yellowing and browning along their margins.
| Possible causes | Low available potassium in the soil, Sandy soils that hold few nutrients, Drought stress limiting uptake during bulking |
|---|---|
| Appears first on | Older, lower leaves, starting at the margins. |
| What to check | Leaf margins on older leaves, Soil type and organic matter, Watering consistency during tuber bulking |
| Possible correction | Apply a complete fertilizer that also supplies potassium and keep the soil evenly moist. |
Interveinal yellowing on older leaves while the veins stay green.
| Possible causes | Low soil magnesium, common in sandy or acidic soils, Heavy potassium feeding competing with magnesium uptake, Leaching from frequent watering |
|---|---|
| Appears first on | Older, lower leaves. |
| What to check | Pattern of yellowing on old versus new leaves, Soil type, Recent heavy potassium feeding |
| Possible correction | Correct soil pH if needed and apply a magnesium source per its label. |
Pruning, Training & Seasonal Maintenance
Jerusalem artichoke is a tall, fast-growing sunflower relative grown for its underground tubers, and its own data is explicit that routine pruning isn’t needed – this is honoured here rather than inventing a shaping regime the plant doesn’t call for. What does apply is an end-of-season stalk removal once frost kills the top growth (clearing the way to dig tubers) and containment of a plant that spreads aggressively from both tubers and rhizomes.
Quick Pruning & Maintenance Specs
| Pruning Tolerance | Low – little to no routine pruning is required or beneficial |
| Primary Pruning Window | After frost has killed the top growth, ahead of digging tubers |
| Typical Frequency | Essentially once per season, at end-of-season stalk removal |
| Main Objective | Clear frost-killed stalks for tuber access; contain spread of an aggressive spreader |
| Young Plant Priority | None – leave young plants unpruned to build the tall top growth that feeds tuber production |
| Mature Plant Priority | Cut down frost-killed stalks at season’s end; remove unwanted volunteer shoots from spreading tubers |
| Best Tool Type | Loppers or bypass secateurs for the coarse, sunflower-like stalks; garden spade for containing spread |
| Avoid Heavy Pruning During | Active growth – removing leaves/stalks while the plant is bulking tubers reduces yield, consistent with the plant’s own "no need" pruning guidance |
Pruning by Plant Age & Size
Newly Established
Leave newly planted tubers/shoots entirely unpruned – the plant needs its full top growth to establish and begin building tubers.
Young / Formative
No pinching or training applies. If stalks become top-heavy and prone to lodging in a very exposed site, staking or a simple perimeter support is a more appropriate fix than cutting the plant back, since removing foliage mid-season would cut into tuber production.
Mature / Established
Through the growing season, the only real task is removing unwanted volunteer shoots coming up from spreading tubers outside the intended bed. At the end of the season, once frost has browned and collapsed the tall stalks, cut them down to clear the ground for harvest.
Seasonal Pruning Schedule
Autumn/Winter (post-frost, pre-harvest): objective is clearing access to dig tubers; cut the frost-killed stalks down near ground level; don’t cut green, still-growing stalks earlier in the season, since that reduces the tuber crop the plant is being grown for; response is simply a cleared bed ready for digging, with no regrowth expected from the cut stalks themselves.
Special Growth to Remove
Volunteer shoots – the main "special growth" to manage on this species, since it is flagged as an aggressive spreader from both tubers left in the ground and rhizomes; dig out unwanted shoots promptly outside the intended growing area. Frost-killed stalks are removed once at season’s end as described above.
Container & Small-Space Pruning
Grows in large containers, which is also a practical way to contain its aggressive spreading habit in a small garden; even in a container, avoid cutting back green top growth during the season, and simply clear the dead stalks after frost before tipping out and sorting the tubers.
Tools
Loppers or bypass secateurs for cutting the coarse, sunflower-like stalks at season’s end; a garden spade for lifting/containing spreading tubers and rhizomes rather than for any above-ground cutting.
Tool Hygiene & Disease Risk
Routine – no disease is flagged in the available data; ordinary clean-tool practice is sufficient. Watch for slugs and snails (the noted pests) around the base rather than treating this as a tool-transmitted risk.
Cut Placement & Technique
Cut stalks near ground level once they are frost-killed and dry rather than trying to cut them green; there’s no need to preserve stubble or buds on this species, since new growth next season comes from tubers left in the soil, not from the old stalks.
Heavy Pruning & Rejuvenation
Not applicable – this plant isn’t rejuvenated by hard pruning; vigour and yield come from the tubers and soil, not from cutting the top growth back harder.
Post-Pruning Care
After clearing the frost-killed stalks, no feeding or special aftercare is needed; the task is really a harvest-prep step. Watch the bed edges for volunteer shoots the following spring.
Common Pruning Mistakes
Cutting back green top growth mid-season in the belief it will "tidy" the plant – this reduces the tuber harvest, contrary to the plant’s own guidance that pruning isn’t needed; failing to contain volunteer shoots and letting the planting spread beyond its bed.
When NOT to Prune
Don’t remove leaves or stalks while the plant is actively growing and bulking tubers; wait until frost has naturally ended the top growth before cutting anything back.
Recommended Tools (by task)
- End-of-season removal of frost-killed stalks: loppers – the coarse, sunflower-like stalks are too thick for fine snips.
- Containing spread from tubers/rhizomes: garden_spade – for lifting or dividing out unwanted volunteer growth, not an above-ground cut.
Pruning Troubleshooting
| Problem | Possible Cause | What to Check | Corrective Action |
| Tall stalks toppling (lodging) before harvest | Exposed site, tall growth (1–2m) without support | Wind exposure and whether stalks were staked | Stake or support tall stalks rather than cutting them back mid-season |
| Reduced tuber size | Top growth removed or damaged during the growing season | Whether leaves/stalks were cut back before frost | Avoid any mid-season pruning; leave full top growth until frost |
| Unwanted plants spreading beyond the bed | Tubers or rhizomes left in soil beyond the intended footprint | Volunteer shoots at the bed margins | Dig out volunteer shoots promptly; contain plantings in a bed edge or container |
Propagation Guide
Jerusalem artichoke is propagated almost exclusively from tuber pieces, planted much like seed potatoes, since this is fast, reliable, and preserves the exact clone. Seed is biologically possible but rarely used in cultivation, since the species is highly cross-pollinated and seedling offspring vary considerably from the parent. Propagation by tuber is easy.
Quick Propagation Specs
| Best Propagation Method | Tuber division / planting whole small tubers or cut pieces |
| Alternative Methods | Seed (uncommon in cultivation) |
| Propagation Difficulty | Easy |
| Seed True-to-Type | Variable – the species is highly cross-pollinated, so seedlings differ from the parent |
| Vegetative True-to-Type | Yes |
| Best Propagation Season | Spring, once the danger of hard frost has passed |
Rhizomes, Tubers, Bulbs & Corms
Tuber Division – Plant whole small tubers, or cut larger brown-skinned, white-fleshed tubers into pieces, making sure each piece carries at least one or two healthy eyes/growth buds, just as with seed potatoes. Plant in spring at a depth of roughly 5–10 cm (2–4 inches), eyes facing upward. Unlike potatoes, the tubers do not need curing before planting or storage, but they dry out and shrivel quickly, so keep planting stock from drying between digging and replanting.
Bloom & Edible Flower Guide
Quick Details
- Bloom Season: Late summer into autumn – it is a short-day sunflower that flowers late in the year
- Time to First Bloom: In its first season, once the days shorten
- Flower Appearance: Small sunflower-like yellow heads with 8 to 12 ray petals
- Edibility: Edible – the golden ray petals can be eaten, like those of other sunflowers (the plant is grown mainly for its tubers)
Detailed Blooming Overview
Jerusalem artichoke is a true sunflower relative, and it caps its tall stems with cheerful yellow daisy-like heads late in the season. Because it flowers in response to shortening days, expect the display in late summer and autumn. The bright ray petals are edible and make a pretty garnish, though the plant is really grown underground for its knobbly tubers.
Flower Characteristics
- Yellow flower heads with 8 to 12 ray petals around a darker centre.
- Held on tall, sturdy stems.
Bloom Care & Thinning
- Support: The tall stems can flop in wind – staking or a sheltered spot helps.
- Pollination: Worked by bees.
Fruit & Uses
Jerusalem artichoke is grown for its knobby underground tubers, which have thin brown skin and crisp white flesh and are the plant’s only edible part. Tubers are typically cooked – boiled, roasted, or mashed – though thin raw slices can also be eaten in salads.
Quick Edible Specs
| Edible Parts | Tubers (underground) |
|---|---|
| Main Use(s) | Culinary – cooked vegetable; also fermented/distilled into alcohol |
| Eaten Raw or Cooked | Mostly cooked; can also be eaten raw, thinly sliced |
| Preparation Required | Scrub or peel skin; cook (boil/roast/mash) for most uses |
| Harvest Season | Autumn to winter, after top growth dies back |
| Time to First Harvest | Tubers bulk up over the growing season and are lifted once foliage dies back in autumn (see Propagation for planting timing) |
| Storage | Best left in the ground and lifted as needed; once dug, keep cool and slightly moist – tubers dry out and shrivel quickly in open air |
| Safety/Toxicity Caveat | Not toxic, but rich in inulin rather than starch, which can cause gas or bloating for some people, especially in quantity |
Roots & Tubers
The edible part is the tuber – a knobby, potato-like storage root with thin brown skin and white flesh inside. Tubers are ready to dig once the tall top growth dies back in autumn, and can be left in the ground through winter and lifted as needed rather than harvested all at once. Because the skin is thin, tubers can often be scrubbed rather than peeled.
Harvesting
Lift tubers from autumn into winter after the foliage has died down. The plant spreads readily from any tubers left behind, so missed ones will often resprout the following season.
Preparation, Uses & Safety
Tubers are most often cooked – boiled, mashed, or roasted – and are also used to make alcohol; thin raw slices add a crisp, nutty bite to salads. The tubers store their carbohydrate mainly as inulin rather than starch, which many people digest less easily than starch and which can cause gas or bloating, particularly the first few times they are eaten or in large servings; cooking and starting with small portions can help.
Pests, Diseases & Troubleshooting
Overview: Jerusalem artichoke is a vigorous, almost weedy perennial sunflower relative grown for its tubers, and it is notably robust – pests rarely check it. Its real problems are diseases that rot the tubers and stems, above all Sclerotinia (white mould), plus the usual sunflower foliar fungi. Rotation, good drainage and careful tuber handling and storage are the keys.
Quick Troubleshooting Overview
| Issue / Pest | Main Symptom | Primary Solution |
|---|---|---|
| Sclerotinia rot | Wilting, bleached stem base, white mould, black sclerotia | Rotate widely, drainage, destroy debris |
| Tuber rot (storage) | Soft, rotting, mouldy tubers in store | Cure & store cool/dry; handle carefully |
| Aphids | Curled leaves, honeydew | Water jet, beneficials, soap |
| Rust | Orange pustules on leaf undersides | Resistant stock, sanitation |
| Powdery mildew | White coating on foliage late season | Airflow; usually cosmetic |
| Slugs/snails (shoots) | Rasped young shoots, slime | Iron-phosphate bait, traps |
Common Pests & Management
- Aphids (Aphis spp.):
- Symptoms: Green or dark soft-bodied insects on leaf undersides and shoot tips, with curling and honeydew; a minor issue on such a vigorous plant, but can transmit viruses.
- Prevention & Control: Tolerate light numbers and encourage predators; blast off or spray insecticidal soap only if heavy. The plant’s vigour usually shrugs them off.
- Slugs & snails (Gastropoda):
- Symptoms: Rasped, ragged damage to emerging spring shoots, with slime trails.
- Prevention & Control: Protect young shoots with iron-phosphate bait, traps or barriers; damage is mostly early-season and cosmetic on established clumps.
- Cutworms & caterpillars (Noctuidae):
- Symptoms: Chewed foliage, or young shoots severed at ground level.
- Prevention & Control: Hand-pick, keep weeds down, and use Bt or collars for young plantings if pressure is high.
Diseases & Fungal Issues
- Sclerotinia stem & tuber rot (white mould) (Sclerotinia sclerotiorum):
- Symptoms: Wilting and a bleached, soft, watery rot at the stem base or on tubers, with characteristic fluffy white mould and hard black sclerotia; infected stems collapse and stored tubers rot.
- Treatment & Management: Rotate widely (sclerotia survive years in soil), avoid dense wet stands and overwatering, harvest and handle tubers gently, and remove and destroy infected debris. Store only sound, dry tubers in cool, airy conditions.
- Tuber & storage rots (Fusarium / bacterial soft rot (Erwinia) & others):
- Symptoms: Bruised or damaged tubers develop soft, brown, mouldy or slimy decay in storage, especially if warm, wet or injured.
- Treatment & Management: Harvest carefully to avoid wounds, cure briefly, and store cool, dry and airy (or leave in the ground and lift as needed in mild climates). Discard damaged tubers before storing.
- Rust (Puccinia helianthi):
- Symptoms: Orange-brown powdery pustules on leaf undersides, yellowing and killing leaves in heavy infection.
- Treatment & Management: Remove volunteers and debris that carry it over, space for airflow, and grow vigorous plants; rarely needs spraying on this robust crop.
- Powdery mildew (Golovinomyces cichoracearum):
- Symptoms: White powdery film on leaves, usually late in the season as plants mature.
- Treatment & Management: Largely cosmetic at that stage; ensure airflow and remove old debris. Sulfur only if it appears early and severe.
Growing Difficulties & Abiotic Problems
- Invasiveness (a ‘problem’ in itself):
- Cause & Symptoms: Any tuber left in the ground regrows, so clumps spread vigorously and are hard to eradicate.
- Correction Strategy: Grow in a contained bed or dedicated patch, lift thoroughly each season, and site where spreading is acceptable.
- Lodging:
- Cause & Symptoms: Very tall stems topple in wind or rich soil.
- Correction Strategy: Site with some shelter or support, and avoid excessive nitrogen that produces soft top-heavy growth.
- Drought stress at tuber fill:
- Cause & Symptoms: Dry spells during tuber formation reduce yield and size.
- Correction Strategy: Water steadily through the main growing and tuber-bulking period; mulch to conserve moisture.
What Helps – Products & Tools
This crop needs little intervention. Keep iron-phosphate slug bait for spring shoots, insecticidal soap for occasional aphids, and rely on rotation, drainage and careful harvest/storage against Sclerotinia and tuber rots. Fungicides are rarely justified on such a vigorous plant.