Plant Profile & Key Characteristics
Overview: Beallara Peggy Ruth Carpenter is a slow-growing evergreen hybrid orchid reaching 0.5-1.2 m (20-48 in), grown for its fragrant, spotted purple flowers. It is used as an ornamental fragrant cut-flower and houseplant orchid.
Quick Specifications
| Specification | Attribute |
|---|---|
| Plant Type / Life Cycle | Perennial |
| Foliage Type | Evergreen |
| Mature Size | 0.5-1.2 m (20-48 in) tall |
| Growth Rate | Slow |
| Hardiness | USDA zones 10b-12 (otherwise grown under glass or indoors) |
Growth Form & Structure
- Height & Spread: 0.5-1.2 m (20-48 in); grown in a snug transparent pot and repotted about once a year
- Growth Habit & Form: Sympodial orchid forming clumps of pseudobulbs with strappy leaves
- Lifespan & Maturity: Long-lived; slow-growing, adding a new pseudobulb each season
Anatomy & Physical Features
- Leaves & Foliage: Green, oval, slightly fleshy leaves arising from pseudobulbs
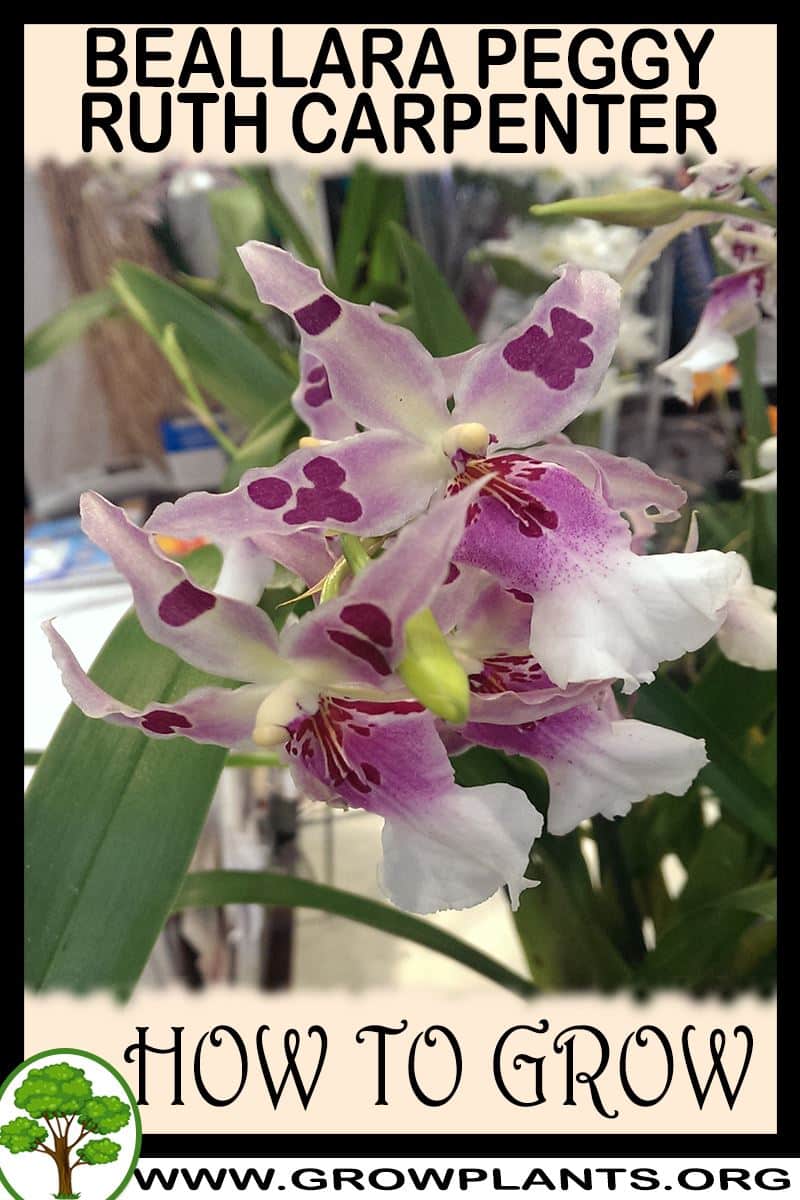
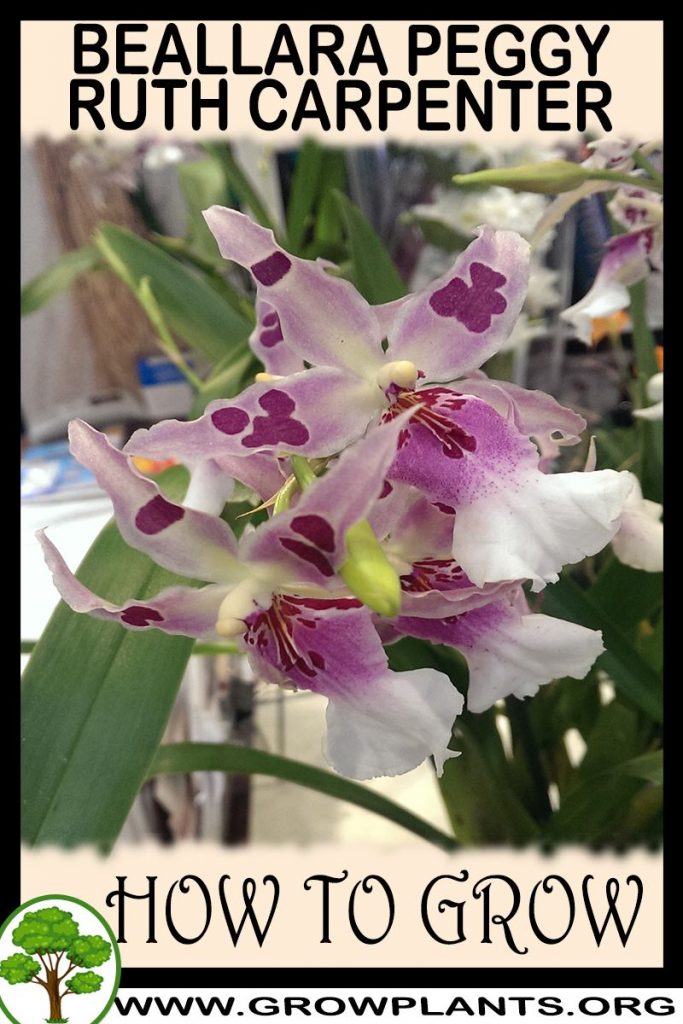
- Flower Characteristics: Fragrant six-petalled flowers, light purple with darker purple spots, the blooms lasting up to three months (see the Bloom guide)
Primary Uses & Landscape Value
- Functional & Ornamental Roles: Ornamental fragrant cut-flower orchid, houseplant and collector’s orchid
Care Guide: Planting, Soil & Watering
Overview: Beallara Peggy Ruth Carpenter is a hybrid orchid grown in deep shade in an open, fast-draining bark-based medium rather than soil. It wants moderate, even moisture with high humidity and warm days around 20–30°C cooling to about 15–20°C at night, with well-aerated roots that are never left waterlogged.
Quick Care Requirements
| Requirement | Ideal Condition |
|---|---|
| Planting Season | Year-round, avoiding winter; repot as it outgrows its pot (about once a year) |
| Growth Rate | Slow |
| Soil Type | Open orchid medium – bark or bark chips (not soil), in a transparent, snug pot with sharp drainage and airflow to the roots |
| Water Need | Moderate – keep the medium lightly moist with room-temperature, clean water; never waterlogged |
Planting & Establishment
- Best Planting Season: Pot or repot year-round except in winter; the roots renew roughly once a year, so refresh the medium then rather than potting straight into a large container.
- How to Pot:
- Pot & Container: Use a transparent pot only slightly larger than the roots – avoid oversizing, which stays too wet.
- Growing Medium: Use fresh bark or bark chips with pieces of Styrofoam for airflow to the roots, and replace the medium before it breaks down into acidic compost.
- Setting the Plant: Cut away any dead roots when repotting and settle the plant so its base sits at the surface of the bark, not buried.
- Growth Speed & Expectations: Slow, reaching about 0.5–1.2 m.
Soil, Watering & Drainage Care
- Medium & Drainage Needs: A coarse, airy, fast-draining bark medium is essential; the transparent pot lets you watch the roots and moisture, and bark plus Styrofoam keep roots aerated to prevent rot.
- Watering Schedule & Technique:
- Young / Newly Potted: Water with clean, room-temperature water (rainwater is ideal), keeping the medium lightly moist while it re-roots.
- Established: Water when the medium nears dryness, always with tepid clean water, and let it drain freely.
- Seasonal Adjustments: Keep humidity high year-round and provide the cooler nights that trigger bloom; water a little less in cool, low-light spells.
Climate, Light & Hardiness
Like other Beallara intergeneric hybrid orchids, Peggy Ruth Carpenter needs warm, humid, essentially frost-free conditions and is hardy outdoors only in zone 10b–12. It flowers best with warm days, distinctly cooler nights, and bright shade rather than direct sun.
Quick Climate Specifications
| Climate Zones | Subtropics, Mediterranean, or indoors/greenhouse as houseplant |
|---|---|
| USDA Hardiness Zones | 10b–12 |
| Optimal Temp Range | Day approximately 20–30°C (68–85°F); night approximately 15–20°C (59–68°F), with nights cooler than days |
| Approx. Survival Minimum | Can briefly tolerate approximately 3°C (37°F) at the low end, and up to about 35°C (95°F) at the high end, per grower data |
| Frost Tolerance | None |
| Light Conditions | Full Shade |
Sunlight & Light Exposure
Optimal Light Setup
Bright, filtered shade rather than direct sun keeps the fleshy leaves in good condition.
Shade & Heat Management
Protect from direct midday sun; a shaded greenhouse bench or bright indoor spot away from a hot window works well.
Temperature Extremes & Hardiness
USDA Hardiness & Regional Limits
Outdoor-hardy only in essentially frost-free zone 10b–12; elsewhere it needs greenhouse or indoor container culture year-round.
Cold Damage & Winter Protection
Keep above roughly 3°C (37°F) at an absolute minimum, and ideally close to 15–20°C (59–68°F) at night, since the day-to-night temperature drop helps trigger blooming.
Frost Sensitivity
Has no frost tolerance; treat any freezing exposure as fatal.
Extreme Heat Tolerance
Tolerates heat to about 35°C (95°F) briefly, but consistently hot nights without a cool-down can suppress flowering even where the plant otherwise survives.
Wind, Humidity & Microclimate
Humidity Preferences
High humidity is important; source care data specifically calls for a consistently moist, humid environment.
Microclimate Recommendations
A bright, shaded, humid spot with a real day-to-night temperature swing supports both healthy growth and reliable flowering.
Growing in Pots, Balconies & Indoors
Beallara ‘Peggy Ruth Carpenter’ is an Oncidium-alliance orchid that the grower rates as a good houseplant, and it is naturally a container plant – almost always grown in a pot. It thrives in bright, filtered light out of direct sun.
Quick Details
- Container Size: A snug pot only slightly larger than the roots – orchids like to be a little tight
- Indoor Suitability: A good houseplant in bright, indirect light
- Best Spot: Full to half shade – bright but out of direct midday sun
- Soil & Drainage: Free-draining bark-based orchid mix, never ordinary soil; a well-vented pot
- Watering in Pots: Average – water then let the bark approach dryness; never leave roots standing in water
Indoors & On the Windowsill
- A genuine houseplant: Grow it indoors in bright, filtered light – an east or shaded window is ideal; direct sun scorches the foliage.
- Windowsill growing: Its size suits a bright sill or a spot just back from a sunny window; steady warmth and some humidity keep it happy.
- Care: Keep it away from hot, drying air from heaters and air-conditioning.
On a Balcony or Patio
- Light & wind: Outdoors give it bright shade with shelter from direct sun and strong wind; it enjoys fresh air and mild humidity but resents scorching and drying out.
- Practicalities: A light plastic or slotted orchid pot drains and dries well and is easy to move under cover in bad weather.
Choosing the Pot, Soil & Long-Term Care
- Pot & drainage: Grow in a well-drained pot only a size up from the roots, with plenty of holes; a clear/slotted pot lets you watch the roots and helps them breathe. Skip a standing-water saucer.
- Potting mix: A coarse bark-based orchid mix (bark chips, with charcoal/perlite) – not garden soil; it must stay open and airy.
- Feeding: Potted plants exhaust their mix faster than those in open ground – nutrients leach away with each watering – so feed lightly through the active growing season. Feed weakly but regularly in growth.
- Repotting: Repot into fresh bark every couple of years as the mix breaks down, or once roots overflow the pot.
Fertilizing & Feeding
This intergeneric orchid hybrid is a light feeder – a dilute, balanced feeding while it is actively producing new growth and roots is enough, with a full rest from fertilizer between growth cycles.
Quick Fertilizing Specs
| Feeding Level | Light feeder |
|---|---|
| Main Nutrient Priority | Balanced feeding while new growth is active; no need for a high-phosphorus bloom formula |
| Best Feeding Period | While new leaves, pseudobulbs, or roots are visibly forming, tapering off around flowering |
| Organic Options | Not applicable – this orchid is grown in bark, cork, or a similar open medium rather than garden soil |
| Soil pH | Grown in bark or a similar open medium rather than soil, so garden soil pH guidance does not apply |
| Reduce/Stop Feeding | Stop feeding once flowering finishes and the plant enters its rest period between growth cycles |
Feeding by Growth Stage
Active Growth and New Root Development
Support the plant in producing new growth and roots after flowering, building strength for the next bloom cycle.
| Nutrient direction | A balanced, dilute feeding supports steady new growth without pushing weak, overly soft tissue. |
|---|---|
| Timing | While the plant is actively producing new leaves or roots, typically outside the bloom period. |
| Frequency | Feed lightly and regularly while new growth is visibly active, easing back once growth slows. |
| Fertilizer types | A balanced fertilizer formulated for orchids, diluted and applied lightly, Fertilizer suited to the bark or cork medium this orchid is grown in |
| Precautions | Periodically water with plain water to avoid salt buildup in the medium, and ease off feeding once new growth stops. |
Bud Formation and Flowering
Support strong bud development and long-lasting blooms without disrupting the temperature cues this orchid needs to flower.
| Nutrient direction | Continue a balanced, dilute feeding; there is no need to switch to a high-phosphorus bloom formula to get this orchid to flower well. |
|---|---|
| Timing | From visible bud formation through the flowering period. |
| Frequency | Continue light, regular feeding through bud development, then ease off as flowers fully open. |
| Fertilizer types | A balanced fertilizer formulated for orchids, diluted and applied lightly |
| Precautions | Avoid disturbing the plant’s temperature or light routine during bud formation, since this orchid needs cooler nights than days to bloom well. |
Rest Between Growth Cycles
Let the plant rest between growth cycles without stressing the roots with unused fertilizer salts.
| Nutrient direction | None – withhold fertilizer while the plant is resting between growth cycles. |
|---|---|
| Timing | Immediately after flowering finishes, before new growth resumes. |
| Frequency | No feeding at this stage. |
| Fertilizer types | No feeding at this stage – water sparingly and let the plant rest |
| Precautions | Do not fertilize while the plant is resting; unused fertilizer salts can build up in the medium and injure roots during a period of reduced uptake. |
Nutrient Deficiency Signs & Corrections
Roots turn brown or mushy and lose their firm, healthy appearance; leaves may yellow or wrinkle.
| Possible causes | overwatering or a growing medium that stays wet too long, a breakdown of old bark or cork medium that no longer drains well, poor pot drainage |
|---|---|
| Appears first on | the roots, then older leaves |
| What to check | condition and age of the growing medium, pot drainage, watering frequency |
| Possible correction | Trim away dead roots, repot into fresh bark or cork medium, and let the medium approach dryness between waterings; hold off on feeding until new roots appear. |
The plant grows well but produces few or no flowers.
| Possible causes | insufficient day-to-night temperature difference needed to trigger blooming, too little light, nitrogen-heavy feeding continued through the period when bud formation should be encouraged |
|---|---|
| Appears first on | whole-plant flowering performance rather than any single leaf |
| What to check | day and night temperatures, light levels, recent feeding balance |
| Possible correction | Provide the cooler nights and adequate light this orchid needs to initiate bloom, and avoid continuing heavy feeding once the plant should be shifting toward bud formation. |
New leaves develop yellowing between the veins while the veins stay green.
| Possible causes | iron or other micronutrient deficiency linked to medium pH or breakdown, salt buildup in the growing medium from unflushed fertilizer, root stress from a soggy or degraded medium |
|---|---|
| Appears first on | new leaves |
| What to check | age and condition of the growing medium, recent flushing with plain water, root health |
| Possible correction | Flush the medium with plain water to clear excess salts, refresh old medium, and apply a chelated micronutrient product per its label if yellowing continues. |
Pruning, Training & Seasonal Maintenance
Beallara Peggy Ruth Carpenter is a sympodial epiphytic orchid built from a chain of pseudobulbs, with no woody trunk to structurally prune. ‘Pruning’ is limited to sanitation – cutting out the spent purple-and-white flower spike once it finishes, removing dead leaves, and trimming dead roots at repotting. This light maintenance can be done whenever the need arises rather than on a strict season, but repotting is best timed to when new roots are actively emerging.
Quick Pruning & Maintenance Specs
| Pruning Tolerance | Low – sanitation only, no structural cutting |
| Primary Pruning Window | After the flower spike finishes blooming |
| Secondary Maintenance Window | At annual repotting (root trimming) |
| Typical Frequency | As needed for dead material; once a year for repot/root care |
| Main Objective | Remove the spent spike and dead leaves; maintain healthy roots at repot |
| Young Plant Priority | Leave pseudobulbs and leaves untouched to build size |
| Mature Plant Priority | Cut the spike after bloom; keep older pseudobulbs as a reserve unless dividing |
| Best Tool Type | Precision snips (sterile) |
| Avoid Heavy Pruning During | While the spike is still green or in bud |
Pruning by Plant Age & Size
Newly Established
No pruning beyond removing any damaged tissue on arrival; let it build pseudobulbs undisturbed.
Young / Formative
No structural training applies – the priority is correct repot sizing, not cutting.
Mature / Established
Cut out the spent flower spike after bloom; remove yellowed leaves as they occur; trim dead/mushy roots at repot and only divide the clump when there are enough pseudobulbs for both halves to remain viable.
Special Growth to Remove
- Spent flower spikes once flowering is fully finished.
- Dead or yellowed leaves.
- Dead or mushy roots, trimmed at repotting.
Container & Small-Space Pruning
Always container-grown, and sensitive to being over-potted. Step up to only a modestly larger pot at repot, trimming dead roots at the same time, using an open bark/cork mix rather than garden soil.
Tools
- Precision snips for cutting the spent spike and trimming dead leaves/roots.
Tool Hygiene & Disease Risk
Increased risk: orchids can carry transmissible viruses and rots between plants on shared tools, so disinfect the blade between different plants.
Cut Placement & Technique
Cut the spike down near its base at the pseudobulb; remove dead leaves where they detach cleanly; trim roots back only to firm, healthy tissue.
Heavy Pruning & Rejuvenation
Not applicable – there is no hard rejuvenation cut for this growth habit. New pseudobulbs each cycle provide renewal; an old leafless backbulb can be divided off to start a new plant if desired.
Post-Pruning Care
Hold off heavy watering for a day or two after cutting a spike or trimming roots to let cut surfaces dry; then resume normal watering and watch new growth for aphids and spider mites.
Common Pruning Mistakes
- Cutting the spike too early while still capable of more blooms.
- Reusing an unclean blade between plants.
- Jumping to an oversized pot instead of a modest step-up with root trimming.
When NOT to Prune
- Do not cut a spike while it is still actively blooming or budding.
- Avoid repotting/root work outside of active root growth.
Recommended Tools (by task)
- Cutting spent spikes / trimming dead leaves & roots (mature plants): precision_snips – every cut on this orchid is fine and small, at the pseudobulb or root.
- Between-plant sanitation: blade_disinfectant – orchids are unusually prone to tool-transmitted disease, so disinfecting between plants matters here.
Propagation Guide
Beallara Peggy Ruth Carpenter, an intergeneric Odontoglossum-alliance hybrid orchid, is propagated almost exclusively by dividing an established clump of pseudobulbs at repotting time, since seed will not reproduce this hybrid true-to-type and cannot realistically be germinated at home without laboratory culture. Division is a moderately involved but achievable task for a home grower, while seed propagation is specialist-level and impractical outside a lab.
Quick Propagation Specs
| Best Propagation Method | Division of pseudobulb clumps (backbulb division) |
| Alternative Methods | Seed (laboratory/flask propagation only) |
| Propagation Difficulty | Moderate (division); Specialist (seed) |
| Seed True-to-Type | Hybrid offspring vary |
| Vegetative True-to-Type | Yes |
| Best Propagation Season | At repotting, roughly once a year as new growth completes |
Growing from Seed
The site notes seed propagation as hard for this hybrid. Orchid seed is dust-like and has no significant nutrient reserves, so it needs either a symbiotic mycorrhizal fungus or sterile in-vitro (flask) culture to germinate – a specialist technique generally out of reach for home growers, which is consistent with the site’s guidance to propagate vegetatively instead.
Division, Offsets, Pups & Suckers
Timing
Best done at repotting, which this orchid typically needs about once a year as the roots fill the pot.
Minimum Viable Size
Each division should include several sound pseudobulbs (a leading growth plus back bulbs) with roots attached to re-establish reliably – a single bare backbulb is a slower, less certain start.
Technique
Divide by cutting through the connecting rhizome between bulb groups with a clean, sharp tool, taking care not to damage the roots of either section.
Establishment Care
Pot each division into an appropriately sized container rather than a large one, since the site notes this orchid does not do well moved directly into an oversized pot.
Bloom & Flower Guide
Quick Details
- Bloom Season: Spring and autumn, when there is a clear difference between day and night temperatures
- Flower Appearance: Fragrant light-purple flowers marked with darker purple dots; six segments, with five pointed elliptic petals and a tongue-like lip, sometimes waxy or slightly spiralled
- Edibility: Ornamental only – this hybrid orchid is grown for its flowers, not for eating
Detailed Blooming Overview
Beallara Peggy Ruth Carpenter is an intergeneric orchid hybrid grown for its long-lasting, fragrant sprays. Blooming is triggered by cooler nights and shorter days, so the main flushes fall in spring and autumn when day and night temperatures pull apart. Once open, a single display can hold for up to three months.
Flower Characteristics
- Fragrant, with a light-purple ground colour and darker purple spotting.
- Six segments – five pointed elliptic petals plus a broad, tongue-like lip; the petals can look waxy or take a slight spiral twist.
- Carried on arching spikes, well suited to cutting.
Bloom Care & Thinning
- Triggering bloom: Give a 5-10C drop between day and night, along with shortening day length, to bring plants into flower.
- Extending the display: Keep flowering plants out of hot, dry air; steady humidity and bright, indirect light help the long-lasting blooms last their full run.
- After flowering: Cut the spent flower spike back once every bloom has faded.
Bloom Health & Protection
- Botrytis petal blight: In cool, damp, still air the open flowers can develop small brown or translucent spots. Improving airflow and avoiding water settling on the blooms helps; a suitable fungicide can be used if it takes hold.
Pests, Diseases & Troubleshooting
Overview: This is an intergeneric hybrid in the Oncidium/Odontoglossum alliance, and it shares that group’s well-known pests – scale (especially Boisduval scale), mealybug, spider and false-spider mites, thrips and aphids, plus slugs and snails on new roots and spikes. Its most dangerous problems are rots: black rot (Phytophthora/Pythium) and bacterial soft rot in stagnant, over-wet conditions, and the incurable orchid viruses. Good airflow, careful watering and strict tool hygiene are the foundation of keeping it clean.
Quick Troubleshooting Overview
| Issue / Pest | Main Symptom | Primary Solution |
|---|---|---|
| Boisduval scale | White/pale crusty scale on pseudobulbs and leaf bases, yellowing | Scrub off, horticultural oil, isolate plant |
| Mealybugs | White cottony tufts in sheaths and leaf axils | Alcohol swab, oil/soap, check roots |
| Spider / false-spider mites | Silvery-bronze pitting/stippling on leaves, fine webbing | Raise humidity, wipe leaves, miticidal oil |
| Black rot (killer) | Black, water-soaked spreading rot on leaves/crown | Cut out into clean tissue, cinnamon/copper, dry air |
| Bacterial soft rot | Soft, smelly, collapsing wet leaf lesions | Excise, dry, improve airflow; reduce leaf wetness |
| Pleated / accordion leaves | Permanently folded, ridged new leaves | Correct watering/humidity during growth |
Common Pests & Management
- Boisduval scale (Diaspis boisduvalii):
- Symptoms: The classic orchid scale: crusty white males and round tan-brown female armour clustered on pseudobulbs, leaf bases and under old sheaths and bracts, sucking sap and causing yellow spotting and decline. Populations hide in sheltered crevices and explode if unchecked.
- Prevention & Control: Strip off dead sheaths and bracts where scale hides, scrub visible scale off with a soft toothbrush and soapy water, and isolate the plant. Smother remaining scale with horticultural oil, repeating every 1–2 weeks to catch crawlers; a systemic can help heavy infestations. Inspect new acquisitions carefully.
- Mealybugs (Pseudococcus / Planococcus spp.):
- Symptoms: White, cottony, waxy tufts in leaf axils, inside sheaths, on flower spikes and among the roots, with sticky honeydew and sooty mould; growth stunts and buds abort.
- Prevention & Control: Dab colonies with a cotton bud of rubbing alcohol, hose off, and check the roots and pot rim (repot if root mealybug is present). Follow with horticultural oil or insecticidal soap into every crevice, and repeat; conserve natural enemies where possible.
- Spider mites and false-spider mites (Tetranychus / Brevipalpus spp.):
- Symptoms: Fine silvery-to-bronze stippling or pitting on the (often thin, soft) leaves, with fine webbing from true spider mites; false-spider mites cause sunken, silvery, later necrotic patches. Worst in hot, dry, low-humidity air.
- Prevention & Control: Raise humidity and improve airflow, wipe or hose the leaves (both surfaces), and isolate affected plants. Treat with horticultural oil or a labelled miticide, repeating to break the cycle; these alliance orchids with softer leaves are especially mite-prone.
- Thrips (Frankliniella / Thrips spp.):
- Symptoms: Silvery streaks and flecks on leaves and, most damagingly, distorted, discoloured, streaked flowers with tiny black specks; thrips can also spread viruses.
- Prevention & Control: Use blue sticky traps, remove infested buds and old flowers, and encourage predatory mites. Spinosad or horticultural oil controls outbreaks; rotate products and treat as buds develop.
- Aphids (Aphis / Myzus spp.):
- Symptoms: Green or black aphids on tender new spikes and buds, distorting flowers, leaving honeydew and potentially vectoring viruses.
- Prevention & Control: Rinse off with water, wipe spikes clean, and use insecticidal soap or neem on stubborn colonies; protect developing spikes.
- Slugs and snails:
- Symptoms: Chewed root tips, flower spikes and buds with slime trails; damage appears overnight, and tiny bush snails live in the mix and graze roots.
- Prevention & Control: Hand-pick at night, set beer or iron-phosphate traps, keep the bench clean, and repot if the mix is infested with bush snails; inspect new plants and mix.
Diseases & Fungal Issues
- Black rot (Phytophthora / Pythium spp.):
- Symptoms: Black, water-soaked, rapidly spreading rot on leaves, new growths and the crown, often starting at the base and killing the plant fast in warm, wet, stagnant conditions.
- Treatment & Management: Cut out all blackened tissue well into clean green tissue with a sterile blade, dust the wound with cinnamon or a copper fungicide, and move the plant to dry, airy conditions with reduced watering. Improve airflow and never let water sit in the crown.
- Bacterial brown spot / soft rot (Acidovorax / Erwinia (Pectobacterium)):
- Symptoms: Soft, water-soaked, sunken lesions that turn brown-black, smell foul and collapse, spreading quickly on wet leaves in warm humid air.
- Treatment & Management: Excise the infected area into healthy tissue with a sterile tool, keep the foliage dry, and increase airflow. Reduce humidity around the plant and avoid overhead watering; copper can protect surrounding tissue.
- Botrytis flower spot (Botrytis cinerea):
- Symptoms: Small brown or pinkish spots peppering the flowers, which age and rot prematurely in cool, damp, still air.
- Treatment & Management: Remove spotted blooms promptly, improve air movement, and lower humidity around flowering plants; avoid misting open flowers.
- Fungal leaf spots (Cercospora / Guignardia spp.):
- Symptoms: Yellow then brown-black spots and blotches on the leaves, sometimes in rings, in humid, crowded, poorly ventilated conditions.
- Treatment & Management: Remove affected leaves, improve spacing and airflow, and keep foliage dry. A copper or labelled fungicide checks persistent spotting.
- Orchid viruses (CymMV & ORSV):
- Symptoms: Colour-break, streaking, ringspots, mosaic mottling and necrotic flecks on leaves and distorted, blotchy flowers; permanent and incurable, spread by cutting tools and sap-sucking pests.
- Treatment & Management: There is no cure – isolate and ideally destroy confirmed virus plants. Prevent spread by sterilising cutting tools between every plant (flame or fresh blade), controlling sap-sucking pests, and buying clean stock.
Growing Difficulties & Abiotic Problems
- Root loss from over- or under-watering:
- Cause & Symptoms: These alliance orchids resent both soggy, stale mix (which rots the fine roots) and complete drying; either causes root loss, then dehydration and decline.
- Correction Strategy: Water thoroughly then let the mix approach (not reach) dryness, use a fresh open medium, repot every 1–2 years, and ensure the pot drains freely with good air to the roots.
- Pleated / accordion leaves:
- Cause & Symptoms: New leaves emerge permanently folded and ridged when the plant is under-watered, under-humidified or root-damaged during the growth flush.
- Correction Strategy: Keep humidity up and moisture even while new growths expand, and fix any root problem; the pleating is permanent on affected leaves but future growth will be smooth.
- Leaf-tip dieback (salt / fertiliser burn):
- Cause & Symptoms: Blackened, dying leaf tips from accumulated salts, over-fertilising, or hard water.
- Correction Strategy: Flush the mix periodically with plain water, feed ‘weakly, weekly’ at reduced strength, and use rain or low-salt water where possible.
- Sunburn:
- Cause & Symptoms: Bleached white-to-brown scorched patches on leaves exposed to too-intense direct sun – these are moderate-light, cool-to-intermediate orchids.
- Correction Strategy: Provide bright, filtered light; shade from midday sun and acclimatise gradually when moving plants to brighter conditions.
- Poor or no blooming:
- Cause & Symptoms: Failure to spike usually reflects too little light, insufficient day-night temperature difference, or a stressed root system.
- Correction Strategy: Increase light to the recommended level, allow a cooler night drop, keep roots healthy, and feed appropriately through the growing season.
What Helps – Products & Tools
Prevention is cultural – airflow, careful watering, clean benches, quarantine of new plants and, above all, sterilising cutting tools between plants to stop virus spread. Useful products include horticultural oil and insecticidal soap (scale, mealybug, mites, aphids), blue sticky traps and spinosad (thrips), iron-phosphate slug bait, copper fungicide and cinnamon for rots and leaf spots, and a low-salt orchid fertiliser. Apply oils in the evening and never on open flowers.