

Plant Profile & Key Characteristics
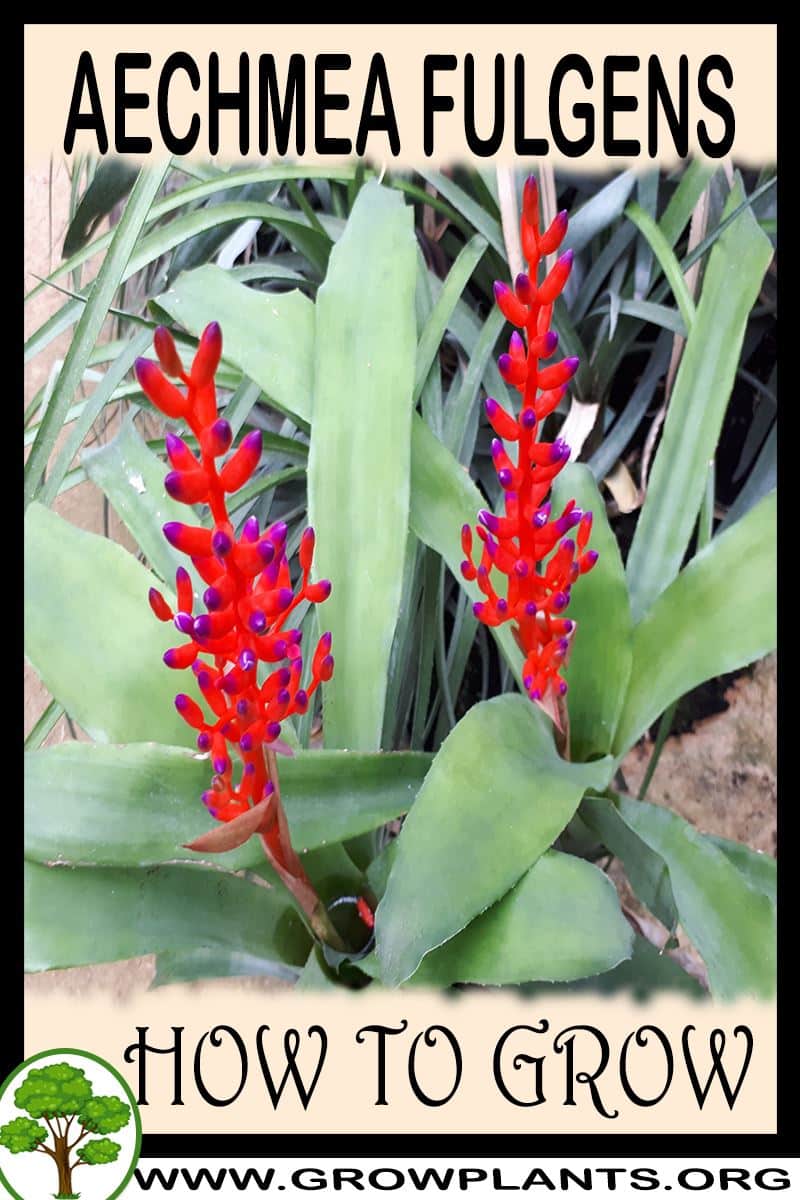
Overview: Aechmea fulgens (coralberry) is an evergreen rosette-forming bromeliad reaching 20-50 cm, grown for its long-lasting red inflorescence. This epiphytic perennial is popular as a houseplant and cut flower.
Quick Specifications
| Specification | Attribute |
|---|---|
| Plant Type / Life Cycle | Perennial |
| Foliage Type | Evergreen |
| Mature Size | 20-50 cm (8-20 in) tall |
| Growth Rate | Slow to Moderate |
| Root System | Epiphytic (anchoring air roots) |
| Toxicity | Non-toxic |
| Hardiness | USDA zone 11+ |
Growth Form & Structure
- Height & Spread: Rosette 20-50 cm (8-20 in) across; grows well in pots or mounted on bark in an airy, free-draining medium.
- Growth Habit & Form: Rosette-forming evergreen bromeliad with a central water-holding cup, spreading by offsets (pups).
- Lifespan & Maturity: Each rosette blooms once and then produces offsets; slow-growing overall.
Anatomy & Physical Features
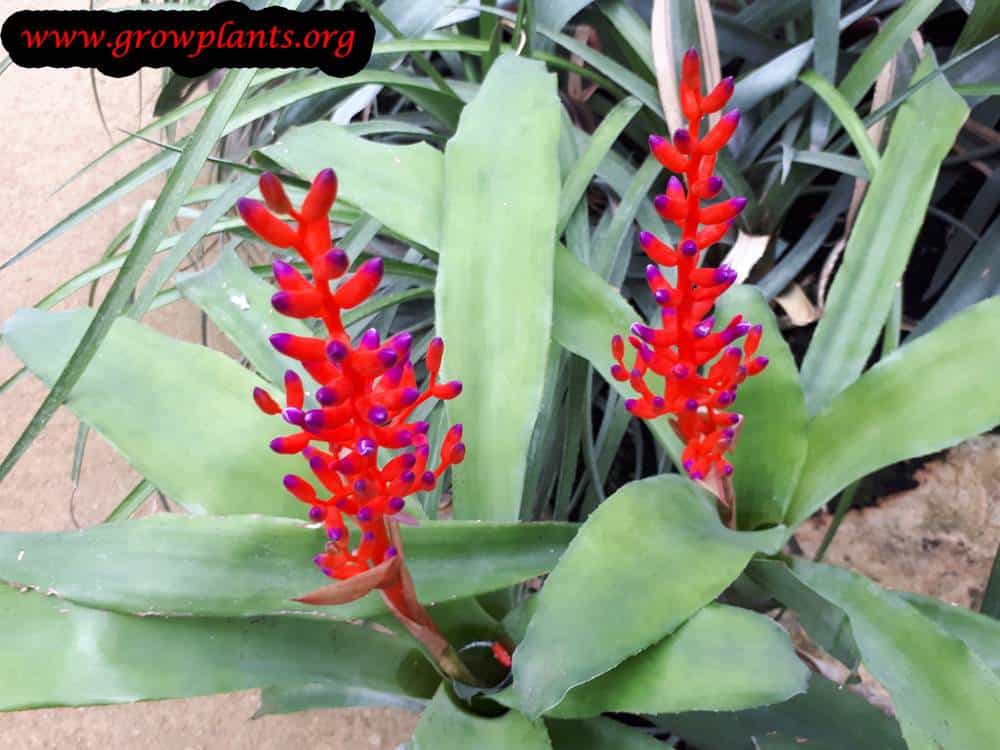
- Leaves & Foliage: Green, strap-like elliptic leaves in a rosette, tapering to a point with small spines along the margins.
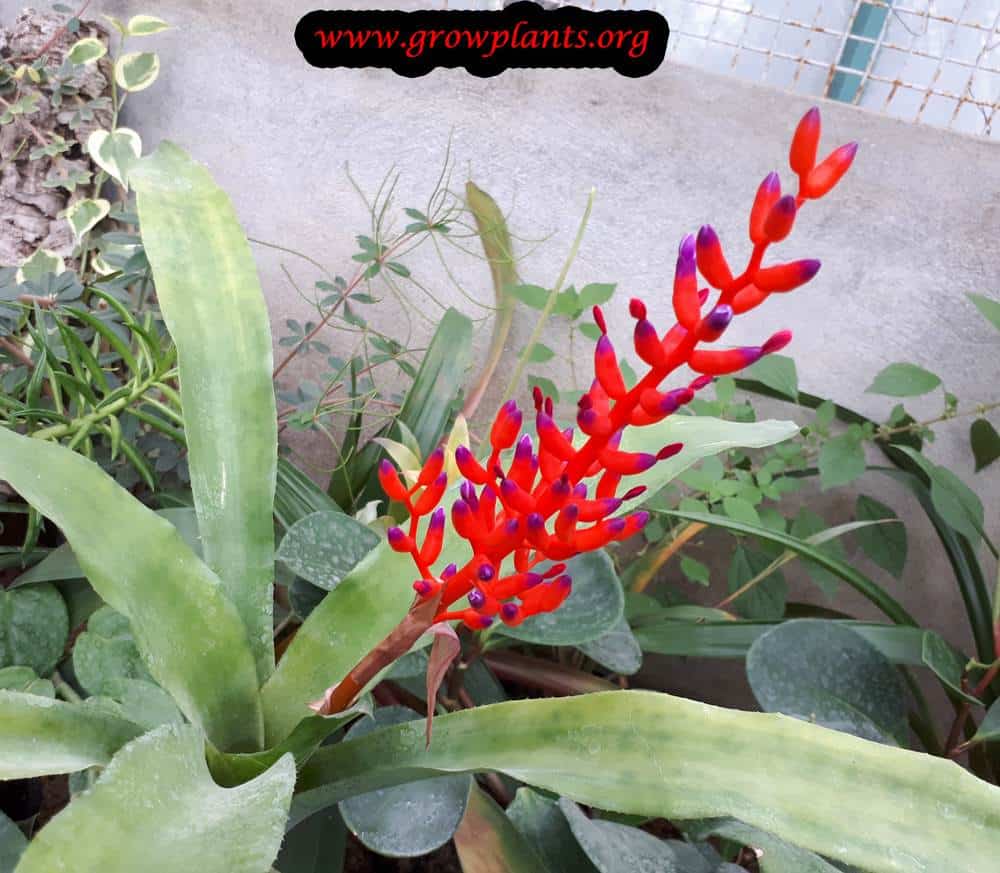
- Flower Characteristics: Red, crescent-shaped flowers on an upright inflorescence spike, long-lasting.
Primary Uses & Landscape Value
- Functional & Ornamental Roles: Ornamental foliage and flower plant, indoor houseplant, cut flower and epiphyte mount.
Care Guide: Planting, Soil & Watering
Overview: Aechmea fulgens is an epiphytic bromeliad that grows best in warm (above about 15°C), humid, brightly shaded conditions in a very light, airy, fast-draining medium. Its roots mainly anchor it, so keep the mix barely moist and water into the central rosette cup rather than soaking the roots.
Quick Care Requirements
| Requirement | Ideal Condition |
|---|---|
| Planting Season | Year-round in warm, frost-free conditions |
| Growth Rate | Slow to Moderate |
| Soil Type | Light, airy, fast-draining epiphyte/bromeliad mix (bark, perlite); never heavy or waterlogged |
| Water Need | Low at the roots — keep the central rosette cup topped up and the mix only lightly moist |
Planting & Establishment
- Best Planting Season: Plant year-round in warm conditions above about 15°C; it survives brief dips toward 10°C but is happiest kept warm.
- How to Plant:
- Hole Preparation: Being an epiphyte, plant it shallowly in a small pot of open mix or mount it on cork or bark — do not pack the roots into heavy soil.
- Soil Amendments: Use an open, bark-based bromeliad mix with perlite for maximum aeration and drainage.
- Planting Depth: Keep the base of the rosette at the surface with the crown above the mix — burying the rosette causes it to rot.
- Growth Speed & Expectations: Slow to moderate, forming a vase-shaped rosette that flowers once and then produces offsets (pups).
Soil, Watering & Drainage Care
- Soil Mix & Drainage Needs: Use a very open, fast-draining, airy medium, or mount the plant on cork/bark, since free drainage is critical and a soggy mix quickly rots the roots.
- Watering Schedule & Technique:
- Young / Newly Planted: Keep the mix lightly moist with a little water in the central cup as it establishes.
- Established: Keep the central rosette topped up with clean rain or purified water, flushing and refreshing it regularly so it does not stagnate and breed mosquitoes; keep the mix only barely moist.
- Seasonal Adjustments: Water and mist more in summer heat for humidity; in cool weather water less and empty the cup during cold spells to prevent rot.
Climate, Light & Hardiness
Aechmea fulgens (Coralberry) is a warm-climate bromeliad for tropical, subtropical, and Mediterranean gardens, or indoor growing elsewhere. It needs full shade and consistent warmth, since direct sun scorches its spiny-edged foliage.
Quick Climate Specifications
| Climate Zones | Tropics, subtropical, Mediterranean |
|---|---|
| USDA Hardiness Zones | 11+ |
| Optimal Temp Range | Warm year-round, generally above 15°C (59°F) |
| Approx. Survival Minimum | Can briefly tolerate around 10°C (50°F), though this is not recommended |
| Frost Tolerance | None |
| Light Conditions | Full shade |
Sunlight & Light Exposure
Optimal Light Setup
Needs full shade with bright ambient light; direct sun burns and permanently marks the leaves and flowers.
Temperature Extremes & Hardiness
USDA Hardiness & Regional Limits
Reliable outdoors year-round only in USDA zone 11 and warmer, truly frost-free climates.
Cold Damage & Winter Protection
Best kept above roughly 15°C (59°F); it can briefly withstand about 10°C (50°F) but this is not recommended for sustained periods.
Frost Sensitivity
Frost sensitive; container culture with winter protection is needed outside the tropics.
Wind, Humidity & Microclimate
Humidity Preferences
Needs high humidity, in keeping with its epiphytic, tropical-forest origin.
Microclimate Recommendations
A warm, humid, shaded spot – greenhouse or indoor culture is often easiest outside the tropics.
Growing in Pots, Balconies & Indoors
Aechmea fulgens (coral berry) is a bromeliad the grower actually finds easier to grow as a houseplant than in the ground – because it is an epiphyte, it is happiest mounted on cork or bark, or set in a planter away from heavy soil, exactly as it grows on trees in the wild. That makes it a striking, low-fuss indoor plant (20-50 cm / 8-20 in).
Quick Details
- Container Size: A small planter, or mount it on cork/bark – as an epiphyte it needs little or no soil
- Indoor Suitability: An excellent houseplant – the grower says it is easier grown indoors
- Best Spot: Bright shade with plenty of light but no direct sun, which scorches the leaves and flowers
- Soil & Drainage: Very open and airy – bark/epiphyte mix, or no soil at all when mounted
- Watering in Pots: Water into the central rosette (the “cup”); keep humidity high but roots well aired
Indoors & On the Windowsill
- A natural houseplant: The grower rates it as easier to grow indoors. Keep it in bright, indirect light and top up the central cup with water; mist for humidity, especially in dry rooms.
- Windowsill growing: A bright sill out of direct sun is ideal – direct rays burn the foliage and leave permanent marks.
- Overwintering: Tender to cold, so keep it warm and indoors through winter; ease off watering while growth is slow.
On a Balcony or Patio
- Light & shelter: A warm, bright, shaded and sheltered spot – never full sun. Good airflow keeps the roots healthy.
- Watch the cup: Standing water in the central rosette can breed mosquitoes outdoors (a problem the grower notes) – flush and refresh it regularly.
Choosing the Pot, Soil & Long-Term Care
- Pot & mounting: Use a small planter with a very open bark mix, or mount the plant on cork or bark, disconnected from soil.
- Keep the roots moist: On cork or bark, wrap the roots with bark or moss to hold humidity, and mist so they never dry out completely.
- Feeding: Feed lightly and occasionally – a dilute feed to the cup and foliage is plenty for an epiphyte.
- After flowering: The main rosette slowly dies after flowering but produces offsets (“pups”) you can grow on to replace it.
Grower’s Container Tip
- Grow it as an epiphyte: Rather than potting it in soil, mount it on cork or bark and keep the roots covered and moist – the grower finds this closest to how it grows in nature and the easiest way to keep it healthy.
- Water the rosette: Fill the central cup of leaves with water rather than soaking a root ball.
Fertilizing & Feeding
A light feeder: the coralberry bromeliad grows as an epiphyte in nature, living on organic debris that collects in its rosette, so it needs only occasional, dilute feeding rather than a rich regular fertilizer.
Quick Fertilizing Specs
| Feeding Level | Light feeder |
|---|---|
| Main Nutrient Priority | Low-nitrogen, balanced overall |
| Best Feeding Period | During active warm-season growth, tapering off around and after flowering |
| Organic Options | A very dilute organic liquid feed applied into the rosette or growing medium |
| Micronutrients | Rarely an issue with an appropriately dilute complete feed; correct specific issues only when diagnosed |
| Soil pH | Prefers a loose, light, well-aerated growing medium rather than dense garden soil |
Feeding by Growth Stage
Establishment in a new pot or mount
Help the rosette settle its roots into a light, airy growing medium or mount.
| Nutrient direction | Hold off on feeding at first, then introduce a very dilute, balanced feed once the plant shows active growth. |
|---|---|
| Timing | From potting or mounting through initial rooting in. |
| Frequency | Minimal feeding is usually needed while the plant settles in. |
| Fertilizer types | A dilute balanced liquid fertilizer, introduced only once new growth is evident |
| Precautions | Feed sparingly while roots are still establishing; a light, airy medium and purified or rain water matter more than fertilizer at this stage. |
Active growth and flowering
Support gradual rosette growth and the eventual red, crescent-shaped inflorescence without overfeeding this naturally low-nutrient plant.
| Nutrient direction | Keep feeding light and low-nitrogen, applied into the rosette or growing medium the way falling organic debris would nourish it in the wild. |
|---|---|
| Timing | Through the main growing period and as the flower stem develops. |
| Frequency | Light, occasional feeding is usually enough through active growth; minimal feeding is needed once flowering is underway. |
| Fertilizer types | A dilute, low-nitrogen liquid feed applied into the rosette or medium |
| Precautions | Avoid concentrated or frequent feeding, which can scorch the rosette and encourage rot where water collects. |
Post-bloom decline of the flowering rosette
Let the flowering rosette wind down naturally as it gives way to new offsets.
| Nutrient direction | None – withhold fertilizer from the spent rosette as it declines. |
|---|---|
| Timing | After flowering finishes, as the mother rosette gradually fades. |
| Frequency | No feeding at this stage. |
| Fertilizer types | No feeding at this stage – the spent rosette naturally declines while offsets take over |
| Precautions | Do not fertilize the fading mother rosette; direct any light feeding toward new offsets once they are established. |
Nutrient Deficiency Signs & Corrections
The center of the rosette turns soft, dark, and mushy, with the innermost leaves easily pulling away.
| Possible causes | stagnant water sitting too long in the rosette cup, fertilizer residue building up in the cup, poor air circulation around the plant |
|---|---|
| Appears first on | the center of the rosette |
| What to check | how often the water in the rosette cup is refreshed, recent feeding strength and frequency, airflow around the plant |
| Possible correction | Flush and refresh the water in the rosette regularly, dilute any feeding further, and improve airflow. |
Growth is unusually slow and leaves look pale or dull despite otherwise suitable light and humidity.
| Possible causes | very long stretches without any feeding, insufficient light, low humidity around the foliage |
|---|---|
| Appears first on | overall foliage color and vigor |
| What to check | feeding history, light exposure, humidity levels |
| Possible correction | Introduce a light, dilute feeding during active growth and confirm light and humidity are adequate. |
New leaves emerge pale yellow while the veins remain green.
| Possible causes | mineral buildup from hard tap water rather than purified or rain water, an overly alkaline growing medium, root stress from a poorly aerated medium |
|---|---|
| Appears first on | newest leaves |
| What to check | the type of water used for watering and feeding, growing medium condition, root health |
| Possible correction | Switch to purified or rain water, refresh the growing medium, and apply a chelated iron product per its label if needed. |
Pruning, Training & Seasonal Maintenance
Aechmea fulgens (Coralberry) is a compact, evergreen, rosette-forming bromeliad usually grown as an epiphyte in a small pot or mounted on bark. It needs no structural or seasonal pruning – maintenance is limited to removing dead leaves and, once flowering finishes, the spent bloom spike. Each rosette is monocarpic: it flowers once (red, crescent-shaped blooms) and then gradually declines while pups form at the base to continue the plant, so pruning here supports tidiness and pup succession rather than repeat bloom. Its small overall size (20–50cm) means very little material is ever removed at once, and work can be done any time of year as tissue naturally ages.
Quick Pruning & Maintenance Specs
| Pruning Tolerance | Low – maintenance only, no structural cutting |
| Primary Pruning Window | Year-round, opportunistic as leaves/bloom spikes decline |
| Main Objective | Remove dead leaves and the spent inflorescence; support pup succession |
| Young Plant Priority | None – let a newly separated pup establish undisturbed |
| Mature Plant Priority | Remove the spent bloom stalk after flowers fade; remove browning outer leaves |
| Best Tool Type | Precision snips |
| Avoid Heavy Pruning During | The first weeks after a pup is separated or the plant is repotted |
Pruning by Plant Age & Size
Newly Established
No pruning – let a young pup root and settle without disturbing its small central cup.
Young / Formative
No structural training; the rosette form is fixed by growth habit. Only remove a leaf if it is visibly damaged.
Mature / Established
Once the rosette flowers, remove the spent inflorescence stalk near its base after the red crescent-shaped blooms have fully faded. Remove yellowing or browning outer leaves as they senesce. Because the mature rosette stays fairly compact, pups can often be left clustered around the parent for a dense colony in a modest-sized pot rather than needing early separation.
Seasonal Pruning Schedule
Ongoing Sanitary
Objective: tidiness and pest/rot prevention. Remove: fully dead or brown leaves at their base, the finished flower spike, and debris that collects in the leaf cup. Do not remove: green or partly yellowing leaves that are still photosynthesizing, or healthy pups. Expected response: none – this is not regrowth-stimulating pruning. Flowering impact: none on the rosette that already bloomed, but keeps the plant tidy while pups develop.
Special Growth to Remove
- Dead or browning outer leaves – remove at the base without disturbing the central water-holding cup.
- The spent flower/inflorescence stalk, once the crescent-shaped blooms have fully faded – cut near its base rather than into the leaves.
- Standing water and debris in the leaf cup – not a cut, but flush and refresh periodically, since this species is noted to attract mosquitoes breeding in the leaf cup and stagnant water also encourages rot.
- Offsets/pups – retain for a natural clump (the compact size suits this), or separate and pot once large enough to propagate.
Container & Small-Space Pruning
Well suited to small pots or mounts given its compact 20–50cm size; water goes into the central rosette cup rather than the soil, and the plant is grown in full shade. Remove dead leaves at their base without disturbing the cup; for mounted plants, trim only loose or dead material without disturbing the mount.
Tools
- Precision snips for dead leaf tips and the spent bloom stalk – the only tool most cuts on a plant this size require.
Tool Hygiene & Disease Risk
Routine – clean, sharp tools are normally sufficient. Take extra care around the water-holding cup: introducing pathogens there via a dirty blade or leaf debris can cause crown/heart rot, which is more serious for a tank bromeliad than an ordinary leaf trim.
Cut Placement & Technique
Cut dead leaves near their base without cutting into living green tissue or nicking the central cup. Cut the spent flower stalk near its base rather than leaving a long dry stub.
Heavy Pruning & Rejuvenation
Not applicable in the shrub sense – renewal happens naturally as the flowering rosette declines after bloom and is replaced by its own pups. Do not attempt to force the spent rosette to regrow; once it has fully browned it can be cut away at the base to make room for the pups.
Post-Pruning Care
No fertilizer is needed for the pruning itself. After removing a dead or spent rosette, avoid disturbing nearby pup roots. Keep the leaf cup topped up with rain or purified water as normal, and monitor any cut site for rot given the humidity this species needs.
Common Pruning Mistakes
- Cutting into the central cup or growing point, which permanently damages the rosette since it has a single growing point.
- Removing the spent bloom stalk too early, before pups have formed or established.
- Over-trimming green leaves for looks – it will not stimulate new rosette growth, since the rosette is monocarpic.
- Letting stagnant water sit uncleaned in the cup, which raises mosquito-breeding and rot risk.
When NOT to Prune
Avoid cutting or disturbing a rosette right after transplanting or separating pups – let it establish first. Avoid removing the spent bloom stalk while pups are still tiny and dependent on the parent rosette’s reserves.
Recommended Tools (by task)
- Dead-leaf and spent-stalk removal – precision_snips: fine, clean cuts near the leaf base without disturbing the central cup on this compact-sized rosette.
Propagation Guide
Aechmea fulgens (Coralberry) is propagated most reliably from the daughter offsets that form at the base of the rosette, since seed of this plant is hard to source and slow to germinate. Offset propagation is easy and is the method the site recommends over seed.
Quick Propagation Specs
| Best Propagation Method | Offsets (pups) |
| Alternative Methods | Seed (difficult, seed hard to source) |
| Propagation Difficulty | Easy (offsets); Difficult (seed) |
| Vegetative True-to-Type | Yes |
| Best Propagation Season | All year |
Division, Offsets, Pups & Suckers
Timing & Selection
After the rosette flowers, it produces offsets (pups) around its base; wait until a pup is roughly a third to half the size of the mother plant and has begun forming its own roots before separating it.
Separation & Establishment
Cut away cleanly, pot into a light, well-drained, airy mix, and keep humidity high with water held in the rosette cup while the new plant establishes, matching this species’ epiphytic origins.
Growing from Seed
Seed is described as hard to find and difficult to germinate for this plant; where available, sow fresh on a moist, sterile medium under high humidity and bright, indirect light, expecting slow and uncertain results compared with offsets.
Bloom & Flower Guide
Quick Details
- Bloom Season: Can flower at almost any time of year, and a mature plant can be brought into bloom in any season under warm, bright conditions
- Time to First Bloom: Once the rosette matures (often three to four years); each rosette flowers once, then offsets (pups) take over
- Flower Appearance: Red flowers in a crescent-shaped inflorescence on an upright stem
- Edibility: Ornamental only – grown as a cut flower and houseplant, not for eating
Detailed Blooming Overview
Aechmea fulgens, sometimes called Coralberry, is a bromeliad prized for its glowing red bloom spike set against broad green leaves. The true flowers are small and carried within a branched, crescent-like inflorescence that stays colourful for weeks. Given warmth and good light it can flower in almost any season, and like other bromeliads each rosette blooms only once before handing over to its pups.
Flower Characteristics
- Red flowers arranged in a crescent-shaped inflorescence on an upright stem.
- The long-lasting colour makes it a popular cut flower and houseplant.
Bloom Care & Thinning
- Encouraging bloom: Bright, indirect light and steady warmth bring on the flower spike; blooming can be prompted at any time of year on a mature plant.
- After flowering: Let the pups develop – they replace the spent rosette for future blooms.
- Pollination: In habitat the flowers are visited by hummingbirds and insects; not required indoors.
Pests, Diseases & Troubleshooting
Overview: Aechmeas are tough, mostly epiphytic bromeliads whose few real enemies are armoured scale and mealybugs hiding in the leaf axils, plus crown and root rot caused by cold, stagnant water or a soggy potting mix. Grow them in a very free-draining, airy medium with bright filtered light, flush the central ‘tank’ with clean water periodically, and most problems never start.
Quick Troubleshooting Overview
| Issue / Pest | Main Symptom | Primary Solution |
|---|---|---|
| Bromeliad scale | Round grey-white flecks on leaves; yellow patches; weak growth | Wipe/scrape off; dab with alcohol; light horticultural oil |
| Mealybugs | White cottony masses in leaf axils and roots; sticky honeydew | Alcohol swab; insecticidal soap; isolate; check roots at repotting |
| Thrips | Silvery streaks and speckling on leaves and bracts | Blue sticky traps; soap/spinosad; remove spent flower spike |
| Crown / heart rot | Central rosette softens, browns and pulls out easily | Empty cold stagnant tank water; improve airflow/drainage; drier, warmer |
| Leaf scorch | Bleached tan patches on the sun-facing side of leaves | Move to bright filtered light; acclimate gradually |
| Brown leaf tips | Dry crispy tips from hard/fluoridated water or dry air | Use rain/distilled water in tank; raise humidity |
Common Pests & Management
- Bromeliad (flyspeck) scale (Gymnaspis aechmeae):
- Symptoms: Small round grey-to-white armoured scales speckle the leaves like flyspecks, especially along the upper surface and edges; feeding causes yellow blotches, a tired dull look and, in numbers, weak growth.
- Prevention & Control: Wipe leaves regularly and scrape or rub off scale with a soft cloth; dab stubborn ones with a cotton bud of rubbing alcohol. A light horticultural oil or insecticidal soap smothers the mobile crawlers – spray thoroughly but test first, as some bromeliads are oil-sensitive.
- Mealybugs (Pseudococcus / Planococcus spp.):
- Symptoms: White cottony tufts nestle deep in the leaf axils and on the flower spike, oozing honeydew that turns to black sooty mould; growth weakens and leaves yellow. A root form infests the root ball unseen.
- Prevention & Control: Swab visible colonies with alcohol and rinse the tank and axils. Insecticidal soap or light oil, repeated weekly, clears foliar mealybug; at repotting check and wash roots for root mealybug and refresh the medium. Isolate new plants before adding them to a collection.
- Thrips (Thysanoptera):
- Symptoms: Fine silvery streaking, pale speckling and distortion on leaves and especially on the colourful bracts and flowers, sometimes with tiny black excrement dots; the slender insects are hard to see.
- Prevention & Control: Hang blue sticky traps to monitor, remove the spent inflorescence where thrips congregate, and spray insecticidal soap or spinosad into the crown and under leaves in the evening to protect pollinators.
- Aphids (Aphidoidea):
- Symptoms: Soft green or black aphids cluster on the emerging flower spike and tender bracts, leaving sticky honeydew and sooty mould and sometimes distorting the bloom.
- Prevention & Control: Rinse them off the spike with water and conserve natural predators. Insecticidal soap targeted at the inflorescence clears heavier colonies without harming the leathery foliage.
- Two-spotted spider mite (Tetranychus urticae):
- Symptoms: In hot, dry indoor air the leaf undersides show fine pale stippling and occasional webbing, with a dull bronzed cast to the foliage.
- Prevention & Control: Raise humidity and rinse the foliage – mites hate moist air. Conserve or introduce predatory mites and use a light soap only if needed; correcting the dry air usually solves it.
- Mexican bromeliad weevil (Metamasius callizona):
- Symptoms: In frost-free landscape plantings the grubs of this black-and-tan weevil bore into the base and heart, causing the whole rosette to topple and collapse from the centre – a serious pest of outdoor bromeliads in warm regions.
- Prevention & Control: Inspect the base for tunnelling and grub frass, remove and destroy infested plants, and keep clumps open and healthy. Where established outdoors, biological control (a parasitic fly) and prompt sanitation are the main tools.
Diseases & Fungal Issues
- Crown & heart rot (Phytophthora / Erwinia / Fusarium spp.):
- Symptoms: The central rosette turns soft, brown and foul, the youngest leaves pull out with a gentle tug, and rot spreads down into the base; caused by cold stagnant water sitting in the tank, overwatering, or a waterlogged mix in cool conditions.
- Treatment & Management: Prevention is key: keep plants warm and airy, empty and refresh the tank water (never leave it cold and stale), water into the medium sparingly and use a gritty, open substrate. Once the heart is rotten the plant rarely recovers, but offsets (‘pups’) can be salvaged if still firm.
- Root rot (Pythium / Phytophthora):
- Symptoms: Roots blacken and mush in a soggy, airless potting mix; the plant loses anchorage, leaves lose colour and lustre, and growth stalls.
- Treatment & Management: Repot into a fast-draining bromeliad/orchid-type mix, water only when the medium approaches dryness, and ensure pots drain freely. Trim rotted roots and let the base callus before re-establishing.
- Fungal leaf spot (Helminthosporium / Colletotrichum spp.):
- Symptoms: Brown to black spots, sometimes with yellow haloes or concentric rings, appear on leaves in warm, wet, poorly ventilated conditions and can merge into blotches.
- Treatment & Management: Improve air circulation, avoid wetting foliage late in the day and remove badly spotted leaves. A copper fungicide labelled safe for bromeliads, used strictly per the product label, can check spread on valued plants; keeping foliage dry and airy usually prevents it in the first place.
Growing Difficulties & Abiotic Problems
- Leaf scorch / bleaching:
- Cause & Symptoms: Sudden or excessive direct sun bleaches and tans the sun-facing leaf surfaces, leaving pale, dry, papery patches that do not recover.
- Correction Strategy: Grow in bright but filtered/indirect light and acclimate plants gradually when moving them to brighter spots; some sun improves colour, but not harsh midday rays.
- Brown, dry leaf tips:
- Cause & Symptoms: Hard, fluoridated or salty tap water and dry air burn the leaf tips brown and crisp; salts also accumulate in the tank.
- Correction Strategy: Fill the central tank with rain, filtered or distilled water, flush it periodically to prevent salt build-up, and raise humidity with grouping or misting in dry rooms.
- Failure to flower:
- Cause & Symptoms: Insufficient light or a very young plant delays blooming; bromeliads flower once from the mature rosette, then the main plant slowly declines after producing offsets.
- Correction Strategy: Give brighter (filtered) light and patience; blooming can be induced with ethylene (the classic ‘apple in a bag’ trick). After flowering, let the pups grow on to replace the parent.
- Cold damage:
- Cause & Symptoms: Temperatures below the plant’s tolerance cause soft, translucent, water-soaked leaf patches that later brown, and predispose the crown to rot.
- Correction Strategy: Keep above the species’ minimum (generally frost-free and warm), avoid cold draughts, and never leave cold water standing in the tank in cool conditions.
What Helps – Products & Tools
Bromeliads need only a light toolkit: rubbing alcohol on a swab and a soft cloth for scale and mealybug, insecticidal soap or a light horticultural oil (patch-test first) for crawlers, thrips and mites, blue/yellow sticky traps for monitoring, and, only if labelled safe for bromeliads and used per the product label, a copper fungicide for leaf spot. For culture, a gritty free-draining bromeliad/orchid mix and rain or distilled water for the tank prevent most rot and tip-burn.