
Plant Profile & Key Characteristics
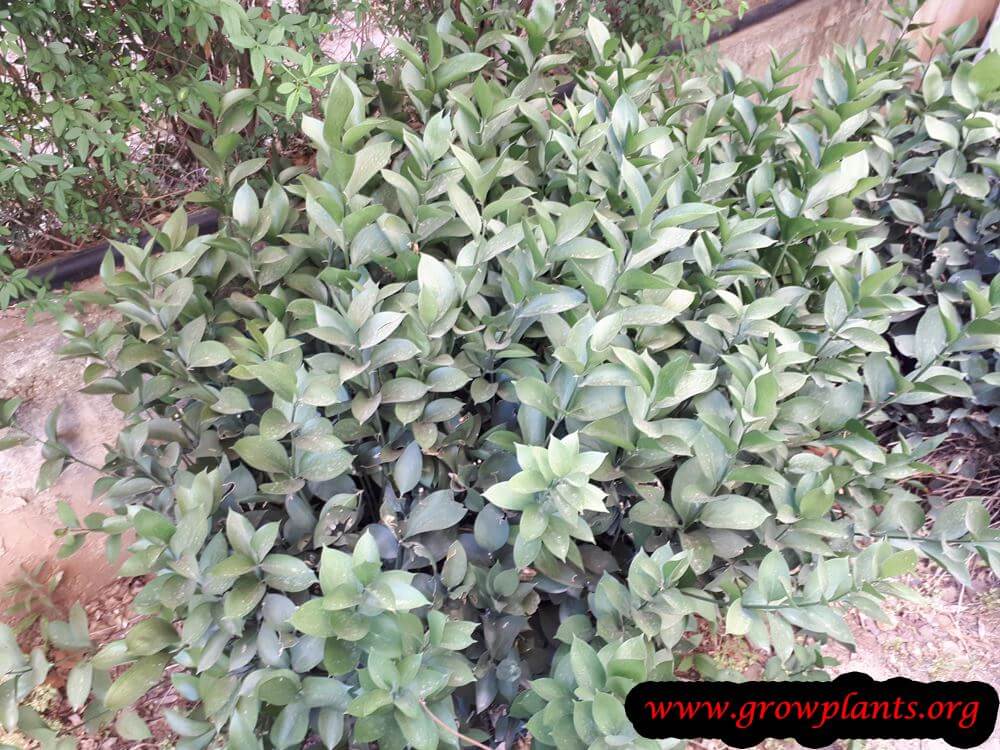
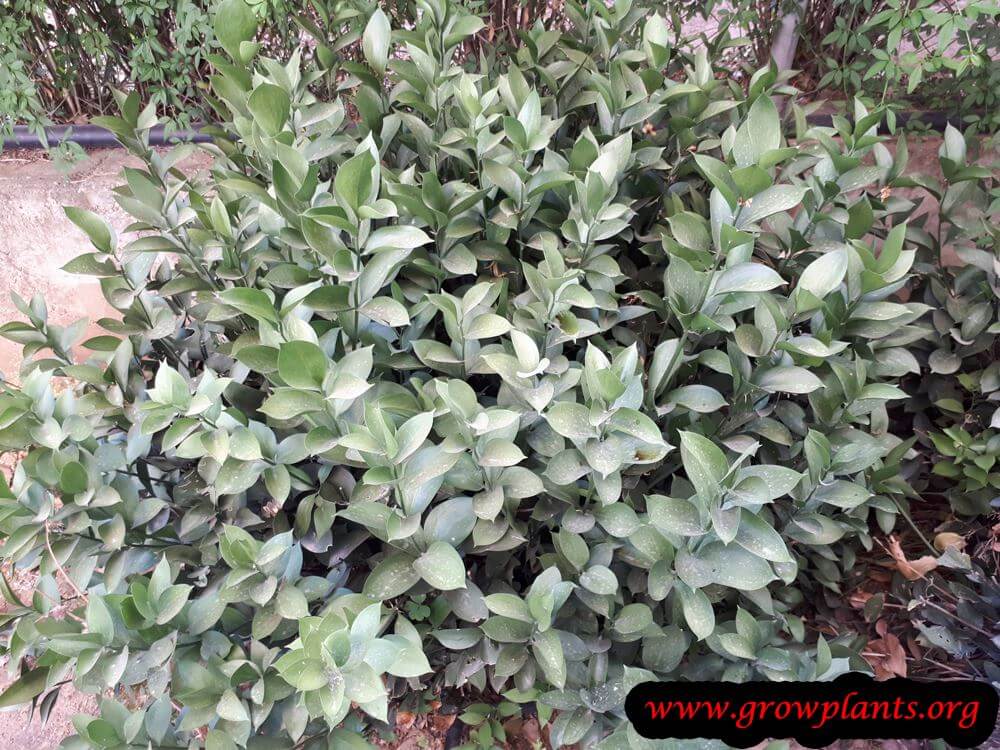
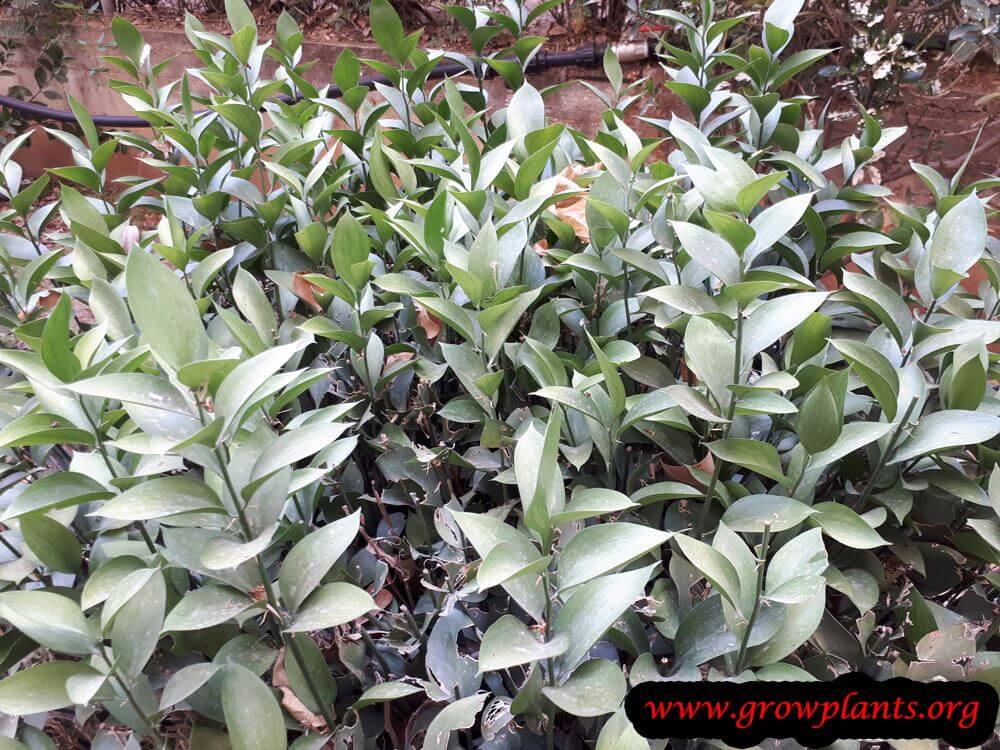
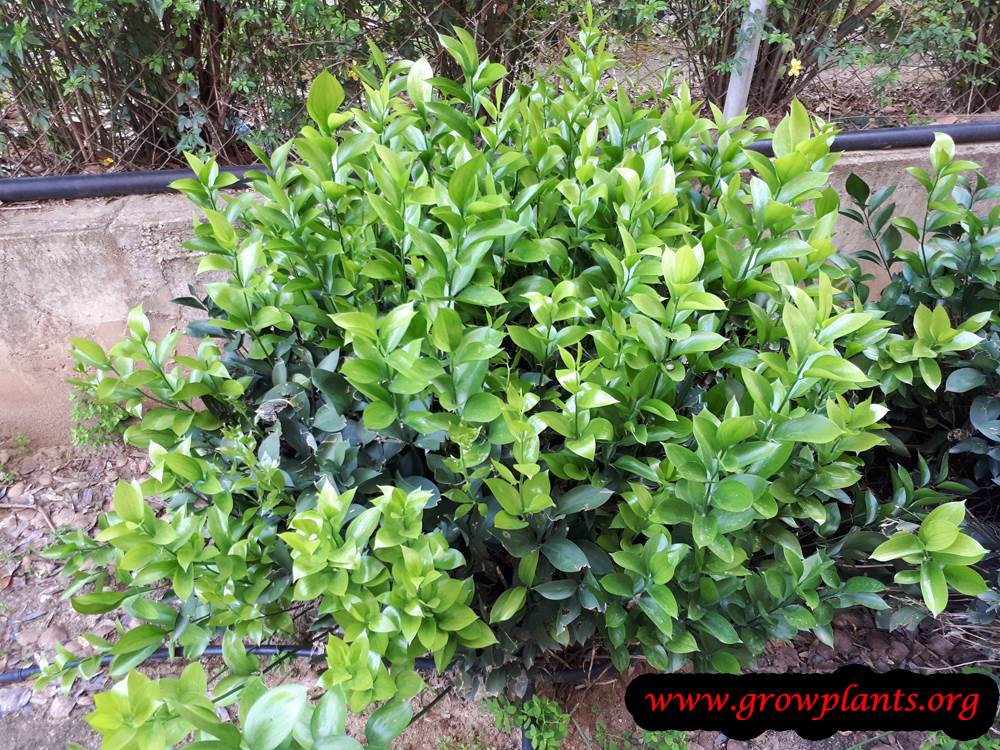
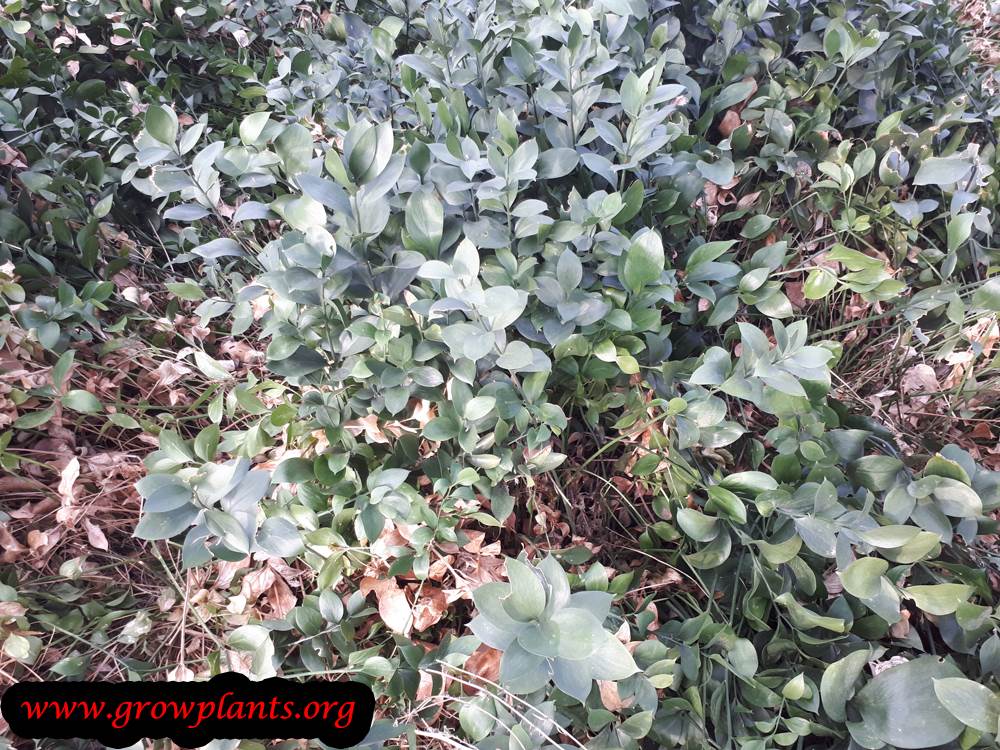
Overview: Israeli ruscus, an evergreen rhizomatous shrub 50-90 cm (1.5-3 ft) tall, grown for its glossy cut foliage and ornamental red berries. It is drought-tolerant and tolerates shade, making a durable florist’s green and houseplant.
Quick Specifications
| Specification | Attribute |
|---|---|
| Plant Type / Life Cycle | Evergreen perennial shrub (rhizomatous) |
| Foliage Type | Evergreen |
| Mature Size | 50-90 cm (1.5-3 ft) tall |
| Growth Rate | Moderate (slow in poor conditions) |
| Root System | Rhizomatous |
| Toxicity | Berries not edible |
| Hardiness | USDA zones 7-11a |
Growth Form & Structure
- Height & Spread: Upright, wiry stems 50-90 cm (1.5-3 ft) tall spreading slowly by rhizomes; a classic container and house plant, needing light but not strong sun.
- Growth Habit & Form: Clump-forming evergreen shrub with stiff, arching stems arising from creeping rhizomes.
- Lifespan & Maturity: Long-lived and slow-growing; foliage can be cut once the stems mature.
Anatomy & Physical Features
- Leaves & Foliage: The apparent leaves are flattened green cladodes (leaf-like stems), elliptic with pointed tips and a firm, glossy texture prized for bouquets.
- Flower Characteristics: Tiny green star-shaped flowers, each with a small purple-and-yellow centre, borne on the cladode surface.
- Fruit Profile: Showy round red berries in late summer to autumn; ornamental only, not edible.
Primary Uses & Landscape Value
- Functional & Ornamental Roles: Grown for long-lasting cut foliage and berries, as a shade-tolerant, drought-tolerant garden shrub, and as a houseplant.
Care Guide: Planting, Soil & Watering
Overview: Israeli ruscus (Ruscus hypophyllum) is a tough, evergreen shade shrub grown for its long-lasting cut foliage, hardy across zones 7-11a. It prefers well-draining soil in half to full shade, is drought-tolerant once established, and resents wet feet.
Quick Care Requirements
| Requirement | Ideal Condition |
|---|---|
| Planting Season | Warm season – spring to autumn (timing shifts by zone) |
| Growth Rate | Slow to Moderate |
| Soil Type | Well-draining |
| Water Need | Low to moderate; let it dry out somewhat before watering again |
Planting & Establishment
- Best Planting Season: Plant in the growing season – spring to autumn in cooler zones, spring to summer in zones 7-10a, and autumn to spring in the warmest zone 11.
- How to Plant:
- Hole Preparation: Dig a hole a little wider than the root ball and loosen the soil so the rhizomatous roots can spread.
- Soil Amendments: Work some organic matter into the backfill on poor soils and ensure the site drains freely; feed lightly about four times a year.
- Planting Depth: Set the plant at the depth it grew in its pot, keeping the crown at the soil surface.
- Growth Speed & Expectations: A slow to moderate grower reaching about 50-90 cm; growth is steady only in the right shady, well-drained conditions and very slow otherwise, so be patient.
Soil, Watering & Drainage Care
- Soil Mix & Drainage Needs: Good drainage is essential – the roots rot in soggy soil; in containers refresh the mix every few years, trimming some roots, once the soil stops absorbing and releasing water well.
- Watering Schedule & Technique:
- Young / Newly Planted: Water regularly after planting to settle the roots, keeping the soil lightly moist but never saturated.
- Established: Once established it tolerates drought; water only when the soil has dried somewhat, and avoid overwatering.
- Seasonal Adjustments: Give a little more water in summer heat and much less in cool weather, keeping the soil on the drier side.
Climate, Light & Hardiness
Israeli ruscus is a tough, drought-tolerant understory shrub suited to temperate, mediterranean, and subtropical climates, or as a houseplant, preferring half shade to full shade. It is broadly hardy across USDA zone 7–11a, giving it more cold tolerance than many similarly shade-loving foliage plants.
Quick Climate Specifications
| Climate Zones | Temperate, Mediterranean, subtropical, or grown as a houseplant |
|---|---|
| USDA Hardiness Zones | Approximately 7–11a |
| Frost Tolerance | Moderate |
| Light Conditions | Half shade (best with morning shade and afternoon sun) to full shade |
Sunlight & Light Exposure
Optimal Light Setup
Best in half shade, ideally with morning shade and some afternoon sun, or full shade; it is a classic understory and indoor plant that does not want intense all-day sun.
Shade & Heat Management
Handles shaded conditions well and is a popular low-light houseplant for this reason.
Temperature Extremes & Hardiness
USDA Hardiness & Regional Limits
Hardy across USDA zone 7–11a, a comparatively wide and cold-tolerant range for a shade-loving evergreen shrub.
Cold Damage & Winter Protection
Established plants handle the cooler end of their range reasonably well; in the coldest zones, a sheltered planting site helps protect against hard frost.
Frost Sensitivity
Moderately frost-tolerant, more so than many warm-climate foliage plants of similar type.
Extreme Heat Tolerance
Drought tolerant and copes well with warm subtropical summers.
Growing in Pots, Balconies & Indoors
Israeli ruscus (Ruscus hypophyllum) is a tough, shade-loving evergreen the grower calls a classic plant to grow at home. Its glossy sprays (long prized by florists) do well indoors in bright shade and in patio containers, and it is not fussy in a pot.
Quick Details
- Container Size: A medium pot; refresh the soil and trim some roots every few years
- Indoor Suitability: A good houseplant – a classic for shaded indoor spots
- Best Spot: Half shade (ideally morning shade with afternoon sun) to full shade; dislikes strong direct sun
- Soil & Drainage: Free-draining mix – good drainage prevents root rot
- Watering in Pots: Small to average; let it dry a little between waterings and never overwater
Indoors & On the Windowsill
- A classic houseplant: The grower calls it a classic home plant – it needs light but not much direct sun, so it suits bright, shaded rooms very well.
- Low-fuss foliage: Its evergreen sprays last a long time and tolerate the drier air of a room better than most; keep it out of scorching window sun.
On a Balcony or Patio
- Shaded shelter: On a balcony give it shade to part shade (a little morning sun is fine); it is undemanding, just keep it from baking afternoon sun and from sitting wet.
Choosing the Pot, Soil & Long-Term Care
- Pot & drainage: A medium pot with strong drainage holes and no standing saucer – good drainage is key to avoiding root rot.
- Use a well-aerated, organic-rich mix – potting compost or peat/coir with perlite or vermiculite for free drainage.
- Potted plants exhaust and leach nutrients faster than those in the ground, so feed more often – a balanced feed through the growing season.
- Repotting: Every few years, when the soil loses its ability to take up and release water, repot into fresh mix and trim some of the roots in the process.
Fertilizing & Feeding
Grown mainly for its glossy evergreen foliage used in bouquets, this rhizomatous shrub benefits from repeated light feedings through the active growing season rather than one heavy application.
Quick Fertilizing Specs
| Feeding Level | Moderate feeder |
|---|---|
| Main Nutrient Priority | Balanced with steady nitrogen to support foliage |
| Best Feeding Period | Across the active growing season from spring into autumn |
| Organic Options | Compost or well-rotted organic matter worked into the soil at planting or repotting |
| Micronutrients | Usually supplied by a complete fertilizer with routine iron and manganese; correct specific issues only when diagnosed |
| Soil pH | Tolerates a range of well-drained soils; avoid heavy, waterlogged ground |
Feeding by Growth Stage
Establishment after planting or repotting
Let new roots settle in before asking the plant to support vigorous new growth.
| Nutrient direction | None – hold off on fertilizer while roots establish in fresh soil. |
|---|---|
| Timing | The first few weeks after planting outdoors or repotting a container or houseplant specimen. |
| Frequency | No feeding at this stage. |
| Fertilizer types | No feeding at this stage; fresh potting or garden soil supplies enough nutrition to start |
| Precautions | Do not fertilize freshly planted or repotted specimens; wait for new growth as a sign roots have taken hold. |
Active growth season
Support steady production of the glossy, leaf-like stems (cladodes) valued for foliage and bouquet use.
| Nutrient direction | A balanced, nitrogen-forward complete fertilizer that keeps foliage full and deep green. |
|---|---|
| Timing | Through the main growing season from spring into autumn, whether grown outdoors or as a houseplant. |
| Frequency | Several light feedings spaced across the growing season work better than one heavy dose. |
| Fertilizer types | A balanced complete fertilizer for foliage or houseplants, Compost or a mild organic feed worked lightly into the topsoil |
| Routine trace nutrients | iron, manganese |
| Precautions | Avoid overfeeding, which can cause salt buildup, especially in containers; flush soil occasionally with plain water. |
Low-light or cool-season slowdown
Match feeding to the plant’s naturally reduced growth when light or temperatures drop.
| Nutrient direction | None – withhold fertilizer while growth is minimal, especially on indoor or shaded specimens in winter. |
|---|---|
| Timing | Winter, or any extended period of low light and cooler temperatures indoors. |
| Frequency | No feeding at this stage. |
| Fertilizer types | No feeding at this stage; resume light feeding once active growth returns |
| Precautions | Do not fertilize while growth has stalled; feeding a dormant plant risks salt injury rather than benefit. |
Nutrient Deficiency Signs & Corrections
Older stems and foliage turn pale green to yellow and new growth slows.
| Possible causes | low available soil or potting-mix nitrogen, infrequent feeding relative to the plant’s steady foliage growth, old, depleted potting mix |
|---|---|
| Appears first on | older growth |
| What to check | recent feeding history, age and condition of the potting mix, watering and drainage |
| Possible correction | Resume light, balanced feeding through the active growing season and refresh old potting mix. |
New growth shows yellowing between the veins while the veins stay green.
| Possible causes | high soil or water pH limiting micronutrient availability, waterlogged or compacted soil restricting root uptake, an old potting mix depleted of trace nutrients |
|---|---|
| Appears first on | newest foliage |
| What to check | soil or irrigation water pH, drainage and root health, how long since the last repotting |
| Possible correction | Improve drainage and correct pH toward neutral; apply a chelated iron or manganese product per its label if the issue persists. |
Leaf and cladode tips brown or scorch, especially on container-grown plants.
| Possible causes | fertilizer salt buildup from repeated feeding without flushing, under-watering that concentrates salts in the root zone, feeding continued into the low-light slowdown period |
|---|---|
| Appears first on | leaf and stem tips |
| What to check | recent fertilizer frequency, watering consistency, drainage, especially in containers |
| Possible correction | Ease off feeding, flush the soil thoroughly with plain water, then return to lighter feeding only during active growth. |
Pruning, Training & Seasonal Maintenance
Israeli ruscus is a rhizomatous, evergreen shrub whose ‘leaves’ are actually flattened stems (cladodes); the true leaves are reduced to tiny scales. It tolerates moderate pruning well, but because its tiny flowers and later its ornamental red berries are produced directly on the surface of these cladodes rather than at new stem tips, indiscriminate shearing removes the very structures that flower and fruit. The safest and most effective approach is renewal pruning – periodically removing whole older canes at the base – done in autumn/winter, rather than trimming cladode tips for a neat outline.
Quick Pruning & Maintenance Specs
| Pruning Tolerance | Moderate (base cane removal only, not tip shearing) |
| Primary Pruning Window | Autumn / Winter |
| Secondary Maintenance Window | Light stem harvesting for cut foliage, any season |
| Typical Frequency | Low – renewal thinning once a year or every couple of years |
| Main Objective | Renew the clump, control spread, harvest stems for arrangements |
| Young Plant Priority | Minimal – let new canes fill in undisturbed |
| Mature Plant Priority | Remove 1–2 of the oldest or weakest canes at the base per year |
| Best Tool Type | Bypass secateurs (wiry, semi-woody canes at the base) |
| Avoid Heavy Pruning During | While cladodes are carrying flowers or the autumn/winter berry display |
Pruning by Plant Age & Size
Newly Established
Remove only damaged or discolored cladodes; the clumping rhizome needs time to establish before any structural work.
Young / Formative
No formal training system applies – it is a naturally clumping rhizomatous shrub. Simply allow new canes to fill in and thin only if growth is overcrowded.
Mature / Established
Each year (or every couple of years) remove the oldest, thinnest, or most yellowed canes at their base to admit light to the crown and stimulate fresh rhizome shoots, while leaving younger, well-furnished canes intact for flower and berry display.
Seasonal Pruning Schedule
| Stage | Objective | Remove | Do Not Remove | Response / Impact |
| Dormant/Winter (Autumn–Winter) | Renew the clump, tidy | Oldest/weakest canes at the base; damaged or yellowed cladodes | Canes still carrying ripe or ripening berries wanted for winter display | Stimulates fresh rhizome shoots the following spring |
Flowering & Fruiting Wood
Unlike leaf-bearing shrubs, this species produces its small star-shaped flowers, and on female plants the ornamental red berries, directly on the underside of the cladodes themselves rather than at branch tips. Because a whole cane’s cladodes remain the flowering surface for as long as that cane is kept, removing entire canes (or stripping cladodes for cut foliage) reduces that display. The plant is also dioecious, so berries require a female plant to be pollinated by a nearby male; removing all of one sex’s canes will reduce fruiting on the other.
Structural Pruning & Training
Height and spread are controlled by removing whole outer or tallest canes at the base, not by shearing cladode tips (which cuts across the flowering surface and leaves a ragged, browning edge). Where the plant’s rhizome is spreading beyond its bed, thin or divide the outermost shoots to contain it.
Special Growth to Remove
- Dead or yellowed cladodes, removed individually at their point of attachment.
- The oldest, weakest canes at the base as part of routine renewal.
- New rhizome shoots beyond the desired planting footprint, if spread needs containing (otherwise these are wanted growth, not suckers to remove on sight).
Container & Small-Space Pruning
Grown as a houseplant or in a pot, repot every few years, trimming back a portion of the roots along with a couple of the oldest canes to keep the clump in scale. Base cane-thinning, not shearing, is still the right way to control size indoors.
Tools
Bypass secateurs for cutting canes at the base – they are wiry and slightly tough where they meet the rhizome. Precision snips are useful for tidying individual damaged cladodes or cutting stems for floristry.
Tool Hygiene & Disease Risk
Routine – clean, sharp tools are sufficient; the noted pests (snails, aphids, slugs) are not tool-transmissible.
Cut Placement & Technique
Cut unwanted canes flush at the base near the rhizome, not partway up – a mid-cane cut leaves an unproductive stub instead of encouraging the desired basal renewal shoot.
Heavy Pruning & Rejuvenation
An old, leggy, or overcrowded clump can be cut back hard, close to the rhizome, to fully renew it; being rhizomatous it resprouts readily. Expect a season with little to no berry display while the new canes mature and begin flowering.
Post-Pruning Care
Keep the soil evenly moist while new canes emerge, and watch tender new shoots for snails and slugs. No extra feeding is needed beyond the plant’s routine four-times-a-year fertilizing already recommended.
Common Pruning Mistakes
- Shearing all the cladode tips for a neat outline, which removes the very surfaces that flower and fruit.
- Repeatedly harvesting cut-foliage stems from the same few canes, exhausting that part of the clump.
- Removing canes that look ‘unproductive’ without checking whether the plant is male or female first.
When NOT to Prune
Avoid removing canes carrying developing or ripening berries if the autumn/winter display is wanted, and avoid heavy renewal cutting right before or during the main spring growth flush.
Recommended Tools (by task)
- bypass_secateurs – cutting whole canes flush at the base for renewal thinning.
- precision_snips – tidying individual damaged cladodes and cutting stems for cut-foliage use.
Pruning Troubleshooting
| Problem | Possible Cause | What to Check | Corrective Action |
| No berries forming | Plant is male, or no male plant nearby for pollination | Look for tiny green-and-purple star flowers; check whether a second plant is present | Plant a male alongside an existing female for cross-pollination |
| Sparse, ragged-looking foliage after tidying | Cladode tips were sheared instead of removing whole canes | Look for cut cladode edges versus cleanly missing whole canes | Switch to base cane-thinning; avoid shearing |
| Weak new growth from the rhizome | Old, overcrowded canes shading the crown | Check cane density and age at the base | Remove 1–2 of the oldest canes at the base to open the clump |
Propagation Guide
Israeli ruscus is most reliably increased by dividing an established clump’s rhizomes if a plant is already on hand; stem cuttings are possible and are the route the site recommends when only cut stems can be sourced, but they root slowly and unreliably, especially from florist-trade stems. Seed is rarely available. Propagation is moderate by division but distinctly harder from stem cuttings.
Quick Propagation Specs
| Best Propagation Method | Rhizome/clump division |
| Alternative Methods | Stem cuttings (difficult, see below); seed (rarely available) |
| Propagation Difficulty | Moderate by division; stem cuttings are notably harder |
| Vegetative True-to-Type | Yes |
| Best Propagation Season | Spring |
| Cutting Rooting Time | Slow and often unreliable, potentially several weeks to months, per site |
Stem Cuttings
Cutting Type
Cuttings taken from the leaf-like flattened stems (cladodes) attached to woody stems.
Cutting Preparation
When sourcing stems, try to find fresh ones: stems bought through the floral trade usually contain preservative chemicals that keep them alive in vase water for a long time, and this is the main reason cutting propagation is so hard. Before attempting to root them, clean the stems and switch their water daily for a while to leach out the preservatives.
Rooting Setup
Root directly in soil rather than in water; use a peat-based or similar soil, kept moist with high humidity, and sterilize the medium (for example in a microwave) beforehand.
Rooting Hormone
A growth hormone is recommended to improve the low rooting success rate.
Rooting Time
Slow, with a low probability of successful rooting, per site notes; be patient and expect an uneven success rate, especially from florist-sourced stems.
Division, Offsets, Pups & Suckers
Israeli ruscus spreads by underground rhizomes and forms multi-stemmed clumps that can be divided; the site lists rhizome division as an option without detailing the steps. Lift an actively growing clump, ideally in spring, and separate sections that each retain healthy roots and at least one or two shoots. Because growth is only medium under good conditions (and can be very slow otherwise, per site), keep divisions in a sheltered, humid spot with consistently moist, well-drained soil until new growth confirms establishment.
Bloom & Flower Guide
Quick Details
- Bloom Season: Spring and summer
- Flower Appearance: Tiny greenish star-shaped flowers with a small purple center, borne directly on the flattened, leaf-like stems
- Edibility: Ornamental — the flowers are insignificant, and the red berries that follow are not edible
Detailed Blooming Overview
Ruscus hypophyllum, Israeli ruscus, has a botanical quirk: what look like leaves are actually flattened stems (cladodes), and its tiny flowers are borne right on their surface. In spring and summer these little greenish stars appear, each with a small purple center and a dot of yellow — charming up close, but very small, since the plant is grown mainly for its glossy, long-lasting cut foliage.
Flower Characteristics
- Tiny green, star-shaped flowers with a purple center and small yellow markings.
- Borne directly on the flattened, leaf-like cladodes.
- Followed by ornamental (but inedible) red berries.
Bloom Care & Thinning
- Managing the bloom: Little is needed — the flowers are a minor feature; grow it for its durable foliage and prune old stems at the base to refresh the clump.
- Note: The bright red berries are decorative only and should not be eaten.
Pests, Diseases & Troubleshooting
Overview: Israeli ruscus / Spineless butcher’s broom (Ruscus hypophyllum) is an exceptionally tough, shade- and drought-tolerant evergreen whose leathery flattened stems (cladodes) are among the most pest- and disease-resistant of garden and cut-foliage plants; it is honestly close to trouble-free. Widely grown as long-lasting cut foliage, so under production the main watch-points are scale and clean, dry, airy handling. The only real risks are sap-feeders (scale and mealybugs) on sheltered or indoor plants and root rot in waterlogged soil – so the whole management approach is simply good drainage, sensible watering and occasional inspection.
Quick Troubleshooting Overview
| Issue / Pest | Main Symptom | Primary Solution |
|---|---|---|
| Scale insects | Brown limpet-like bumps on stems; honeydew | Wipe/prune off, horticultural oil on crawlers |
| Mealybugs | White cottony tufts on sheltered/indoor plants | Alcohol swab, insecticidal soap/oil |
| Spider mites (rare) | Faint stippling in hot, dry, dusty air | Rinse foliage, raise humidity |
| Root rot | Yellowing, dieback in soggy soil | Improve drainage, reduce watering |
| Leaf/stem spot (minor) | Occasional brown spots in stagnant damp air | Improve airflow, remove affected stems |
Common Pests & Management
- Scale insects (Coccus / Aspidiotus spp.):
- Symptoms: Small brown, tan or grey limpet-like bumps fixed along the cladodes and stems, sucking sap and producing sticky honeydew and sooty mould; heavy scale slowly weakens the plant and dulls the foliage – the most likely pest on Ruscus, mainly under glass or in still air.
- Prevention & Control: Wipe off or scrape light infestations, prune out badly encrusted stems, and encourage parasitic wasps and lady beetles outdoors. Spray horticultural oil to smother crawlers and eggs, repeating; improve airflow around sheltered plants.
- Mealybugs (Planococcus / Pseudococcus spp.):
- Symptoms: White, cottony waxy tufts collect in stem crevices and cladode bases on indoor, greenhouse or sheltered plants, sucking sap and leaving honeydew and sooty mould.
- Prevention & Control: Dab colonies with a cotton bud dipped in rubbing alcohol, wash the plant, and isolate new or infested specimens. Insecticidal soap or horticultural oil, thoroughly applied and repeated, controls them; avoid the still, dry conditions they favour.
- Spider mites (uncommon) (Tetranychus urticae):
- Symptoms: Faint pale stippling and, in bad cases, fine webbing on cladodes in hot, dry, dusty indoor air; genuinely rare on this leathery plant.
- Prevention & Control: Rinse foliage and raise humidity, keep the plant unstressed, and treat rare hot-spots with insecticidal soap or horticultural oil.
Diseases & Fungal Issues
- Root and crown rot (Phytophthora / Pythium / Armillaria spp.):
- Symptoms: Yellowing, thinning and stem dieback with a decaying base and roots, seen only in heavy, waterlogged or overwatered soil; healthy Ruscus in free-draining ground almost never rots.
- Treatment & Management: Plant in well-drained soil, never in standing water, and water sparingly once established, as this is a drought-tolerant plant. Remove and destroy rotted specimens and improve drainage; there is no cure once the crown collapses.
- Leaf / stem spot (minor) (Colletotrichum / Phyllosticta spp.):
- Symptoms: Occasional small brown spots or blotches on cladodes in stagnant, overly humid conditions; cosmetic and uncommon.
- Treatment & Management: Improve airflow and reduce overhead wetting, and cut out affected stems. Sanitation is enough; fungicides are essentially never needed on Ruscus.
Growing Difficulties & Abiotic Problems
- Root rot from overwatering / poor drainage:
- Cause & Symptoms: Yellowing, weak growth and dieback appear when this drought-tolerant plant sits in wet, heavy soil or over-frequent watering.
- Correction Strategy: Water only when the soil has dried, plant in free-draining ground or a gritty mix, and avoid waterlogged sites; once established it needs very little water.
- Leaf/cladode scorch or bleaching:
- Cause & Symptoms: Foliage can pale, brown or scorch if a shade-adapted plant is moved abruptly into intense full sun.
- Correction Strategy: Grow in partial to full shade or dappled light as it prefers, and acclimatise gradually if increasing light; provide shelter from harsh reflected heat.
- Slow establishment / sparse growth:
- Cause & Symptoms: Ruscus is naturally slow-growing and can look thin for its first seasons or in deep dry shade.
- Correction Strategy: Be patient, keep young plants evenly moist while establishing, and mulch; growth and density improve markedly once the rhizome is settled.
What Helps – Products & Tools
Ruscus rarely needs anything beyond horticultural or neem oil and insecticidal soap for the occasional scale or mealybug, rubbing alcohol on a swab for spot-treating them, and simply good drainage to prevent root rot. Fungicides and insecticides are almost never warranted on this genuinely tough plant. Apply any oil in the evening to protect pollinators.