

Plant Profile & Key Characteristics
Overview: A tough, deciduous shrub or small tree reaching 1-8 m (3-26 ft), grown for its feathery grey-green foliage and airy sprays of tiny pink-to-white flowers. Highly drought and salt tolerant, it is used as an ornamental, an informal shade tree and a coastal or desert windbreak.
Quick Specifications
| Specification | Attribute |
|---|---|
| Plant Type / Life Cycle | Woody perennial (shrub or small tree) |
| Foliage Type | Deciduous |
| Mature Size | 1-8 m (3-26 ft) tall |
| Growth Rate | Slow |
| Root System | Deep, far-reaching taproot that seeks out the water table (a key reason it naturalises so aggressively) |
| Hardiness | USDA zones 7-11 |
Growth Form & Structure
- Height and Spread: In the ground a spreading shrub or small tree of 1-8 m (3-26 ft); can also be kept in a large container, which restrains its size.
- Growth Habit and Form: Multi-stemmed, arching shrub-to-tree with slender, wispy branches building a light, open crown; responds well to hard pruning for shape.
- Lifespan and Maturity: A long-lived, slow-growing woody plant that establishes readily and is notably tolerant of poor, saline and sandy soils.
Anatomy & Physical Features
- Leaves and Foliage: Tiny, scale-like, needle-like leaves in a green-grey tone, giving the whole plant a soft, feathery texture.
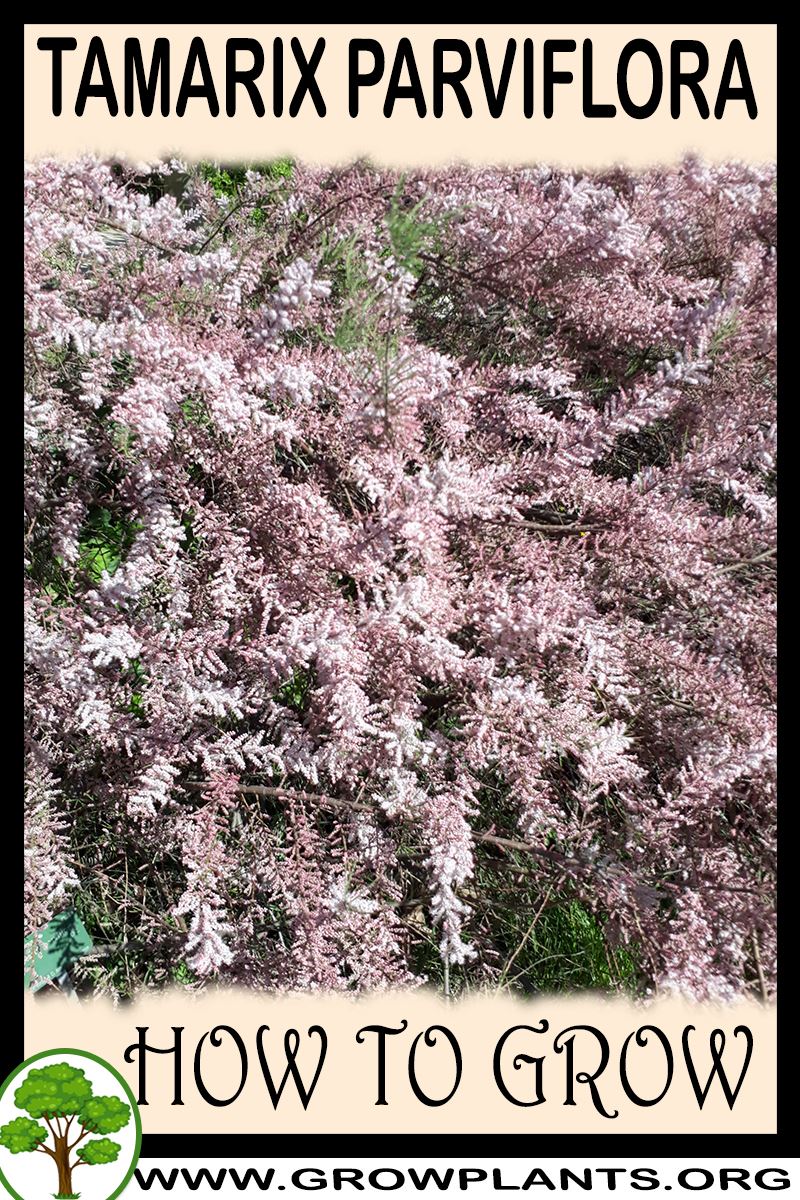
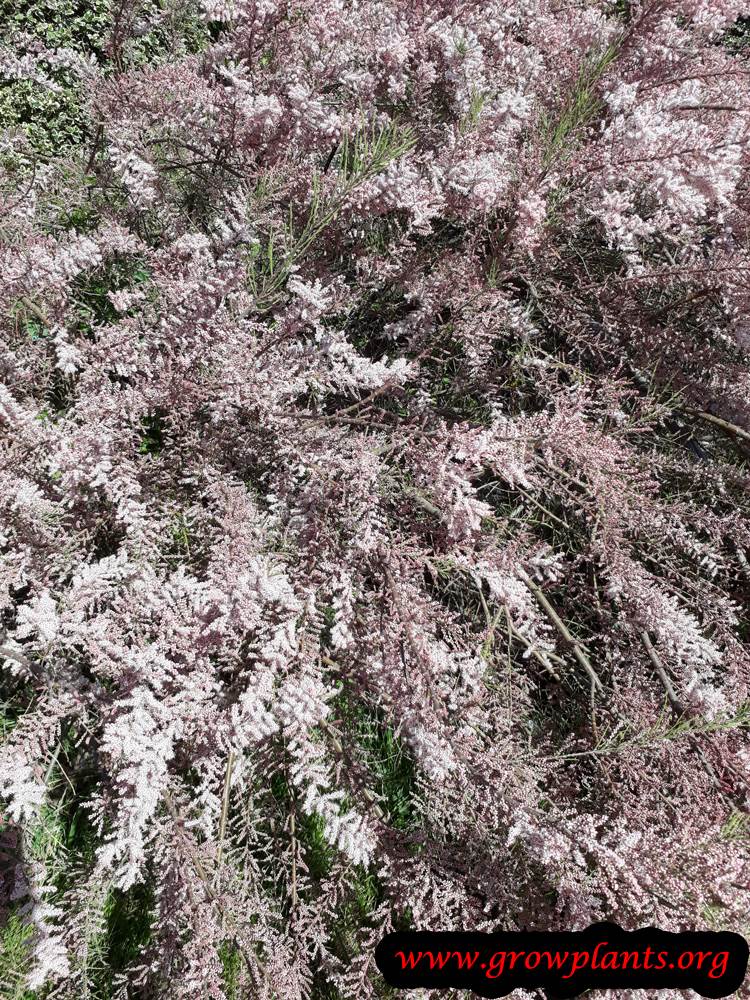
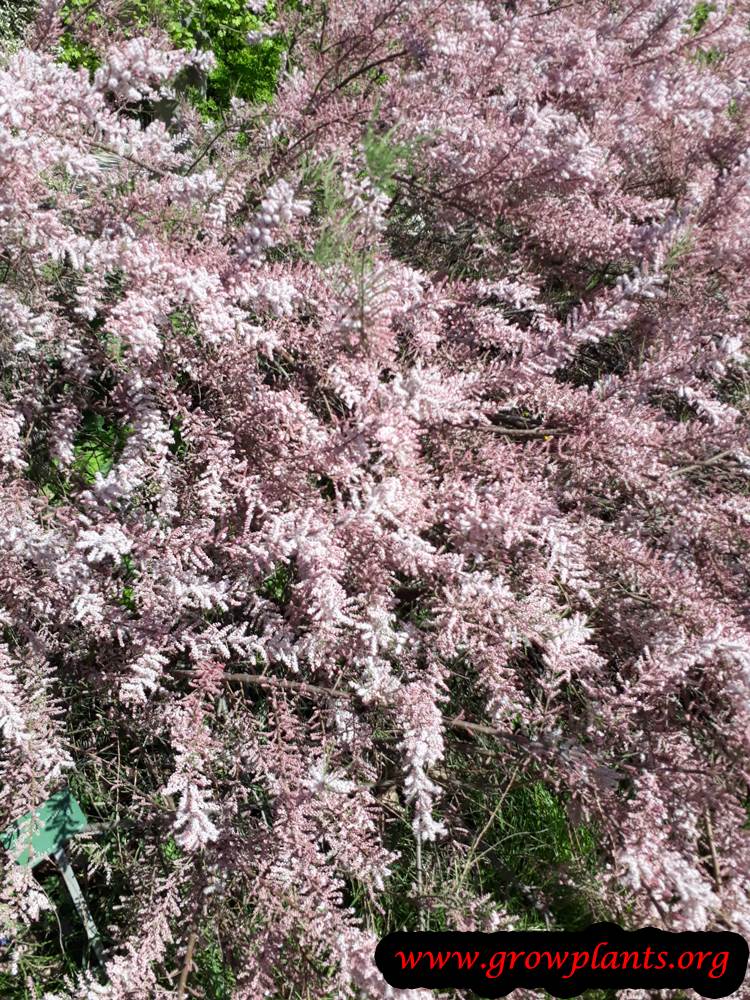
- Flower Characteristics: Minute pink-to-white flowers (about 1 mm) massed in slender plume-like sprays toward the branch tips.
Primary Uses & Landscape Value
- Functional and Ornamental Roles: Ornamental specimen, informal shade tree, and coastal or desert windbreak; excellent for saline, sandy sites where little else thrives. Note that it is considered invasive in many regions and can dominate waterways.
Care Guide: Planting, Soil & Watering
Overview: Smallflower tamarisk (Tamarix parviflora) is a tough, drought- and salt-tolerant shrub or small tree for full sun (hardiness zone 7–11). It thrives in well-drained sandy or even saline soils where little else grows and needs very little water once established.
Quick Care Requirements
| Requirement | Ideal Condition |
|---|---|
| Planting Season | Cooler part of the year — autumn, winter or spring |
| Growth Rate | Slow |
| Soil Type | Well-drained sandy, and even salty, soil |
| Water Need | Low — very drought-tolerant; water sparingly once established |
Planting & Establishment
- Best Planting Season: Plant in the cooler part of the year — autumn, winter or spring — so roots settle before summer heat.
- How to Plant:
- Hole Preparation: Dig a hole as deep as the root ball and a little wider in the loosened, free-draining soil.
- Soil Amendments: It needs no rich amendment — sharp drainage matters far more than fertility; work in coarse sand if the ground is heavy.
- Planting Depth: Set the root collar level with the surrounding soil, firm gently and water in to settle it.
- Growth Speed & Expectations: Slow-growing but tough and long-lived, forming a wind- and salt-hardy screen or shade tree.
Soil, Watering & Drainage Care
- Soil Mix & Drainage Needs: Sharp drainage is everything; it tolerates poor, sandy and saline soils and dislikes constantly wet ground. Any container needs excellent drainage.
- Watering Schedule & Technique:
- Young / Newly Planted: Water new plants occasionally through the first season to help roots establish.
- Established: Once established it is highly drought-tolerant — water sparingly, if at all, letting the soil dry thoroughly between waterings.
- Seasonal Adjustments: A little extra water in extreme summer heat; essentially none needed in cool or wet seasons.
Climate, Light & Hardiness
Tamarix parviflora is an exceptionally tough, drought-, salt-, and wind-tolerant desert-and-coastal shrub/small tree for desert, Mediterranean, temperate, subtropics climates, growing in full sun through full shade. Its stress tolerances (salt, wind, drought) are its standout climate traits, not cold sensitivity.
Quick Climate Specifications
| Climate Zones | Desert, mediterranean, temperate, subtropics |
|---|---|
| USDA Hardiness Zones | Zones 7–11 |
| Frost Tolerance | Moderate to high |
| Light Conditions | Full sun / half shade / full shade |
| Wind Tolerance | High |
| Salt / Coastal Tolerance | High (a classic salt-cedar for coastal and saline sites) |
Sunlight & Light Exposure
Optimal Light Setup
Tolerates full sun through full shade, an unusually wide range; full sun gives the densest growth and best flowering.
Temperature Extremes & Hardiness
USDA Hardiness & Regional Limits
Hardy across its stated zone range, tolerating both hot desert summers and cold winters within that range.
Wind, Humidity & Microclimate
Wind Tolerance
Excellent - it is often used as a windbreak in exposed desert and coastal sites.
Coastal / Salt Tolerance
Outstanding tolerance of salt spray, saline soil, and coastal exposure, reflected in its common name "salt cedar."
Microclimate Recommendations
Well suited to exposed, harsh sites - open desert, coastal fronts, and saline or sandy soils - where more delicate ornamentals struggle.
Growing in Pots, Balconies & Indoors
Small-flowered tamarisk (Tamarix parviflora) is a tough, feathery tree or large shrub of 1-8 m, thriving in salt, wind and drought – not a houseplant, but a striking container plant for a hot, exposed, or seaside balcony while young, kept pruned; long-term it wants the open ground.
Quick Details
- Container Size: A large, heavy pot, 40-80 L (10-18 gal), for a shrub/tree of 1-8 m (3-24 ft); pot up and prune to keep it in bounds
- Indoor Suitability: Not a houseplant (the grower marks it “No”) – a full-sun, salt- and wind-tolerant tree/shrub
- Best Spot: Full sun; it also tolerates part and even full shade, but flowers best in sun
- Soil & Drainage: Free-draining mix; very tolerant of poor, sandy and saline soils
- Watering in Pots: Low – deeply drought-tolerant once established; water sparingly
Indoors & On the Windowsill
- Houseplant limits: The grower marks it as not suitable indoors. It is a wind-loving tree that needs full sun and moving air, and will not thrive in a room.
- Overwintering: Hardy and tough; a potted specimen stays outdoors, sheltered against a wall only in the very hardest frost.
On a Balcony or Patio
- Light & wind: Ideal for the most exposed, windy, sun-baked or coastal balcony, where salt spray and drought defeat other plants. Pots still dry fast against hot walls, so check them in summer heat.
- Practicalities: Use a large, weighty pot for stability, and prune to keep the airy crown compact and balanced.
Choosing the Pot, Soil & Long-Term Care
- Pot & drainage: A large, stable 40-80 L pot with strong drainage holes; skip a standing water saucer to avoid root rot. Terracotta breathes and suits its love of dry roots.
- Potting mix: A free-draining mix; lean, sandy soil is perfectly fine.
- Feeding: Feed lightly through the season – it is not a hungry plant.
- Repotting: Pot on or refresh the mix every couple of years while young, and prune after flowering; long-term it is best planted out.
Fertilizing & Feeding
Like other tamarisks, this shrubby small tree is built for lean, salty, sandy ground: keep feeding light through establishment and the growing season, and skip it entirely once the plant goes dormant for winter.
Quick Fertilizing Specs
| Feeding Level | Light feeder |
|---|---|
| Main Nutrient Priority | Balanced, low-key feeding while roots establish |
| Best Feeding Period | At planting and through the growing season |
| Organic Options | Organic matter mixed into sandy planting soil |
| Reduce/Stop Feeding | Stop through the winter rest period |
| Micronutrients | Iron chlorosis can show on alkaline or poorly drained ground; correct only if diagnosed |
| Soil pH | Adaptable, including salty and alkaline conditions |
Feeding by Growth Stage
Planting and root establishment
Get roots settled into sandy or saline ground without forcing tender growth this hardy shrub does not need.
| Nutrient direction | Keep it simple: a light, balanced feeding at planting is plenty for a plant this well adapted to poor soils. |
|---|---|
| Timing | At planting, in the cooler or milder parts of the year when it is typically set out. |
| Frequency | One light feeding at planting carries the plant through early establishment. |
| Fertilizer types | A light, balanced fertilizer at planting time, Organic matter blended into sandy or saline planting soil |
| Precautions | Resist the urge to feed heavily; excess fertility encourages soft growth and can favor this species’ invasive spread. |
Growing-season maintenance
Maintain steady, wiry growth through the warm season without overfeeding a shrub adapted to poor, dry ground.
| Nutrient direction | Minimal feeding is the rule; a small, occasional balanced application is all that’s typically warranted. |
|---|---|
| Timing | Through the spring-into-autumn growing period. |
| Frequency | Feed only occasionally, and only if growth or color looks off. |
| Fertilizer types | An occasional light, balanced fertilizer if growth appears weak |
| Precautions | Because this species self-seeds and spreads readily, avoid routine heavy feeding that would only push more of that growth. |
Dormant-season rest
Allow the shrub to rest through its dormant period without stimulating cold-tender new growth.
| Nutrient direction | None – withhold fertilizer while the plant is dormant. |
|---|---|
| Timing | During the dormant, cool part of the year. |
| Frequency | No feeding at this stage; pick back up only once active growth resumes. |
| Fertilizer types | No feeding at this stage; withhold fertilizer until active growth resumes. |
| Precautions | Do not fertilize during dormancy; new growth pushed now is more vulnerable to cold. |
Nutrient Deficiency Signs & Corrections
New leaves turn pale yellow between visibly green veins.
| Possible causes | alkaline soil pH tying up available iron, compacted or waterlogged soil limiting root function, naturally iron-poor sandy or calcareous soil |
|---|---|
| Appears first on | newest growth |
| What to check | soil pH, drainage and recent watering, root condition and any signs of root stress |
| Possible correction | Address soil pH or drainage first, then apply a chelated iron product per its label if new growth stays pale. |
Overall pale, thin foliage and noticeably slower growth than expected.
| Possible causes | insufficient available soil nitrogen, nitrogen washed out of light, sandy soil, very low soil organic matter |
|---|---|
| Appears first on | older foliage first |
| What to check | how long since the last feeding, soil texture and organic matter, watering and leaching patterns |
| Possible correction | Add a balanced fertilizer with nitrogen and work in organic matter, keeping the overall amount light for this low-demand shrub. |
Scorched or browned leaf tips and margins out of proportion to normal drought or salt tolerance.
| Possible causes | buildup of fertilizer salts from over-application, concentrated soil salts during dry spells, a confined root zone such as a container planting |
|---|---|
| Appears first on | leaf tips and margins |
| What to check | how much and how often fertilizer has been applied, watering depth and frequency, whether roots are confined in a container or narrow bed |
| Possible correction | Cut back on feeding and water deeply to leach excess salts before resuming any fertilizer. |
Pruning, Training & Seasonal Maintenance
Tamarix parviflora (Smallflower Tamarisk) differs from its Tamarix relatives in one pruning-critical way: it flowers in early spring on wood produced the PREVIOUS year, before the new season’s leaves are fully out. Unlike a generic ‘prune any time’ salt-cedar, its safest and most effective window is right after the spring bloom finishes, not during the dormant winter months – a winter prune would cut off the flower buds already set on that old wood and sacrifice the display.
Quick Pruning & Maintenance Specs
| Pruning Tolerance | High (vigorous resprouter like its relatives), but timing is bloom-critical |
| Primary Pruning Window | Immediately after flowering finishes in spring, once petals have dropped |
| Secondary Maintenance Window | Light sucker/resprout control through summer |
| Typical Frequency | One structural prune per year, timed to bloom, plus as-needed sucker control |
| Main Objective | Renew flowering wood for next spring while controlling size/spread – pruning right after bloom gives the plant a full season to grow the old wood that will flower the following spring |
| Young Plant Priority | Select strong basal stems/framework, minimal cutting |
| Mature Plant Priority | After bloom, thin/renew a portion of the oldest stems and control size/spread |
| Best Tool Type | Loppers/bypass secateurs for stems; pruning saw for older basal wood on a mature shrub |
| Avoid Heavy Pruning During | Late summer through winter and before/during bloom – cutting then removes wood already set to flower the following spring |
Pruning by Plant Age & Size
Newly Established
Minimal – remove only damaged growth; no bloom-timing constraint yet on a young plant that hasn’t flowered.
Young / Formative
Select several strong basal stems as an informal shrub framework; no formal leader system is needed.
Mature / Established
Post-bloom renewal: right after the spring flowering finishes, remove some of the oldest stems at the base to stimulate fresh growth, which ripens over summer/autumn and carries next spring’s flowers, plus general size/shape control.
Seasonal Pruning Schedule
- Post-Flowering (the defining window for this species): right after the spring bloom drops, do the year’s main structural and renewal pruning plus any size control, giving the plant the rest of the growing season to produce next year’s flowering wood.
- Ongoing Sanitary: remove root suckers/resprouts through summer as needed.
Flowering & Fruiting Wood
T. parviflora blooms in early spring on one-year-old wood formed the previous growing season, not on the current season’s new growth. Pruning timing directly trades off against bloom: prune right after flowering to allow a full season for new wood to ripen and set next year’s buds. Pruning in autumn, winter, or before bloom removes buds already formed and will visibly reduce or eliminate the following spring’s flower display.
Structural Pruning & Training
Renewing a portion of the oldest stems each year, done post-bloom, keeps the shrub producing plenty of fresh one-year wood for flowering. Height/spread control is done at this same post-bloom time; canopy thinning helps keep growth from becoming overly twiggy or congested.
Special Growth to Remove
Root suckers/basal resprouts spreading beyond the intended footprint (the shared genus invasive tendency noted in the facts); spent flowering twigs can be included in the post-bloom renewal cut.
Container & Small-Space Pruning
Container growing is possible per the facts. Keep the same post-bloom pruning timing in a container to avoid losing next year’s flowers; container specimens are easier to keep compact via this annual post-bloom renewal.
Tools
Loppers and bypass secateurs for stem-level renewal cuts; pruning saw for thicker old basal wood on a mature shrub.
Tool Hygiene & Disease Risk
Routine – aphids are the only pest flagged in the facts; standard clean-tool practice is sufficient.
Cut Placement & Technique
Renewal cuts at the base of selected oldest stems; general shaping cuts just above a healthy bud or node.
Heavy Pruning & Rejuvenation
Tolerated well given its vigorous resprouting, but time any hard rejuvenation cut for right after bloom (the same rule as routine pruning) so the plant has a full season to regrow and set the next round of flower buds – a hard prune done in winter would remove an entire year’s bloom.
Post-Pruning Care
Normal watering for this drought-tolerant, low-water plant; no extra feeding needed; monitor fresh regrowth for aphids.
Common Pruning Mistakes
Pruning in the dormant winter season out of habit (correct for many shrubs, but wrong here) and losing next spring’s flowers as a result; confusing this species’ old-wood spring-bloom habit with the new-wood bloom habit of common salt-cedar, which tolerates winter pruning without losing bloom.
When NOT to Prune
Avoid pruning in autumn, winter, or early spring before/during bloom – all of these remove flower buds already set on old wood. The only truly off-limits window is the pre-bloom and blooming period itself.
Recommended Tools (by task)
- loppers – stem-level renewal cuts done post-bloom.
- bypass_secateurs – finer shaping cuts.
- pruning_saw – older basal wood on a mature specimen.
Pruning Troubleshooting
| Problem | Possible Cause | What to Check | Corrective Action |
| Little or no spring bloom | Pruned during autumn/winter/dormant season, removing old-wood flower buds | When the last prune was done relative to the spring bloom | Shift all pruning to immediately after flowering from now on |
| Overly twiggy, congested growth | No post-bloom renewal/thinning of oldest stems | Proportion of old versus fresh stems | Remove some oldest stems at the base right after each bloom |
| Suckers spreading beyond the bed | Vigorous resprouting/invasive tendency | Perimeter for new shoots | Remove promptly at the point of origin |
Propagation Guide
Tamarix parviflora roots very easily from hardwood cuttings, making this the most practical propagation method, and it also spreads readily from its own seed — part of why it is flagged as invasive on this site. Grafting is not needed. Overall propagation difficulty is Easy.
Quick Propagation Specs
| Best Propagation Method | Hardwood stem cuttings |
| Alternative Methods | Seed |
| Propagation Difficulty | Easy |
| Seed True-to-Type | Usually true-to-type (species) |
| Vegetative True-to-Type | Yes |
| Best Propagation Season | Dormant season (autumn/winter), in line with the plant’s recommended planting season |
| Cutting Rooting Time | Typically a few weeks to a couple of months |
Growing from Seed
Seed Handling & Viability
Seed is small and short-lived, as in other Tamarix, and germinates best when it reaches moist ground soon after being shed — a trait that also explains how readily this shrub self-seeds where conditions suit it.
Germination Conditions
Requires consistently moist, bare substrate; germination can be rapid but fails quickly if the seedbed dries out.
Stem Cuttings
Cutting Type
Hardwood cuttings taken from dormant-season wood.
Best Timing
Dormant season, autumn to winter.
Cutting Preparation
Take firm, pencil-thickness stem sections; minimal preparation is needed.
Rooting Setup
Cuttings root well inserted directly into moist, well-drained soil, including sandy or salty sites; no special humidity control is typically required.
Rooting Hormone
Not necessary; cuttings root readily untreated.
Rooting Time
Typically a few weeks to a couple of months, depending on temperature.
Bloom & Flower Guide
Quick Details
- Bloom Season: Spring, summer and autumn, with the main flush in spring
- Flower Appearance: Tiny flowers, about 1 mm each, pink to white, massed into feathery plumes along the arching branches
- Edibility: Ornamental only – not eaten
Detailed Blooming Overview
Smallflower tamarisk is grown for the froth of tiny pink flowers that clothe its arching branches. Each bloom is only about a millimetre across, but massed together they wrap the shrub in a soft pink haze – most heavily in spring, since this species flowers largely on the previous year’s wood. Like its relatives it is tough, drought-tolerant and happy in salty, exposed sites.
Flower Characteristics
- Very small flowers, roughly 1 mm across, in pink to white.
- Borne in dense, feathery plumes running along the slender branches.
- Give the whole shrub a soft, smoky-pink appearance in bloom.
Bloom Care & Thinning
- Encouraging bloom: Because it flowers on last year’s wood, prune just after the spring display rather than in winter, to avoid removing the coming season’s flowers.
- Tolerance: Shrugs off drought, wind and salt in full sun.
- Pollination: The nectar-rich plumes draw bees and other insects.
Pests, Diseases & Troubleshooting
Overview: Tamarisk is a tough, salt- and drought-tolerant deciduous shrub that is largely free of serious pests, its main troubles being occasional sap-suckers on soft growth and root or stem rot where soil stays wet. Manage it culturally by siting it in full sun and free-draining ground and keeping it vigorous; chemical intervention is rarely needed.
Quick Troubleshooting Overview
| Issue / Pest | Main Symptom | Primary Solution |
|---|---|---|
| Aphids | Curled, sticky new shoots | Water jet, insecticidal soap |
| Scale insects | Bumps on twigs, sooty mould | Horticultural oil on crawlers |
| Canker / dieback | Sunken lesions, twig death | Prune out affected wood |
| Root rot | Wilting in wet soil | Improve drainage, ease watering |
| Leaf scorch | Browned foliage in extreme heat | Ensure roots have water |
Common Pests & Management
- Aphids (Aphidoidea):
- Symptoms: Clusters of tiny soft-bodied green, black or grey insects on new shoots, flower buds and leaf undersides. Feeding causes puckered, curled or yellowing young growth, and a sticky honeydew that fosters sooty mould and attracts ants.
- Prevention & Control: Knock colonies off with a firm jet of water and pinch out badly infested tips. Encourage ladybirds, lacewings and hoverflies, and avoid excess nitrogen that pushes soft sappy growth. For persistent outbreaks apply insecticidal soap or a light horticultural/neem oil, coating leaf undersides and spraying in the cool of evening to protect pollinators.
- Scale Insects (Coccoidea):
- Symptoms: Small immobile brown, tan or waxy white bumps clamped to stems, twigs and leaf undersides. They exude honeydew that blackens with sooty mould; heavy infestations cause yellowing, dieback and reduced vigour.
- Prevention & Control: Scrub off light infestations with a soft brush or a cotton bud dipped in dilute alcohol, and prune out badly encrusted twigs. Conserve predatory ladybirds and parasitic wasps. Smother the vulnerable crawler stage with horticultural oil, timing repeat sprays for when young scales are active.
- Spider Mites (Tetranychus urticae):
- Symptoms: Fine pale stippling or bronzing of leaves, with delicate silken webbing on undersides and between stems; worst in hot, dry, dusty conditions. Heavily fed leaves dry, curl and drop.
- Prevention & Control: Raise humidity and hose foliage regularly to break the dry microclimate mites favour. Remove and destroy the worst leaves, and conserve predatory mites and other natural enemies. Treat with insecticidal soap or horticultural/neem oil, thoroughly wetting leaf undersides and repeating every 5-7 days to catch new hatchlings.
Diseases & Fungal Issues
- Canker & Dieback (Botryosphaeria / Nectria spp.):
- Symptoms: Sunken, discoloured, sometimes oozing lesions on stems and branches that girdle and kill the wood beyond; foliage above wilts and dies back, often after drought or frost stress.
- Treatment & Management: Prune out cankered wood well below the lesion in dry weather, disinfecting tools between cuts, and burn or bin the prunings. Keep the plant unstressed with steady watering and mulch; there is no spray cure, so sanitation and vigour are the defence.
- Root & Crown Rot (Phytophthora / Pythium spp.):
- Symptoms: Wilting despite moist soil, yellowing lower leaves, and dark, soft, decayed roots or a rotted stem base; a slow decline or sudden collapse in heavy, wet ground follows.
- Treatment & Management: Prevention is decisive: plant in free-draining soil (or raised beds), never let the crown sit wet, and water only when the topsoil dries. Remove and destroy badly affected plants and improve drainage before replanting; biological drenches (Trichoderma) can help protect healthy roots.
- Powdery Mildew (Erysiphales):
- Symptoms: A white to greyish powdery coating on leaves and shoots, usually starting on the upper surface; affected leaves may yellow, distort and drop. Worst in crowded plantings with warm days, cool nights and poor airflow.
- Treatment & Management: Space and prune for good air movement and sun, and avoid wetting foliage late in the day. Remove affected leaves and clear fallen debris. Where needed, apply a sulphur or potassium-bicarbonate fungicide, or a horticultural oil, at first signs and repeat per label.
Growing Difficulties & Abiotic Problems
- Overwatering & Root Rot:
- Cause & Symptoms: Yellowing lower leaves, wilting despite wet soil, and a soft, foul-smelling root ball or stem base result from waterlogged, airless soil that suffocates and rots the roots.
- Correction Strategy: Let the soil dry appropriately between waterings, plant in free-draining media, and ensure pots have working drainage holes. Ease off water in cool or dormant periods and never leave the plant standing in a saucer of water.
- Salt & Fertiliser Burn:
- Cause & Symptoms: Brown, scorched leaf edges and tips and a white crust on the soil surface, caused by salt build-up from over-feeding, hard water or de-icing/coastal salt.
- Correction Strategy: Flush containers and beds periodically with plenty of clean water to leach salts, feed at modest rates, and avoid fertilising stressed or dry plants. Where salt spray or run-off is the source, screen or resite the plant.
- Sunscald / Leaf Scorch:
- Cause & Symptoms: Bleached, tan or brown dead patches on the most exposed leaves or bark, appearing after a sudden move into strong sun, intense heat, or reflected heat, especially on soft or previously shaded growth.
- Correction Strategy: Acclimatise plants gradually to stronger light, provide light shade during fierce afternoon heat, and keep roots evenly moist so the plant can transpire. Site sensitive plants where they escape the harshest midday and reflected sun.
What Helps – Products & Tools
For the occasional sap-sucker, insecticidal soap and horticultural or neem oil are all that is usually required, sprayed to leaf undersides in the evening. Keep a pair of clean, sharp secateurs for cutting out any cankered or dead wood. This is a plant where good drainage and full sun do far more than any spray.