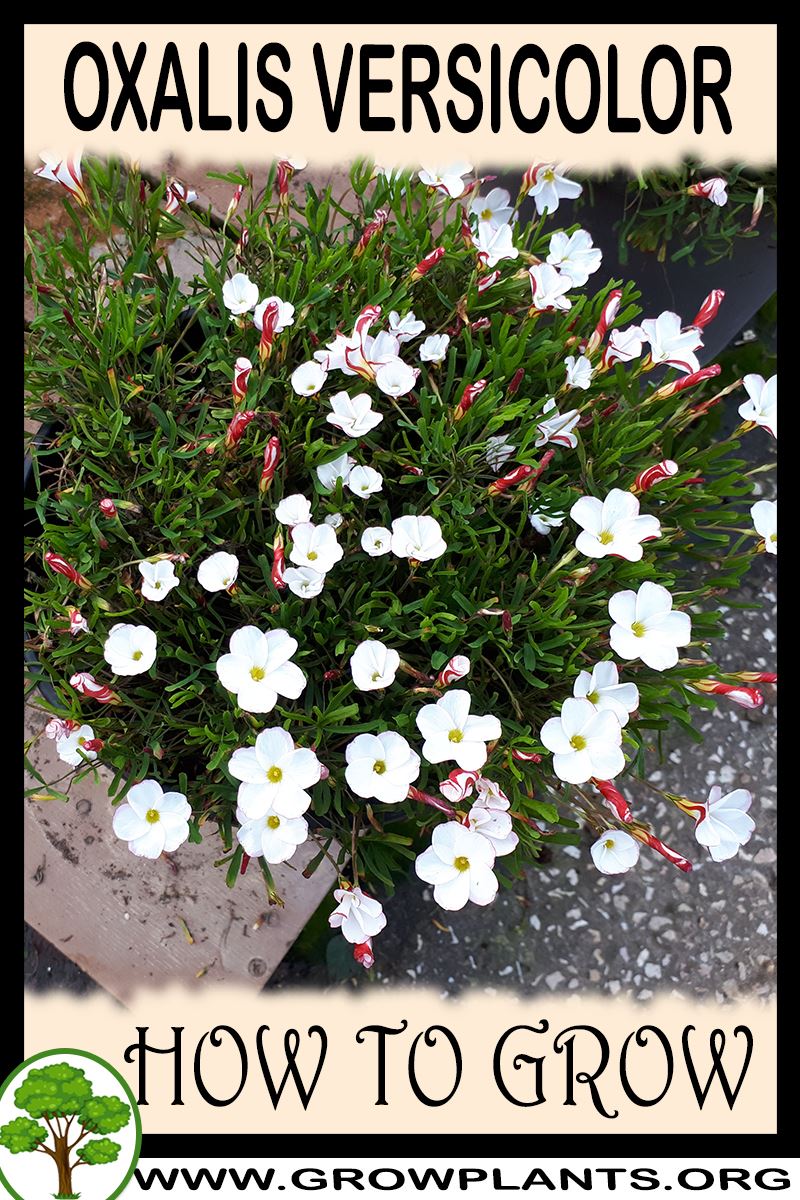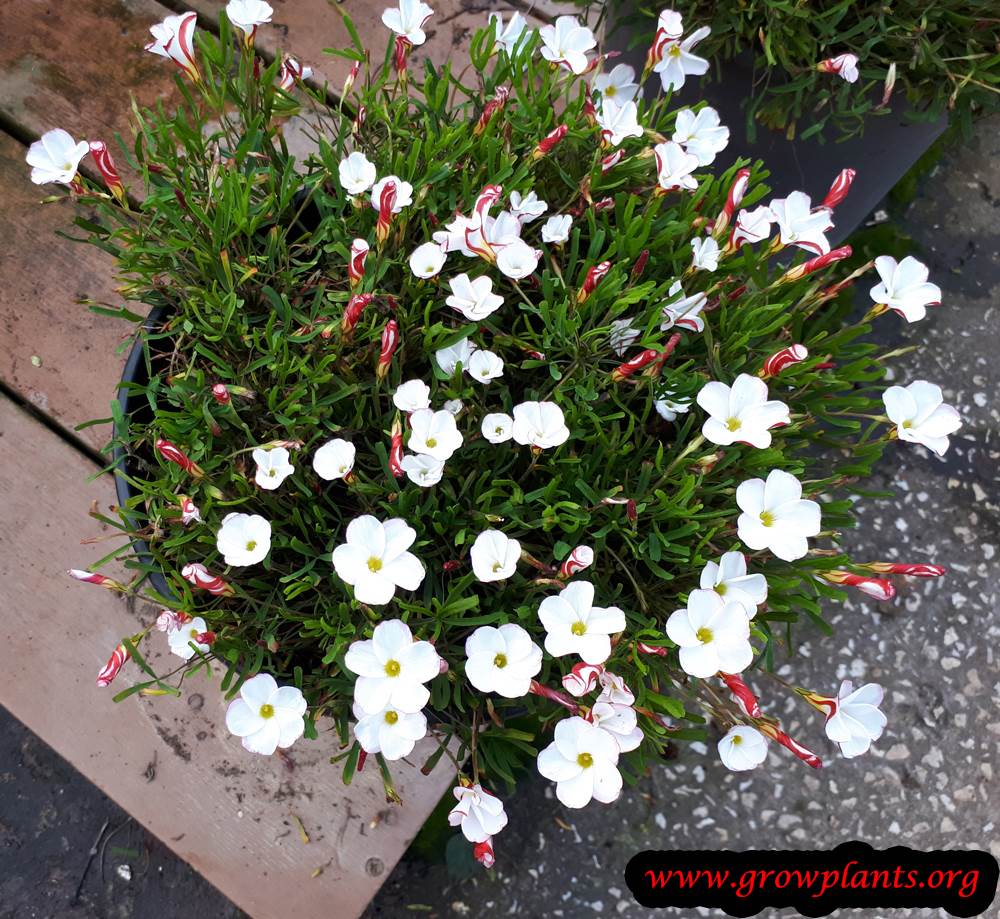



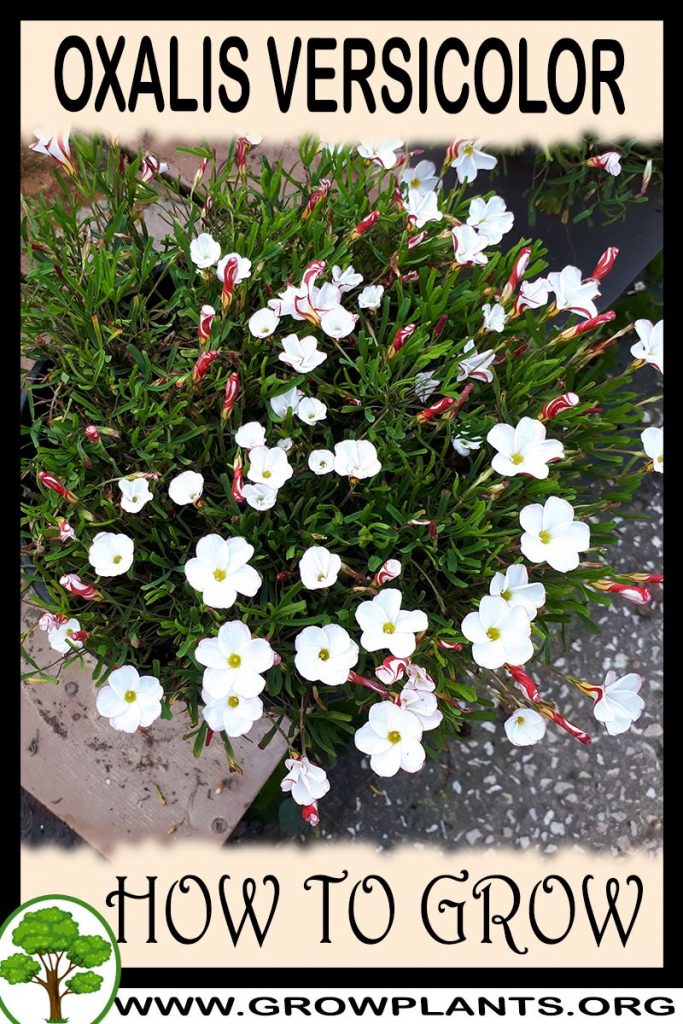
Plant Profile & Key Characteristics
Overview: A herbaceous perennial geophyte of the genus Oxalis (candy cane sorrel) growing 20-35 cm high, with narrow, linear green leaves that die back in its dormant season. It is grown purely as an ornamental for its distinctive red-and-white ‘candy cane’ flower buds.
Quick Specifications
| Specification | Attribute |
|---|---|
| Plant Type / Life Cycle | Perennial (bulbous geophyte) |
| Foliage Type | Deciduous (dormant season varies by zone) |
| Mature Size | 20-35 cm (8-14 in) tall |
| Growth Rate | Fast to moderate |
| Root System | Bulbous geophyte |
| Toxicity | Contains oxalic acid – mildly toxic in large quantities |
| Hardiness | USDA zones 6-10 |
Growth Form & Structure
- Height & Spread: 20-35 cm (8-14 in) tall in low clumps; in pots start at 3-6 L (0.8-1.6 gal) and pot on as needed, lifting the bulbs during dormancy.
- Growth Habit & Form: Low, clump-forming geophyte grown from small bulbs.
- Lifespan & Maturity: Perennial regrowing from bulbs each season; bulbs can be lifted and stored over winter outside its hardiness range.
Anatomy & Physical Features
- Leaves & Foliage: Green, narrow, linear leaflets.
- Flower Characteristics: White five-petalled flowers whose reverse shows a red-and-white candy-cane stripe as the bud unfurls; about 2-4 cm, borne in clusters.
Primary Uses & Landscape Value
- Functional & Ornamental Roles: Ornamental border and container plant prized for its striped buds; not suited to indoor growing.
Care Guide: Planting, Soil & Watering
Overview: Oxalis versicolor (Candy cane sorrel) is a bulbous, summer-dormant geophyte that grows from small bulbs in rich, well-draining soil kept evenly moist during its active season. It does best with cool weather during its growing season and rich soil. It appreciates regular moisture while in leaf, then rests through its dormancy.
Quick Care Requirements
| Requirement | Ideal Condition |
|---|---|
| Planting Season | Spring to summer in zones 6–10a; autumn to winter in zone 10b |
| Growth Rate | Moderate to Fast |
| Soil Type | Rich, well-draining soil that holds some moisture (peat / organic) |
| Water Need | Moderate to High – keep evenly moist during active growth |
Planting & Establishment
- Best Planting Season: Plant at the start of the growing season – spring to summer in zones 6–10a, or autumn to winter in zone 10b; set bulbs 2–5 cm (1–2 in) deep.
- How to Plant:
- Hole Preparation: Dig the hole noticeably larger than the root ball – roughly two to three times its size – so the roots settle into loose soil; bulbs go 2–5 cm (1–2 in) deep.
- Soil Amendments: Mix organic matter, humus and dried leaves into the backfill for a rich, moisture-retentive but still free-draining bed, then mulch the surface to hold moisture.
- Planting Depth: Set the root ball at soil level and firm the soil gently – not too hard, but firm enough that the plant does not sink when watered.
- Growth Speed & Expectations: Growth is moderate to fast during the active season; the clump fills out and can be lifted and divided when dormant.
Soil, Watering & Drainage Care
- Soil Mix & Drainage Needs: Use a rich, well-draining mix that still retains some moisture; in containers use rich soil with organic matter and drainage holes, and the bulbs can be lifted and stored during dormancy. It grows in full sun to half shade.
- Watering Schedule & Technique:
- Young / Newly Planted: Water daily for about the first two weeks after planting (preferably in the morning) to settle the plant, keeping the soil consistently moist.
- Established: Keep the soil evenly moist through active growth, watering deeply but never leaving it waterlogged.
- Seasonal Adjustments: Reduce watering as the foliage dies back into dormancy and keep it on the dry side while resting; resume regular watering when new growth appears.
Climate, Light & Hardiness
Oxalis versicolor is a cool-season bulb suited to mediterranean, subtropical, and temperate climates, preferring full sun to half shade and cool weather during its active growing period. It is hardy outdoors from about USDA zone 6 through 10a, and can be grown with care in 10b or lifted and stored where winters don't provide enough natural chill.
Quick Climate Specifications
| Climate Zones | Mediterranean, subtropical, temperate |
|---|---|
| USDA Hardiness Zones | 6–10a (10b with right care, or bulbs lifted for winter outside this range) |
| Frost Tolerance | Moderate (foliage), bulb more resilient when protected |
| Light Conditions | Full Sun to Half Shade |
Sunlight & Light Exposure
Optimal Light Setup
Full sun to half shade during the growing season suits it well.
Temperature Extremes & Hardiness
USDA Hardiness & Regional Limits
Hardy in the ground from about zone 6 through 10a, and possible in 10b with attentive care; in colder or in unsuitably warm-winter areas outside this range, gardeners can lift the bulbs and store them over winter instead of relying on in-ground survival.
Chilling Requirement
This species needs a genuine cool-to-cold rest period - the site data specifies at least one month of temperatures under about 5°C (41°F) - to cycle properly between dormancy and active growth; without adequate winter chill, flowering and foliage cycling are likely to suffer.
Frost Sensitivity
Foliage is frost-sensitive as the plant is winter- or summer-deciduous depending on hardiness zone, dying back on its own schedule rather than purely from cold damage.
Wind, Humidity & Microclimate
Rainfall & Seasonal Moisture
Prefers cool, moist conditions during active growth and a drier rest during dormancy, which is part of why it is often lifted in climates with the wrong rainfall pattern for its cycle.
Growing in Pots, Balconies & Indoors
Candy-cane sorrel is a small bulb (20-35 cm) grown for its swirled flowers – the grower rates it as not a deep-room houseplant, but it grows beautifully in a pot on a bright, sunny windowsill, balcony or patio.
Quick Details
- Container Size: Start in a 3-6 L (0.8-1.6 gal) pot and pot up as it fills
- Indoor Suitability: Not a deep-room houseplant; happy on a bright, sunny sill
- Best Spot: Full sun to light shade
- Soil & Drainage: Rich, free-draining mix with plenty of drainage holes
- Watering in Pots: Average to generous while growing; keep dry when dormant
Indoors & On the Windowsill
- Windowsill, not deep indoors: The grower rates it unsuitable as a room houseplant, but a bright, sunny windowsill suits this little bulb well.
- Dormancy: Let it die back and rest after flowering – keep it dry, and you can even lift the bulbs out of the mix during the dormant season.
- Safety: Oxalis contains oxalic acid and is mildly toxic if eaten in quantity – keep it out of reach of children and pets.
On a Balcony or Patio
- Sunny spot: A bright, sunny balcony or patio suits it; keep the mix moist while in growth.
- Light & heat: Walls, railings and paving reflect heat and wind dries pots fast, so check moisture often and water more in hot spells.
Choosing the Pot, Soil & Long-Term Care
- Pot & drainage: A pot with plenty of drainage holes; the grower stresses good drainage.
- Potting mix: Rich, free-draining mix with organic matter.
- Feeding: Feed while in active growth; ease off as it heads for dormancy.
- Refresh: When it fills the pot, move up a size and refresh part of the soil.
Grower’s Container Tip
- Pot up in stages: Start in a 3-6 L pot and only move to a bigger one each time the plant fills its current pot, working up to the size you want – this keeps the soil fresh and the plant well cared for. Good drainage matters, and you can lift the bulbs out during the dormant season.
Fertilizing & Feeding
Candy cane sorrel is a light-feeding geophyte – it stores energy in its bulbs and does best on a lean diet, with feeding limited to its active leafy growth period.
Quick Fertilizing Specs
| Feeding Level | Light feeder; rich soil at planting usually covers most of its needs |
|---|---|
| Main Nutrient Priority | Balanced feeding during active leaf growth, without pushing excess foliage at the expense of flowering |
| Best Feeding Period | Once new leaves emerge through the flowering period |
| Organic Options | Compost or humus mixed into the planting hole, plus a light compost topdressing during active growth |
| Reduce/Stop Feeding | Stop as soon as foliage begins to yellow and the bulb heads toward dormancy |
Feeding by Growth Stage
Establishment
Help newly planted bulbs or divisions root in before any fertilizer is added.
| Nutrient direction | None – withhold fertilizer while new roots establish. |
|---|---|
| Timing | The first few weeks after planting bulbs or divisions. |
| Frequency | No feeding at this stage. |
| Fertilizer types | No feeding at this stage; plain watering is sufficient while roots establish. |
| Precautions | Do not fertilize freshly planted bulbs; let roots establish first in soil already enriched with organic matter at planting. |
Active Growth and Bloom
Support leaf growth and flowering while the plant is active above ground.
| Nutrient direction | A light, balanced feed to support foliage and flower production without pushing excess leafy growth. |
|---|---|
| Timing | Once new leaves emerge, continuing through the bloom period. |
| Frequency | A single light feeding early in active growth is often enough, with an additional light feeding if growth is especially vigorous. |
| Fertilizer types | A balanced, diluted liquid fertilizer, or a light topdressing of compost worked around the base of the plant. |
| Precautions | Avoid heavy or frequent feeding – this geophyte is a light feeder, and excess nitrogen can reduce flowering. |
Post-Bloom Dormancy
Let the plant die back and rest without fertilizer as it heads into dormancy.
| Nutrient direction | None – withhold fertilizer once bloom finishes and foliage begins to die back. |
|---|---|
| Timing | After flowering ends, as leaves yellow and die back toward dormancy. |
| Frequency | No feeding at this stage. |
| Fertilizer types | No feeding at this stage; let foliage die back naturally and resume feeding only when new growth restarts. |
| Precautions | Do not fertilize a dormant bulb; feeding during dieback does not benefit the resting bulb and can encourage rot. |
Nutrient Deficiency Signs & Corrections
Leaves look pale green and the plant produces fewer flowers than expected during its active season.
| Possible causes | Insufficient feeding during active leaf growth, Bulbs planted at the wrong depth for the site, Overcrowded clumps competing for nutrients |
|---|---|
| Appears first on | Whole-plant foliage color and flower count |
| What to check | Feeding history during the active growth period, Planting depth relative to guidance for the site, Clump density and whether division is overdue |
| Possible correction | Resume light balanced feeding during active growth and divide overcrowded clumps at the appropriate season. |
Leaves yellow and collapse well before the expected dormancy period.
| Possible causes | Waterlogged or poorly drained soil causing bulb and root stress, Fungal disease such as powdery mildew or rot, Excess fertilizer salts around the bulb |
|---|---|
| Appears first on | Older leaves first, then spreading across the plant |
| What to check | Soil drainage and recent watering, Leaves and stems for fungal signs, Recent fertilizer strength and frequency |
| Possible correction | Improve drainage, treat any fungal issue, and reduce fertilizer strength if overfeeding is suspected. |
New leaves emerge yellow between green veins.
| Possible causes | Iron deficiency linked to alkaline or compacted soil, Cold, wet soil slowing nutrient uptake, Root stress from waterlogging |
|---|---|
| Appears first on | Newest leaves |
| What to check | Soil pH and drainage, Soil temperature relative to season, Root condition |
| Possible correction | Improve drainage and soil warmth where possible; correct pH and apply a chelated iron product per its label if chlorosis persists. |
Pruning, Training & Seasonal Maintenance
Oxalis versicolor is a herbaceous geophyte (bulb) with no woody growth at all, so pruning here means deadheading and, more importantly, timing the removal of dying foliage around the bulb’s dormancy cycle. Unusually, that cycle flips with climate: in cooler zones (6–10a) the plant is winter-deciduous and dormant, while in warm zone 10b it instead goes summer-dormant. The plant tolerates trimming for tidiness at any point, but the one cut that genuinely affects next year’s performance is removing foliage – and that should only happen once the leaves have yellowed and finished feeding the bulb, not while they are still green.
Quick Pruning & Maintenance Specs
| Pruning Tolerance | High for spent flowers and truly dead foliage; Low for green, still-active foliage |
| Primary Pruning Window | Winter, in hardiness zone 6–10a (as foliage dies back for dormancy) |
| Secondary Maintenance Window | Spring to summer, in hardiness zone 10b (as foliage dies back for its summer dormancy instead) |
| Typical Frequency | Ongoing light deadheading through bloom; one foliage cleanup per dormancy cycle |
| Main Objective | Tidy the clump and clear truly spent foliage without cutting the bulb’s food source short |
| Young Plant Priority | Deadhead only; leave all foliage in place through the first growing cycle to build up the bulb |
| Mature Plant Priority | Deadhead through bloom; remove foliage only once it has yellowed at the natural dormancy point |
| Best Tool Type | Precision snips (soft, thin foliage and flower stalks only) |
| Avoid Heavy Pruning During | While foliage is still green and photosynthesizing, even after bloom has finished |
Pruning by Plant Age & Size
Newly Established
Deadhead spent flowers only; leave all foliage untouched through its first cycle so the young bulb can build up reserves.
Young / Formative
No structural training applies to this clump-forming bulb; management is limited to deadheading and, later, seasonal foliage cleanup.
Mature / Established
Deadhead through the bloom season; once foliage naturally yellows at the onset of dormancy (winter in zone 6–10a, or the warm-season dormancy in zone 10b), cut the dead leaves back to the base to tidy the clump.
Seasonal Pruning Schedule
Dormant (zone 6–10a: Winter | zone 10b: Spring–Summer)
Objective: clean up the clump once its own dormancy cycle begins. Remove: foliage that has fully yellowed or died back. Do not remove: any leaf that is still green – it is still feeding the bulb for the next growing cycle. Expected response: a tidy, foliage-free clump until regrowth resumes at the end of dormancy.
Ongoing Sanitary
Deadhead spent flower clusters through the bloom period to keep the display tidy; this does not affect next season’s flowering since bloom forms on new seasonal growth, not on retained older tissue.
Special Growth to Remove
- Spent flower stems – deadhead at the base of the flower stalk once blooms fade.
- Fully yellowed or dead foliage at the natural end of the growth cycle – cut to the base; do not pull, which can disturb the shallow bulb.
Container & Small-Space Pruning
Very commonly grown in pots, including the option of lifting the bulbs out of the soil for dry storage through dormancy instead of leaving them in the container. Where bulbs are left in the pot, hold off on any foliage removal until it has yellowed, exactly as for an in-ground planting – container culture does not change the underlying dormancy-timing rule.
Tools
Precision snips are the only tool needed – both flower stalks and foliage are soft and thin.
Tool Hygiene & Disease Risk
Routine care is sufficient for deadheading. This species is noted as susceptible to powdery mildew and fungal issues, so when removing foliage that shows fungal spotting, a wipe of the blade before moving to a healthy plant is a reasonable precaution, though not a strict sterilization requirement.
Cut Placement & Technique
Deadhead by cutting the flower stalk down at its base rather than snipping just the spent bloom, since the bare stalk itself has no ornamental value once flowering is done. Cut dead foliage at the base rather than pulling, to avoid disturbing the shallow-rooted bulb.
Post-Pruning Care
No special watering or feeding is needed after routine deadheading. After the seasonal foliage cleanup at the start of dormancy, reduce watering to match the bulb’s resting state rather than continuing regular irrigation.
Common Pruning Mistakes
- Cutting back green foliage right after bloom finishes, before it has yellowed – this starves the bulb of the reserves it needs for next cycle’s growth and flowering.
- Applying the same pruning calendar regardless of hardiness zone, when this species’ dormancy timing actually reverses between cooler and warm-zone plantings.
- Pulling dead foliage instead of cutting it, risking damage to the shallow bulb.
When NOT to Prune
Do not remove foliage while it is still green, even once flowering has finished – wait for it to yellow. Avoid disturbing the clump right after transplanting or repotting until it is settled.
Recommended Tools (by task)
- precision_snips – deadheading spent flower stalks and cutting back yellowed foliage at the base; the only cut this bulb ever needs.
Propagation Guide
Oxalis versicolor can be grown from either bulb offsets or seed, but this plant’s own data notes it is easier to start from bulbs than from seed, even though vegetative propagation isn’t strictly required. Bulb propagation is easy, while raising it from seed is moderate, needing steady moisture and humidity through a multi-week germination period.
Quick Propagation Specs
| Best Propagation Method | Bulb offsets/division |
| Alternative Methods | Seed |
| Propagation Difficulty | Easy (bulbs); Moderate (seed) |
| Vegetative True-to-Type | Yes |
| Best Propagation Season | Bulbs: lift and replant during dormancy, timed to the plant’s planting season (spring to summer in hardiness zone 6-10a, autumn to winter in zone 10b). Seed: spring once above 5°C (41°F), or autumn where winters fall below 0°C (32°F) |
| Seed Germination Time | 3-5 weeks |
| Seed Sowing Depth | 0.5cm (0.25 inch), seed does require covering |
Growing from Seed
Seed Handling & Viability
Store saved seed in a dry, dark place, ideally refrigerated, until sowing.
Sowing Season
Sow in spring once temperatures are above 5°C (41°F); in areas with hard winters (below 0°C/32°F) autumn sowing is also used.
Sowing Depth & Orientation
Sow at about 0.5cm (0.25in) deep – the seed needs to be covered, not surface-sown. Space at roughly 2-3cm (0.8-1.2in) in the seed tray or nursery bed.
Germination Conditions
Keep the soil consistently moist with high humidity; don’t let it dry out. Water at an average to generous rate.
Germination Time
3-5 weeks.
Seedling Care
Keep seedlings in moist soil with high humidity, in half shade, until they are well established.
Rhizomes, Tubers, Bulbs & Corms
Bulb Division: this plant’s own data notes it is easier to start new plants from bulbs than from seed, though vegetative propagation isn’t strictly necessary. Established clumps of this species typically form offset bulbs around the parent bulb, which can be gently separated when the clump is lifted.
Timing
Lift and divide during the plant’s dormant period – the site notes bulbs can be taken out of the soil while dormant – then replant at the start of the appropriate planting season for the hardiness zone (spring to summer in zones 6-10a, or autumn to winter in zone 10b).
Planting Depth
Set bulbs about 2-5cm (1-2 inches) deep.
Bloom & Flower Guide
Quick Details
- Bloom Season: Summer to autumn, or winter to spring in warmer zones
- Flower Appearance: White flowers, 2-3 cm, that show red-and-white candy-cane stripes on the outside as the furled buds open
- Edibility: Ornamental – Oxalis contains oxalic acid, so it is not recommended as food
Detailed Blooming Overview
Candy cane sorrel earns its name from the buds: before they open, the furled petals show crisp spirals of red and white, exactly like a candy cane. In sunshine they unfurl to reveal clean white flowers with the red striping tucked underneath. The blooms are carried in clusters and open widest in bright light.
Flower Characteristics
- White flowers, 2-3 cm, with five petals fused at the base.
- Red-and-white candy-cane striping on the outside of the furled buds.
- Borne in clusters.
Bloom Care & Thinning
- Opening the flowers: Full sun is what makes the blooms open wide and show their best.
- Off-season: Outside its zone, lift and dry the bulbs during dormancy; tidy spent blooms as they fade.
Pests, Diseases & Troubleshooting
Overview: Ornamental Oxalis versicolor (candy-cane sorrel) is generally tough, but its soft, oxalic-rich foliage is prone to sap-sucking insects and, above all, to Oxalis rust. In damp, crowded, or poorly ventilated conditions foliar fungi take hold quickly. Manage it culturally first – good airflow, dry foliage, and prompt removal of infected leaves – and reserve sprays for genuine outbreaks; the plant readily regrows from its bulbils after a hard cutback.
Quick Troubleshooting Overview
| Issue / Pest | Main Symptom | Primary Solution |
|---|---|---|
| Oxalis rust | Bright orange-yellow pustules on leaf undersides, distorted leaves | Remove infected foliage; improve airflow; sulfur or copper if severe |
| Aphids | Sticky, curled new growth; clusters on stems | Blast off with water; insecticidal soap |
| Spider mites | Fine stippling, faint webbing in hot/dry spells | Raise humidity; horticultural oil |
| Powdery mildew | White powdery film on leaves | Thin growth; improve airflow; sulfur spray |
| Whiteflies | Tiny white flies rising when disturbed; yellowing | Yellow sticky traps; insecticidal soap |
| Wet-soil rot | Mushy crown/bulbs, collapse | Improve drainage; ease off watering |
Common Pests & Management
- Aphids (Aphis spp.):
- Symptoms: Small green, black, or grey soft-bodied insects clustered on tender shoots and flower stalks, leaving sticky honeydew and curled, stunted new leaves; ants patrolling the plant are a giveaway.
- Prevention & Control: Dislodge colonies with a firm jet of water and squash survivors. Encourage ladybirds, lacewings, and hoverflies. For persistent infestations use insecticidal soap or a light horticultural oil, covering leaf undersides; repeat weekly until clear.
- Spider mites (Tetranychus urticae):
- Symptoms: Fine pale stippling that gives leaves a dusty, bronzed look, with delicate webbing on undersides during hot, dry weather; foliage dulls and dries.
- Prevention & Control: Raise humidity and avoid drought stress. Hose down foliage to knock back numbers. Introduce predatory mites (Phytoseiulus persimilis) under cover, or spray insecticidal soap / horticultural oil, targeting undersides and repeating every 5–7 days.
- Whiteflies (Trialeurodes vaporariorum):
- Symptoms: Clouds of tiny white moth-like insects lifting off when the plant is touched; yellow-mottled leaves and sooty mould on honeydew.
- Prevention & Control: Hang yellow sticky traps to monitor and reduce adults. Encourage Encarsia parasitic wasps under glass. Spray insecticidal soap or horticultural oil on undersides in the evening, repeating to catch newly hatched scales.
- Fungus gnats (Bradysia spp.):
- Symptoms: Small dark flies running over the soil surface; larvae in constantly wet compost can nibble fine roots and weaken potted plants.
- Prevention & Control: Let the top of the mix dry between waterings and improve drainage. Use yellow sticky traps and a layer of grit or sand on the surface; drench with Bacillus thuringiensis var. israelensis or beneficial nematodes if larvae persist.
Diseases & Fungal Issues
- Oxalis rust (Puccinia oxalidis):
- Symptoms: The signature disease of the genus: bright orange to yellow-brown powdery pustules erupt on leaf undersides, with pale spots above; heavily infected leaves twist, yellow, and die back. It spreads fast in humid, still air.
- Treatment & Management: Remove and bin (do not compost) infected leaves at first sign, and thin the clump to open it up. Water at the base to keep foliage dry and space plants for airflow. A sulfur or copper-based fungicide checks severe outbreaks; a hard cutback often lets clean new growth flush from the bulbils.
- Powdery mildew (Erysiphe / Podosphaera spp.):
- Symptoms: A white to greyish powdery coating on upper leaf surfaces and stems, usually in warm days with cool, humid nights; leaves may yellow and distort.
- Treatment & Management: Improve air movement, avoid overhead watering, and remove the worst leaves. Treat with sulfur, potassium bicarbonate, or a milk-based spray at the first film; keep the planting uncrowded to prevent recurrence.
- Botrytis / grey mould (Botrytis cinerea):
- Symptoms: Fuzzy grey-brown mould on spent flowers and soft, damaged, or crowded foliage in cool, damp conditions, causing tissue to collapse and rot.
- Treatment & Management: Deadhead spent blooms, clear fallen debris, and increase ventilation. Avoid wetting foliage late in the day. Remove affected parts promptly; a general fungicide is rarely needed if sanitation and airflow are good.
- Root and bulb rot (Pythium / Rhizoctonia spp.):
- Symptoms: Sudden wilting or collapse with soft, brown, mushy bulbs and crown in waterlogged soil, especially in dormancy when the plant is watered as if in active growth.
- Treatment & Management: Plant in free-draining soil or gritty potting mix and never leave pots standing in water. Withhold water during dormancy. Lift and discard rotted bulbils; replant only firm, healthy ones in fresh, well-drained media.
Growing Difficulties & Abiotic Problems
- Invasive spread
- Cause & Symptoms: The plant self-sows and multiplies aggressively from tiny bulbils, colonising beds, paths, and neighbouring pots; broken bulbils survive cultivation and resprout.
- Correction Strategy: Grow in containers or contained beds, deadhead before seed sets, and dig out unwanted clumps completely – sieving soil for stray bulbils. Solarising infested soil or repeated cutting weakens established patches.
- Dormancy dieback (mistaken for disease)
- Cause & Symptoms: Foliage yellows and dies back naturally in heat or after flowering, which growers sometimes read as pest damage and over-water.
- Correction Strategy: Recognise this as normal rest: reduce watering, let the plant go dormant, and resume feeding and water when fresh shoots appear. Do not treat dormancy with fungicide or extra water.
- Oxalic acid (edibility caution)
- Cause & Symptoms: All parts contain oxalic acid; while nibbled in tiny amounts by people, large quantities are mildly toxic and the sap can irritate, and it makes the plant unpalatable to some pests.
- Correction Strategy: Site away from where children or pets graze if that is a concern; this is a handling note rather than a disease and needs no treatment.
- Leggy, weak growth
- Cause & Symptoms: Pale, stretched, floppy stems with sparse flowering in deep shade or overly rich, wet soil.
- Correction Strategy: Give bright light (with some shade in the fiercest sun), lean well-drained soil, and moderate feeding. Trim back leggy growth to encourage a compact, floriferous habit.
What Helps – Products & Tools
Reach for gentle, contact-based tools first: a strong water jet and insecticidal soap for aphids and whiteflies, horticultural / neem oil for mites and soft insects, and yellow sticky traps to monitor flying pests. For rust and powdery mildew, a sulfur or copper fungicide (or potassium bicarbonate) applied early is most effective, alongside sanitation. Free-draining soil and restrained watering are your best defence against rot.