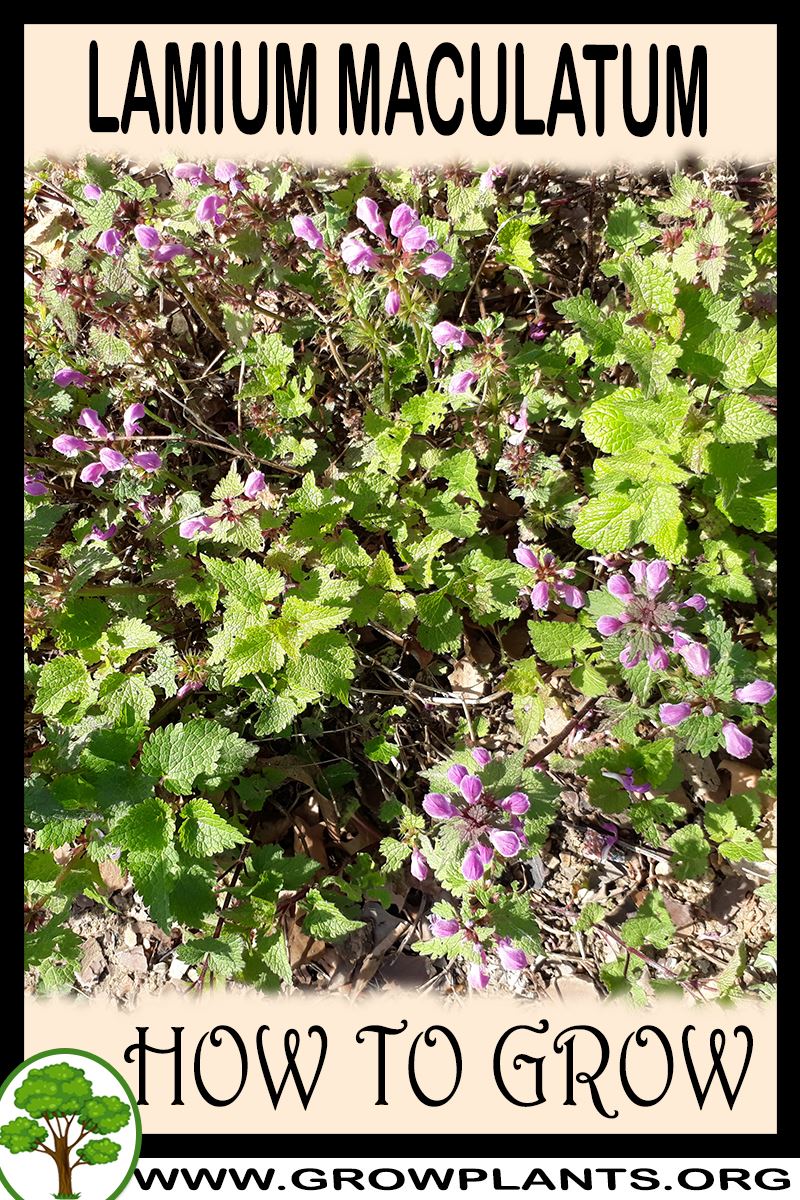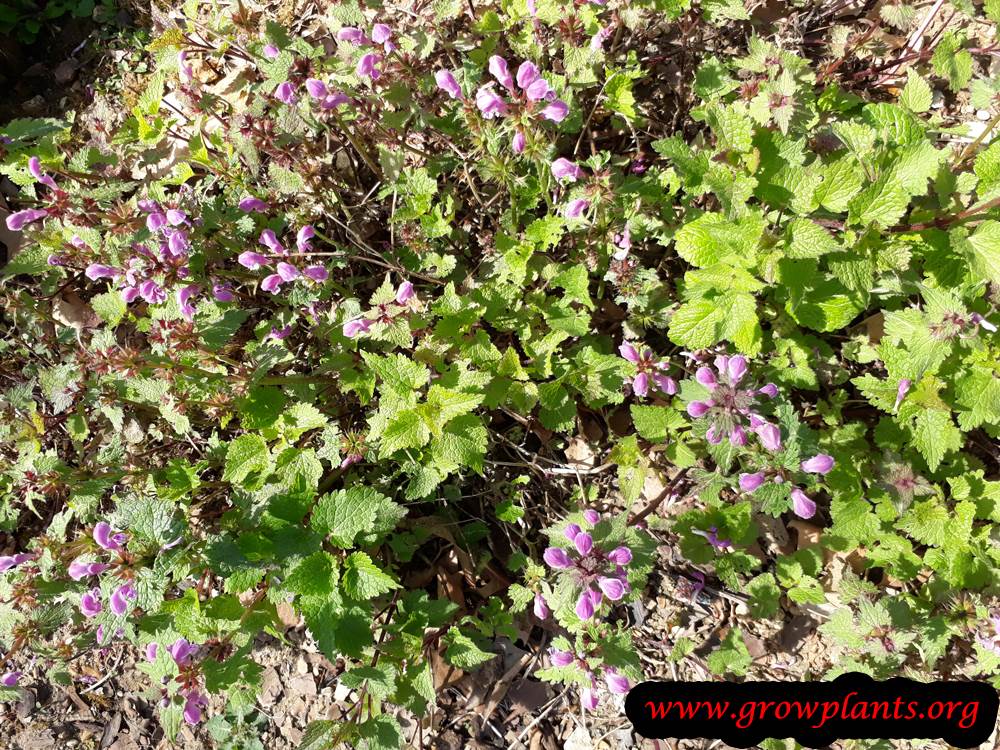
Plant Profile & Key Characteristics
Overview: This dead nettle is a low, spreading evergreen perennial reaching 20-70 cm, grown mainly as an ornamental groundcover. Its green leaves boldly marked with silver and purple flowers carpet shady ground under trees and shrubs.
Quick Specifications
| Specification | Attribute |
|---|---|
| Plant Type / Life Cycle | Perennial |
| Foliage Type | Evergreen (semi-evergreen in cold winters) |
| Mature Size | 20-70 cm (8-28 in) tall |
| Growth Rate | Moderate to fast |
| Root System | Rhizomatous / stoloniferous – spreads to form a groundcover |
| Toxicity | Non-toxic |
| Hardiness | USDA zones 3-10 |
Growth Form & Structure
- Height & Spread: 20-70 cm (8-28 in) tall, spreading wider by creeping stems; grows well in pots and containers.
- Growth Habit & Form: low, mat-forming groundcover with square Lamiaceae stems.
- Lifespan & Maturity: quick to establish and fill its space within a season or two.
Anatomy & Physical Features
- Leaves & Foliage: Green leaves boldly marked with silver, elliptic with serrated margins.
- Flower Characteristics: Purple – hooded, two-lipped (labiate) flowers whorled around the stem (spring to autumn).
Primary Uses & Landscape Value
- Functional & Ornamental Roles: shade groundcover, underplanting and container/edging plant; also grown indoors as a houseplant.
Care Guide: Planting, Soil & Watering
Overview: Lamium (dead nettle) is a low, spreading groundcover that grows in full sun to shade in temperate and Mediterranean climates. It does best in moist but well-draining, humus-rich soil.
Quick Care Requirements
| Requirement | Ideal Condition |
|---|---|
| Planting Season | In spring after the last frost, through summer |
| Growth Rate | Moderate to Fast |
| Soil Type | Moist, well-draining, humus-rich soil |
| Water Need | Moderate – keep the soil evenly moist |
Planting & Establishment
- Best Planting Season: Plant in spring once frost has passed, through summer, giving young plants time to root and spread before cold weather.
- How to Plant:
- Hole Preparation: Dig a hole slightly wider than the root ball and loosen the surrounding soil.
- Soil Amendments: Work in compost or leaf mould to enrich the soil and help it hold moisture.
- Planting Depth: Set the crown level with the soil surface; do not bury it.
- Growth Speed & Expectations: A quick-spreading groundcover, vigorous enough to knit together and cover ground within a season or two, so give it room.
Soil, Watering & Drainage Care
- Soil Mix & Drainage Needs: Prefers moist but freely draining, humus-rich soil; good drainage prevents rot while organic matter keeps the roots cool and evenly moist.
- Watering Schedule & Technique:
- Young / Newly Planted: Keep the soil evenly moist while young plants establish and begin to spread.
- Established: Water moderately once established, keeping the soil from drying out fully, especially in sun.
- Seasonal Adjustments: Water more in summer heat and in full-sun sites; reduce in winter as growth slows.
Climate, Light & Hardiness
Spotted dead nettle is a very cold-hardy groundcover for temperate, Mediterranean, and subtropical climates, also grown indoors, and tolerates the full range from full sun to full shade given consistently moist soil.
Quick Climate Specifications
| Climate Zones | Temperate, Mediterranean, Subtropical |
|---|---|
| USDA Hardiness Zones | 3–10 |
| Frost Tolerance | High |
| Light Conditions | Full Sun to Full Shade |
Sunlight & Light Exposure
Optimal Light Setup
Tolerates full sun through full shade, though foliage color and variegation are often best with some direct or bright light.
Temperature Extremes & Hardiness
USDA Hardiness & Regional Limits
Hardy across USDA zones 3–10, tolerating severe winter cold without protection.
Wind, Humidity & Microclimate
Rainfall & Seasonal Moisture
Prefers consistently moist soil rather than a dry-summer pattern.
Growing in Pots, Balconies & Indoors
Spotted dead nettle is a low, spreading groundcover the grower confirms can be grown indoors and in containers. Its tolerance of full shade is what makes it work as a cool, bright-room plant, and it is lovely trailing from an outdoor pot or basket as well.
Quick Details
- Container Size: A medium pot or basket, 5-15 L, for this 20-70 cm spreader
- Indoor Suitability: Can be grown indoors in bright, cool conditions; very shade-tolerant
- Best Spot: Full sun to full shade – adaptable, but happiest with bright indirect light indoors
- Soil & Drainage: Free-draining mix kept lightly moist
- Watering in Pots: Average water; keep it from drying out, especially in a basket
Indoors & On the Windowsill
- Houseplant care: Give it a bright, cool spot with indirect light and steady moisture; pinch it back to keep the silver-marked foliage dense.
- Windowsill growing: Fine on an east or north sill; avoid a hot, dry south window.
- Trailing indoors: Its spreading habit suits a shelf or hanging pot where it can cascade.
On a Balcony or Patio
- Trailing display: Excellent spilling from a raised pot or basket outdoors in sun or shade; baskets dry fast, so water often.
- Containing it: A pot keeps this ready spreader tidy rather than letting it run across a bed.
Choosing the Pot, Soil & Long-Term Care
- Pot & drainage: A well-drained pot or basket with strong drainage holes and no standing-water saucer to avoid root rot; terracotta breathes and dries faster, glazed or plastic holds moisture longer.
- Potting mix: A well-aerated, organic-rich potting mix – peat or coir blended with perlite or vermiculite.
- Feeding: Potted plants are fed more often than those in the ground, as watering steadily leaches nutrients from the mix – a light feed keeps the foliage fresh.
- Repotting: Divide and refresh every year or two; cut back hard to rejuvenate.
Fertilizing & Feeding
A vigorous, variegated evergreen groundcover grown outdoors or in containers; it performs well in average soil with light, occasional feeding, and heavy fertilizing tends to encourage rampant spread and diluted leaf variegation rather than better flowering.
Quick Fertilizing Specs
| Feeding Level | Light feeder – groundcover vigor rarely needs a rich feeding program |
|---|---|
| Main Nutrient Priority | Balanced feeding to support foliage variegation and steady bloom |
| Best Feeding Period | Active growth in the warmer months |
| Soil pH | Tolerates a wide soil pH range |
| Reduce/Stop Feeding | Ease off as growth slows going into the cooler season |
Feeding by Growth Stage
Spring Growth
Support fresh foliage flush and vigorous groundcover establishment as growth resumes
| Nutrient direction | A balanced, general-purpose fertilizer supports leaf growth and overall vigor |
|---|---|
| Timing | As new growth resumes in spring |
| Frequency | A light feeding or two through the active growing season is usually plenty |
| Fertilizer types | A balanced general-purpose granular or liquid feed, Compost or well-rotted organic matter worked into the soil surface |
| Precautions | Avoid heavy nitrogen doses, which can push overly vigorous spreading and dilute leaf variegation |
Bloom Period
Sustain the purple bloom display through spring into summer and autumn
| Nutrient direction | Balanced feeding with adequate nitrogen supports steady flowering rather than a phosphorus-heavy approach |
|---|---|
| Timing | During the spring-through-autumn bloom window |
| Frequency | Minimal feeding is usually enough once the plant is established and flowering |
| Fertilizer types | A balanced general-purpose fertilizer applied sparingly, A container-formulated feed for potted plantings |
| Precautions | Overfeeding during bloom tends to favor leafy spread over flowers in this groundcover |
Dormant / Rest Period
Allow the plant to rest through the cooler, slow-growth part of the year
| Nutrient direction | None – withhold fertilizer while growth is slow or dormant |
|---|---|
| Timing | Autumn through winter, when growth slows |
| Frequency | No feeding at this stage |
| Fertilizer types | No feeding at this stage – allow the plant to rest |
| Precautions | Do not fertilize during dormancy; wait for active growth to resume in spring |
Nutrient Deficiency Signs & Corrections
Overall pale leaf color with reduced contrast in the normal white-spotted variegation
| Possible causes | Nitrogen deficiency, Too much shade reducing pigment expression, Waterlogged or compacted soil limiting root uptake |
|---|---|
| Appears first on | Newest leaves and overall canopy color |
| What to check | Light exposure, Soil drainage and moisture, Recent feeding history |
| Possible correction | Apply a balanced general-purpose fertilizer and confirm the site gets adequate light and drainage |
Interveinal yellowing on younger leaves while veins stay green
| Possible causes | Iron chlorosis from high soil pH, Root stress from overly wet soil, General nutrient deficiency |
|---|---|
| Appears first on | New growth at stem tips |
| What to check | Soil pH and drainage, Root health, Recent fertilizer history |
| Possible correction | Correct soil pH if alkaline and apply a chelated iron product per its label |
Leaf-edge browning and stunted growth on container-grown plants despite regular feeding
| Possible causes | Fertilizer salt buildup in the pot, Insufficient drainage in the container, Overfeeding relative to the plant’s light needs |
|---|---|
| Appears first on | Leaf margins on container plants |
| What to check | Feeding rate and frequency, Drainage of the container and soil mix, Visible salt crust on soil surface or pot rim |
| Possible correction | Flush the pot thoroughly with water to leach excess salts and reduce feeding frequency going forward |
Pruning, Training & Seasonal Maintenance
Lamium maculatum is a low, spreading herbaceous groundcover, not a woody plant, so it tolerates hard shearing rather than selective structural pruning. Growers note pruning is mainly a design and dead-part job in autumn/winter, but because this species reblooms across spring, summer and autumn and grows fast to medium, shearing the whole mat back after its main flowering flush is a well-established way to keep it dense and encourage a fresh round of bloom. It also spreads by rooting trailing stems (listed as invasive), so containing that spread is part of routine maintenance.
Quick Pruning & Maintenance Specs
| Pruning Tolerance | High (tolerates full shearing of the mat) |
| Primary Pruning Window | After the main spring/summer bloom flush |
| Secondary Maintenance Window | Autumn/winter tidy-up of dead or frost-damaged foliage |
| Typical Frequency | 1–2 shearings per growing season, plus ongoing edge control |
| Main Objective | Rejuvenate foliage, force fresh bloom, and contain spread |
| Young Plant Priority | Pinch trailing stem tips to build a dense mat |
| Mature Plant Priority | Shear after bloom flushes; trim runners at the bed edge |
| Best Tool Type | Hedge shears for mass shearing; precision snips for small beds or containers |
| Avoid Heavy Pruning During | Just before a hard frost in cold zones, and during heat/drought stress |
Pruning by Plant Age & Size
Newly Established
Remove only damaged or dead foliage while the plant is rooting in; hold off on shearing until it is spreading actively.
Young / Formative
No formal training system is needed for a trailing groundcover — pinch stem tips to encourage branching and faster mat coverage.
Mature / Established
Shear the whole mat back by roughly a third to a half after each bloom flush to keep it compact and trigger fresh flowering growth; trim spreading stems at the bed edge to control the plant’s invasive tendency.
Seasonal Pruning Schedule
Post-Flowering (after each bloom flush): objective – rejuvenate foliage and force new flowering growth; remove spent flower stems and the top portion of the foliage mat; do not remove the crown or root system; response – fast, dense regrowth given the plant’s fast/medium growth rate; flowering impact – positive, this species flowers on current-season growth so shearing back typically brings on another flush rather than losing bloom.
Dormant/Winter: objective – tidy dead or frost-damaged foliage; remove only dead or unsightly leaves and stems; do not hard-shear right before an expected hard frost, since tender new growth is frost-sensitive; response – cleaner overwintering mat; flowering impact – none.
Flowering & Fruiting Wood
Flowers form on current-season growth along the trailing stems, not on old wood, so cutting the mat back hard after a bloom flush removes spent flowers rather than next season’s buds — this is what allows repeat shearing to force additional flushes through spring, summer and autumn.
Structural Pruning & Training
No branch framework to build; the relevant “structural” task is controlling spread — trimming rooting trailing stems back from bed edges, paths or neighboring plants before they root in and expand the mat, since this species is listed as invasive/aggressive.
Special Growth to Remove
- Dead or frost-damaged foliage, especially after winter in the colder end of its hardiness range
- Spent flower stems – deadhead to tidy the mat and reduce self-seeding given its invasive tendency
- Trailing stems that have rooted outside the intended planting area
Container & Small-Space Pruning
Grows well in containers and can be kept as a houseplant. In pots, pinch trailing stems regularly to prevent them from spilling too far over the container edge, and shear lightly after bloom to keep growth compact rather than letting the plant get leggy in the confined root space.
Tools
Hedge shears for shearing a mass groundcover planting in one pass; precision snips for spot deadheading, edge trimming, or container-grown plants.
Tool Hygiene & Disease Risk
Routine — clean, sharp tools are sufficient. Aphids are the listed pest here rather than a serious cut-transmitted pathogen, so there is no need for between-cut disinfection.
Cut Placement & Technique
Shear to a few centimeters above the crown rather than scalping it; for spot deadheading, cut individual flower stems just above a leaf node.
Heavy Pruning & Rejuvenation
Tolerated and encouraged — shearing the entire mat back hard after a bloom flush is the standard way to rejuvenate this groundcover, prevent a bare, woody-looking center from developing, and prompt fresh flowering growth. Regrowth is quick given its fast/medium growth rate.
Post-Pruning Care
Water in after a hard shear to support fast regrowth; watch tender new growth for aphids, the species’ listed pest, which are often drawn to soft new shoots. No fertilizing is needed purely because of pruning.
Common Pruning Mistakes
- Never shearing the mat, which lets the center go bare and woody-looking over a few seasons
- Letting spent flowers mature and self-seed, adding to the plant’s invasive spread
- Hard-shearing right before a hard frost in the colder part of its range (zone 3–10), exposing tender regrowth to cold damage
When NOT to Prune
- Right after transplanting, until the plant is established
- During hot, dry stress – shear when conditions are cooler so regrowth isn’t stressed
- Immediately before an expected hard frost in cold-end zones, since fresh regrowth is frost-tender
Recommended Tools (by task)
- Shearing a mass groundcover bed after bloom: hedge_shears – the fastest, most practical way to cut back a spreading mat evenly.
- Spot deadheading, edge trimming or container plants: precision_snips – precise, small-scale cuts where whole-bed shearing isn’t appropriate.
Propagation Guide
Spotted dead nettle is most easily propagated by dividing rooted sections of its trailing, mat-forming stems or by simple stem cuttings, both of which reliably keep named silver- or white-marked leaf cultivars true. Seed is an option for the plain species but won’t reproduce a specific cultivar’s leaf pattern, so vegetative propagation is generally preferred, and overall this plant is easy to propagate.
Quick Propagation Specs
| Best Propagation Method | Division of rooted spreading stems / stem cuttings |
| Alternative Methods | Seed |
| Propagation Difficulty | Easy |
| Seed True-to-Type | Usually true-to-type for the plain species; named leaf-pattern cultivars do not come true from seed |
| Vegetative True-to-Type | Yes |
| Best Propagation Season | Spring to summer |
| Cutting Rooting Time | Typically a couple of weeks in moist soil or water |
| Germination Temperature | Around 18–22°C (64–72°F) |
Growing from Seed
Sowing Season
Spring, matching the plant’s normal spring/summer planting window.
Germination Conditions & Time
Keep the sowing medium consistently moist at room-warm temperature; germination is generally not difficult but can take several weeks and be somewhat uneven.
Stem Cuttings
Cutting Type
Short tip or stem-section cuttings from healthy, non-flowering growth – useful for both garden and houseplant-grown specimens.
Best Timing
Spring through summer.
Rooting Setup
Roots readily in moist soil or in a glass of water, since the trailing stems naturally root at the leaf nodes as they spread; keep humidity up until rooted.
Rooting Hormone
Not necessary – this species roots easily on its own.
Rooting Time
Usually within a couple of weeks under warm, humid conditions.
Division, Offsets, Pups & Suckers
Because the spreading stems root as they creep along the soil (part of why the plant can become invasive), established mats can be lifted and divided into rooted sections through the growing season, though spring is easiest; replant divisions with roots attached and water in well.
Bloom & Flower Guide
Quick Details
- Bloom Season: Spring through summer and into autumn
- Flower Appearance: Purple, two-lipped (hooded) flowers in whorls around the stem
- Edibility: Grown as an ornamental groundcover, not as an edible flower
Detailed Blooming Overview
Spotted dead-nettle is a low, spreading member of the mint family valued for both its silver-marked leaves and its long season of bloom. The purple, hooded flowers are held in tiered whorls above the foliage and appear over a long period, making it a dependable groundcover for shade. Bees visit the nectar-rich blooms readily.
Flower Characteristics
- Two-lipped, hooded flowers in shades of purple to mauve-pink.
- Carried in whorls spaced along short upright stems.
- Long flowering season, especially where summers stay mild.
Bloom Care & Thinning
- Pollination: Worked by bumblebees and other long-tongued bees.
- Managing the bloom: Shear back after the first flush to refresh the foliage and encourage repeat flowering.
Pests, Diseases & Troubleshooting
Overview: Deadnettles are tough, shade-tolerant groundcover perennials in the mint family and are among the more trouble-free garden plants. Their aromatic mint-family foliage deters many pests, so the few problems are minor: slugs and snails on soft new growth, occasional aphids, and fungal leaf and rot issues where plants sit wet or overcrowded. Good drainage, airflow and simple hygiene keep them healthy; chemicals are rarely needed.
Quick Troubleshooting Overview
| Issue / Pest | Main Symptom | Primary Solution |
|---|---|---|
| Slugs & snails | Ragged holes in soft new leaves | Reduce damp cover; traps; grit barriers |
| Aphids | Sticky, curled shoot tips | Water jet, beneficials, soap |
| Powdery mildew | White coating in dry shade/crowding | Airflow, thin plants, remove leaves |
| Downy mildew / leaf spot | Yellow blotches or spotting, furry undersides | Dry foliage, remove debris, spacing |
| Crown & root rot | Collapse in wet, heavy soil | Improve drainage; divide congested clumps |
| Leggy/bare patches | Sparse open growth after flowering | Shear back to force fresh dense regrowth |
Common Pests & Management
- Slugs & snails (Gastropoda):
- Symptoms: Irregular ragged holes chewed in young leaves and soft new shoots, worst in damp, shaded conditions, with tell-tale silvery slime trails and seedlings sometimes grazed to the ground overnight.
- Prevention & Control: Clear damp hiding places (boards, debris, dense mulch against stems), water in the morning so the surface dries by night, and hand-pick after dark. Protect vulnerable crowns and seedlings with copper barriers, grit or wool pellets; use beer traps or iron-phosphate slug pellets, which are safe around wildlife, only where pressure is high.
- Aphids (Aphidoidea):
- Symptoms: Small soft-bodied green, black or grey insects clustering on new shoots, flower buds and the undersides of young leaves. They suck sap, causing curled, distorted, sticky (honeydew-coated) growth and can transmit viruses. Look for cast white skins and attending ants.
- Prevention & Control: Blast colonies off with a firm jet of water and pinch out badly infested tips. Encourage ladybirds, lacewings and hoverflies with companion flowers; avoid excess high-nitrogen feeding that produces soft, aphid-prone growth. If populations persist, treat with insecticidal soap or a light horticultural/neem oil, coating leaf undersides and spraying in the cool of the evening to protect pollinators.
- Spider mites (Tetranychus urticae):
- Symptoms: Fine pale stippling or a bronzed, dusty look on leaves, with delicate webbing in leaf axils during hot, dry conditions. Leaves dry, yellow and drop; a shaken leaf over white paper reveals tiny moving specks.
- Prevention & Control: Mites thrive in hot, dry, dusty air, so raise humidity, hose down foliage and avoid drought stress. Preserve predatory mites and other beneficials by avoiding broad-spectrum sprays. For outbreaks, apply insecticidal soap or horticultural oil to leaf undersides, repeating every 5-7 days to catch newly hatched mites.
Diseases & Fungal Issues
- Powdery mildew (Erysiphales):
- Symptoms: A white to grey powdery coating on upper leaf surfaces, shoots and buds, worst where air is still and humid but roots are dry. Affected leaves may yellow, distort and drop early.
- Treatment & Management: Improve airflow by correct spacing and thinning, site plants in good light, and avoid drought stress and overhead watering late in the day. Remove affected leaves. Organic sprays such as potassium bicarbonate, diluted milk, sulfur or neem oil check its spread; choose mildew-resistant varieties where available.
- Downy mildew & leaf spot (Peronospora lamii / Septoria spp.):
- Symptoms: Yellow angular blotches with a greyish furry growth on the leaf undersides (downy mildew), or brown-margined leaf spots (Septoria/Ramularia), developing in cool, wet, crowded plantings.
- Treatment & Management: Thin and divide congested clumps for airflow, water at the base to keep foliage dry, and remove and destroy affected leaves and debris. Deadnettles usually grow away from minor infection; copper is only needed in persistently wet situations.
- Root & crown rot (Phytophthora / Pythium / Rhizoctonia spp.):
- Symptoms: Wilting despite moist soil, yellowing lower leaves, blackened mushy roots or a rotting stem base, often in heavy, poorly drained or overwatered ground. Deadnettles tolerate dry shade far better than soggy soil.
- Treatment & Management: This is a drainage and water-management problem first: plant in free-draining soil or raised beds, never let containers stand in water, and water deeply but only when the surface has dried. Remove and destroy collapsed plants and improve soil structure with grit and organic matter; biological drenches (Trichoderma) help in beds. Chemical fungicides rarely rescue an established rot.
Growing Difficulties & Abiotic Problems
- Legginess & bare centres (abiotic / habit):
- Cause & Symptoms: Plants grow open and sparse or develop bare, woody centres after flowering, especially in too much shade or after a flush of bloom.
- Correction Strategy: Shear the whole plant back hard after the main flush to force fresh, dense, compact regrowth and often a second bloom. Divide tired clumps every few years to rejuvenate them, and give enough light for sturdy growth.
- Scorch in dry sun (abiotic):
- Cause & Symptoms: Browned, crisped leaf edges where these shade-lovers are grown in hot, dry, full sun with insufficient moisture.
- Correction Strategy: Site deadnettles in partial to full shade, mulch to conserve moisture, and water during dry spells. Moving stressed plants to a shadier, moister spot restores lush foliage.
- Invasive spread (abiotic / vigour):
- Cause & Symptoms: Some deadnettles (notably yellow archangel types) spread aggressively by rooting runners and can swamp neighbours.
- Correction Strategy: Site vigorous types where their spread is useful as groundcover, contain them with edging or in beds bounded by mown grass or paving, and pull back or divide runners each season to keep them in bounds.
What Helps — Products & Tools
Deadnettles rarely need more than cultural care: slug barriers or iron-phosphate pellets for young growth, insecticidal soap for the odd aphid outbreak, and a good pair of shears for the rejuvenating post-flowering cut. Good drainage prevents the crown rot that is their only real threat.