
Care Guide: Planting, Soil & Watering
Overview: Kitaibelia (Russian hibiscus) is a vigorous herbaceous perennial for temperate and subtropical climates (hardy zones 5 to 9) that grows in full sun to part shade. It thrives in a rich, well-drained soil kept moist with organic matter, and takes moderate watering that rises sharply during summer heat.
Quick Care Requirements
| Requirement | Ideal Condition |
|---|---|
| Planting Season | From winter to spring, and into summer in cooler zones; in the warmest zones plant in winter to early spring rather than summer |
| Growth Rate | Moderate to fast |
| Soil Type | Rich, well-draining soil, improved with organic matter |
| Water Need | Moderate normally, but high in heat above about 38C (100F) |
Planting & Establishment
- Best Planting Season: Plant from winter through spring (into summer in cooler zones); in hot, mild-winter areas favour winter to early spring and avoid planting in the heat of summer.
- How to Plant:
- Hole Preparation: Dig a hole about 50% larger than the root ball, and stake the plant if it is not stable after planting.
- Soil Amendments: Mix organic matter, dead leaves and humus into the backfill, then blend with some of the removed soil; mulch afterwards to keep the soil moist.
- Planting Depth: Backfill and cover the roots lightly but firmly enough that the plant does not shift; consider pruning if a tall stem is unsteady.
- Growth Speed & Expectations: Moderate to fast, quickly making a large, bushy perennial 1 to 1.5 m tall.
Soil, Watering & Drainage Care
- Soil Mix & Drainage Needs: It wants a rich, moisture-retentive yet well-drained soil; add humus, organic matter and mulch to hold moisture, and take care that water never stands around the roots. In pots use a light mix such as potting soil with peat and perlite and water regularly.
- Watering Schedule & Technique:
- Young / Newly Planted: Water twice on planting day, then daily for about the first two weeks; in summer keep watering generously until it has pushed out at least five new leaves.
- Established: Water regularly through the growing season, giving deep, generous soakings; feed at least once and keep the soil mulched.
- Seasonal Adjustments: Give big amounts of water in summer heat (flowers can burn above about 38C), water little over winter, and wait until spring to resume daily watering of new plantings.
Climate, Light & Hardiness
Kitaibelia vitifolia is a temperate-to-subtropical perennial hardy in USDA zones 5–9, extending into zone 10a with attentive care. It grows best in full sun in cooler climates, but needs half shade in hot zone 10a conditions, and its flowers can be damaged by heat waves.
Quick Climate Specifications
| Climate Zones | Temperate, subtropical |
|---|---|
| USDA Hardiness Zones | 5–9 (10a possible with attentive care) |
| Frost Tolerance | High |
| Light Conditions | Full sun to half shade (half shade required in zone 10a) |
Sunlight & Light Exposure
Optimal Light Setup
Full sun in temperate climates; half shade in hot zone 10a conditions.
Direct Sun Requirement
Tolerates full sun where summers aren't extreme.
Shade & Heat Management
Flowers can burn during heat waves; provide half shade and generous water (the source data calls for a large increase in water above 38°C/100°F) to protect blooms in hot conditions.
Best Exposure / Orientation
Open sun in cooler zones; part shade with reliable irrigation in the hottest parts of its range.
Temperature Extremes & Hardiness
USDA Hardiness & Regional Limits
Hardy in zones 5–9; zone 10a is possible only with attentive care (half shade, extra water in extreme heat).
Cold Damage & Winter Protection
Dies back in autumn/winter (consistent with its autumn/winter pruning); the dormant crown is well adapted to zone 5–9 winter cold.
Frost Sensitivity
Low; hardy through typical zone 5 winters.
Extreme Heat Tolerance
Limited - flowers burn in heat waves, and the plant needs substantially more water once temperatures exceed about 38°C (100°F).
Wind, Humidity & Microclimate
Rainfall & Seasonal Moisture
Needs an average amount of water normally, rising sharply in extreme heat; mulch helps retain soil moisture.
Microclimate Recommendations
In hot climates (zone 10a), site in half shade with reliable irrigation to protect flowers from heat-wave damage.
Growing in Pots, Balconies & Indoors
Kitaibelia vitifolia is a tall, vigorous mallow relative that grows well in a large container but, the grower confirms, is not a houseplant. Give it a big, free-draining pot in full sun to part shade outdoors.
Quick Details
- Container Size: Large – about 10-20 L (2-4 gal) or bigger; start a pot roughly 50% larger than the root ball.
- Indoor Suitability: No – not a houseplant; a very sunny position at most, but really an outdoor plant.
- Best Spot: Full sun to part shade (in the hottest zones it prefers part shade).
- Soil & Drainage: Well-drained potting or peat mix lightened with perlite; enrich with humus and organic matter, and mulch to hold moisture.
- Watering in Pots: Moderate and regular; if you use a saucer, do not let water stand in it for days.
Indoors & On the Windowsill
- Not a houseplant: The grower says no – it is a big, hardy outdoor perennial and does not suit a room.
- A very sunny spot at most: If tried inside it would need the brightest possible position, but it is far better out on a balcony or patio.
- Hot climates: In the warmest zones give it part shade, as the grower notes, to spare it from scorching.
On a Balcony or Patio
- Sun, wind and heat: Give it your sunniest, most open spot; walls and railings throw back heat and wind dries pots fast, so check moisture daily in hot weather and stake tall stems on an exposed balcony. A drip irrigation kit with a timer can take over that watering check automatically.
- Size and weight: It is a large plant, so use a big, stable, well-drained pot and give it room; mulch the surface to keep the roots cool and moist.
Choosing the Pot, Soil & Long-Term Care
- Pot size: Grow it in a 10-20 L (2-4 gal) container or larger, starting about 50% bigger than the root ball.
- Drainage & mulch: Use a well-drained, humus-rich mix with perlite; if you stand it in a saucer, empty it so water never sits for days, and mulch the top to hold moisture.
- Potting mix: Fill with a well-aerated, organic-rich medium – a good potting mix, or peat/coir blended with perlite or vermiculite for drainage.
- Feeding: Container plants run through nutrients fast because watering washes them out, so feed a little more often through the growing season than you would in open ground.
Grower’s Container Tip
- Gradual soil-swap when potting on: Each time you move it to a bigger pot, replace only some of the soil with fresh mix until it reaches the size you want; after that, every few years lift it slightly from the side of the pot to swap out part of the soil and cut some roots, rather than lifting the whole plant.
Fertilizing & Feeding
A moderate feeder: this fast-growing herbaceous perennial performs best in rich, organic-matter-laden soil, with balanced feeding during the growing season supporting its tall stems and abundant white bowl-shaped flowers.
Quick Fertilizing Specs
| Feeding Level | Moderate feeder |
|---|---|
| Main Nutrient Priority | Balanced feeding with adequate nitrogen to support vigorous, fast-growing stems |
| Best Feeding Period | Spring into the summer bloom season |
| Organic Options | Well-drained, rich soil worked with organic matter, humus, and a maintained mulch layer |
| Reduce/Stop Feeding | Withhold feeding once growth dies back in autumn or winter, or where grown as an annual |
| Micronutrients | Usually met by rich, well-amended soil; correct only diagnosed issues |
| Soil pH | Adaptable; performs well in rich, well-drained garden soil across a wide range |
Feeding by Growth Stage
Spring growth flush
Fuel this fast grower’s rapid early-season stem and foliage development.
| Nutrient direction | A balanced, complete fertilizer with adequate nitrogen matches this plant’s vigorous early growth habit. |
|---|---|
| Timing | As new growth emerges in spring after planting or after winter dieback. |
| Frequency | Feeding at the start of the growing season, worked in alongside organic matter, supports strong establishment. |
| Fertilizer types | A balanced complete fertilizer, Organic matter, humus, and compost mixed into the planting hole or bed |
| Precautions | Keep new plantings evenly moist when feeding; stressed or drought-checked roots take up nutrients poorly. |
Summer–autumn bloom season
Support the tall stems and abundant white, fan-petaled flowers through the main bloom period.
| Nutrient direction | Continue balanced feeding through bloom; a high-phosphorus product is not needed to drive more flowers. |
|---|---|
| Timing | Through summer and into early autumn while flowering continues. |
| Frequency | An occasional feeding through the bloom season keeps this vigorous grower well supplied without overdoing it. |
| Fertilizer types | A balanced complete fertilizer, A top-dressing of compost or mulch to conserve soil moisture in heat |
| Precautions | In container culture, watch soil moisture closely in hot weather; drought stress combined with heat can scorch flowers regardless of feeding. |
Autumn–winter dieback and rest
Let top growth die back and the plant rest through its dormant or annual-cycle end period.
| Nutrient direction | None – withhold fertilizer once growth dies back for the season. |
|---|---|
| Timing | During autumn and winter, when this species is typically cut back or, where grown as an annual, finishing its life cycle. |
| Frequency | No feeding at this stage. |
| Fertilizer types | No feeding at this stage; do not fertilize until new growth resumes in spring. |
| Precautions | Do not fertilize dormant or dying-back growth; resume feeding only once fresh spring growth appears. |
Nutrient Deficiency Signs & Corrections
Overall pale foliage and noticeably slower stem elongation for a normally fast-growing plant.
| Possible causes | low soil nitrogen, soil lacking organic matter, nutrient leaching from heavy watering |
|---|---|
| Appears first on | older, lower leaves and overall vigor |
| What to check | recent feeding history, soil organic matter content, watering and drainage pattern |
| Possible correction | Apply a balanced complete fertilizer with nitrogen and work in additional organic matter. |
Weak, floppy stems and leaf margins that brown or scorch, especially during heat.
| Possible causes | low soil potassium, heat and drought stress unrelated to nutrition, sandy soil with poor nutrient retention |
|---|---|
| Appears first on | older leaf margins and overall stem strength |
| What to check | soil potassium status, recent heat and watering conditions, soil texture |
| Possible correction | Apply a balanced or potassium-inclusive fertilizer and ensure consistent watering during heat. |
Leaf margins brown or scorch on container-grown plants despite adequate watering.
| Possible causes | fertilizer salt buildup in container soil, insufficient drainage at the pot base, excessive or too-frequent feeding |
|---|---|
| Appears first on | leaf margins and tips, especially in containers |
| What to check | recent fertilizer amounts, container drainage, how long water pools at the pot base |
| Possible correction | Ease off feeding, ensure the container drains freely, and water thoroughly to flush accumulated salts. |
Pruning, Training & Seasonal Maintenance
In the colder part of its zone 5-9 range this Malvaceae perennial behaves herbaceously and is cut back to the base once dormant each autumn to winter; in the milder, more evergreen end of its range (through 10a with care) the same autumn-winter window is used instead to clear dead material and thin non-flowering interior stems. Either way this is a once-a-year job, not a plant that needs or tolerates repeated pruning through the season, and cutting back does not cost next year’s bloom since flowers form on the growth that follows.
Quick Pruning & Maintenance Specs
| Pruning Tolerance | Moderate |
| Primary Pruning Window | Autumn to Winter, once a year |
| Secondary Maintenance Window | None needed – this is a once-yearly-pruned plant |
| Typical Frequency | Once a year |
| Main Objective | Remove dead top-growth (colder zones) or dead and non-blooming interior stems (milder zones); manage size and its noted spreading/invasive tendency |
| Young Plant Priority | Let the clump establish; avoid the yearly hard cutback in the first season |
| Mature Plant Priority | Annual cutback or thinning of non-blooming interior growth |
| Best Tool Type | Bypass secateurs, loppers for thicker basal stems |
| Avoid Heavy Pruning During | Summer heat-wave stress, when flowers are already reported to burn |
Pruning by Plant Age & Size
Newly Established
Minimal – let the clump establish in its first season, removing only damaged growth; skip the yearly hard cutback until it is well-rooted.
Young / Formative
No formal training system is needed for this self-supporting herbaceous clump; if a young plant is unstable, staking at planting is the source’s own recommended fix rather than corrective pruning.
Mature / Established
Once-a-year autumn-winter cutback: in cold-winter sites, cut the dead top down to the base; in milder, more evergreen sites, remove dead material and thin interior stems that are not flowering.
Seasonal Pruning Schedule
Dormant / Winter (or as autumn growth slows): clear the season’s growth before or as new growth resumes; remove dead top-growth in cold zones (cut to the base) or dead parts and non-blooming inner branches in milder evergreen zones, without cutting into the live crown or roots; fresh basal growth follows in spring and flowers over summer-autumn with no negative flowering impact.
Structural Pruning & Training
Thin non-blooming interior branches to redirect the plant’s energy to flowering stems, directly reflecting the source’s own pruning guidance. Height and spread control matters here too given its 1-1.5m size and documented invasive/spreading tendency – the annual cutback helps contain the clump before it spreads or seeds further.
Special Growth to Remove
- Dead top-growth and foliage
- Non-flowering interior branches
- Spent flower heads before seed-set, to help slow spread given its invasive tendency
Container & Small-Space Pruning
Container-grown plants get root-pruning every few years at repotting – cutting some roots and refreshing part of the soil – rather than moving up in pot size indefinitely, per the source’s own container guidance. Top growth still gets the same once-yearly autumn-winter cutback as in-ground plants, trimmed a bit more through the season if it starts to flop.
Tools
Bypass secateurs for the season-end stem cutback, since stems can be moderately thick at 1-1.5m height; loppers only if base stems have thickened significantly on an older, well-established clump.
Tool Hygiene & Disease Risk
Routine – clean tools; the noted pests (aphids, mealybugs) are not typically pruning-tool-transmitted, so no elevated disinfection protocol is warranted.
Cut Placement & Technique
Cut dead top-growth back close to the crown in cold-winter sites. When thinning non-blooming interior stems, cut each back to its point of origin near the base rather than leaving stubs.
Heavy Pruning & Rejuvenation
A full cutback to the base once a year is the normal annual routine for this plant, not an occasional rejuvenation measure. Expect vigorous fast-to-medium regrowth the following season.
Post-Pruning Care
The source’s own care notes call for a fertilizer application and heavy watering above 38C (100F) – time feeding to support the fresh growth that follows the cutback. Watch new spring shoots for the aphids and mealybugs noted as this plant’s common pests.
Common Pruning Mistakes
- Skipping the annual cutback and letting old, spent growth smother the crown
- Leaving non-blooming interior stems in place, crowding out the flowering shoots
- Pruning or disturbing the plant during a summer heat wave, when flowers are already reported to burn
When NOT to Prune
Avoid disturbing or cutting during an active summer heat wave, when the plant is already heat-stressed and flowers are burning. Skip the hard structural cutback in the plant’s first establishment season.
Recommended Tools (by task)
| bypass_secateurs | The once-yearly autumn-winter cutback and thinning of non-blooming interior stems |
| loppers | Thicker basal stems on a large, well-established clump |
Propagation Guide
Kitaibelia vitifolia is not hard to start from seed, but stem cuttings are the best method when it matters to guarantee a particular flower color and plant size, since seed-grown plants can vary in these traits. Vegetative propagation is not strictly necessary, but is recommended whenever true-to-type results are wanted. Overall difficulty is easy.
Quick Propagation Specs
| Best Propagation Method | Stem cuttings |
| Alternative Methods | Seed |
| Propagation Difficulty | Easy |
| Seed True-to-Type | Variable – flower color and plant size may not match the parent |
| Vegetative True-to-Type | Yes |
| Best Propagation Season | Early spring, before the plant resumes growth after dormancy |
| Cutting Rooting Time | A few weeks |
Growing from Seed
Seed Handling & Viability
Not detailed on the site; as with many Malvaceae relatives, seed generally stores reasonably well when kept cool and dry.
Dormancy & Pre-Sowing Treatment
Not specified for this species by the site; Malvaceae seed often has a hard seed coat, so soaking before sowing may improve and speed germination – a general precaution for the family rather than a site-confirmed requirement.
Seedling Care
Not hard to raise from seed per the site, though resulting plants may vary somewhat in flower color and mature size.
Stem Cuttings
Cutting Type
Stem cuttings taken from stems that are not going to bloom.
Best Timing
Early spring is best, ideally before the plant starts growing again after its dormant period, or whenever temperatures are 15–26°C (59–79°F).
Cutting Preparation
Choose non-blooming stems.
Rooting Setup
Moist, peat-based soil with high humidity; using a greenhouse (or a small plastic box/bag with holes for airflow) is strongly recommended to maintain the humidity these cuttings need.
Rooting Hormone
Recommended – the site lists rooting hormone as part of the standard requirements for successful rooting.
Rooting Time
A few weeks.
Bloom & Flower Guide
Quick Details
- Bloom Season: Summer into autumn
- Time to First Bloom: A vigorous perennial that flowers well from its second year
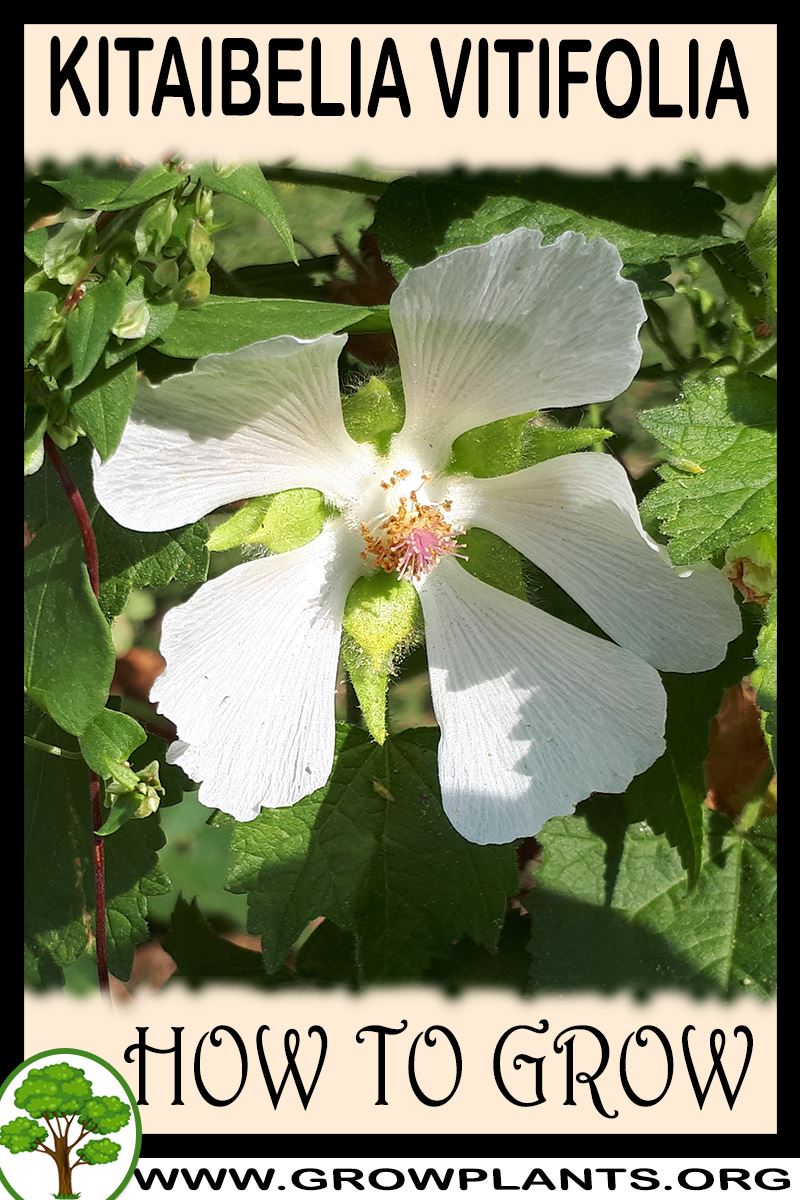
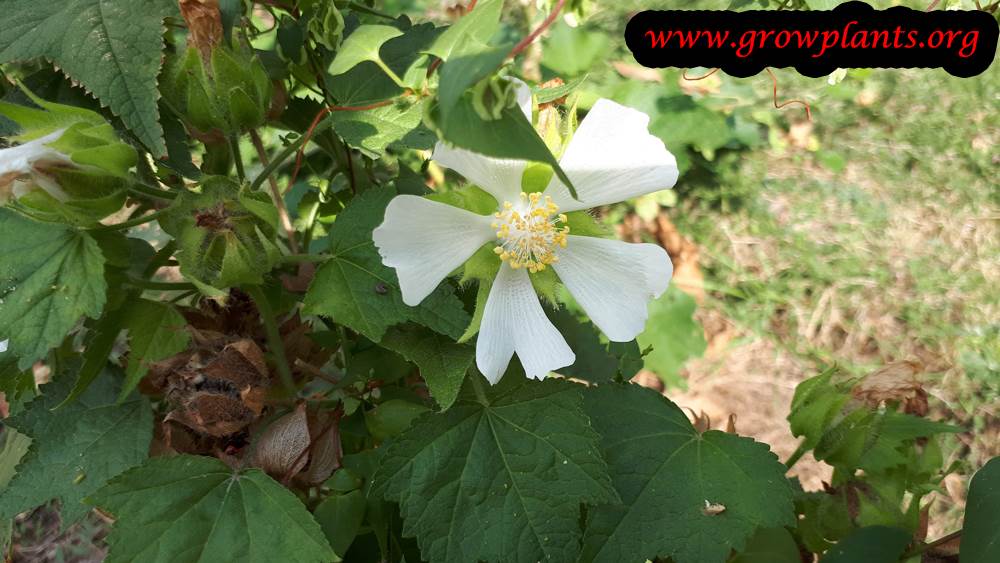
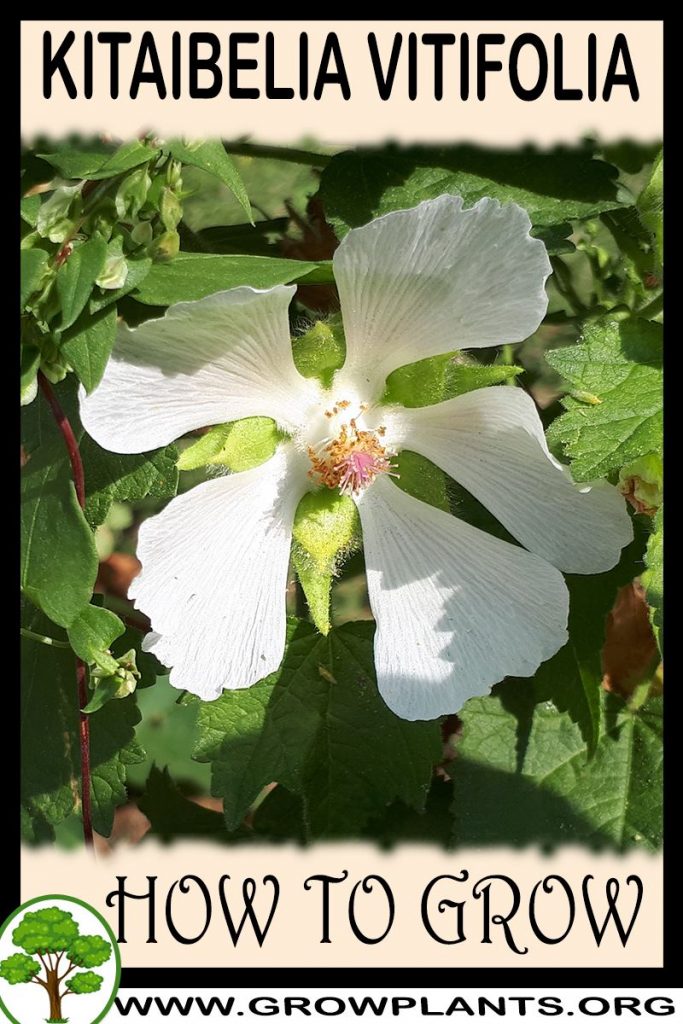
- Flower Appearance: White bowl-shaped mallow flowers with fan-shaped petals that leave small gaps, giving a star look when half open
- Edibility: Grown as an ornamental — the flowers are not eaten
Detailed Blooming Overview
Russian hibiscus is a tall, vigorous mallow that produces a long run of white saucer flowers along the upper stems from summer into autumn. Each petal is fan-shaped, and the little gaps between them give the half-open flower an appealing star shape before it rounds out into a full bowl.
Flower Characteristics
- Five fan-shaped white petals forming a shallow bowl.
- A central column of stamens, typical of the mallow family.
- Gaps between the petals create a star effect as the flower opens.
Bloom Care & Thinning
- Site for best flowering: Full sun and room to spread; average soil is fine for this undemanding plant.
- Managing the bloom: Cut back hard in late winter; deadheading keeps it tidy and prolongs the display.
- Pollination: The open flowers are readily worked by bees.
Pests, Diseases & Troubleshooting
Overview: This vigorous Malvaceae (mallow-family) perennial is robust and largely trouble-free, sharing the pest and disease profile of its relatives the mallows and hollyhocks. Its main weaknesses are sap-sucking insects on soft growth and the classic mallow fungal problem, hollyhock rust. Manage it with good airflow, garden hygiene and organic sprays, keeping chemicals as a last resort.
Quick Troubleshooting Overview
| Issue / Pest | Main Symptom | Primary Solution |
|---|---|---|
| Hollyhock rust | Orange pustules under leaves, yellow spots on top | Remove infected leaves; improve airflow; sulfur or copper |
| Aphids | Curled sticky new shoots, insect clusters | Water jet, beneficials, insecticidal soap |
| Mallow sawfly | Leaves skeletonised, holes chewed | Hand-pick larvae; neem if severe |
| Japanese beetle | Lacy, skeletonised leaves in warm season | Hand-pick into soapy water; row cover |
| Spider mites | Stippled, bronzed leaves in hot dry spells | Raise humidity, hose foliage, oil/soap |
Common Pests & Management
- Aphids (Aphidoidea):
- Symptoms: Small soft-bodied green, black or grey insects clustering on new shoots, flower buds and the undersides of young leaves. They suck sap, causing curled, distorted, sticky (honeydew-coated) growth and can transmit viruses. Look for cast white skins and attending ants.
- Prevention & Control: Blast colonies off with a firm jet of water and pinch out badly infested tips. Encourage ladybirds, lacewings and hoverflies with companion flowers; avoid excess high-nitrogen feeding that produces soft, aphid-prone growth. If populations persist, treat with insecticidal soap or a light horticultural/neem oil, coating leaf undersides and spraying in the cool of the evening to protect pollinators.
- Mallow sawfly (Neoptilia / Homostegia spp.):
- Symptoms: Pale green caterpillar-like larvae on leaf undersides that chew small holes and can skeletonise foliage, leaving only the veins in bad cases, mainly in warm months.
- Prevention & Control: Inspect leaf undersides and hand-pick or rub out larvae, and hose plants to dislodge them. Encourage predatory insects and birds. Because sawfly larvae are not true caterpillars, Bt is ineffective; use neem oil or insecticidal soap only if defoliation becomes severe.
- Japanese & other leaf beetles (Popillia japonica):
- Symptoms: Metallic beetles chewing leaf tissue between the veins, giving a lacy, skeletonised appearance to foliage during warm weather.
- Prevention & Control: Hand-pick beetles in the cool early morning by knocking them into soapy water, and use fine netting over prized plants during peak flights. Avoid scented lure traps, which draw in more beetles than they catch.
- Spider mites (Tetranychus urticae):
- Symptoms: Fine pale stippling or a bronzed, dusty look on leaves, with delicate webbing in leaf axils during hot, dry conditions. Leaves dry, yellow and drop; a shaken leaf over white paper reveals tiny moving specks.
- Prevention & Control: Mites thrive in hot, dry, dusty air, so raise humidity, hose down foliage and avoid drought stress. Preserve predatory mites and other beneficials by avoiding broad-spectrum sprays. For outbreaks, apply insecticidal soap or horticultural oil to leaf undersides, repeating every 5-7 days to catch newly hatched mites.
Diseases & Fungal Issues
- Hollyhock rust (Puccinia malvacearum):
- Symptoms: The signature mallow-family disease: bright orange-brown raised pustules on leaf undersides with matching yellow spots above, spreading upward until leaves brown and drop. It overwinters on old foliage and related weeds.
- Treatment & Management: Remove and destroy infected leaves as soon as they appear, clear all old foliage at season’s end, and pull mallow weeds nearby that harbour it. Water at the base, space for airflow, and apply a sulfur or copper fungicide preventively where rust is a recurring problem.
- Powdery mildew (Erysiphales):
- Symptoms: A white to grey powdery coating on upper leaf surfaces, shoots and buds, worst where air is still and humid but roots are dry. Affected leaves may yellow, distort and drop early.
- Treatment & Management: Improve airflow by correct spacing and thinning, site plants in good light, and avoid drought stress and overhead watering late in the day. Remove affected leaves. Organic sprays such as potassium bicarbonate, diluted milk, sulfur or neem oil check its spread; choose mildew-resistant varieties where available.
- Leaf spot (Cercospora / Colletotrichum spp.):
- Symptoms: Brown or tan spots with defined margins on the leaves, sometimes merging into larger dead patches in wet seasons.
- Treatment & Management: Remove spotted leaves, avoid overhead watering, and clear debris in autumn. Good spacing and airflow usually keep it minor; copper sprays help only under persistent wet conditions.
Growing Difficulties & Abiotic Problems
- Root rot from waterlogging (abiotic / drainage):
- Cause & Symptoms: Wilting despite moist soil, yellowing lower leaves and blackened roots where this vigorous perennial sits in heavy, poorly drained or waterlogged winter soil.
- Correction Strategy: Grow in fertile but free-draining soil, avoid winter waterlogging, and improve heavy ground with grit and organic matter before planting. Water deeply in dry spells but never keep the crown sodden; lift and divide congested clumps to relieve damp, stagnant centres.
- Leaf scorch / wind burn (abiotic):
- Cause & Symptoms: Browning leaf margins and tattered foliage on this tall perennial after strong wind, intense heat or dry soil at the roots.
- Correction Strategy: Site in deep, moisture-retentive soil with some shelter for such a tall plant, mulch to conserve moisture, and water deeply during hot, dry spells. Staking helps prevent stem breakage and the ragged look that follows.
What Helps — Products & Tools
The organic toolkit for a mallow relative is straightforward: insecticidal soap and neem or horticultural oil for aphids, mites and beetles; sulfur or copper fungicide for rust and leaf spot; potassium bicarbonate for powdery mildew; plus good sanitation (removing infected leaves) as the first line of defence.