Plant Profile & Key Characteristics
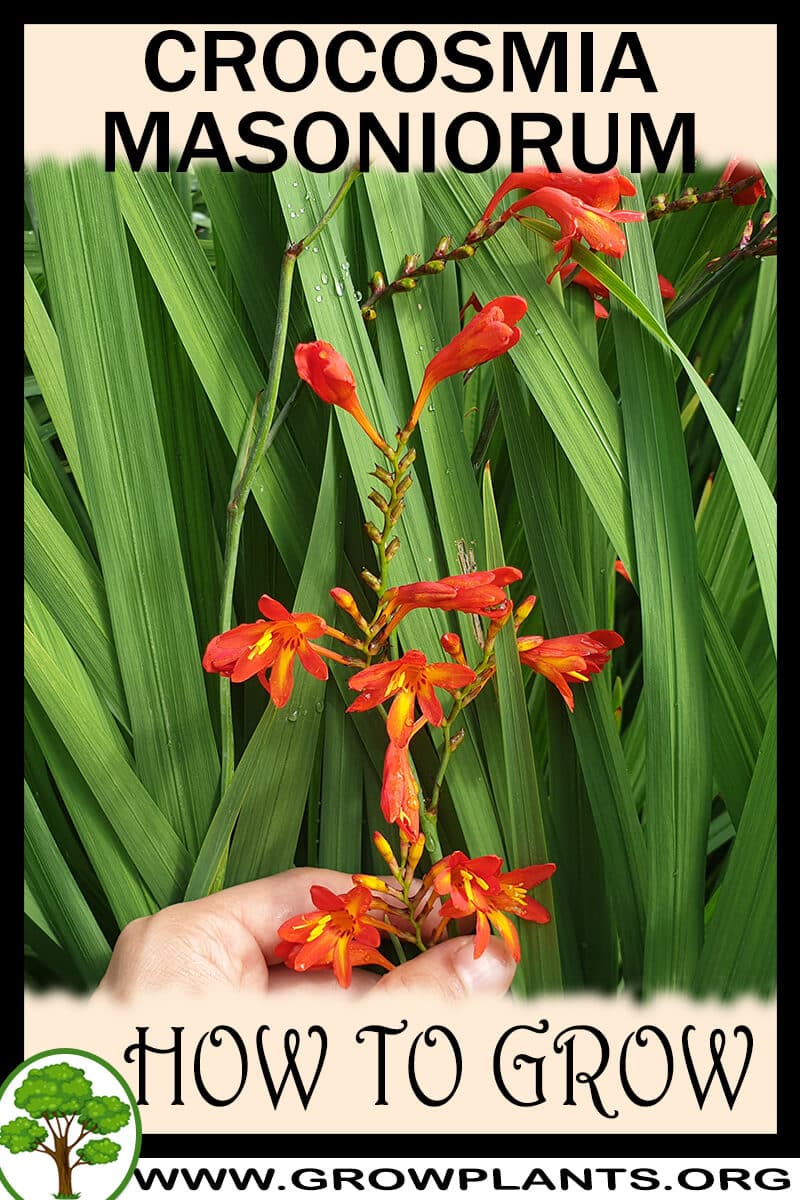
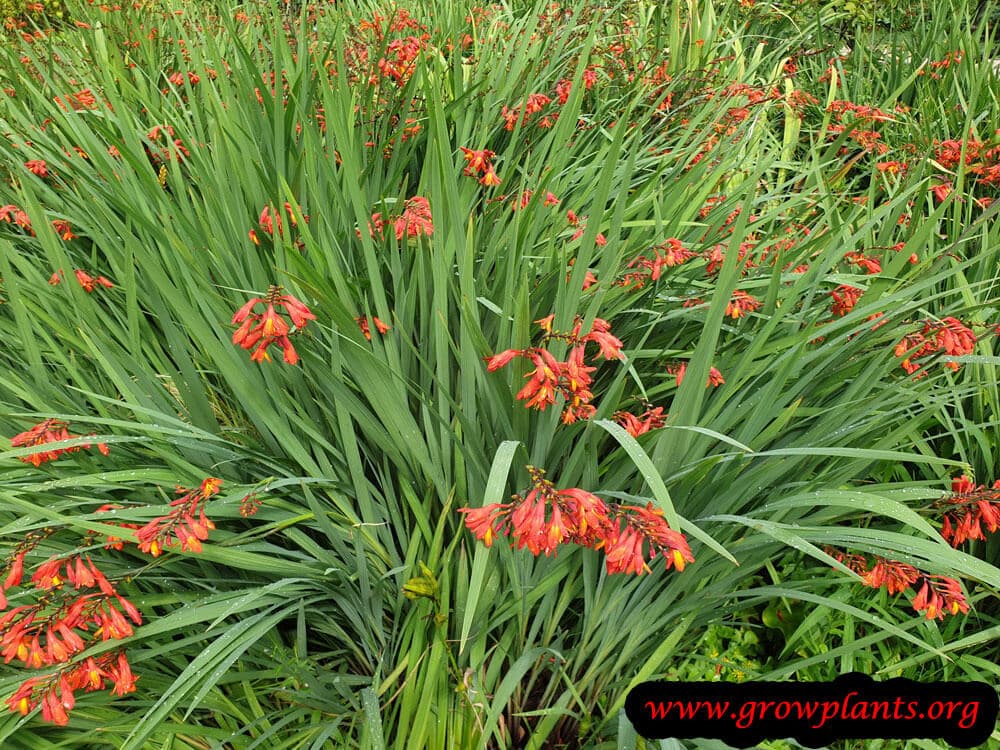
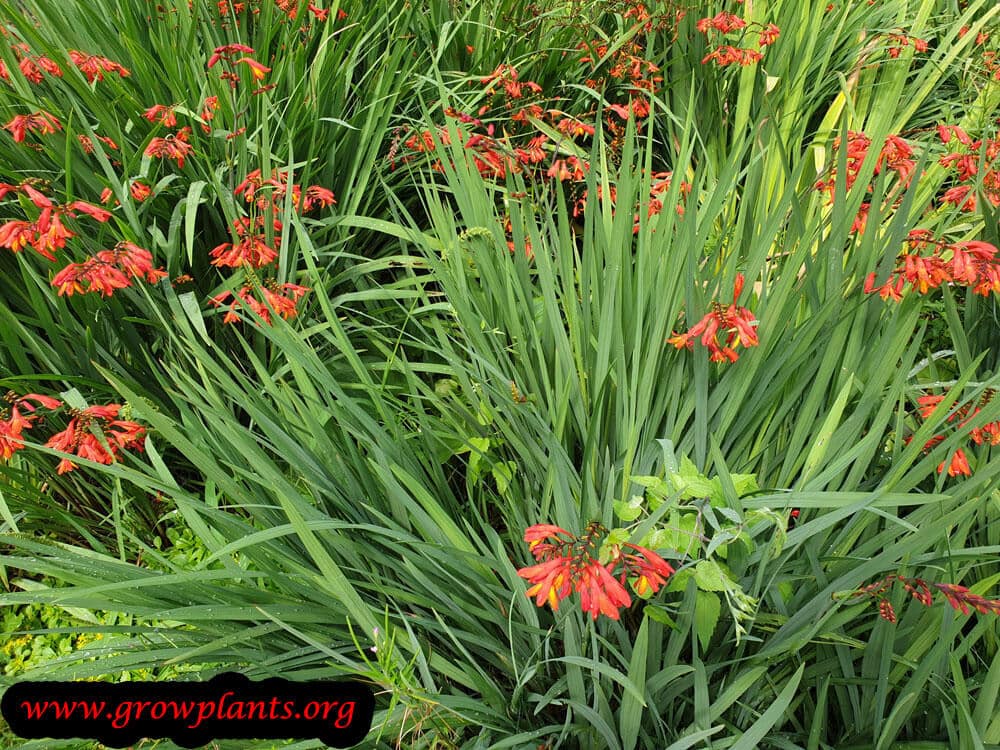
Overview: Crocosmia masoniorum (Montbretia / Coppertips) is a clump-forming cormous perennial reaching about 30–100 cm (12–40 in) tall, with upright sword-shaped leaves. It is grown as an ornamental and cut flower for its arching sprays of tubular flowers.
Quick Specifications
| Specification | Attribute |
|---|---|
| Plant Type / Life Cycle | Perennial cormous geophyte |
| Foliage Type | Evergreen or deciduous (climate dependent) |
| Mature Size | 30–100 cm (12–40 in) tall |
| Growth Rate | Fast to moderate |
| Root System | Cormous geophyte (forms chains of corms) |
| Hardiness | USDA zones 6–10a, and 10b with the right care |
Growth Form & Structure
- Height & Spread: Reaches 30–100 cm (12–40 in) tall, forming spreading clumps as the corms multiply; a single corm grows well in about 5 L (1.3 gal) in a container.
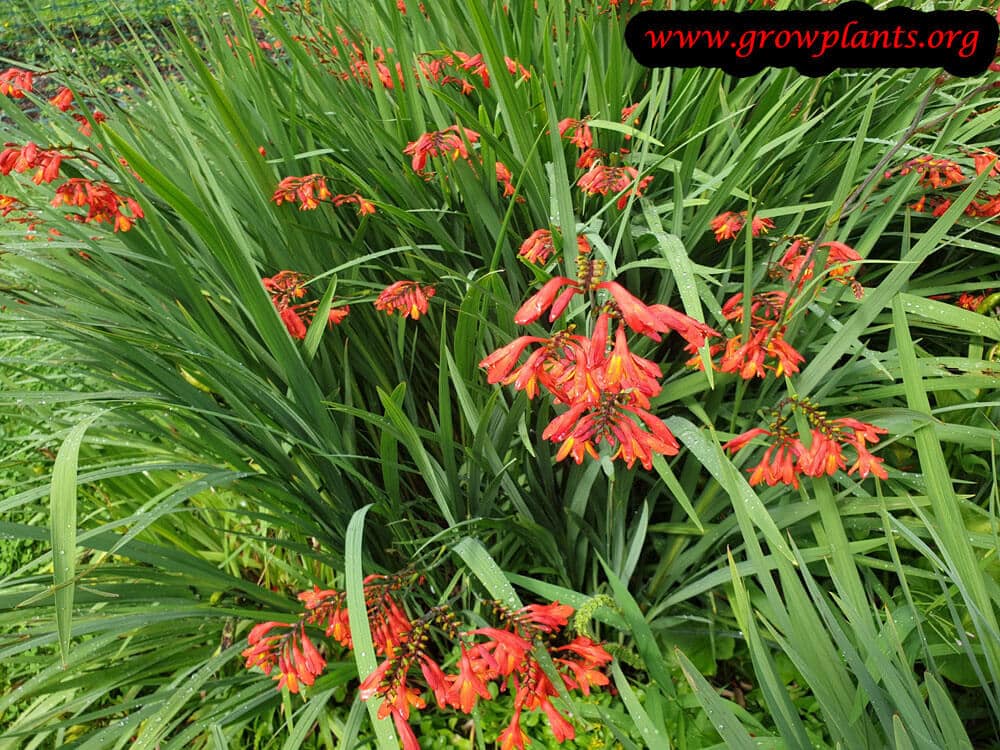
- Growth Habit & Form: Upright clump of pleated, sword-shaped leaves with wiry, arching flower stems held above the foliage.
- Lifespan & Maturity: Long-lived perennial that spreads readily by offset corms.
Anatomy & Physical Features
- Leaves & Foliage: Green, sword- to lance-shaped pleated leaves in an upright fan.
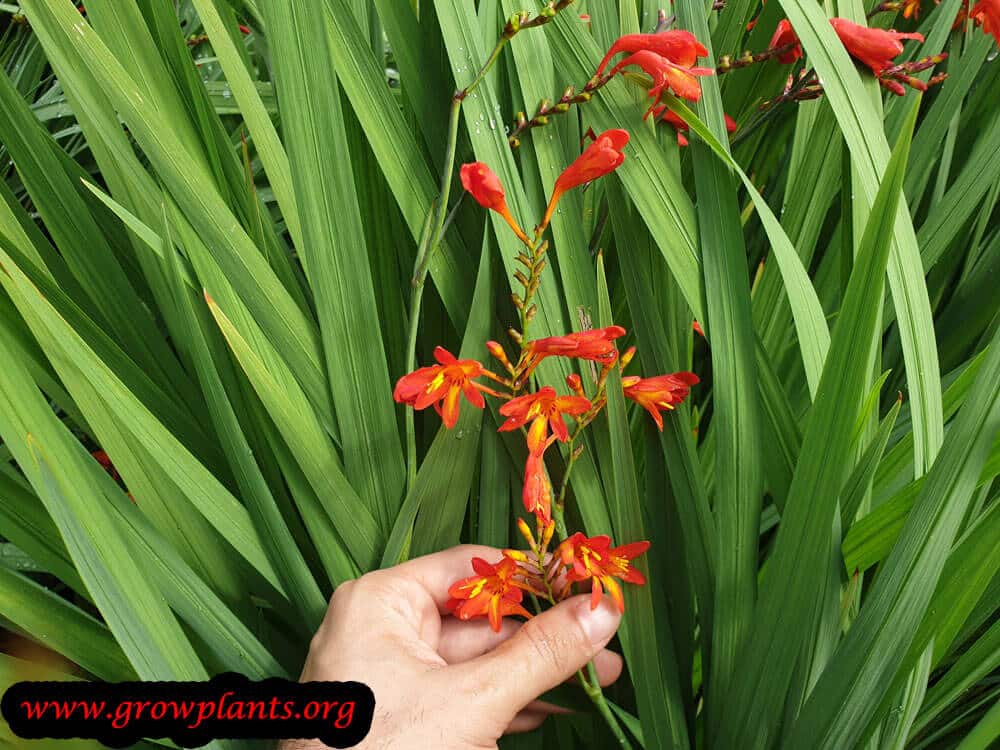
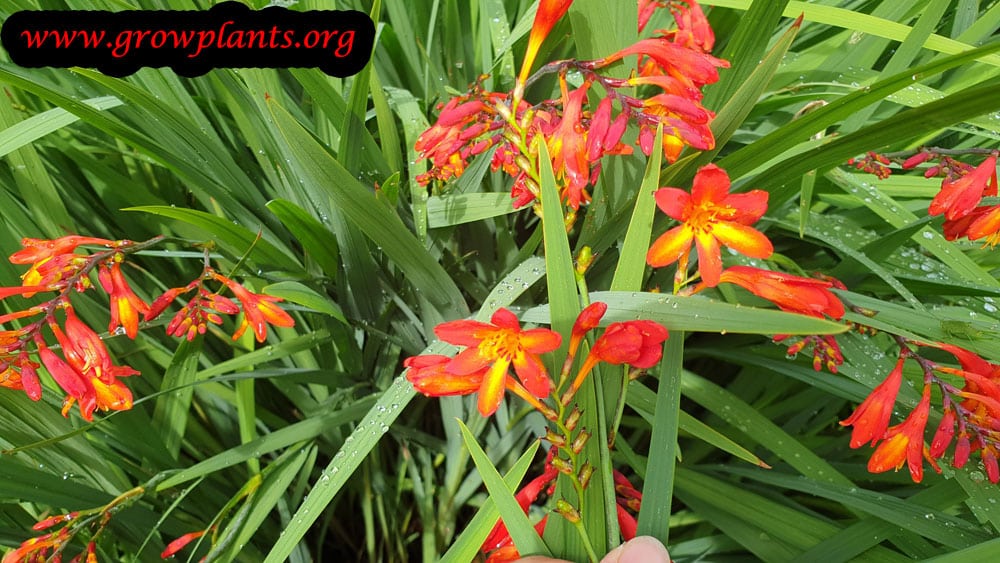
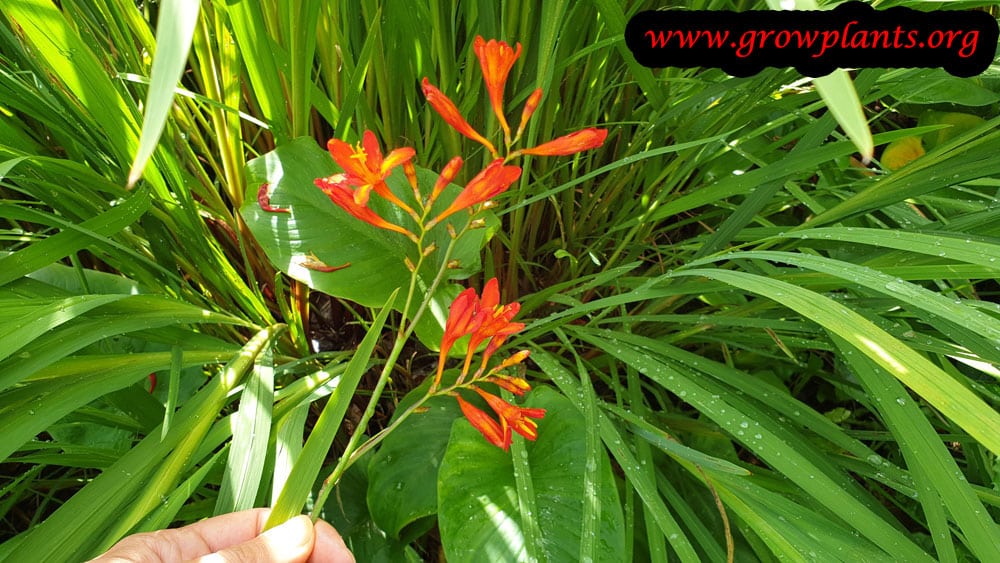
- Flower Characteristics: Tubular orange to red flowers with six petals along wiry arching stems, opening from the base upward, in summer.
Primary Uses & Landscape Value
- Functional & Ornamental Roles: Ornamental border and cottage-garden perennial; excellent long-lasting cut flower.
Care Guide: Planting, Soil & Watering
Overview: Crocosmia masoniorum (Coppertips / Montbretia) is a summer-flowering corm that grows best in rich, moisture-retentive, slightly acidic soil in full sun to part shade. It likes steady moisture through the growing season in soil that still drains freely.
Quick Care Requirements
| Requirement | Ideal Condition |
|---|---|
| Planting Season | Spring through summer in cooler zones; autumn through spring in the warmest zones |
| Growth Rate | Fast to moderate |
| Soil Type | Rich, moist but well-drained soil |
| Soil pH | Slightly acidic |
| Water Need | Moderate — keep the soil evenly moist during growth |
Planting & Establishment
- Best Planting Season: Plant corms in spring through summer in cooler zones, or from autumn through spring where summers are very hot, choosing a sunny to lightly shaded spot.
- How to Plant:
- Hole Preparation: Set the corms several centimetres deep and a little apart in loosened, enriched soil so the clump can spread.
- Soil Amendments: Work compost or organic matter into rich, slightly acidic soil to hold moisture while keeping drainage open.
- Planting Depth: Plant corms roughly 8–10 cm deep with the growing point upward; when transplanting, do so in winter dormancy and trim back some roots and leaves.
- Growth Speed & Expectations: Growth is fast to moderate and clumps multiply readily, giving a generous display within a season or two.
Soil, Watering & Drainage Care
- Soil Mix & Drainage Needs: Give it rich, moisture-retentive but well-drained, slightly acidic soil. In containers a corm grows well in about 5 L of quality potting mix with good drainage; refresh the soil periodically and pot on once the roots fill the container.
- Watering Schedule & Technique:
- Young / Newly Planted: Keep the soil moist while the corms sprout and establish.
- Established: Water regularly to maintain even moisture through the growing season; it dislikes drying out while in active growth.
- Seasonal Adjustments: Water freely in warm weather — more so where temperatures climb above 40°C, which the plant resents — and reduce watering as it goes dormant in winter.
Climate, Light & Hardiness
Crocosmia masoniorum is a summer-flowering corm that adapts well to temperate, Mediterranean, and subtropical gardens, thriving in full sun with some afternoon shade where summers are extremely hot. It is reliably hardy from USDA zone 6 through 10a, can be grown in zone 10b with extra care, and becomes stressed once temperatures climb above about 40°C (104°F).
Quick Climate Specifications
| Climate Zones | Temperate, Mediterranean, subtropical |
|---|---|
| USDA Hardiness Zones | 6–10a (10b possible with extra care) |
| Approx. Survival Minimum | Roughly −23 to −18°C (−9 to 0°F) for the dormant corm, consistent with USDA zone 6 |
| Frost Tolerance | Moderate |
| Light Conditions | Full Sun to Half Shade (reduce to half shade above about 40°C/104°F) |
| Wind Tolerance | Low to Moderate |
Sunlight & Light Exposure
Optimal Light Setup
Full sun gives the strongest flowering in temperate and cooler-summer climates.
Direct Sun Requirement
Needed for best bloom in most climates, but in the hottest zones – where temperatures approach 40°C (104°F) – reduce to half shade.
Shade & Heat Management
Where summer heat regularly nears 40°C (104°F), afternoon shade prevents the heat stress specifically flagged in the site's own care data.
Best Exposure / Orientation
An open bed with good air movement suits the tall flower spikes; avoid deep shade, which reduces flowering.
Temperature Extremes & Hardiness
USDA Hardiness & Regional Limits
Reliable from zone 6 through 10a per site data, with zone 10b achievable given extra care.
Cold Damage & Winter Protection
In zone 6–8 areas, foliage dies back naturally with the first frosts and the corm rests dormant underground; a winter mulch is a sensible precaution at the coldest end of its range.
Frost Sensitivity
Moderate – foliage is frost-tender, but the corm itself is considerably hardier below ground and tolerates seasonal freezing within its rated zones.
Extreme Heat Tolerance
Limited – site data specifically notes sensitivity above about 40°C (104°F), so reduce direct sun exposure in extreme-heat climates.
Wind, Humidity & Microclimate
Humidity Preferences
Prefers evenly moist, humid growing conditions during the active summer growing season.
Dry-Air Tolerance
Moderate – benefits from consistent moisture and humidity rather than very dry air, particularly while in bloom.
Wind Tolerance
Low to moderate; the tall flower spikes can lodge in strong, open wind, so a sheltered spot or staking helps in windy sites.
Rainfall & Seasonal Moisture
Adapted to climates with reliable moisture through the growing season; avoid prolonged summer drought during active growth and flowering.
Microclimate Recommendations
A site with full sun, shelter from strong wind, and – in the hottest zones – light afternoon shade gives the best results.
Growing in Pots, Balconies & Indoors
Crocosmia masoniorum is a sun-loving corm (about 30-100 cm / 12-40 in) grown for its arching flower sprays. It is not a houseplant, but it grows very well in a pot on a sunny patio or balcony, a few corms to a container.
Quick Details
- Container Size: About 5 L (1.3 gal) per bulb/corm; size up or divide when roots fill the pot
- Indoor Suitability: Not a houseplant – it needs full sun to flower well
- Best Spot: Full sun (a little shade in very hot climates, where it flowers less)
- Soil & Drainage: Well-drained – potting mix or similar; refresh every few years
- Watering in Pots: Average, with free drainage
Indoors & On the Windowsill
- Not indoors: The grower marks it unsuitable indoors – it is a full-sun corm that will not flower in room light.
- Overwintering: Where winters are cold, move the pot to a frost-free place or lift and store the corms dry until growth resumes.
- Heat note: It resents temperatures above about 40C (104F) and flowers less in strong shade – give sun but shelter from extreme heat.
On a Balcony or Patio
- Light & heat: Full sun brings the best flowering; in very hot spots give a little afternoon shade. Pots dry fast in reflected heat, so check moisture in summer.
- Practicalities: The clump multiplies – watch that roots do not fill the pot solid, which cuts flowering.
Choosing the Pot, Soil & Long-Term Care
- Pot & drainage: About 5 L per corm with strong drainage holes and no standing-water saucer.
- Potting mix: Well-drained potting mix or similar.
- Feeding: Potted plants exhaust and leach nutrients faster than those in the ground, so feed lightly during active growth – more often than you would in open soil.
- Repotting & division: Every few years refresh the soil by washing it off and replacing; if roots have filled the planter, divide the corms or size up to keep it flowering.
Fertilizing & Feeding
A moderate feeder while its sword-like foliage and flower stems are actively growing, then feeding stops as the corm goes dormant and the plant is lifted or dies back.
Quick Fertilizing Specs
| Feeding Level | Moderate feeder during active growth |
|---|---|
| Main Nutrient Priority | Balanced feeding early, shifting toward potassium as flower stems form |
| Best Feeding Period | From spring emergence through bud formation |
| Organic Options | Rich, humus-amended soil worked in at planting |
| Soil pH | Prefers slightly acidic, rich soil |
| Reduce/Stop Feeding | Feeding stops as foliage yellows and the corm heads into dormancy |
Feeding by Growth Stage
Spring emergence and foliage growth
Fuel the sword-like foliage as new shoots emerge from the corm and build the energy reserves needed for flowering.
| Nutrient direction | A balanced fertilizer with adequate nitrogen supports strong leaf growth in this early stage. |
|---|---|
| Timing | As new shoots emerge in spring through early summer. |
| Frequency | A light feeding as growth resumes, repeated if foliage looks pale as the season progresses. |
| Fertilizer types | A balanced complete fertilizer, Compost or humus worked into rich, moisture-retentive soil |
| Precautions | Keep the rich, moist soil this plant favors from becoming waterlogged, which can rot the corm regardless of feeding. |
Bud formation and bloom
Support the tall flowering stems and their sequential tubular blooms through summer.
| Nutrient direction | Shift toward a potassium-supportive, balanced feeding as buds form to support strong stems and flower color. |
|---|---|
| Timing | As flower stems and buds develop, through the summer bloom period. |
| Frequency | A light feeding at bud formation is usually sufficient to carry the plant through bloom. |
| Fertilizer types | A balanced fertilizer with a potassium-supportive formulation |
| Precautions | Avoid heavy nitrogen at this stage, which can favor leaf growth over strong flower stems. |
Post-bloom dieback and corm dormancy
Let the plant redirect energy into the corm as foliage yellows, and rest the corm through its dormant period.
| Nutrient direction | None – withhold fertilizer once bloom finishes and foliage begins to yellow and die back. |
|---|---|
| Timing | From the end of bloom through dieback and any period the corm is lifted and stored. |
| Frequency | No feeding during this stage. |
| Fertilizer types | No feeding at this stage; do not fertilize while the corm is dormant or in storage. |
| Precautions | Do not fertilize dormant or stored corms; keep them in a cool, dark, dry spot until replanting or new growth resumes. |
Nutrient Deficiency Signs & Corrections
Foliage emerges pale or yellow-green and flower stems are fewer or weaker than expected.
| Possible causes | low available soil nitrogen, poor, sandy, or leached soil, corms planted in depleted or unamended soil |
|---|---|
| Appears first on | emerging foliage |
| What to check | soil richness and organic matter, recent feeding history, corm crowding and age of planting |
| Possible correction | Work in a balanced fertilizer and organic matter early in the growing season and monitor for stronger regrowth. |
Leaf margins scorch or brown and flower stems are weak or prone to flopping.
| Possible causes | low soil potassium, heavy nitrogen feeding without balancing potassium, sandy soil that leaches nutrients readily |
|---|---|
| Appears first on | older leaf margins |
| What to check | recent fertilizer balance, soil texture and drainage, staking or wind exposure affecting stems |
| Possible correction | Shift to a potassium-supportive balanced fertilizer as buds form and avoid excess nitrogen. |
New leaves emerge yellow while veins remain green.
| Possible causes | soil pH too high for this slightly-acid-preferring plant, waterlogged soil limiting root uptake, cold, wet spring soil slowing nutrient uptake |
|---|---|
| Appears first on | newest emerging leaves |
| What to check | soil pH, drainage, recent soil temperature and moisture |
| Possible correction | Improve drainage, work toward the slightly acidic soil this plant prefers, or apply a chelated iron product per its label. |
Pruning, Training & Seasonal Maintenance
Crocosmia masoniorum is a cormous perennial that carries no woody framework, so “pruning” here means seasonal foliage and flower-stem management rather than shaping. It tolerates only light, mostly sanitary cutting back: deadheading spent bloom stems through summer, then a dormant-season cutback of the foliage once it dies back (fully deciduous types) or of just the tired leaves (where it stays semi-evergreen in the warmest zones). Timing follows the corm’s dormancy cycle – winter in hardiness zone 6–10a, autumn into winter in zone 10b – and does not affect next year’s flowering as long as green, actively photosynthesizing foliage is left alone until it has naturally yellowed.
Quick Pruning & Maintenance Specs
| Pruning Tolerance | Low – mostly sanitary, not structural |
| Primary Pruning Window | Winter (zone 6–10a) / autumn–winter (zone 10b), once foliage dies back |
| Secondary Maintenance Window | Summer, ongoing deadheading through bloom |
| Typical Frequency | Deadhead as flowers fade; one cutback per dormancy cycle |
| Main Objective | Tidy spent stems/leaves and let the corm recharge before cutback |
| Young Plant Priority | Leave foliage untouched to build up the corm |
| Mature Plant Priority | Deadhead promptly; cut down only once foliage has yellowed |
| Best Tool Type | Precision snips / hand shears |
| Avoid Heavy Pruning During | While foliage is still green and actively growing |
Pruning by Plant Age & Size
Newly Established
No cutting beyond removing any damaged leaves – a young clump needs every leaf to build up the corm for future flowering.
Young / Formative
No structural training applies to a cormous perennial like this; the only formative step is spacing/thinning offset corms if planted in dense clusters, which is a planting task rather than pruning.
Mature / Established
Deadhead individual flower stems as blooms finish (the source notes flowers open sequentially up the stem, so full stems are usually left until the whole spike is spent), then remove the whole flowering stem at its base once finished. At the end of the growing season cut the foliage down at soil level once it has died back on its own.
Seasonal Pruning Schedule
| Stage | What to do |
| Summer (bloom) | Remove spent flower stems at the base as they finish; do not touch green leaves. |
| Dormant/Winter (zone 6–10a) or Autumn–Winter (zone 10b) | Once foliage has yellowed and died back, cut all top growth down to the soil; expected response is a clean dormant clump that resprouts from the corm the following season. |
Special Growth to Remove
- Spent flower stems, cut at the base once the whole spike has finished.
- Dead/yellowed leaves once they have fully died back – in zones where it grows as deciduous, all above-soil growth is removed at that point.
Container & Small-Space Pruning
In a container, the same light touch applies, but watch the corm clump more closely: the source notes that once roots fill the pot, flowering declines unless the clump is thinned or moved to a larger container – that thinning (removing excess corms/roots) is a repotting task rather than a foliage-pruning one, but it takes the place of any “hard pruning” this plant would otherwise need.
Tools
- Precision snips – deadheading individual flower stems.
- Hand shears or bypass secateurs – cutting down the full dormant clump of dead foliage.
Tool Hygiene & Disease Risk
Routine – keep tools clean and sharp; no specific transmissible disease is flagged for this species.
Cut Placement & Technique
Cut spent flower stems back to their base rather than partway, to avoid leaving bare stubs; cut dormant foliage close to soil level once it has died back.
Post-Pruning Care
No extra watering or feeding is needed after the dormant cutback – the corm is entering rest. During the growing season, resume normal watering after deadheading.
Common Pruning Mistakes
- Cutting green, still-photosynthesizing foliage back early for tidiness – this weakens the corm and reduces next year’s flowering.
- Leaving spent flower stems too long, letting the plant put energy into seed set instead of the corm.
When Not to Prune
Do not cut back foliage while it is still green; wait until it has yellowed and died back naturally at the end of the season.
Recommended Tools (by task)
- precision_snips – deadheading individual spent flower stems through the bloom season.
- bypass_secateurs – cutting down the full dormant clump of dead foliage at season’s end.
Propagation Guide
Crocosmia masoniorum is most easily and reliably increased by dividing the corm clumps (commonly called bulbs), which multiplies quickly and keeps the plant true to type; seed is possible but slower to reach flowering size. Vegetative propagation is not strictly necessary but is the easier and faster route, making overall difficulty easy.
Quick Propagation Specs
| Best Propagation Method | Corm division |
| Alternative Methods | Seed |
| Propagation Difficulty | Easy |
| Seed True-to-Type | Usually true-to-type for the species, though Crocosmia hybridizes readily in mixed plantings, so seed from a garden with other Crocosmia can vary |
| Vegetative True-to-Type | Yes |
| Best Propagation Season | Winter, while the plant is dormant |
Growing from Seed
Seed can be sown to raise new plants, but because this genus cross-pollinates easily, seedlings from a garden with mixed Crocosmia may not match the parent exactly; corm division is more dependable when true-to-type plants are wanted.
Rhizomes, Tubers, Bulbs & Corms
Corm Division
Lift and divide in winter when the plant is mostly dormant, since the corm is the essential part to keep intact; trim back some of the roots and leaves before replanting. Established clumps produce clusters of new cormlets around the base of the main corm each season – separate cormlets that are a reasonable size with their own roots for the best establishment rate, and replant promptly rather than letting them dry out for long.
Storage
If corms are lifted and held before replanting, keep them in a dark, cool location rather than exposed to light or warmth.
Bloom & Flower Guide
Quick Details
- Bloom Season: Summer, occasionally into autumn
- Time to First Bloom: Corms usually flower in their first or second season once established
- Flower Appearance: Tubular, rounded flowers with six lobes in vivid orange to red, ranged along arching stems
- Edibility: Ornamental only – grown for its bright flowers and as a cut flower, not for eating
Detailed Blooming Overview
Crocosmia lights up summer with arching sprays of tubular orange-to-red flowers, held in two neat rows along wiry stems. The flowers open in sequence from the base upward, the topmost last, so each spike stays in bloom for a good while. The bright, tubular form is built for nectar-feeding birds – sunbirds in its native South Africa, hummingbirds elsewhere – and it makes a superb, long-lasting cut flower.
Flower Characteristics
- Tubular, six-lobed flowers in vivid orange to red.
- Ranged along arching stems, opening in sequence from the base up.
- Nectar-rich and shaped for pollination by nectar-feeding birds.
Bloom Care & Thinning
- Cutting: Pick stems as the lowest flowers open for a long-lasting vase display.
- After flowering: Leave the foliage to die back naturally so the corms build up for next year.
- Pollination: Bird-pollinated where nectar birds occur; not needed for the garden display.
Pests, Diseases & Troubleshooting
Overview: Crocosmia are vigorous, largely trouble-free cormous perennials whose one signature pest is the spider mite, which can badly stipple and brown the sword-shaped leaves in hot, dry seasons. Beyond that they share the iris/gladiolus family’s susceptibilities – thrips, gladiolus rust, and Fusarium corm rot in wet or congested plantings. Most problems are prevented by airflow, dividing congested clumps, and good drainage.
Quick Troubleshooting Overview
| Issue / Pest | Main Symptom | Primary Solution |
|---|---|---|
| Spider mites | Fine pale stippling, bronzing, webbing in hot dry weather | Raise humidity/airflow; soap or oil to undersides |
| Gladiolus thrips | Silvery streaks and flecking on leaves and flowers | Remove debris; blue sticky traps; soap/oil if heavy |
| Aphids | Colonies on soft growth; honeydew; virus spread | Hose off; encourage predators; soap if needed |
| Gladiolus rust | Orange-brown pustules on leaf undersides | Airflow; remove infected leaves; fungicide if severe |
| Fusarium corm rot | Yellowing fans, stunting; rotten brown corms | Plant sound corms; good drainage; divide congested clumps |
| Poor flowering | Lots of leaf, few flowers | Divide congestion; full sun; avoid heavy shade/excess N |
Common Pests & Management
- Spider mites (Tetranychus urticae):
- Symptoms: The signature Crocosmia problem. In hot, dry weather the leaves lose colour and show fine silvery-to-bronze stippling; badly-affected fans dry, brown and die back early, and you may see fine webbing and moving ‘dust’ on the undersides. Sheltered, dry, dusty positions are worst.
- Prevention & Control: Raise humidity and keep plants watered and unstressed – mites thrive on drought-stressed foliage. Hose the undersides of the leaves forcefully to knock mites off, and treat persistent attacks with insecticidal soap or a light horticultural oil, repeating to break the rapid life-cycle. Clear away dust-trapping debris and improve airflow between clumps.
- Gladiolus thrips (Thrips simplex):
- Symptoms: Tiny slender insects that rasp the leaves and flowers, leaving silvery streaks, pale flecking and a dirty speckled look; heavy attacks distort and brown the foliage and spoil the blooms. They can carry over on stored corms.
- Prevention & Control: Remove and destroy old plant debris where they overwinter, and lift and inspect stored corms. Blue sticky traps monitor and reduce adults; insecticidal soap or horticultural oil, well aimed, controls heavy infestations. Encourage predatory mites and lacewings.
- Aphids (Aphididae):
- Symptoms: Soft green or dark aphids clustering on emerging shoots and flower stems, with honeydew and sooty mould. Beyond the direct feeding, they can transmit viruses between plants.
- Prevention & Control: Dislodge with a jet of water, encourage ladybirds, lacewings and hoverflies, and use insecticidal soap on heavy colonies. Controlling aphids also limits virus spread through the clump.
- Slugs & snails (Gastropoda):
- Symptoms: Rasped holes and grazed shoots on the emerging spring growth, with slime trails, worst in mild damp conditions near the crown.
- Prevention & Control: Protect emerging shoots with grit or copper barriers, clear damp hiding places, and hand-pick after dark or use iron-phosphate bait. Established clumps quickly outgrow early damage.
Diseases & Fungal Issues
- Gladiolus rust (Uromyces transversalis):
- Symptoms: Rows of orange-to-brown powdery pustules, mainly on the undersides of the leaves and running in lines along the veins; heavy rust yellows and kills foliage and weakens the clump. Favoured by warm, humid, crowded conditions.
- Treatment & Management: Improve airflow by spacing and dividing clumps, avoid overhead watering, and remove and destroy infected leaves promptly. On valued or repeatedly-affected plantings a protective fungicide can be used; start with clean, rust-free stock and resistant selections.
- Fusarium corm rot & yellows (Fusarium oxysporum):
- Symptoms: Fans yellow, weaken and stunt, and the corms show brown, dry, sometimes concentric rot when lifted; roots are poor. It builds up in congested, poorly-drained plantings and spreads on infected corms.
- Treatment & Management: There is no cure for an infected corm, so rely on prevention: plant only firm, healthy corms in free-draining soil, divide congested clumps regularly, and discard any soft or discoloured corms. Rotate to fresh ground where the disease has struck, and avoid waterlogging.
- Botrytis / core rot (Botrytis gladiolorum):
- Symptoms: Greyish rot and spotting on leaves, flowers and stored corms in cool, damp, crowded conditions; stored corms develop a soft core rot.
- Treatment & Management: Space and ventilate plantings, avoid overhead watering late in the day, and remove dead and dying tissue. Cure and store lifted corms dry and airy, discarding any showing rot.
Growing Difficulties & Abiotic Problems
- Poor flowering from congestion:
- Cause & Symptoms: Crocosmia multiply into dense mats of corms; overcrowded, or over-shaded and over-fed clumps produce abundant leaf but few flowers.
- Correction Strategy: Lift and divide congested clumps every few years, replanting the biggest corms in full sun and free-draining soil; avoid heavy nitrogen and deep shade.
- Waterlogging corm rot:
- Cause & Symptoms: Corms in cold, heavy, waterlogged soil suffocate and rot, and the clump thins and yellows.
- Correction Strategy: Improve drainage before planting, avoid wet hollows, and in wet-winter climates lift tender selections or mulch for protection with good surface drainage.
- Drought / heat stress:
- Cause & Symptoms: Prolonged drought and heat stress the foliage, browning leaf tips and, importantly, predisposing plants to damaging spider-mite outbreaks.
- Correction Strategy: Keep the root zone reasonably moist in the growing season and mulch to conserve water; relieving drought stress is also the best mite prevention.
- Frost damage to tender types:
- Cause & Symptoms: Some large-flowered Crocosmia are less hardy; hard frost on unprotected corms causes losses in cold-winter areas.
- Correction Strategy: Mulch deeply over winter, or lift, dry and store corms frost-free, replanting in spring; grow hardier species where winters are severe.
What Helps – Products & Tools
Cultural care carries most of the load – dividing congested clumps, spacing for airflow, and keeping plants unstressed against mites. Useful product types are insecticidal soap and light horticultural oil for spider mites and thrips; blue sticky traps to monitor thrips; iron-phosphate bait and grit/copper barriers for slugs; and a protective fungicide for gladiolus rust on repeatedly-affected plantings. Always start from clean, firm corms. Spray oils in the cool of evening to protect pollinators.