

Plant Profile & Key Characteristics
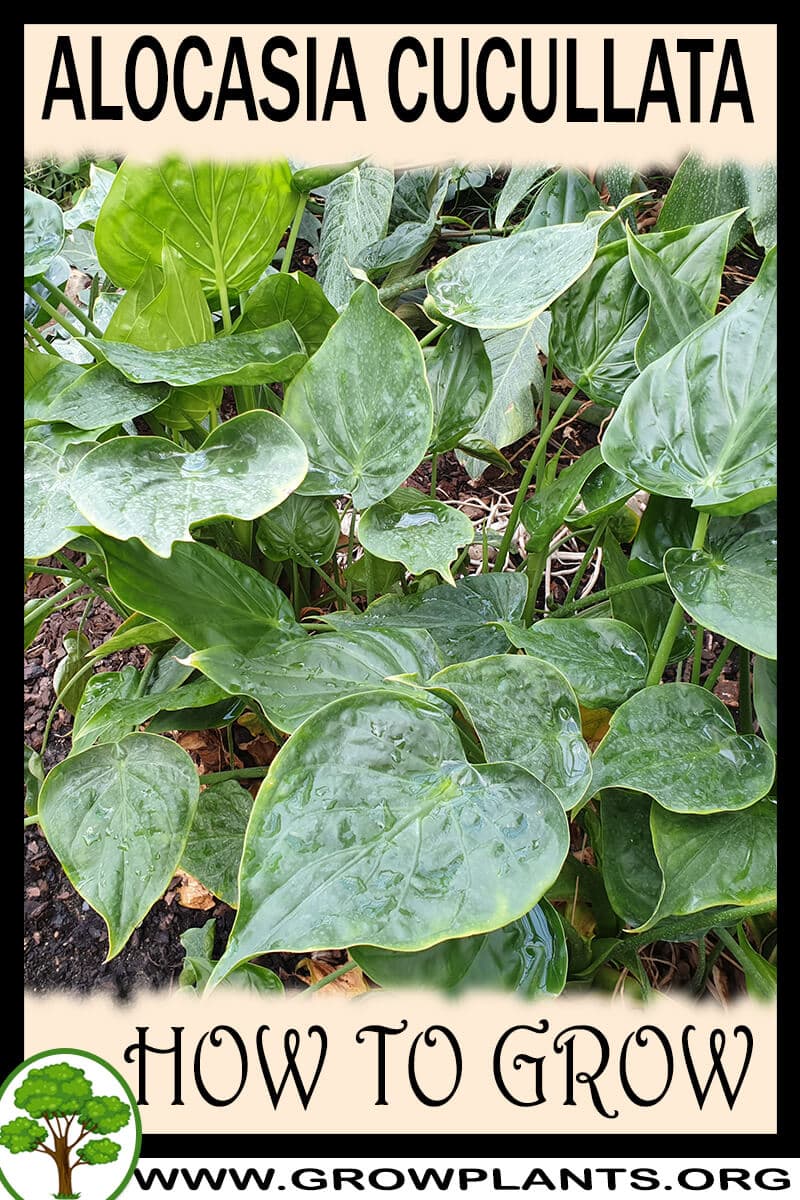
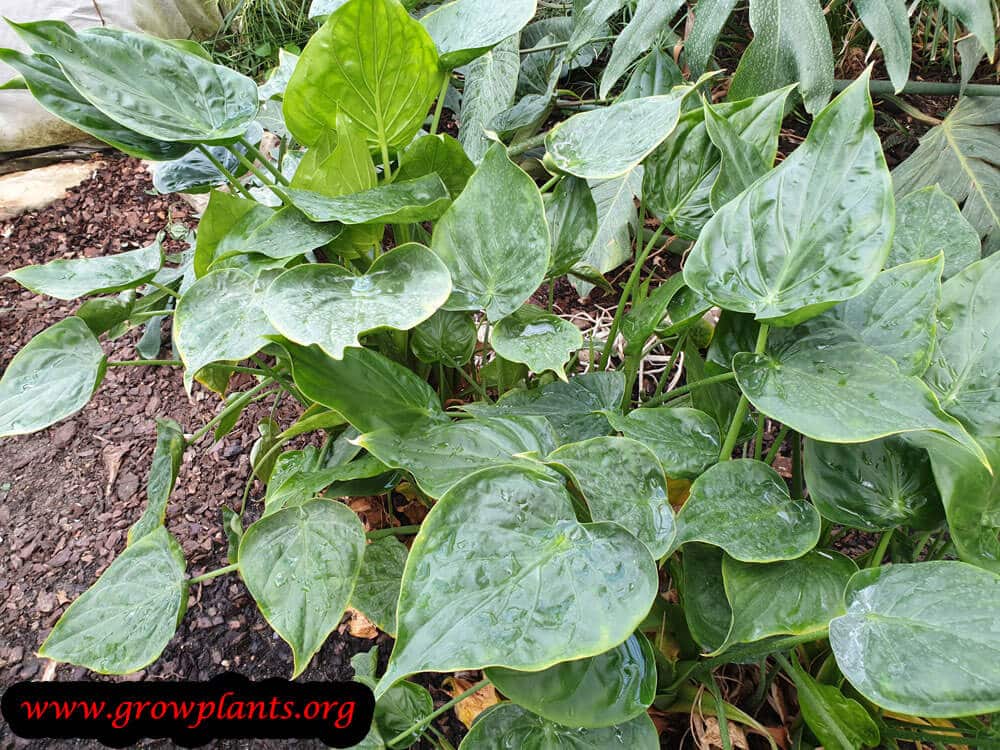
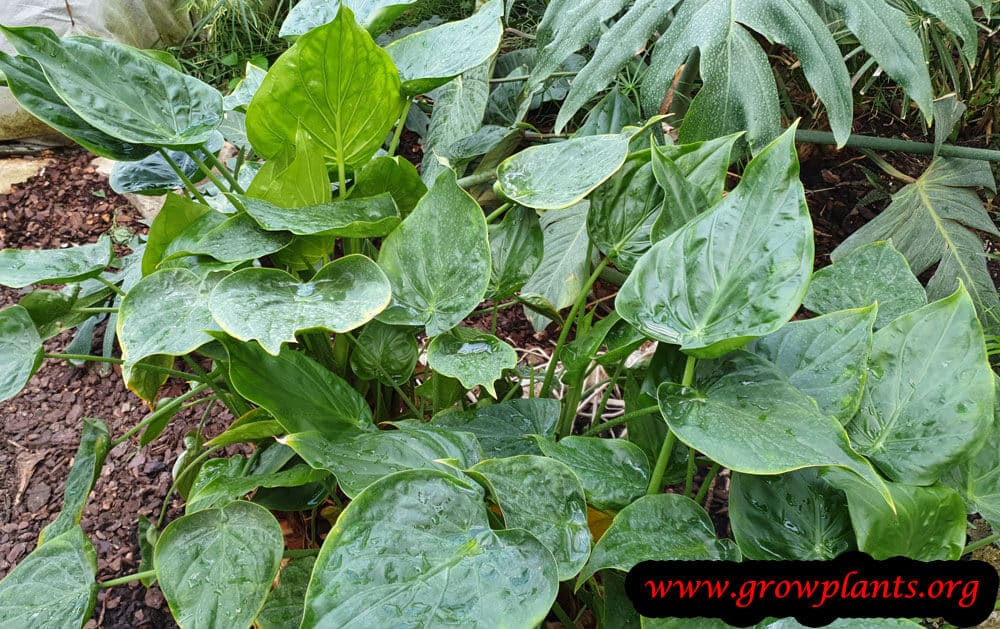
Overview: Alocasia cucullata (Chinese taro) is an evergreen, clump-forming perennial geophyte reaching about 1-2 m (3-6 ft), grown for its glossy, heart-shaped leaves. It is used mainly as an ornamental foliage plant in tropical and subtropical gardens and as an easy indoor houseplant.
Quick Specifications
| Specification | Attribute |
|---|---|
| Plant Type / Life Cycle | Perennial (evergreen geophyte / herbaceous) |
| Foliage Type | Evergreen |
| Mature Size | 1-2 m (3-6 ft) tall, forming a leafy clump |
| Growth Rate | Fast to moderate |
| Root System | Rhizomatous / tuberous (geophyte) |
| Toxicity | All parts contain insoluble calcium oxalate crystals – toxic to people and pets (source notes it is toxic to dogs and cats); the sap can irritate skin and mucous membranes. |
| Hardiness | USDA zone 10b+ (grown as a houseplant in colder zones) |
Growth Form & Structure
- Height & Spread: In the ground a mature plant reaches 1-2 m (3-6 ft) tall with a spreading leafy clump; it is well suited to container culture and is commonly grown indoors as a foliage houseplant in warm, bright indirect light.
- Growth Habit & Form: Clump-forming herbaceous geophyte with upright stems bearing glossy heart-shaped leaves on long stalks.
- Lifespan & Maturity: Long-lived evergreen perennial in frost-free conditions; fast-growing, filling out within a season or two.
Anatomy & Physical Features
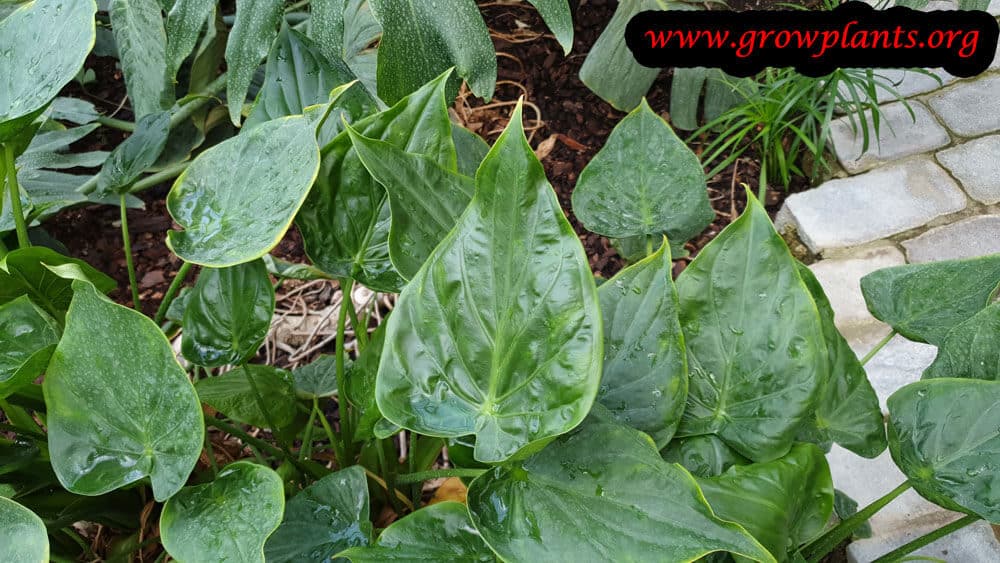
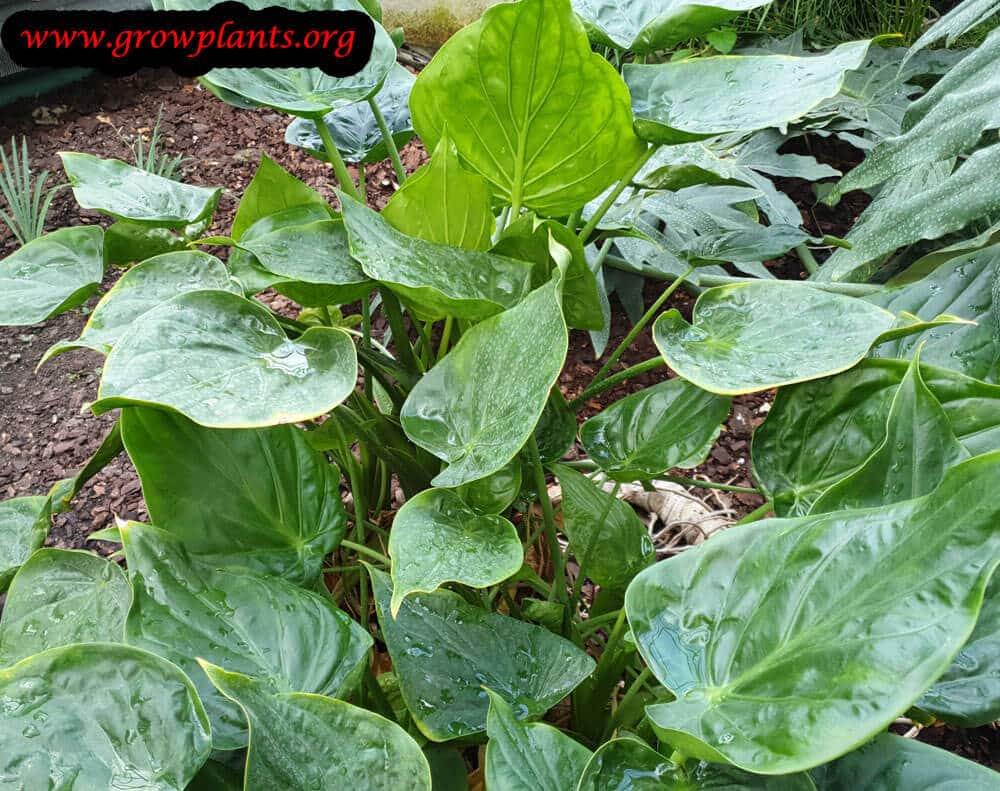
- Leaves & Foliage: Leaf colour green in heart shape grows on stem.
- Flower Characteristics: Small white-yellowish flowers on a spadix wrapped by a pale bract/spathe (the ‘ice-pop’ structure) – grown for foliage rather than bloom.
Primary Uses & Landscape Value
- Functional & Ornamental Roles: A compact ornamental foliage plant for shade and tropical gardens and a popular houseplant (also grown as a lucky/feng-shui plant); valued for its glossy heart-shaped leaves.
Care Guide: Planting, Soil & Watering
Overview: Alocasia cucullata is a tropical geophyte that grows best in warm, humid conditions with bright but filtered light, and it tolerates deep shade as long as there is some light. It wants rich, moisture-retentive yet well-draining soil kept evenly moist, and it is hardy only in zone 10b and warmer or grown as a houseplant.
Quick Care Requirements
| Requirement | Ideal Condition |
|---|---|
| Planting Season | Warm season — spring through autumn, once frost has passed |
| Growth Rate | Moderate to Fast |
| Soil Type | Rich, moisture-retentive but well-draining |
| Water Need | Moderate — keep the soil evenly moist, never soggy |
Planting & Establishment
- Best Planting Season: Plant through the warm season (spring to autumn) once the soil is warm and frost is no longer a risk.
- How to Plant:
- Hole Preparation: Dig a hole roughly twice the width of the tuber or root ball so the roots settle into loose, open soil.
- Soil Amendments: Work in plenty of compost or other organic matter to hold moisture while keeping the mix loose enough to drain freely.
- Planting Depth: Set the tuber or root collar at soil level and cover lightly — do not bury the stem.
- Growth Speed & Expectations: A moderate to fast grower in warm, humid conditions, quickly putting out large heart-shaped leaves.
Soil, Watering & Drainage Care
- Soil Mix & Drainage Needs: Use a rich, moisture-retentive mix that still drains well; in containers a peat- or coco-based potting mix works best, and the pot must have drainage holes so the roots stay moist but never waterlogged.
- Watering Schedule & Technique:
- Young / Newly Planted: Keep the soil consistently moist while the plant establishes, and maintain high humidity.
- Established: Water regularly so the soil stays evenly moist; do not let it dry out fully, but tip away any standing water.
- Seasonal Adjustments: Water less in winter when growth slows, and more often during hot, dry spells.
Climate, Light & Hardiness
Alocasia cucullata is a tropical aroid that thrives in warm, humid tropical, subtropical, and Mediterranean climates, and is commonly grown as a houseplant well beyond those zones. It prefers bright, filtered shade rather than direct sun, and has essentially no tolerance for frost or sustained cold.
Quick Climate Specifications
| Climate Zones | Tropical, subtropical, Mediterranean; grown as a houseplant elsewhere |
|---|---|
| USDA Hardiness Zones | 10b and warmer outdoors |
| Optimal Temp Range | Approximately 18–29°C (64–85°F) |
| Cold Damage Begins | Approximately 10°C (50°F) |
| Approx. Survival Minimum | Approximately 0–5°C (32–41°F), briefly, in established plants only |
| Frost Tolerance | None |
| Light Conditions | Full shade with bright ambient light |
Sunlight & Light Exposure
Optimal Light Setup
Grows best in full shade with plenty of bright, indirect light rather than direct sun - typical of an aroid understory plant.
Shade & Heat Management
Direct sun scorches the heart-shaped leaves, so provide filtered or dappled light outdoors and keep indoor plants back from unfiltered south-facing glass.
Best Exposure / Orientation
An east- or north-facing window works well indoors; outdoors, place under canopy shade or on a shaded patio.
Temperature Extremes & Hardiness
USDA Hardiness & Regional Limits
Reliably grown outdoors year-round only in USDA zone 10b and warmer; in cooler climates it is grown as a container houseplant that must come indoors before cold weather arrives.
Cold Damage & Winter Protection
Chilling injury to foliage typically begins around 10°C (50°F). Move container plants indoors, and keep them away from cold drafts and unheated porches, well before nighttime temperatures approach this range.
Frost Sensitivity
Frost is not tolerated and will damage or kill exposed foliage and stems.
Extreme Heat Tolerance
Handles typical tropical heat well provided humidity and shade are adequate; combined intense sun and heat can still scorch the leaves.
Wind, Humidity & Microclimate
Humidity Preferences
Prefers consistently high humidity, reflecting its native tropical understory habitat.
Dry-Air Tolerance
Tolerates dry indoor air poorly; heating and air conditioning can cause leaf-tip browning, so misting, a pebble tray, or a humidifier helps indoors.
Wind Tolerance
Broad, thin leaves are easily torn or stressed by strong wind, so a sheltered position is preferred.
Microclimate Recommendations
Choose a warm, humid, shaded, and wind-sheltered spot - indoors near a bright window, or outdoors under tree canopy in frost-free climates.
Growing in Pots, Balconies & Indoors
Alocasia cucullata (Chinese taro, ‘hooded’ dwarf elephant ear) is a lush foliage aroid (to about 1-2 m / 3-6 ft) that the grower rates as a houseplant and a container plant. It grows in full shade with bright indirect light, so it suits a warm, well-lit room without direct sun.
It is a genuine indoor plant, but like its aroid relatives it is toxic if chewed, so place it out of reach of children and pets.
Quick Details
- Container Size: A medium-to-large pot sized to the roots; pot up as the clump grows.
- Indoor Suitability: A good houseplant for a warm, bright, shaded spot.
- Best Spot: Full shade with plenty of light / bright indirect light; warm and humid, out of direct sun.
- Soil & Drainage: Light, aerated, organic mix; free-draining and kept evenly moist.
- Watering in Pots: Keep evenly moist – average water; never waterlogged or bone dry.
Indoors & On the Windowsill
- Genuine houseplant: Yes – it grows well indoors in bright, indirect light. Keep it warm and humid and out of hot direct sun.
- Safety: All parts contain calcium oxalate and are toxic if chewed – keep it away from children and pets and wash hands after handling.
- Windowsill: Bright, filtered light suits it; avoid scorching midday sun on the glass.
On a Balcony or Patio
- Light & shelter: In warm, frost-free weather it enjoys a shaded, sheltered, humid balcony out of direct sun and wind; bring it in before cold nights.
- Container reality: Big leaves transpire fast, so pots dry quickly in reflected heat – check moisture often.
Choosing the Pot, Soil & Long-Term Care
- Pot & drainage: A medium-to-large pot with room for the clump to grow. Give it strong drainage holes and skip a standing-water saucer to avoid root rot; terracotta breathes and dries faster, while glazed or plastic pots hold moisture longer.
- Potting mix: A light, aerated, organic-rich mix – potting soil, or peat/coir with perlite, enriched with a little humus or compost.
- Feeding: Potted plants use up their food faster because nutrients wash out with every watering, so feed lightly but more regularly than plants growing in open ground.
- Repotting: Refresh the mix and pot up every couple of years; divide crowded clumps and remove tired leaves.
Growing this plant in a greenhouse
A greenhouse can give alocasia cucullata frost protection, cold protection, humidity control and extra warmth.
Greenhouse at a glance
| Greenhouse suitability | Good - clearly useful |
|---|---|
| Main benefits | frost protection, cold protection, humidity control, extra warmth |
| Season extension | earlier spring & later autumn |
| Outdoor protection advisable below | about 10°C |
| Maintain greenhouse minimum | around 10°C for active growth |
| Suitable types | heated greenhouse, polycarbonate greenhouse |
| Heating | Heating is recommended in cold climates for continuous growth. |
Related greenhouse guides
- Greenhouses: How to Choose the Right Greenhouse
- Best Greenhouse Heaters
- Greenhouse Climate Control: Temperature, Ventilation and Humidity
- Polycarbonate Greenhouses: What to Look for Before Buying
Fertilizing & Feeding
A moderate feeder: this vigorous, glossy-leaved aroid rewards regular light feeding through its active growing season, tapering off as growth slows.
Quick Fertilizing Specs
| Feeding Level | Moderate feeder |
|---|---|
| Main Nutrient Priority | Balanced feeding with adequate nitrogen to support big, glossy heart-shaped leaves |
| Best Feeding Period | Spring through the warm active growing season |
| Organic Options | Compost or organic matter worked into rich, moist soil |
| Reduce/Stop Feeding | Hold off feeding in cooler weather or when growth slows |
| Micronutrients | A complete fertilizer with iron and manganese supports healthy leaf color; correct only diagnosed issues |
Feeding by Growth Stage
Establishment after planting or repotting
Let new roots settle into moist, humid soil before asking the plant to take up fertilizer.
| Nutrient direction | None – withhold fertilizer while roots establish. |
|---|---|
| Timing | The first weeks after planting, dividing, or repotting. |
| Frequency | No feeding at this stage. |
| Fertilizer types | No feeding at this stage; hold off fertilizing until new roots are established and active growth resumes. |
| Precautions | Do not fertilize a freshly potted or divided plant; wait for active growth before feeding. |
Active growth in warmth and humidity
Support fast, glossy heart-shaped foliage while temperature and humidity favor active growth.
| Nutrient direction | A balanced, nitrogen-forward fertilizer supports steady leaf production. |
|---|---|
| Timing | Through the warm season while the plant is actively pushing new leaves. |
| Frequency | Regular light feedings through the active growing season keep this vigorous grower well fed. |
| Fertilizer types | A balanced complete fertilizer with good nitrogen content, Compost or organic matter worked into the soil surface |
| Routine trace nutrients | iron, manganese |
| Precautions | Keep humidity and moisture consistent alongside feeding; a well-fed plant in dry, low-humidity air can still struggle. |
Cool or low-light slowdown
Avoid pushing growth when cooler temperatures or lower light slow the plant down.
| Nutrient direction | None – growth has slowed and feeding is not needed. |
|---|---|
| Timing | Cooler months or periods of reduced light and slower growth. |
| Frequency | No feeding while growth is slow. |
| Fertilizer types | No feeding at this stage; withhold fertilizer until active growth resumes. |
| Precautions | Do not fertilize while growth is slow; unused nutrients can build up as salts in the soil. |
Nutrient Deficiency Signs & Corrections
New leaves emerge smaller and paler than usual and overall growth slows.
| Possible causes | low available soil nitrogen, infrequent feeding during active growth, nutrient leaching from consistently moist soil |
|---|---|
| Appears first on | older, lower leaves |
| What to check | recent feeding history, soil moisture and drainage, overall growth rate |
| Possible correction | Resume regular light, balanced feeding through the active growing season. |
New leaves turn pale to yellowish while the veins stay greener.
| Possible causes | high soil pH limiting iron uptake, waterlogged or compacted soil reducing root function, general root stress from poor drainage |
|---|---|
| Appears first on | newest leaves |
| What to check | soil pH and drainage, watering consistency, root condition when repotting |
| Possible correction | Correct soil pH toward the plant’s preference and apply a chelated iron product per its label. |
Leaf tips and margins brown despite adequate watering.
| Possible causes | fertilizer salt buildup in the soil, under-watering that concentrates salts, excessive or too-frequent feeding |
|---|---|
| Appears first on | leaf tips and margins |
| What to check | recent fertilizer amounts and frequency, watering consistency, drainage, especially in containers |
| Possible correction | Ease off feeding, water thoroughly to flush accumulated salts, then return to lighter feeding. |
Pruning, Training & Seasonal Maintenance
Chinese Taro is a rhizomatous, clump-forming aroid rather than a woody plant, so “pruning” here means routine leaf and inflorescence clean-up, not structural cutting. It tolerates only light maintenance – each stem carries a single growing point, and cutting into it does no good – and the main objective is removing spent leaves and finished flower stalks to keep the clump tidy. Because it is evergreen year-round in its preferred tropical/subtropical range and grown as a houseplant elsewhere, there is no single dormant pruning season; light clean-up is appropriate whenever a leaf or bloom stalk fades. Routine leaf removal has no bearing on future flowering, since each new leaf and each inflorescence arise independently from the rhizome.
Quick Pruning & Maintenance Specs
| Pruning Tolerance | Low – foliage/inflorescence clean-up only, no woody framework to shape |
| Primary Pruning Window | Ongoing, all year, as individual leaves or flower stalks fade |
| Typical Frequency | As needed, spot removal rather than a scheduled session |
| Main Objective | Remove dead/yellowing leaves and spent inflorescence stalks; keep the clump’s growing points clear |
| Young Plant Priority | Leave foliage untouched while a new division or offset establishes its own root system |
| Mature Plant Priority | Clear old leaves and spent flower stalks; divide congested clumps rather than cutting them back |
| Best Tool Type | Precision snips or bypass secateurs (petioles are thick and fleshy) |
| Avoid Heavy Pruning During | Removing more than one or two mature leaves at once from a small plant – each leaf is a large share of its total photosynthetic area |
Pruning by Plant Age & Size
Newly Established
Do not remove healthy leaves from a newly potted division or offset; it needs all existing foliage to fund new root growth. Only trim visibly damaged or rotting tissue.
Young / Formative
No structural training applies – this species grows from a central rhizome with a rosette of stemmed leaves, not a branching framework, so there is nothing to train into a shape.
Mature / Established
Remove individual leaves as they yellow or collapse, and cut spent “ice-pop” flower stalks once the bracts fade. In a crowded pot, divide off basal offsets rather than pruning the mother clump back.
Special Growth to Remove
- Dead, yellowing or collapsed leaves – cut the petiole near its base at the rhizome
- Spent flower stalks once the white-yellowish spadix and wrapping bract have faded – they add nothing ornamentally once finished and are simplest to remove at the base
- Basal offsets/daughter plants if the clump is outgrowing its space – separate for propagation rather than shearing the plant back (vegetative division is this species’ normal means of increase)
Container & Small-Space Pruning
As a common houseplant, keep it compact by removing old outer leaves promptly rather than letting the plant carry excess spent foliage, and control clump size in a pot by dividing and removing offsets rather than cutting back living leaves for size.
Tools
Precision snips for thin leaf/flower stalks; bypass secateurs for older, thicker petioles. No loppers, saws or hedge shears are ever appropriate on this single-growing-point aroid.
Tool Hygiene & Disease Risk
Routine – clean, sharp tools are sufficient; no significant transmissible pathogen risk is documented for this species from pruning cuts. The bigger hazard is to the handler: all Alocasia species carry irritant calcium-oxalate sap that is toxic and irritating to skin, and the plant is documented as toxic to dogs and cats, so wear gloves when cutting and keep cut material away from pets.
Cut Placement & Technique
Cut each petiole or flower stalk close to the rhizome without nicking neighboring emerging growth points, and always cut cleanly rather than tearing, since torn tissue on a soft-stemmed aroid is slower to heal and more prone to rot.
Heavy Pruning & Rejuvenation
Not tolerated in the woody sense – there is no framework to cut back hard, and removing most of a plant’s leaves at once can seriously set it back or kill individual stems. If a clump becomes overcrowded or tired-looking, the appropriate renewal is to divide it and pot up healthy offsets, not to shear the foliage.
Post-Pruning Care
Maintain the humidity and consistently moist soil this species needs; a fresh cut petiole in low humidity can dry back further than intended. Wash any sap off skin promptly after handling cuts.
Common Pruning Mistakes
- Stripping multiple healthy leaves at once for a “tidy” look, which starves the plant of photosynthetic area
- Leaving long petiole stubs instead of cutting back to the base, inviting rot
- Handling cuts bare-handed, causing skin irritation from the sap, or leaving trimmings where pets can reach them
When NOT to Prune
Avoid removing leaves from a young or newly divided offset before it has rooted in, and avoid taking more than a leaf or two at a time from any specimen, since each leaf represents a large share of the plant’s limited foliage.
Recommended Tools (by task)
- Any age, leaf/flower-stalk removal (precision_snips): thin fresh stalks need only a clean small-scale snip.
- Mature plants, older thickened petioles (bypass_secateurs): established petioles can be fibrous enough to need a bypass blade rather than snips for a clean cut.
Propagation Guide
Alocasia cucullata is most easily propagated by dividing the offsets that form naturally around its rhizome, which quickly produces new plants identical to the parent. The species will generally grow true from seed as well, so vegetative propagation is not strictly required, but division remains faster and more reliable, and is the method needed to reproduce a specific plant’s exact form – making this an easy plant to propagate overall.
Quick Propagation Specs
| Best Propagation Method | Rhizome/Offset Division |
| Alternative Methods | Seed |
| Propagation Difficulty | Easy |
| Seed True-to-Type | Usually true-to-type |
| Vegetative True-to-Type | Yes |
| Best Propagation Season | Spring to summer |
| Seed Germination Time | Typically a few weeks, can be uneven |
| Germination Temperature | Roughly 21–29°C (70–85°F) |
| Seed Sowing Depth | Shallow – lightly cover or surface-sow |
Growing from Seed
Seed Handling & Viability
Alocasia seed is generally short-lived and is best sown fresh rather than stored, as viability tends to decline quickly once it dries out.
Dormancy & Pre-Sowing Treatment
No pretreatment is required; sow fresh seed directly.
Sowing Season
Warm months, in line with this plant’s spring-to-autumn planting season.
Sowing Depth & Orientation
Sow shallowly, lightly covered or surface-sown, and keep consistently moist.
Germination Conditions
Warm, roughly 21–29°C (70–85°F), with high humidity.
Germination Time
Typically a few weeks, though it can be uneven.
Seedling Care
Keep seedlings warm and humid in moist soil, avoiding waterlogging; wear gloves when handling seedlings, cuttings, or divisions, as the sap typical of this genus can irritate skin, consistent with the plant’s noted toxicity.
Division, Offsets, Pups & Suckers
Alocasia cucullata forms offsets from its underground rhizome as it grows. Divide established clumps in spring as new growth begins; each offset should be separated with its own roots and at least one growth point attached to the rhizome section. Replant divisions promptly in moist, humus-rich soil and keep humidity elevated until they are established – larger offsets with more roots establish fastest.
Bloom & Flower Guide
Quick Details
- Bloom Season: Spring into summer
- Flower Appearance: An aroid inflorescence – a finger-like, white-yellowish spadix wrapped in a pale hood (spathe)
- Edibility: Not edible – all parts are toxic (calcium oxalate)
Detailed Blooming Overview
Chinese taro (Alocasia cucullata) is grown for its foliage, but as an aroid it does flower. What looks like the “flower” is really an inflorescence: a finger-like spadix packed with tiny true flowers, wrapped by a pale, white-to-yellowish hood called a spathe – the “ice-pop” shape the grower describes. Indoors it blooms only occasionally.
Flower Characteristics
- A slim, white-yellowish spadix carrying many tiny flowers.
- Wrapped in a pale spathe (a modified leaf, not petals) that forms the hood.
Bloom Care & Thinning
- Managing the bloom: The inflorescence is modest, so many growers cut it off to keep the plant’s energy in its striking foliage.
- Safety: Every part contains insoluble calcium oxalate crystals; the sap irritates skin and mouth, so the flower is not edible – keep it away from children and pets.
Pests, Diseases & Troubleshooting
Overview: Alocasias are big-leaved tropical aroids grown from a fleshy corm, and their vulnerabilities cluster around moisture and air: soft, thin leaves invite spider mites in dry heat, while the corm and roots rot readily in cold, waterlogged soil. As the compact Buddha’s-hand / hooded dwarf elephant ear, it is one of the more forgiving alocasias but still mite-prone in dry indoor air and rot-prone if overwatered. The management philosophy is warm, bright-but-filtered light, high humidity with good airflow, and a chunky, free-draining aroid mix that stays evenly moist but never soggy – get that right and most problems disappear. Treat pests organically first with rinsing, oils and soaps, and lean on sanitation and dryness for disease.
Quick Troubleshooting Overview
| Issue / Pest | Main Symptom | Primary Solution |
|---|---|---|
| Spider mites | Fine stippling, dull/bronzed leaves, webbing under leaves in dry air | Raise humidity & airflow, rinse, insecticidal soap / miticidal oil |
| Mealybugs & scale | White fluff in leaf joints or brown bumps on stems; sticky honeydew | Wipe off, horticultural oil / insecticidal soap; check roots |
| Thrips & aphids | Silvery streaks, distorted new leaves, sticky growth tips | Blue sticky traps, soap/oil, rinse new growth |
| Leaf spot / blight | Brown/black watery spots, sometimes yellow halo, that spread | Stop wetting leaves, improve airflow, remove leaves, copper |
| Corm & root rot | Mushy corm, yellowing collapse, rotten smell | Unpot, cut to clean tissue, re-pot in airy mix, water less |
| Cold / low humidity | Crispy brown edges, yellowing, dormancy dieback | Keep warm & humid; corm may re-sprout |
Common Pests & Management
- Spider mites (Tetranychus urticae):
- Symptoms: The signature Alocasia pest, especially indoors. Fine pale stippling gives leaves a dull, dusty, bronzed look; badly hit leaves yellow and dry, with delicate webbing along the veins and undersides. The mites are moving specks best seen on the underside against the light.
- Prevention & Control: Dry heat is the trigger, so raise humidity and keep gentle air moving. Rinse or wipe both leaf surfaces regularly, then treat undersides with insecticidal soap or a fine horticultural/miticidal oil, repeating every 5–7 days to break the cycle. Predatory mites work well in a warm indoor setting.
- Mealybugs & scale (Planococcus citri; soft brown scale Coccus hesperidum):
- Symptoms: Cottony white mealybug tufts wedge into leaf sheaths, petiole junctions and the crown; scale form brown limpet bumps along stems and midribs. Both drip honeydew that blackens with sooty mould. Root mealybugs may lurk on the corm and roots of a stalling plant.
- Prevention & Control: Wipe colonies away with an alcohol-dipped swab, then spray horticultural oil or insecticidal soap, repeating to catch survivors. Inspect the corm/roots at repotting and wash off any root colonies; a systemic drench helps persistent cases. Quarantine new plants.
- Thrips (Frankliniella / Thrips spp.):
- Symptoms: Silvery-grey streaking and fine black frass on leaves, distorted or scarred new growth, and pale flecking. Slender insects dart into leaf folds when disturbed. Thrips can also carry viruses.
- Prevention & Control: Hang blue sticky traps to monitor and thin adults. Rinse and treat with insecticidal soap, neem/horticultural oil or spinosad, targeting unfurling leaves where they hide, and repeat. Remove badly scarred leaves.
- Aphids (Aphis / Myzus spp.):
- Symptoms: Clusters of soft green or black insects on tender petioles and unfurling leaves, leaving sticky honeydew and curled, distorted new growth; often attended by ants.
- Prevention & Control: Knock off with a water jet, then use insecticidal soap or a light oil on the growing tips. Beneficials (ladybirds, lacewings) clear them outdoors.
Diseases & Fungal Issues
- Corm & root rot (Pythium / Phytophthora / Fusarium spp.):
- Symptoms: Cold, soggy soil rots the corm and roots – the plant yellows, wilts and collapses despite “enough” water, and the unpotted corm is soft, brown-black and foul-smelling instead of firm and white.
- Treatment & Management: Prevent with a chunky, airy aroid mix, a draining pot and warmth; water when the top has dried and never leave the plant cold-and-wet. If rot starts, unpot and cut the corm back to firm white tissue, dust with sulfur or cinnamon, air-dry and re-pot in fresh mix; a healthy firm corm often re-sprouts even after total leaf loss.
- Leaf-spot & blight (Phytophthora, Colletotrichum, Xanthomonas):
- Symptoms: Water-soaked brown-to-black spots, sometimes ringed with yellow, that enlarge and merge on wet foliage; bacterial forms look greasy and may smell, fungal forms are drier with rings.
- Treatment & Management: Keep water off the leaves, boost airflow and lower leaf wetness; remove and destroy spotted leaves and clear debris. A copper fungicide checks spread; avoid crowding and overhead watering.
- Xanthomonas / bacterial leaf blight (Xanthomonas spp.):
- Symptoms: Small water-soaked flecks that expand into dark, mushy, yellow-haloed lesions and can rot leaf margins quickly in warm, wet, humid conditions.
- Treatment & Management: No cure once systemic – rely on prevention: dry foliage, spacing, sanitised tools, and prompt removal of infected leaves. Copper sprays give partial protection; discard severely affected plants.
Growing Difficulties & Abiotic Problems
- Overwatering / corm rot (the #1 killer):
- Cause & Symptoms: A dense, constantly wet mix starves roots of oxygen and rots the corm; leaves yellow, droop and drop. Cold compounds it.
- Correction Strategy: Use an airy aroid mix (bark, perlite, coir), a draining pot, and water when the top inch dries; ease right off in cool, low-light dormancy. Treat established rot as corm rot above.
- Low humidity & crispy edges:
- Cause & Symptoms: Dry indoor air browns leaf edges and tips, weakens the plant and invites spider mites. Draughts and heaters worsen it.
- Correction Strategy: Aim for high humidity (pebble tray, grouping, humidifier) with gentle airflow, away from heat vents. Trim crisped edges for looks.
- Cold damage & dormancy:
- Cause & Symptoms: Below roughly 15°C growth stalls; cold, wet conditions yellow and drop leaves and the plant may die back to the corm – alarming but often just dormancy, not death.
- Correction Strategy: Keep warm (ideally 18–27°C) and away from cold windows. If it drops all leaves, keep the corm barely moist and warm; it usually re-sprouts when warmth returns.
- Sunburn & leaf scorch:
- Cause & Symptoms: Harsh direct midday sun bleaches and scorches the thin leaves into pale then brown dead patches.
- Correction Strategy: Give bright, filtered/indirect light or gentle morning sun; acclimatise gradually and shade from fierce afternoon sun.
- Guttation & edema:
- Cause & Symptoms: With warm, moist roots the plant sweats water droplets from leaf tips (guttation – normal); overwatering in cool, dull spells can also cause corky edema bumps underneath. Guttation drops can leave harmless mineral crust or scorch tips if very salty.
- Correction Strategy: Reduce watering in cool, low-light conditions; flush salts occasionally with clean water. Both are cosmetic signals to fine-tune moisture.
What Helps – Products & Tools
Start cultural: an airy, free-draining aroid mix, warmth, high humidity with airflow, and filtered light prevent most trouble. For pests, keep insecticidal soap and horticultural (neem) oil on hand for spider mites, mealybugs, scale, thrips and aphids; add blue sticky traps to monitor thrips, isopropyl alcohol swabs for spot-cleaning, and spinosad for stubborn thrips. Use a copper fungicide for leaf spot/blight, sulfur or cinnamon as a wound dressing on a cut corm, and a systemic soil drench as the fallback for hidden root mealybug. Predatory mites suit warm indoor rooms. Follow all labels and apply oils in the cool evening to protect the plant and pollinators.