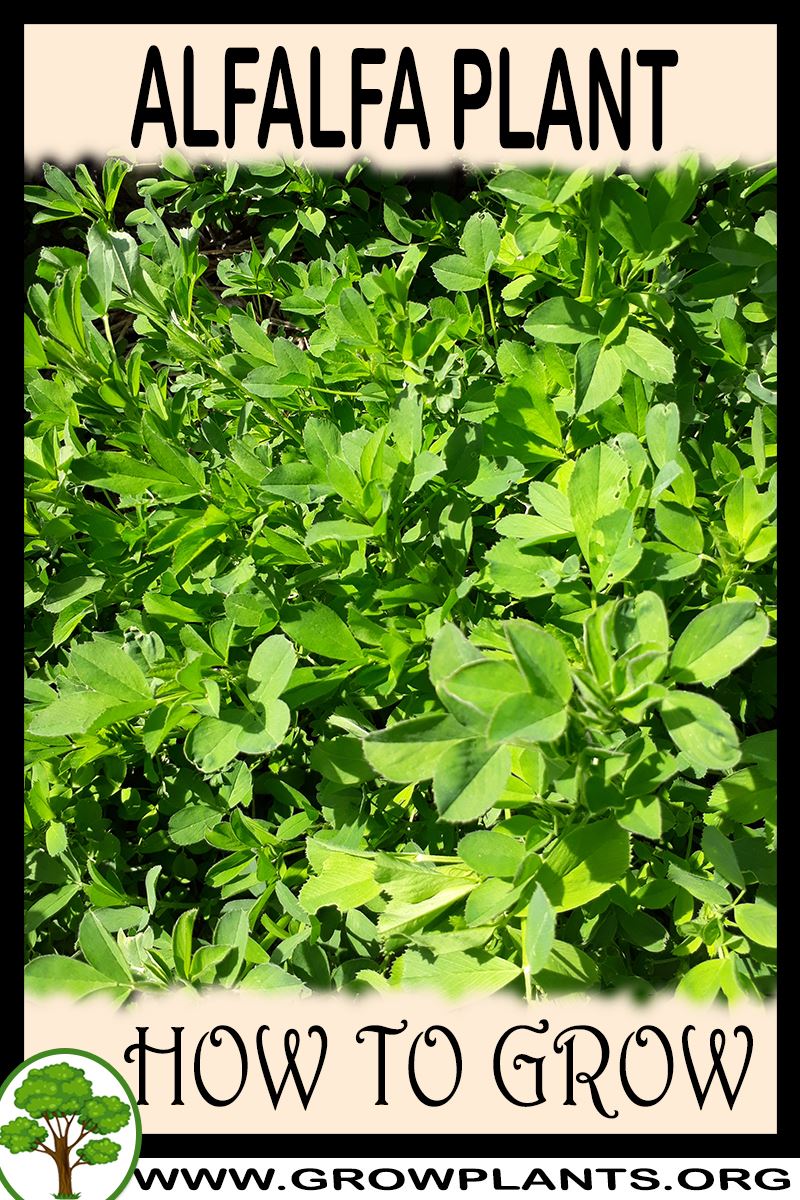



Plant Profile & Key Characteristics
Overview: Alfalfa (Medicago sativa) is a deep-rooted herbaceous legume 60-100 cm, grown for edible sprouts and forage; a nitrogen-fixing, drought-tolerant plant that is evergreen in mild climates and deciduous where cold.
Quick Specifications
| Specification | Attribute |
|---|---|
| Plant Type / Life Cycle | Perennial (evergreen; deciduous in cold) |
| Foliage Type | Semi-evergreen |
| Mature Size | 60-100 cm (24-40 in) |
| Growth Rate | Fast to moderate |
| Root System | Very deep taproot (to ~15 m), nitrogen-fixing |
| Toxicity | Non-toxic / edible (sprouts and young leaves) |
| Hardiness | USDA 4-11 |
Growth Form & Structure
- Height & Spread: 60-100 cm (24-40 in); can be grown in containers, and sprouted indoors.
- Growth Habit & Form: Upright, clumping leguminous herb with clover-like foliage.
- Lifespan & Maturity: Fast-establishing, long-lived perennial; sprouts ready to eat 5-8 days from seed, seed set within about a year.
Anatomy & Physical Features
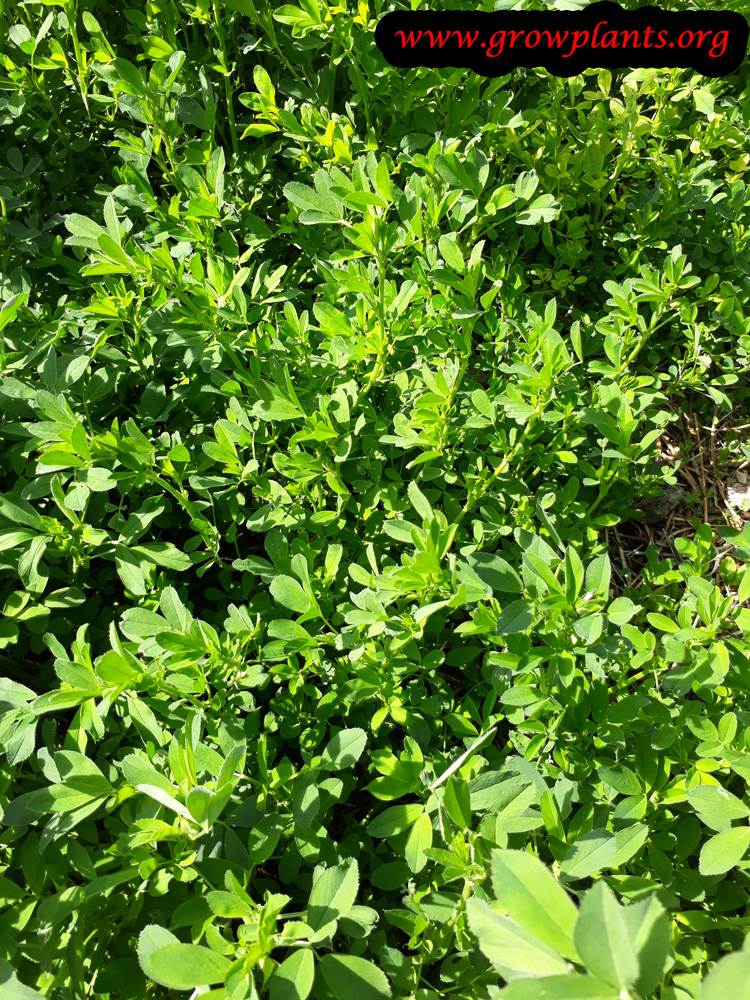
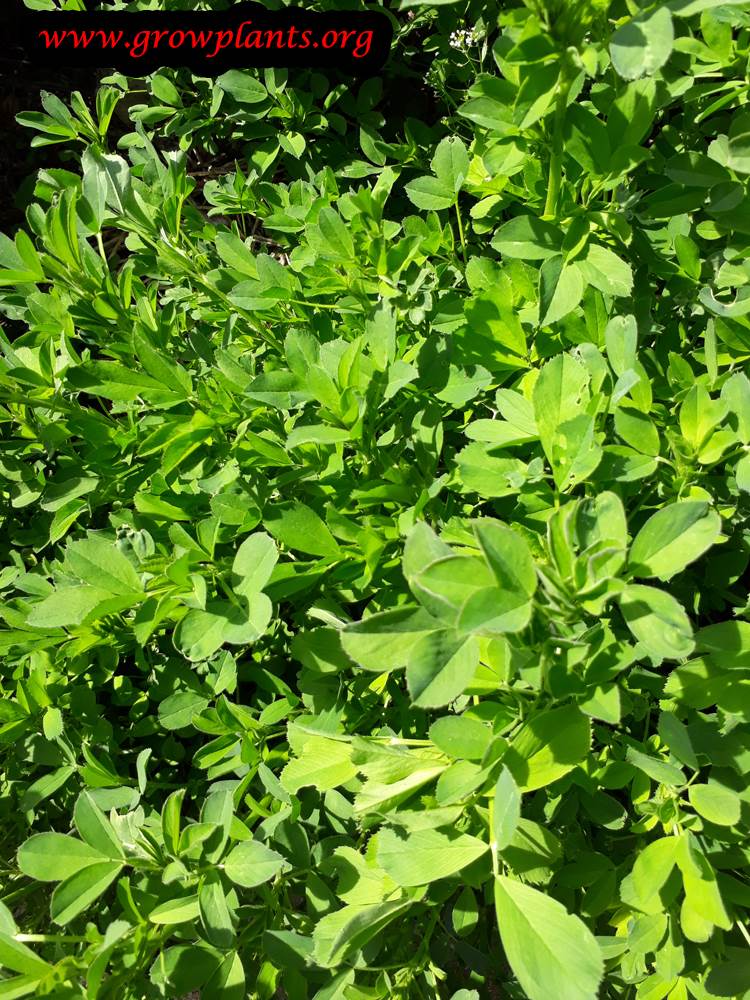
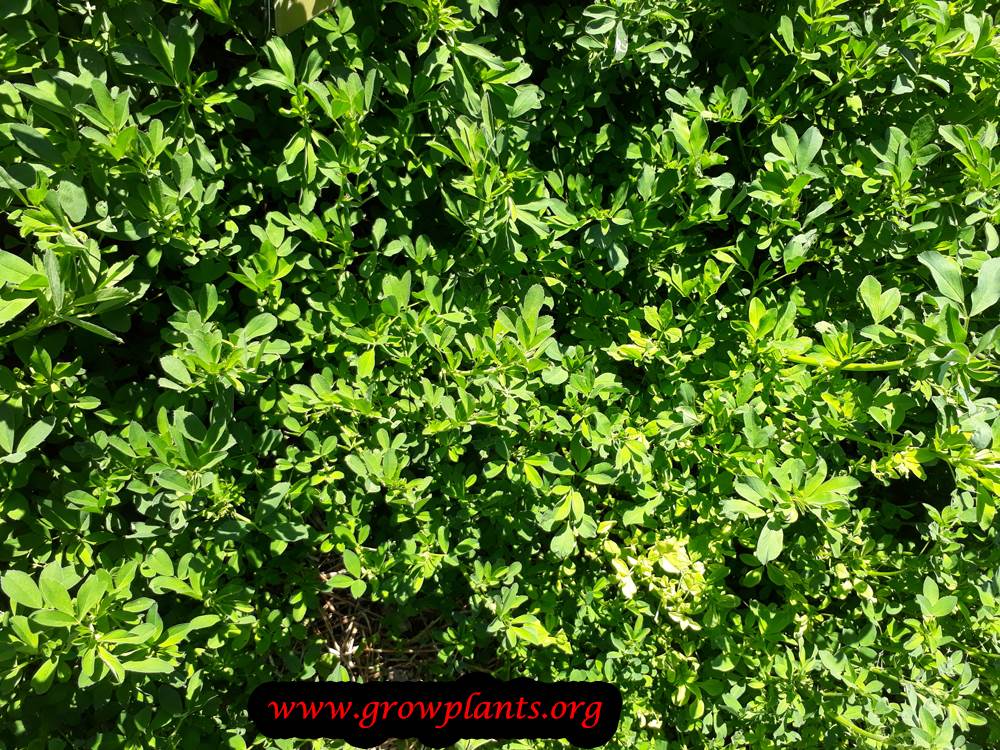
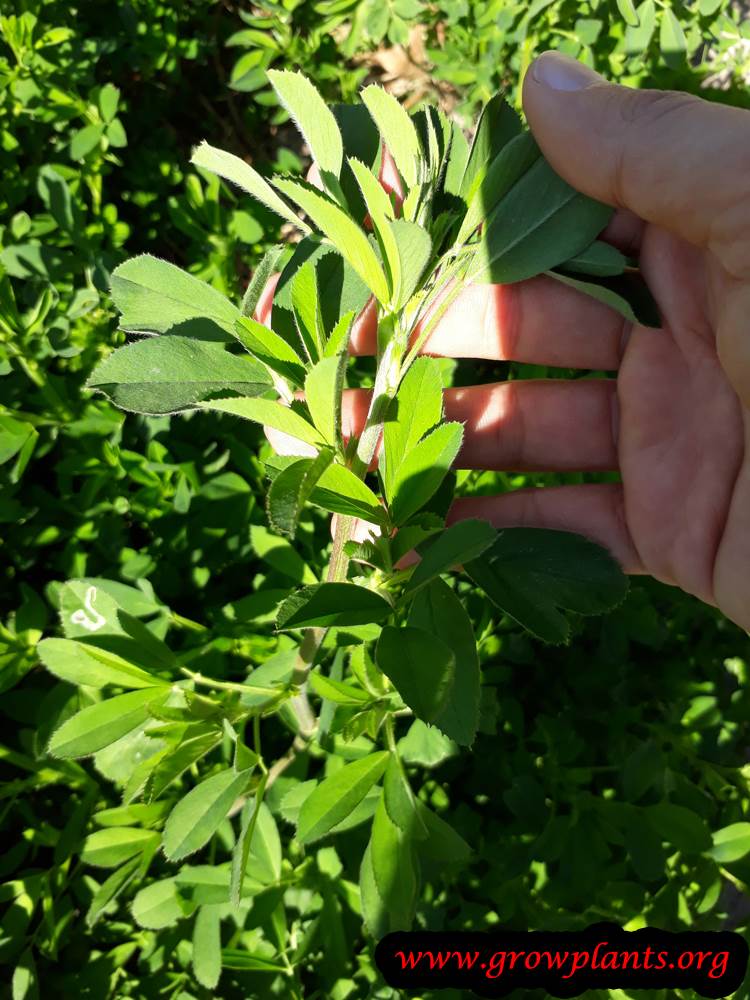
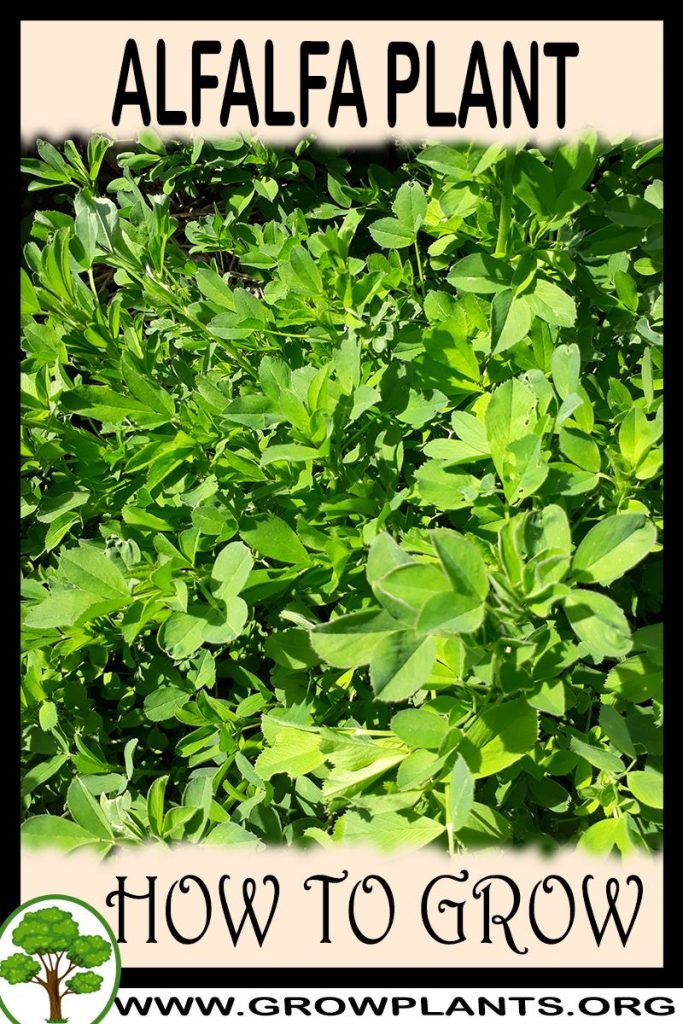
- Leaves & Foliage: Green, three-part clover-like (elliptic) edible leaves.
- Flower Characteristics: Purple pea-shaped flowers in clusters (see Bloom guide).
Primary Uses & Landscape Value
- Edible Uses: Sprouts eaten raw; young leaves and seeds cooked.
- Functional & Ornamental Roles: Forage and cover crop, nitrogen-fixing green manure, drought-tolerant planting.
Care Guide: Planting, Soil & Watering
Overview: Alfalfa (Medicago sativa) is a fast- to medium-growing perennial legume (zones 4–11) that grows in full sun to part shade and fixes nitrogen through a very deep root system. It is drought tolerant once established and adaptable in its watering, but always needs well-draining soil.
Quick Care Requirements
| Requirement | Ideal Condition |
|---|---|
| Planting Season | Spring, or autumn in hot climates |
| Growth Rate | Fast to Moderate |
| Soil Type | Deep, well-draining |
| Water Need | Low to Moderate — drought tolerant once established |
Planting & Establishment
- Best Planting Season: Plant in spring, or in autumn in hot climates.
- How to Plant:
- Hole Preparation: Loosen the soil deeply — the taproot can descend many metres, so it needs open ground to run down.
- Soil Amendments: Little enrichment is needed; focus on loosening compacted ground and ensuring good drainage.
- Planting Depth: Set the crown at soil level so it sits just at the surface.
- Growth Speed & Expectations: Fast to medium — reaches about 60–100 cm (24–40 in), with roots going far deeper.
Soil, Watering & Drainage Care
- Soil Mix & Drainage Needs: Well-draining soil is essential — the deep roots dislike waterlogged ground; it also grows in a deep container with good drainage.
- Watering Schedule & Technique:
- Young / Newly Planted: Water regularly to help the seedlings and deep roots establish.
- Established: Water lightly to moderately — the deep root system makes it very drought tolerant once settled.
- Seasonal Adjustments: More during hot, dry growth and less in cool weather.
Climate, Light & Hardiness
Alfalfa (Medicago sativa) is a deep-rooted, drought-tolerant perennial suited to temperate, Mediterranean, desert, and subtropical climates, growing in full sun to half shade (sprouts alone can be raised in full shade). It is broadly cold-hardy across USDA zones 4–11, going deciduous in cold winters and evergreen in mild ones.
Quick Climate Specifications
| Climate Zones | Temperate, Mediterranean, Desert, Subtropical |
|---|---|
| USDA Hardiness Zones | 4–11 |
| Frost Tolerance | High |
| Light Conditions | Full Sun to Half Shade (full shade viable only for sprout production) |
Sunlight & Light Exposure
Optimal Light Setup
Full sun to half shade suits the mature plant; full shade is only appropriate when growing it purely for edible sprouts rather than as a garden plant.
Temperature Extremes & Hardiness
USDA Hardiness & Regional Limits
Hardy across an unusually wide USDA range of zones 4–11, thanks to its very deep root system (extending to around 15m / 45ft) that helps it access moisture and survive stress. In cold climates it dies back for winter (cold-deciduous); in mild climates it stays evergreen.
Frost Sensitivity
Established plants tolerate winter frost well within their hardy zones; foliage dies back naturally in cold winters and regrows from the crown in spring.
Growing in Pots, Balconies & Indoors
Alfalfa (Medicago sativa) grows to 60-100 cm (24-40 in) in the ground, and the grower lists it as suitable indoors and in containers. Indoors it is mostly grown as nutritious sprouts and microgreens on a kitchen counter, while a full-size plant wants a very bright spot or the outdoors.
Quick Details
- Container Size: A 10-20 L (3-5 gal) pot for a full plant, or a shallow tray/jar for sprouts and microgreens
- Indoor Suitability: Suitable indoors – easy as sprouts/microgreens; a mature plant needs a very bright sill
- Best Spot: Full sun to half shade for plants; sprouts germinate in shade, then greened in light
- Soil & Drainage: Free-draining mix; as a legume it fixes its own nitrogen and is not demanding
- Watering in Pots: Average – keep evenly moist; rinse sprouts twice daily and drain well
Indoors & On the Windowsill
- As a houseplant: The grower lists it as suitable indoors. Most people grow it indoors for sprouts or microgreens – quick, easy and needing little light to start.
- Windowsill: To grow a leafy plant indoors, give it the brightest sill; in low light it grows thin and weak.
- Sprouts: Rinse and drain seeds a couple of times a day in a jar or tray; harvest in a few days.
On a Balcony or Patio
- Light & wind: Give it the sunniest spot; walls, railings and paving throw back heat so pots dry quickly – check moisture often and shelter or stake it on an exposed, windy balcony.
- Practicalities: Account for the weight of a full pot and make sure drainage water can run away freely without staining the balcony.
Choosing the Pot, Soil & Long-Term Care
- Pot & drainage: Use a pot with strong drainage holes and skip a standing-water saucer to avoid root rot; terracotta breathes and dries faster, while glazed or plastic holds moisture longer.
- Potting mix: Well-aerated and organic-rich – a quality potting mix, or peat/coir with perlite or vermiculite.
- Feeding: As a nitrogen-fixing legume it needs little feeding – the odd light, low-nitrogen feed is enough for potted plants.
- Repotting: Refresh the surface mix each year and pot on or divide every couple of years, trimming the roots lightly once it fills the container.
Fertilizing & Feeding
A nitrogen-fixing legume that draws much of its own nitrogen from root nodules, so it needs little supplemental nitrogen; feeding instead focuses on phosphorus and potassium to support root, nodule, and regrowth vigor across repeated cuttings.
Quick Fertilizing Specs
| Feeding Level | Light feeder |
|---|---|
| Main Nutrient Priority | Phosphorus and potassium emphasis rather than nitrogen, since this legume fixes its own nitrogen once established |
| Best Feeding Period | At establishment, then lightly through the harvest season as leaves are repeatedly cut |
| Organic Options | Compost or well-rotted organic matter worked into well-drained soil at planting |
| Micronutrients | Usually supplied by a complete fertilizer and organic matter; correct specific issues only when diagnosed |
| Soil pH | Performs best in well-drained soil that is not strongly acidic, which supports the nitrogen-fixing root nodules |
| Reduce/Stop Feeding | Ease off feeding as the plant goes semi-dormant or dormant in cold climates, or as active leaf harvest slows |
Feeding by Growth Stage
Seedling establishment and root nodule development
Help young plants establish a deep root system and develop the nitrogen-fixing nodules this plant relies on.
| Nutrient direction | A balanced starter fertilizer, moderate in phosphorus, to support root and nodule development. |
|---|---|
| Timing | At planting and through early seedling establishment. |
| Frequency | A light starter feeding at planting is generally enough to get the deep root system going. |
| Fertilizer types | A balanced starter fertilizer, Compost or well-rotted organic matter |
| Precautions | Avoid heavy nitrogen at establishment, which can discourage the root nodules from forming and taking over nitrogen supply. |
Vegetative growth once nodules are active
Let the established root nodules supply most of the plant’s nitrogen while supporting overall vigor with other nutrients.
| Nutrient direction | Keep nitrogen low once nodules are active; favor phosphorus and potassium to support root and shoot health instead. |
|---|---|
| Timing | Once the plant is established and actively growing leaves. |
| Frequency | Minimal nitrogen feeding is typically needed; occasional light phosphorus and potassium feeding supports ongoing growth. |
| Fertilizer types | A low-nitrogen fertilizer emphasizing phosphorus and potassium |
| Precautions | Heavy nitrogen feeding at this stage is usually unnecessary and can even discourage the plant’s own nitrogen-fixing activity. |
Repeated leaf harvest and regrowth
Support vigorous regrowth after repeated cutting of the edible leaves and sprouts, and healthy seed pod development where seed is wanted.
| Nutrient direction | A potassium-forward feed to support regrowth vigor and stem strength after each round of cutting. |
|---|---|
| Timing | Through the active harvest season as leaves are repeatedly cut and regrow. |
| Frequency | Light, periodic feeding timed to support regrowth after cutting is generally sufficient. |
| Fertilizer types | A potassium-forward complete fertilizer, applied lightly after cutting |
| Precautions | Repeated cutting removes nutrients along with the harvested leaves, so watch for signs of potassium or phosphorus depletion over a long harvest season. |
Nutrient Deficiency Signs & Corrections
Stunted growth with a dark green to purplish tint on the leaves, along with weak root and nodule development.
| Possible causes | low soil phosphorus, cold soil temperatures limiting phosphorus uptake, poorly drained soil |
|---|---|
| Appears first on | younger leaves and overall plant vigor |
| What to check | soil phosphorus status, soil temperature and drainage, root and nodule development |
| Possible correction | Apply a balanced or phosphorus-moderate fertilizer and improve drainage where needed. |
Leaf margins yellow or scorch and regrowth after cutting comes back weaker than expected.
| Possible causes | low soil potassium, especially after repeated cutting removes nutrients, leaching in light, sandy soils, an imbalanced feeding history |
|---|---|
| Appears first on | older leaf margins |
| What to check | soil potassium status, harvest frequency and history, soil texture and drainage |
| Possible correction | Shift to a potassium-forward feeding after cutting and improve soil organic matter. |
Overall pale, yellow-green foliage despite this legume’s normal ability to supply much of its own nitrogen.
| Possible causes | poor root nodule formation from unfavorable soil conditions, waterlogged or compacted soil limiting nodule activity, strongly acidic or alkaline soil pH interfering with nodulation |
|---|---|
| Appears first on | whole plant, general pale coloring |
| What to check | root nodule presence and appearance, soil drainage and compaction, soil pH |
| Possible correction | Improve drainage and correct pH toward a more favorable range to support nodule activity; only add nitrogen fertilizer if nodulation problems persist. |
Pruning, Training & Seasonal Maintenance
Alfalfa is a deep-rooted herbaceous legume grown for its edible leaves and forage value, not as an ornamental, so “pruning” here means the regular cutting back of top growth that both harvests usable material and stimulates the vigorous fresh regrowth this nitrogen-fixing crop is suited to. It tolerates frequent, fairly hard cutting once established, similar to a cut-and-come-again herb, but should not be cut during its establishment period, when the plant is investing in the deep taproot system it depends on.
Quick Pruning & Maintenance Specs
| Pruning Tolerance | High once established (bred for repeated cutting and regrowth) |
| Primary Pruning Window | Spring through autumn, during active growth |
| Typical Frequency | Repeated cutbacks through the growing season, starting only after the plant is well established |
| Main Objective | Stimulate fresh leafy regrowth through regular cutting; control size and self-seeding spread |
| Young Plant Priority | No significant cutting for roughly the first six months while the root system establishes |
| Mature Plant Priority | Routine repeated cutback through the growing season |
| Best Tool Type | Precision snips or bypass secateurs |
| Avoid Heavy Pruning During | The establishment period, and periods of heat or drought stress |
Pruning by Plant Age & Size
Newly Established
Avoid significant cutting for roughly the first six months, allowing the deep taproot system to develop before repeatedly removing top growth.
Young / Formative
No ornamental structural training applies to this herbaceous species; the first cuts, once establishment is complete, should be moderate rather than severe, to avoid overtaxing a still-developing root reserve.
Mature / Established
Cut back regularly through the growing season, leaving enough lower stem and crown buds to resprout each time.
Seasonal Pruning Schedule
Ongoing (Growing Season)
Objective: keep the stand productive with continual fresh regrowth. Remove: upper stems and leaves in each cutback. Do not remove: the crown or so much growth, so often, that root reserves cannot recover between cuts. Expected response: a vigorous regrowth flush, typical of this fast-growing nitrogen-fixing legume. Flowering impact: cutting before bloom removes developing flower buds, which is fine when the plant is grown for leaf material; if seed is wanted, let a cutting cycle flower and set seed through summer instead.
Special Growth to Remove
There are no woody suckers or watersprouts on this herbaceous species. Because it is noted as an aggressive, spreading grower, deadheading or cutting flowering stems before seed matures helps limit unwanted self-seeding in a garden setting where spread is not wanted.
Container & Small-Space Pruning
This species can be grown in a container or indoors, but its very deep taproot habit makes it a poor long-term container subject; expect more frequent, lighter cutting back to keep a confined plant productive, since its root system cannot develop to the extent it would in open ground. (Growing it specifically for quick seed sprouts is a separate, non-pruning practice.)
Tools
- Precision snips for light, small-scale trims.
- Bypass secateurs for coarser cutback of a fuller stand.
Tool Hygiene & Disease Risk
Routine risk — clean tools are sufficient; no transmissible disease is associated with routine cutback (birds targeting the seed are a harvest-stage issue, not a pruning-tool vector).
Cut Placement & Technique
Cut stems back to a few centimeters above the crown or lowest buds, leaving enough basal growth points for regrowth; avoid cutting into the crown itself.
Heavy Pruning & Rejuvenation
Once established, this species tolerates fairly hard, repeated cutback well — it is bred for regrowth after cutting. It should not, however, be cut hard during its establishment period or under heat/drought stress, when root reserves are needed for recovery rather than for funding fast top regrowth.
Post-Pruning Care
Water normally after cutback. Because this species fixes its own nitrogen, routine nitrogen feeding after cutting is unnecessary and can encourage soft, weak regrowth.
Common Pruning Mistakes
- Cutting back before the plant is established (roughly six months), weakening the developing root system.
- Treating this as an ornamental plant “pruned for design” rather than a repeatedly-cut forage and edible-leaf crop.
- Cutting hard during heat or drought stress instead of during active growth.
- Letting all flowering stems set seed when this species’ aggressive, spreading habit is not wanted in the space.
When NOT to Prune
Avoid significant cutting during the first roughly six months of establishment. Avoid cutting during extreme heat or drought stress. Avoid repeated very-close cutting without any rest period, which can exhaust the plant over time.
Recommended Tools (by task)
- Established stand, light routine trims — precision_snips: controlled cuts for small-scale garden management.
- Established stand, coarser seasonal cutback — bypass_secateurs: enough capacity for a fuller stand of stems.
Pruning Troubleshooting
| Problem | Possible Cause | What to Check | Corrective Action |
| Weak regrowth after cutting | Cut too early, before the root system was established | Time since planting or since the last full establishment period | Wait until the plant is well established (about six months) before the first significant cutback |
| Stand thinning or general decline | Repeated close, frequent cutting without a rest period | Cutting frequency and the stem height left after each cut | Leave more stem height and rest time between cuts to let root reserves recover |
| Unwanted seedlings spreading through the bed | Flowering stems left to set and drop seed on this aggressive-spreading species | Volunteer seedlings appearing nearby | Cut or deadhead flowering stems before seed matures if spread is not wanted |
Propagation Guide
Alfalfa is propagated almost exclusively from seed, which is direct-sown and comes true-to-type for the species, though as an open-pollinated, bee-pollinated crop some variation can occur between named cultivars. Establishment from seed is easy and is the standard method used at any scale; division of an established clump is possible but not a normal or practical way to propagate this plant.
Quick Propagation Specs
| Best Propagation Method | Seed |
| Alternative Methods | Division (uncommon; not a standard practice for this crop) |
| Propagation Difficulty | Easy |
| Seed True-to-Type | Usually true-to-type for the species; some variation possible between open-pollinated cultivars |
| Best Propagation Season | Spring, or autumn in hot climates |
| Seed Germination Time | Typically within one to two weeks under warm soil conditions |
| Seed Sowing Depth | Shallow, roughly 0.5–1.5cm (0.2–0.6in), typical for this small legume seed |
Growing from Seed
Sowing Season
Sow in spring, or in autumn where the climate is hot, matching the site’s planting-season guidance.
Sowing Depth & Orientation
Sow shallowly, around 0.5–1.5cm (0.2–0.6in) deep, typical for this fine legume seed.
Germination Conditions
Warm soil with consistent moisture gives the fastest, most even germination; as a nitrogen-fixing legume, inoculating seed with the appropriate Rhizobium bacteria before sowing is a widely recommended practice to support strong root nodulation and establishment.
Germination Time
Typically within one to two weeks under warm conditions.
Seedling Care
Keep young seedlings consistently watered until established; the plant’s own deep taproot system develops over subsequent growth once it is past the seedling stage.
Bloom & Edible Flower Guide
Quick Details
- Bloom Season: Summer.
- Time to First Bloom: In its first season, typically within a couple of months of establishing.
- Flower Appearance: Small purple pea-shaped flowers borne in short clusters.
- Edibility: Edible – the small blossoms are mild and pea-like, used fresh in salads and dried for herbal teas.
Detailed Blooming Overview
Medicago sativa is a nitrogen-fixing legume, and its bloom shows the family clearly: short spikes of small violet pea flowers over the summer. The flowers are a strong draw for bees, and good bee activity is what drives seed set.
Flower Characteristics
- Purple, pea-shaped flowers in loose clusters.
- Classic legume (pea-family) form.
- Rich in nectar and highly attractive to bees.
Bloom Care & Thinning
- Managing the bloom: If you are growing alfalfa for tender leaves or sprouts, cutting it back before or at early flowering keeps growth soft; let it bloom if you want flowers or seed.
- Pollination: Pollinated by bees.
Bloom Health & Protection
- Plant bugs (lygus) and aphids: These feed on buds and blooms and can reduce seed set. Encouraging natural predators, or a light neem oil application, usually keeps numbers down.
Fruit & Uses
Alfalfa is grown not for a fruit but for its edible leaves, seeds and, most famously, its fast-growing seed sprouts. Young sprouts and leaves are eaten fresh as greens, while leaves and larger quantities of seed are typically cooked.
Quick Edible Specs
| Edible Parts | Leaves, seeds, and sprouted seeds (sprouts) |
| Main Use(s) | Culinary – leafy green (leaves), fresh salad/sandwich topping (sprouts), cooked pulse (seed) |
| Eaten Raw or Cooked | Sprouts and young leaves are commonly eaten raw or lightly cooked; larger quantities of seed are cooked |
| Preparation Required | Sprouts – soak and sprout the seed, then rinse; Leaves – harvest and use fresh or cook; Seed – collect, dry, and cook before eating in quantity |
| Harvest Season | Leaves: spring through autumn in cold climates, year-round in hardiness zone 10b; Seed: autumn; Sprouts: ready year-round indoors soon after sowing |
| Time to First Harvest | Leaves can be cut once the plant is established; seed production takes longer to begin (see site’s own establishment/seed-bearing timing under Propagation/Sowing) – cross-reference only |
| Storage | Fresh leaves and sprouts are best used promptly and kept refrigerated; dried seed stores well in a cool, dry, sealed container |
| Safety/Toxicity Caveat | A widely eaten, generally safe food plant; as with any raw sprouted seed, alfalfa sprouts carry the general food-safety risk of bacterial contamination (e.g. Salmonella, E. coli) if seed or growing conditions aren’t clean, so rinse well and keep sprouts refrigerated |
Leaves & Greens
The green, elliptic leaves are edible and are used cooked as a leafy green. They can be harvested from spring to autumn in colder climates, or year-round in hardiness zone 10b, once the plant has had time to establish (roughly half a year) – after that, leaves can be cut/pruned as needed.
Seeds, Pods & Nuts
The brown, bean-shaped seeds are edible and, when collected in larger quantities, are cooked before eating (rather than eaten raw in bulk). Seed is harvested in autumn by collecting the mature pods.
Shoots & Stems (Sprouts)
Alfalfa is widely grown specifically for its sprouts: seeds are sprouted and ready to eat in about 5–8 days. Sprouts are typically eaten fresh/raw in salads and sandwiches and can be grown indoors in any season, including full shade, since they don’t rely on outdoor light.
Harvesting
Leaf harvesting and seed harvesting draw on the same plant in different ways: repeatedly cutting leaves for greens removes flowering growth and can reduce seed set, so a planting used mainly for leaf harvest will generally yield less seed, and vice versa. Seed pods are collected in autumn once mature; birds can be a pest on ripening seed, so timely collection helps.
Preparation, Uses & Safety
Leaves and larger batches of seed are cooked before eating; sprouts and small amounts of young leaf are commonly eaten raw. The main safety note is general food hygiene for raw sprouts – use clean seed, rinse thoroughly, and refrigerate promptly, since raw sprouted seeds of many crops (including alfalfa) can harbour bacteria if not handled cleanly.
Pests, Diseases & Troubleshooting
Overview: Alfalfa (Medicago sativa) is a deep-rooted perennial forage legume whose key pests are the alfalfa weevil, several aphids and the potato leafhopper, with lygus bugs and caterpillars in some regions, while its main diseases are Phytophthora and other root/crown rots, anthracnose, bacterial wilt and virus. Management is built on resistant varieties, well-drained soil, timely cutting, and conserving the many natural enemies a flowering legume supports.
Quick Troubleshooting Overview
| Issue / Pest | Main Symptom | Primary Solution |
|---|---|---|
| Alfalfa weevil | Skeletonised, chewed tip leaves; green larvae in the crown | Time cutting to disrupt larvae; conserve parasitoids; treat at threshold |
| Aphids | Clusters on stems and tips; stunting, honeydew, wilting | Resistant varieties, natural enemies; treat at threshold |
| Potato leafhopper | Wedge-shaped “hopperburn” yellowing of leaf tips | Resistant (glandular-haired) varieties; timely cutting |
| Lygus bugs | Blasted buds and flowers, poor seed set | Monitor sweep nets; manage in seed crops |
| Phytophthora root rot | Wilting, stand thinning; dark rotted taproots in wet soil | Resistant varieties, well-drained soil, avoid waterlogging |
| Bacterial/fusarium wilt | Stunting, yellowing, dieback; discoloured vascular roots | Resistant varieties, rotation, healthy stands |
Common Pests & Management
- Alfalfa weevil (Hypera postica):
- Symptoms: Small green larvae with a white dorsal stripe feed on the growing tips and unfolding leaves, skeletonising and “frosting” the top growth so fields look greyish and ragged; the first cutting is most at risk.
- Prevention & Control: Scout the tips and crown, conserve the parasitoid wasps and fungal diseases that regulate weevils, and time the first cutting to remove larvae with the crop. Treat only when scouting exceeds economic thresholds, choosing a product safe for pollinators and beneficials.
- Aphids (Acyrthosiphon pisum; Therioaphis maculata; A. kondoi):
- Symptoms: Pea aphid, spotted alfalfa aphid and blue alfalfa aphid form dense colonies on stems and growing points, sucking sap to stunt and wilt plants, secreting honeydew, and (spotted alfalfa aphid) injecting a toxin; they also spread virus.
- Prevention & Control: Grow aphid-resistant varieties, conserve ladybirds, lacewings and parasitic wasps that usually control them, and monitor with sweep nets; treat only at established thresholds to protect natural enemies.
- Potato leafhopper (Empoasca fabae):
- Symptoms: Tiny green wedge-shaped hoppers inject a toxin as they feed, causing a characteristic V-shaped yellowing (“hopperburn”) at the leaflet tips, stunting regrowth and cutting yield and protein.
- Prevention & Control: Grow glandular-haired (leafhopper-resistant) varieties, scout regrowth after cutting, and time harvest to disrupt populations; treat at threshold where resistant varieties are not used.
- Lygus (tarnished plant) bugs (Lygus spp.):
- Symptoms: Feeding on buds and flowers blasts them and reduces seed set, an important pest chiefly in alfalfa seed production.
- Prevention & Control: Monitor with sweep nets, manage especially in seed crops, and conserve natural enemies; time any control to protect pollinators during bloom.
- Alfalfa caterpillar & armyworms (Colias eurytheme; Spodoptera spp.):
- Symptoms: Green or striped caterpillars chew and defoliate foliage, sometimes stripping regrowth during outbreaks.
- Prevention & Control: Conserve parasitoids and predators, scout for defoliation, and use Bacillus thuringiensis (Btk) or a threshold-based treatment for heavy infestations; early cutting also removes larvae.
Diseases & Fungal Issues
- Phytophthora root rot (Phytophthora medicaginis):
- Symptoms: Wilting and yellowing with stand thinning, and dark brown, rotted lateral roots and taproots, especially in heavy, wet or poorly drained soils.
- Treatment & Management: Grow Phytophthora-resistant varieties, plant on well-drained soil, avoid waterlogging and compaction, and correct drainage; resistance plus drainage is the core defence.
- Anthracnose (Colletotrichum trifolii):
- Symptoms: Sunken, diamond-shaped straw-coloured stem lesions with dark borders, girdling and killing stems so shepherd’s-crook dead tips appear, thinning stands.
- Treatment & Management: Use resistant varieties, rotate crops, and remove infected residue; resistance is the main tool as fungicides are rarely economic in forage.
- Bacterial wilt (Clavibacter (Curtobacterium) insidiosus):
- Symptoms: Gradual stunting, yellowing and dieback of older stands with a yellow-brown discolouration of the root’s inner tissue; plants slowly decline.
- Treatment & Management: Grow resistant varieties, rotate out of alfalfa for several years, and avoid cutting or grazing wet fields that spread the bacterium; keep stands vigorous.
- Alfalfa mosaic virus & foliar diseases (Alfalfa mosaic virus (aphid-vectored); Leptosphaerulina, Pseudopeziza leaf spots):
- Symptoms: Mottling and stunting from virus, plus common leaf spots (spring black stem, common/pepper leaf spot) that spot and drop lower leaves in damp weather.
- Treatment & Management: Control aphid vectors and use tolerant varieties for virus; for leaf spots, cut on time to remove infected lower leaves before they drop, and maintain airflow with appropriate stand density.
Growing Difficulties & Abiotic Problems
- Autotoxicity:
- Cause & Symptoms: Established alfalfa releases compounds that suppress germination and growth of new alfalfa seedlings, so reseeding into an old stand fails.
- Correction Strategy: Do not reseed alfalfa directly into an old alfalfa stand; rotate to another crop for a year or more before re-establishing.
- Soil acidity / poor nodulation:
- Cause & Symptoms: Weak, yellow, unproductive stands on acidic or low-fertility soils where rhizobia nodulate poorly.
- Correction Strategy: Lime to a near-neutral pH, inoculate seed with the correct rhizobium, and maintain phosphorus, potassium and boron for this demanding legume.
- Waterlogging & winter injury:
- Cause & Symptoms: Stand thinning and death from prolonged wet feet, ice sheeting or heaving in cold climates.
- Correction Strategy: Plant on well-drained soils, choose winter-hardy varieties, and avoid late cutting that leaves plants without reserves going into cold.
What Helps – Products & Tools
Resistant varieties, drainage and timely cutting do most of the work, backed by conserving natural enemies. Where thresholds are exceeded, sweep-net monitoring guides targeted, pollinator-safe insecticide for weevil, aphids or leafhopper, and Btk handles caterpillars. Rhizobium inoculant, lime and balanced P-K-boron fertiliser keep stands vigorous and disease-tolerant.